So many things can go wrong
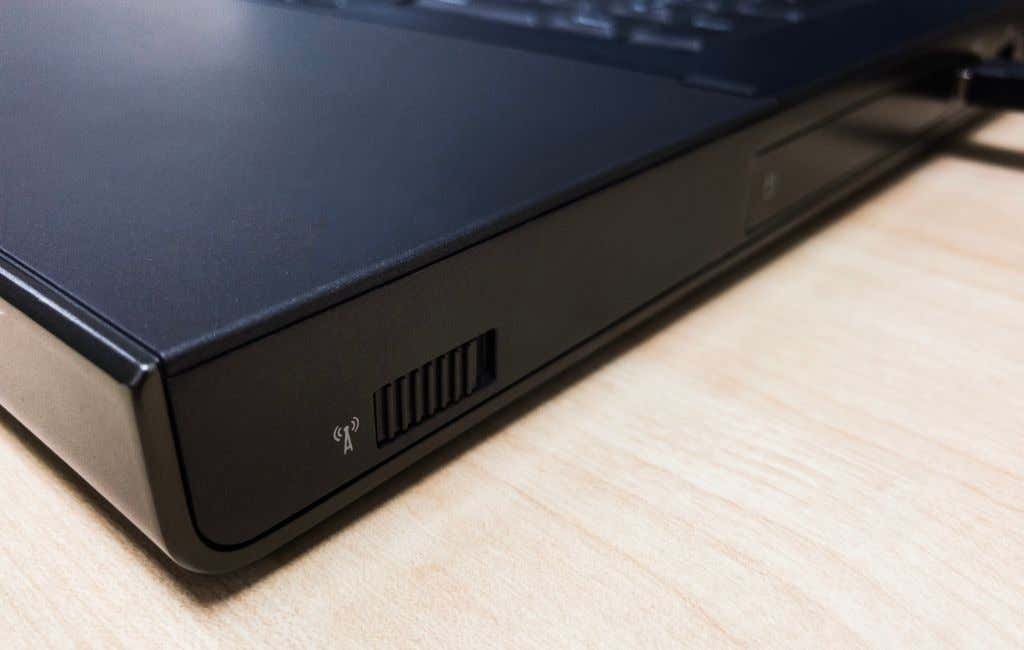
If you recently installed or updated Windows 10, you might experience some WiFi issues. We’re here to help! Wireless networking problems are particularly annoying because there are so many things that can cause them. Maybe you’re missing a driver or your computer’s power options aren’t properly set. Did you check the wireless switch (if you have one)? So many things can go wrong.
In this article, we’re going to troubleshoot Windows 10 WiFi by exploring the most common issues. Let’s get started.
Limited Connectivity
Many Windows 10 users get a limited connectivity message and it’s challenging to figure out what’s causing it. It can be triggered by outdated drivers, a faulty Ethernet cable, your network adapter, or even the antivirus software you use. The only thing you can do is troubleshoot WiFi one step at a time and hope for the best.
We’re going to try the most common solutions, but make sure to try other fixes mentioned in this article if those don’t work.
Run the Networking Troubleshooter
The first thing you should try is the built-in Windows 10 networking troubleshooter. In a lot of cases, WiFi problems can be solved automatically.
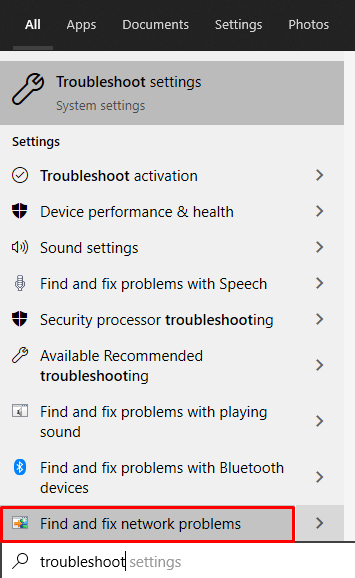
The easiest way to access this resource is to type troubleshoot in the search box and select the Find and fix network problems option.
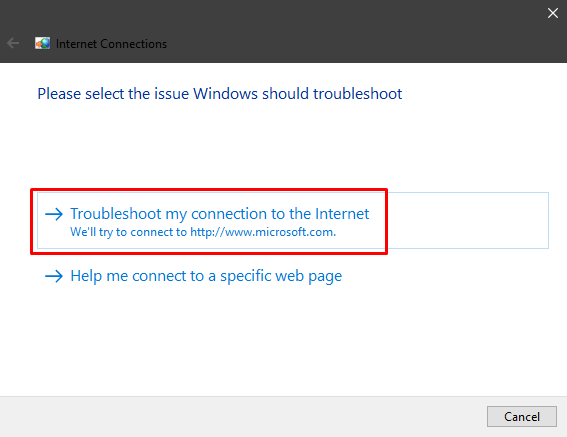
This opens the Internet Connections panel.
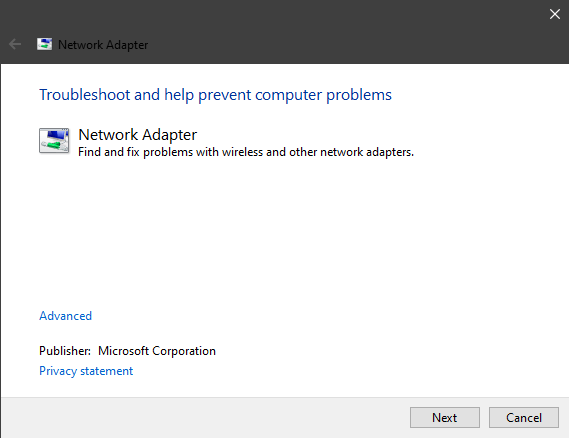
Let Windows diagnose the networking issues and apply any suggested fixes. If this doesn’t help, you should also troubleshoot the network adapter. Type troubleshoot network adapter in the search box and follow the same steps.
Reset TCP
If the troubleshooter found an error that says WiFi doesn’t have a valid IP configuration, you should reset the TCP/IP. This is the most common solution to this problem, although outdated drivers can also cause it.
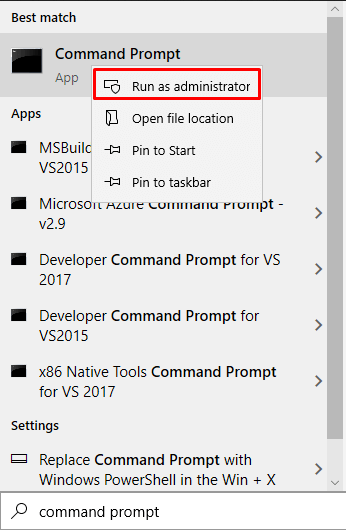
To reset the TCP, type command prompt in the Windows search box. Before you launch the prompt, make sure to right-click and select the Run as administrator option otherwise some commands might not work.
Next, type the following commands separately by pressing the Enter key after each one:
netsh winsock reset
ipconfig /release
ipconfig /renew
netsh int ip reset
ipconfig /flushdns
Restart your computer and check if your wireless connection works now. If it doesn’t, continue to troubleshoot wifi using our tips below.
Check Your Antivirus
Having antivirus software is important, but it can sometimes cause a conflict that leads to a limited internet connection message. Take note that Windows Defender, the antivirus that comes with Windows 10, shouldn’t cause any problems with your wireless connection.
Most users report that third-party antivirus software can block WiFi. So if you’ve been struggling with trying to figure this out, try disabling your antivirus. If BitDefender, Avast, AVG, or a similar antivirus is indeed the culprit, uninstall it.
Missing WiFi Icon
In some cases, wireless is disabled. You can’t find the WiFi icon and if you dig deeper into your network settings you won’t find a wireless section.
A lot of users report this problem, especially after a clean Windows 10 install. This is usually due to missing or outdated WiFi drivers. The WiFi module might also be the culprit if you purchased one so make sure it’s properly connected.
That said, there are several solutions you can try.
Check for Updates
Start looking at your drivers, especially if you just installed Windows 10. A lot of users install the operating system without connecting their machine to the Internet. As a result, Windows can’t install any drivers automatically during the installation process, so some of them will be missing.
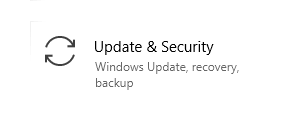
1. Navigate to the Settings panel and select Updates & Security.
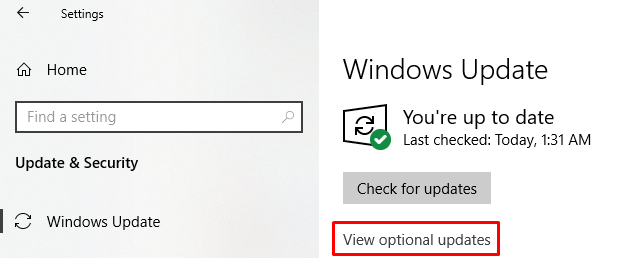
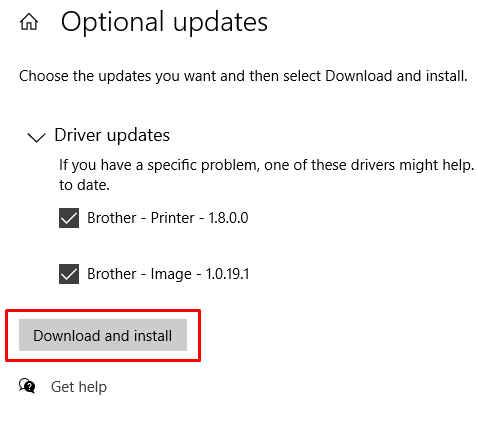
2. Next, you need to check for driver updates by clicking on View optional updates.
3. Click on Driver updates to see if you have anything to download.
In your case, you should have other drivers than the ones seen in this image. Hopefully, one of them is the WiFi driver. Make sure you’re connected to the Internet through a network cable or your smartphone’s connection and download the drivers.
Reinstall the WiFi Driver
In some cases, the WiFi driver is corrupted, and updating it won’t do anything. What you need to do is reinstall it. To do that, you need first uninstall the driver and then either check for updates using the previous solution or download it from the manufacturer’s website.
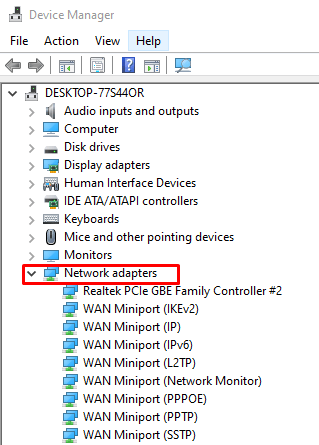
To remove the existing driver, head over to the Device Manager and look for your WiFi driver under Network adapters.
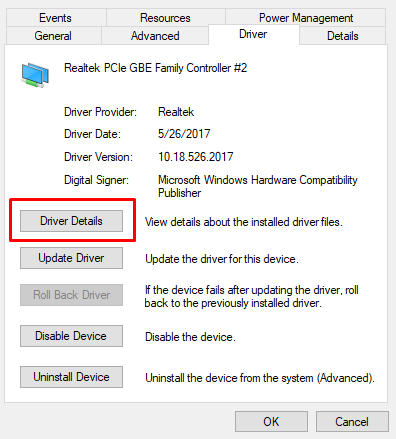
Select your wireless driver, double-click to launch the Properties panel, and navigate to Driver. There you’ll find the Driver Details button, which will tell you everything you need to know about the driver.
You need this information if you want to download and install the driver from the WiFi card manufacturer’s website.
Now, go back to the driver inside the device manager, right-click on it, and select the Uninstall device option. This will remove the driver from your computer so that you can properly install it.
Once the driver has been removed, you can either go back to the Check for Updates panel we talked about above or to the manufacturer’s website. Either way, install the driver and restart your computer.
WiFi Disconnected After Sleep Mode
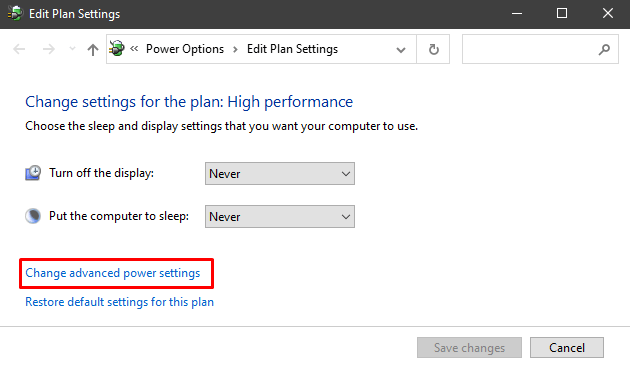
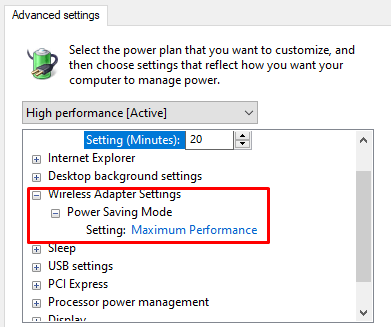
Your wireless connection works just fine until your computer enters Sleep/Hibernate mode? Chances are you’re dealing with an annoying power-saving option that keeps your computer from returning your WiFi connection after it wakes up. To fix this, type Power Plan in the Windows search bar and select Edit Power Plan. This opens your computer’s current power plan settings. Then click on the Change advanced power settings option.
Scroll to Wireless Adapter Settings, expand it, and change the Power Saving Mode to Maximum Performance.
Other WiFi Troubleshooting Tips
There are a few other things you can try at this point if none of the previous tips fixed your WiFi connection.
Configure Your Network Adapter
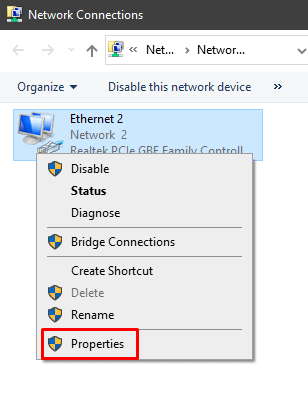
Are you sure your network adapter is properly configured? Go to Network and Sharing Center and click on Change adapter settings to open the Network Connections page. Right-click on your WiFi adapter and select Properties.
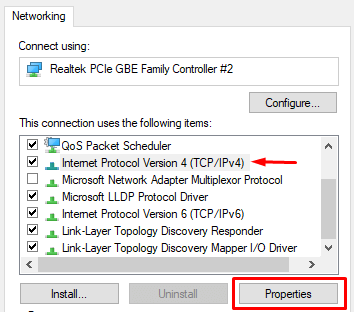
You need to find Internet Protocol Version 4 (TCP/IPv4). Select it and click on the Properties button.
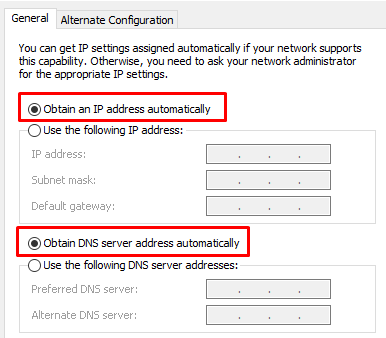
Are the Obtain an IP address automatically and Obtain DNS server address automatically options selected? If they aren’t, enable them.
Reset Your Router
Router configurations can sometimes interfere or conflict with your computer’s WiFi settings. This issue can pop over time or if you played with the router’s settings. Either way, you should try resetting it to its default settings.
There are a few ways of resetting your router. Generally, you can either press the tiny, hidden reset button or go to the router’s configuration page and do it from there.
For more details on how to reset a router, check out our dedicated article.
Check the WiFi Switch
Some laptops still come with a switch that enables or disables WiFi. If that’s the case with yours, make sure to check that it’s set to ON.
Device Interference
Certain devices can interfere with the WiFi signal. Check the frequency specifications of your microwave oven, phone, speakers, and other electronic devices. If they match the same frequency used by your router, you should try turning them off.
If your problem is caused by a household device, the solution is to move the router away from it.
Last Resort – Update or Reset BIOS
If you tried every single troubleshoot wifi step above, you should try this solution.
Updating BIOS used to be something most people avoided at all costs, but nowadays with modern motherboards, it’s quite easy to do. Just make sure you read the instructions that came with your motherboard and backup your data.
Alternatively, you can also try resetting BIOS to its default settings.
As mentioned at the start of the article, a lot of things can make your WiFi go haywire. Hopefully, one of our solutions has worked for you. If not, then you probably have a hardware problem and you should inspect the wireless module. Let us know in the comments how you fixed your WiFi!

