
Wirelessly hooking multiple devices to one printer is now common practice in many homes and offices. Printing from a designated computer attached in this age and time is impractical and inconvenient. If your printer only supports wired/cable printing, there are ways to make it print wirelessly. This tutorial will show you how to convert a wired printer to a wireless one
How to Make Wired Printer to Wireless?
Many new-generation printers have Wi-Fi support or wireless capability for wireless printing. But what if you have a wired printer without Wi-Fi support? You don’t have to buy a whole new printer, and that’s because there’s a way to make virtually any wired printer wireless. Listed below are some ways to make wired printers print wirelessly without cable.
Get a Wireless Adapter for Supported Models
Converting a non-wireless printer into a wireless printer using an adapter is sometimes expensive. Many printer manufacturers sell a wireless adapter or module that can upgrade your current wired printer to one that can use Wi-Fi or Bluetooth.
First, check whether your printer has an official (or compatible third-party) wireless adapter. Then, verify that the adapter is compatible with your computer’s operating system version. You shouldn’t necessarily buy it immediately; read the product reviews while evaluating the other options.
Connect It to a Router via USB
Check the back of your internet router. Does it have a USB port? Many routers can now act as USB hosts. In most cases, that means you can connect an external USB drive, and the router will offer it as network-attached storage to devices on the network. Such routers can also work as wireless print servers.
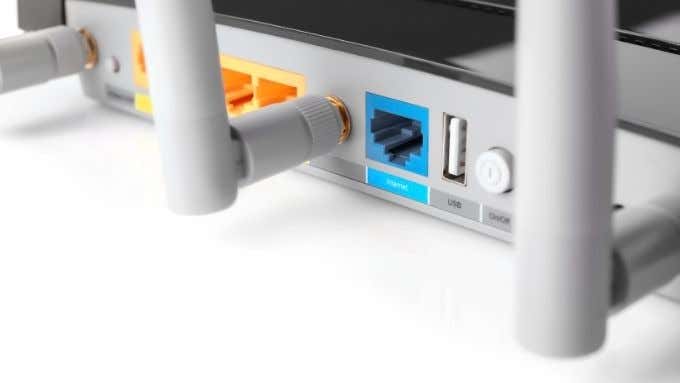
First, connect the wired printer to the router’s USB port using a USB-to-USB cable. Afterward, open the router’s settings and make the USB port function as a wireless print server. Refer to your router’s instruction manual for instructions on how to do this. If you want NAS mass storage functionality, one downside of this method could be that your router can’t do both simultaneously.
Connect It to a Router via Ethernet
Wired printers that don’t support Wi-Fi typically have an Ethernet port. If your wired printer has an Ethernet port, connect it to your router using an Ethernet cable. With a powerline Ethernet extender, you can connect the printer to your router from virtually anywhere in your home.
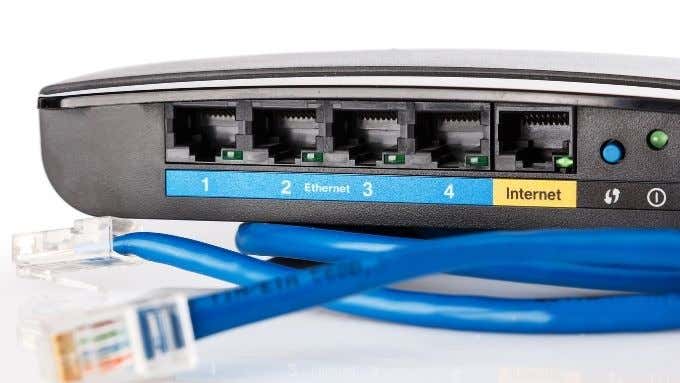
Remember that you’ll likely need to configure the printer to work correctly over Ethernet. You can do that on the printer itself using its screen and buttons. Alternatively, you may have to configure it using software on your PC and a USB cable or by logging into the printer over the network.
Share Your Printer Through a PC
Most operating systems, including Windows, let you share a printer connected to the computer with other devices on the network. In this situation, the PC connected to the printer acts as a print server.
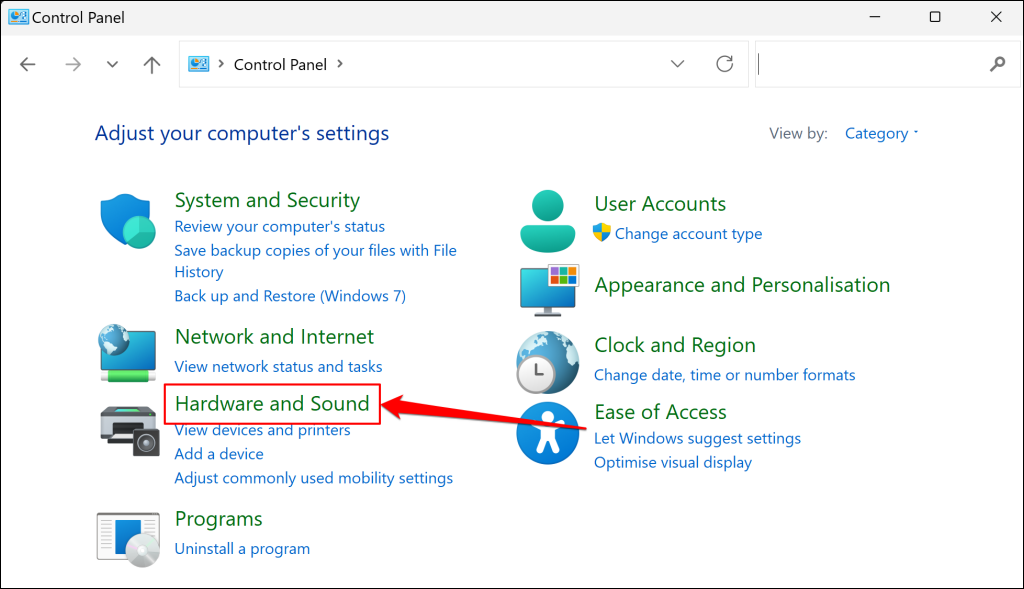
Here’s how to share wired printers with other devices in Windows:
- Open the Control Panel and select Hardware and Sound.
- Next, select Advanced printer setup in the “Devices and Printers” section.

- Select the printer from the list of devices.

- Choose Printer properties on the next screen.

- Switch to the Sharing tab and select the Share this printer checkbox.
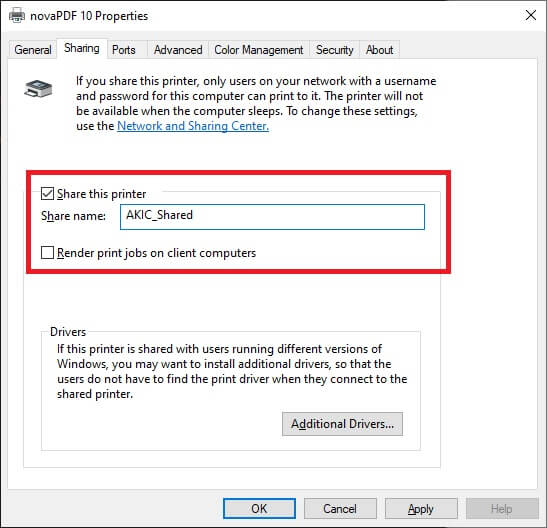
You can also change the printer’s share name at this point. This is the name that everyone else sees when looking for a network printer to use.
This is probably the fastest and cheapest method to make your wired printer a wireless one, but it has significant drawbacks. First, your computer has to stay on all the time; otherwise, the printer won’t be available. That isn’t the most energy-efficient or best solution if you’re energy-conscious.
With lower-end computers, handling print requests can also affect the performance of that computer, which might not be what you want to happen in the middle of something else.
Use an Ethernet to Wi-Fi Adapter
If you have a printer with an Ethernet port and don’t want to use the powerline adapter method, you can use an Ethernet to Wi-Fi adapter. The only catch is that you will have to connect the printer to a PC first to ensure that all the network settings are correct before using the Wi-Fi adapter.
Use a Dedicated Print Server Device
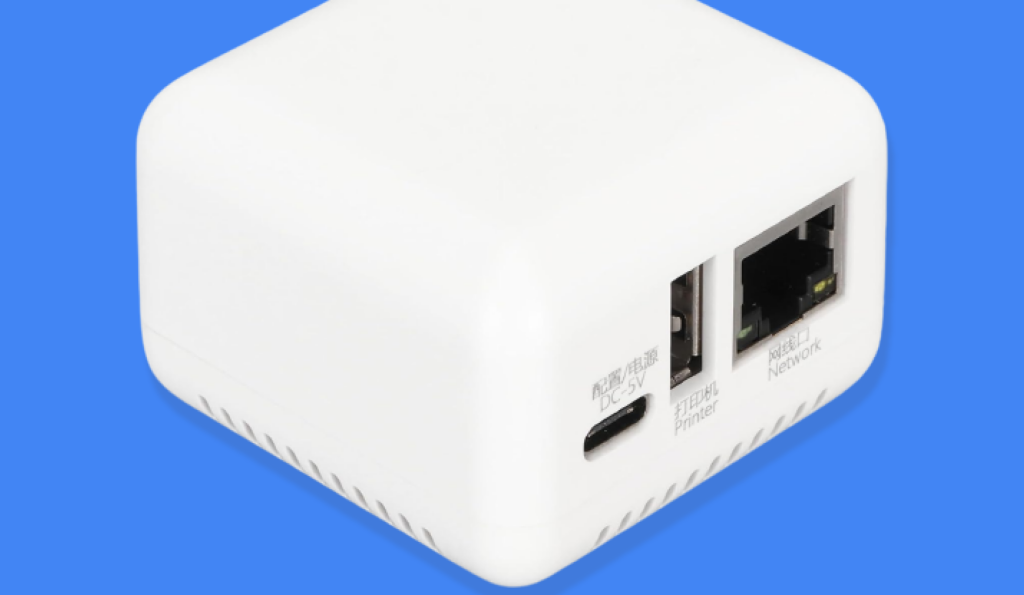
If none of the solutions above work or just don’t suit you, there’s a relatively affordable and reliable solution. You can buy/use a dedicated wireless print server box. This is a little box with a USB connection on one side and an Ethernet port on the other. Inside is a small dedicated computer that accepts network print jobs and then passes them to the printer.
While this does mean your printer has to be connected to the router via Ethernet, it instantly allows all network devices to share that printer. The dedicated print server uses very little electricity and is always available.
There are also wireless dedicated print server devices, which cost slightly more than the Ethernet-only variety. So you’ll have to decide if the extra few dollars are worth it.
Get Inked!
That covers almost every way we can think of to make a wired printer wireless so that you can print to it from just about any modern gadget. If we’ve missed one or you’ve come up with a new creative solution, share it with everyone in the comments below.