Looking for a way to get rid of Java on your Windows or Mac machine? Though essential to some web users, most people do not need to risk running Java on their machines because of all the security vulnerabilities associated with Java.
In this article, I’m going to talk about the steps you need to take in order to completely remove all traces of Java from your Windows machine. The process for Mac is a bit different, so you can scroll down the Remove Java on Mac section if you are running OS X.
Note that the newer versions of Java (Java 8v20 and higher) have a built-in tool for uninstalling older Java versions automatically, but sometimes even this tool doesn’t get rid of everything. Also, it keeps the latest version installed, which you might not want either.
Is Java Installed?
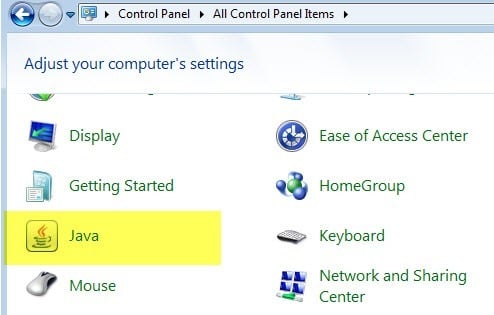
You can check whether you have Java installed or not in Windows by going to the Control Panel and looking for the Java icon. If you see it there, that means you have Java installed.
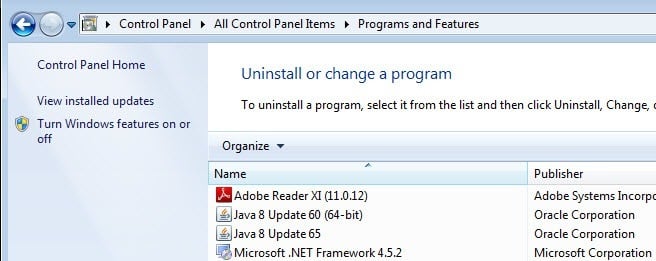
Using this Control Panel option, you can also disable Java in your web browser without uninstalling it. I’ll explain that option below also. If you go back to the Control Panel and click on Programs and Features, you can see all the different versions of Java installed on your computer.
So what’s next? Well, the first thing I do when removing Java on Windows is to uninstall the older versions first.
Remove Older Versions of Java
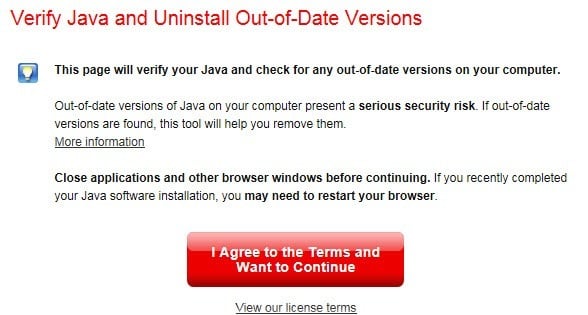
To get rid of the older versions, you can download and install the latest version of Java, which will automatically check for older versions and then install the latest version or you can run the Java Uninstall Tool.
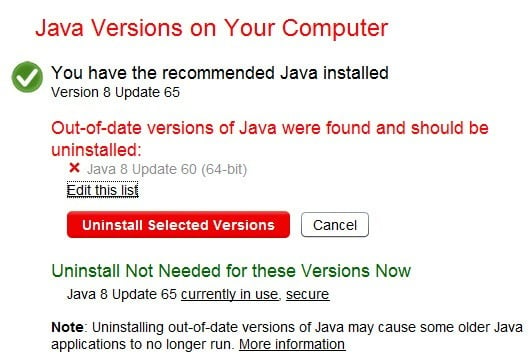
The applet will check your version of Java and then remove out-of-date versions. If there are older versions, you will get a message showing you the versions and giving you the ability to uninstall them.
Click on the Uninstall Selected Versions button to remove the older versions. As you can see, I don’t need Java 8 Update 60 because I have the latest Java 8 Update 65 installed. Now that you only have the latest version, we can do one of two things: either disable Java or uninstall it.
Disable Java
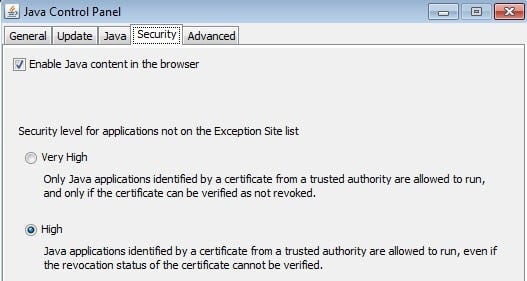
If you need to occasionally use Java for certain websites, but don’t need it enabled all the time, you can disable it instead of uninstalling. To do this, open the Control Panel, click on Java and then click on the Security tab.
Uncheck the Enable Java content in the browser box to disable Java in Internet Explorer. It’s worth noting that Chrome doesn’t even support Java anymore since version 42, so you don’t have to worry about it in that browser.
For Firefox, you have to click on Tools, then Add-ons and select Plugins. Click on Java Platform and then click on Disable. Note that even though Java is disabled, it can become outdated and still present a security vulnerability to your computer since it is installed.
Uninstall Java in Windows
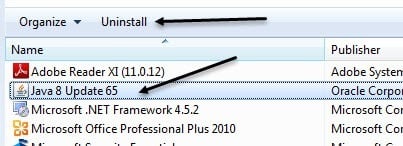
To uninstall Java, first remove the older versions like shown above and then go to Control Panel and Programs and Features. Click on the latest Java version listed there and click on Uninstall.
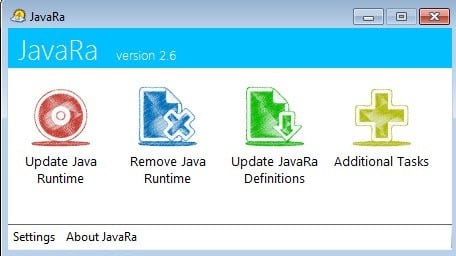
Technically, this is all you should have to do, but if you really want to get rid of every trace of Java, I recommend using a freeware app called JavaRa. Once you download it, just run the application. You’ll see a couple of icons, but the one we want to use is Remove Java Runtime.
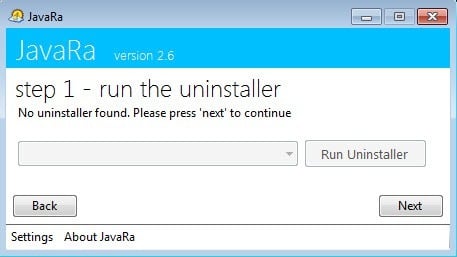
On the first screen, it’ll show you that the uninstaller was not found, which is fine since we uninstalled all versions of Java. Just click on the Next button.
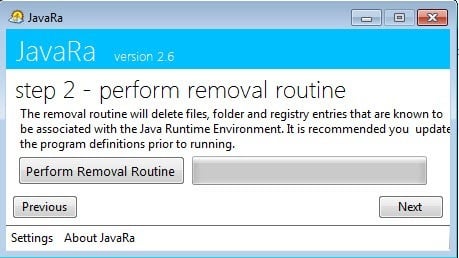
The most important part of this program is Step 2. Here you want to click the Perform Removal Routine button, which will remove any leftover files, folders and Java registry entries.
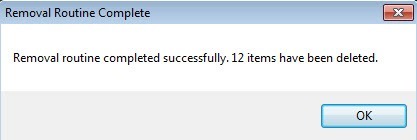
Even after uninstalling Java using its own tools, JavaRa was able to remove 12 more items that were left behind.
Click Next and you’ll see a button to download the latest version. Unless you want to reinstall Java, just click Next and then click Finish on the next screen. Now Java is completely removed from your Windows system.
Remove Java on Mac
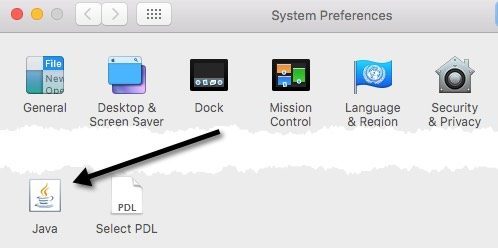
On Macs, everything is pretty much the same, except for the uninstall process. You can see whether Java is installed on your Mac in pretty much the same way as Windows. Just open up System Preferences and check to see if there is a Java icon at the bottom.
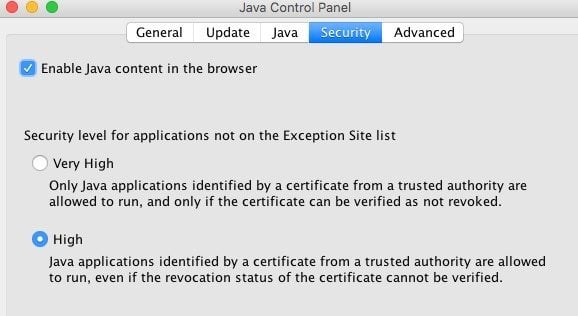
If the Java icon is there, that means you have Java installed on OS X. Also, just as in Windows, you can choose to keep Java installed, but disable it in Safari if you like. The first way is to click on the Java icon in System Preferences, which will open the Java Control Panel, which looks exactly like the one in Windows. Click on the Security tab and then uncheck the Enable Java content in browser box.
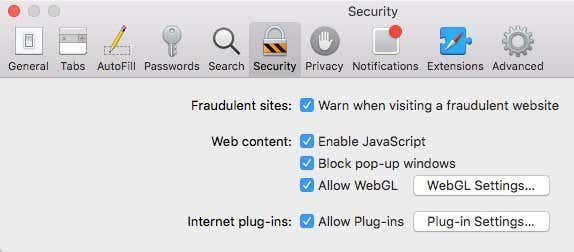
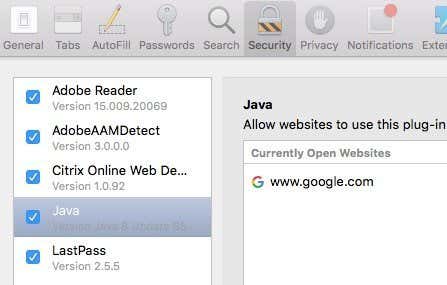
The other way is to disable Java in Safari directly. To do that, open Safari and then go to Preferences.
Click on the Security tab and then click on the Plug-in Settings button at the very bottom next to Internet plug-ins.
You should see Java in the list and unchecking the box will disable Java in Safari. If you want to uninstall Java on OS X, it’s a bit technical. First, open up the Terminal by clicking on Spotlight and typing in Terminal or by going to Applications – Utilities and then Terminal.
Now copy and paste in the following commands one at a time and press Enter after pasting each command.
sudo rm -fr /Library/Internet\ Plug-Ins/JavaAppletPlugin.plugin
sudo rm -fr /Library/PreferencePanes/JavaControlPanel.prefpane
When you press enter, you will be asked to enter your administrator password. If everything went well, you won’t see any output.
If you go and check in System Preferences, the Java icon should be gone. Also, if you go to the plugins section in Safari, it will also be gone from the list of installed plugins. That’s about it for removing Java on Macs. If you have any questions, feel free to post a comment. Enjoy!
