
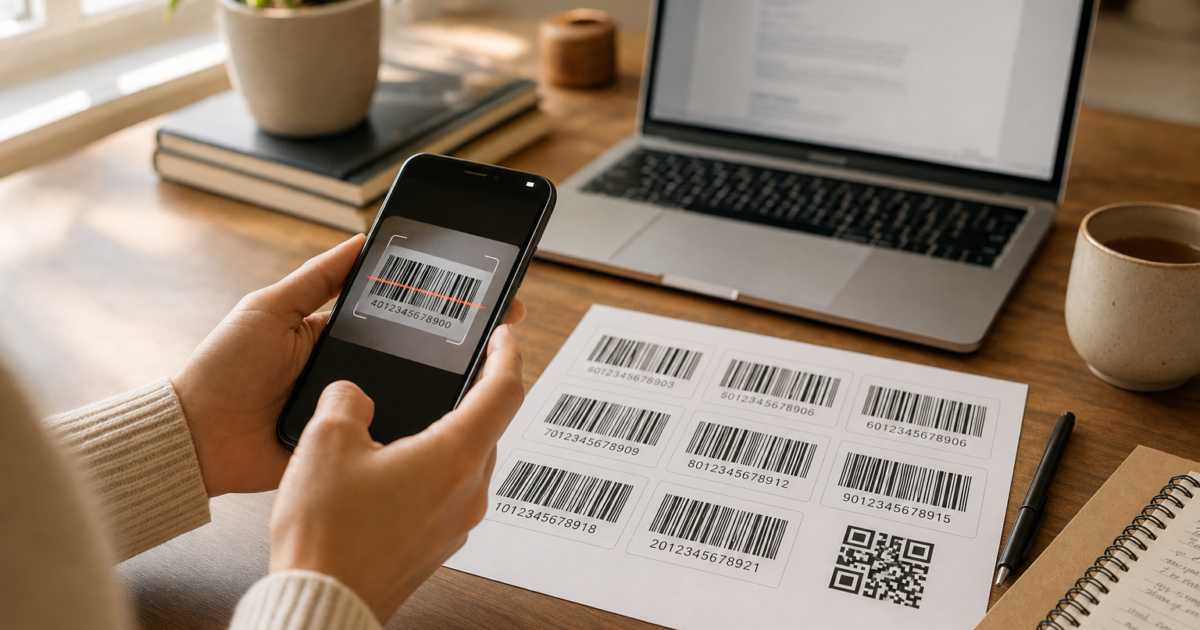
Ever needed a barcode for a label, inventory sheet, or personal project and didn’t want to pay for specialized software? Good news: Microsoft Word can generate barcodes right out of the box, and it’s a lot easier than you might think. No third-party fonts required (though those still work if you want them).
In this guide, you’ll learn how to use Word’s built-in DisplayBarcode field to create real, scannable barcodes for Code 128, QR codes, UPC-A, EAN-13, and more. We’ll also cover the old barcode font method as a secondary option, and show you how to test your barcodes with a free smartphone app before you print anything.
What Is a Word Barcode Field?
Microsoft Word has a built-in feature called field codes, hidden instructions you can embed in a document that tell Word to do something automatically, like insert today’s date or generate a barcode. The DisplayBarcode field code is Word’s native way to create barcodes as actual graphic objects (not just styled text).
Key things to know:
- No fonts to install: Word renders the barcode as a graphic, so it scans reliably
- Supports 10 barcode types: Including Code 128, Code 39, QR codes, UPC-A, EAN-13, and more
- Works in Microsoft 365 and Word 2019/2021/2024: On both Windows and macOS
- Mail merge friendly: Use the related MergeBarcode field to generate barcodes from a spreadsheet for labels
Heads up: Microsoft’s own support page confirms that Word no longer has a dedicated barcode toolbar or menu button. Instead, you insert barcodes using field codes, which sounds scarier than it is. We’ll walk you through it step by step.
Before You Begin
Make sure you have:
- Microsoft Word (Microsoft 365, Word 2019, 2021, or 2024, on Windows or macOS)
- The data you want to encode (a number, product ID, URL, etc.)
- A printer or screen if you want to test scanning
How to Create a Barcode in Word Using Field Codes
This is the modern, Microsoft-recommended method. It works on both Windows and macOS versions of Word.
Step 1: Place Your Cursor Where You Want the Barcode
Open a Word document and click to position your cursor exactly where you want the barcode to appear, whether in a table cell, on a label, or just in the middle of the page.
Step 2: Insert a Field Code Bracket with Ctrl+F9
Here’s the part that trips people up: you cannot just type curly braces {} and expect this to work. Word needs a real field bracket pair, which you insert with a keyboard shortcut.
On Windows
Press Ctrl + F9. You’ll see a pair of grey curly braces appear: { }
On macOS
Press Cmd + F9. Same result, a grey field bracket pair appears.
The grey color is your clue that it’s a real field bracket and not just typed characters. If your braces look black and normal, delete them and try the shortcut again.
Step 3: Type the DisplayBarcode Field Code
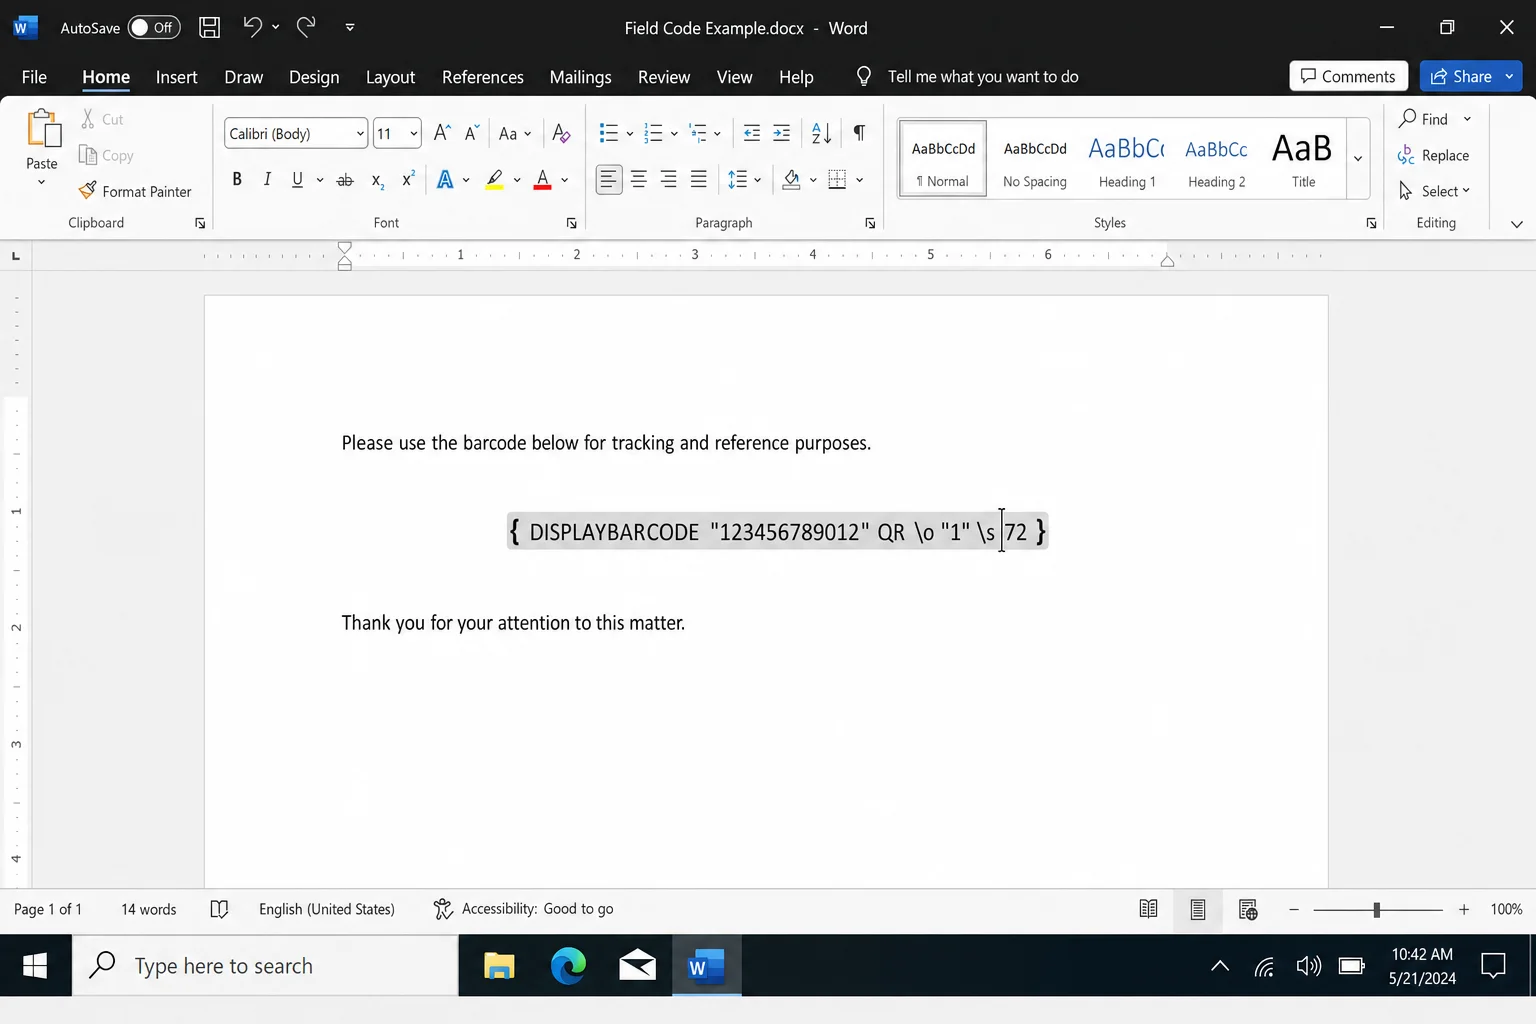
Click inside the grey brackets and type your field code. Here’s the basic format:
DisplayBarcode "your data here" BARCODETYPEFor example, to create a Code 128 barcode encoding the text HELLO123, you’d type:
DisplayBarcode "HELLO123" CODE128So the full thing inside the brackets looks like this:
{ DisplayBarcode "HELLO123" CODE128 }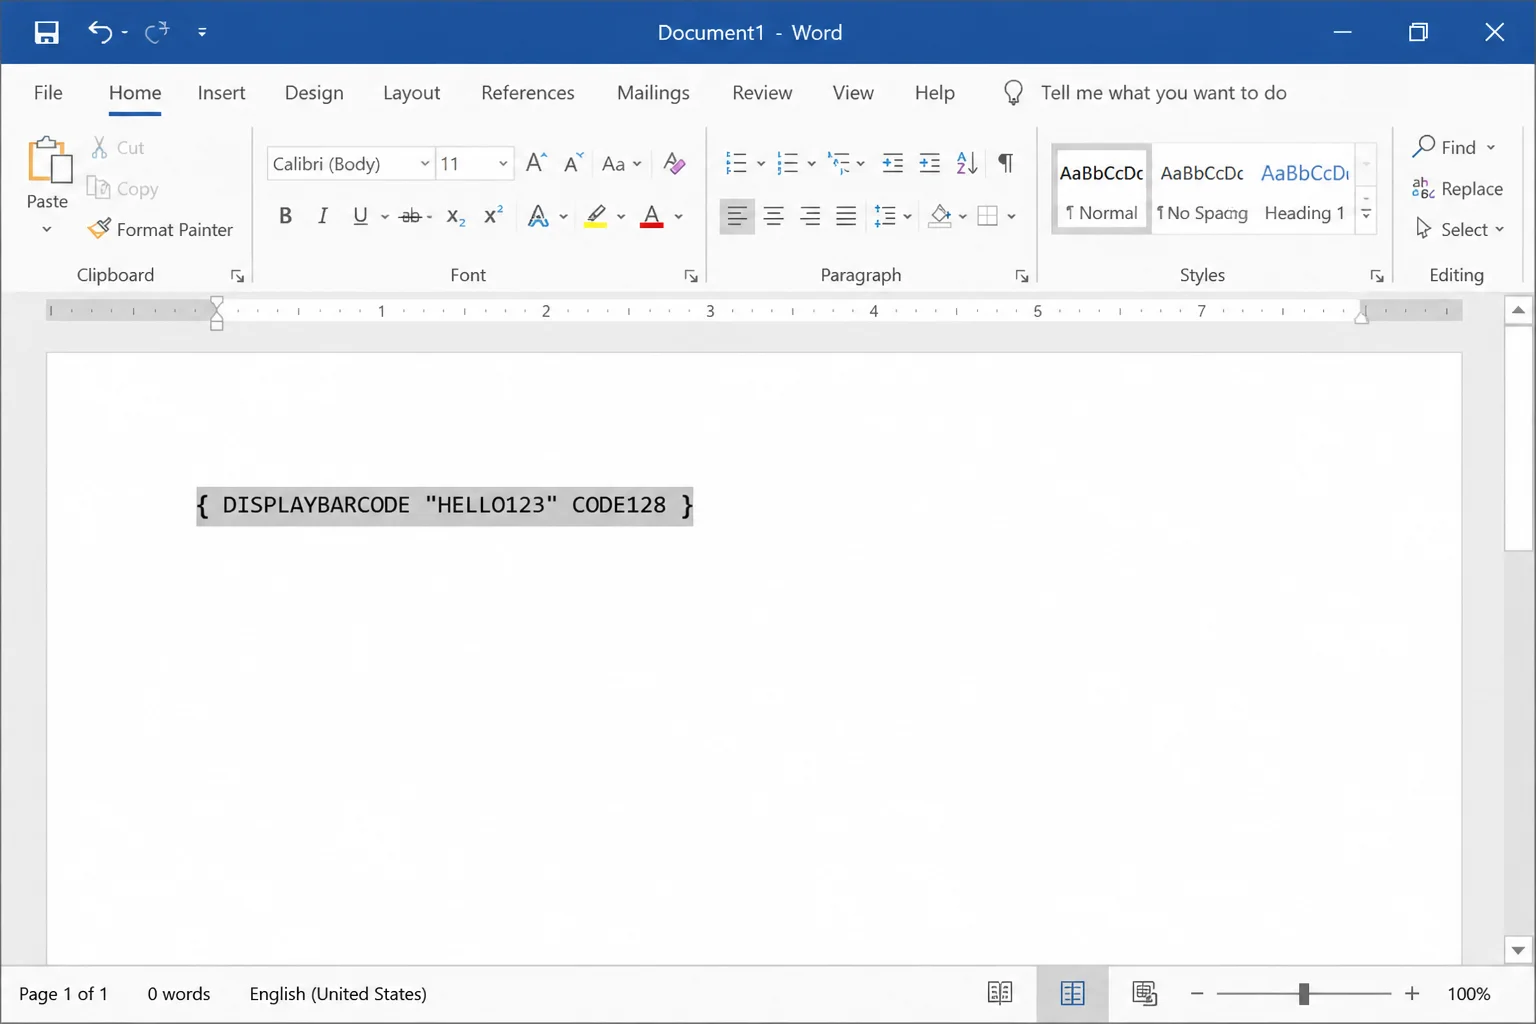
Step 4: Press F9 to Generate the Barcode
Press F9 (Windows) or Fn + F9 (macOS) to update the field. Word will replace the field code text with an actual barcode graphic right there in your document.
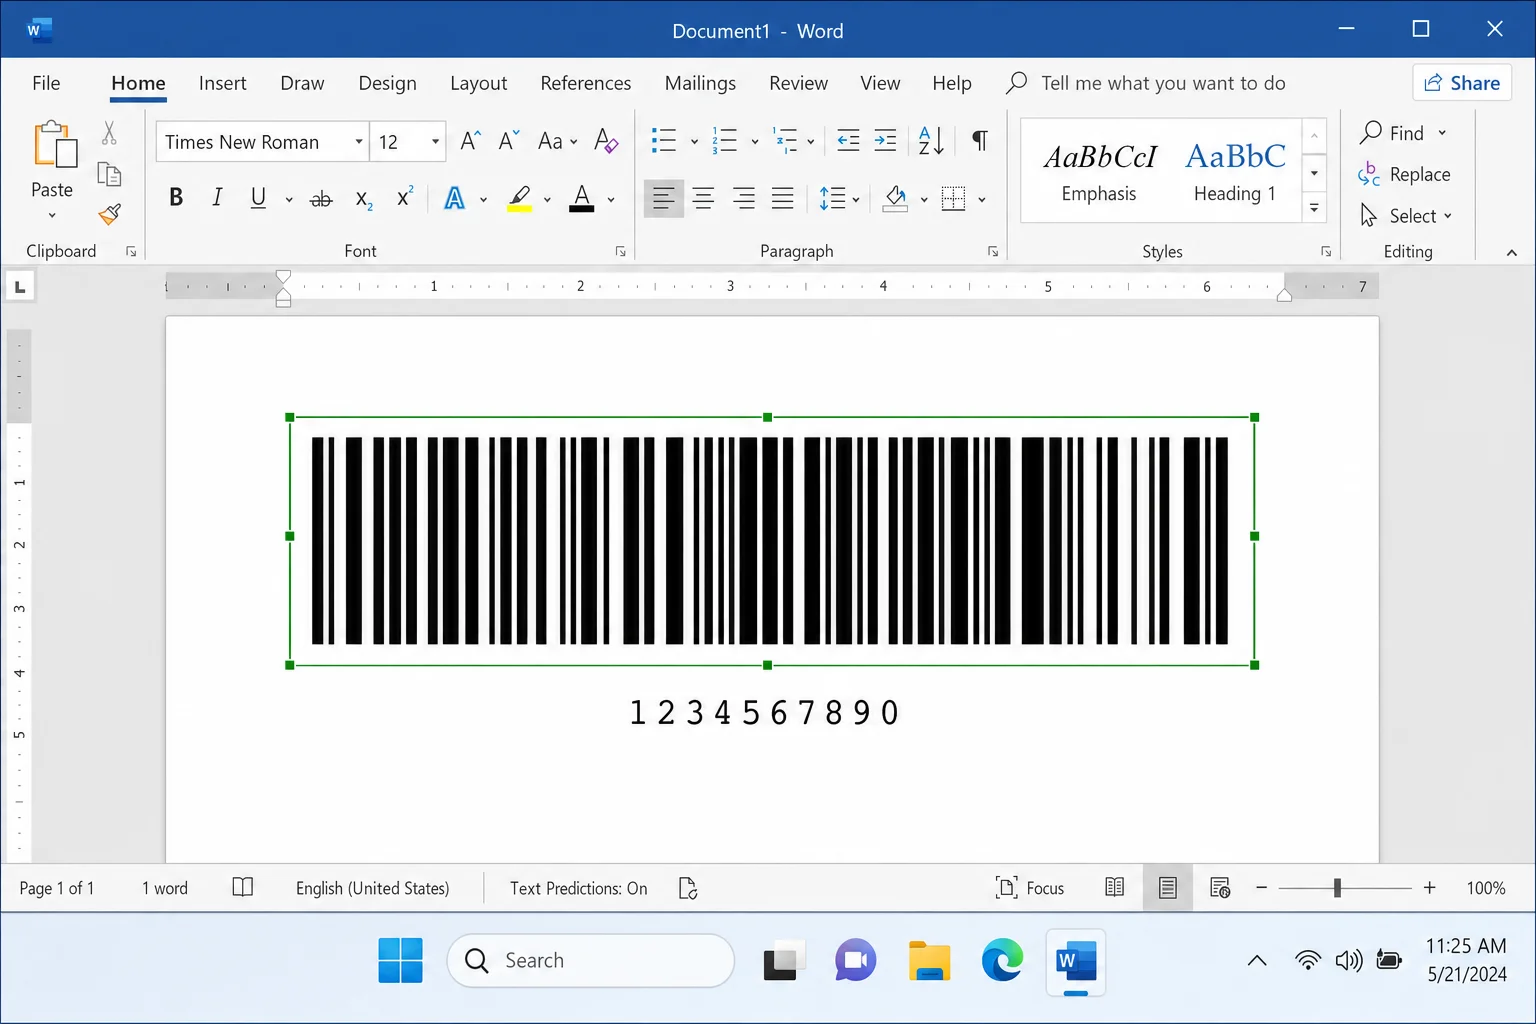
That’s it. You’ve got a real, scannable barcode! If you want to switch back to viewing the code (to edit it, for example), right-click the barcode and choose Toggle Field Codes.
Barcode Types You Can Use
The DisplayBarcode field supports 10 different barcode formats. Here are the most useful ones and when to use each:
| Barcode Type | Field Code Name | Best For | Data Requirements |
|---|---|---|---|
| Code 128 | CODE128 | Product IDs, alphanumeric data | Variable length text or numbers |
| Code 39 | CODE39 | Short text labels | Uppercase letters and numbers |
| QR Code | QR | URLs, contact info, long data | Any text or URL |
| UPC-A | UPCA | Retail products | Exactly 12 digits |
| EAN-13 | EAN13 | International retail | Exactly 13 digits |
| EAN-8 | EAN8 | Small product labels | Exactly 8 digits |
To use any of these, just swap out the barcode type name in your field code. For example, a QR code looks like this:
{ DisplayBarcode "https://www.online-tech-tips.com" QR }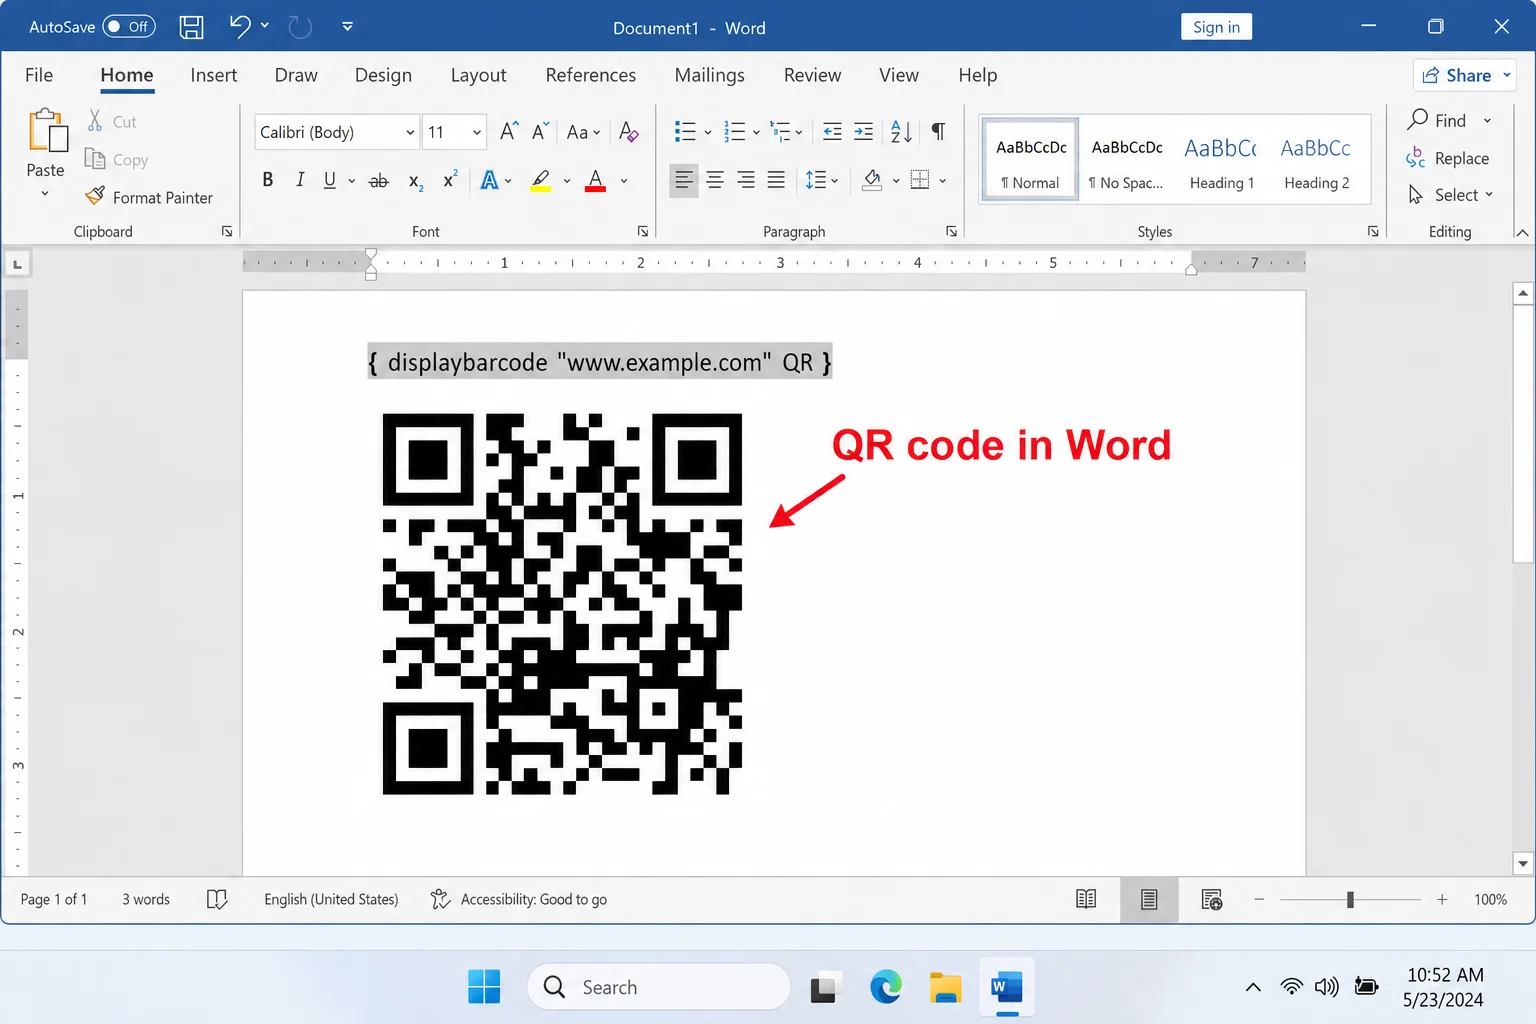
How to Create Barcodes for Labels (Mail Merge)
If you need to print a whole sheet of labels, each with a unique barcode, Word’s mail merge feature combined with the MergeBarcode field is your best friend. Here’s how to set it up:
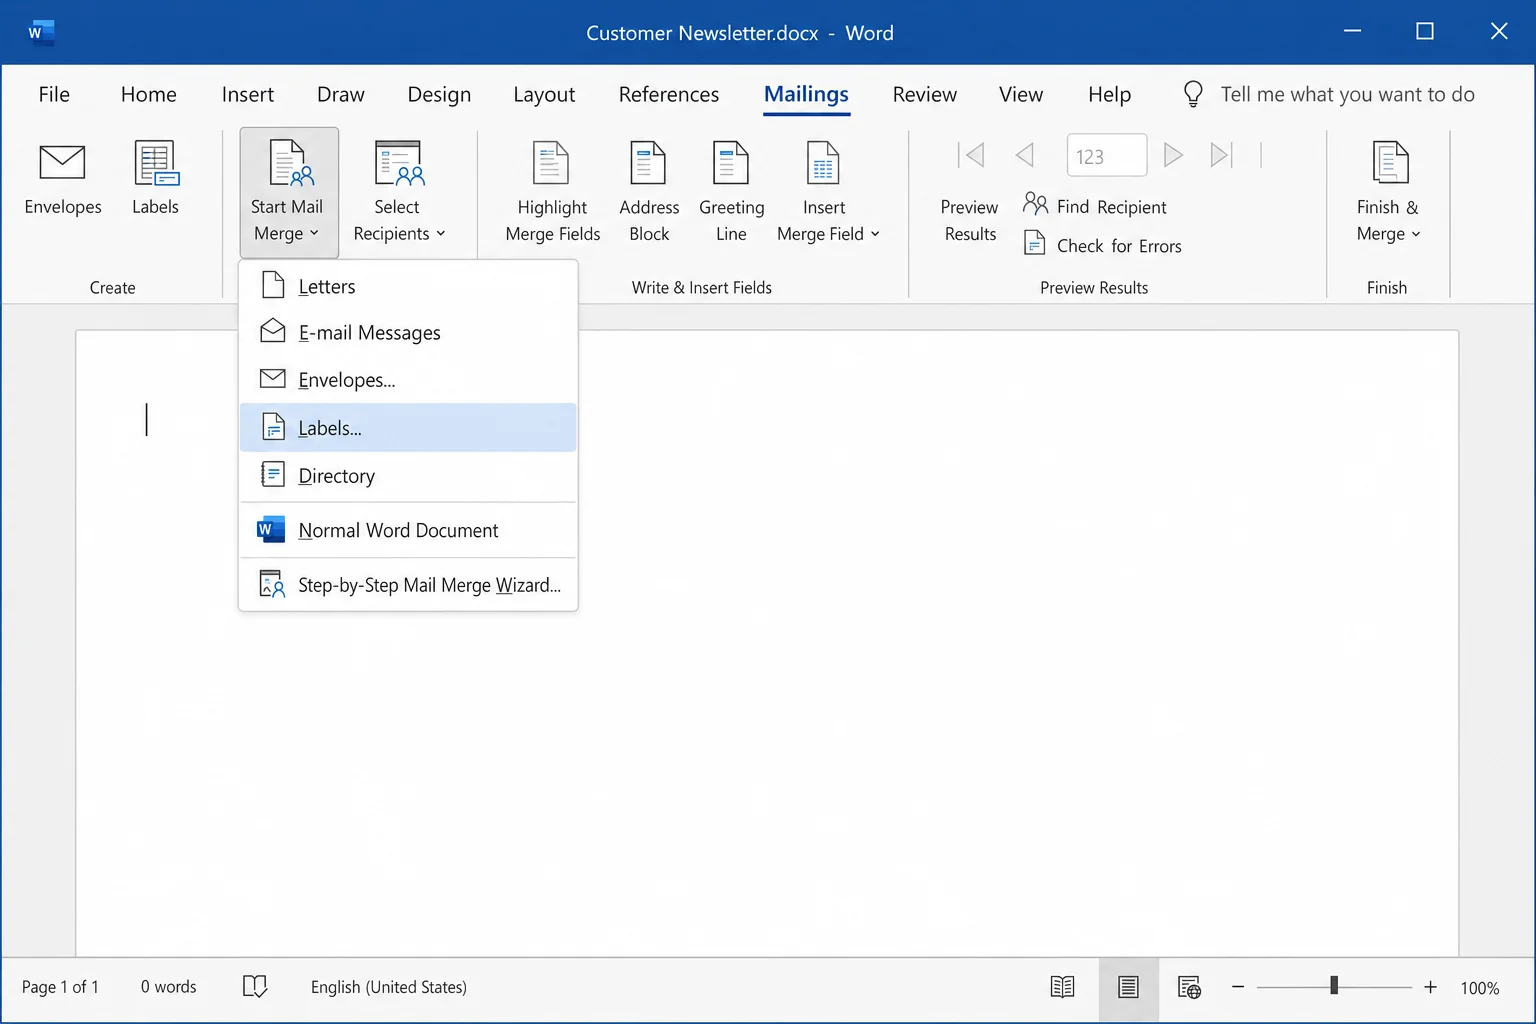
Step 1: Set Up Your Label Document
Go to the Mailings tab and click Start Mail Merge > Labels. Choose your label size and click OK.
Step 2: Connect Your Data Source
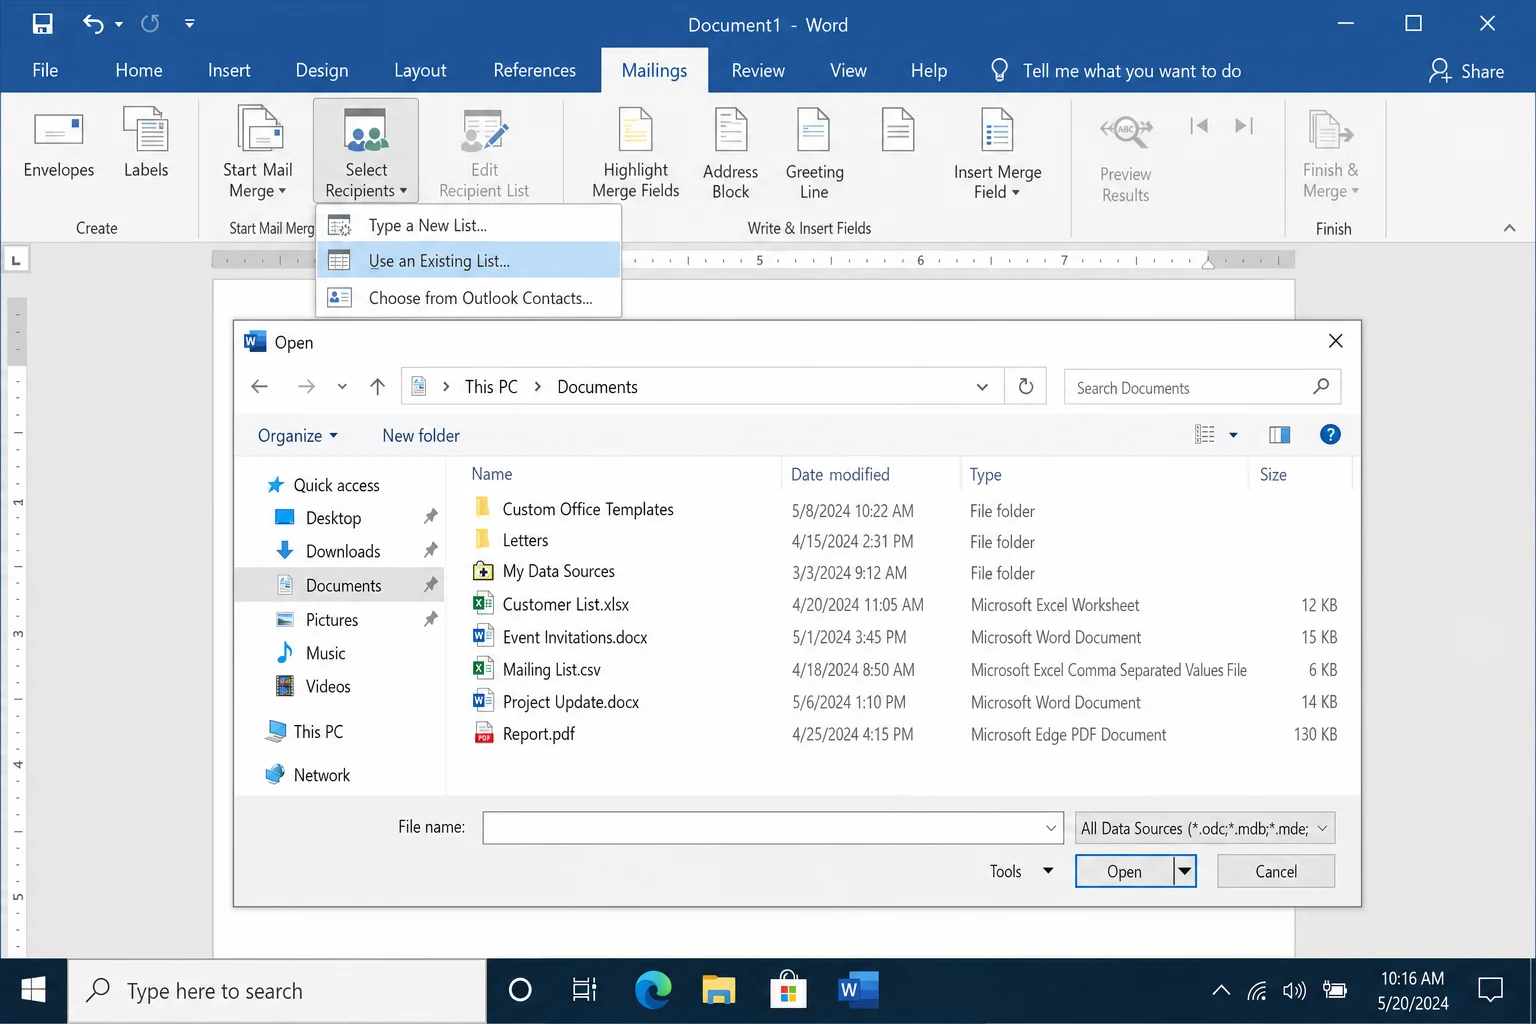
Click Select Recipients > Use an Existing List and point Word to your Excel spreadsheet or CSV file containing the barcode data. Make sure your spreadsheet has a column with the values you want to encode (like product IDs or serial numbers).
Step 3: Insert a MergeBarcode Field
Click in the first label, press Ctrl + F9 (or Cmd + F9 on Mac) to insert field brackets, and type:
MergeBarcode ColumnName CODE128Replace ColumnName with the actual header name from your spreadsheet (e.g., ProductID). So it looks like:
{ MergeBarcode ProductID CODE128 }Step 4: Update All Labels
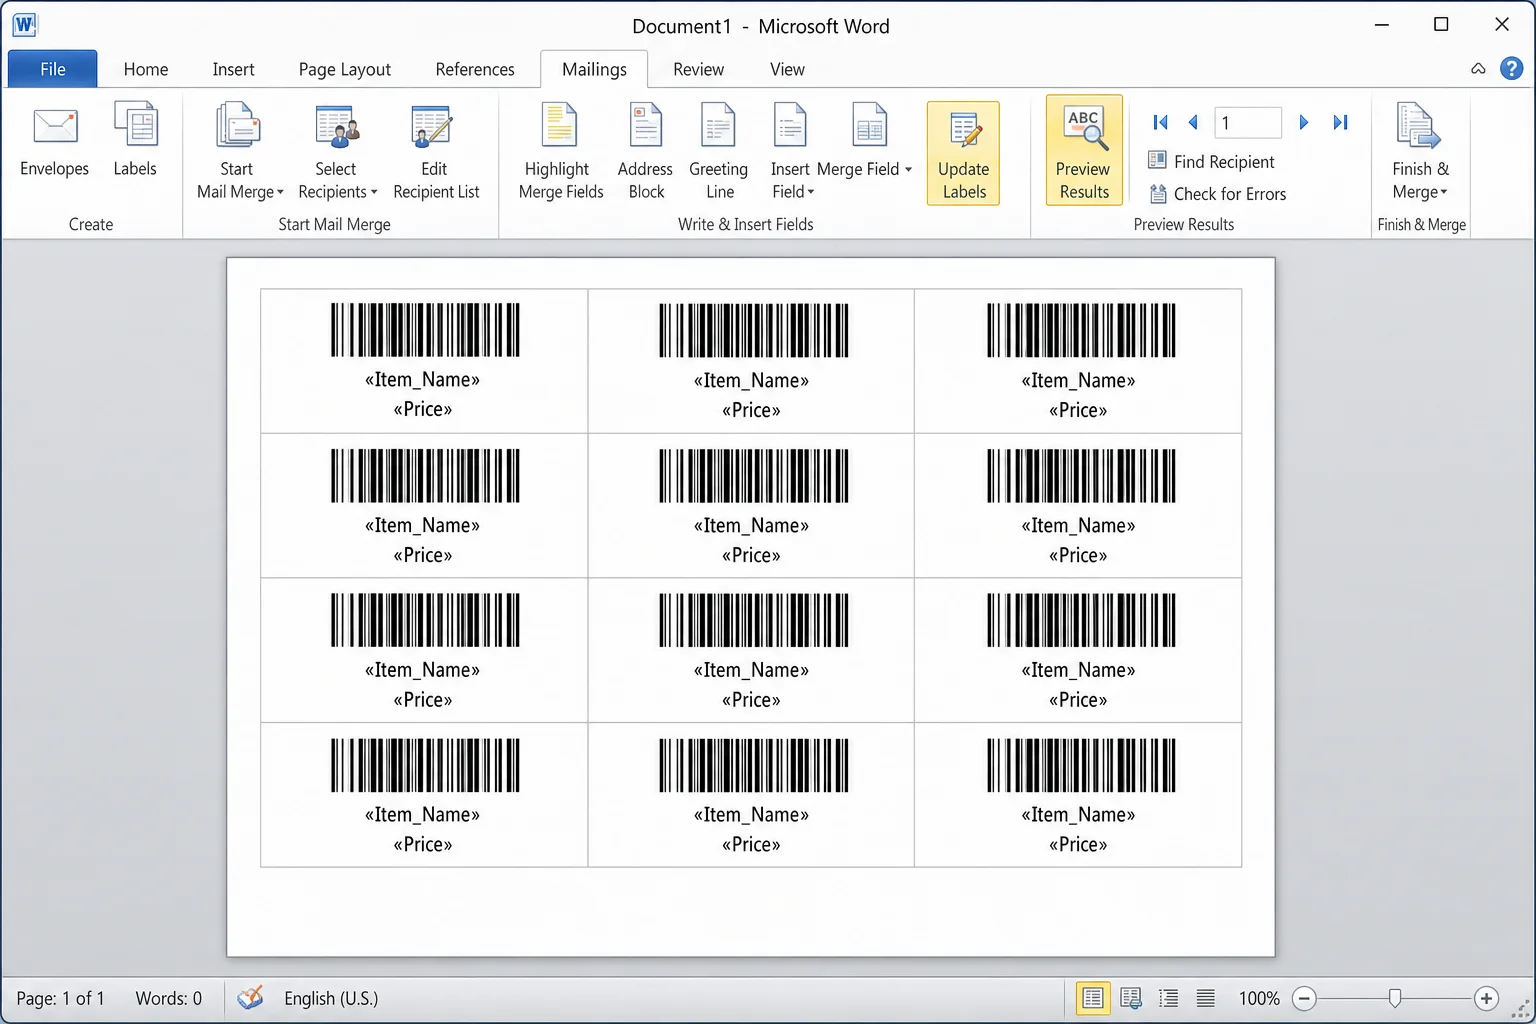
Click Update Labels in the Mailings tab to copy the field to all labels on the sheet. Then click Preview Results to see your barcodes populated with real data. When everything looks good, click Finish & Merge > Print Documents.
The Barcode Font Method (Legacy Alternative)
Before Word had built-in field codes for barcodes, the standard approach was to install a special barcode font and apply it to your text. This method still works, but it’s more finicky. For Code 128 especially, you need to pre-encode your text using an external tool before it’ll scan correctly. We’d recommend sticking with the field code method above for most situations, but here’s how the font approach works if you need it.
Step 1: Download a Barcode Font
There are free barcode fonts available for Code 39 and Code 128. A reliable source is IDAutomation’s free Code 39 font. Download the ZIP file to your computer.
Step 2: Install the Font on Windows
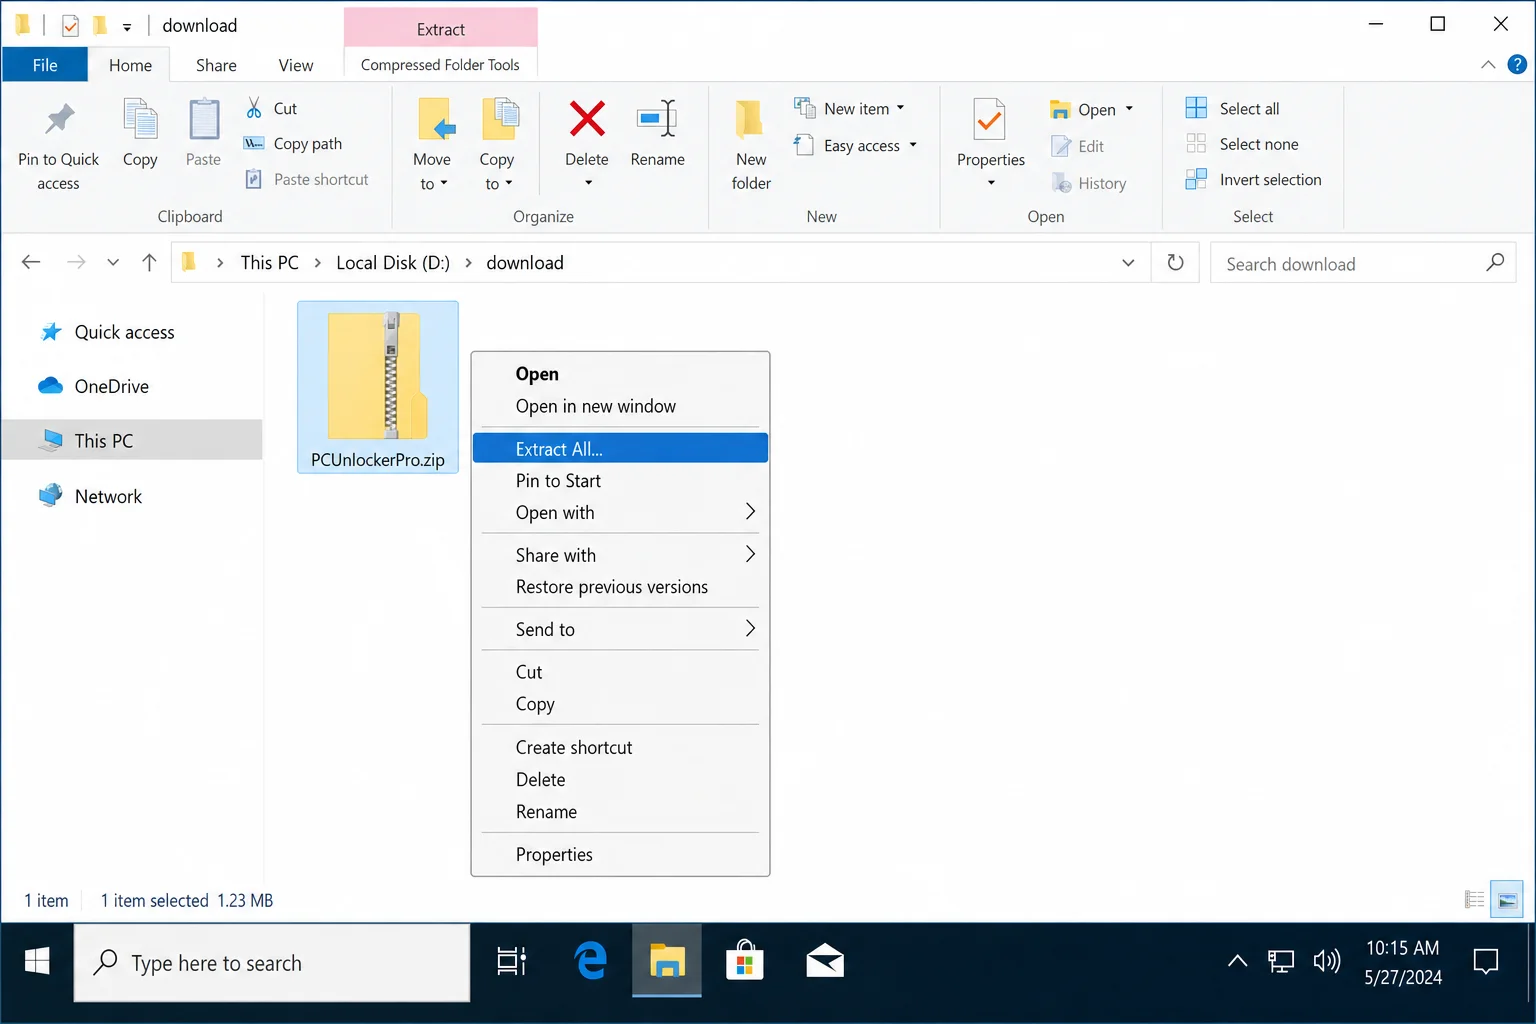
- Go to your Downloads folder in File Explorer.
- Right-click the ZIP file and choose Extract All.
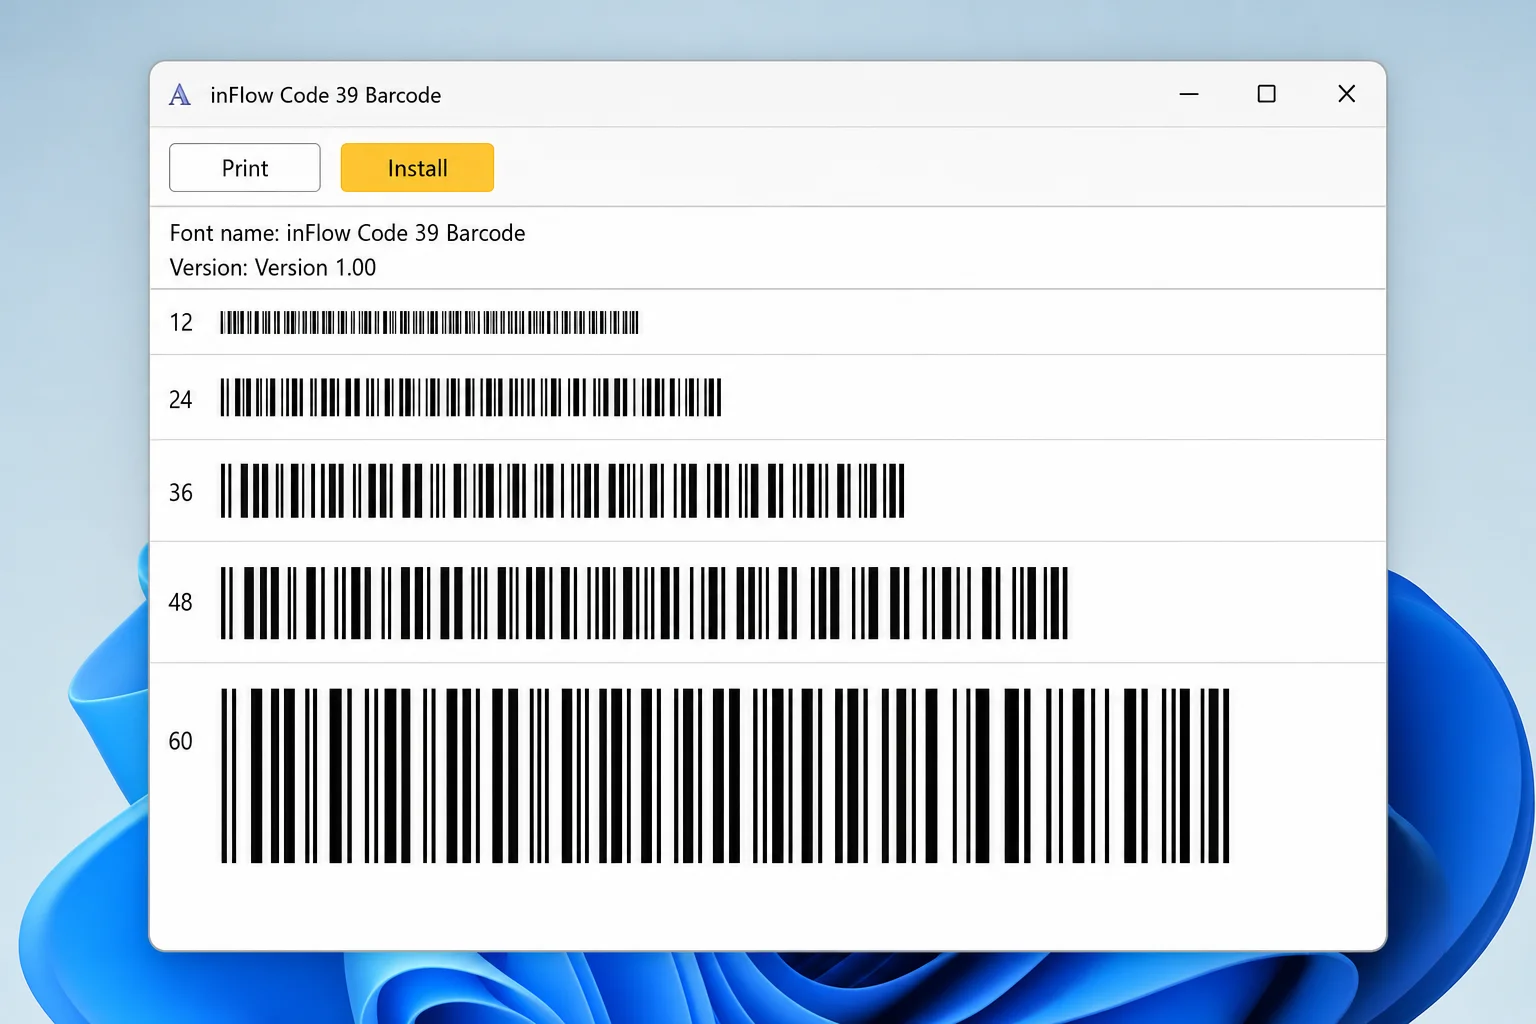
- Open the extracted folder and find the file ending in .ttf (that’s the font file).
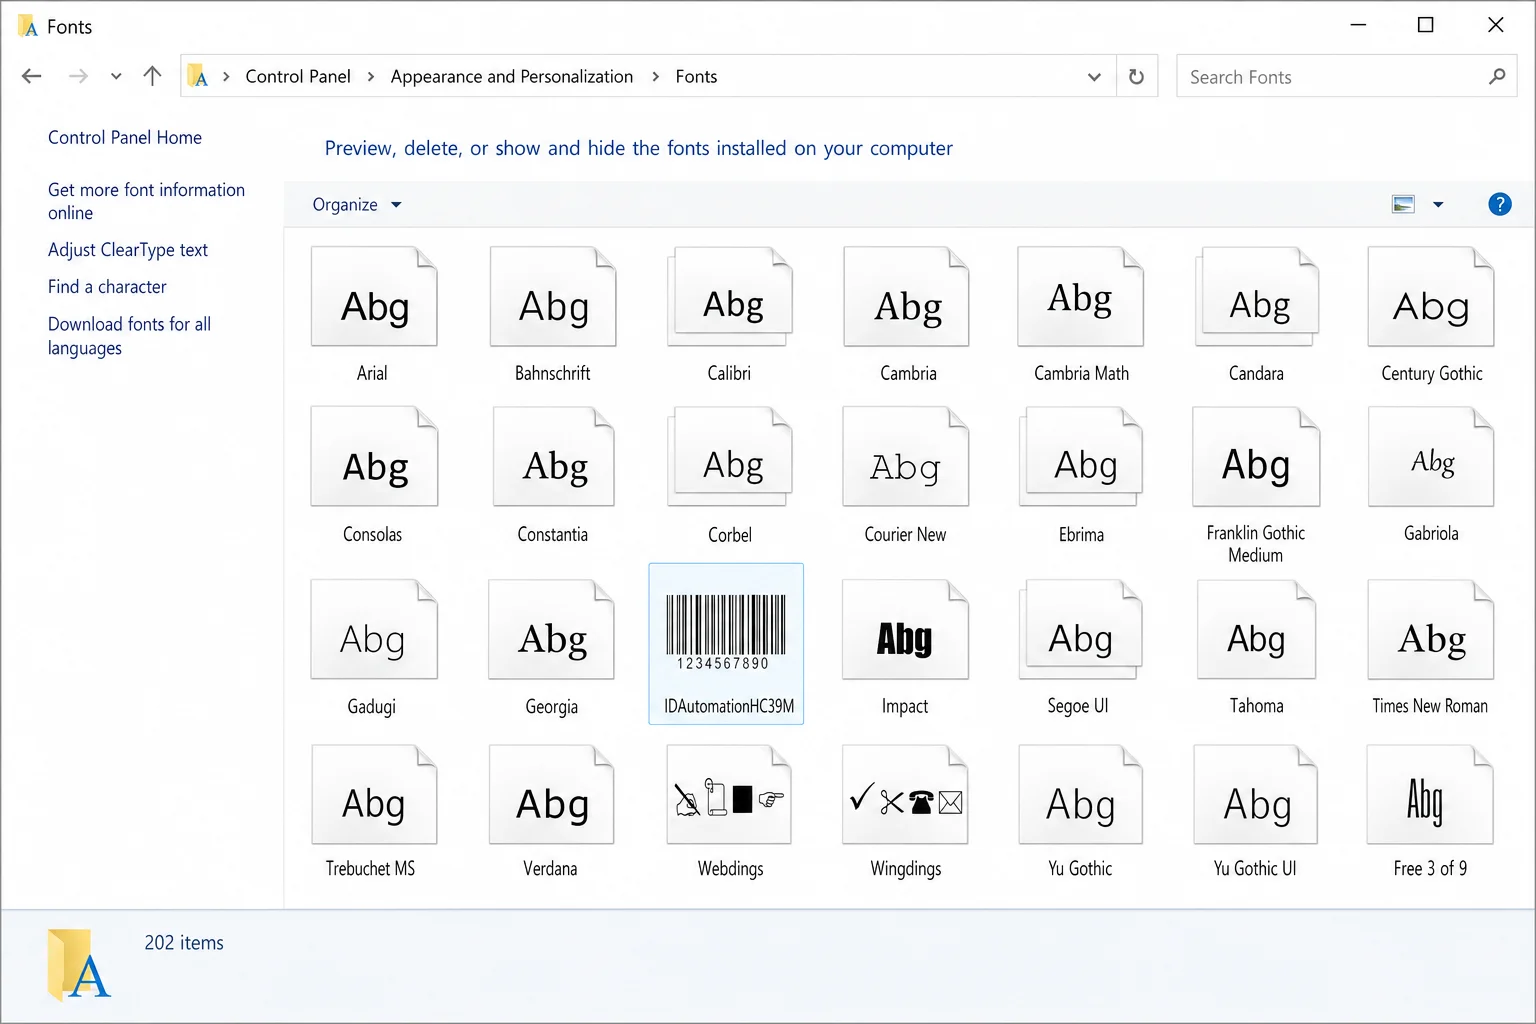
- Double-click the .ttf file to preview it, then click Install at the top of the preview window.
- Close and reopen Word so it picks up the newly installed font.
Step 3: Install the Font on macOS
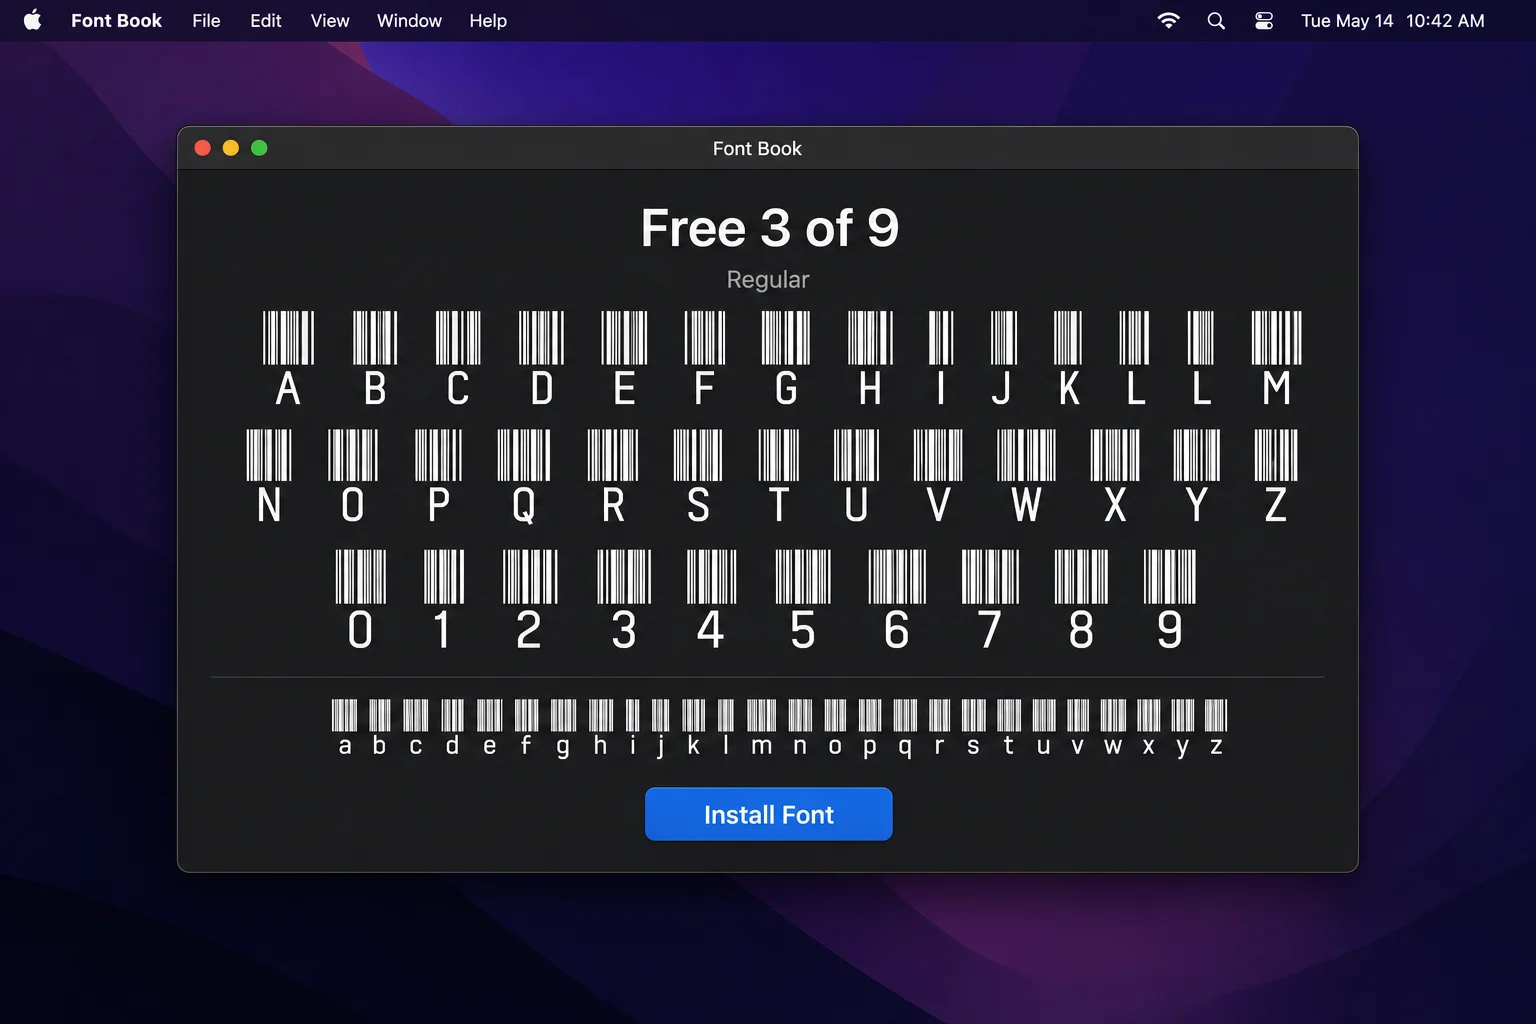
- Double-click the downloaded ZIP file to extract it.
- Double-click the .ttf font file.
- Click Install Font in the Font Book window that opens.
- Close and reopen Word.
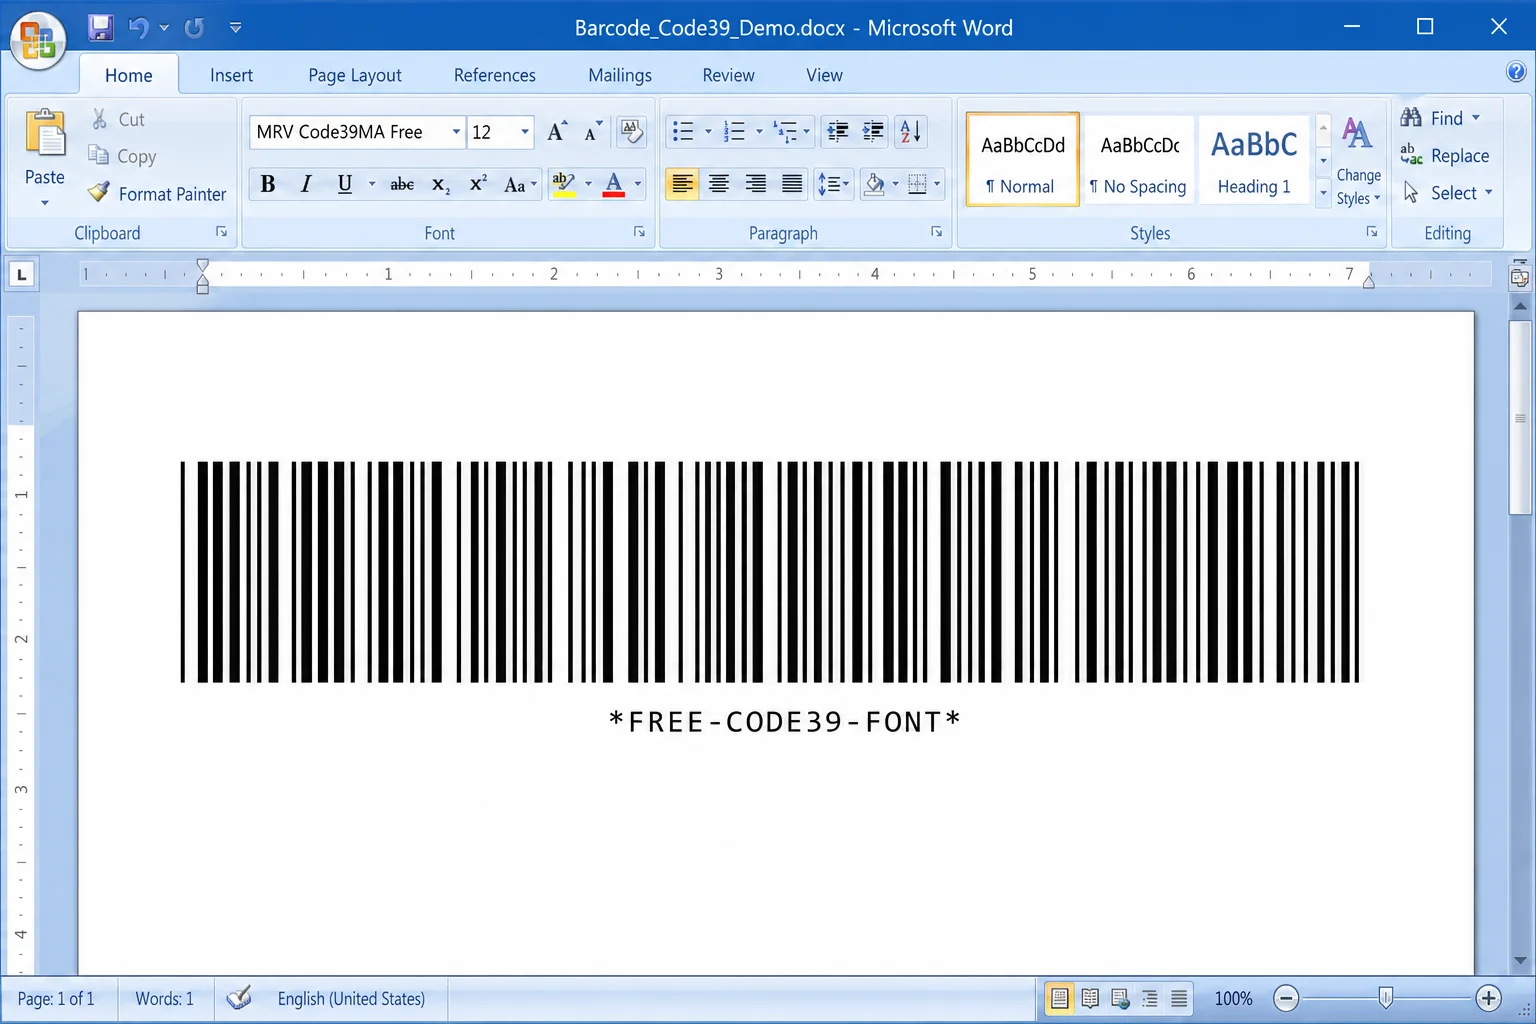
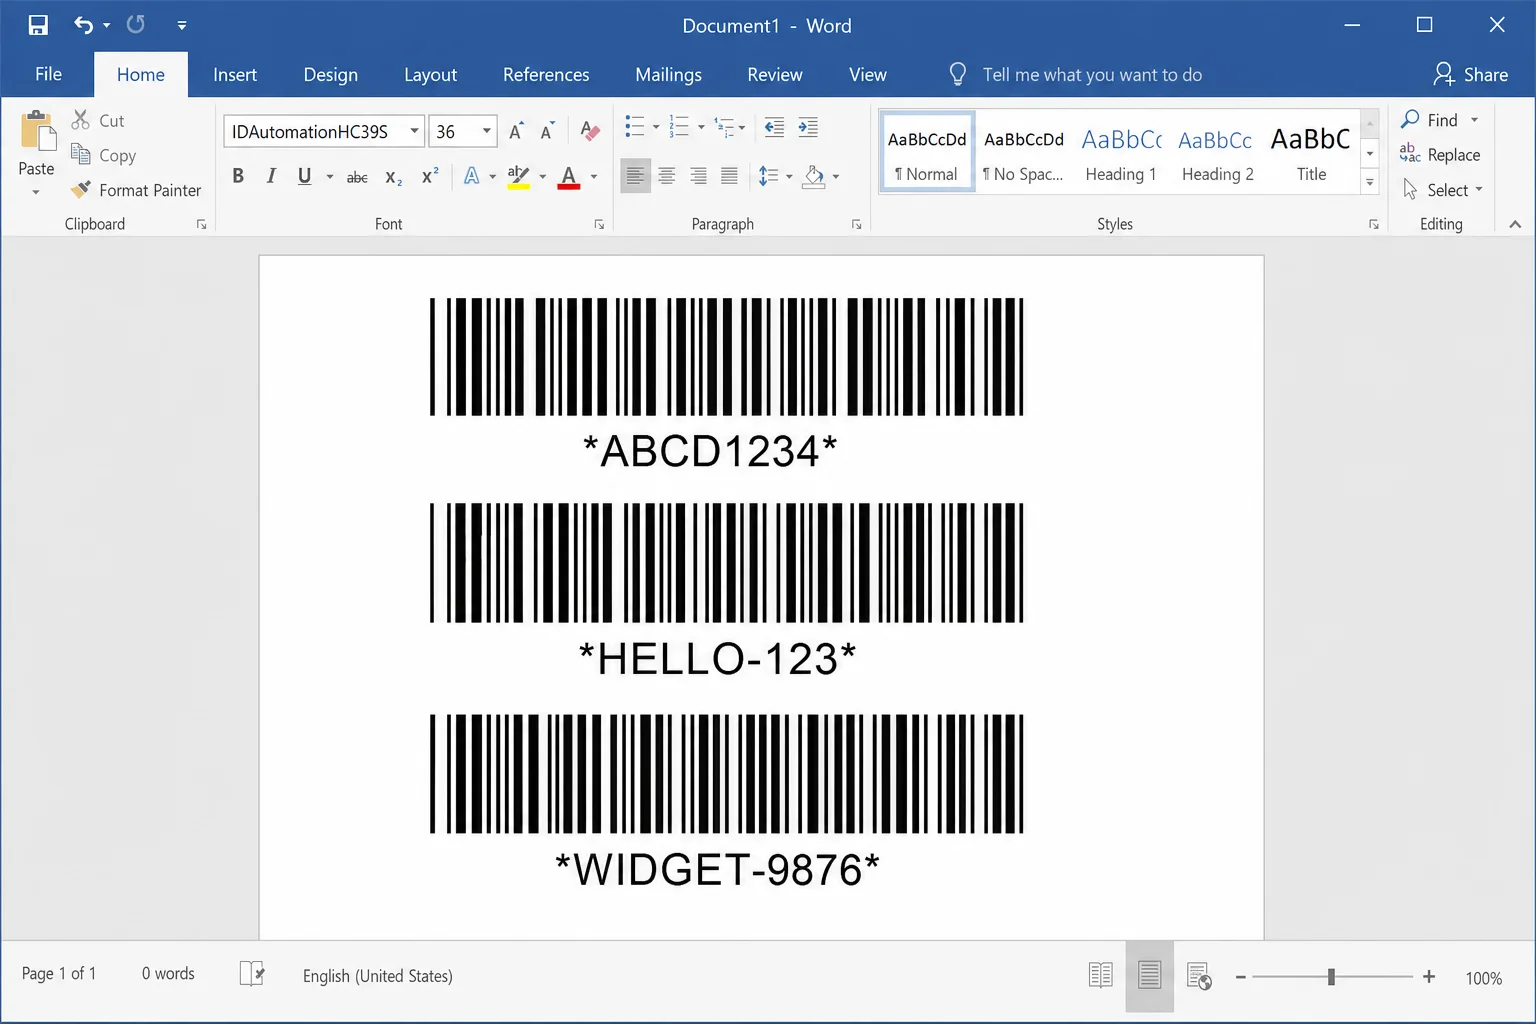
Step 4: Generate a Code 39 Barcode in Word
Code 39 is the simplest barcode font to use because it doesn’t need any pre-encoding. The trick is adding an asterisk (*) before and after your text, those are the start and stop characters that make the barcode scannable.
- In Word, type your text with asterisks: for example,
HELLO123 - Select the text.
- Change the font to your installed Code 39 barcode font and increase the size to at least 28pt or larger.
The text will transform into a barcode. One thing to know: Code 39 doesn’t support spaces. If you need a space in your data, use the equals sign (=) as a substitute, so HELLO=WORLD will scan as “HELLO WORLD”.
Step 5: Generate a Code 128 Barcode in Word
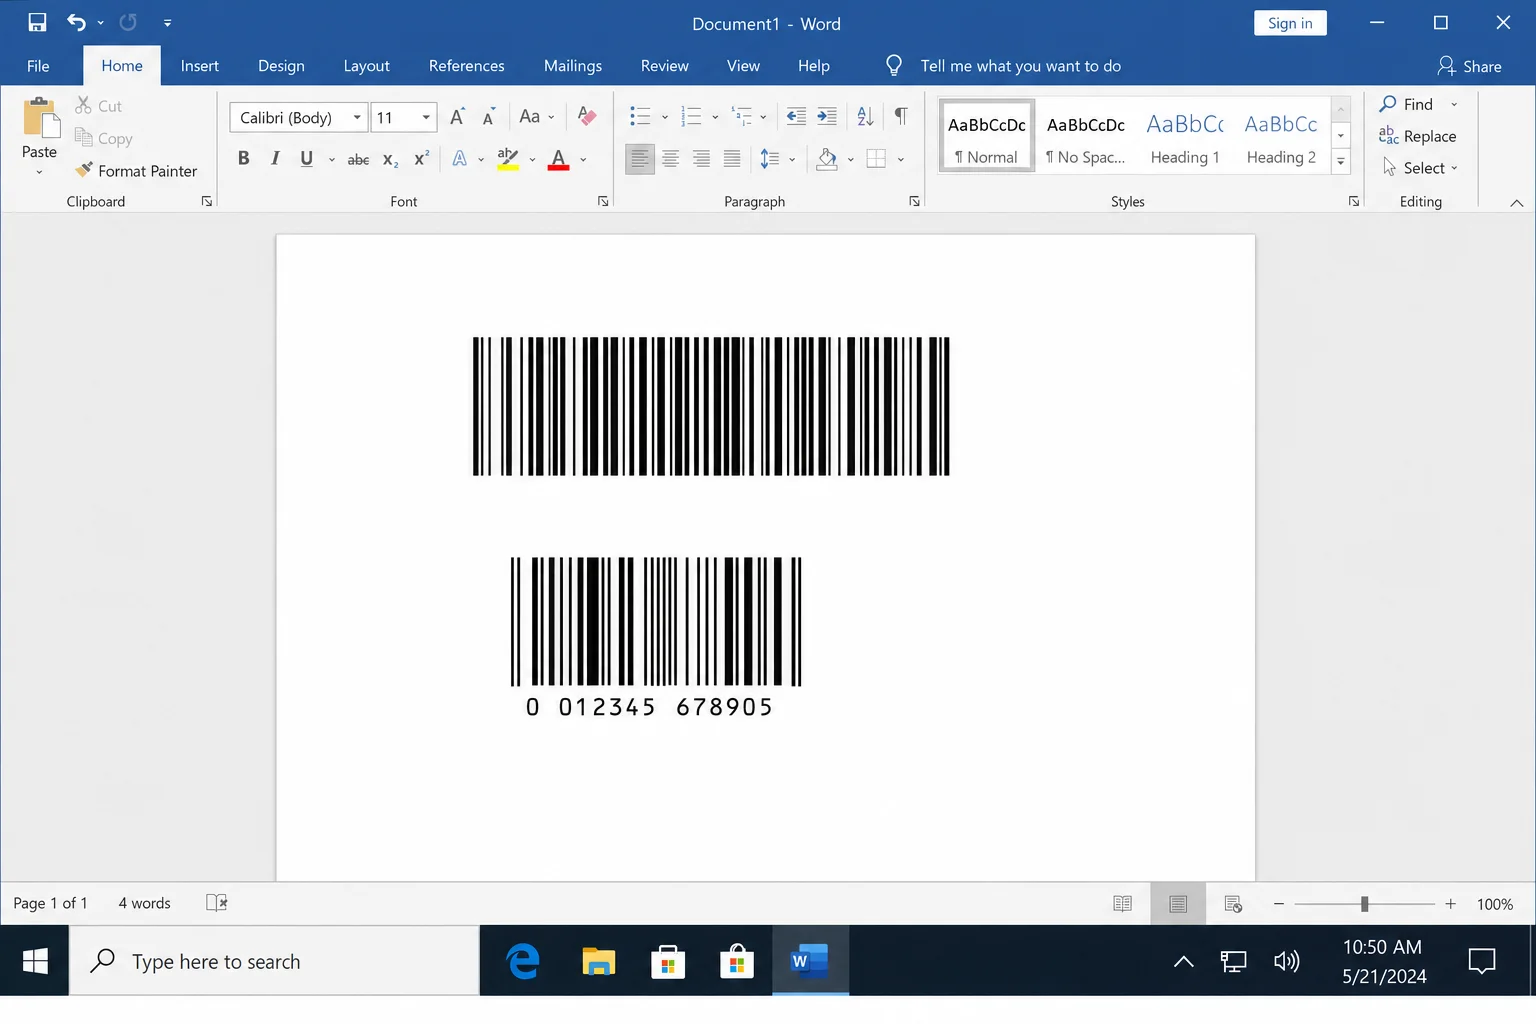
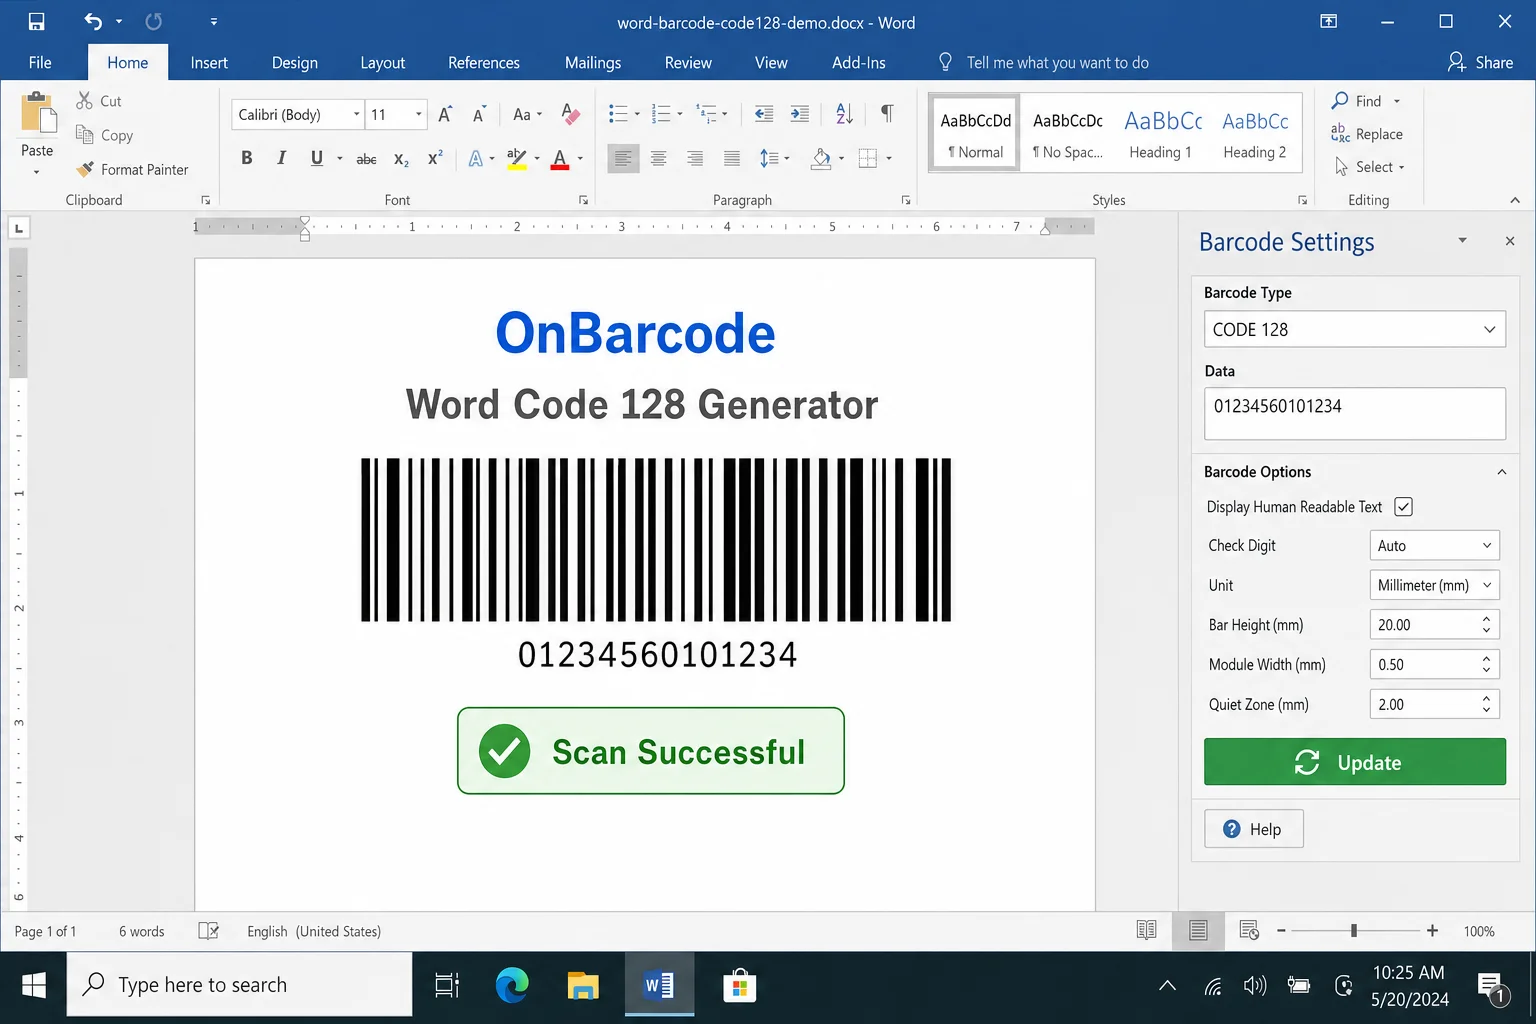
Code 128 is trickier with the font method because it requires special checksum characters that you can’t just type manually. You’ll need to use an online encoder first to get the right text to paste into Word.
- Visit a free online barcode generator tool (search for “Code 128 font encoder” to find current options).
- Type your data into the encoder and copy the encoded output.
- Paste the encoded text into Word.
- Select it and apply your Code 128 font at a large size (48pt or 72pt).
Bottom line: If you just need a quick barcode and don’t want to mess with encoding tools, use the DisplayBarcode field method instead. It handles all of this automatically.
How to Scan Your Barcodes
Before you print anything, it’s worth testing your barcode with a scanner to make sure it actually works. If you have a physical barcode scanner, great. Just plug it in and scan. If not, your smartphone camera can do the job.
On iPhone: Open the built-in Camera app and point it at the barcode. iOS will automatically detect it and show a notification at the top of the screen with the decoded data. You can also download a dedicated scanning app from the App Store for more detail, such as the barcode type, raw data, and so on.
On Android: Google Lens (built into the camera on most Android phones) can scan barcodes. Just open your camera, point it at the barcode, and tap the Google Lens icon. Alternatively, search the Play Store for a barcode scanner app. There are plenty of free options.
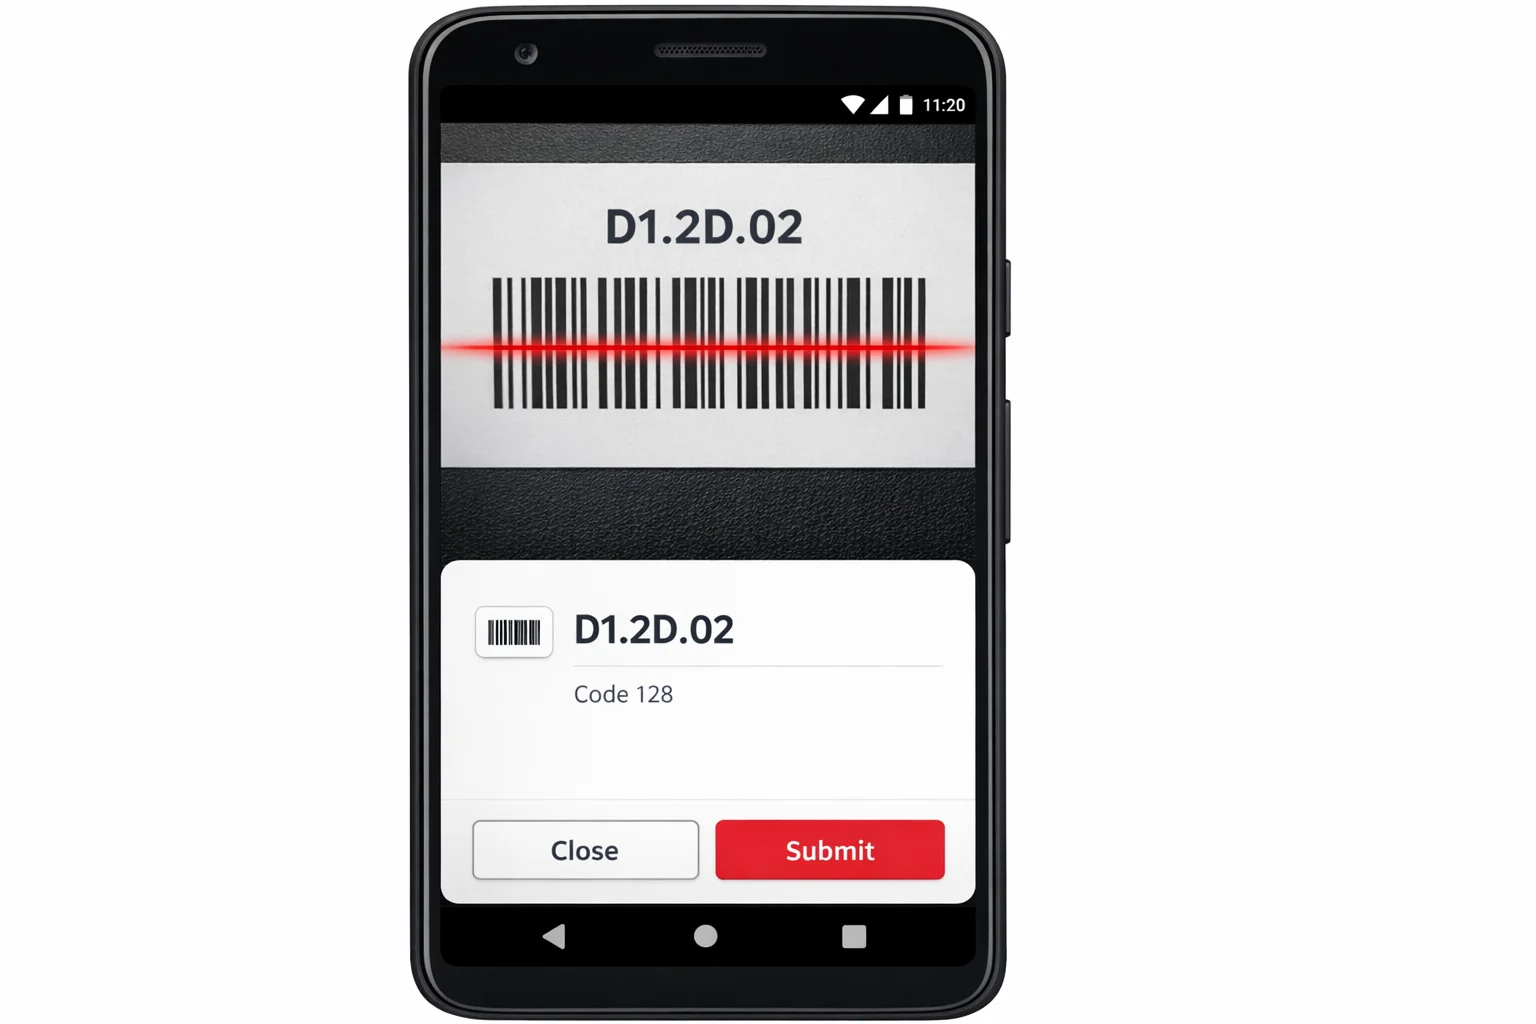
One pro tip: scan the barcode on your screen first before printing. If it scans correctly on screen, it’ll scan correctly on paper (as long as you don’t scale the document when printing, more on that below).
Tips and Troubleshooting
Common Issues
Problem: My curly braces aren’t working as a field
This is the most common mistake. You must use Ctrl + F9 (Windows) or Cmd + F9 (macOS) to insert field brackets. Typing {} on your keyboard creates regular characters that Word won’t treat as a field, so your barcode simply won’t appear.
Problem: The barcode doesn’t appear after pressing F9
Double-check your field code for typos. Right-click the field and choose Toggle Field Codes to see the code again. Make sure the barcode type name is spelled correctly (e.g., CODE128, not Code128 or code 128) and that your data is in quotes.
Problem: UPC-A or EAN-13 barcode isn’t generating
These formats are strict about data length. UPC-A requires exactly 12 digits, and EAN-13 requires exactly 13 digits. If your number is too short or too long, Word won’t generate the barcode. Count your digits carefully!
Problem: The barcode won’t scan after printing
This is almost always a print scaling issue. Make sure you’re printing at 100%. Don’t use “Fit to page” or any scaling option. Stretching or squishing a barcode even slightly can make it unreadable to scanners. Also make sure your printer is producing a clean, high-contrast print, since low ink leads to bad scans.
Problem: The barcode keeps showing the field code text instead of the graphic
Press F9 to update the field, or right-click and choose Update Field. If that doesn’t work, go to File > Options > Advanced and make sure Show field codes instead of their values is unchecked.
Pro Tips
- Resize carefully: You can resize the barcode by clicking it and dragging a corner handle, but always hold
Shiftto maintain proportions. A distorted barcode won’t scan. - Edit the barcode data: Right-click the barcode and choose Toggle Field Codes, edit your data, then press
F9to regenerate it. - Need lots of barcodes? For high-volume or industrial label printing, dedicated barcode software or label design tools will save you a lot of time. Word’s field codes are great for occasional use, but they’re not built for batch generation at scale.
- QR codes for URLs: The
QRbarcode type works great for encoding website addresses. Just make sure to include the full URL withhttps://.
Wrapping Up
Generating barcodes in Microsoft Word is genuinely useful once you know the trick, and the DisplayBarcode field code method makes it easier than ever without needing to install anything extra. Whether you’re labeling storage bins, creating inventory sheets, or just having fun with a personal project, you’ve now got everything you need to make it work.
If you’re printing a lot of barcodes or need industrial-grade reliability, it might be worth looking at dedicated label software. But for most everyday needs, Word does the job just fine. Give it a try, and don’t forget to test your barcodes on screen before you commit to printing a whole sheet!