An excellent way to keep everything organized
While Microsoft already had a Kanban board-style application (Microsoft Planner), the newly released Microsoft Lists fulfills the need for a more general-purpose task collaboration tool. Let’s look at how you can use Microsoft Lists yourself.
Users familiar with Microsoft Sharepoint would note the similarities with the new Lists app, as it is in essence an upgraded version of the same tool. While Sharepoint lists were mostly about data management and could be accessed through Excel spreadsheets, Microsoft Lists are focused more on collaboration and can be viewed in multiple user-friendly ways.
What Is Microsoft Lists?
Microsoft Lists is described pretty well by its name already, but the number of similar products in Microsoft’s arsenal still makes things a bit confusing. Microsoft To-Do already lets you add tasks to a list, while something like Microsoft Planner works as a proper agile team collaboration tool. And then there is Sharepoint, which lets you create shareable lists as well.
Microsoft Lists distinguishes itself from these applications by its modern interface, cross-platform support, and incredible customization. It seeks not to supplant these tools but to supplement them, and to this end provides native integration with Planner and Sharepoint.
Lists are meant for creating multipurpose lists of, well, anything, from tasks to calendar events and even just data entries. This is paired with the ability to share these lists with Microsoft Teams (again, natively integrated) to discuss and collaborate on any list item.
Essentially, Microsoft Lists works as a powerful alternative to project management tools like Trello for teams that use the Office 365 suite, plugging a major gap in the capabilities of the Microsoft ecosystem.
Using Microsoft Lists
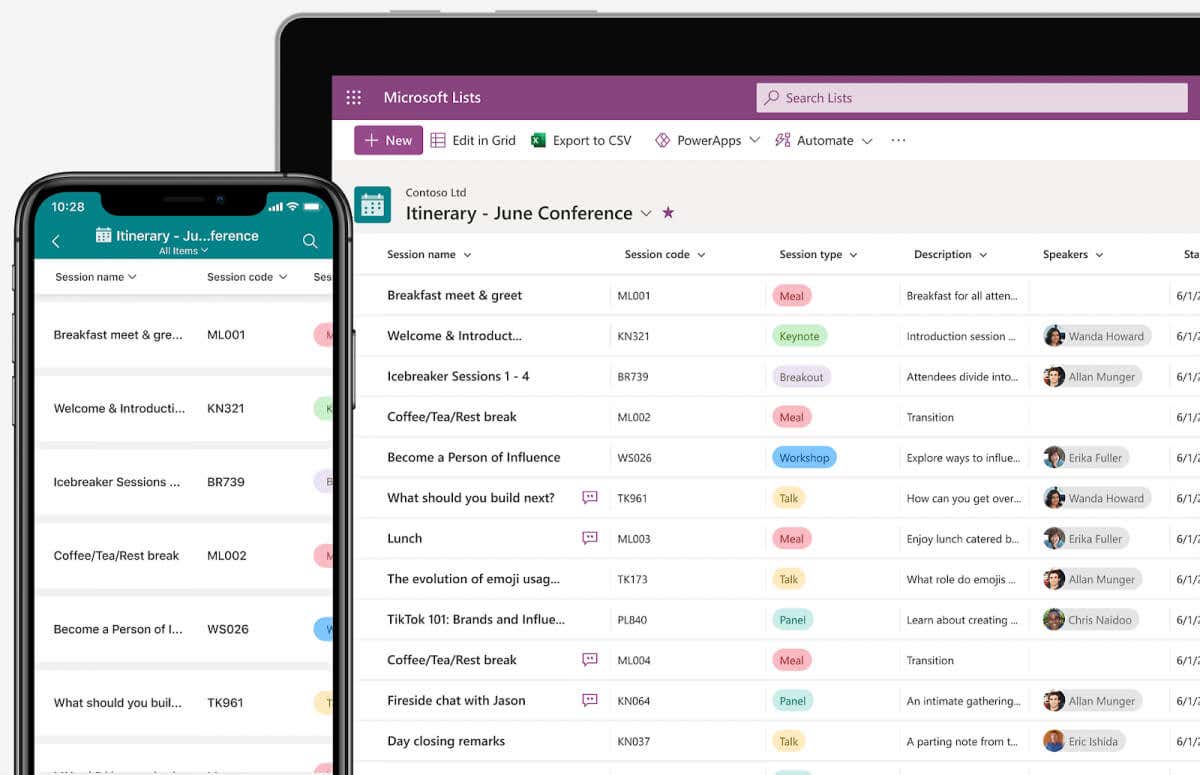
As Microsoft Lists is intended to work as a general-purpose collaborative list-making tool, it’s designed to be cross-platform. Along with the desktop app, you can download the Lists mobile app on Android as well as iOS phones, apart from the web version that can be accessed through any browser.
It is a part of the Office 365 suite, but you can also use it as a preview for now with any Microsoft account even without an Office subscription.
- To try out the Microsoft Lists preview, head to lists.live.com, which acts as the web app for the tool. You may have to log in with your Microsoft account to gain access.
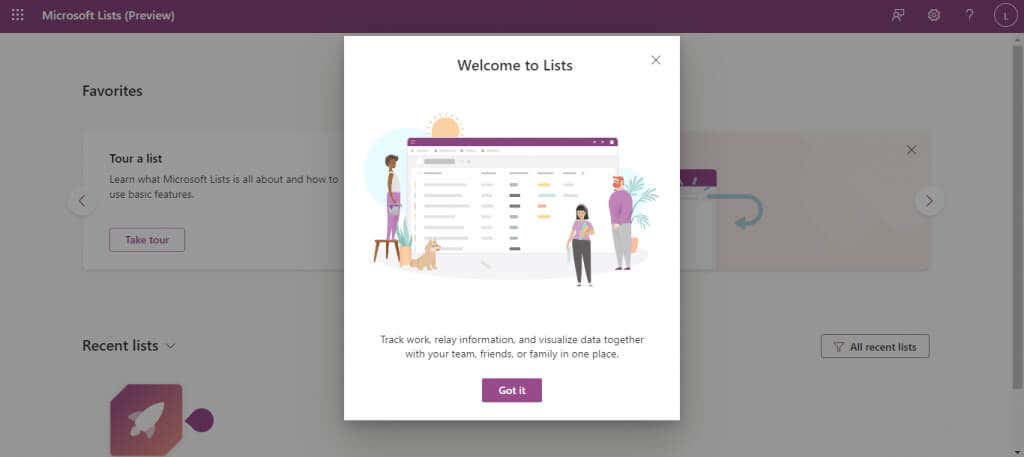
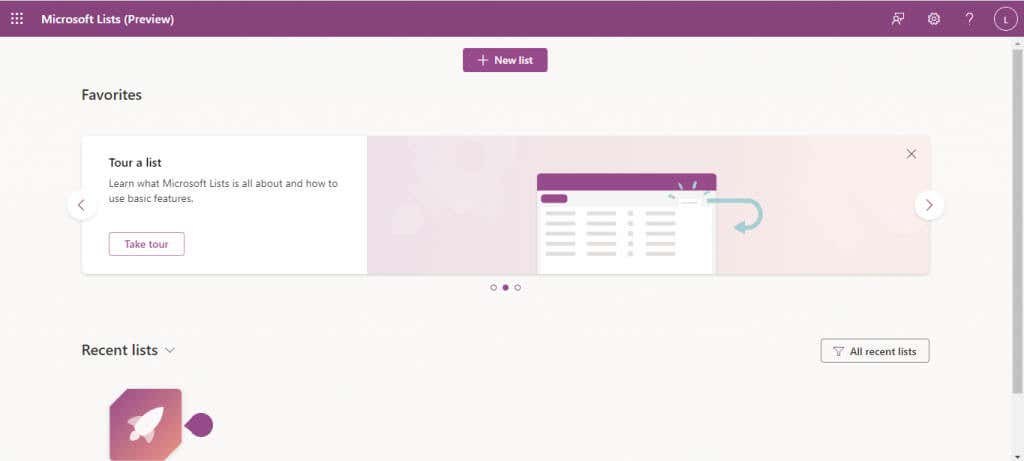
- The interface is clean and clutter-free, with one button standing out at the top: New list. Click on it to create our first list.
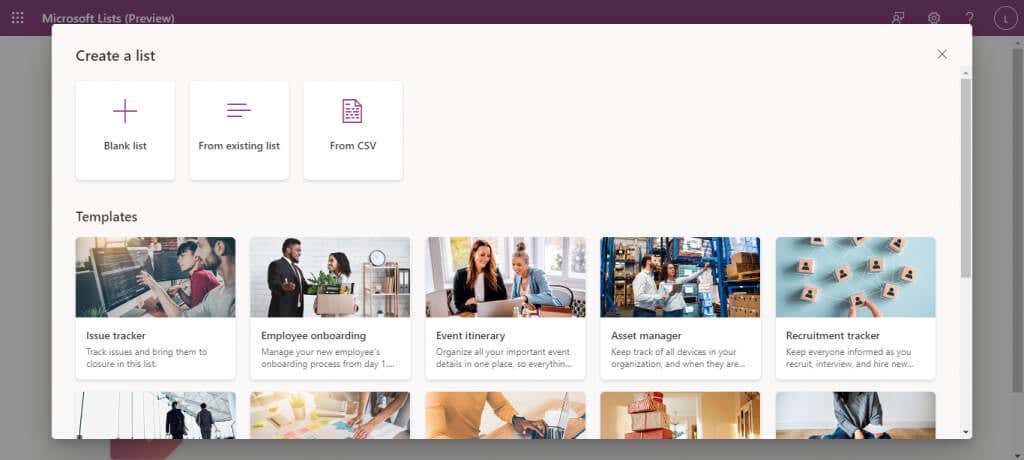
- This is where we get our first glimpse of the flexibility of Microsoft Lists. You can create a Blank list, use ready-made templates, or import a .csv file as a list, similar to Microsoft Sharepoint. And of course, you can also select a template to create a specific type of list.
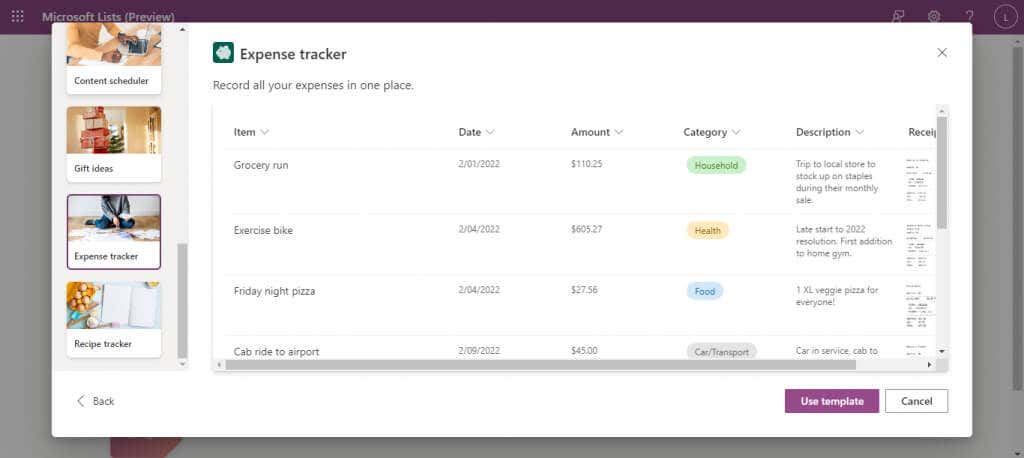
- Selecting a template also gives you a preview of what the template will look like with data filled in, after which you can click on the Use template button to go ahead with it.
- Now just enter a name for the list, along with an optional description to make it easier to understand the purpose of the list. A color and icon will be chosen by default (based on the type of template) but you can change these too if you want. Select Create when you are satisfied.
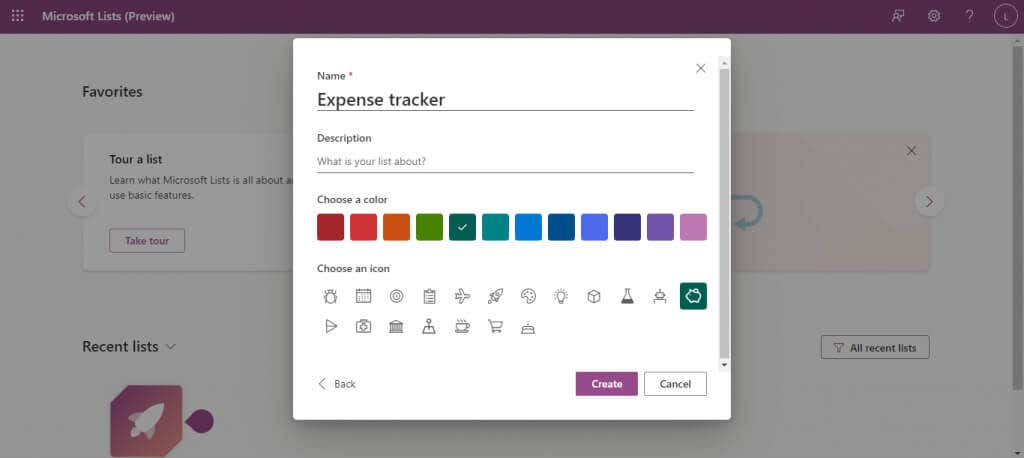
- The new list will open with all the fields (columns) already in place, ready to accept data. You can add more fields with the Add column button on the right, and new rows with the Add new item option on the left.
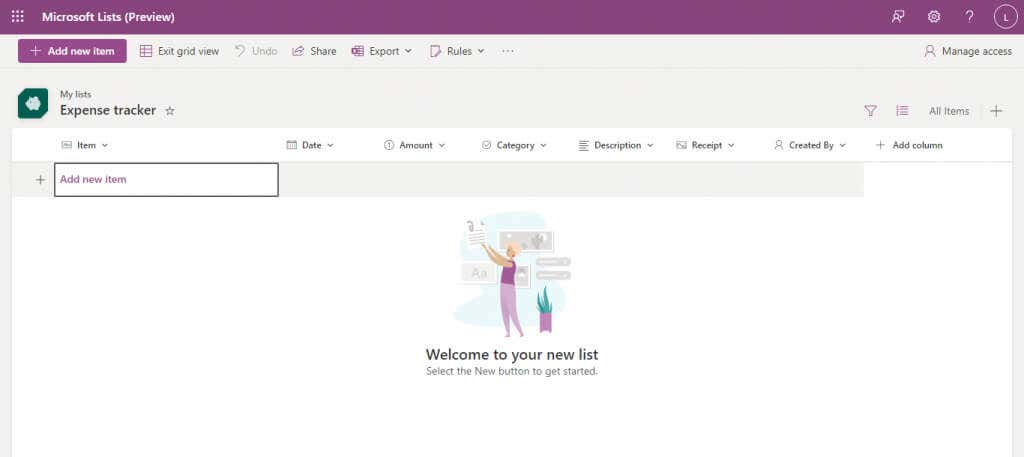
- The categories are already configured with their respective data types, so for fields like date, you will get a calendar to pick from.
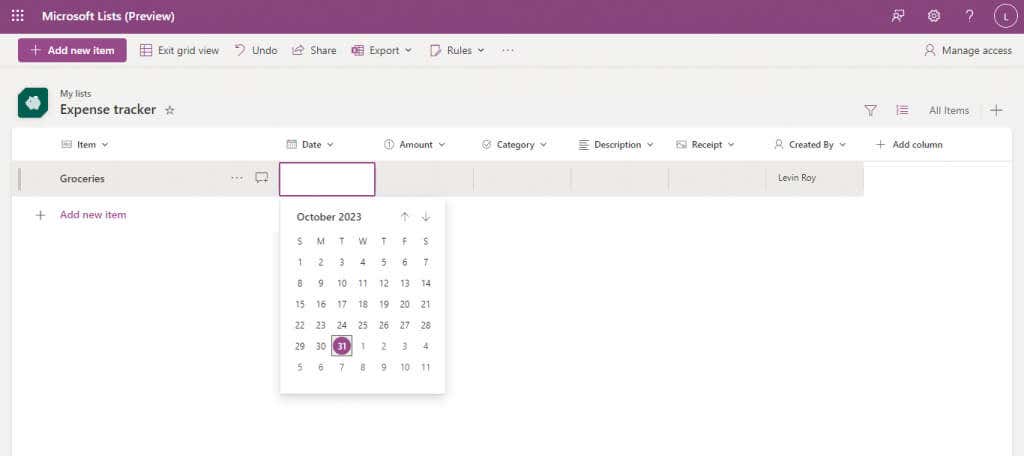
- Simply enter all the fields to create a new item, repeating the process for as many entries as you want to add. As you might note, the Created by field keeps track of who added the item, making it easier to organize in case of multiple people using the same list.

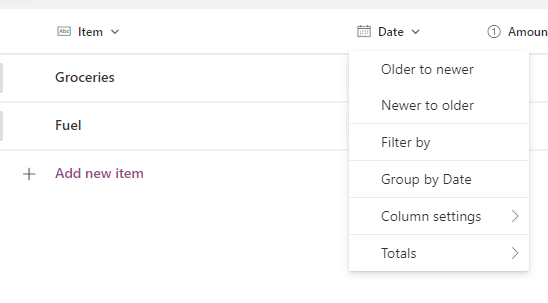
And that’s all you need to get started. Those proficient with Excel (or Sharepoint) will find many similar features like sorting the data in a column or using Filters to view a selection of the list.
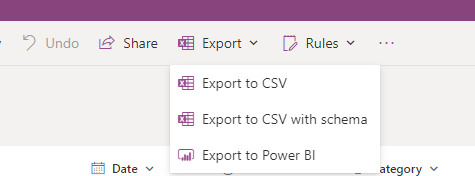
You can even export any list as a CSV file or a Microsoft Power BI file with the Export button on the top.
Sharing a List
Since the whole premise of Microsoft Lists is about collaborating with others, let’s take a look at how you can share lists that you have created.
- Open an existing Microsoft List.

- Click on the Share button from the top bar.

- A small window will appear, letting you add names and a message for the people you are sharing the list with. All of it is optional since the only thing you need to do is to Copy link and share it with your team members.
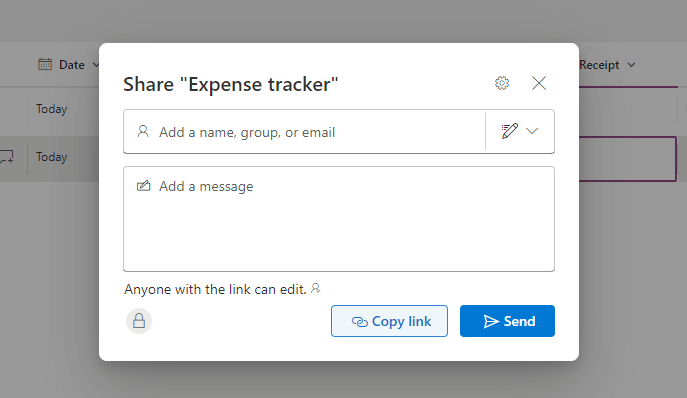
- By default the link permissions are set to allow anyone with the link to edit lists (after signing in), but you can modify this as well. Click on the Sharing settings button on the top of this small window (the gear icon) to view all the available options.

- Now you can change the sharing access, from turning off the sign-in requirement to restricting it to people added to your organization. You can also set a password for an extra layer of security, or change what kind of permissions the link provides, limiting it to viewing only if you need to. Select Apply when you are done to bring the changes into effect.
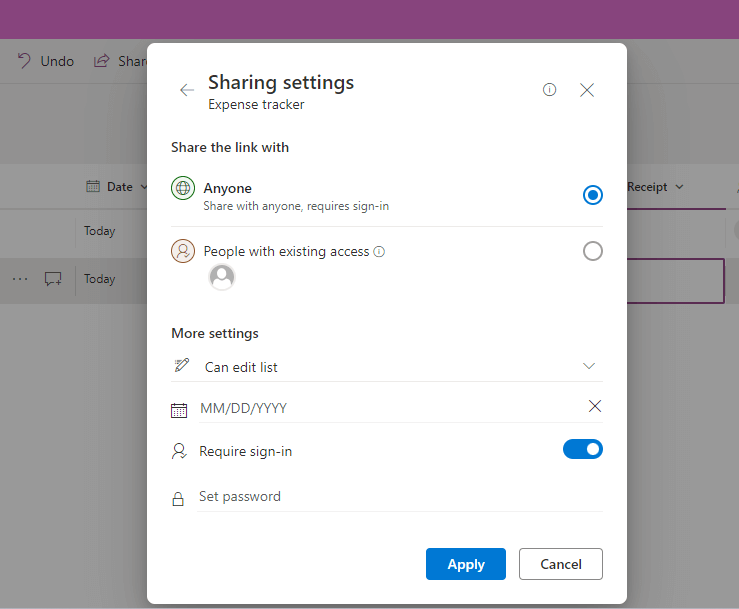
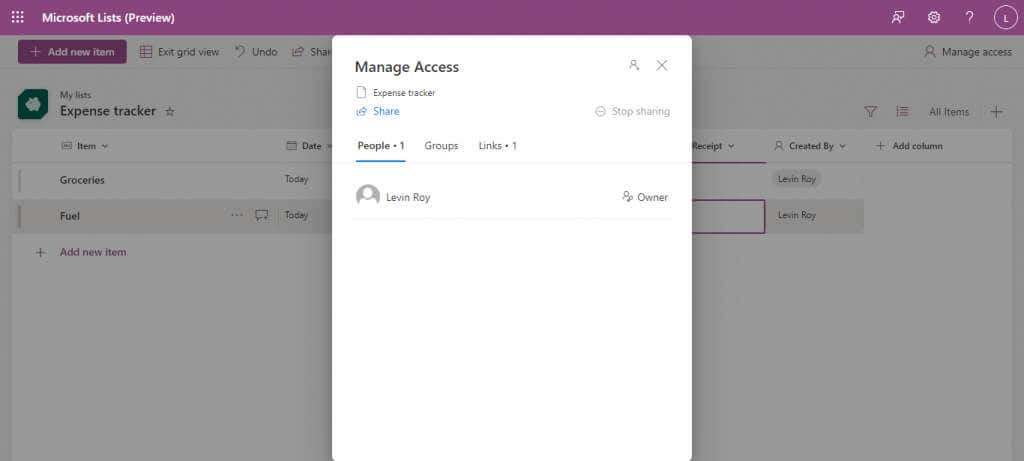
Don’t worry about any mistakes made during this part; you can always use the Manage access button on the top right to modify user permissions for any given list.
Creating Views in Microsoft Lists
The default list is not the only way of viewing a Microsoft list. You can choose from four different views: List, Calendar, Gallery, and Board.
This flexibility in visualizing the information is another advantage Lists has over Sharepoint. There is no perfect view – depending on the content of the list in question, some views are better suited than others.
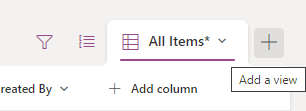
- To create a new view, open a list and slick on the Add a view button on the right (with the + icon).
- Here you can select the type of the list and enter the additional information required. Gallery and the default List view only require a name, while the Board needs you to specify a column to organize the list by. The Calendar view asks for a layout (Month or Week) along with the starting and ending dates.
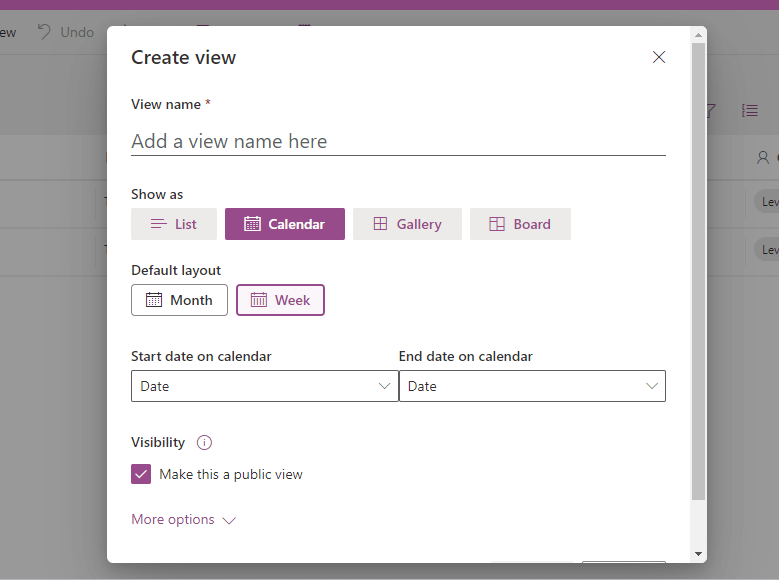
- Click on the Create button after entering the information to have the new view created for you.
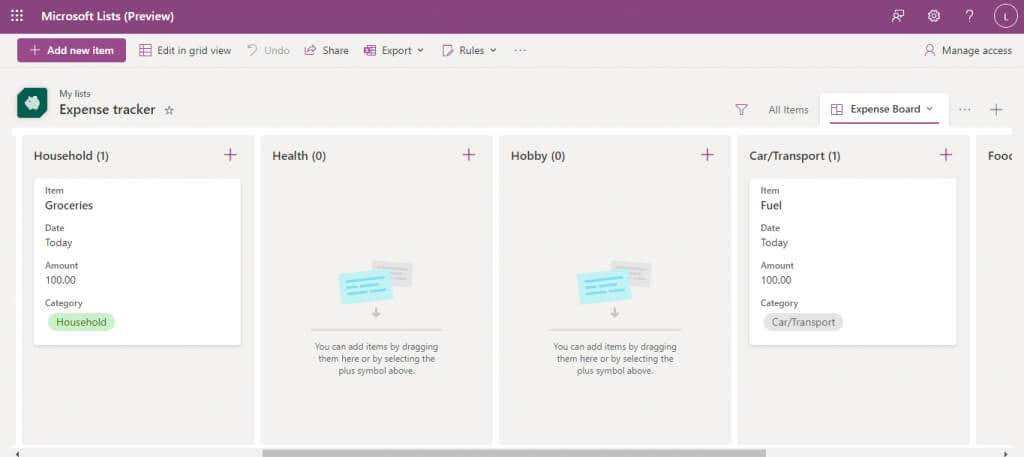
- You can edit new items in this view itself, or switch back to the grid view by using the dedicated button on the top left.

- If you have multiple views, bringing down the three-dot menu on the right will let you choose from them.
Automate Tasks by Creating Rules
An essential feature of a collaborative list creation app is to be able to automate certain tasks. Fortunately, Microsoft Lists has you covered.
We say tasks, though for now, the only thing you can automate are notifications. You can set a list up to notify you when certain changes are made, letting you keep track of how the list is being used by your team.
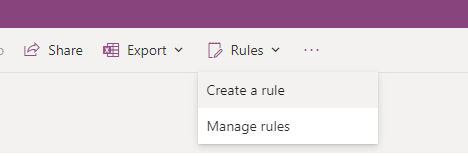
- To do this, click on the Rules button on the top bar, and select Create a rule.
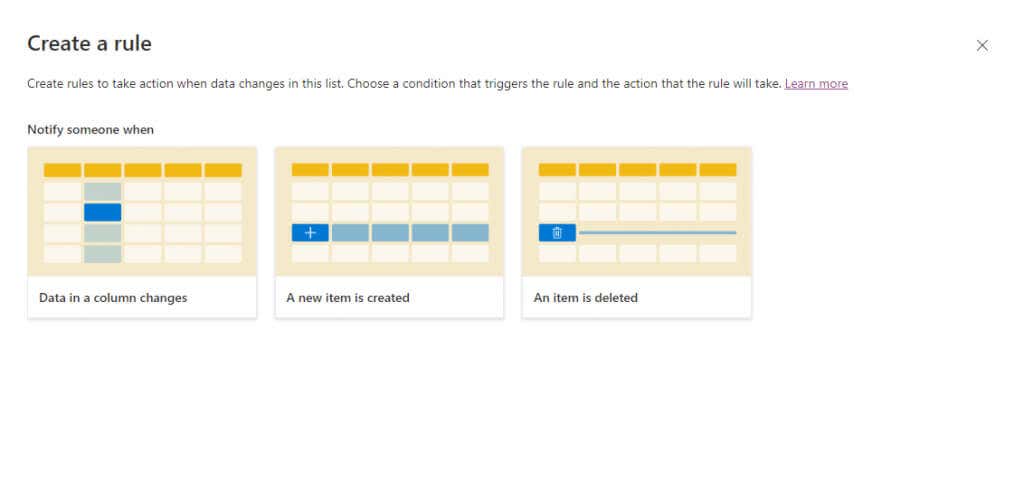
- A new window will appear, prompting you to select the type of condition you want to trigger a notification for. Select the icon that matches your needs.
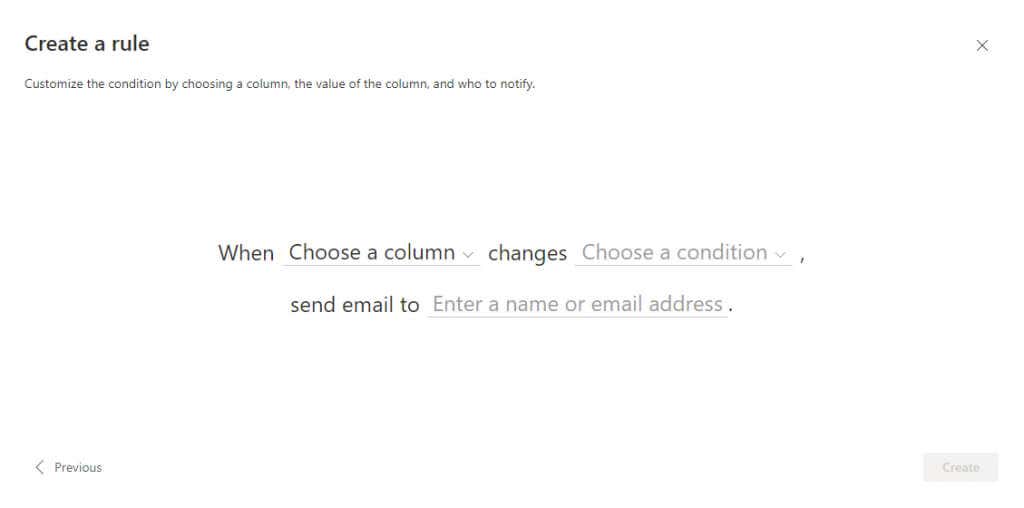
- Enter any other information required (such as the name of the column to track and any additional conditions) and the name or email address of the person to be notified.
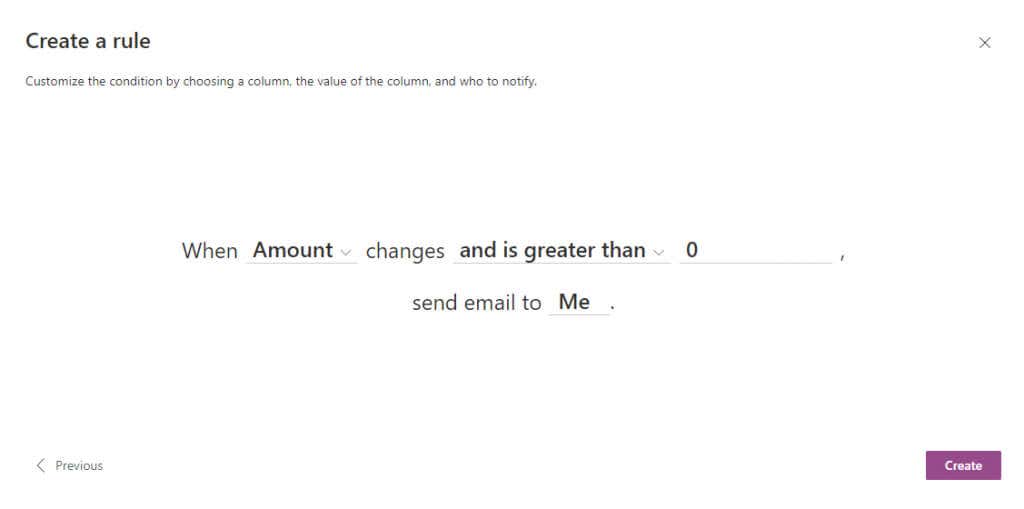
- Select Create when you are done to bring the new rule into effect.
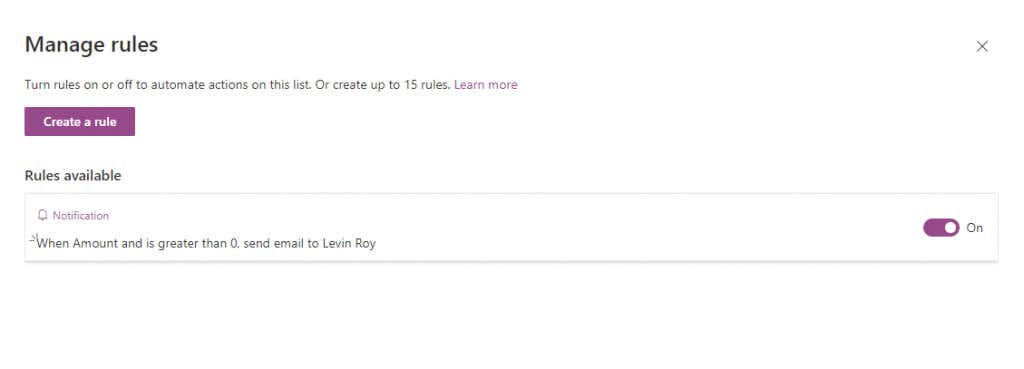
- You can head to Rules > Manage rules at any time to view the rules running on a list and disable them with a click.
Is Microsoft Lists Worth It?
For anyone already acquainted with the Office 365 ecosystem, the Microsoft Lists app is an excellent way to keep everything organized, whether you are working on it with a small team or a full corporate division.
You can create tasks, list out calendar events, and discuss every item with your teammates. The lists are extremely customizable, with several templates to create the perfect list for your use case, be it Employee onboarding or an Expense tracker.
And that’s before we get into the native integration with other Office 365 apps like Teams or Planner, making it the perfect organizational tool for someone familiar with Microsoft’s applications.

