
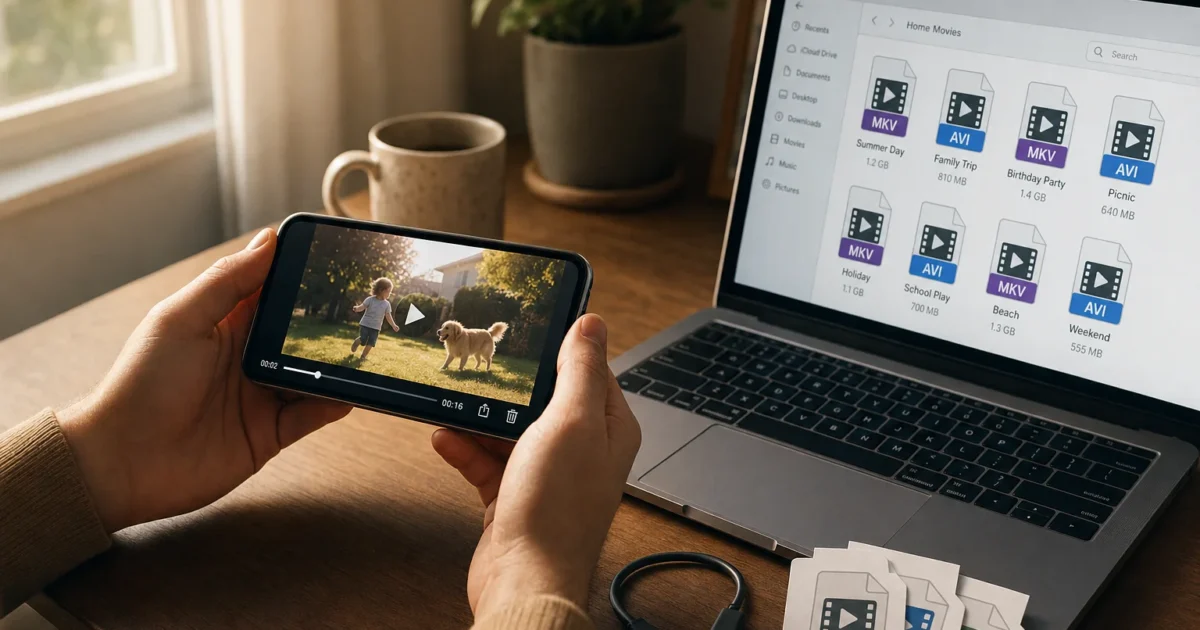
Got a bunch of videos sitting on your computer that you’d like to watch on your iPhone or iPad? Maybe it’s some home movies, a downloaded film, or a video in a weird format that just won’t play. Whatever it is, you’re hoping this works, and the good news is that in 2026, getting videos onto your Apple device is a lot easier than it used to be.
You’ve got two main paths: convert the video to a format Apple loves, then transfer it over, or skip the conversion entirely and use a third-party player like VLC that handles almost anything. We’ll walk you through both options, whether you’re on Windows 11 or a modern Mac.
What Format Does iPhone and iPad Actually Support?
Before you start converting anything, it helps to know what you’re aiming for. iPhones and iPads natively support a pretty solid range of video formats these days, but there’s still a “sweet spot” format that works on everything:
- Container: MP4 or MOV (also M4V)
- Video codec: H.264 (broadest compatibility) or HEVC/H.265 (smaller file sizes on newer devices)
- Audio codec: AAC (the safest choice)
- File extensions:
.mp4,.m4v,.mov
If a video is already in H.264/AAC inside an MP4 container, there’s a good chance it’ll just play without any conversion at all. Formats like MKV, AVI, FLV, or DIVX are the ones that usually need some work, or a third-party player app.
Option 1: Skip Conversion and Use VLC (The Easy Route)
Honestly, if you just want to watch a video on your own device and don’t care which app plays it, this is the fastest way. VLC for iOS is free, handles pretty much any video format you throw at it (MKV, AVI, FLV, you name it), and supports subtitles too. No conversion needed.
Here’s how to get a video into VLC on your iPhone or iPad:
Via Wi-Fi (No Cable Needed)
- Install VLC from the App Store on your iPhone or iPad.
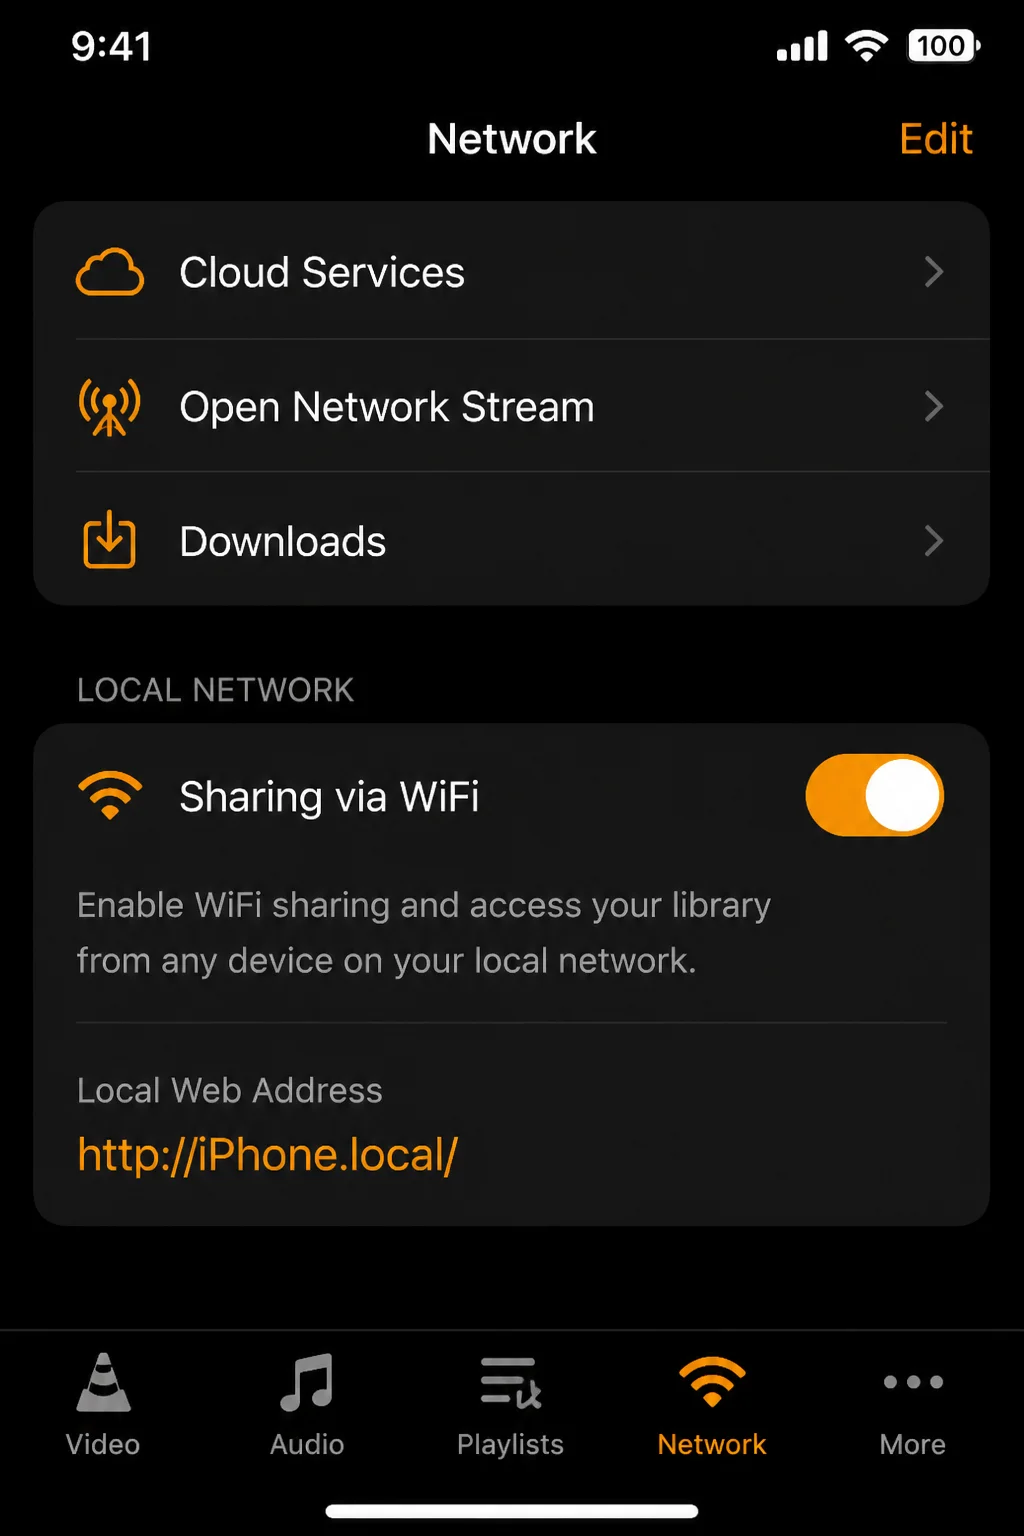
- Open VLC, tap the Network tab at the bottom, then tap Sharing via WiFi to turn it on. VLC will show you a local web address (something like
http://192.168.1.x:8080). - On your computer, open a browser and type in that address.
- Drag and drop your video file onto the page, or click the + button to upload it.
- Once uploaded, the file will appear in VLC on your device, ready to play.
Via USB Cable (Finder or iTunes)
- Connect your iPhone or iPad to your computer with a USB cable.
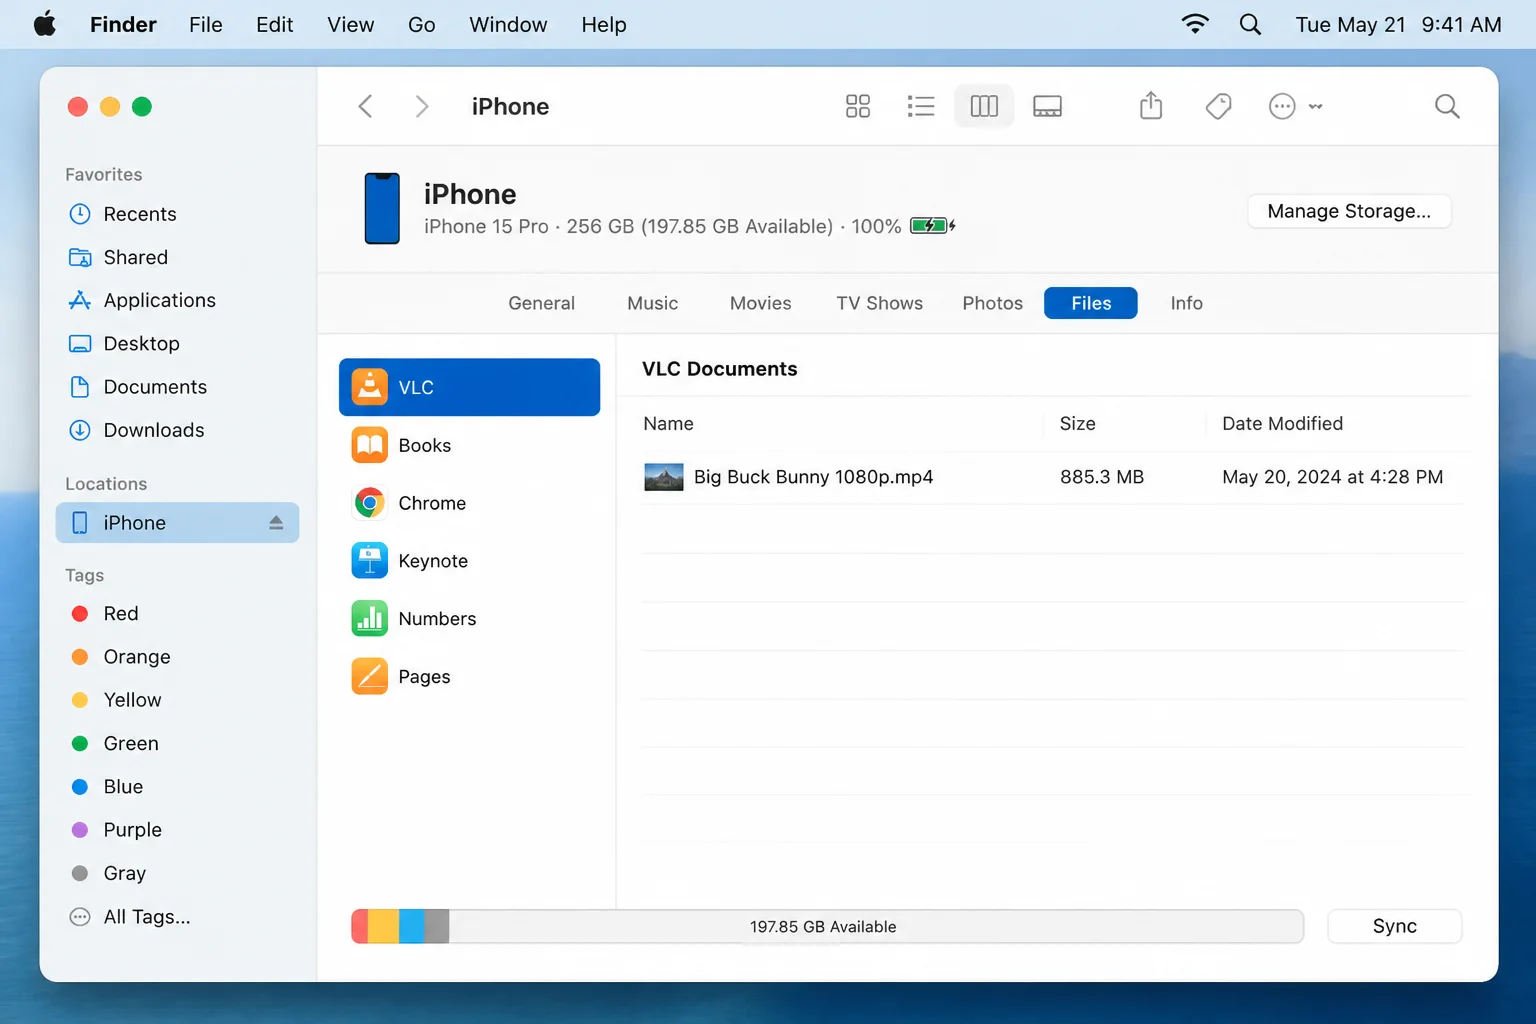
- On Mac: Open Finder and select your device in the sidebar. Click the Files tab, then expand VLC in the list.
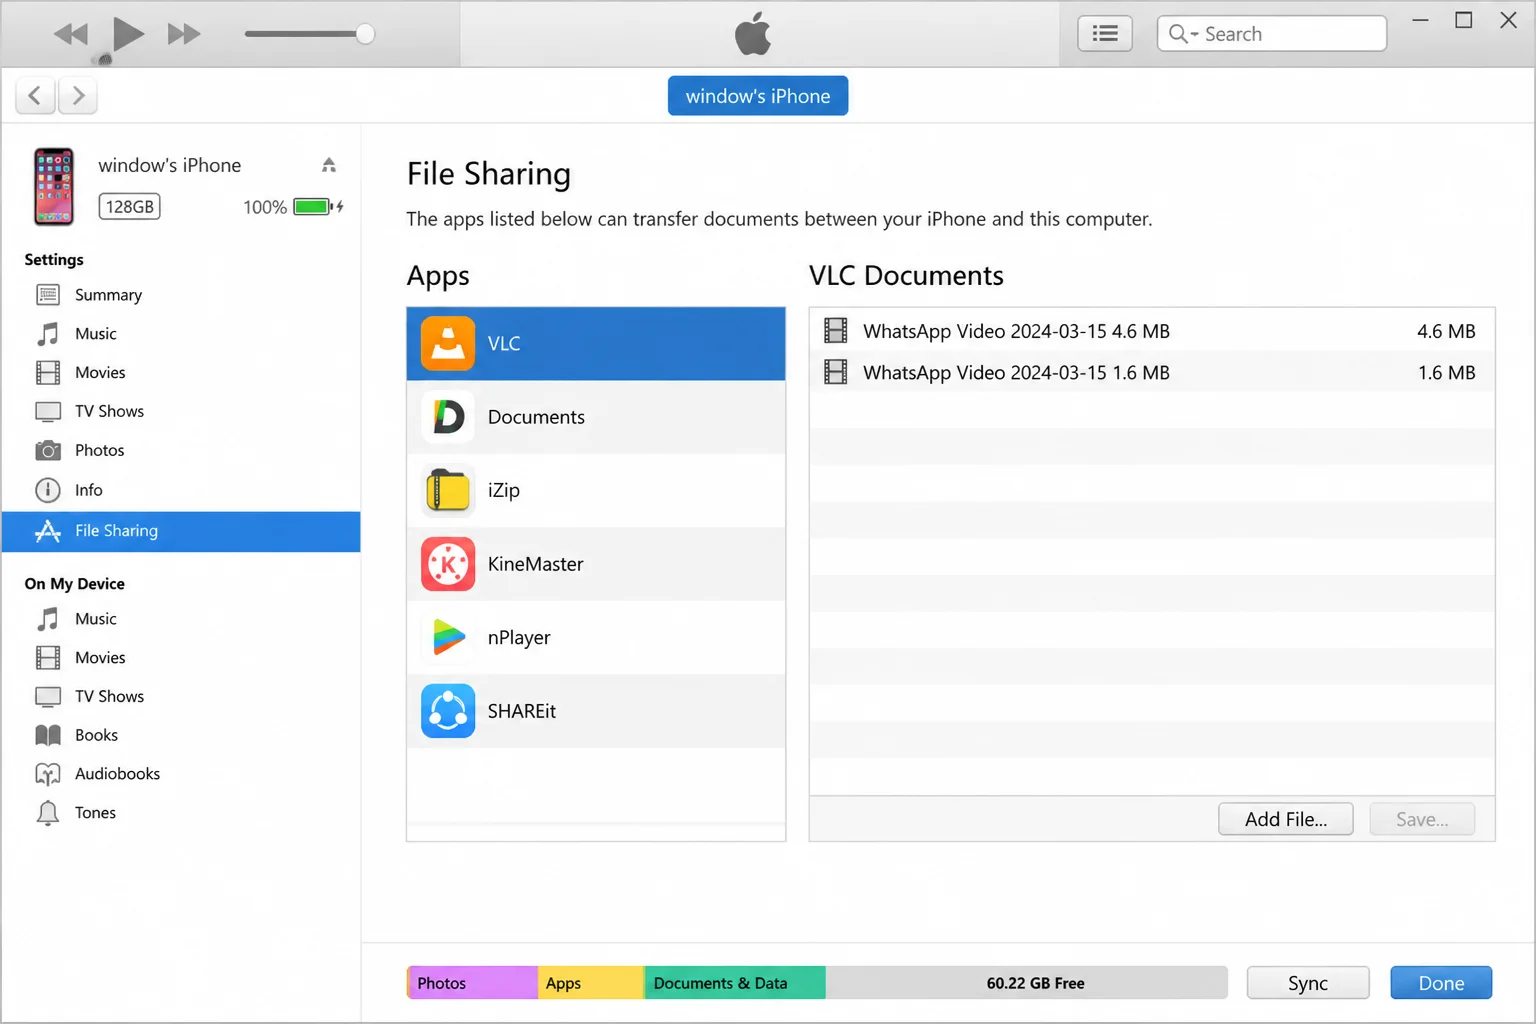
- On Windows: Open iTunes, click the device icon at the top, then go to File Sharing and select VLC.
- Drag your video file into the VLC documents area.
- Click Sync (or Apply on Windows). Open VLC on your device, your video will be there.
Option 2: Convert the Video First, Then Transfer It
If you want your video to play in the built-in Apple TV app (or you just prefer keeping things in Apple’s ecosystem), you’ll need to convert it to a compatible format first. HandBrake is still the go-to free tool for this. It’s open source, actively maintained, and works on both Windows and macOS.
Step 1: Download and Install HandBrake
Head to handbrake.fr and download the version for your operating system. Install it like any normal app.
Step 2: Open Your Video File
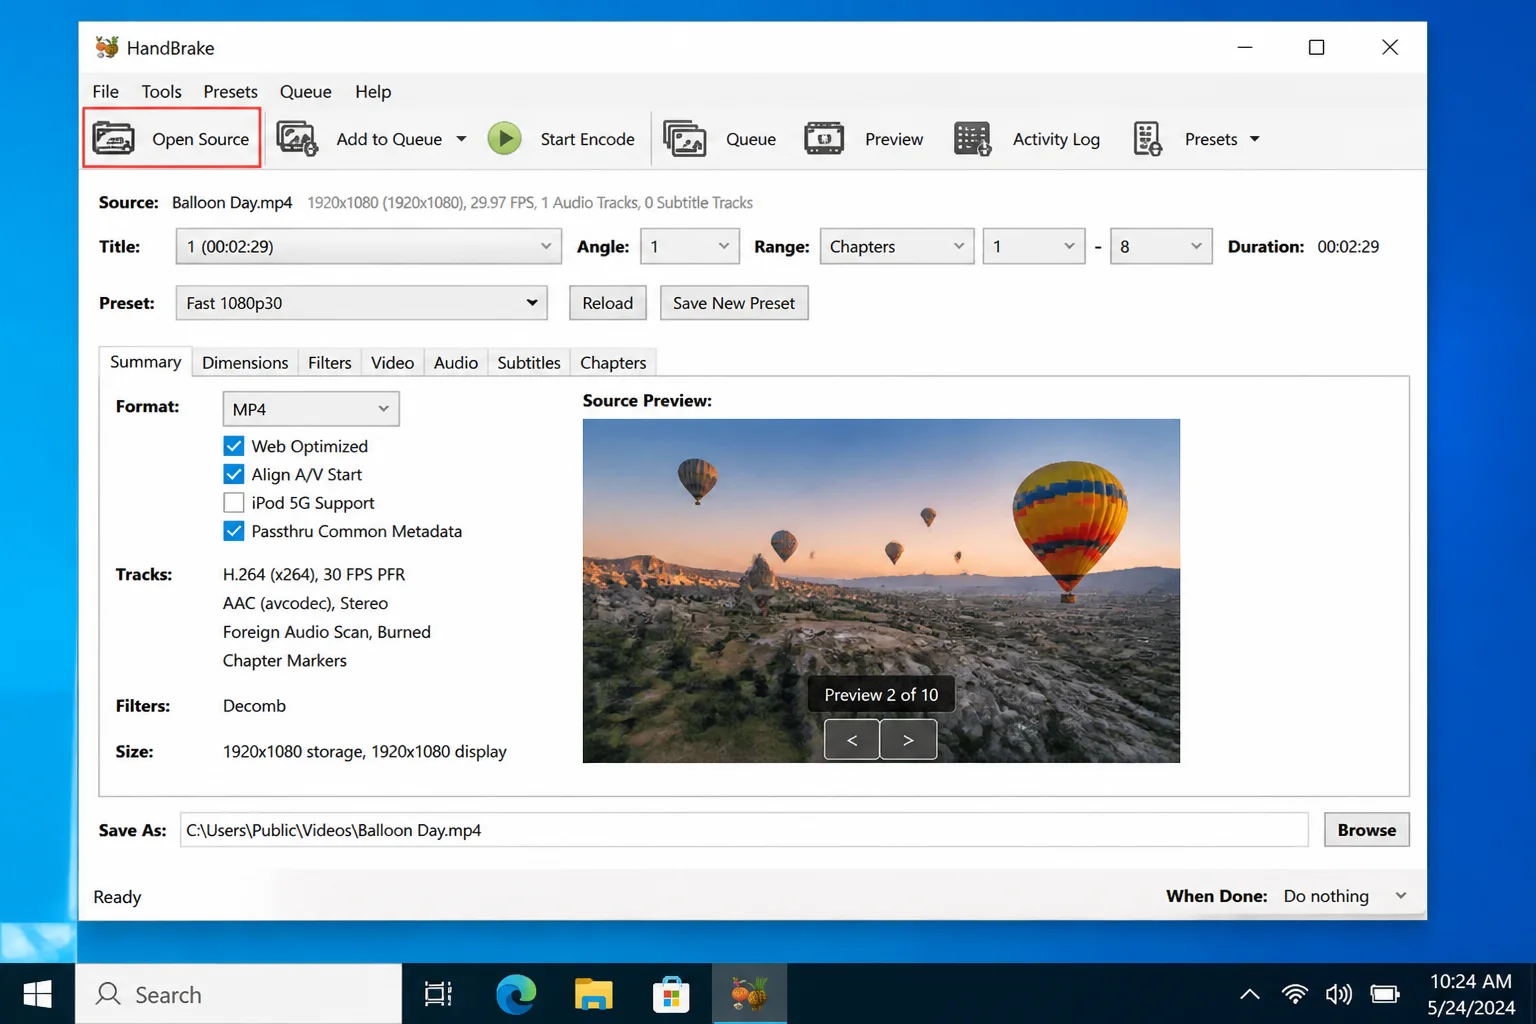
Launch HandBrake. You’ll see a big Open Source button. Click it and select your video file. You can also drag and drop a file straight onto the HandBrake window. HandBrake will scan the file and load up its details.
Step 3: Choose a Preset
On the right side of the HandBrake window, you’ll see a Presets panel. Look for the Devices category and pick one of the Apple presets. Something like Apple 1080p30 Surround works great for most modern iPhones and iPads. If you want smaller file sizes and have a newer device, you can pick an H.265 preset instead.
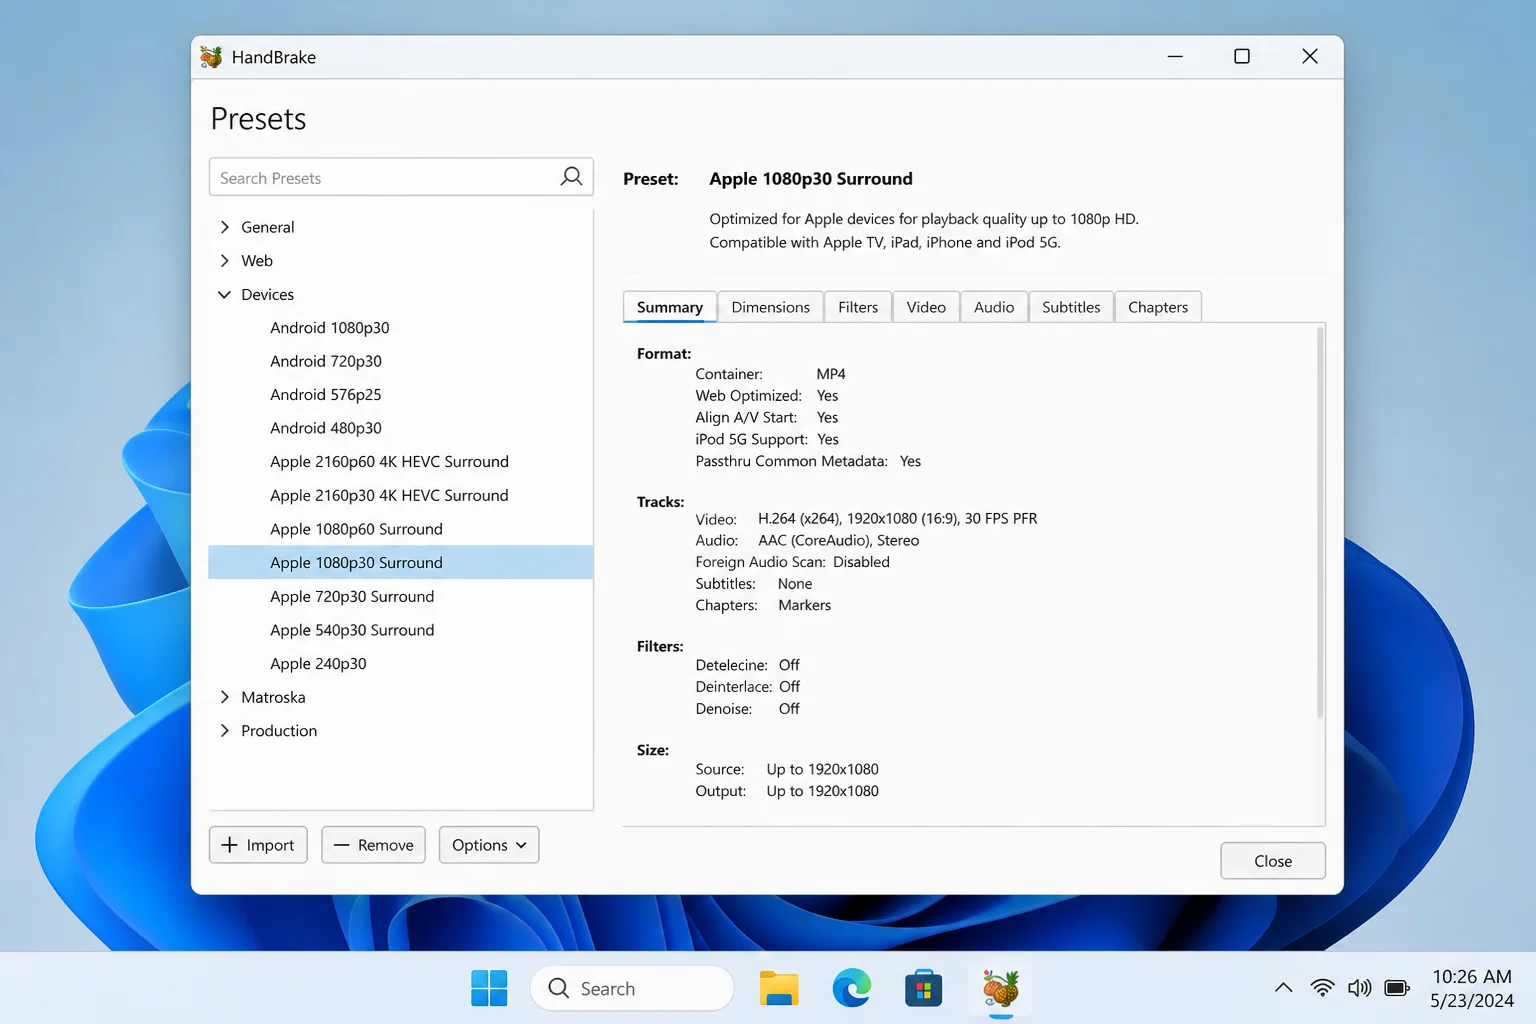
A quick note on codecs, in plain English: H.264 is the “plays everywhere, no fuss” option. H.265 (HEVC) gives you a smaller file at the same quality, but only works reliably on newer iPhones and iPads (iPhone 7 and later). When in doubt, go with H.264.
Step 4: Set Your Save Location
Under the Save As field near the bottom of the window, click Browse and choose where you want the converted file to be saved. Make sure the format is set to MP4, which it usually is by default.
Step 5: Start the Conversion
Click the green Start Encode button at the top. You’ll see a progress bar at the bottom of the window. Depending on the size of your video and your computer’s speed, this could take anywhere from a minute to quite a while, so grab a coffee.
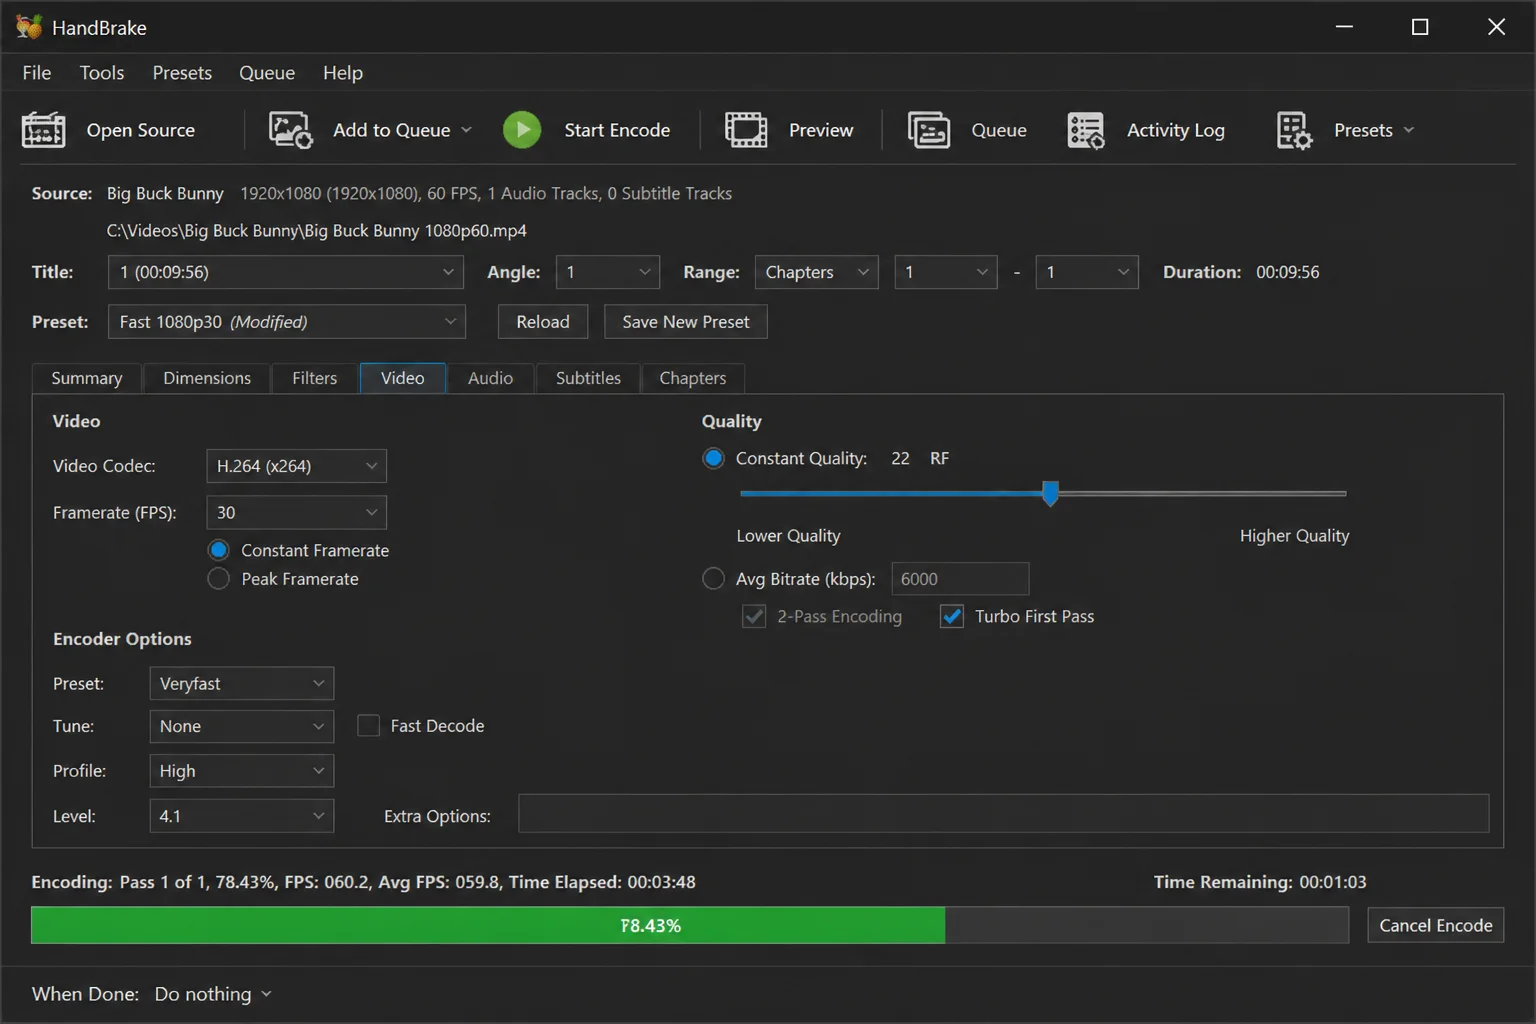
Once it’s done, you’ll have a shiny new MP4 file ready to transfer.
How to Transfer the Converted Video to Your iPhone or iPad
Now for the fun part: getting it onto your device. You’ve got a few options here, so pick whichever one fits your setup.
Option A: AirDrop (Mac Only, Fastest and Easiest)
If you’re on a Mac, AirDrop is honestly the most painless way to do this.
- Make sure both your Mac and your iPhone/iPad have Wi-Fi and Bluetooth turned on.
- On your iPhone/iPad, swipe down to open Control Center and make sure AirDrop is set to Contacts Only or Everyone.
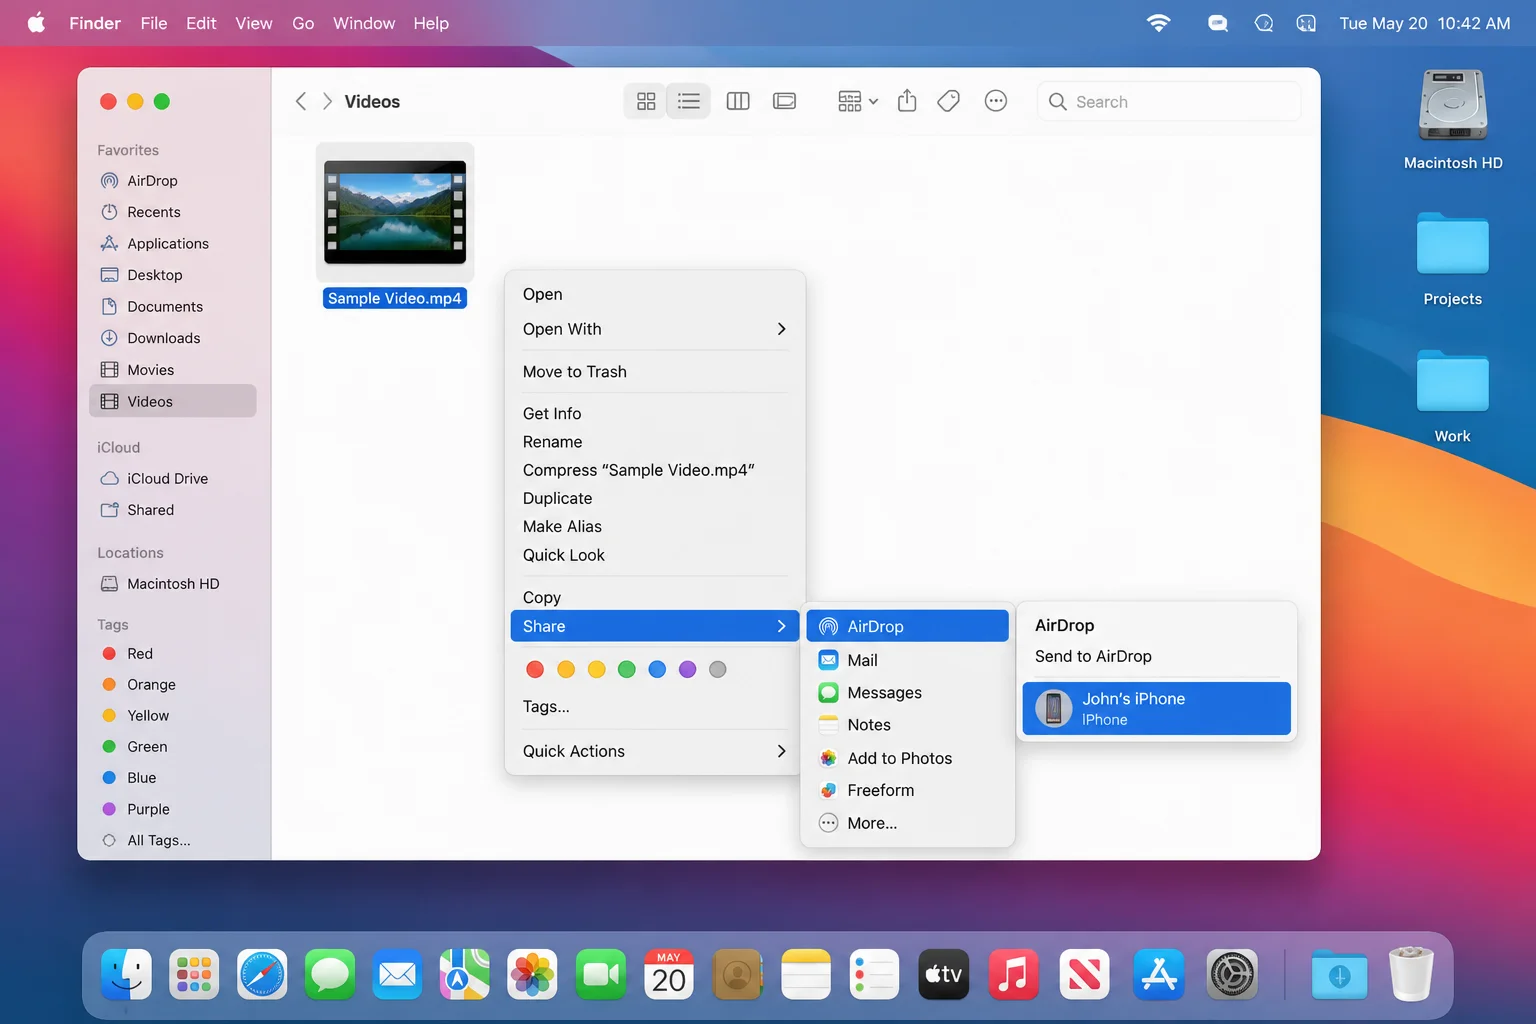
- On your Mac, right-click the converted video file and select Share > AirDrop.
- Select your iPhone or iPad from the list.
- On your device, tap Accept when the prompt appears. The video will land in your Photos app or prompt you to open it in a compatible app.
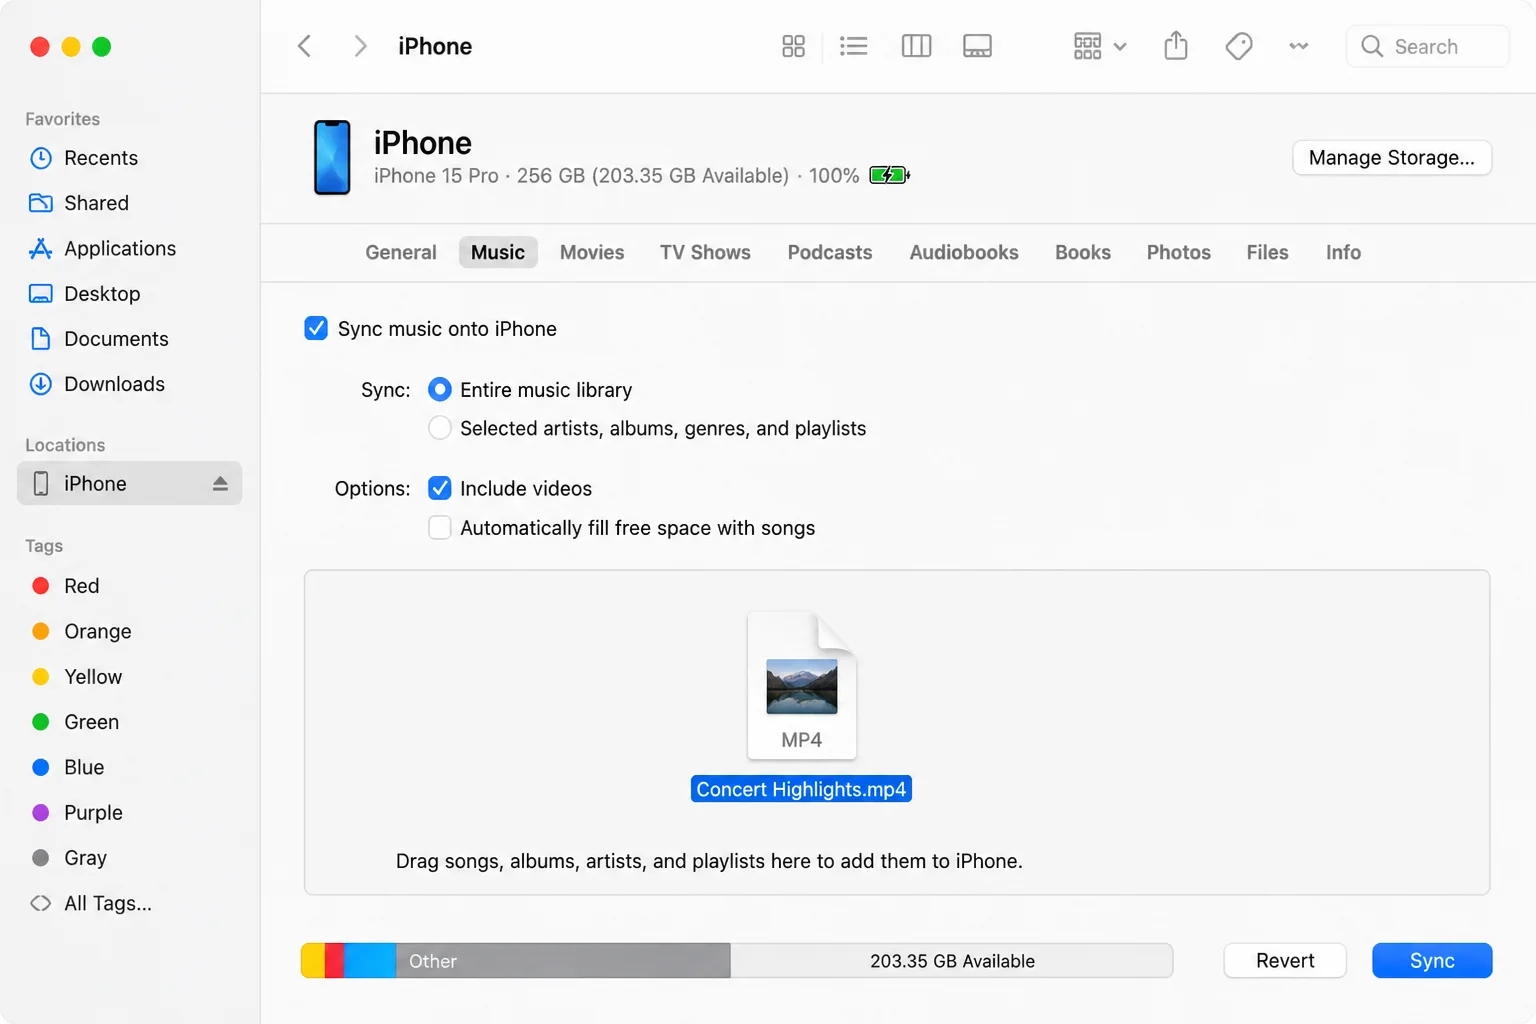
Option B: Finder (Mac with macOS Catalina or Later)
If you’d rather use a cable, here’s how to do it on a modern Mac. Note that iTunes is gone on recent macOS versions, replaced by Finder.
- Connect your iPhone or iPad to your Mac with a USB cable.
- Open Finder. Your device will appear in the left sidebar under Locations. Click on it.
- Click the Movies tab at the top (or Files if you want to transfer to a specific app).
- Drag your converted MP4 file into the Movies area.
- Click Sync in the bottom right. Once it finishes, the video will appear in the Apple TV app on your device under Library.
Option C: iTunes (Windows)
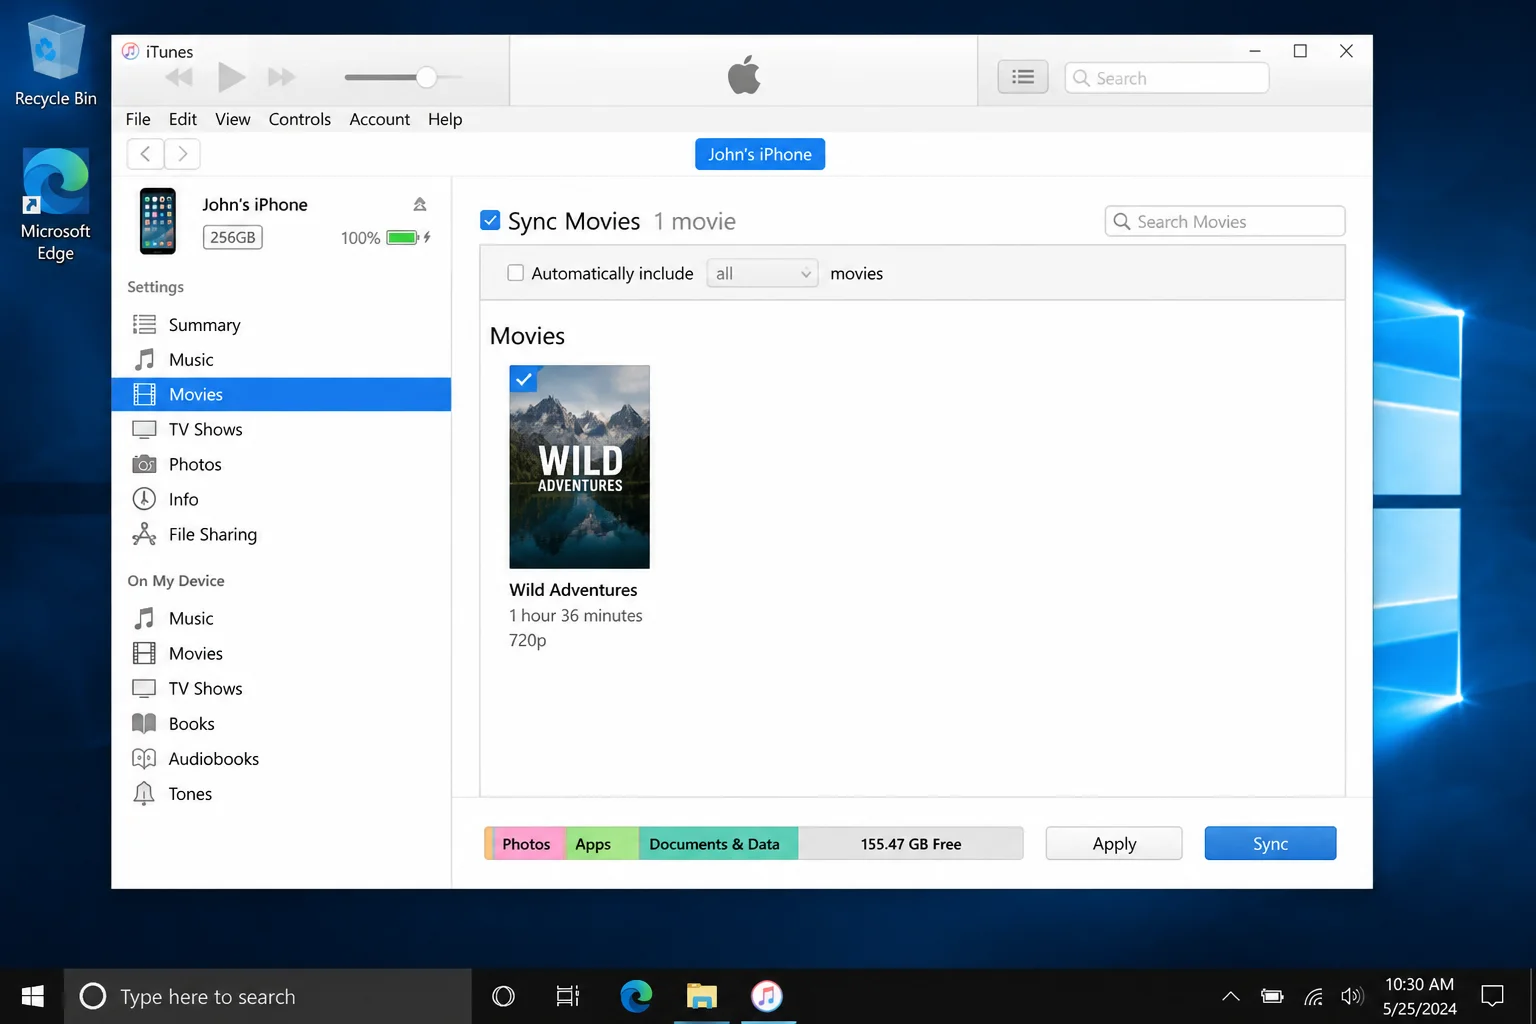
On Windows, iTunes is still the go-to for cable transfers.
- Open iTunes and connect your iPhone or iPad via USB cable.
- Click the device icon near the top left of the iTunes window.
- In the left sidebar, click Movies under the On My Device section.
- Open File Explorer, find your converted video, and drag it into the Movies area in iTunes.
- Click Sync (or Apply) at the bottom right. The video will transfer to your device.
Option D: Cloud Storage (iCloud, Dropbox, Google Drive)
No cable? No problem. This works from any computer.
- Upload your converted video to iCloud Drive, Dropbox, Google Drive, or OneDrive from your computer.
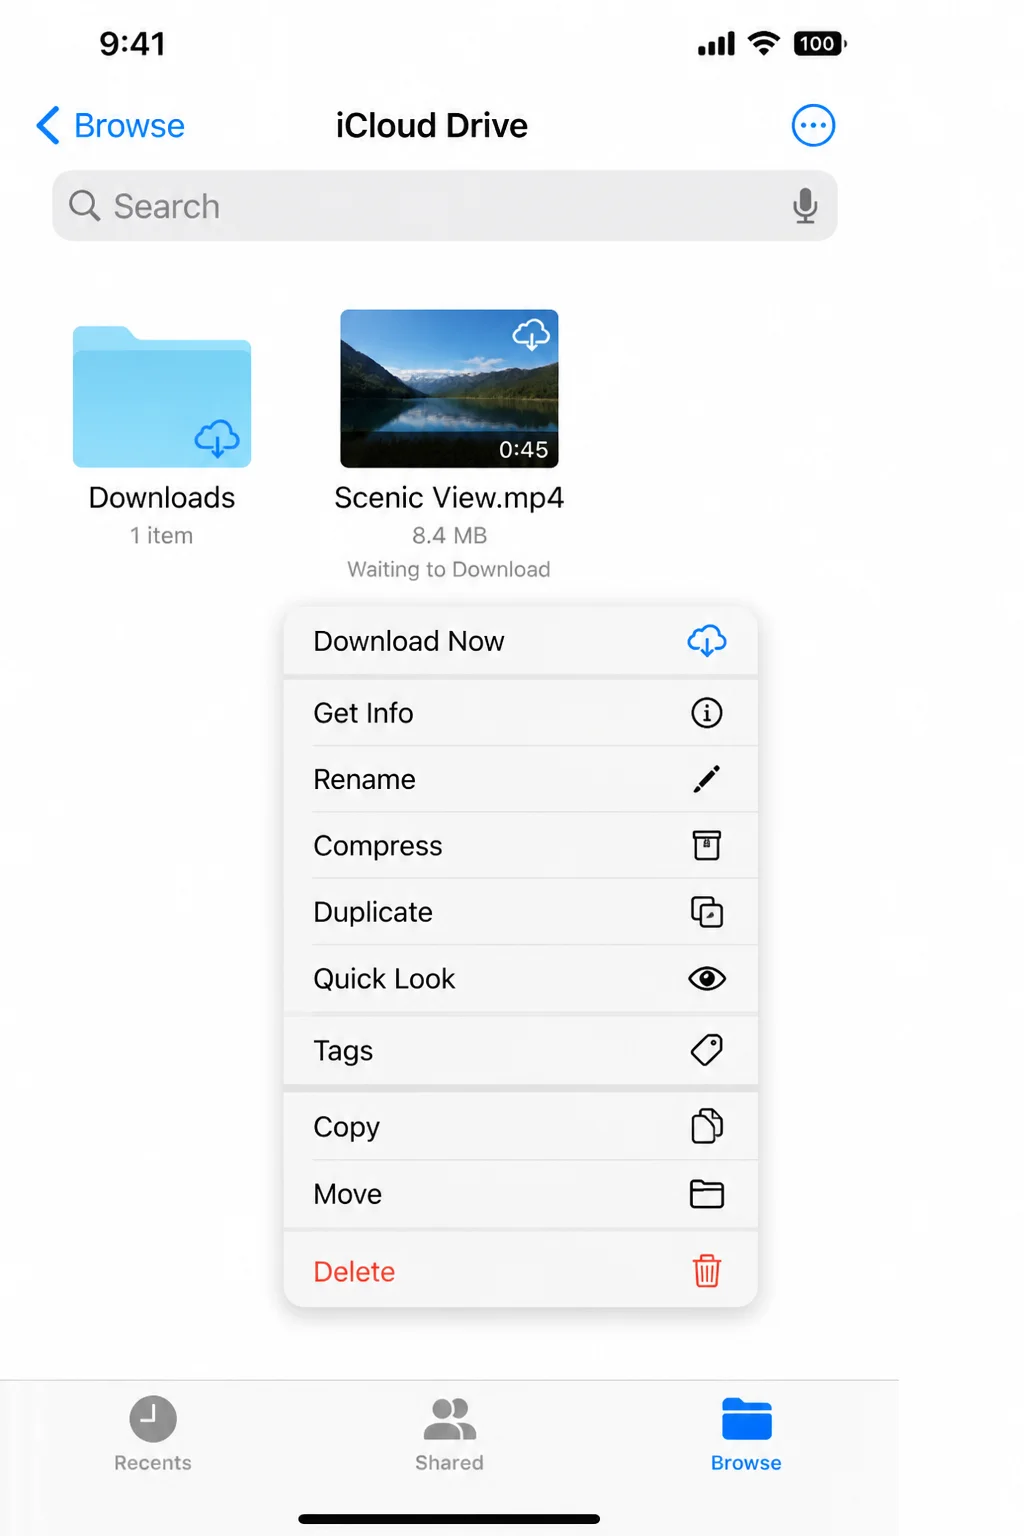
- On your iPhone or iPad, open the Files app (or the relevant cloud storage app).
- Find your video file. Tap it to stream it, or tap and hold and choose Download Now (or Make Available Offline) to save it locally for offline viewing.
- To watch it in a specific app, tap the Share icon and choose Open in… to pick your preferred video player.
Tips and Troubleshooting
Common Issues
Problem: My video is already MP4 but it still won’t play on my iPhone.
This is more common than you’d think. Just because a file ends in .mp4 doesn’t mean it uses a compatible codec inside. Lots of MP4 files use MPEG-2 or other codecs that iPhones don’t support natively. The fix: run it through HandBrake using the H.264 preset, or just open it in VLC which handles almost any codec.
Problem: The video plays but there’s no sound (or no picture).
This usually means the audio track is in a format like DTS or AC-3 that the built-in player doesn’t like. Re-encode the audio to AAC using HandBrake (it does this automatically with the Apple presets), or use VLC which supports those audio formats natively.
Problem: 4K video stutters or won’t transfer properly.
Older iPhones and iPads can struggle with high-bitrate 4K video. In HandBrake, try converting to 1080p instead. Use the Fast 1080p30 preset. Also make sure your device has enough free storage before syncing.
Problem: My iPhone is recording in HEVC and my PC can’t open the files.
Newer iPhones default to “High Efficiency” recording mode, which uses HEVC. Windows needs the HEVC Video Extensions from the Microsoft Store to play these natively. Alternatively, change your iPhone’s recording format: go to Settings > Camera > Formats and select Most Compatible to record in H.264 instead.
Problem: iTunes is asking to “Erase and Sync” my device.
This happens when your device was previously synced to a different iTunes library. Click Cancel. In most cases you can still transfer files using the File Sharing method (device icon → File Sharing → choose an app) without wiping anything.
Pro Tips
- Batch convert multiple videos at once: In HandBrake, add your first video, configure the settings, then click Add to Queue instead of Start. Repeat for each video, then click Start Queue to convert them all in one go.
- Want smaller files? Use the H.265/HEVC preset in HandBrake. You’ll get roughly the same quality at about half the file size, which is great for 4K or longer videos. Just make sure your device supports it (iPhone 7 and later, iPad Pro 2nd gen and later).
- Already have a player app like Infuse or nPlayer? These apps support even more formats than VLC and can also stream directly from your home network or NAS. Worth a look if you’ve got a large video library.
- Check your format first: Before converting anything, try just copying the original file to VLC or Infuse. If it plays fine there, you’ve saved yourself the conversion step entirely.
Wrapping Up
Getting videos onto your iPhone or iPad in 2026 is way less painful than it used to be. If you just want something that works fast, install VLC and copy your files straight in, no conversion needed. If you want everything tidy inside the Apple TV app, HandBrake plus a quick Finder or iTunes sync is still a solid, reliable workflow. Either way, you’ve got options, and none of them require you to be a tech wizard.
Personally, I’d recommend trying VLC first. It handles the most formats with the least fuss, and the Wi-Fi transfer feature means you don’t even need a cable. If you hit any snags or have a specific format giving you trouble, drop a question in the comments.