Smartphones, computers, and some digital cameras geotag photos with GPS data or location information. This tutorial will show you how to know where a picture was taken using its geotagged GPS data. You’ll also learn to configure your phone and computer to geotag photos.
Also, be sure to check out our YouTube channel, where we posted a short video covering some of the stuff we talk about in this article.
How to Find Where a Picture Was Taken on Mobile
Follow the steps below to check the location data of pictures on an Android device, iPhone, or iPad.
How to Find Where a Picture Was Taken in Android
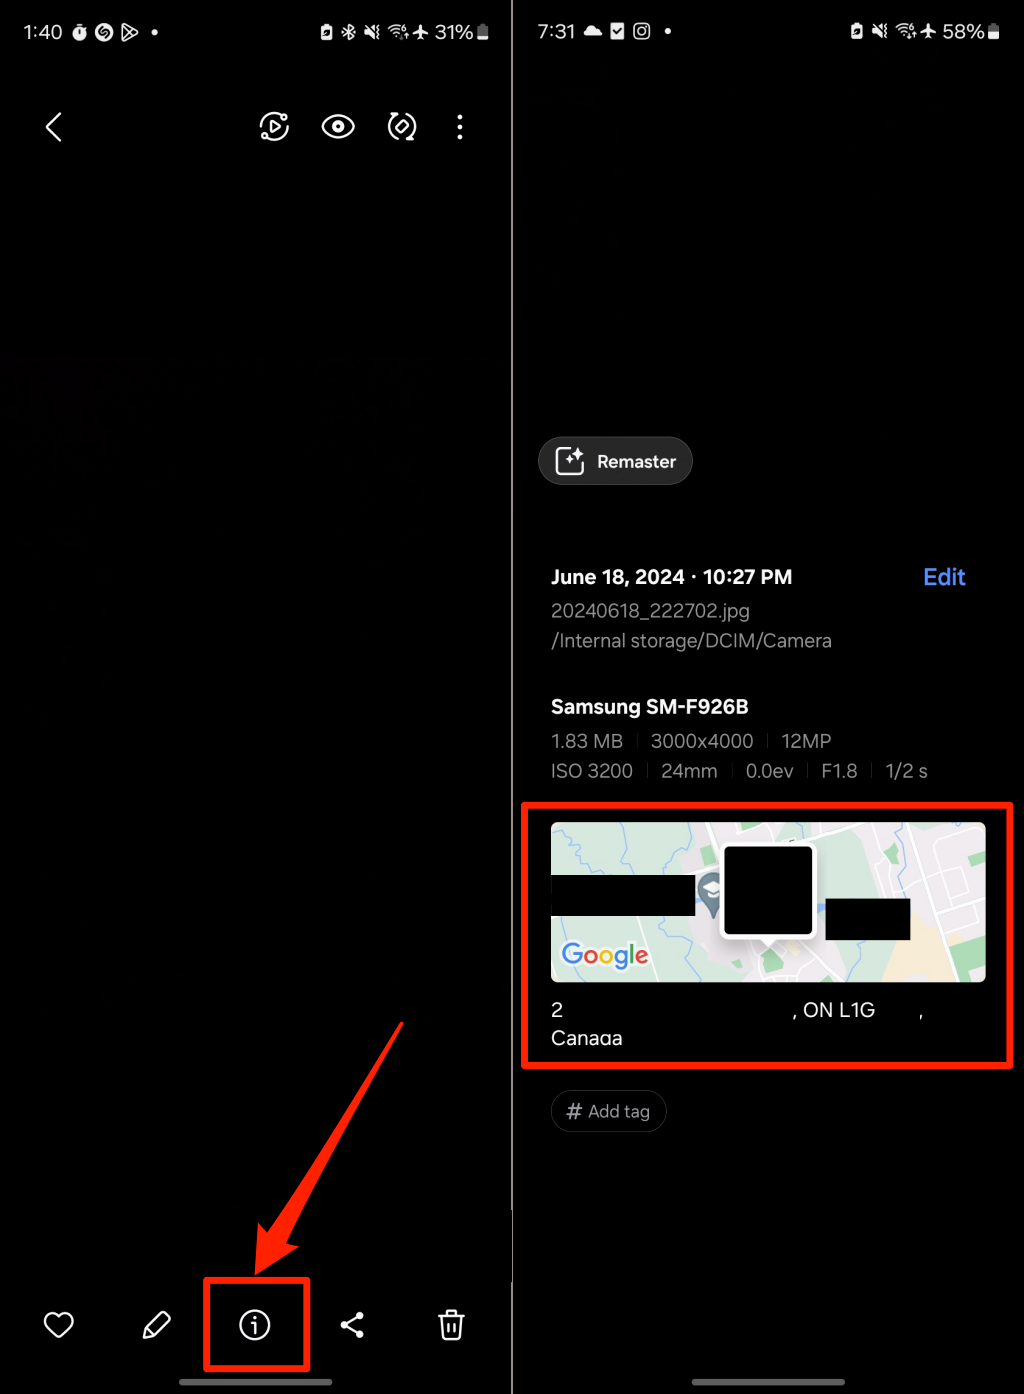
Open the picture in your device’s gallery app and tap the Info (i) icon. You should see location information (address, postal/ZIP code, longitude coordinates, etc.) that tells you where the photo was taken.
Use the Google Photos app if your device’s gallery app doesn’t provide a picture’s location details.
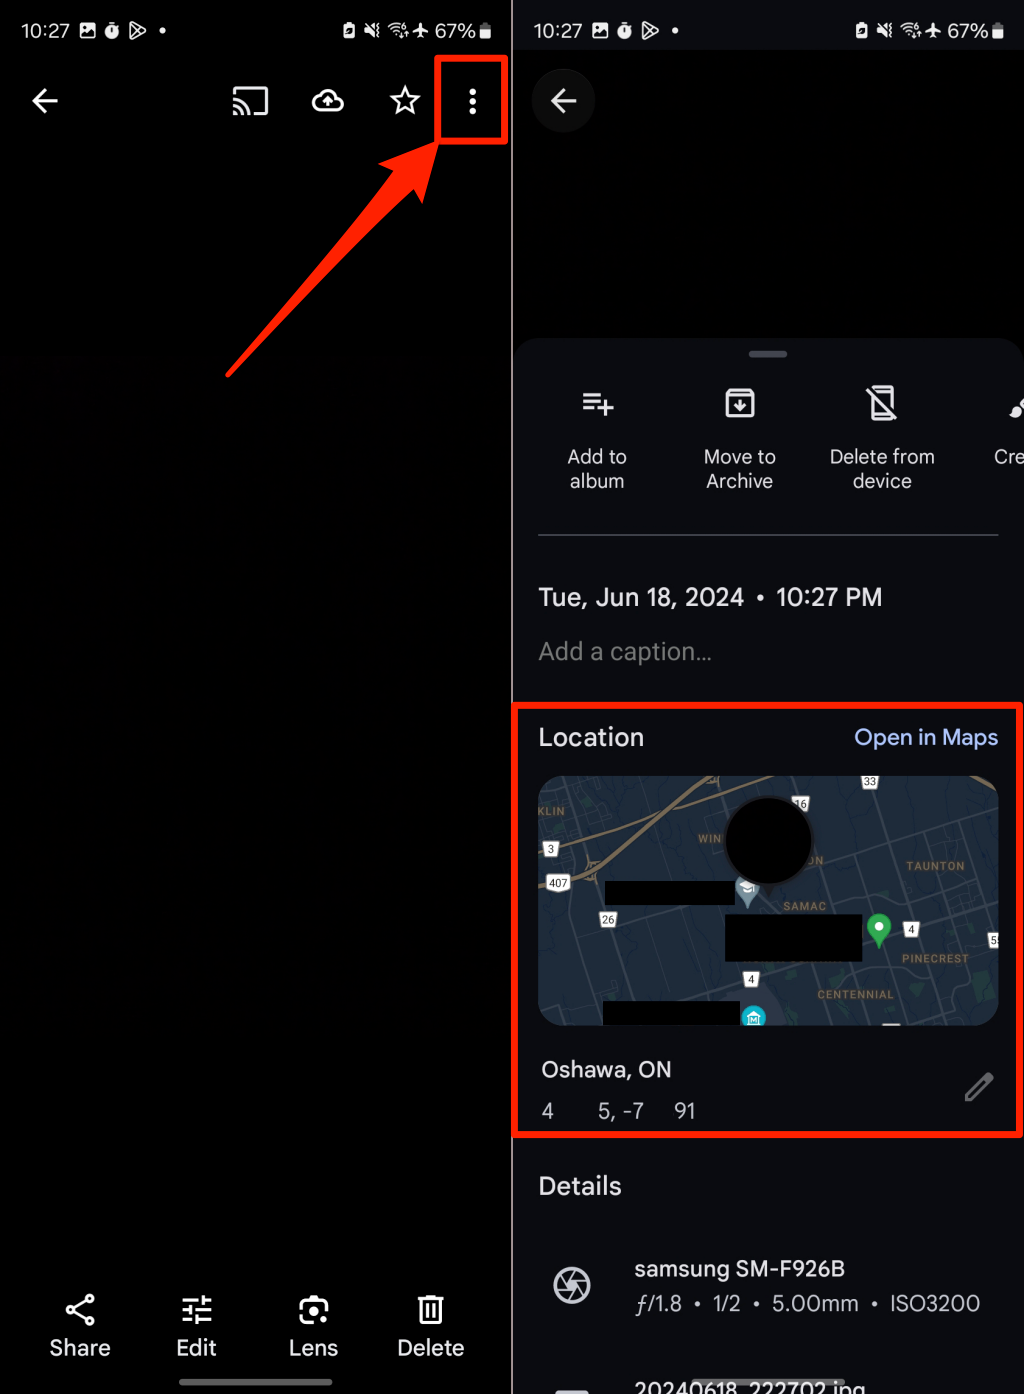
Open the picture in the Google Photos app and tap the three-dot icon in the top-right corner. The “Location” section houses the following data: city, state, latitude and longitude coordinates, and a map view.
Tap Open in Maps to see the exact location (in Google Maps) where the photo was taken.
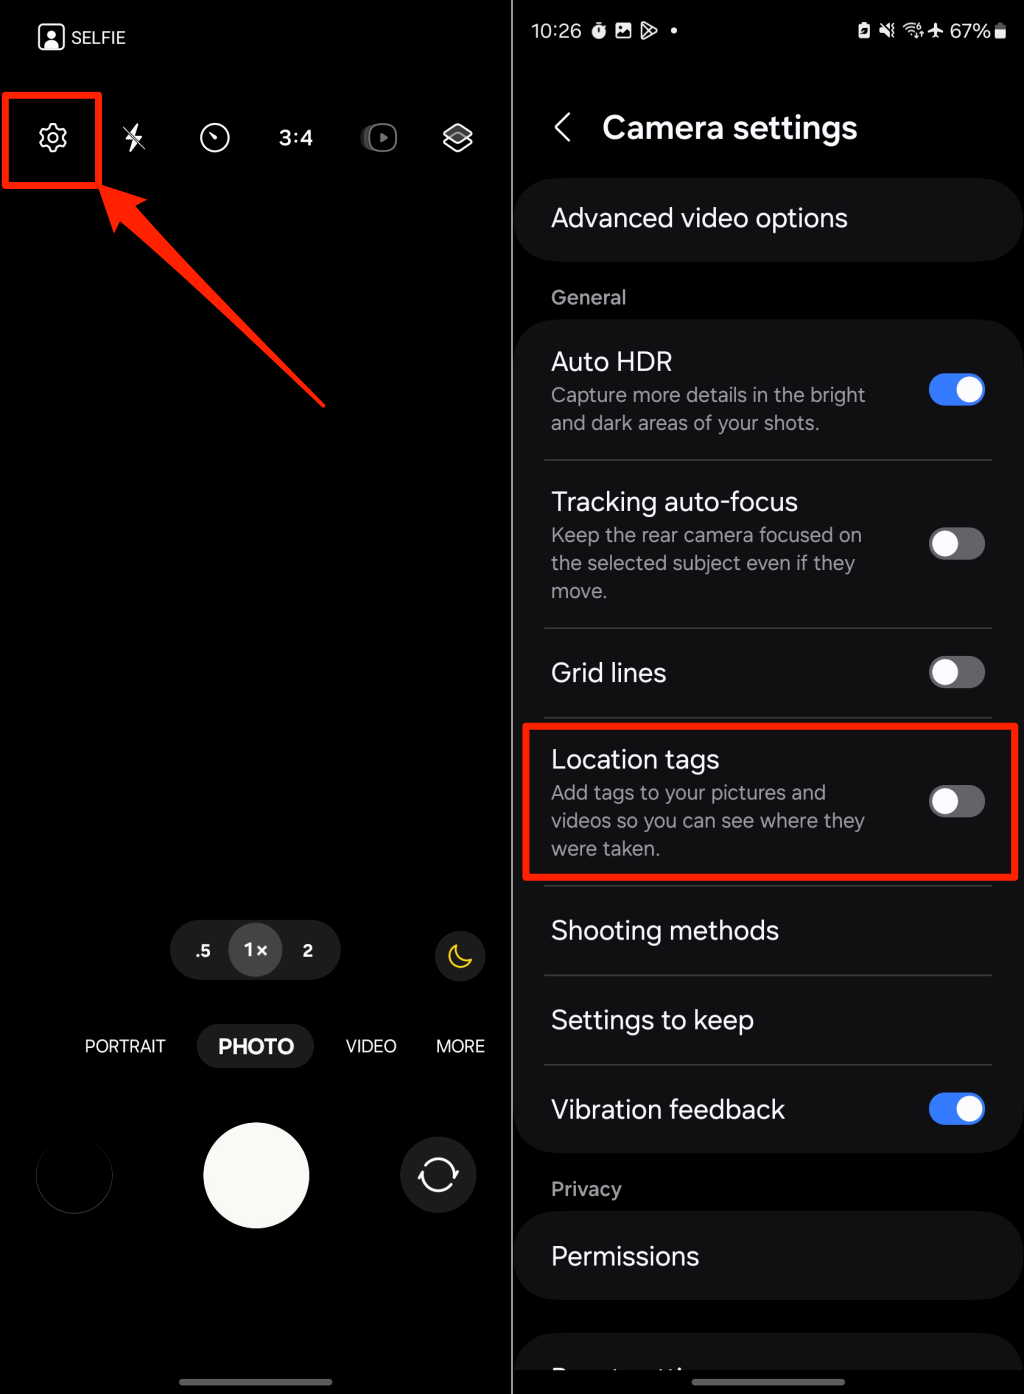
You can only see where pictures were taken if the Camera app on your device geotags them with location information. Change your camera location settings if your pictures don’t have location data.
Open your Camera app, tap the Settings icon, and turn on Save location/Location tags/Tags locations/Geo-tag photos/Store location data. The option will vary depending on your device model and operating system.
How to Find Where a Picture Was Taken on iPhone/iPad
Photos on your iPhone/iPad will have location data if the Camera app has location access. Here’s how to see where the pictures on your iPhone were captured:
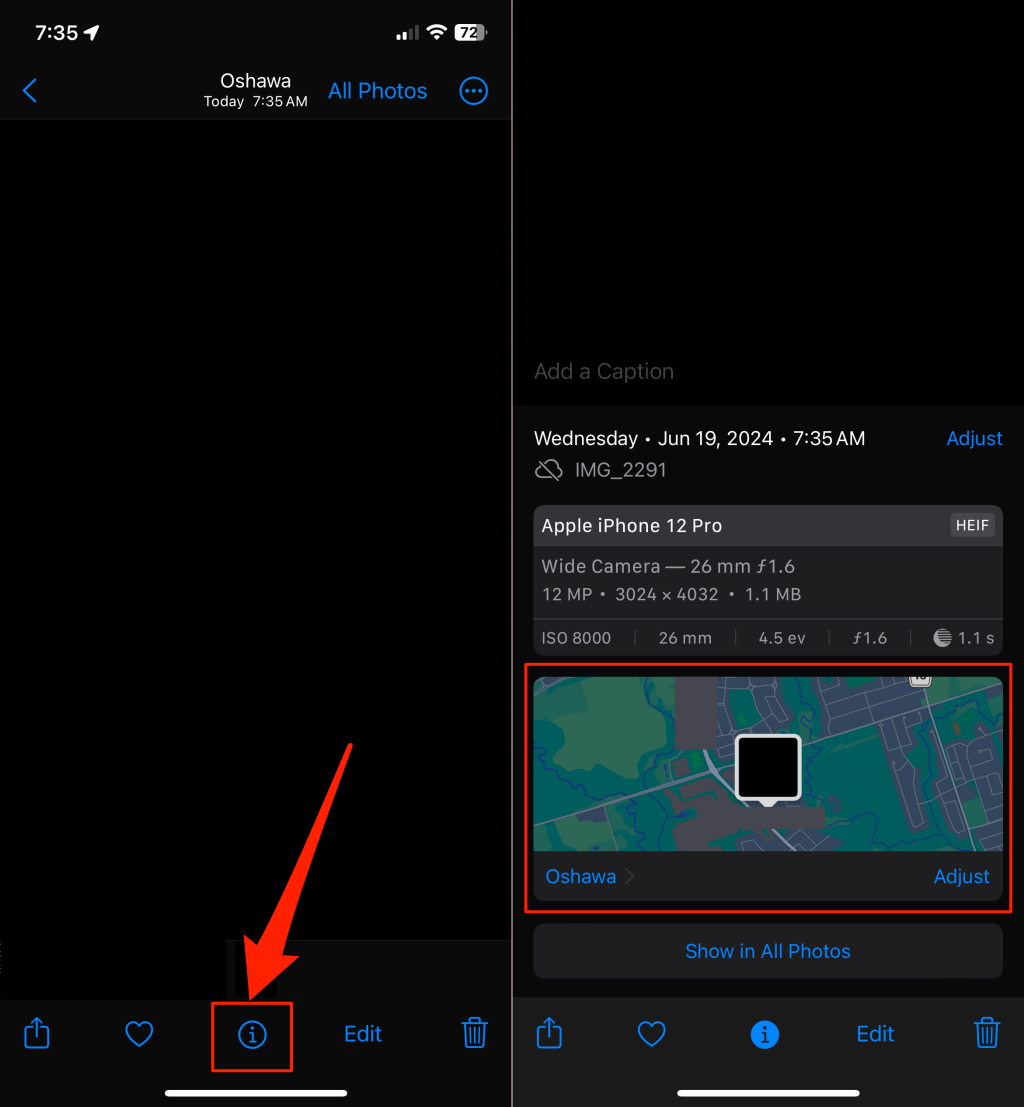
- Open the picture in the Photos app and tap the Info (i) icon in the bottom menu.
- If the picture is geo-tagged, you should see a map view below the photo information. Tapping the city in the bottom-left corner of the map opens a pin (in Apple Maps) on the exact location where the picture was captured.
- Tap Adjust to see the exact edit address or edit the location information.
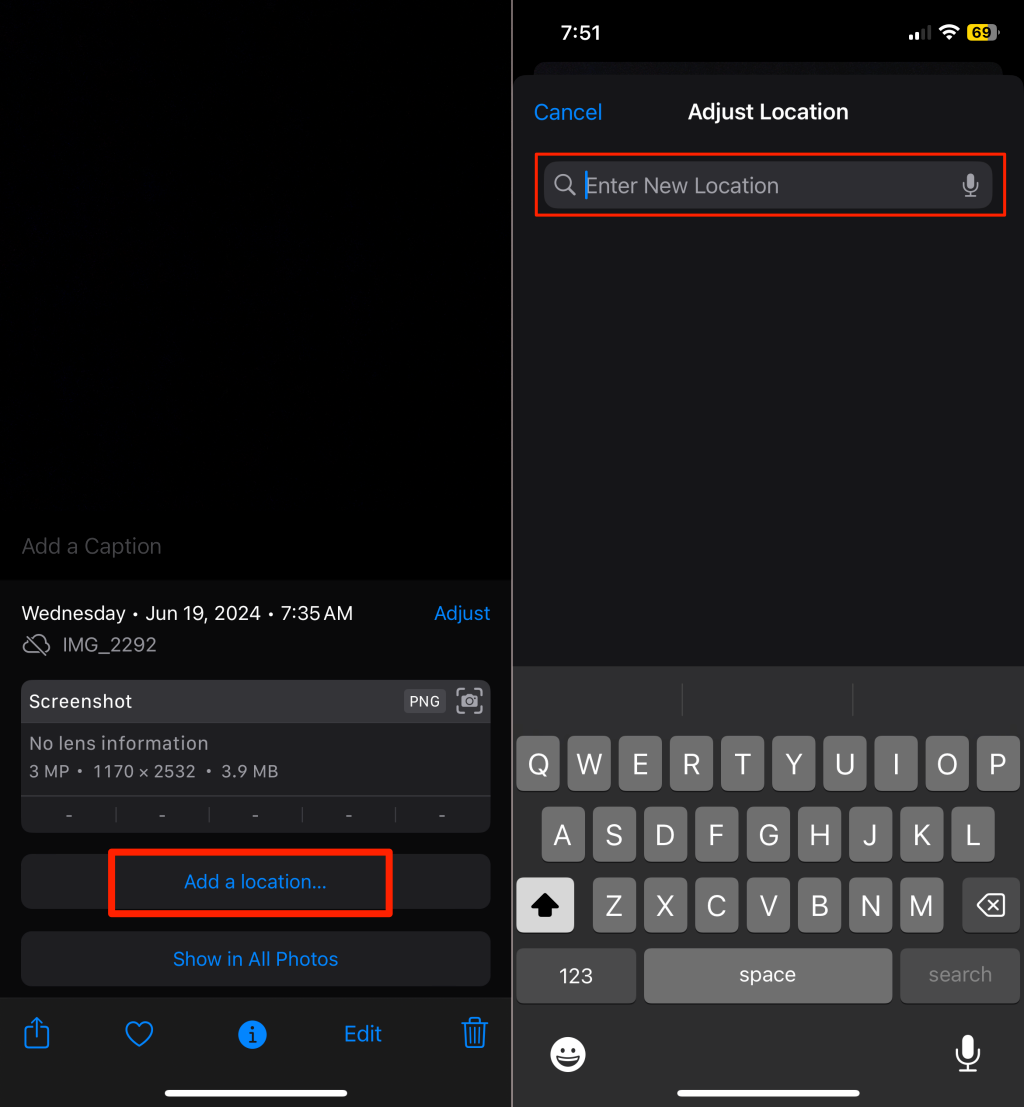
If the picture doesn’t have location data, you won’t find a map view on the photo details page. Tap Add a location and enter an address, city, or country in the search bar.
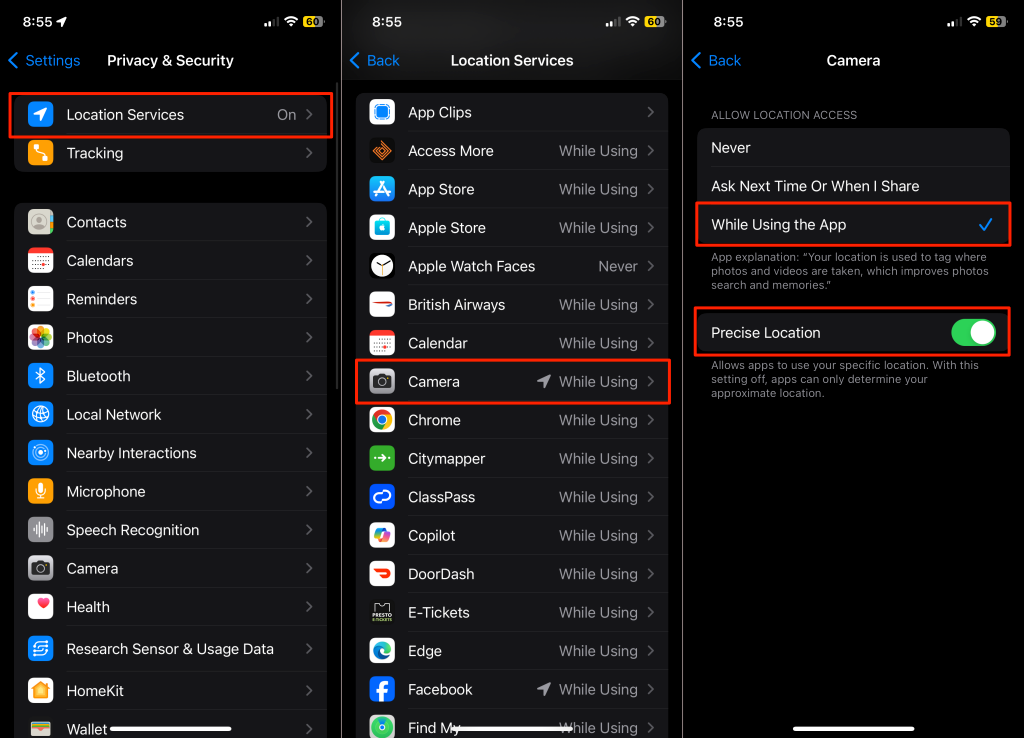
If none of your photos have location data, verify that the Camera app has location access.Go to Settings > Privacy & Security > Location Services > Camera, choose While Using the App, and turn on Precise Location.
How to Find Where a Picture Was Taken on PC
Follow the steps below to check the location properties of a picture on a Windows computer.
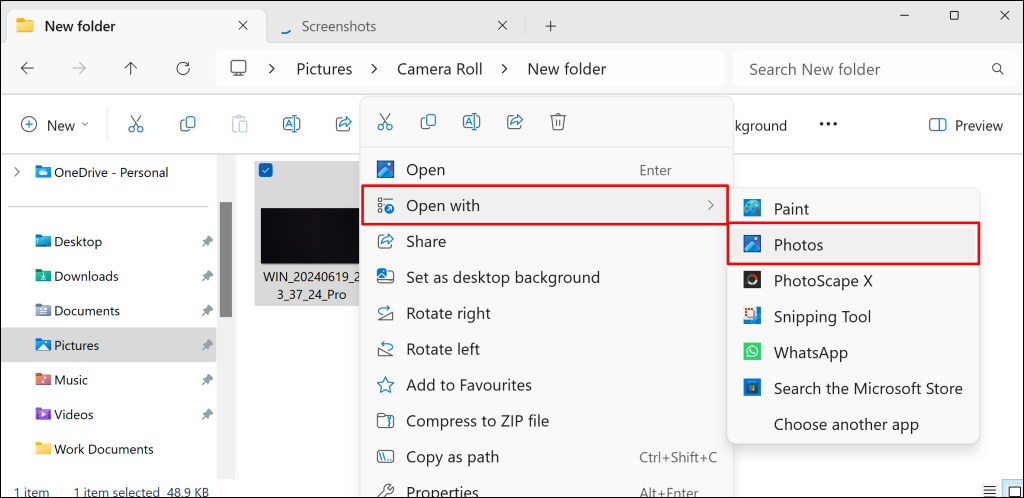
- Double-click the picture to open it in the Photos app. Alternately, right-click the image, select Open with, and choose Photos.
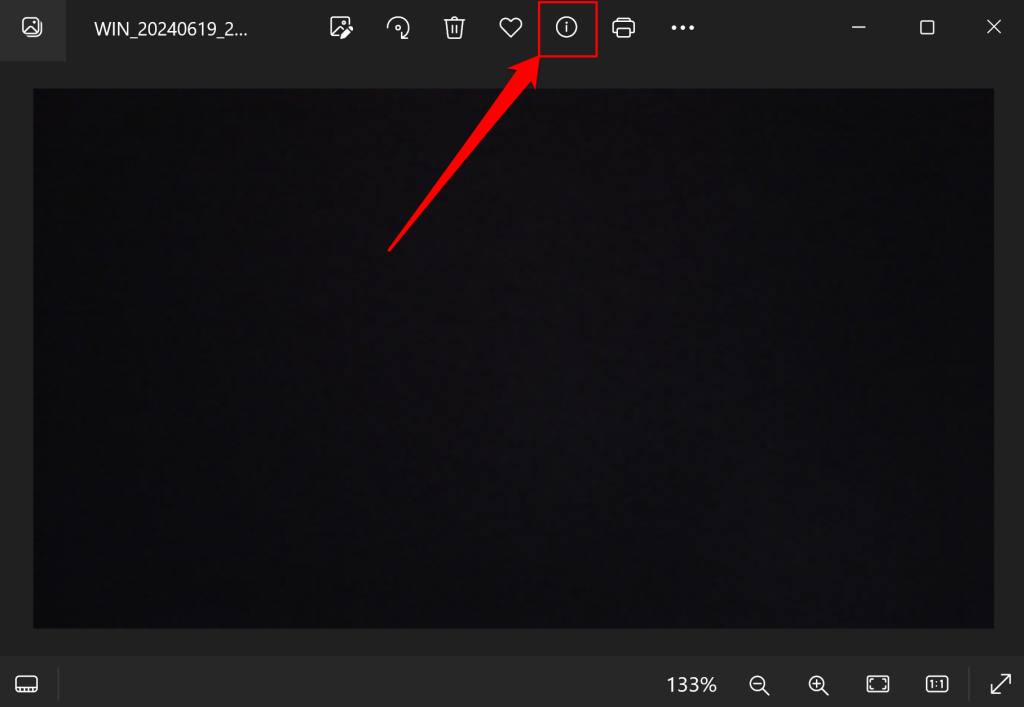
- Select the File info (i) icon on the top menu in the Photos app.
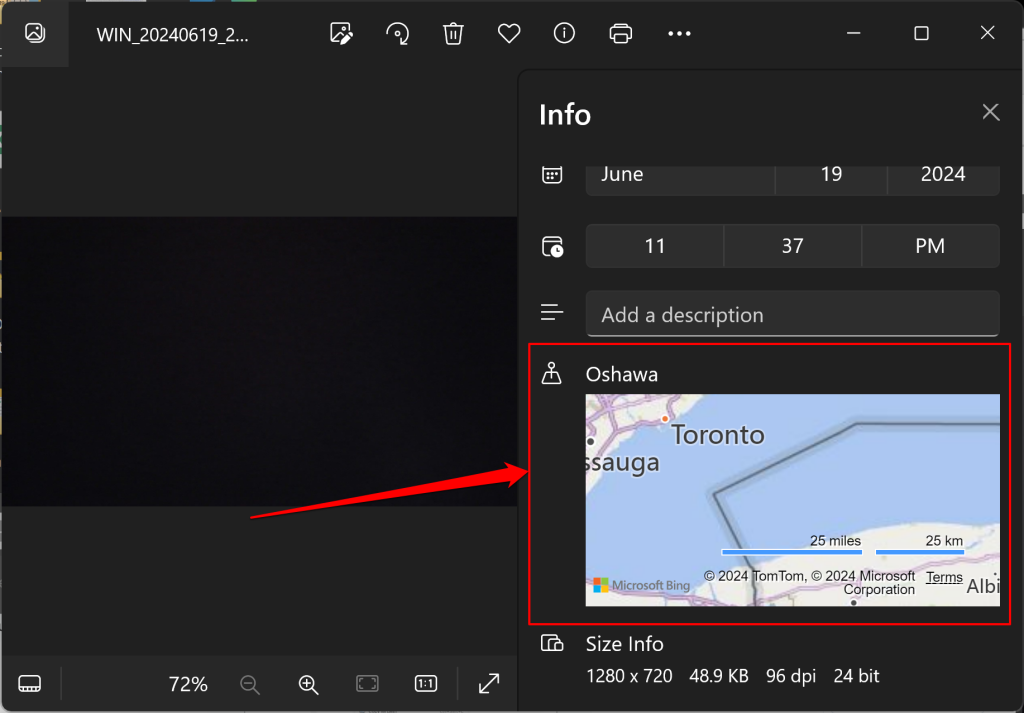
- The Info screen should show the picture’s location properties (city/country and map view). Select the pin on the map view for precise location details. This will open the Windows Maps app, which will show the precise location where the picture was captured.
Webcam pictures won’t have GPS metadata if the Camera app doesn’t have location access. Check your webcam settings and ensure it can use your PC’s location information.
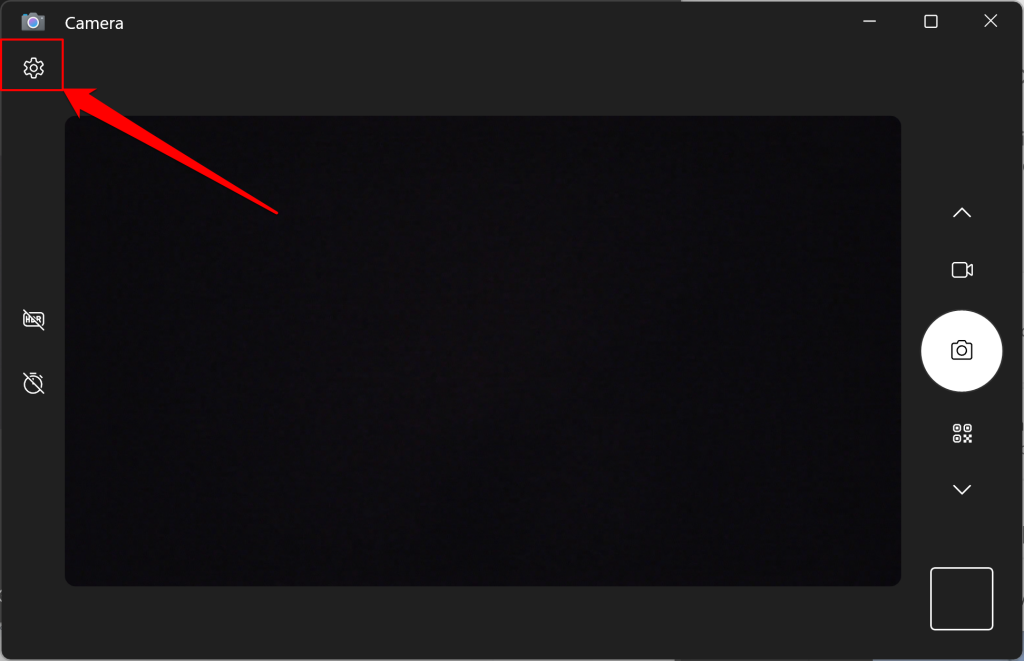
- Open the Camera app and select the Settings icon in the top-left corner.
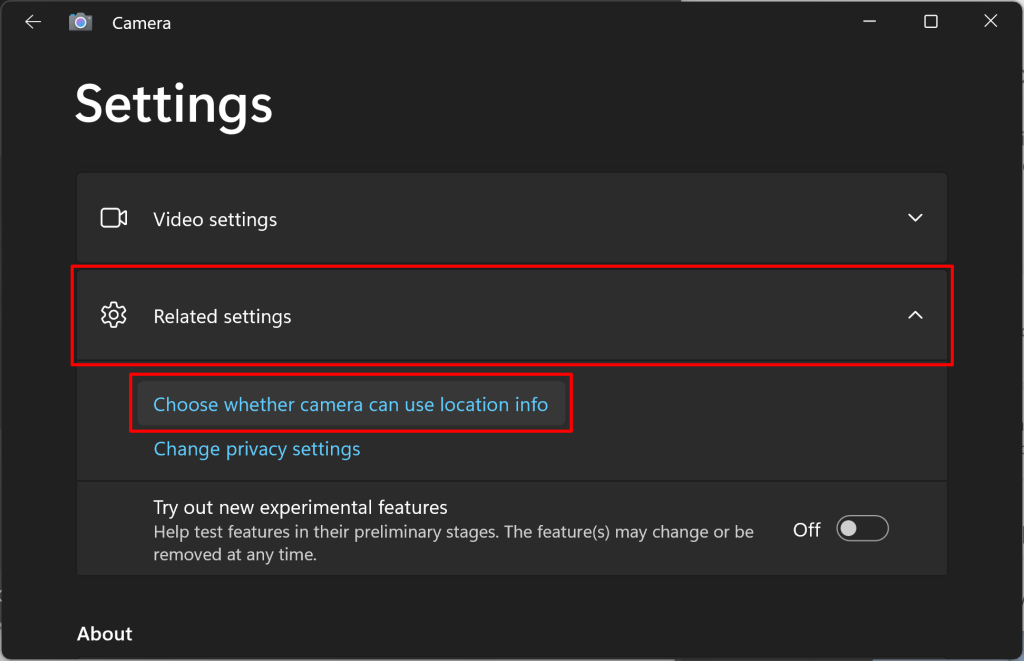
- Expand the Related settings menu and select Choose whether camera can use location info.
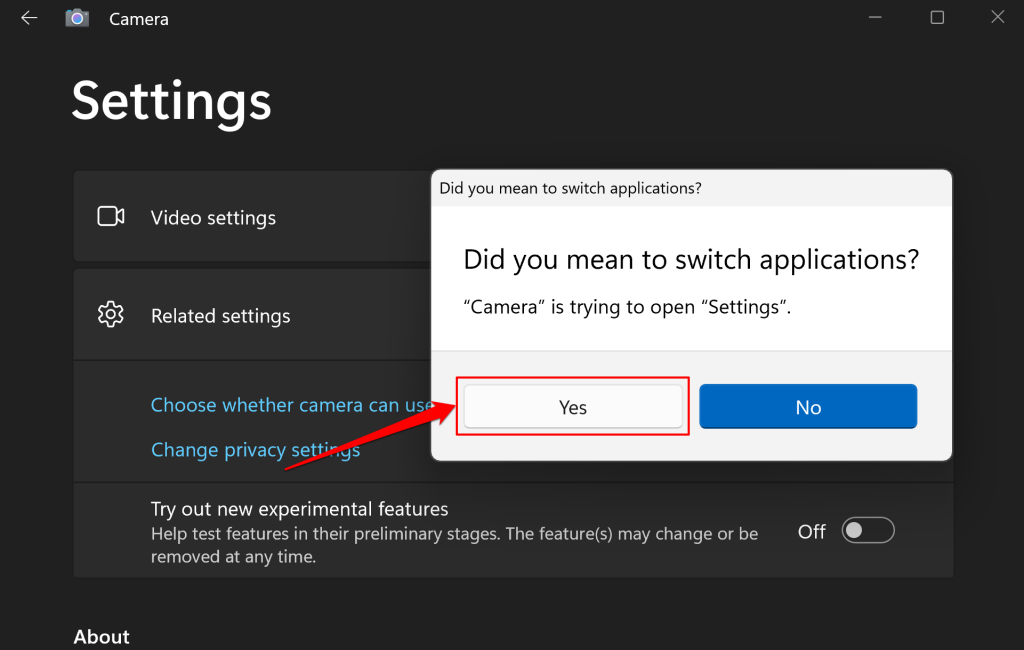
- Choose Yes on the pop-up.
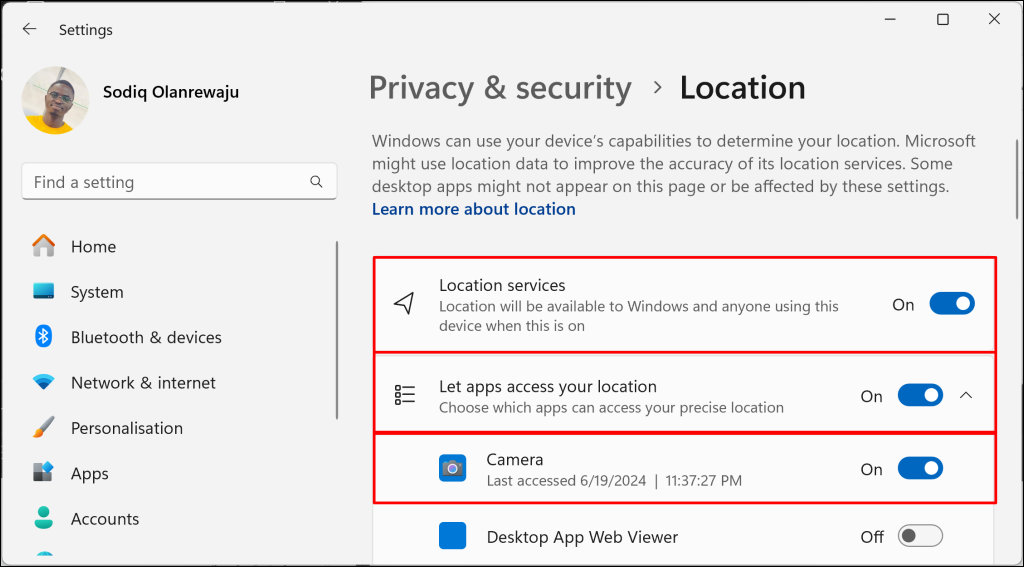
- Turn on Location services and Let apps access your location, then toggle on location access for Camera. Turning on this setting allows the camera app to geo-tag photos captured with your webcam.
How to Find Where a Picture Was Taken on Mac
You can use the macOS Photos app to view the location information of a geotagged photo. Here’s how:
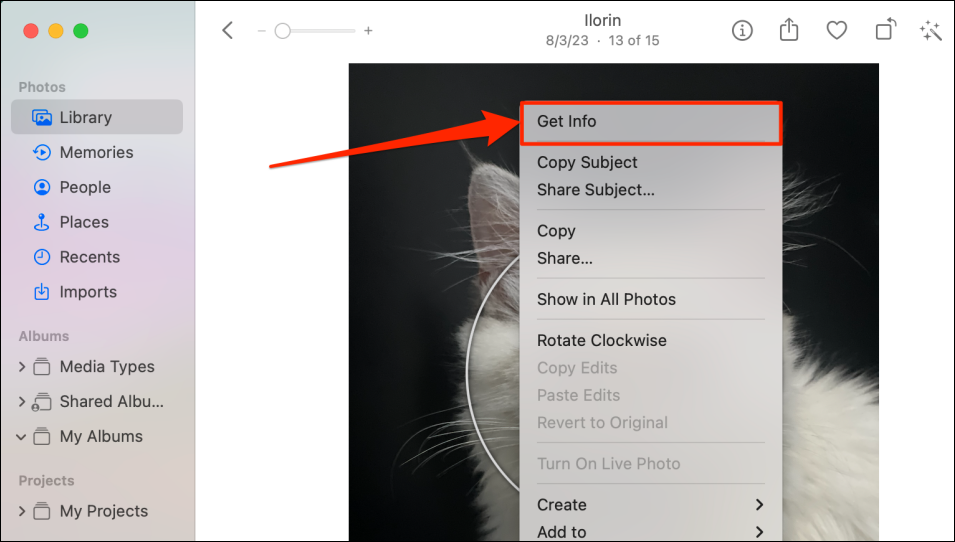
- Open the picture in the Photos app, right-click the picture, and select Get Info.
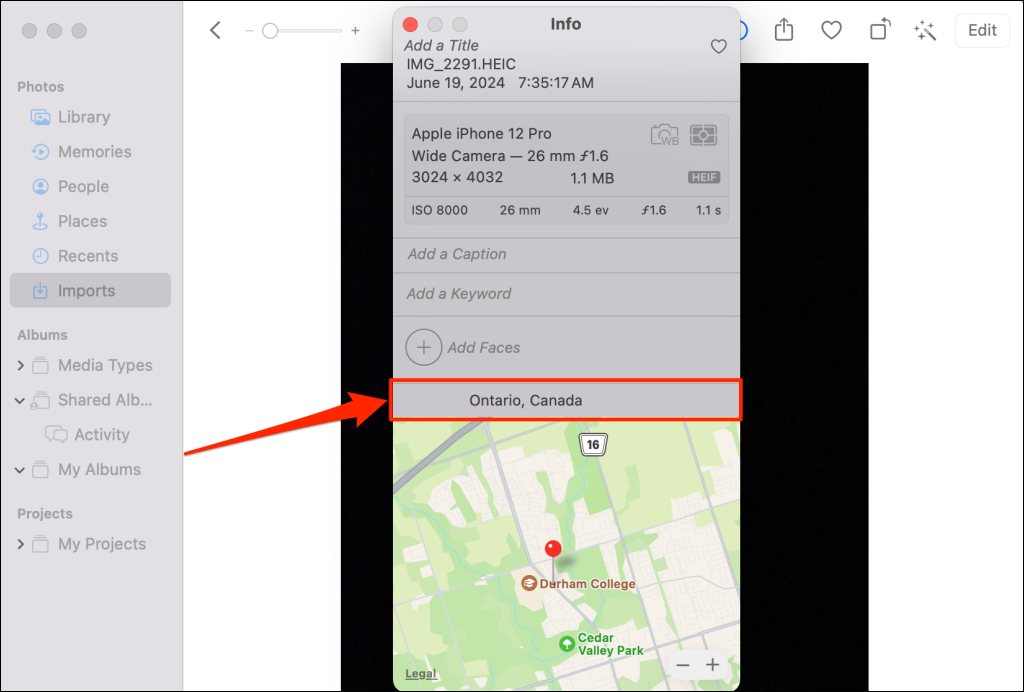
- If the picture is geo-tagged, you’ll see a map view and the city/country the picture was taken. Select the city/country information to edit the location or assign a new location.
How to Know Where Pictures Were Taken: Alternative Methods
Gallery/photo applications can only provide the location of a geotagged photo. Hence, the above methods won’t yield the desired results for photos without location metadata. However, there are workarounds for finding the location where non-geotagged photos were taken. We list some of them below.
Take Advantage of EXIF Data
EXIF data is a form of metadata that can be found in some JPEG and TIFF images. Cameras with a GPS unit tag photos with the GPS coordinates as part of the EXIF data. Armed with these coordinates, you can put them into Google Maps, which might tell you where the photographer was standing when the photo was taken.
If that sounds too easy, that’s because it is. You’ll often find that a given image has no EXIF data at all. Although smartphones are the most common source of photos and all have GPS sensors, popular services such as Facebook and Twitter strip EXIF data from images specifically to prevent privacy violations. So if your image is sourced from social media, this is likely going to be a dead end.
Incidentally, check out our article on how to remove EXIF data yourself, which also happens to show you how to view that data in the process. Alternatively, you can use an online EXIF viewer.
Search GPS Coordinates On Google Maps/Street View
While finding the GPS coordinates is easy enough, you need to plug them into a map system to find the exact location. The good news is that Google Maps actually supports raw GPS coordinates.
Google has excellent instructions on how to do it, what format it should be in, and how the method varies from one platform to the next. Just remember that GPS coordinates are not precise, at least not on civilian systems, so they may be out by a few meters.
So, if possible, activate Street View for the location in question and then look around to see if you can find the same spot the picture was taken from. Of course, if the location is indoors or somewhere that the Street View team can’t reach, this won’t help much.
Reverse Image Search Can Provide Context
There are various reverse image search services on the Internet that use fancy methods to find where images can be found. These services don’t necessarily tell you where the photo was taken, but if you are lucky, they will lead you to additional information about the image.

For example, you may find tags, captions, or contact information for site administrators. These data sources may then solve the mystery of where the photo was taken. If you’re looking for good tools to find where a picture was taken, we suggest either Google or TinEye.
Convert the Image into Search Terms
Reverse image search doesn’t always do a good job, but that doesn’t mean all hope is lost when trying to find an image’s location.
Look at your image and try to come up with search terms that describe it. Then, put these terms into Google and switch over to the image results section. If you’re lucky, your original image will appear in the results, given that it’s on the web in the first place.

If you don’t strike gold right away, get imaginative with your keywords and try different iterations. Sometimes the keywords that get you to the image you want may be a little left of field.
Check for Landmarks or Other Clues
If the above methods don’t get you any closer to finding where a picture was taken, it might be time to put on your serious detective hat. Look carefully at the image for things that tie it to a specific time and place—clothing, objects, fashion, and other relevant details.

Look up these items on Google to learn where they come from or any other information that could help pinpoint a photo’s origin. You can also use this method to get additional keywords for the previous method. This basic investigation can help narrow the location to a specific country, region, or city. Brand names, for example, can be very specific to particular places.
Ask the Internet for Help
If you’ve exhausted the easier methods of figuring out where a photo comes from, there’s no shame in asking other people for help. Post a request for help on Twitter, Facebook, web forums, and relevant online communities.
Your photo’s content and reasons for wanting the location will determine where you go for help. For example, if you know that an image was taken in Japan, you may post a question in a group that specializes in Japanese geography or tourism.
If you have a photo of an event or, for example, a band, you’ll want to post a question in a fan group. Basically, ask for help from people who are likely to know the answer.
Match Pictures to Locations
Finding where a geotagged photo using your phone or computer’s gallery/photos app is quick and easy. Conversely, finding the origin of photos without GPS metadata can be frustrating and time-consuming. This means that at some point in your hunt, you’ll have to think carefully about how important it is to solve the puzzle.
If it’s just a matter of casual curiosity, then it’s hardly worth scouring the internet for an answer. If it’s really important, the most important tip we can give you is to be patient. While you may not find the answers today, the web is always in flux. Information is always being added, so even if the photo’s origin is seemingly a total mystery, the truth may finally be revealed if you keep checking every now and then.