Two handy tools to help you make the transition
Got some videos you would like to copy over to your iPad or iPhone for offline viewing? iCloud is great and works really well, but you can obviously only download content that is available in the iTunes store.
If you have some home videos or downloaded movies that you’d like to get onto your iPad or iPhone, you’ll need to first convert them into the appropriate format. Once you do that, you can check out my post on how to copy or transfer files over to your iPad.
So what’s the easiest way to get any video converted to the correct format? In my opinion, HandBrake is the best application for getting the job done. It’s open source and works on Mac, Windows and even Linux.
HandBrake makes the job super easy by having a set of built-in presets for converting video to specific formats for Apple TV, iPad, iPhone, iPod, etc.
Using HandBrake to Convert Video
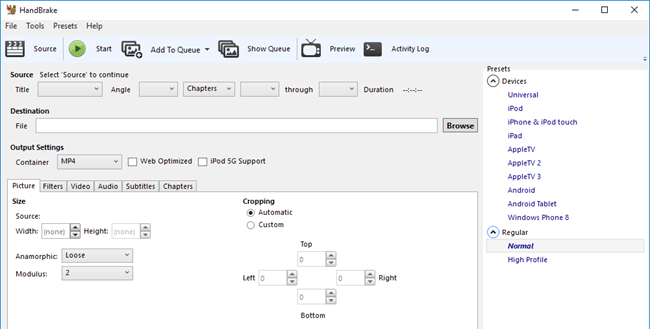
Once you download and install HandBrake, you’ll see the main interface where you can choose the video (Source) and the output format (Presets).
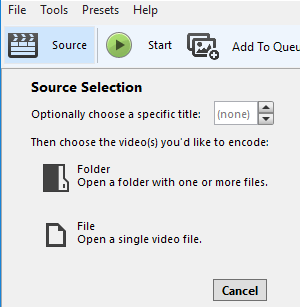
Go ahead and click on the Source button and then choose from either File or Folder. On Windows and Mac, you can easily batch convert a whole bunch of videos at once if you like.
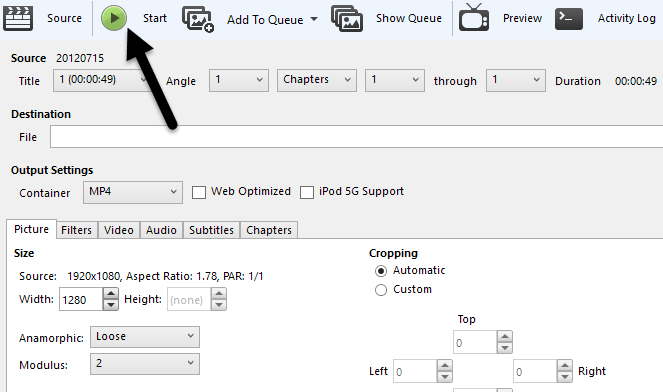
Once you choose a video file, HandBrake will scan it and display information about the video file.
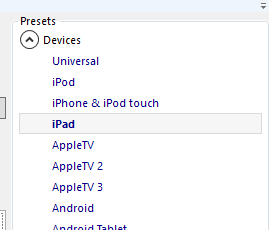
Before you start the conversion, make sure you select iPad or iPhone from the presets on the right.
The values for the resolution of the video and type of codec will already be selected for you when you choose a preset. The only thing you have to do now is start the conversion by clicking on the Start button. You can also click on Add to Queue and then add more videos if you like.
If this is the first time you are using the program, you also need to choose a destination for the converted file. By default, videos will be converted to MP4 format using the H.264 codec. You’ll be able to see the progress at the bottom of the HandBrake window.
Once completed, your file is ready. You can now transfer this file over to your iPad using iTunes. If you want to convert videos for your iPhone, follow the same steps, just choose iPhone from the presets. If you are more technically-savvy, you can also click on the tabs and manually adjust settings to your liking.
Copy File to Device using iTunes
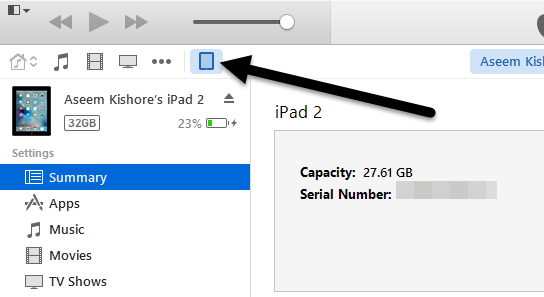
To get the converted video onto your iPad or iPhone, open iTunes and connect your device using the USB cable. In iTunes, click on the icon for your device at the top.
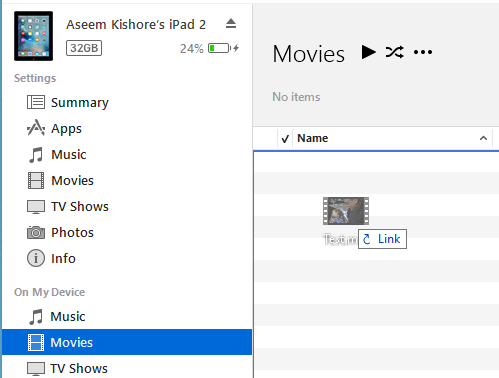
Now in the left-hand sidebar, you will see a section called On My Device. Go ahead and click on Movies under that heading.
Open Explorer and find your video. When you have it, just drag and drop it onto the right hand side of the screen under Movies.
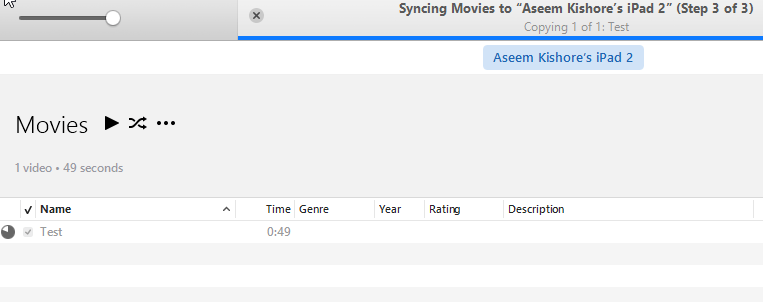
Go ahead and click on the Sync button at the bottom right and eventually it should start copying over the video file to your iPad. Note that if you have already synced your iPad or iPhone to another iTunes library, it’ll give you a message asking to Erase and Sync your current device. Just click Cancel and let it continue syncing. I was able to copy the file over even though my iPad was synced to another computer.
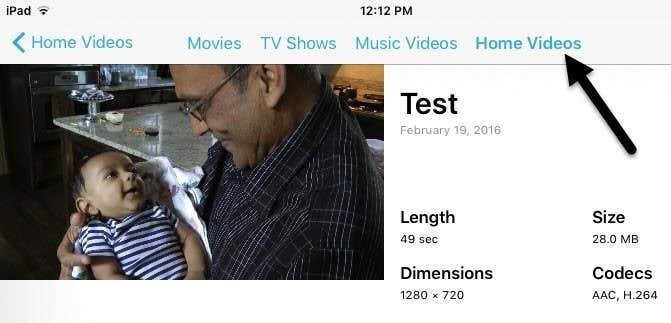
Finally, on your iPad, go ahead and open the Videos app. You should see a new tab called Home Videos. Here you will find all the movies that you have synced manually yourself. The video should play perfectly as long as it got synced to your device. If you have any questions, feel free to comment. Enjoy!

