
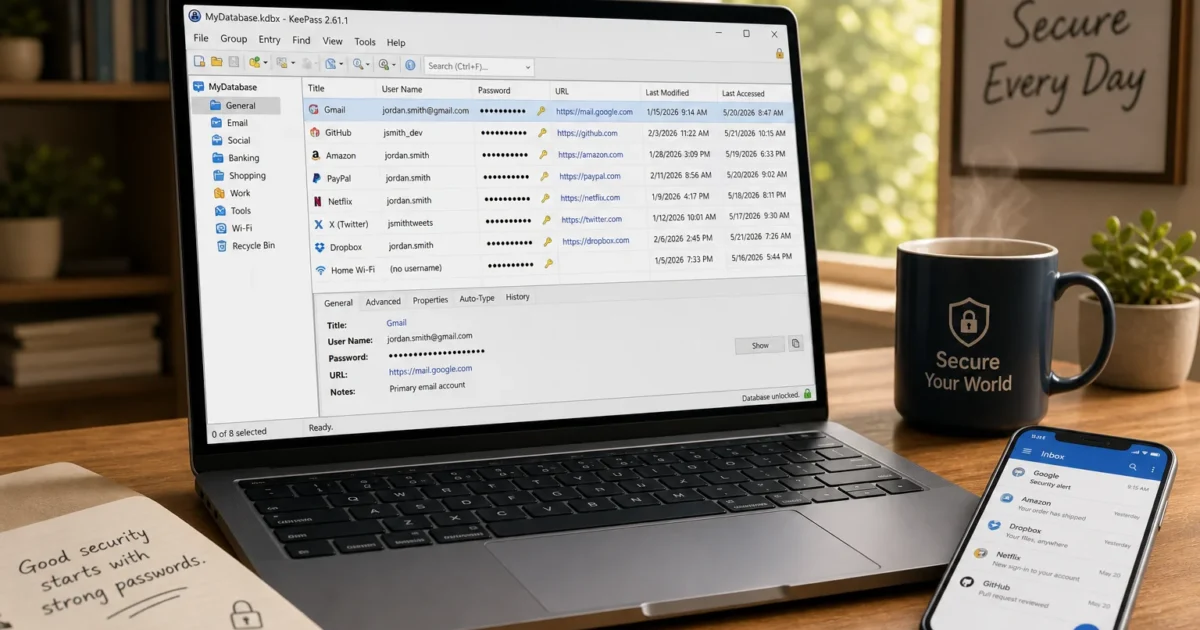
Using a different password for every account sounds sensible until you’re staring at dozens of logins you can’t possibly remember. If you’ve been struggling with reused passwords, KeePass solves the problem by storing them in one encrypted database.
This guide shows you how to set up KeePass 2.61.1 on Windows, create safer passwords, log in faster, and protect your database. You’ll also learn how to use the same database on macOS, Android, and iPhone.
What Is KeePass?
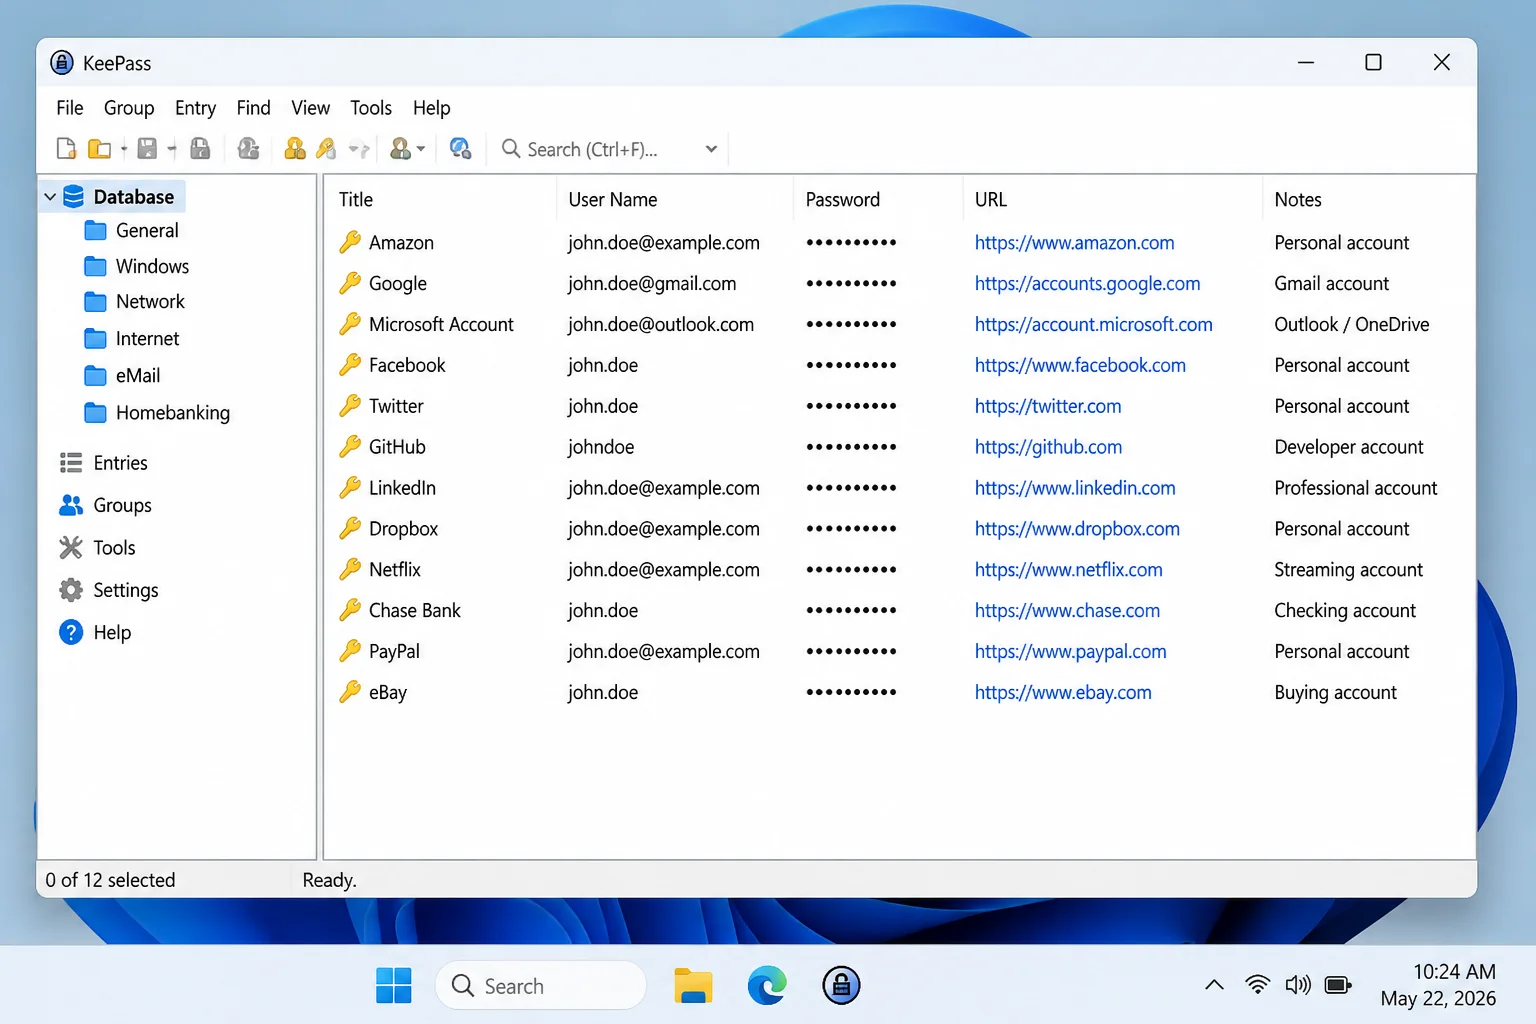
KeePass is a free, open-source password manager that stores your logins in an encrypted .kdbx database. Think of that file as a locked safe: your passwords stay scrambled until you open it with your master password.
Key features:
- Local storage: You decide where the database lives.
- Password generator: KeePass creates long, random passwords for your accounts.
- Portable version: You can run KeePass from a USB drive without installing it.
- Auto-Type: KeePass can type a saved username and password into a login form.
- Compatible database format: KeePassXC and several mobile apps can open KeePass databases.
KeePass works best for people who want direct control over their password file and don’t mind handling backups and syncing themselves.
KeePass or KeePassXC: Which Should You Pick?
The original KeePass app is primarily made for Windows. KeePassXC uses the same database format and provides a more modern experience across Windows, macOS, and Linux.
| Choose | Best For |
|---|---|
| KeePass 2.61.1 | Windows users who want the original app or a portable version |
| KeePassXC 2.7.12 | Windows, macOS, or Linux users who want browser integration |
| Keepass2Android | Opening and autofilling a KeePass database on Android |
| Strongbox | Opening a KeePass database on iPhone, iPad, or macOS |
KeePassXC is my pick for households with a mix of Windows PCs and Macs. The original KeePass remains a good fit if you use Windows and prefer its classic, no-fuss layout.
Before You Begin
Make sure you have:
- A Windows 10 or Windows 11 PC
- A folder where you can safely store your database
- A long master passphrase you can remember
- A separate backup location, such as an external drive
- KeePassXC instead if you’re following along on macOS
Your master password deserves extra thought. Use four to six unrelated words that you can remember but nobody else could guess. Don’t use a quote, address, birthday, pet name, or anything you’ve posted online.
How to Install KeePass on Windows
Step 1: Download KeePass
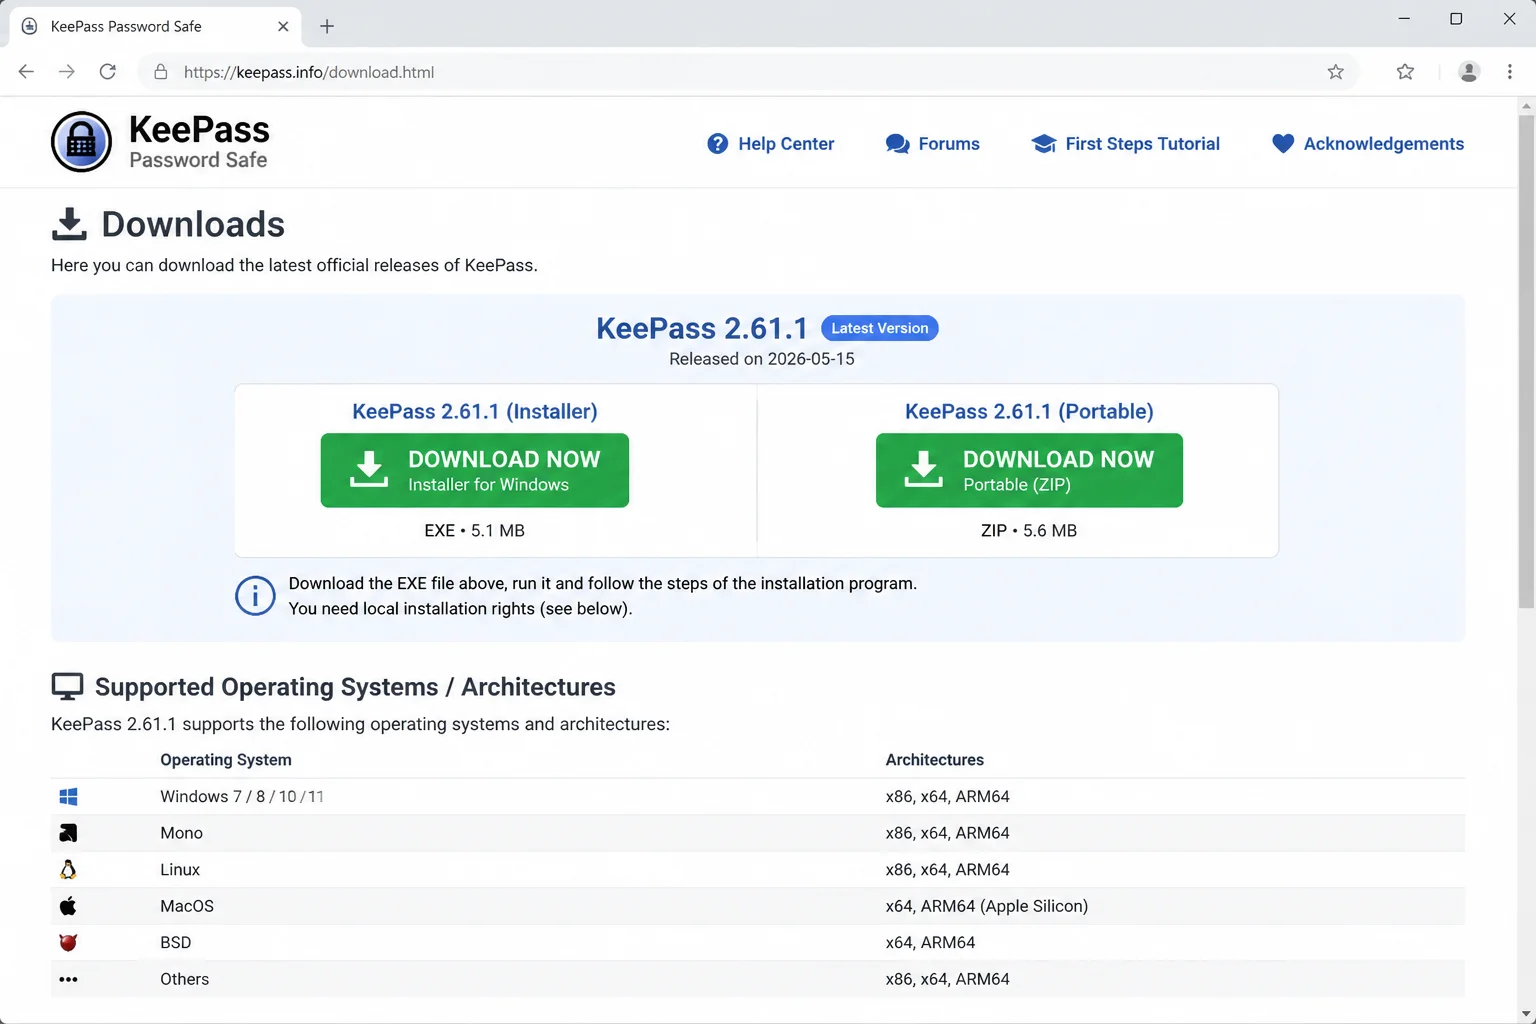
Open the official KeePass downloads page and find KeePass 2.61.1. Choose the installer for the simplest setup or the portable package if you want to run KeePass from a USB drive.
The download should appear in your browser’s downloads list.
Step 2: Install or Extract the App
Open the installer and accept the standard options. If you downloaded the portable ZIP file, right-click it, select Extract All, and choose a dedicated folder.
The extracted folder should contain KeePass.exe and its supporting files.
Step 3: Open KeePass
Double-click KeePass from the Start menu or open KeePass.exe from the portable folder.
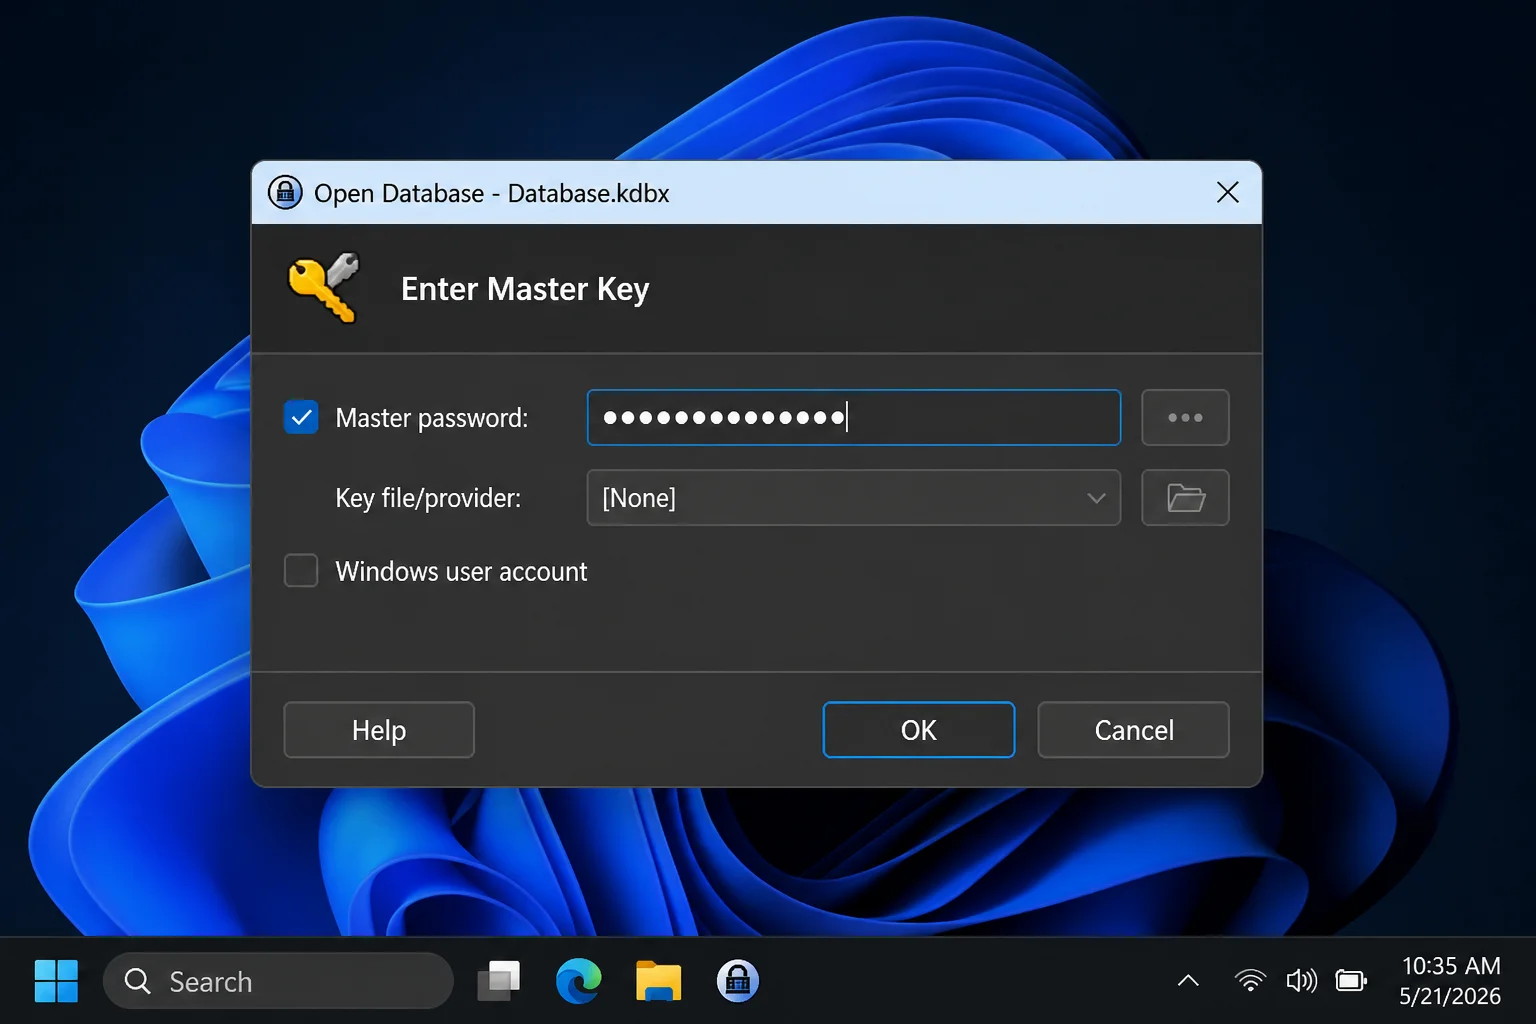
You may initially see a database login prompt. Close it if you haven’t created a database yet.
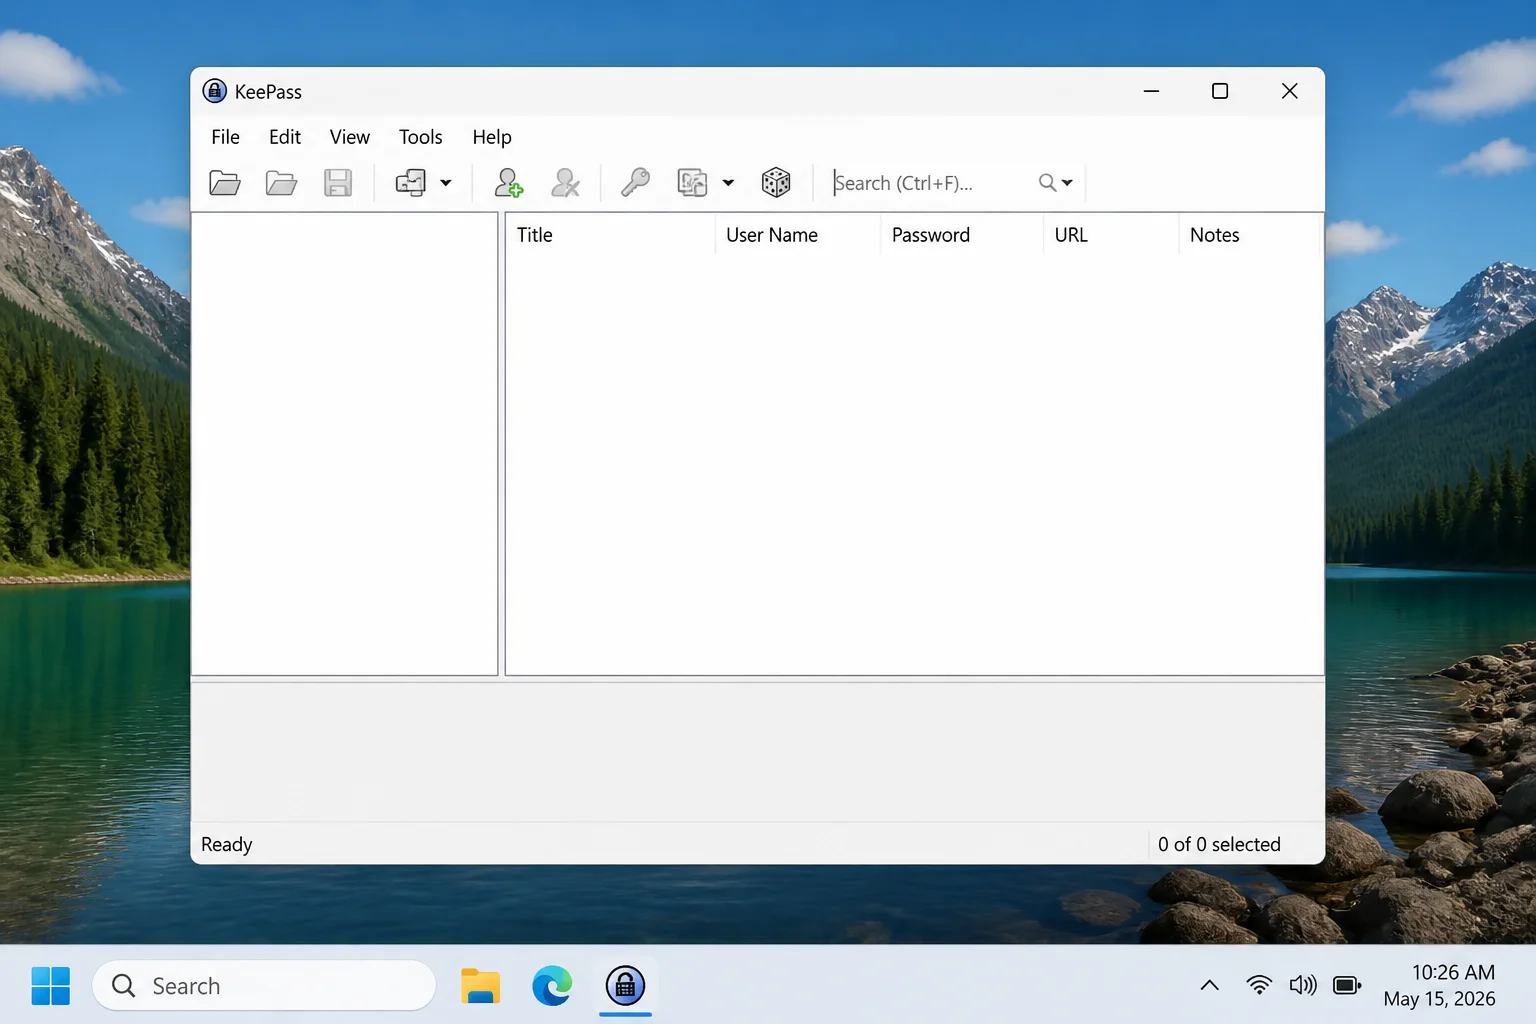
The main KeePass window will appear without any saved entries.
How to Create Your KeePass Database
Step 1: Start a New Database
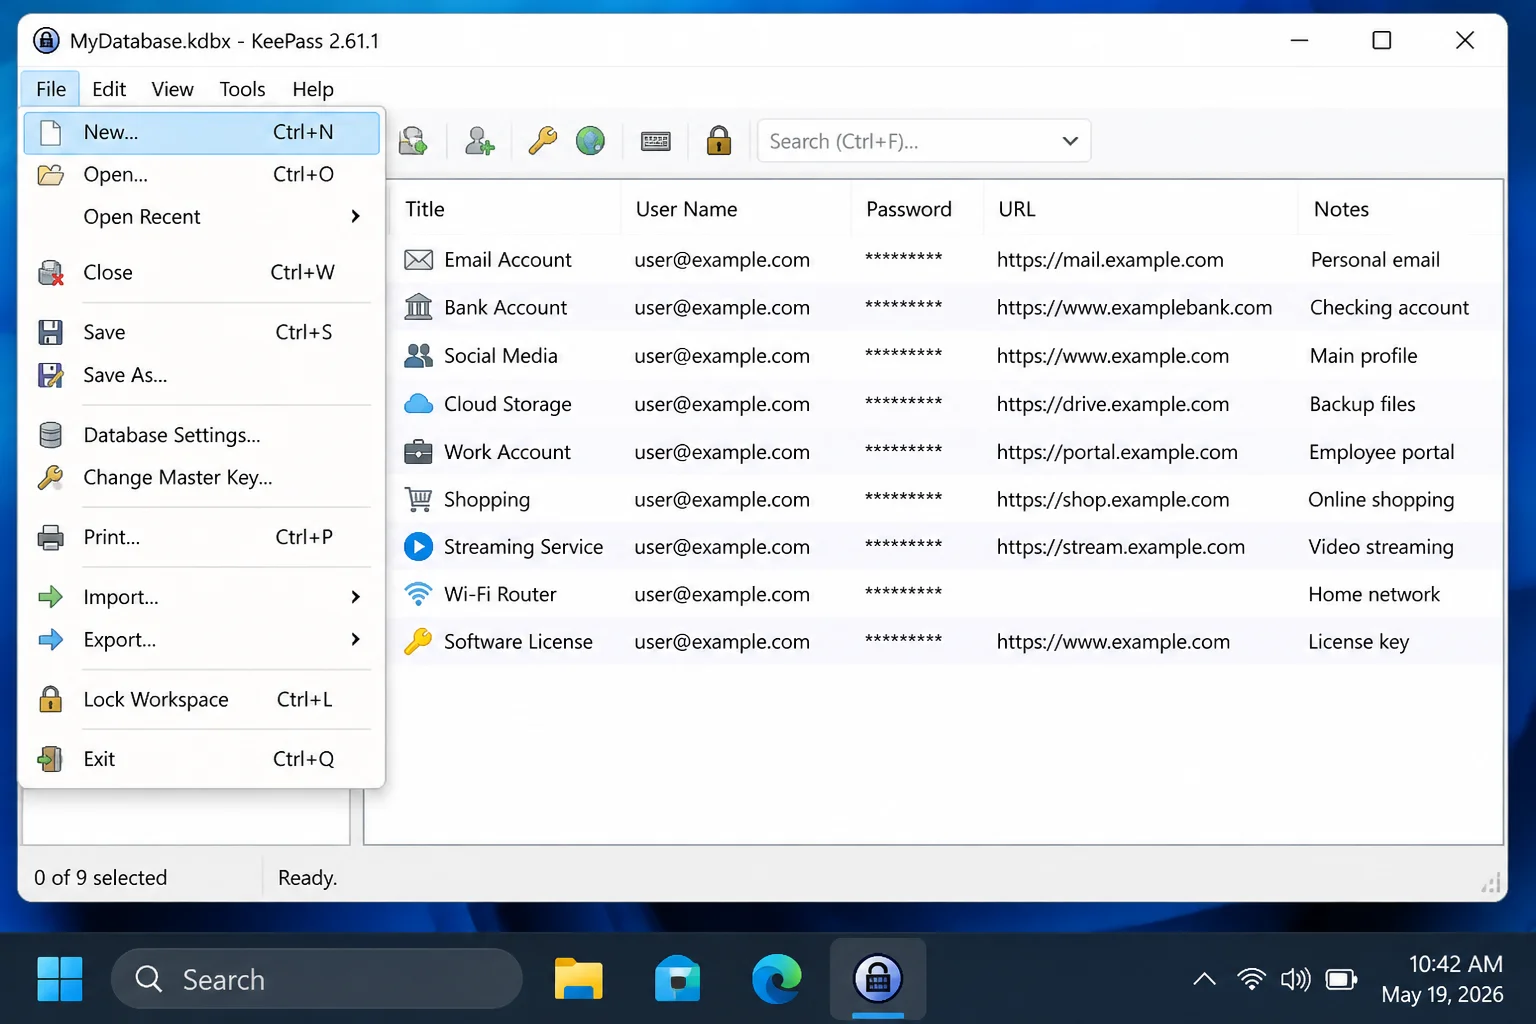
Select File > New in KeePass.
A message will explain that your passwords will be stored in a database file.
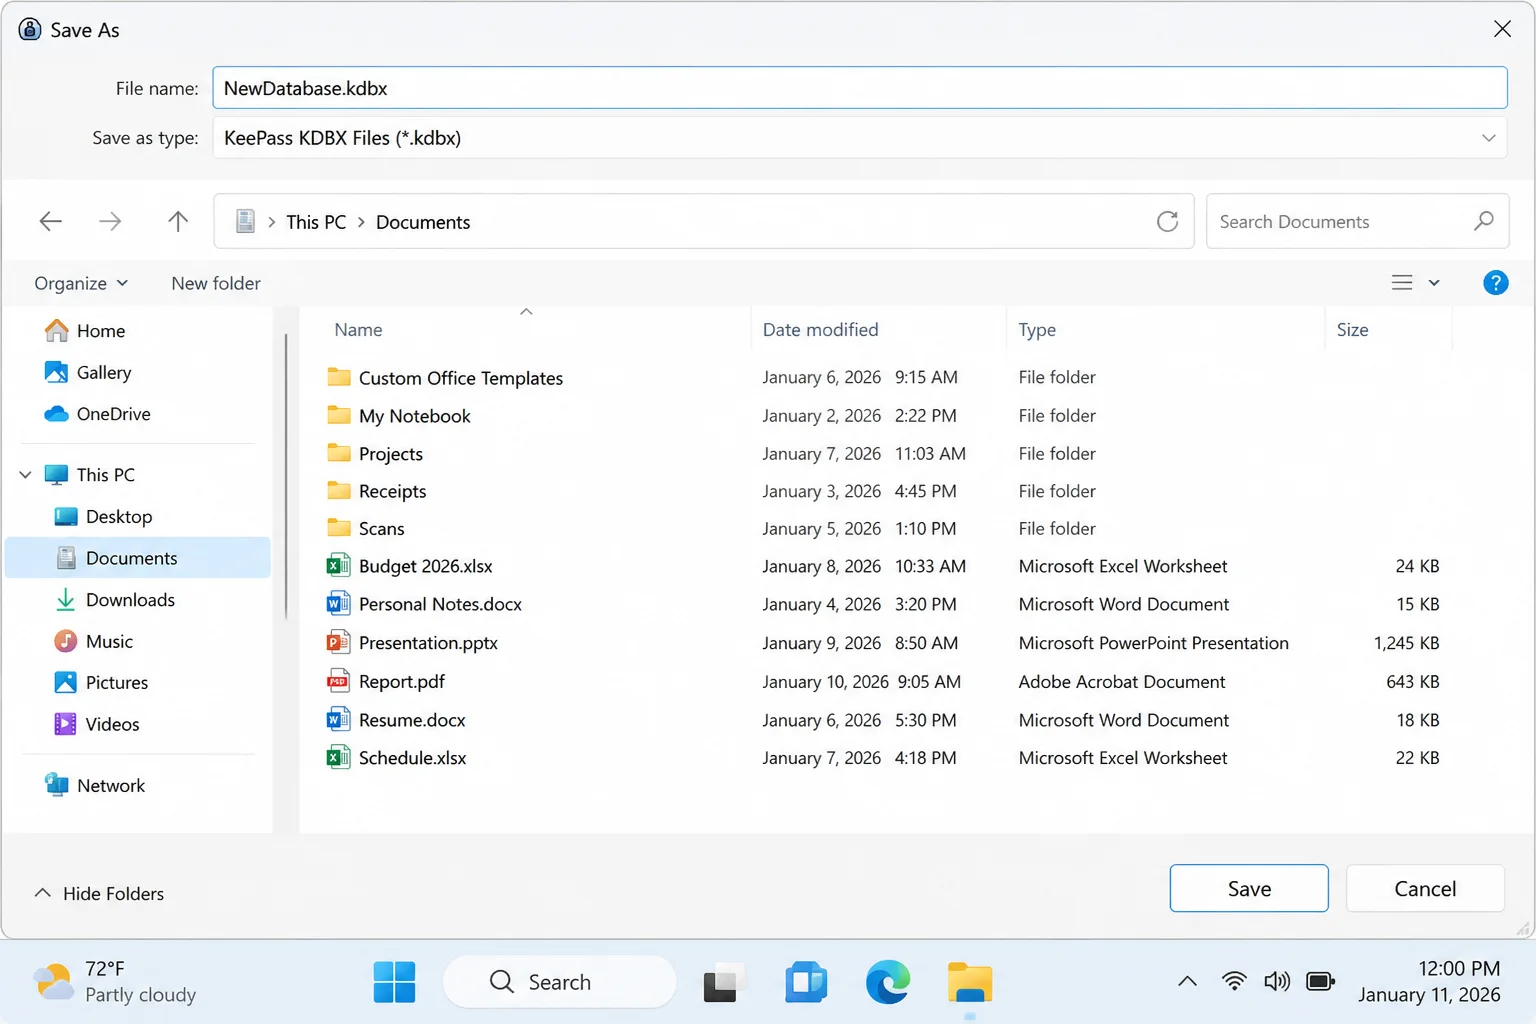
Step 2: Save the Database File
Click OK, choose a safe folder, enter a recognizable filename, and click Save. KeePass will add the .kdbx extension.
Your database can have any filename you like. Something clear, such as Personal Passwords.kdbx, is easier to spot in a backup folder than Mango.kdbx (though KeePass won’t complain either way).
Step 3: Create Your Master Password
Enter your long master passphrase in Master password, type it again in Repeat password, and click OK.
This password controls access to every login in the database. KeePass can’t reset it, so forgetting it means losing access to the file.
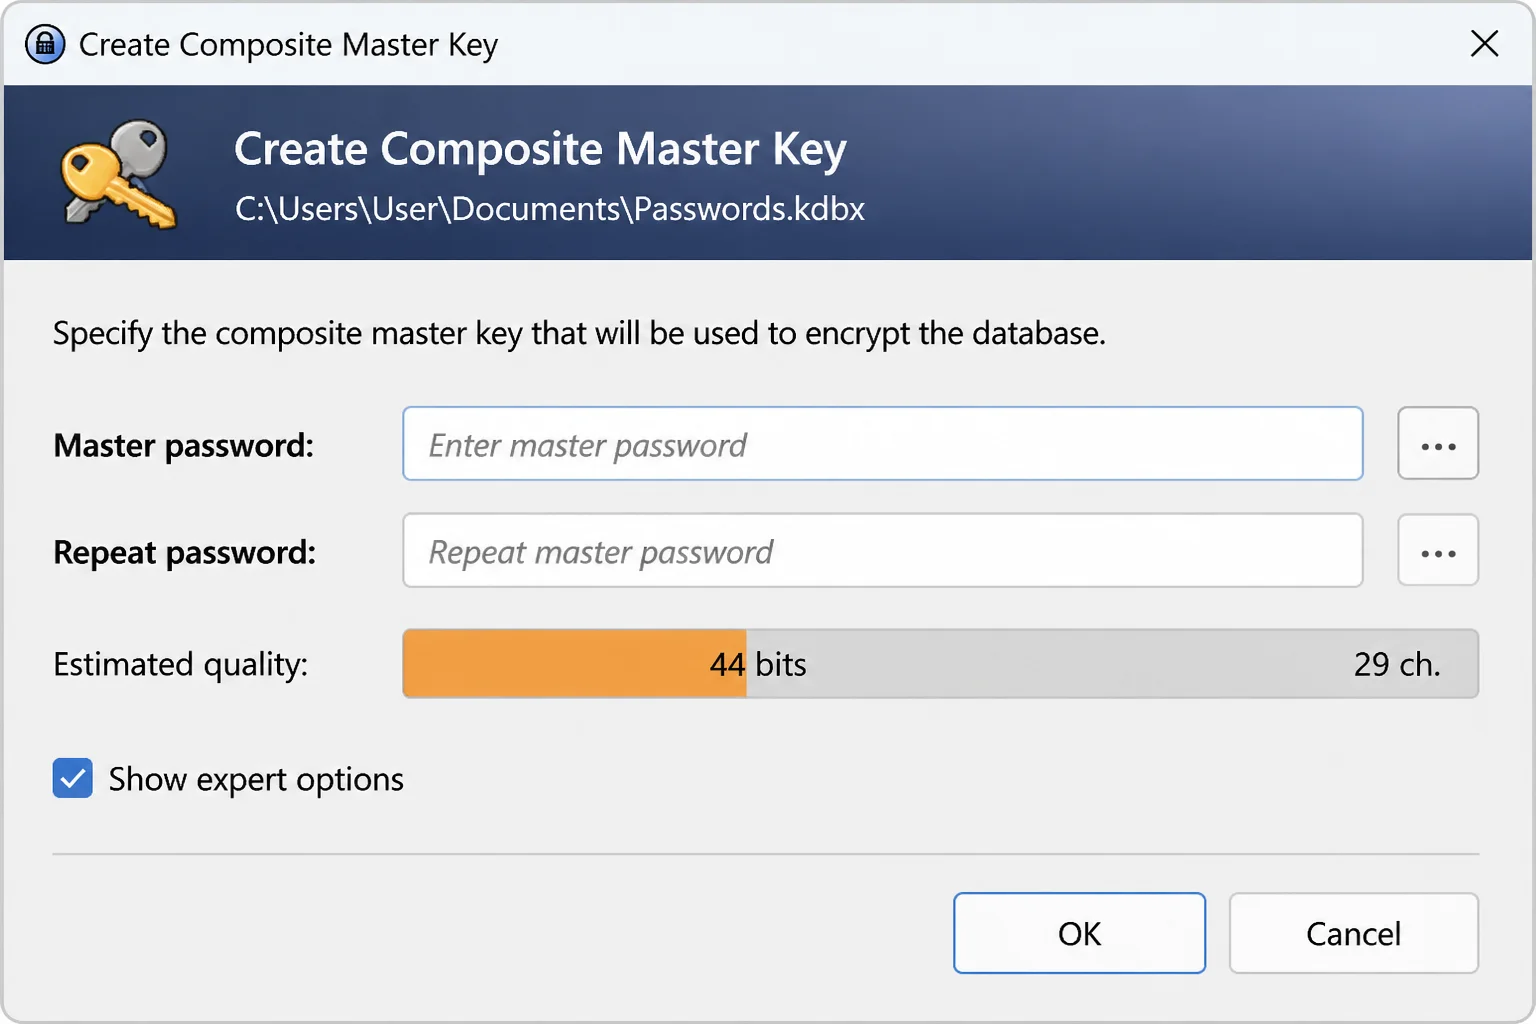
KeePass displays an estimated quality score while you type. Length matters, but the phrase also needs to be hard for another person to predict.
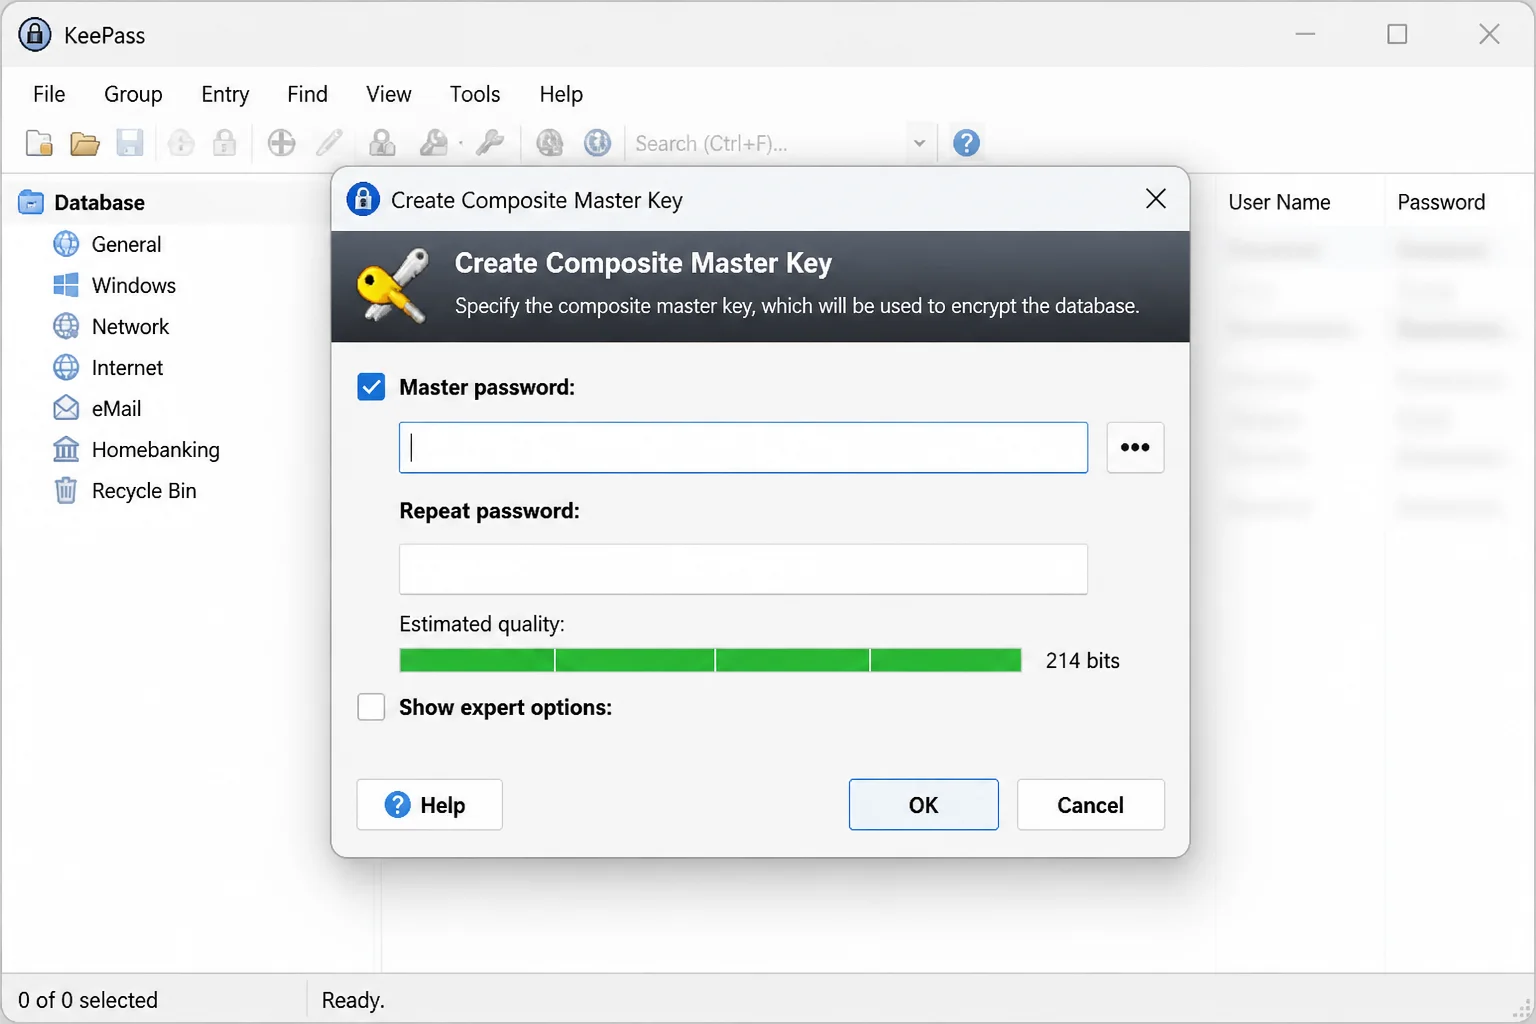
Step 4: Review the Database Settings
Enter a database name and optional description in the settings window, then click OK.
KeePass will open the new database and show its default groups in the left sidebar.
Step 5: Store Emergency Access Instructions
Print the emergency sheet if KeePass offers one, or write the database location and master password on paper. Store it in a locked safe or another secure place your trusted family member can access when needed.
A paper copy sounds old-fashioned, but it doesn’t crash, lose power, or forget your password. Don’t keep it beside the computer.
Step 6: Save the Database
Select File > Save or press Ctrl + S.
Your .kdbx file now contains the database settings and is ready for entries.
How to Organize Your KeePass Database
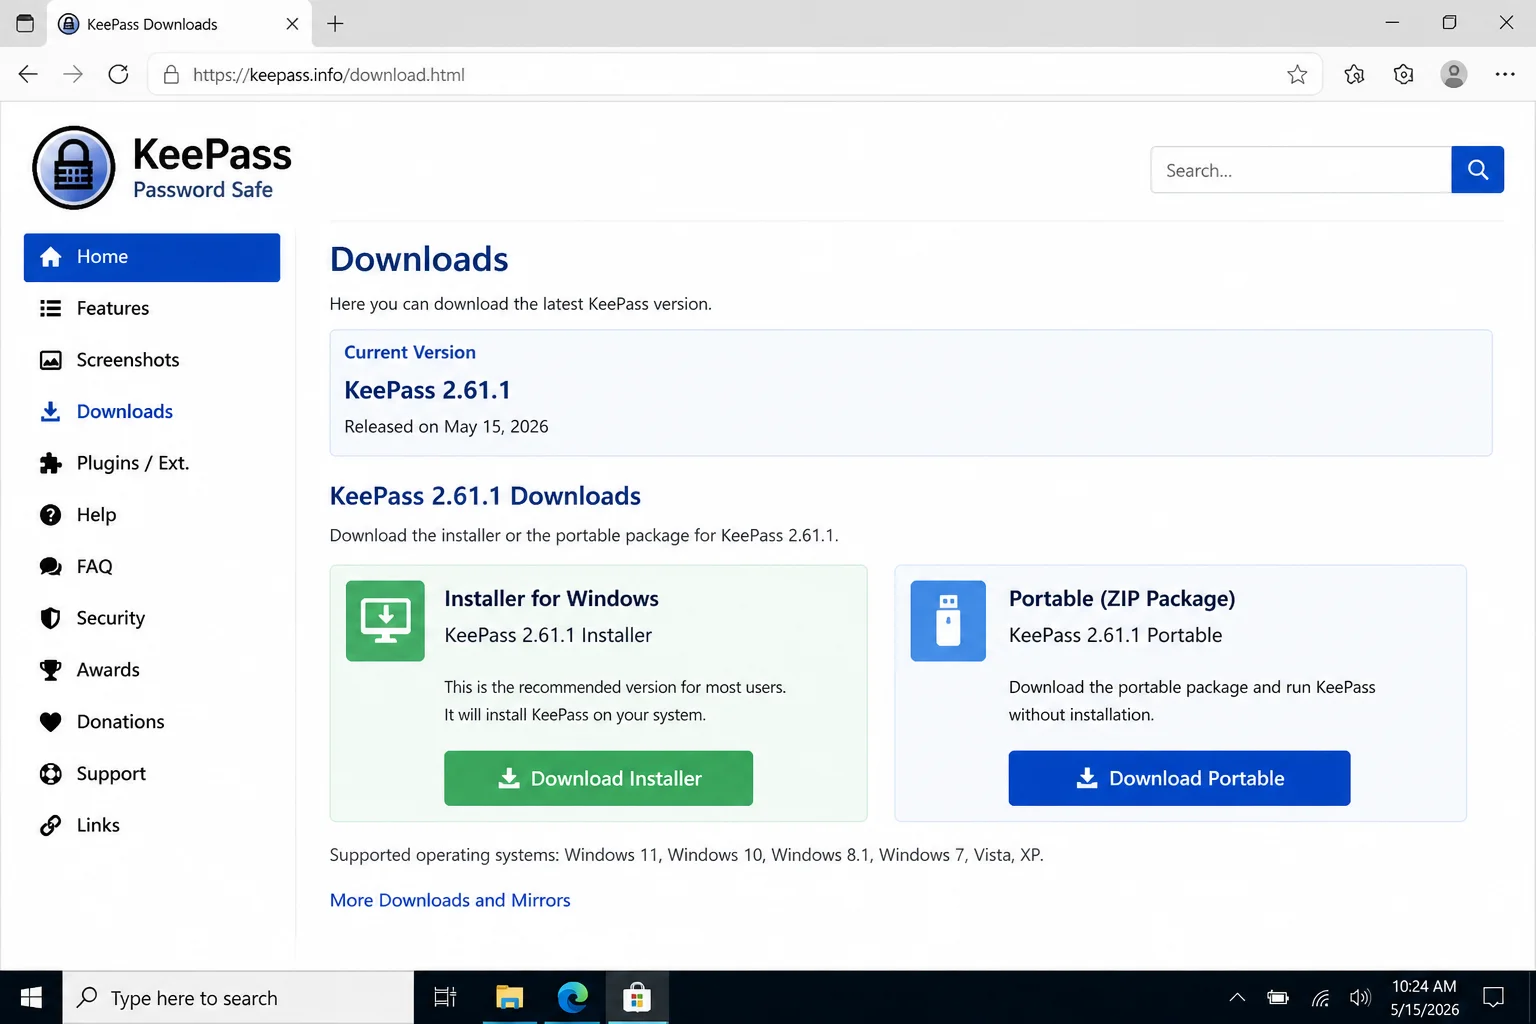
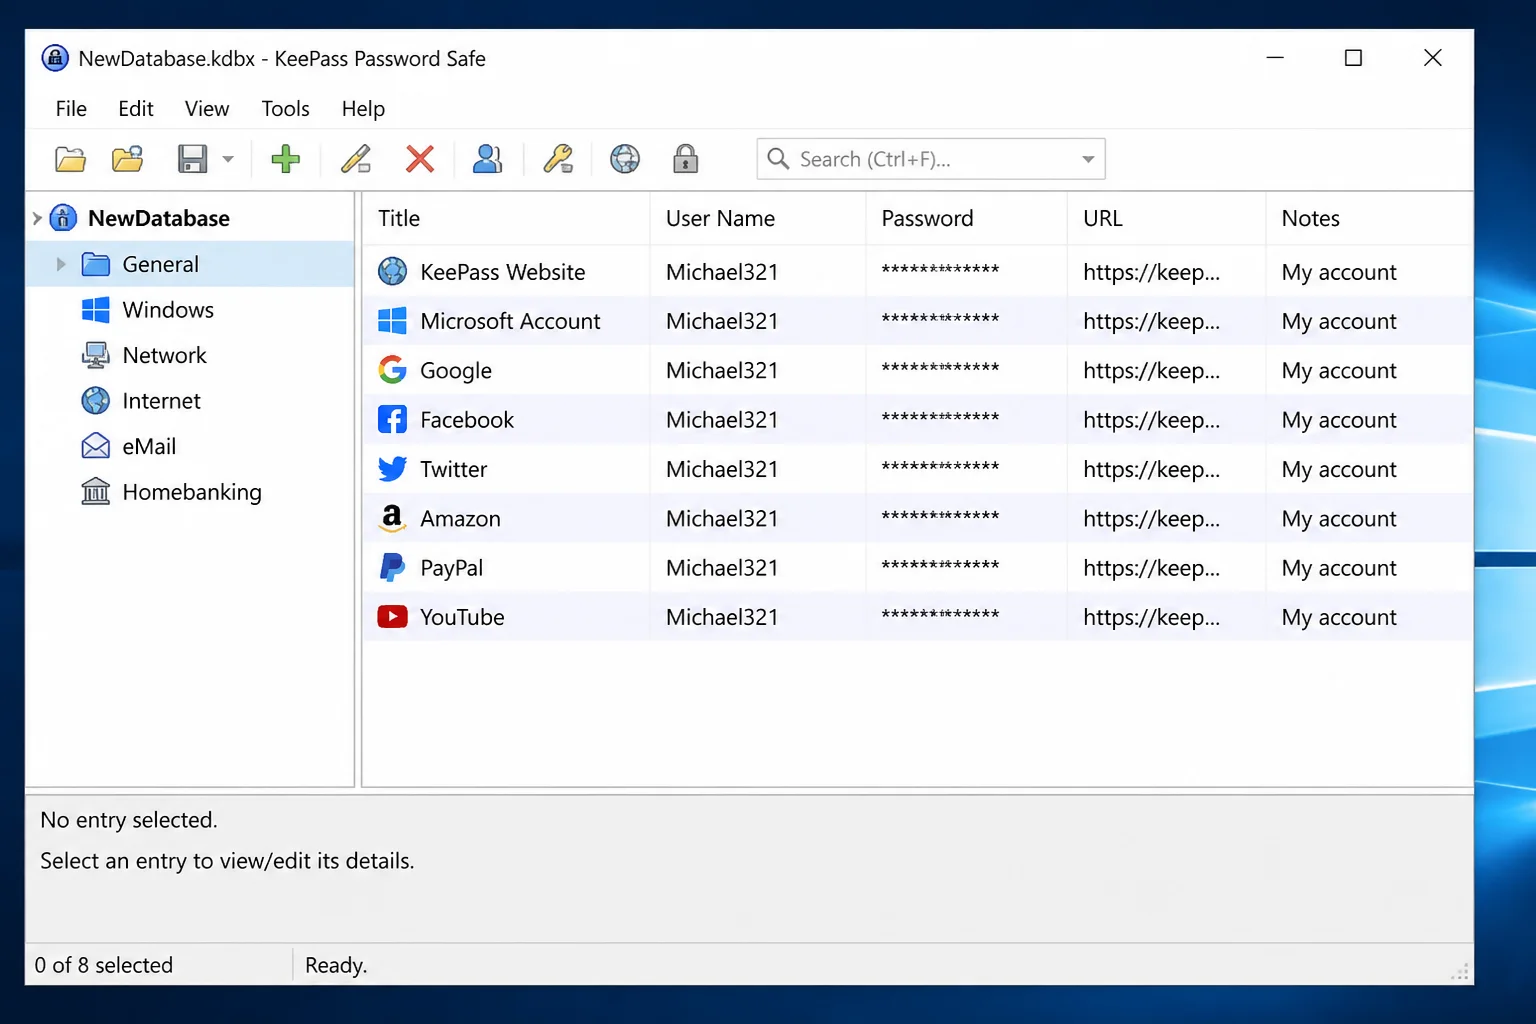
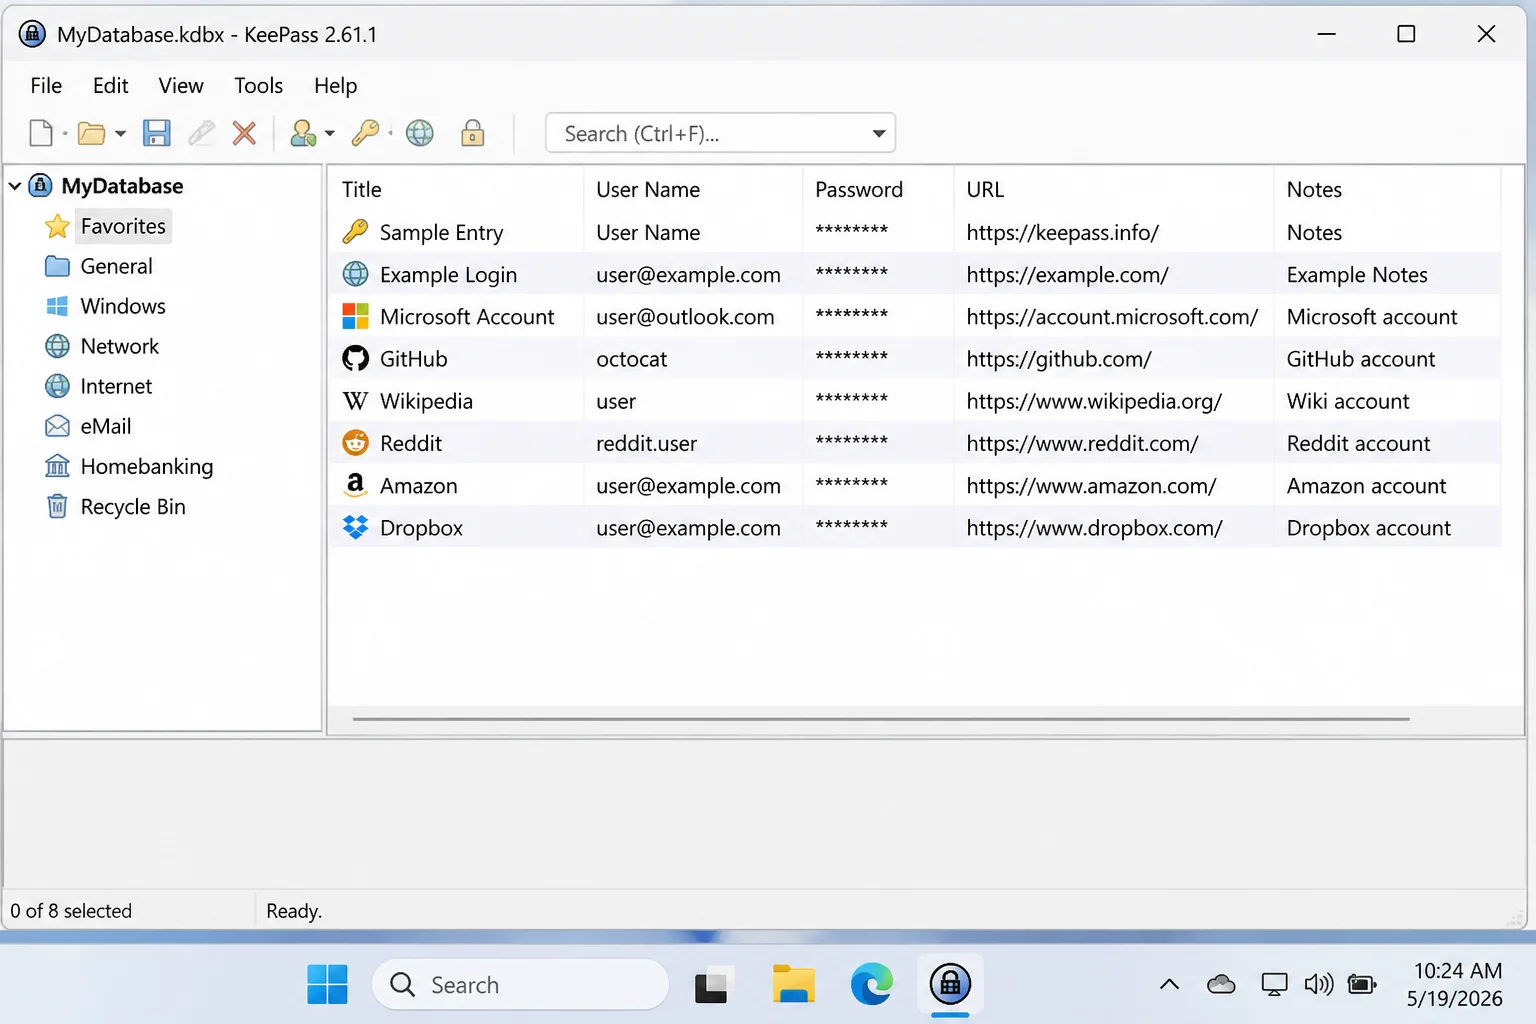
KeePass places groups such as Internet, Email, and Homebanking in the left sidebar. Groups work like folders, keeping a crowded password database from turning into a junk drawer.
You can right-click a group to rename or delete it. You can also create groups for work, shopping, streaming services, or anything else that makes sense to you.
Delete the sample entries after you’ve looked at them. They’re examples rather than real accounts.
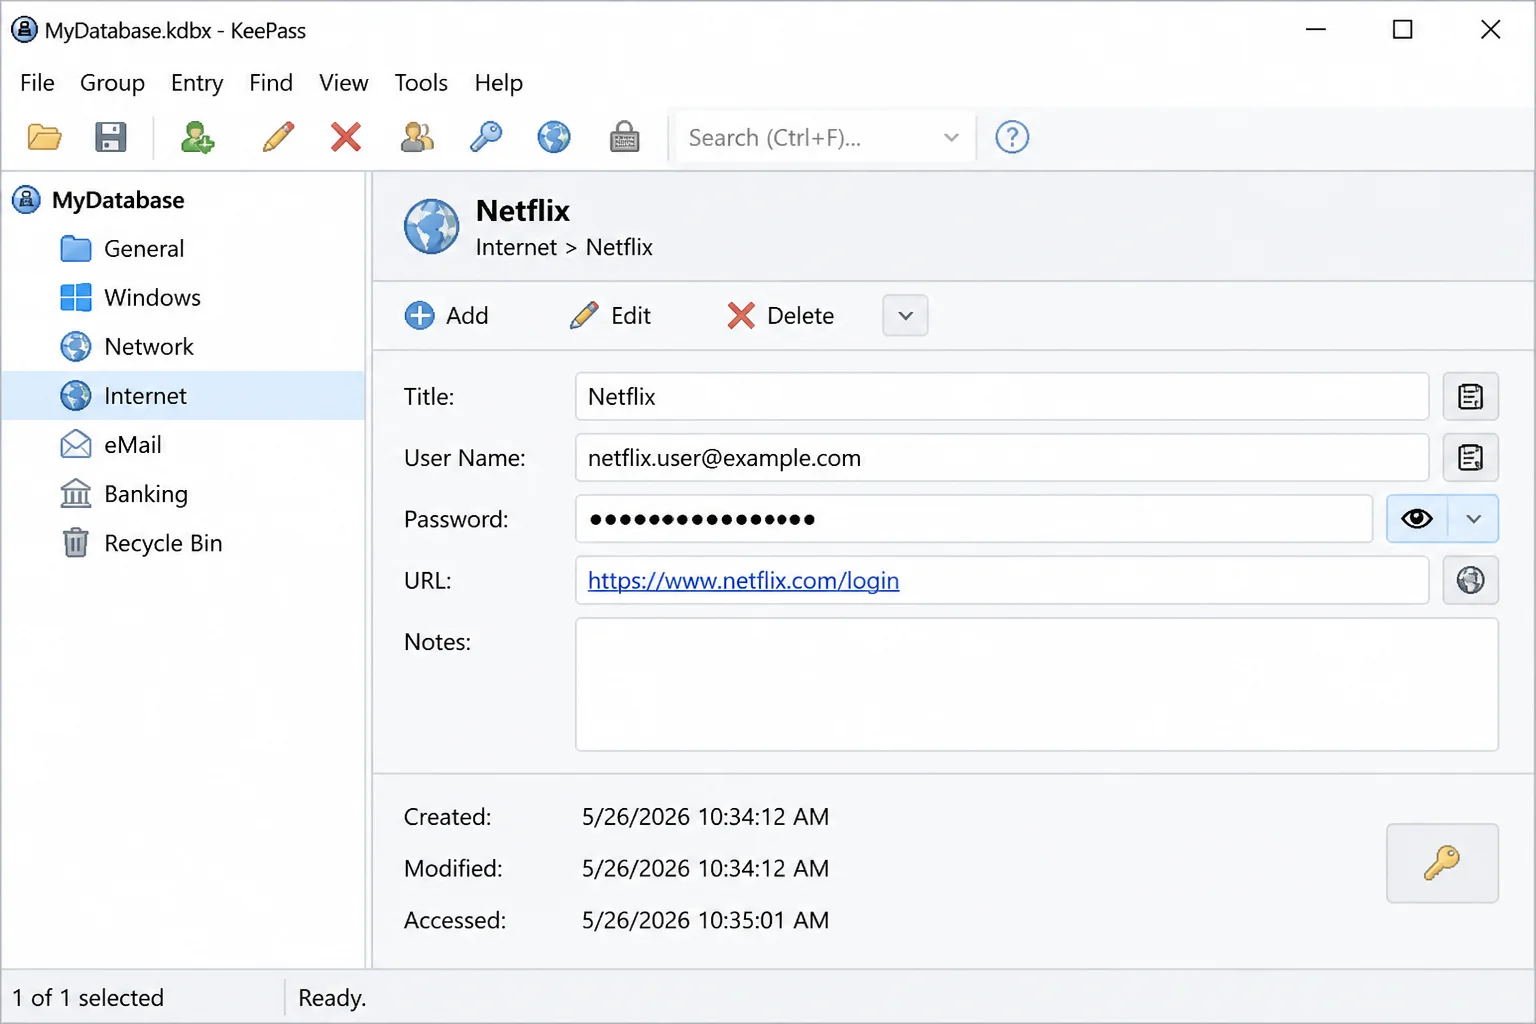
How to Add a Login to KeePass
Step 1: Choose a Group
Click the group where you want to store the account, such as Internet.
The selected group will be highlighted in the sidebar.
Step 2: Open the Add Entry Window
Select Entry > Add Entry, or click the yellow key button on the toolbar.
A new entry window will open.
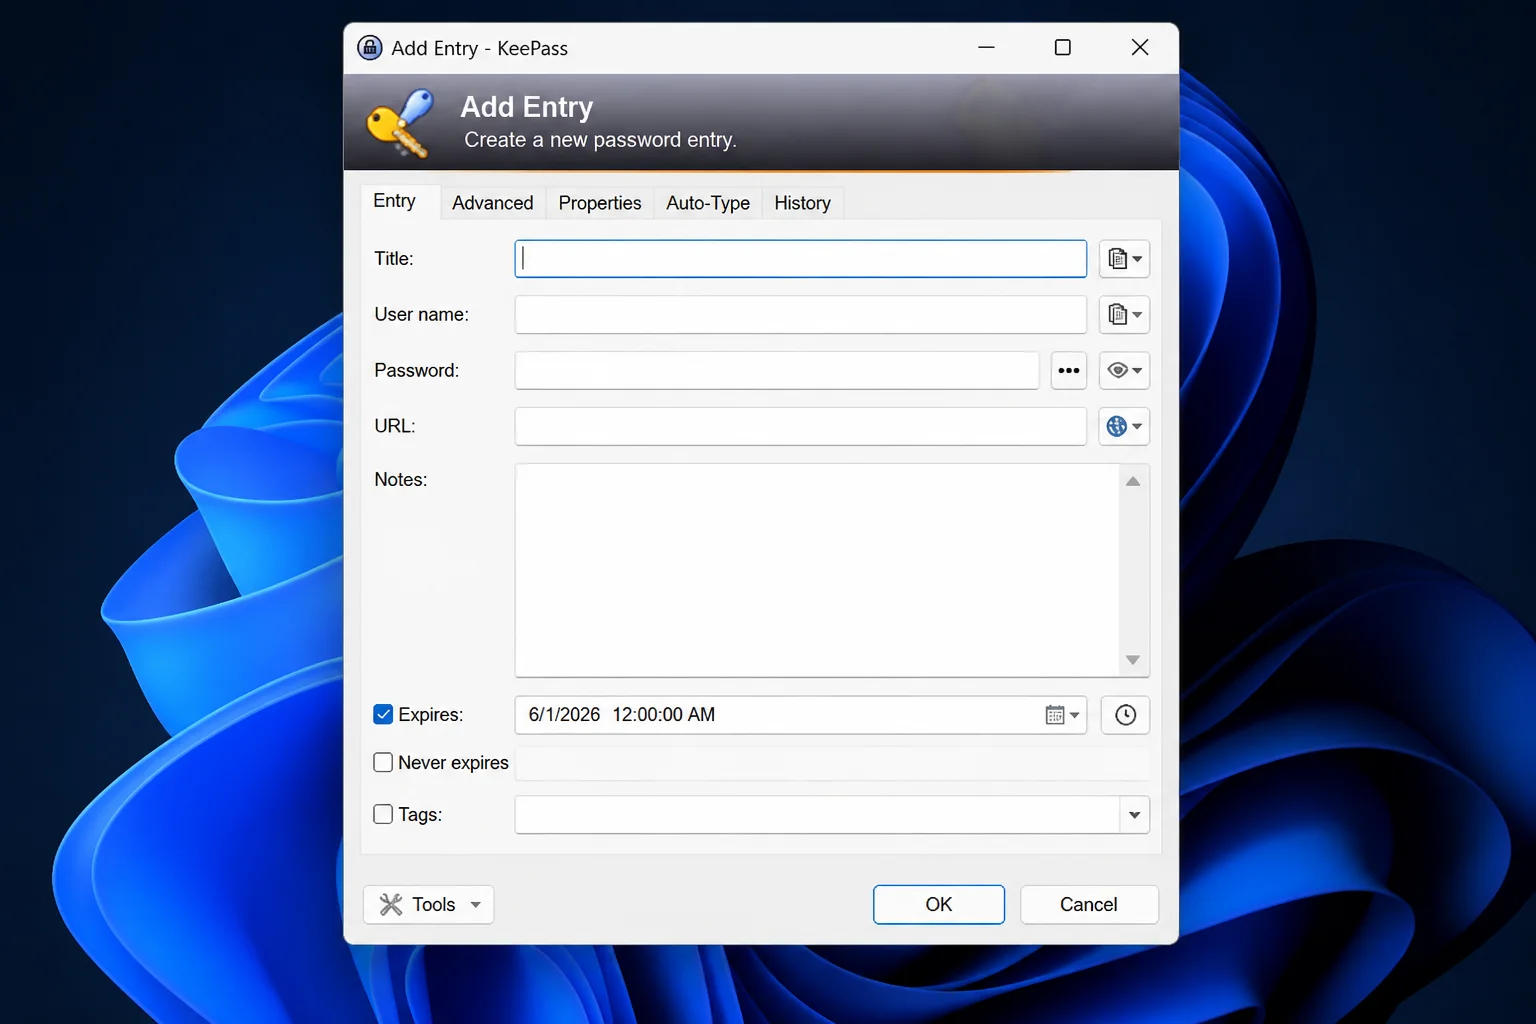
Step 3: Enter the Account Details
Fill in Title, User name, and URL. Add notes or tags if they’ll help you recognize the account later.
The title should be something obvious, such as Gmail or Electric Company.
Step 4: Generate a Unique Password
Click the password-generation button beside the password field, then select Open Password Generator.
The password generator window will appear.
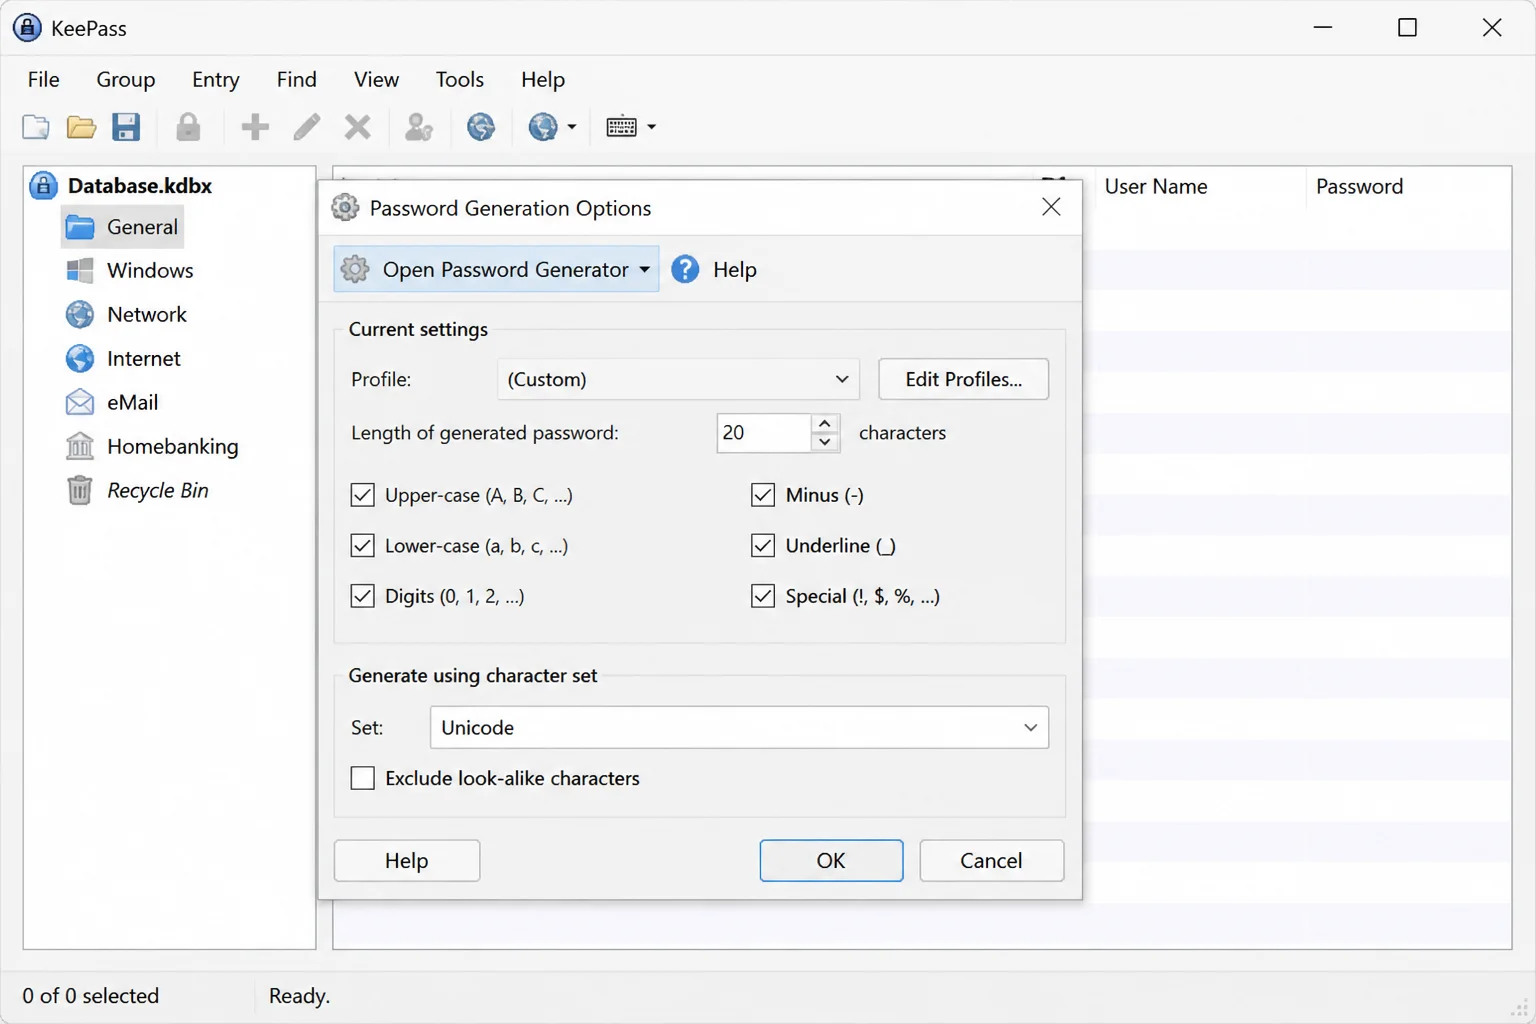
Step 5: Set the Password Length
Select the character-set generator, choose a length of at least 20 characters, and enable the character types accepted by the website.
Some websites reject certain symbols or limit password length (because apparently passwords needed paperwork). Adjust the generator only when the site requires it.
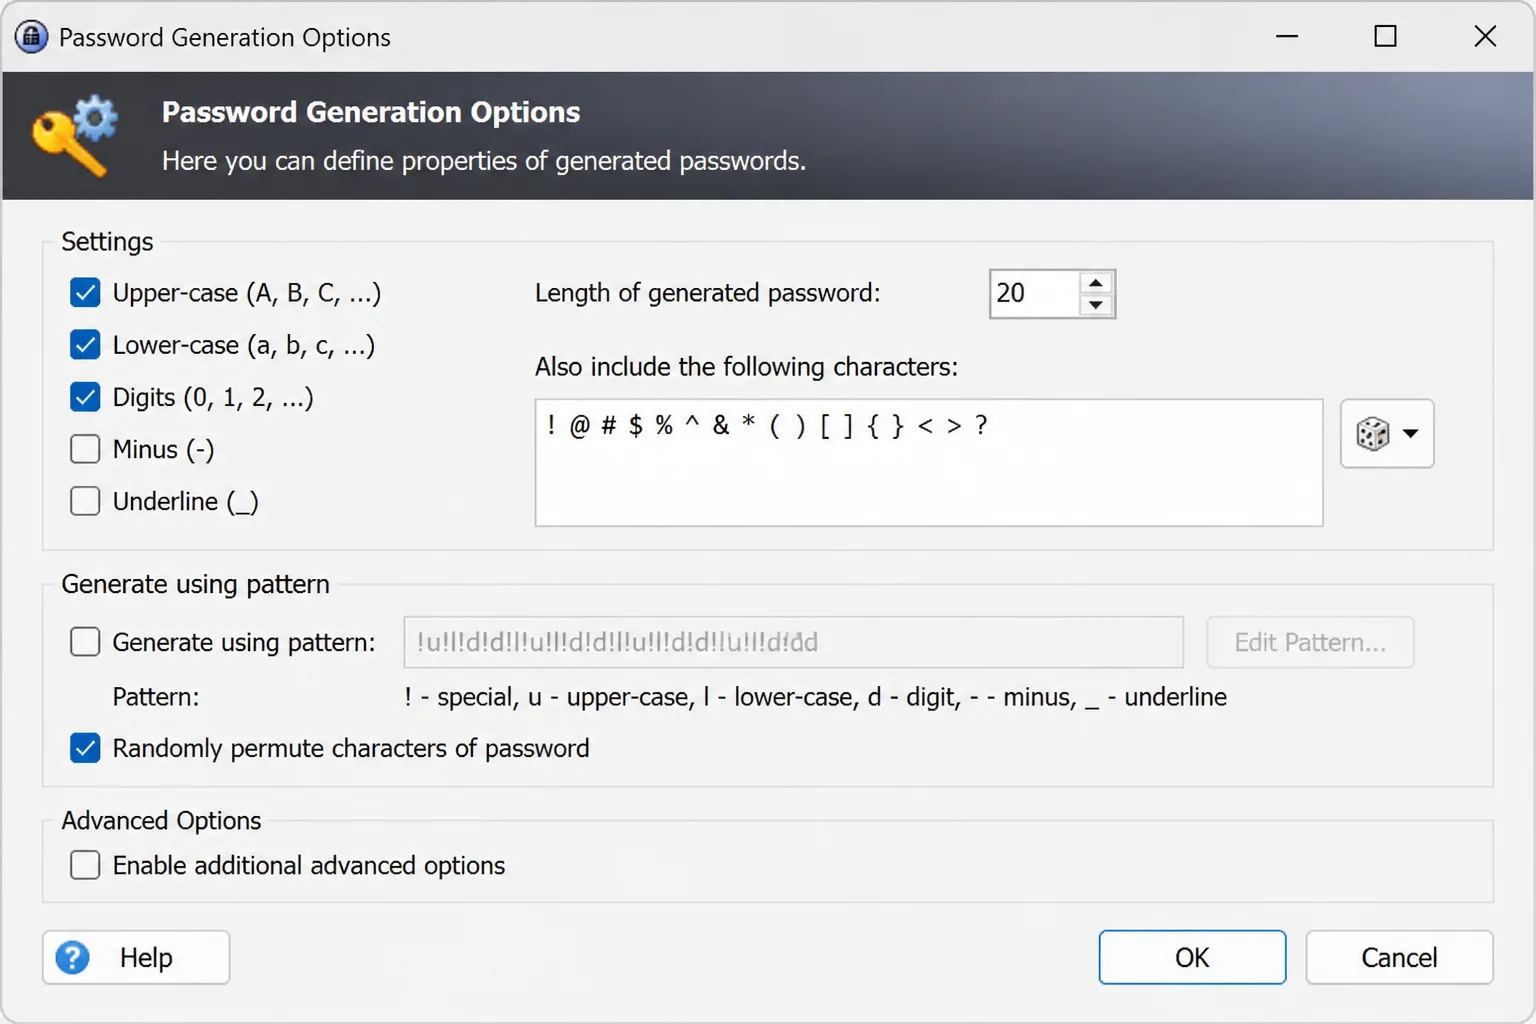
Step 6: Accept the Generated Password
Click OK to place the generated password in the entry.
The password and confirmation fields should contain matching concealed values.
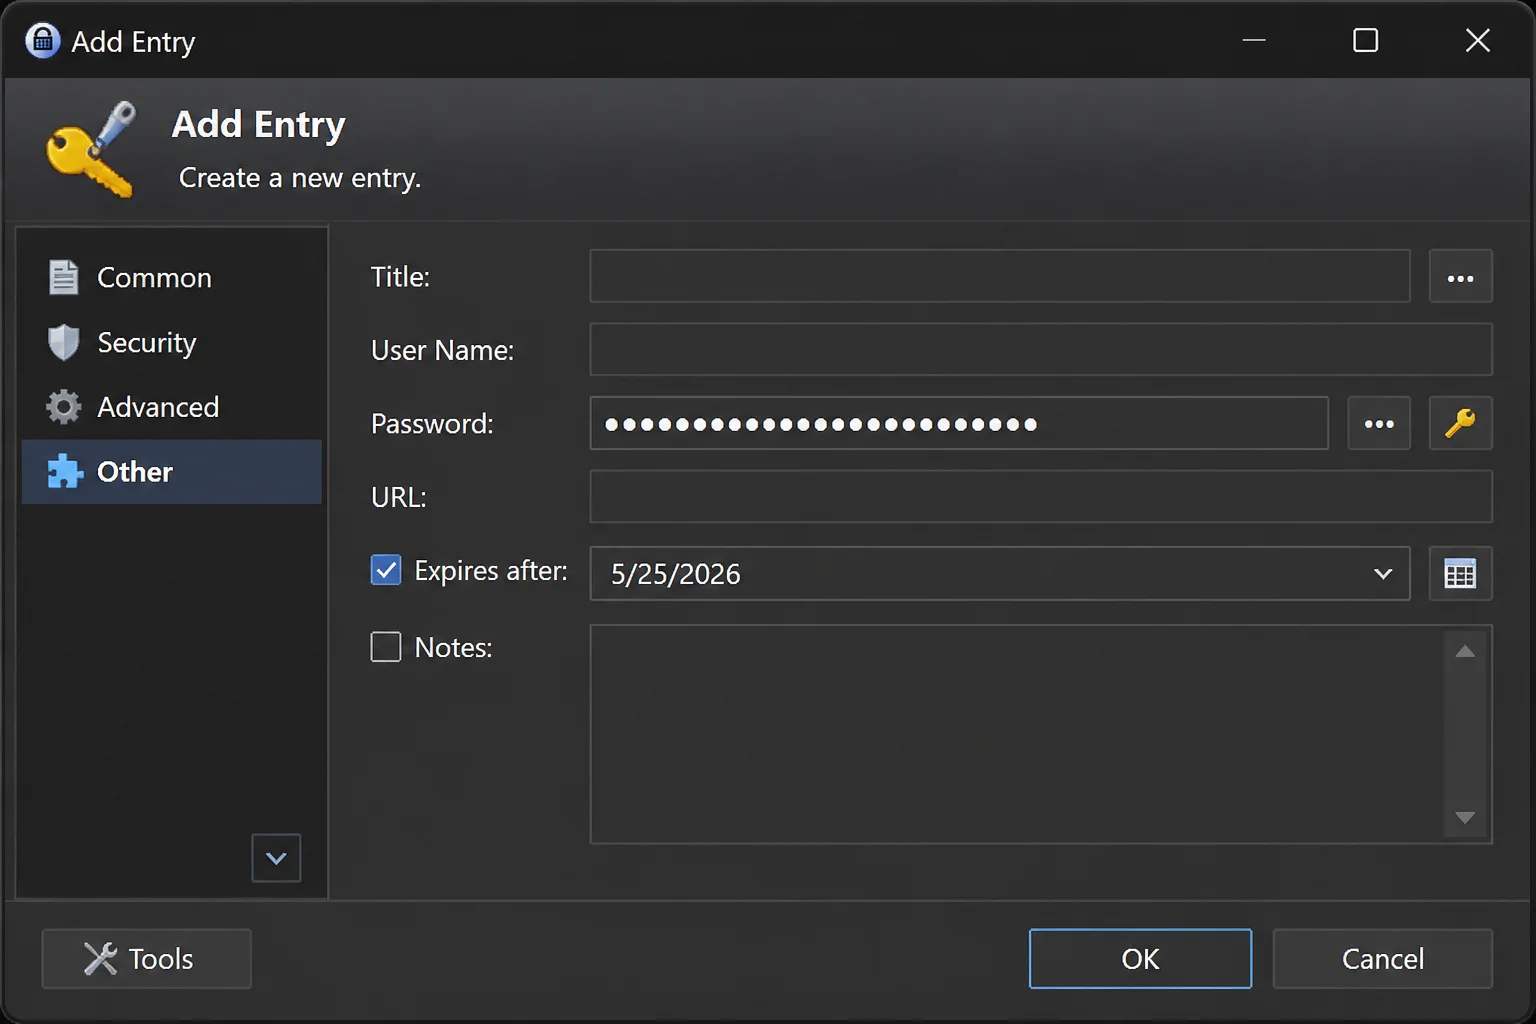
Step 7: Save the Entry
Click OK, then press Ctrl + S to save the database.
The new login should appear in the selected group.
How to Use a Saved KeePass Login
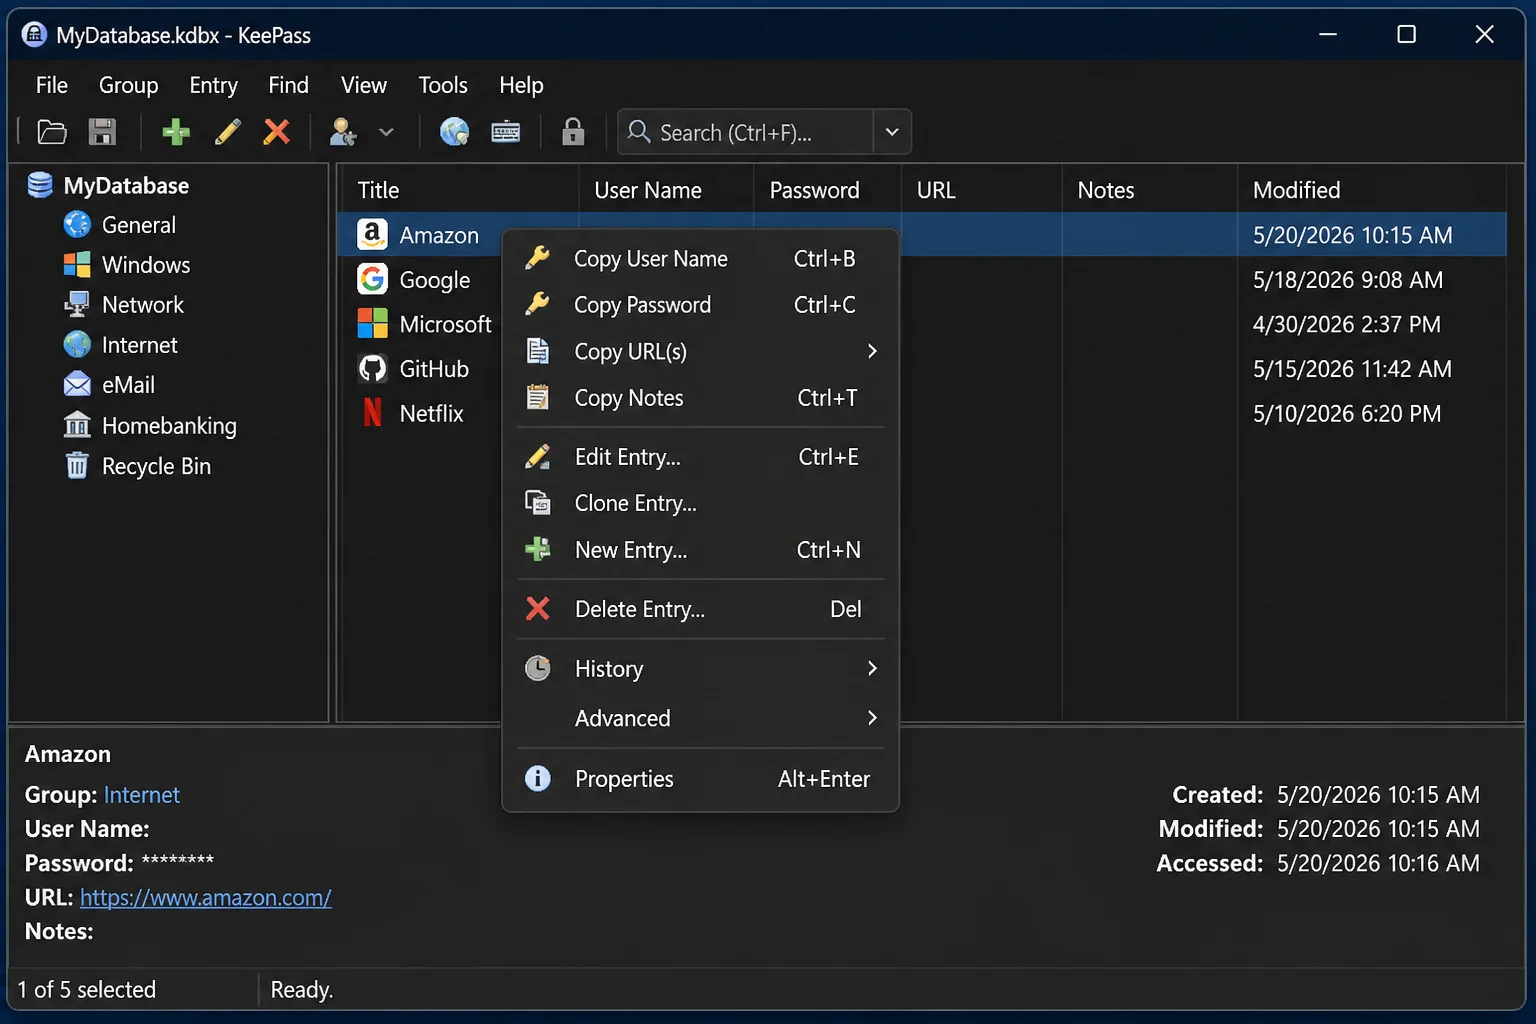
Copy and Paste a Login
- Right-click the saved entry.
- Select Copy User Name.
- Click the website’s username field and press
Ctrl + V. - Right-click the entry again and select Copy Password.
- Click the password field and press
Ctrl + V.
KeePass clears copied credentials from the clipboard after a short period. That reduces the chance of accidentally pasting your password into a chat or document.
Use Auto-Type
- Open the website’s login page.
- Click inside the login form.
- Switch to KeePass and select the matching entry.
- Press
Ctrl + Alt + A.
KeePass types the stored username and password into the active window. Check the destination carefully first, since Auto-Type sends keystrokes wherever the cursor is sitting.
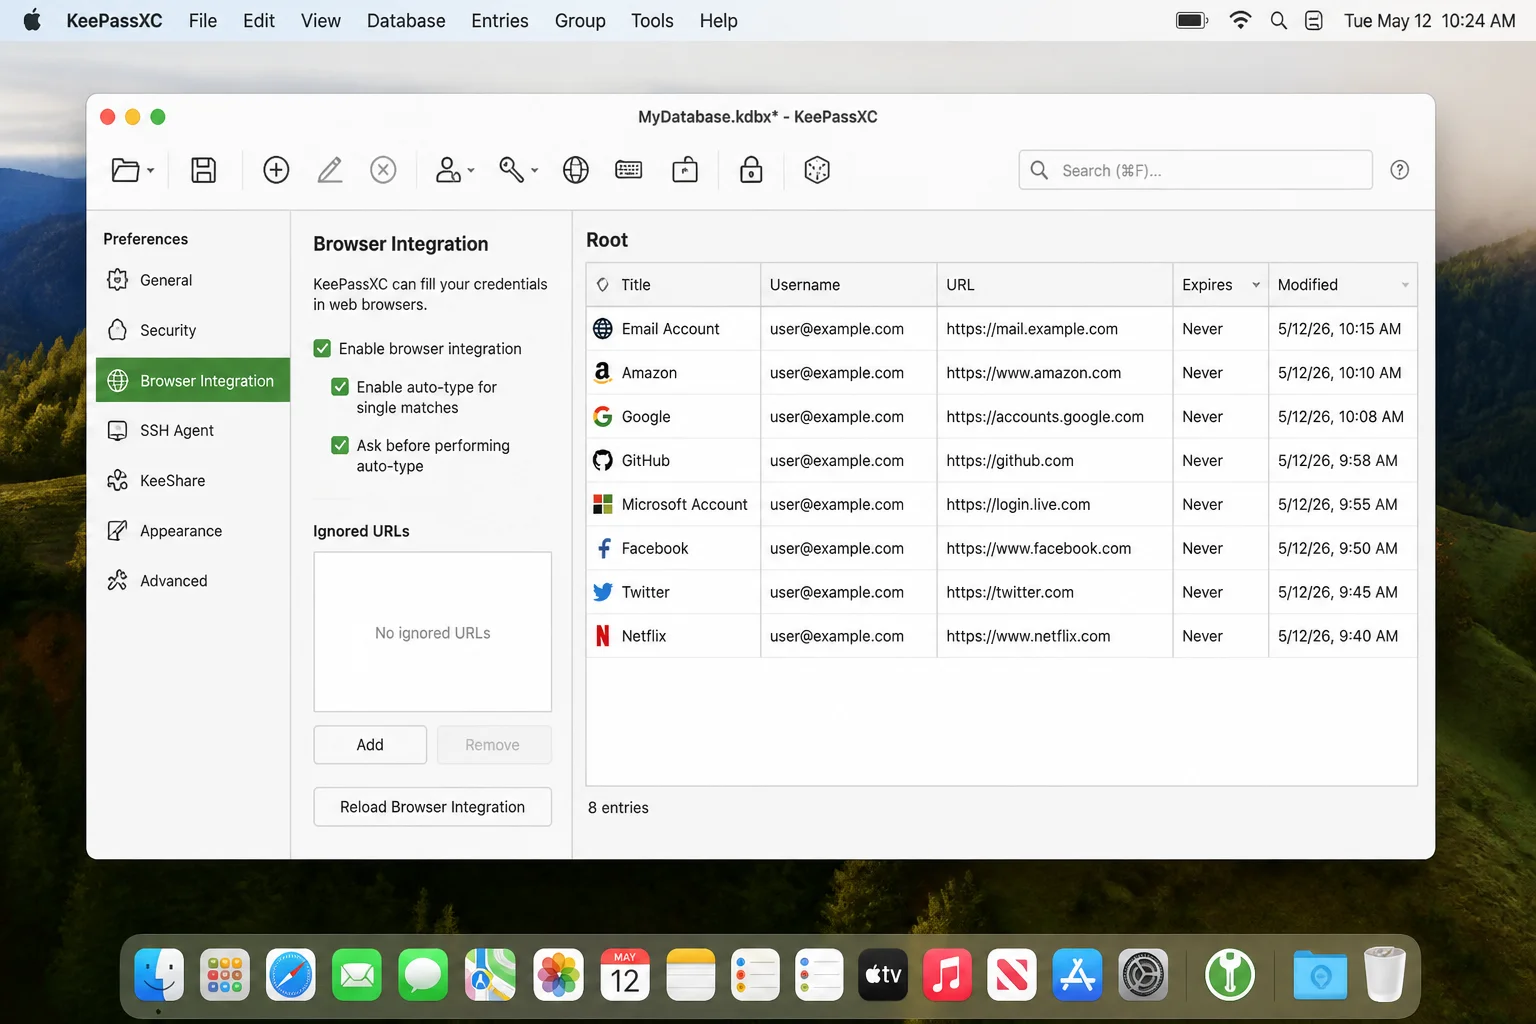
Use KeePassXC Browser Integration
KeePassXC addresses the clunky copy-and-paste routine with official extensions for current versions of Chrome, Edge, and Firefox.
- Install KeePassXC and its extension for your browser.
- Open KeePassXC and select the browser-integration settings.
- Enable integration for your browser.
- Approve the connection when the extension asks to pair with KeePassXC.
- Open a saved website and choose the suggested login.
The exact extension button and settings placement can vary by browser version. Once paired, the extension can detect login forms and fill matching credentials from your open database.
How to Use a KeePass Database on macOS
The original KeePass app focuses on Windows, so KeePassXC is the easier choice on a Mac.
- Download KeePassXC from its official website.
- Install KeePassXC and open it.
- Choose the option to open an existing database.
- Select your
.kdbxfile. - Enter the database’s master password.
- Install the KeePassXC extension if you want browser autofill.
Your groups and saved entries should appear after the database opens. Use Cmd + S to save changes and Cmd + V when pasting a copied credential.
How to Use KeePass on Android and iPhone
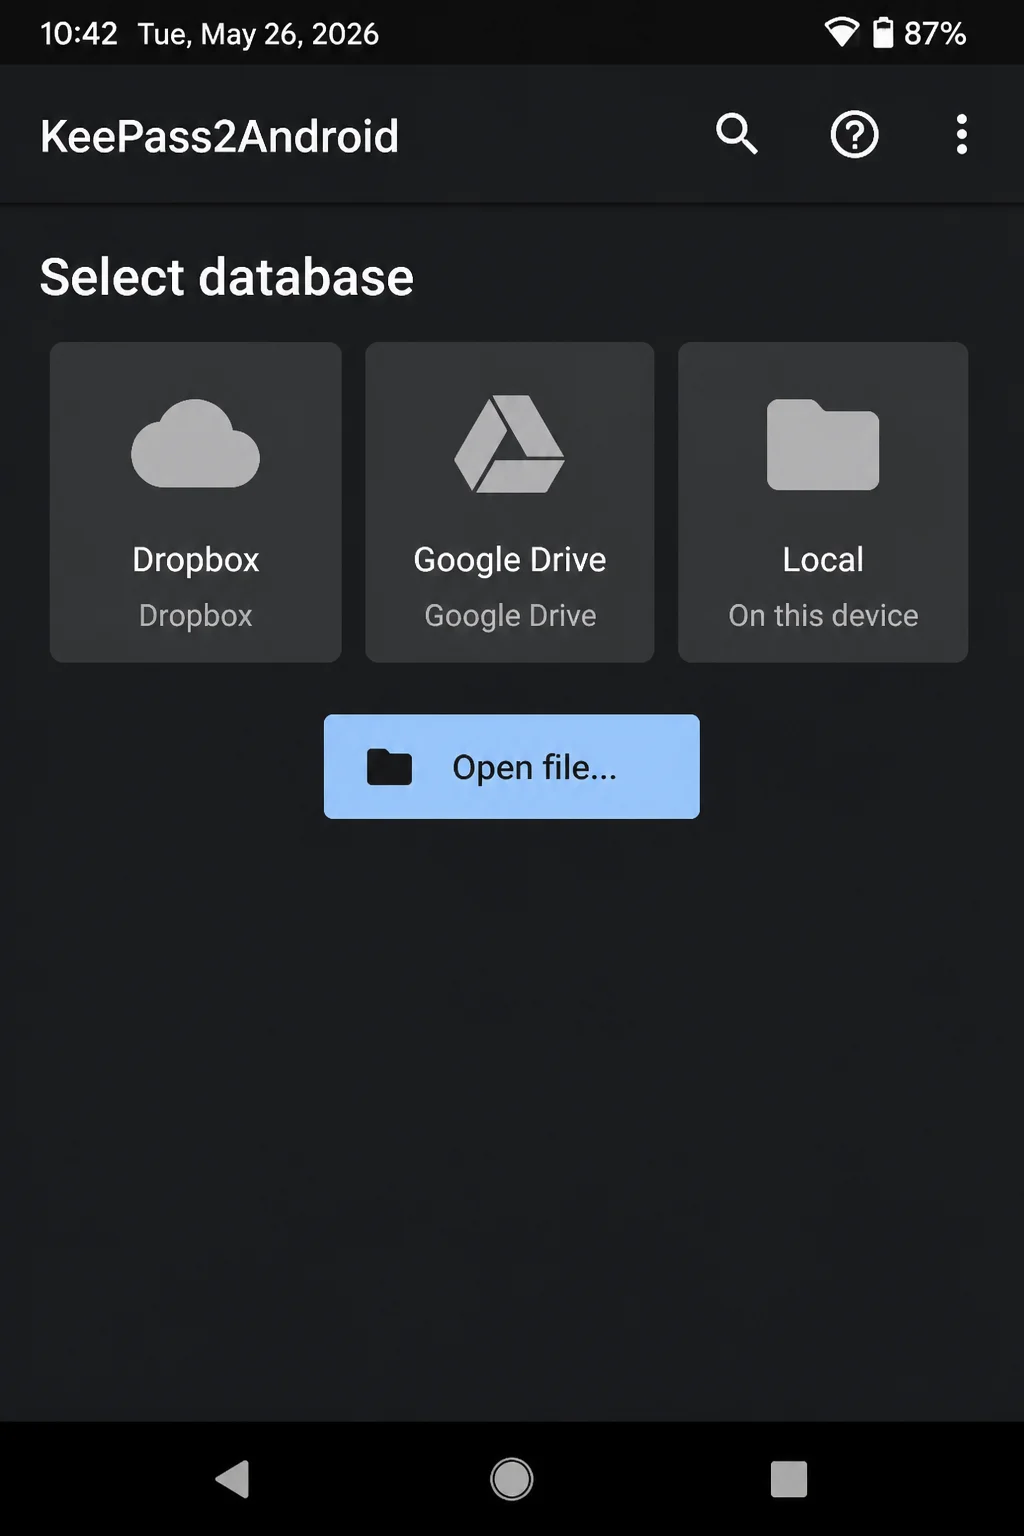
On Android
- Install Keepass2Android from Google Play.
- Open the app and choose the option to open an existing database.
- Select the
.kdbxfile from your device or connected cloud-storage provider. - Enter your master password.
- Enable Keepass2Android in Android’s autofill settings if you want logins filled inside apps and websites.
The names and locations of Android autofill settings can vary by phone manufacturer. Search Settings for autofill if you can’t find them.
On iPhone and iPad
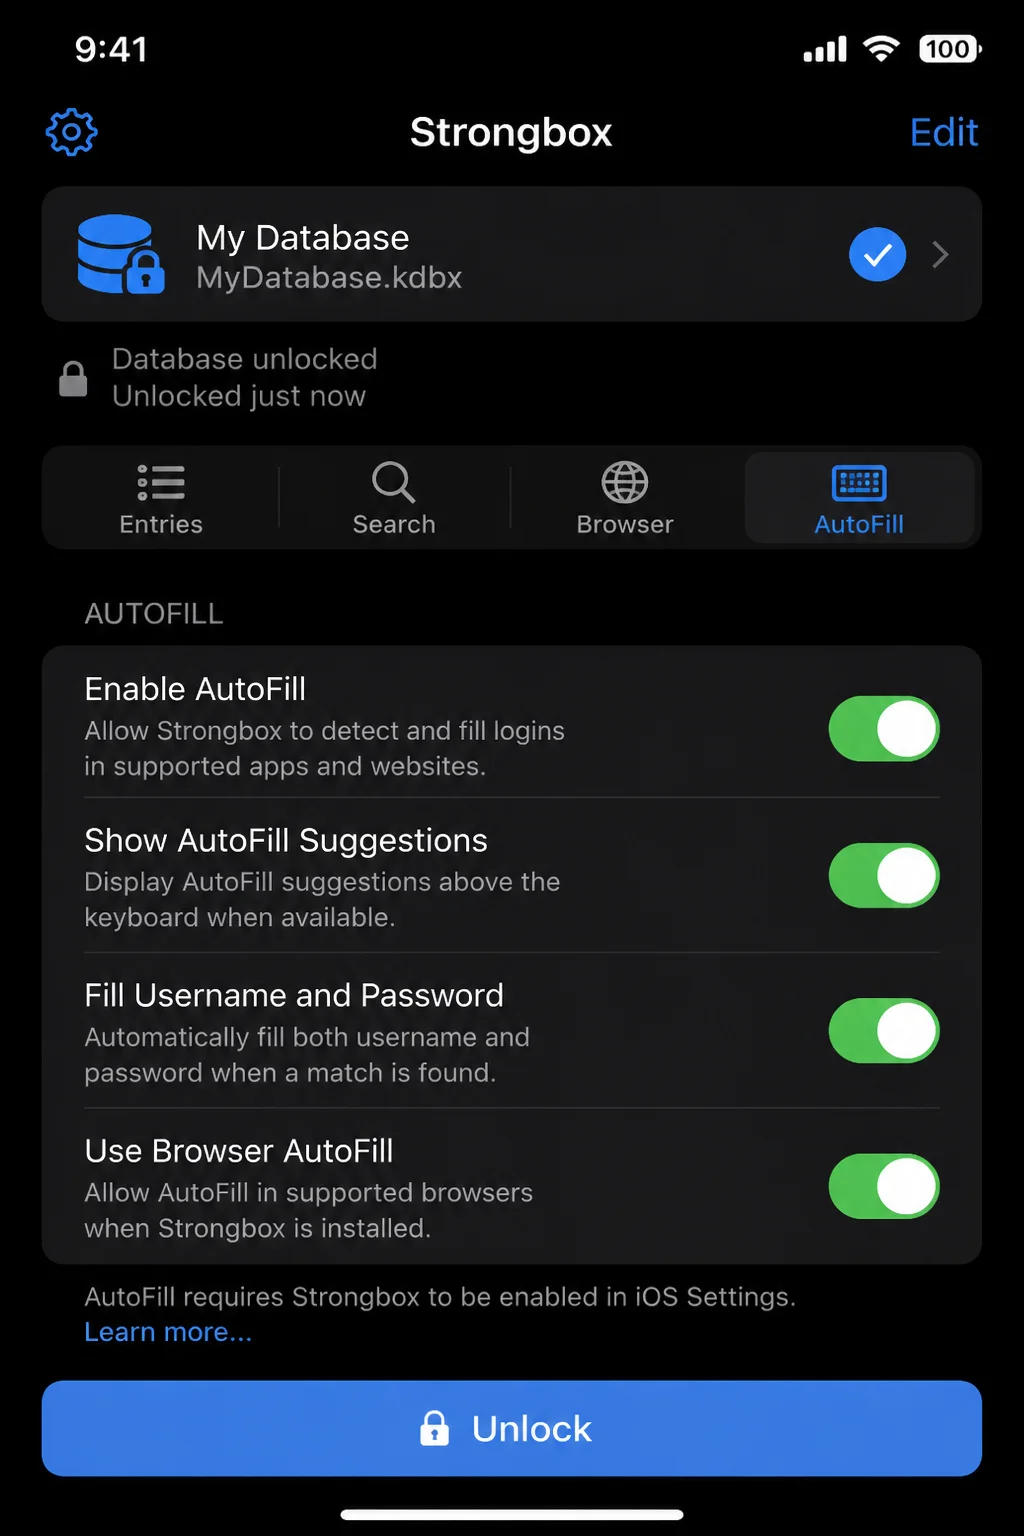
- Install a KeePass-compatible app such as Strongbox.
- Open the app and choose its option for adding an existing database.
- Select your
.kdbxfile from the Files app or a supported cloud-storage provider. - Enter the master password.
- Enable Strongbox as an AutoFill Passwords provider in iOS Settings.
You can enable Face ID or Touch ID inside the app for quicker access. Keep your master password somewhere safe because biometric access doesn’t replace it.
How to Sync KeePass Across Devices Safely
A .kdbx file is encrypted, so you can place it in a synced folder from a reputable cloud-storage provider. Each compatible app opens the same file using your master password.
- Close or save the database before moving it.
- Place the
.kdbxfile in your chosen synced folder. - Wait for the upload to finish.
- Open that file from KeePassXC or a compatible mobile app.
- Save a separate backup before making changes from another device.
Avoid editing the database on two devices at the same time. You could create conflicting copies and end up wondering which file contains the latest password (a particularly unfun guessing game).
Protect every connected device with a screen lock and current security updates. Don’t share the database file with other people.
Back Up Your KeePass Database
The database has no recovery backdoor. A forgotten master password, damaged file, or missing backup can lock you out permanently.
Keep at least one separate copy of the .kdbx file on an external drive. A second encrypted cloud copy gives you protection if the computer and drive are lost together.
Test the backup occasionally:
- Copy the backup to a different folder or device.
- Open it with KeePass or KeePassXC.
- Enter your master password.
- Check that a few recent entries appear.
- Close the test copy without changing it.
A backup you’ve never opened is a bit like a spare key you’ve never tried. It probably works, but finding out during an emergency is lousy timing.
Add 2FA and Passkeys Where Available
A strong password protects the first door. Two-factor authentication, or 2FA, adds another check, such as a temporary code or hardware security key.
Use password managers to generate and store unique, complex passwords for each account. Enable 2FA on email, banking, cloud storage, and other important accounts. KeePassXC can store time-based one-time password details, commonly called TOTP, though keeping the second factor in a separate authenticator provides more separation.
Passkeys let you sign in with a trusted device, fingerprint, face scan, or device PIN. Use them when a service offers them, but keep recovery methods updated. KeePassXC supports passkey-related workflows, while browsers and operating systems commonly manage passkeys too.
Tips and Troubleshooting
KeePass Won’t Open the Database
Problem: KeePass says the master key is invalid
Check that you selected the right .kdbx file and typed the exact master password. Make sure Caps Lock is off and confirm your keyboard layout hasn’t changed.
If you created the database with a key file, you need that same key file every time. Losing either part locks you out.
The Database Has Conflicting Copies
Problem: Your synced folder contains two versions of the database
Stop editing both files. Open each copy separately, compare their recent entries, and keep backups of both until you’ve moved the missing entries into one database.
Auto-Type Fills the Wrong Window
Problem: KeePass types credentials into the wrong app or field
Click the correct login form immediately before running Auto-Type. If it still sends the wrong sequence, copy and paste the username and password instead.
Browser Autofill Doesn’t Work
Problem: The KeePassXC extension can’t connect
Open KeePassXC, confirm the database is unlocked, and check that browser integration is enabled for your browser. Pair the extension again if it no longer recognizes the app.
KeePass Reports an Available Update
KeePass checks for updates but doesn’t install them automatically. Download current releases from the official KeePass site and avoid plugin downloads from unfamiliar websites.
Third-party plugins run inside your password manager, so be picky. I’d skip a plugin unless it’s well maintained and you genuinely need what it adds.
Alternatives to KeePass
KeePass gives you local control, but that control comes with chores: syncing, backups, and manual updates. If you’d rather have a service handle cross-device syncing, consider Bitwarden, 1Password, Proton Pass, Dashlane, or RoboForm.
KeePassXC sits in the middle. It keeps the KeePass database model while adding a friendlier interface and better browser integration.
Wrapping Up
KeePass solves the password-reuse problem with one encrypted database and a generator that handles those impossible-to-remember account passwords. Once you’ve created the database, added a backup, and connected your other devices, you’re no longer dealing with scattered logins or recycled passwords.
I like KeePass for the control it gives you, but it asks more of you than a cloud-based manager. If you keep the app updated and treat the .kdbx file like an important document, it’s still a dependable way to fix your password workflow in 2026.