
Nothing’s more frustrating than trying to delete a simple folder and getting smacked with “Cannot delete folder. You need permission to perform this action.” Even when you’re the administrator! This annoying Windows error has been plaguing users across Windows 10, 11, and even Server editions, and it usually boils down to two culprits: wonky permissions or files that are locked by running processes.
The good news? You can fix this without becoming a Windows expert. In this guide, you’ll learn four proven methods to reclaim control over your stubborn folders, starting with the simplest fixes and working up to the nuclear options.
What Causes the “Cannot Delete Folder” Error?
This error happens when Windows thinks you don’t have the right to delete something, even if you created it. The most common causes are:
- Ownership Issues: The folder might be owned by “TrustedInstaller” (Windows system account) or another user
- Broken Permissions: NTFS security settings got corrupted or misconfigured
- Files in Use: A program or Windows process is holding onto files inside the folder
- Leftover Junk: Update remnants or app leftovers that Windows can’t clean up properly
Method 1: Take Ownership (Works for Most Cases)
This is your best first move. Taking ownership tells Windows “I’m the boss of this folder now” and usually solves permission headaches.
Step 1: Access Folder Properties
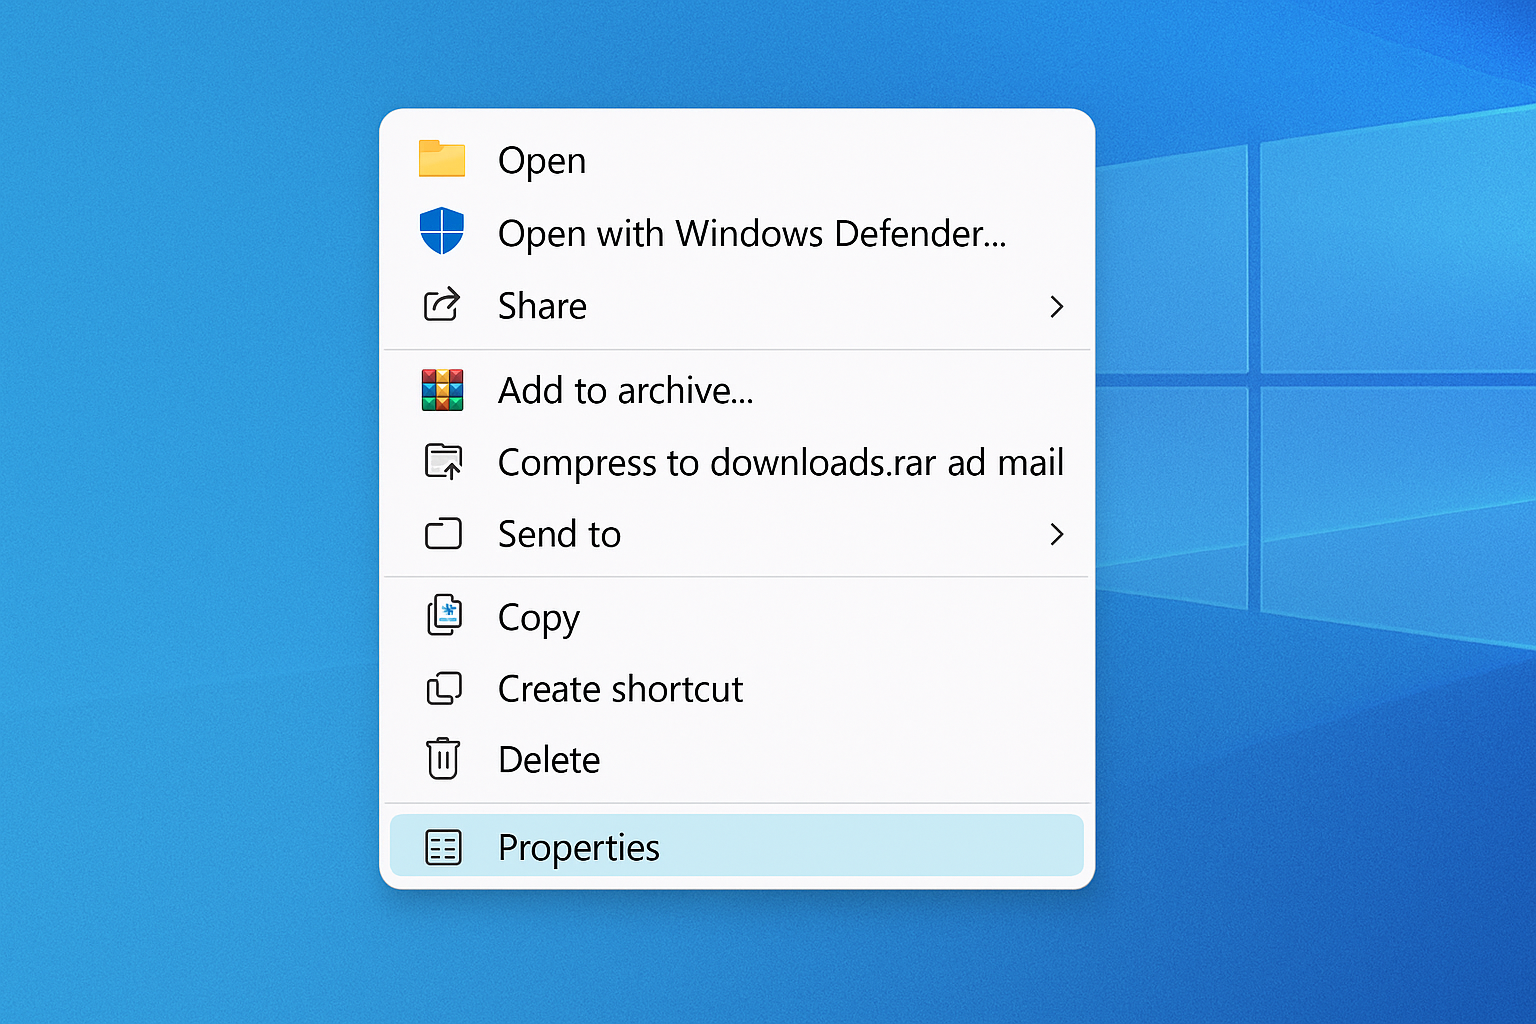
Right-click the stubborn folder and select Properties.
Step 2: Open Advanced Security Settings
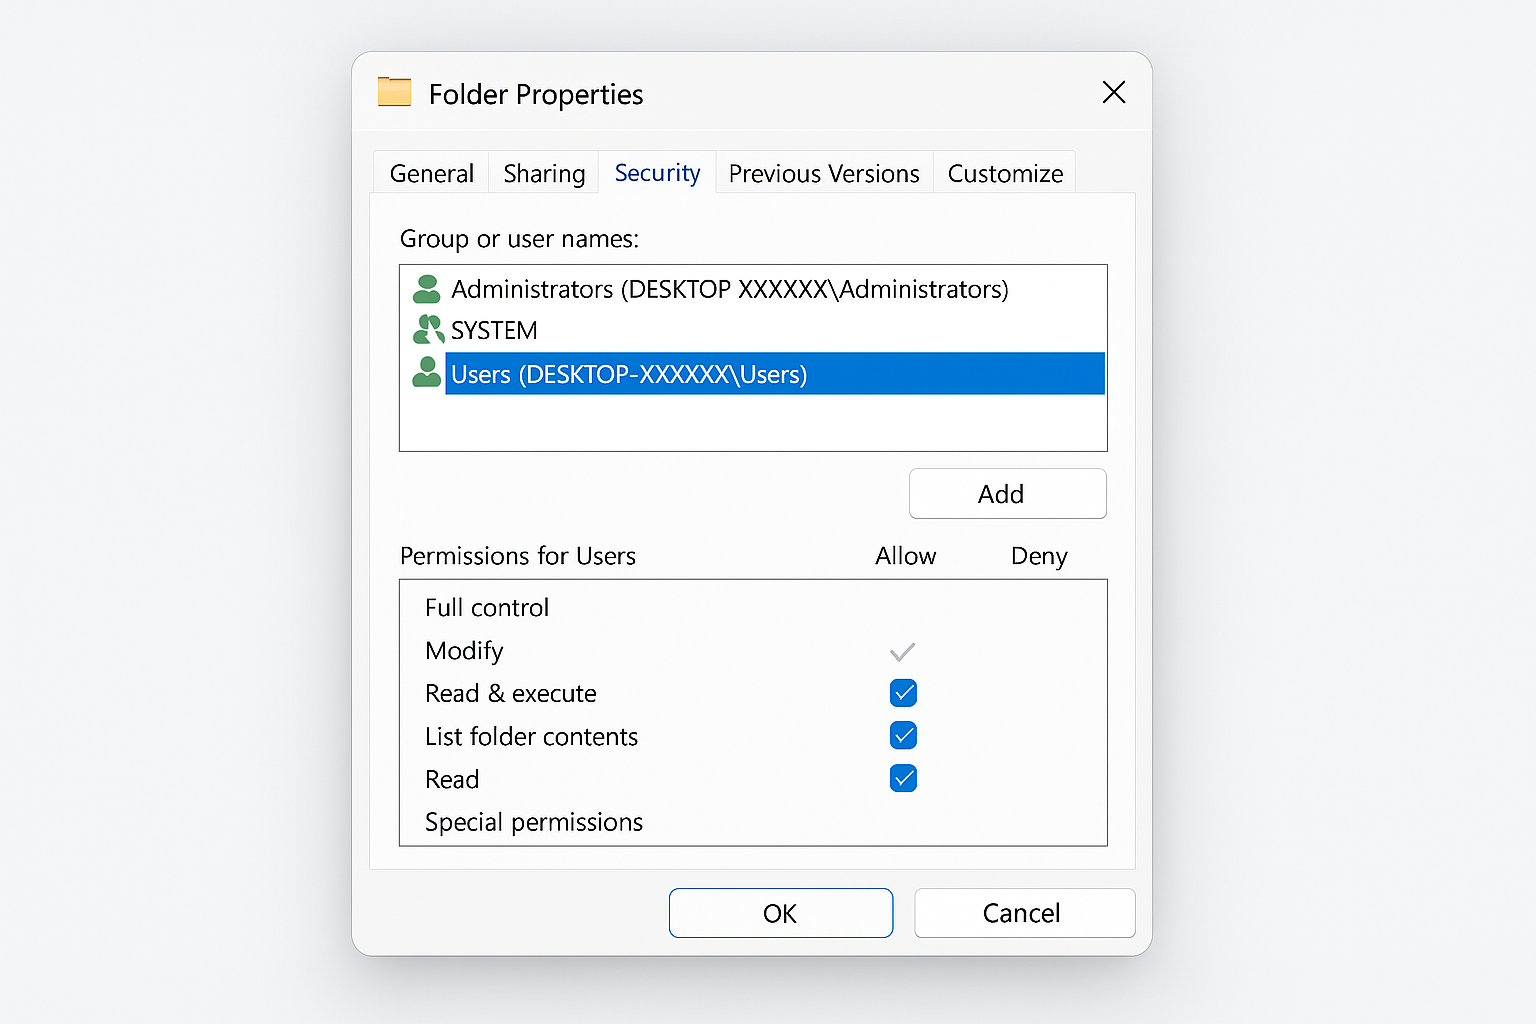
Click the Security tab, then click the Advanced button at the bottom.
Step 3: Change Ownership
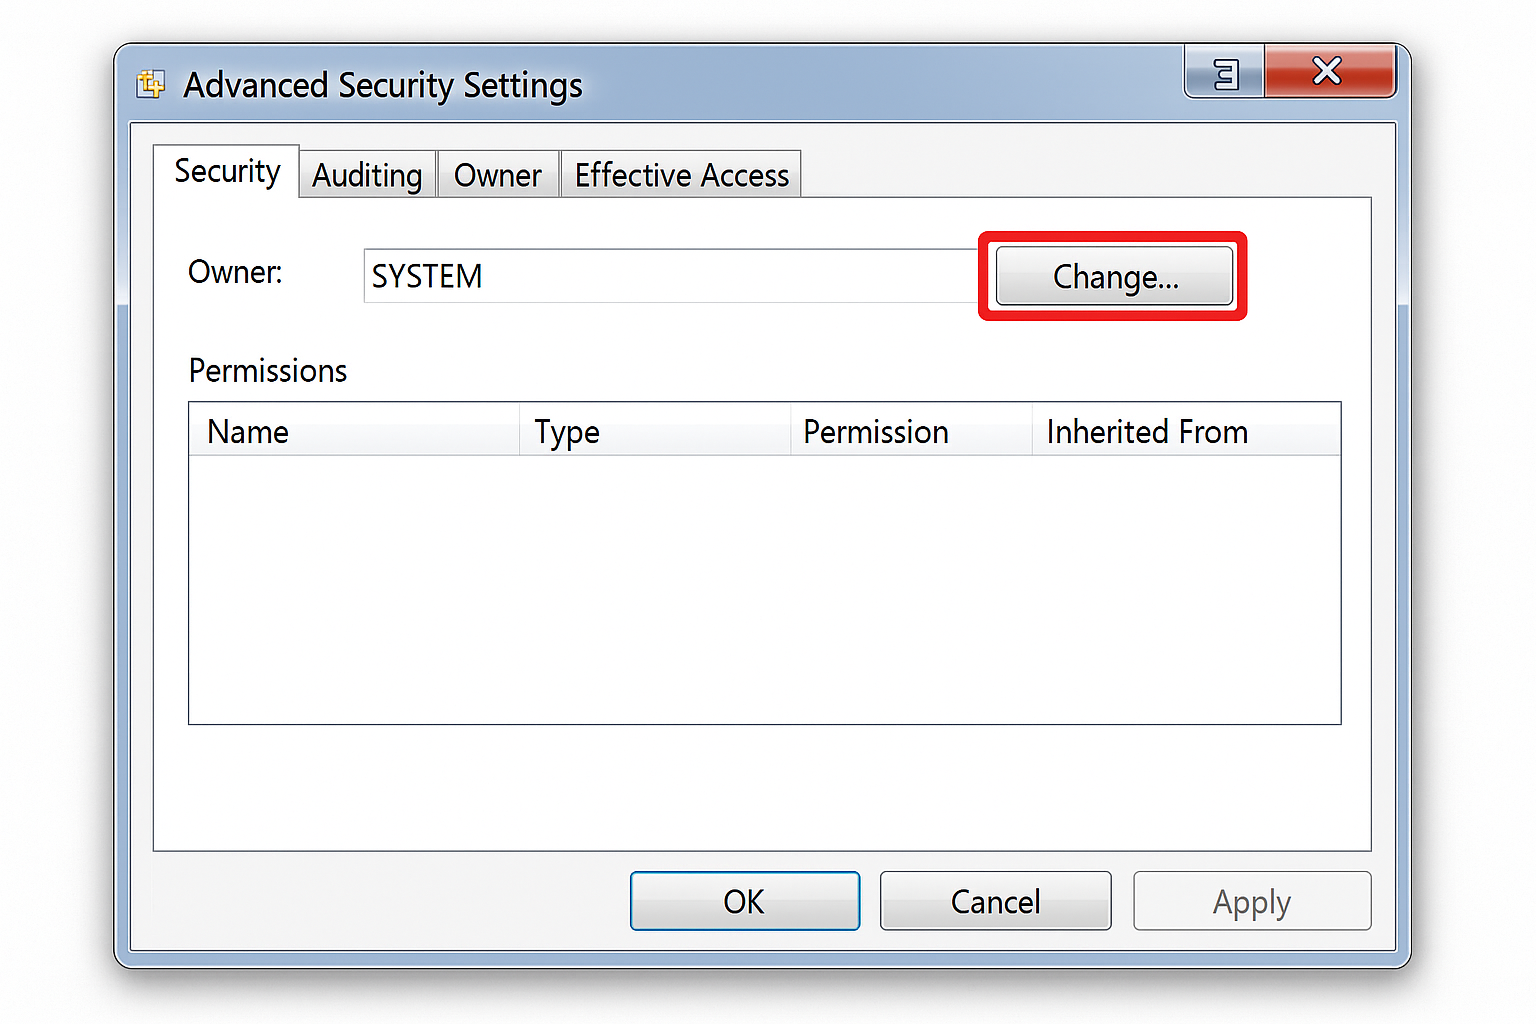
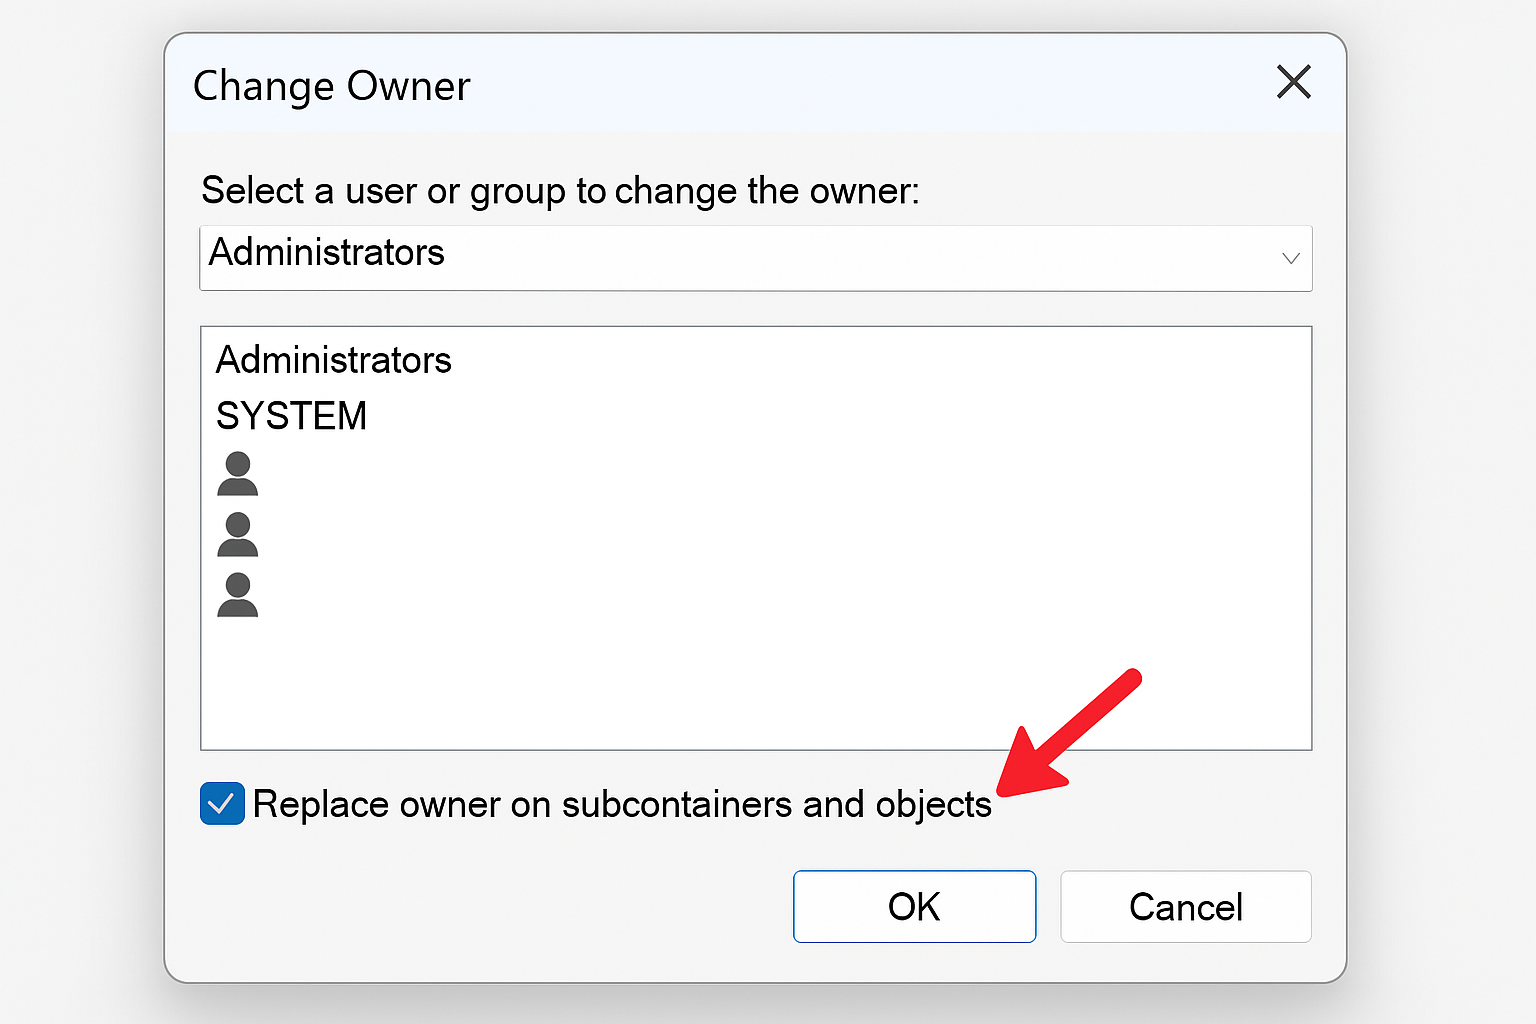
Next to “Owner,” click Change. In the box that appears, type your username (or “Administrators”) and click Check Names. Windows will format it properly for you. Click OK.
Step 4: Apply to All Subfolders
Check the box that says Replace owner on subcontainers and objects, then click OK. This makes sure you own everything inside the folder too.
Step 5: Grant Full Control
Back in the Security tab, click Edit. Select your username from the list and check Full control under “Allow.” Click OK and then Apply.
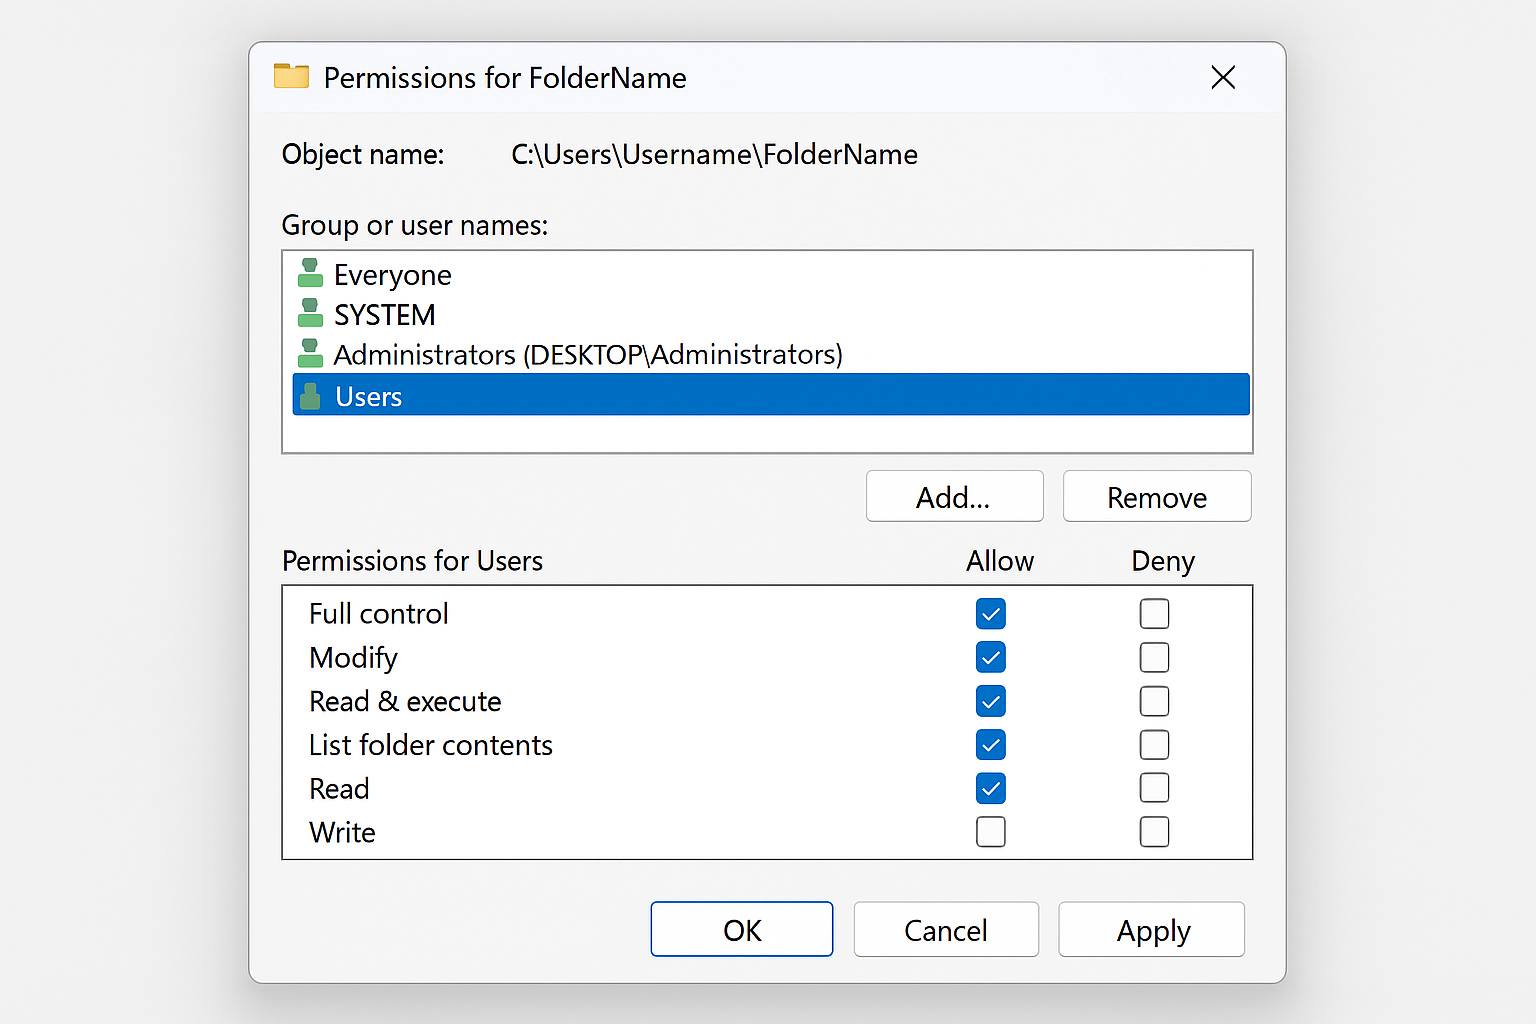
Now try deleting the folder normally. This method works for about 80% of permission issues.
Method 2: Command Prompt Power User Fix
When the GUI fails you, the command line rarely does. This method forces ownership and permissions through Windows’ built-in tools.
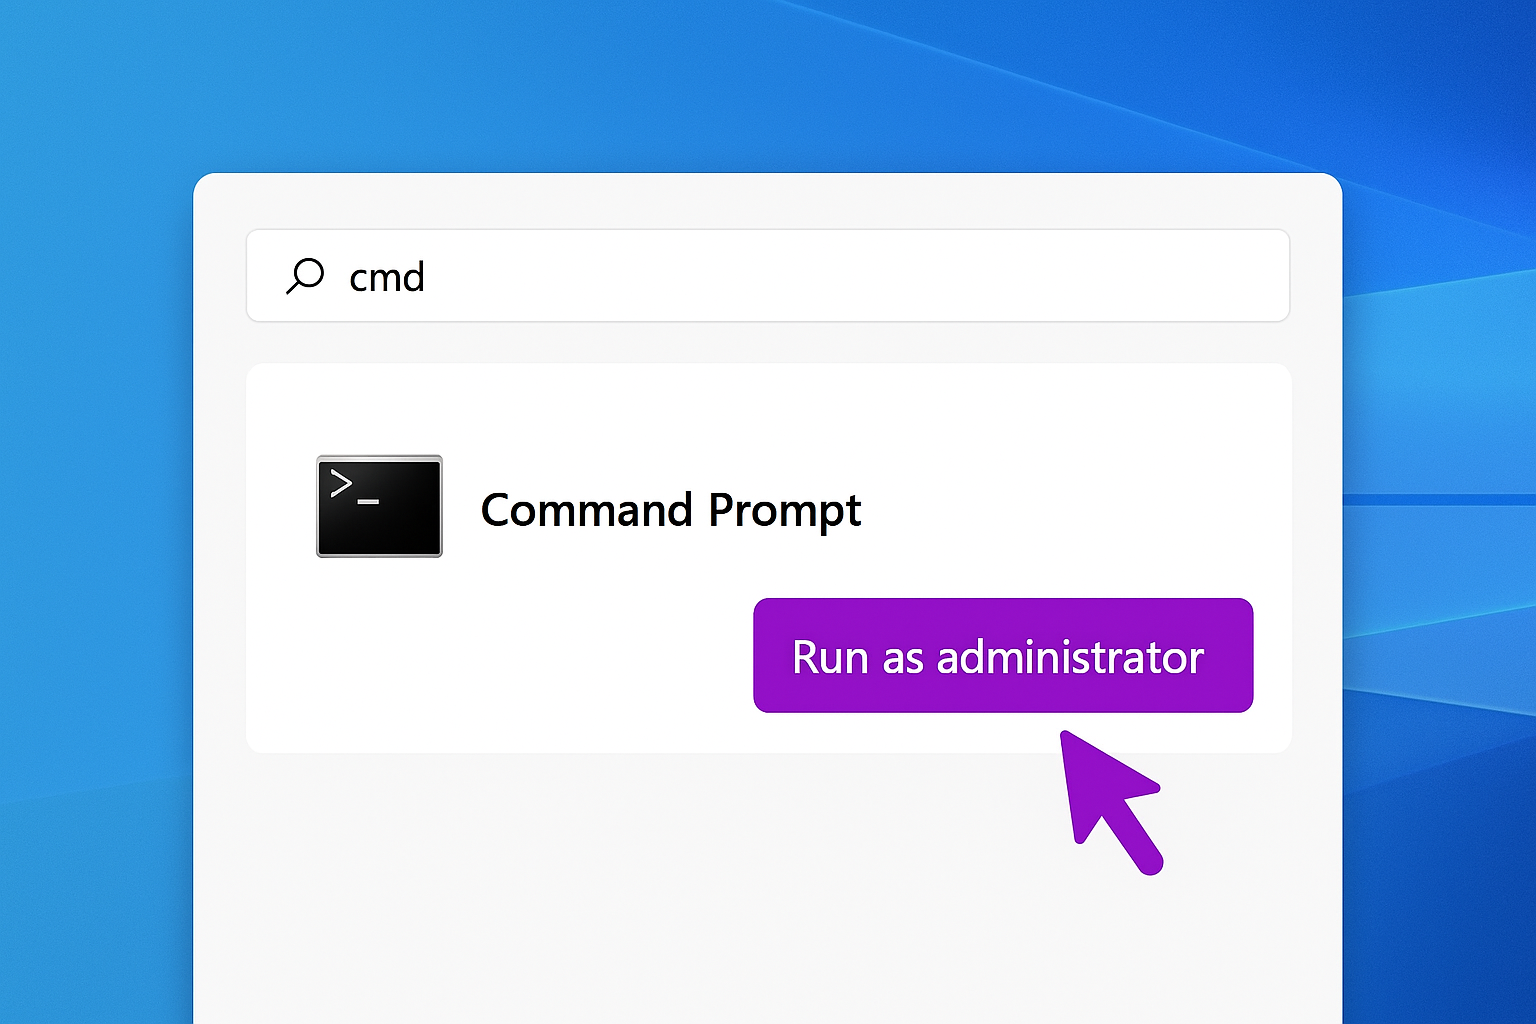
Step 1: Open Command Prompt as Administrator
Press Win + S, type “cmd,” then click Run as administrator.
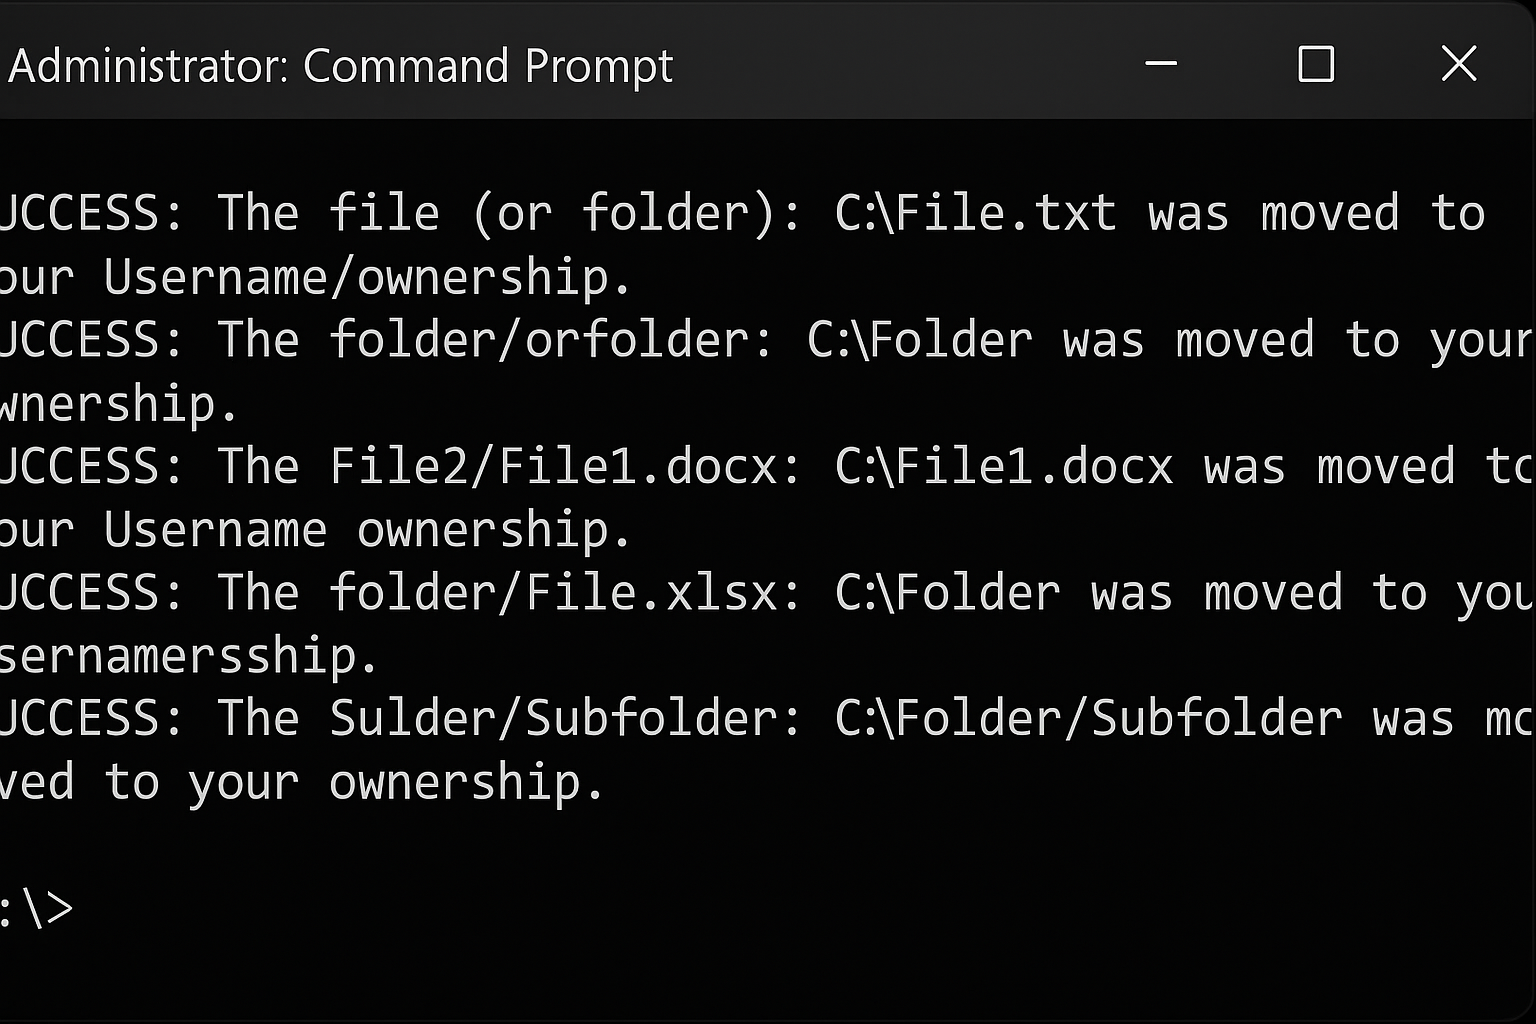
Step 2: Take Ownership via Command Line
Type this command (replace the path with your actual folder path):
takeown /F "C:\path\to\your\folder" /R /D Y
The /R flag makes it work on all subfolders, and /D Y automatically answers “Yes” to prompts.
Step 3: Grant Full Permissions
Now run this command to give administrators full control:
icacls "C:\path\to\your\folder" /grant administrators:F /T
Step 4: Force Delete
Finally, delete the folder with:
rmdir /S /Q "C:\path\to\your\folder"
The /S removes all files and subfolders, while /Q skips confirmation prompts.
Method 3: Safe Mode (When Files Are Locked)
Sometimes Windows processes are holding onto files like a dog with a bone. Safe Mode loads Windows with minimal processes, often freeing up those locked files.
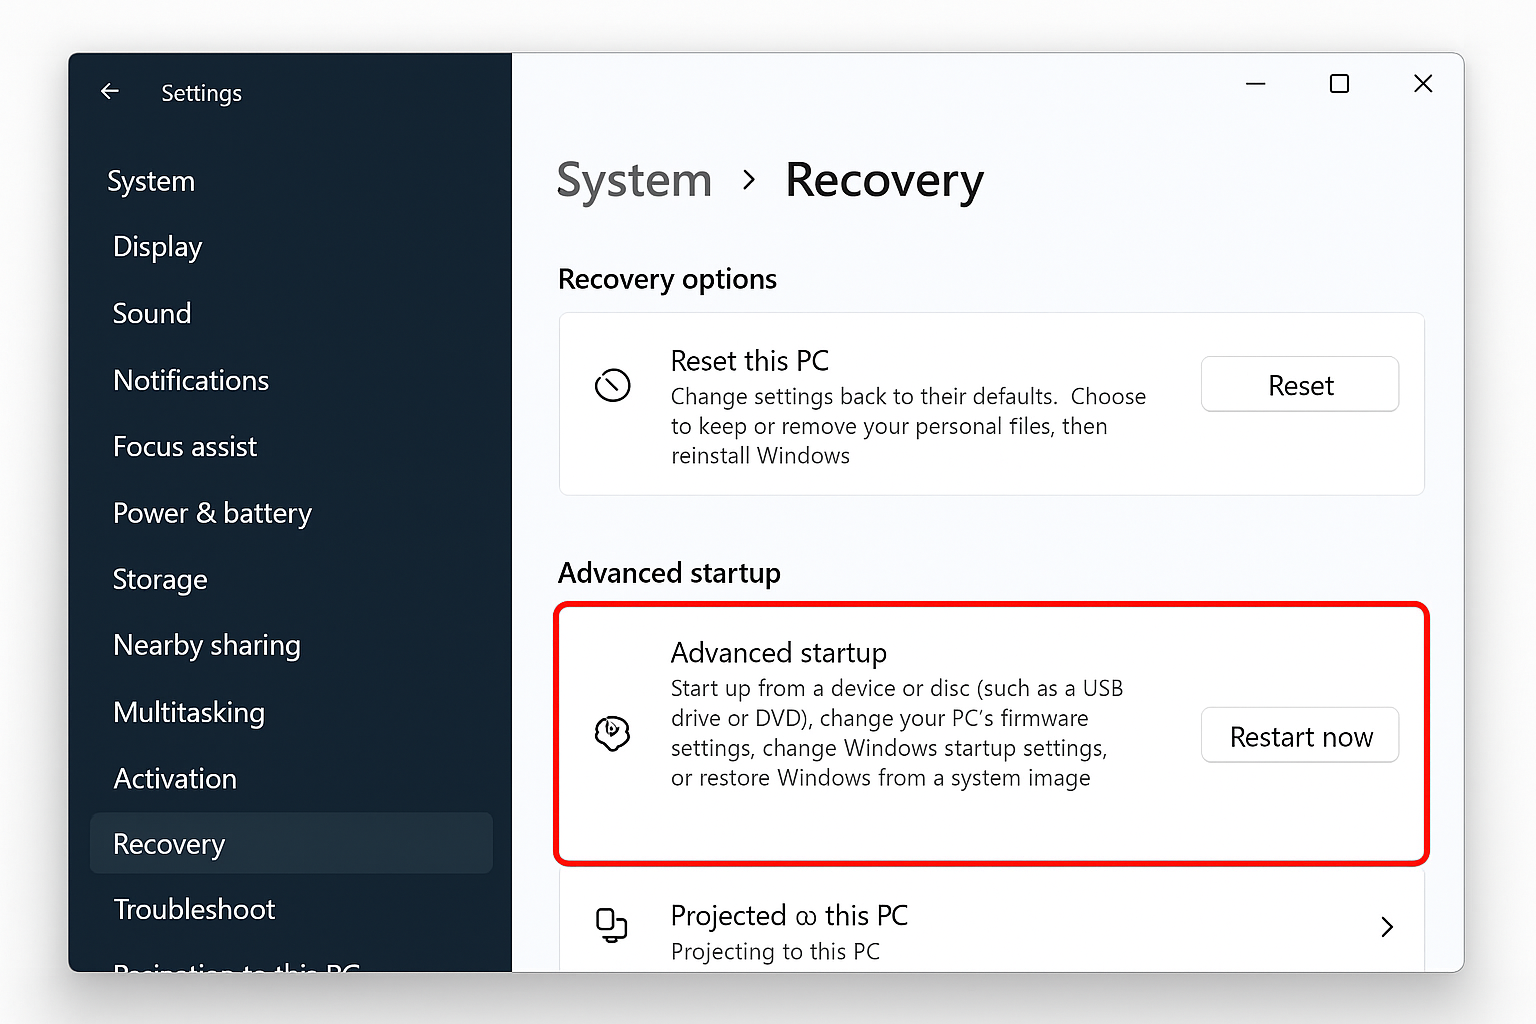
Step 1: Boot into Safe Mode
Go to Settings > System > Recovery > Advanced startup > Restart now.
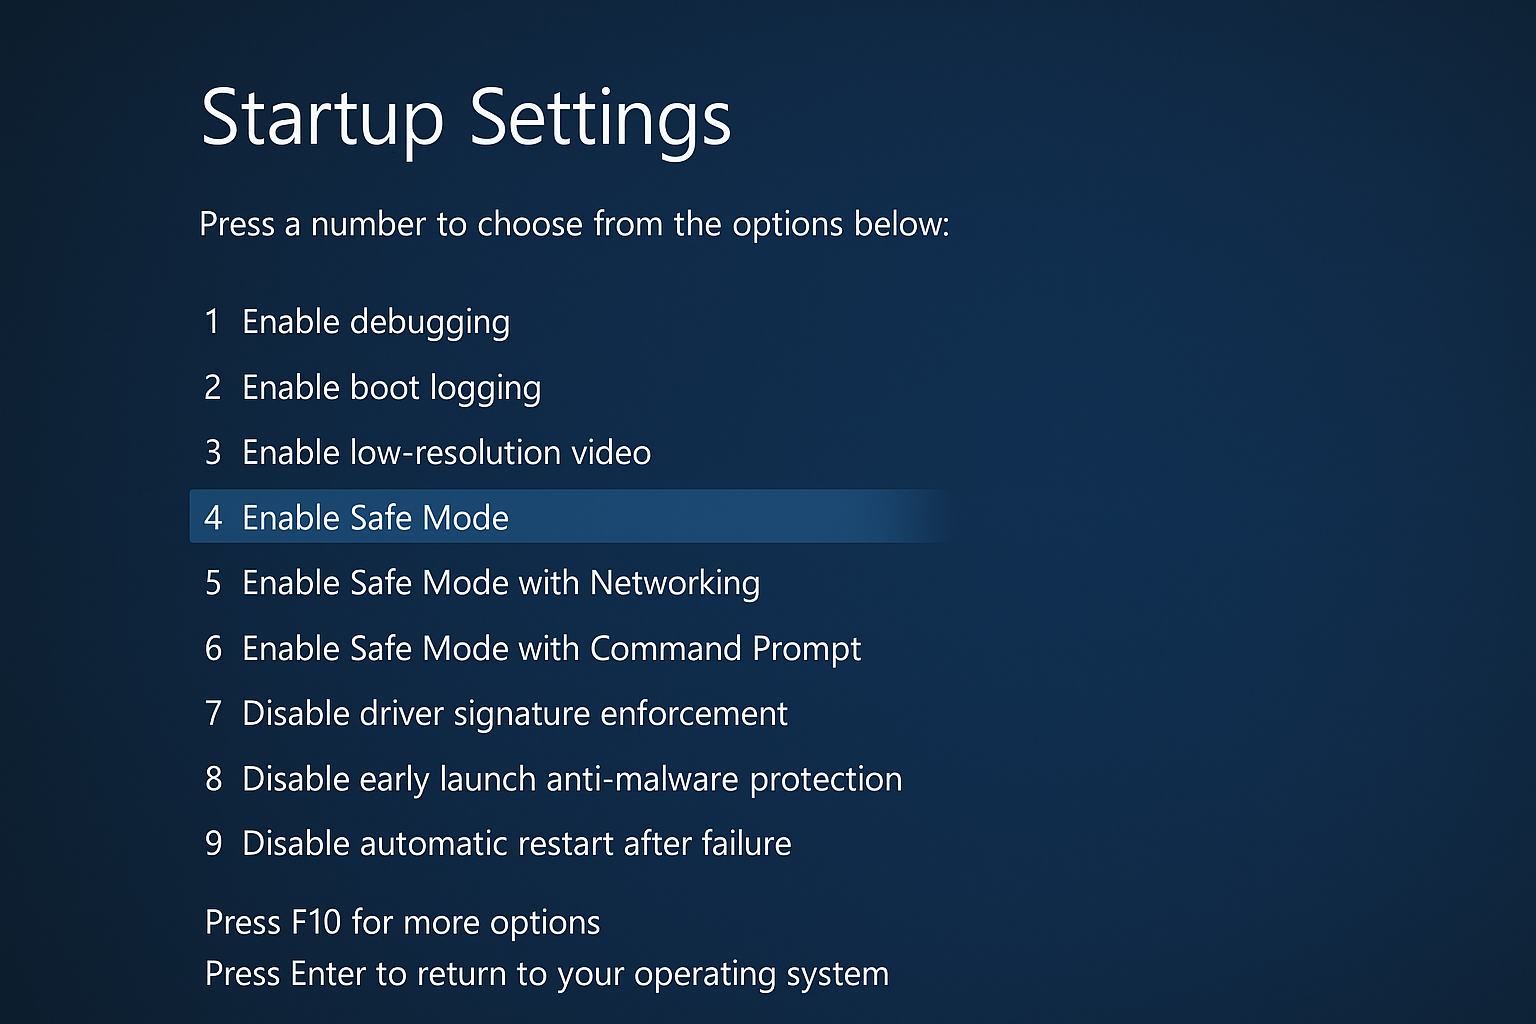
Step 2: Navigate the Boot Menu
Select Troubleshoot > Advanced options > Startup Settings > Restart. When the menu appears, press 4 to select Safe Mode.
Step 3: Delete in Safe Mode
Once Windows loads in Safe Mode, navigate to your problem folder and try deleting it normally through File Explorer. Most locked files will be free to delete here.
Method 4: Third-Party Unlocker Tools
When all else fails, specialized tools can identify and unlock stubborn files. Use these if you’re comfortable installing third-party software.
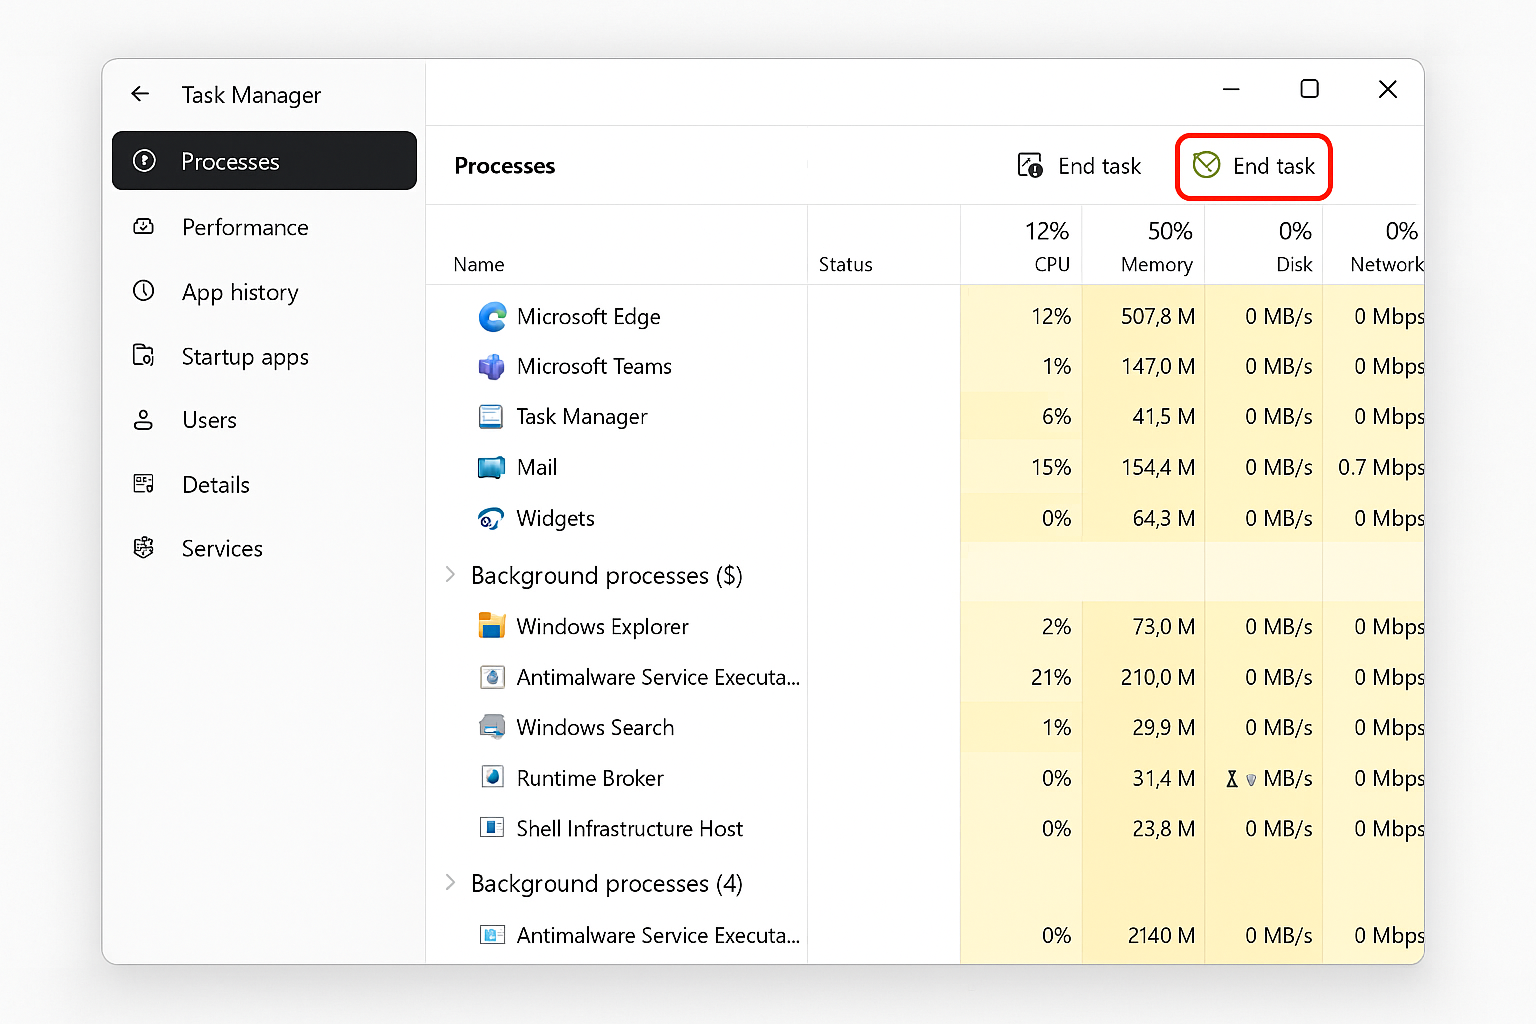
Built-in Option: Task Manager
Press Ctrl + Shift + Esc to open Task Manager. Go to the Processes tab, find any processes that might be using your folder (like File Explorer or specific apps), and click End task.
Free Tool Option: LockHunter
Download LockHunter (a free, safe tool) and install it. Right-click your problem folder and select What’s locking this folder? The tool will show you exactly which processes are holding locks and let you unlock or delete them safely.
Tips and Troubleshooting
Common Issues
Problem: “Access denied” even after taking ownership
This usually means Windows is still running a process that’s using the folder. Try restarting Windows Explorer by opening Task Manager, finding “Windows Explorer” in the Processes tab, clicking “End task,” then going to File > Run new task and typing “explorer.exe”.
Problem: The folder reappears after deletion
Some system folders (like Windows.old) are protected and will regenerate. Use Disk Cleanup (search for it in the Start menu) to properly remove these system leftovers.
Problem: “Security information unavailable” error
The folder’s permissions are completely broken. Use the command line method (Method 2) or reset permissions with: icacls "C:\path\to\folder" /reset /T
Pro Tips
- Add “Take Ownership” to right-click menu: Download the registry hack from ElevenForum to add a one-click ownership option to your context menu
- PowerShell one-liner: For power users, try:
Get-Acl "C:\path" | Set-Acl "C:\path"; Remove-Item "C:\path" -Recurse -Force - Prevention tip: Avoid creating folders in system directories (like C:\Windows) to prevent permission headaches later
When to Use Each Method
| Method | Best For | Difficulty | Success Rate |
|---|---|---|---|
| Take Ownership | Permission errors, system folders | Easy | 80% |
| Command Prompt | Broken permissions, stubborn folders | Medium | 90% |
| Safe Mode | Files locked by programs | Easy | 70% |
| Unlocker Tools | Complex locks, multiple processes | Easy | 85% |
Wrapping Up
Nobody should have to wrestle with Windows just to delete a folder, but at least now you’ve got the tools to win that fight. The take ownership method handles most permission issues, while the command line approach is your heavy artillery for truly stubborn cases. Safe Mode is perfect when programs won’t let go of your files.
In my experience, Method 1 (taking ownership) solves the problem about 80% of the time, and it’s definitely the least intimidating option. If you’re still stuck after trying these methods, the folder might be corrupted at the file system level and at that point, you might want to run a disk check or consider backing up your data and doing a clean Windows install.