
Ever tried copying a massive video file to your NAS and wondered if you could make a sandwich while waiting? I stumbled upon this exact problem when I got my first 4K camera and suddenly had terabytes of footage to manage. What caught my eye was how my “gigabit” network was crawling along at a pathetic 40 MB/s.
Turns out, there’s a lot more to getting fast network speeds than just having gigabit everything. After some digging and testing, I managed to boost my transfer speeds from that sluggish 40 MB/s all the way up to 110 MB/s downloads. Worth a look if you’re tired of watching progress bars creep along!
What Are Realistic Network Transfer Speeds?
Let’s clear up the confusing numbers first. When your router says “gigabit,” it’s talking about megabits per second (Mbps), but file transfers show megabytes per second (MB/s). Here’s what you can actually expect:
Standard Ethernet Speeds:
- 100 Mbps Ethernet: Theoretical max of 12.5 MB/s, real-world speeds of 4-8 MB/s
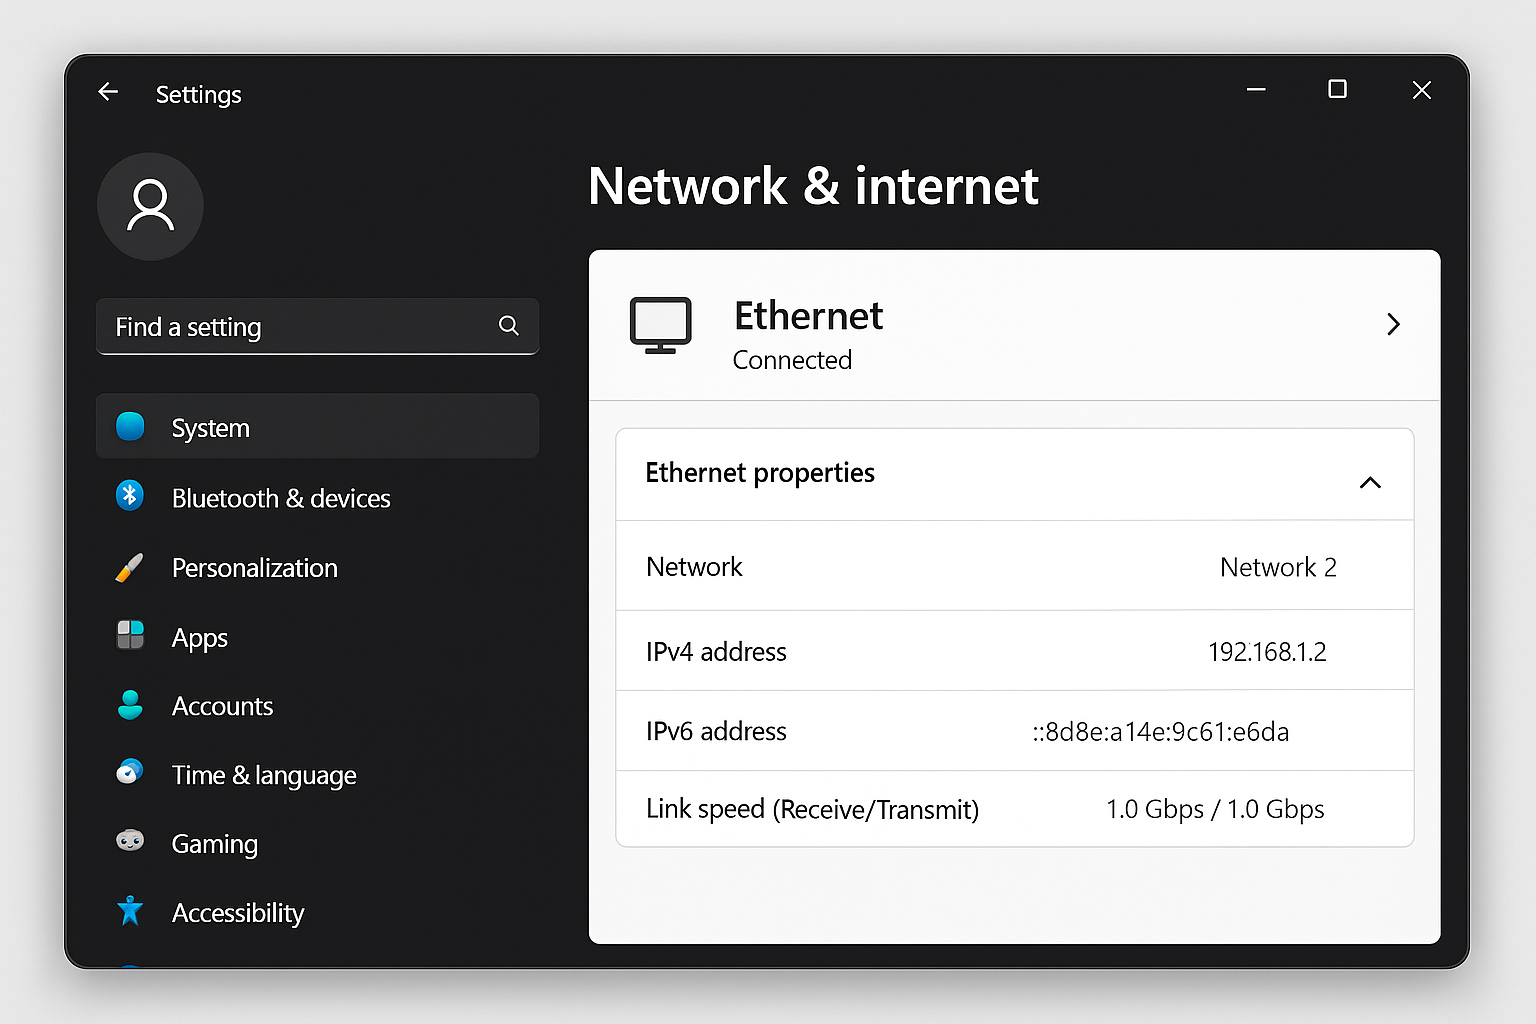
- Gigabit Ethernet (1 Gbps): Theoretical max of 125 MB/s, real-world speeds of 70-115 MB/s
- Multi-Gigabit (2.5/5 Gbps): Real-world speeds of 300+ MB/s with proper setup
- 10 Gigabit Ethernet: Real-world speeds of 800+ MB/s (mostly for enthusiasts and pros)
The gap between theoretical and real speeds exists because of overhead, protocols, and hardware limitations. If you’re getting way less than these numbers, something’s definitely holding you back.
How to Test Your Network Transfer Speed
Before we fix anything, let’s figure out what speeds you’re actually getting. Here are the best ways to test your network in modern times:
Method 1: Simple File Copy Test
This is the most realistic test since it shows actual file transfer performance.
On Windows:
- Copy a large file (10+ GB) from your PC to your NAS using File Explorer
- Open Task Manager (press
Ctrl + Shift + Esc) - Click the Performance tab, then Ethernet to see real-time transfer speeds
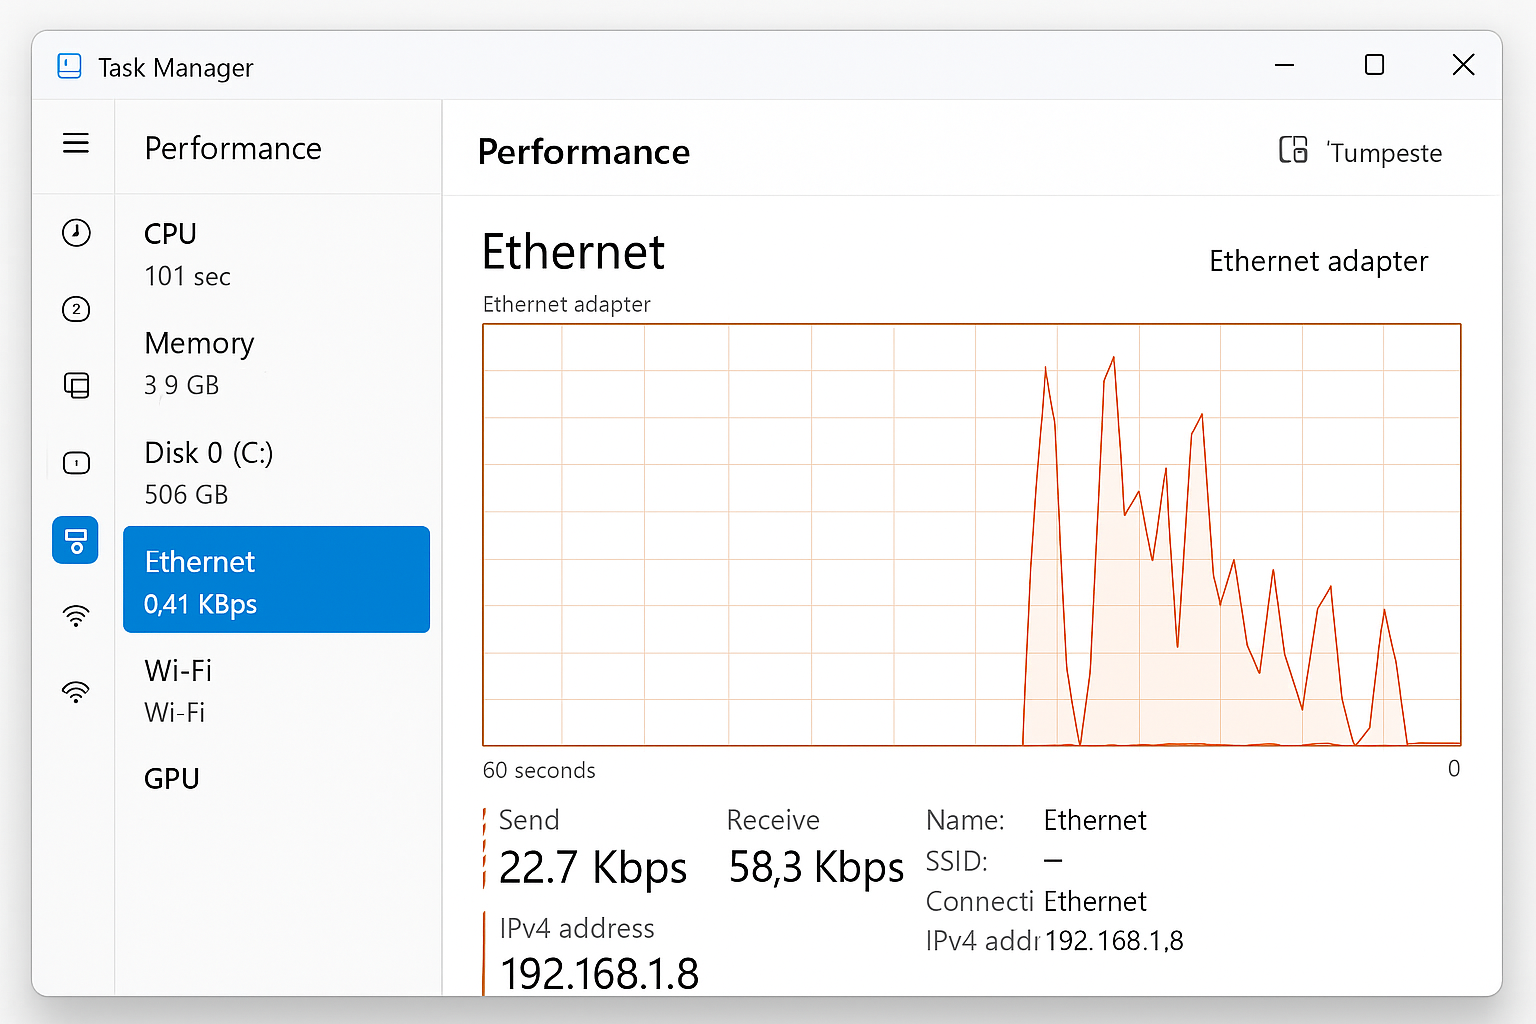
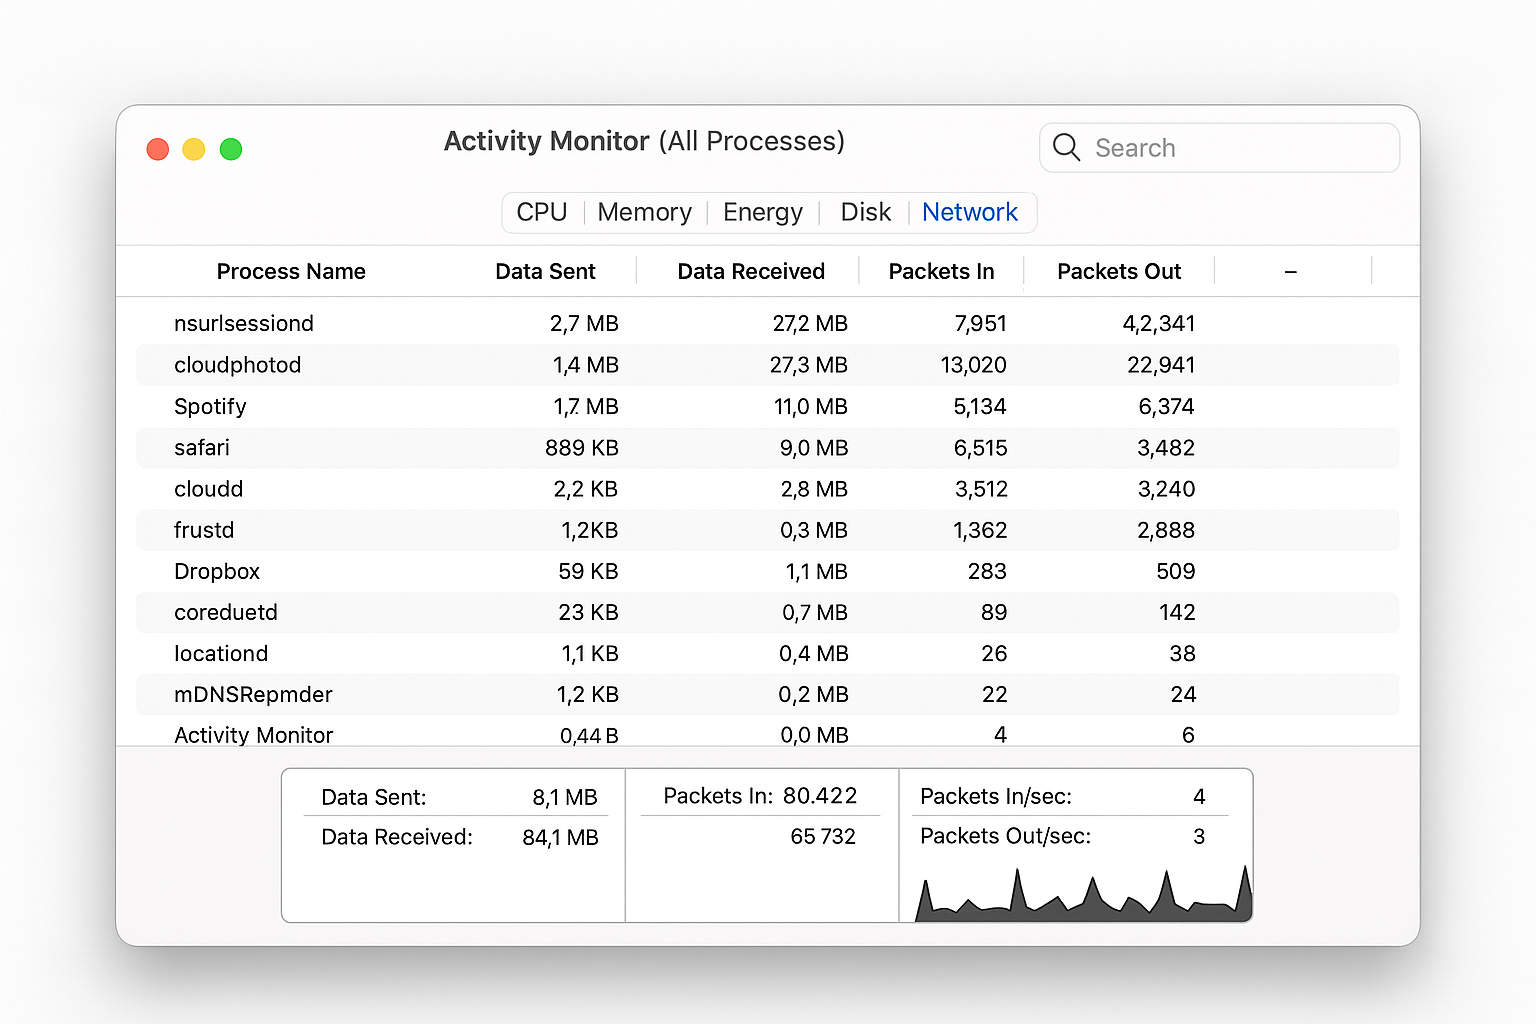
On macOS:
- Copy a large file to your NAS using Finder
- Open Activity Monitor (Applications > Utilities)
- Click the Network tab to monitor transfer rates
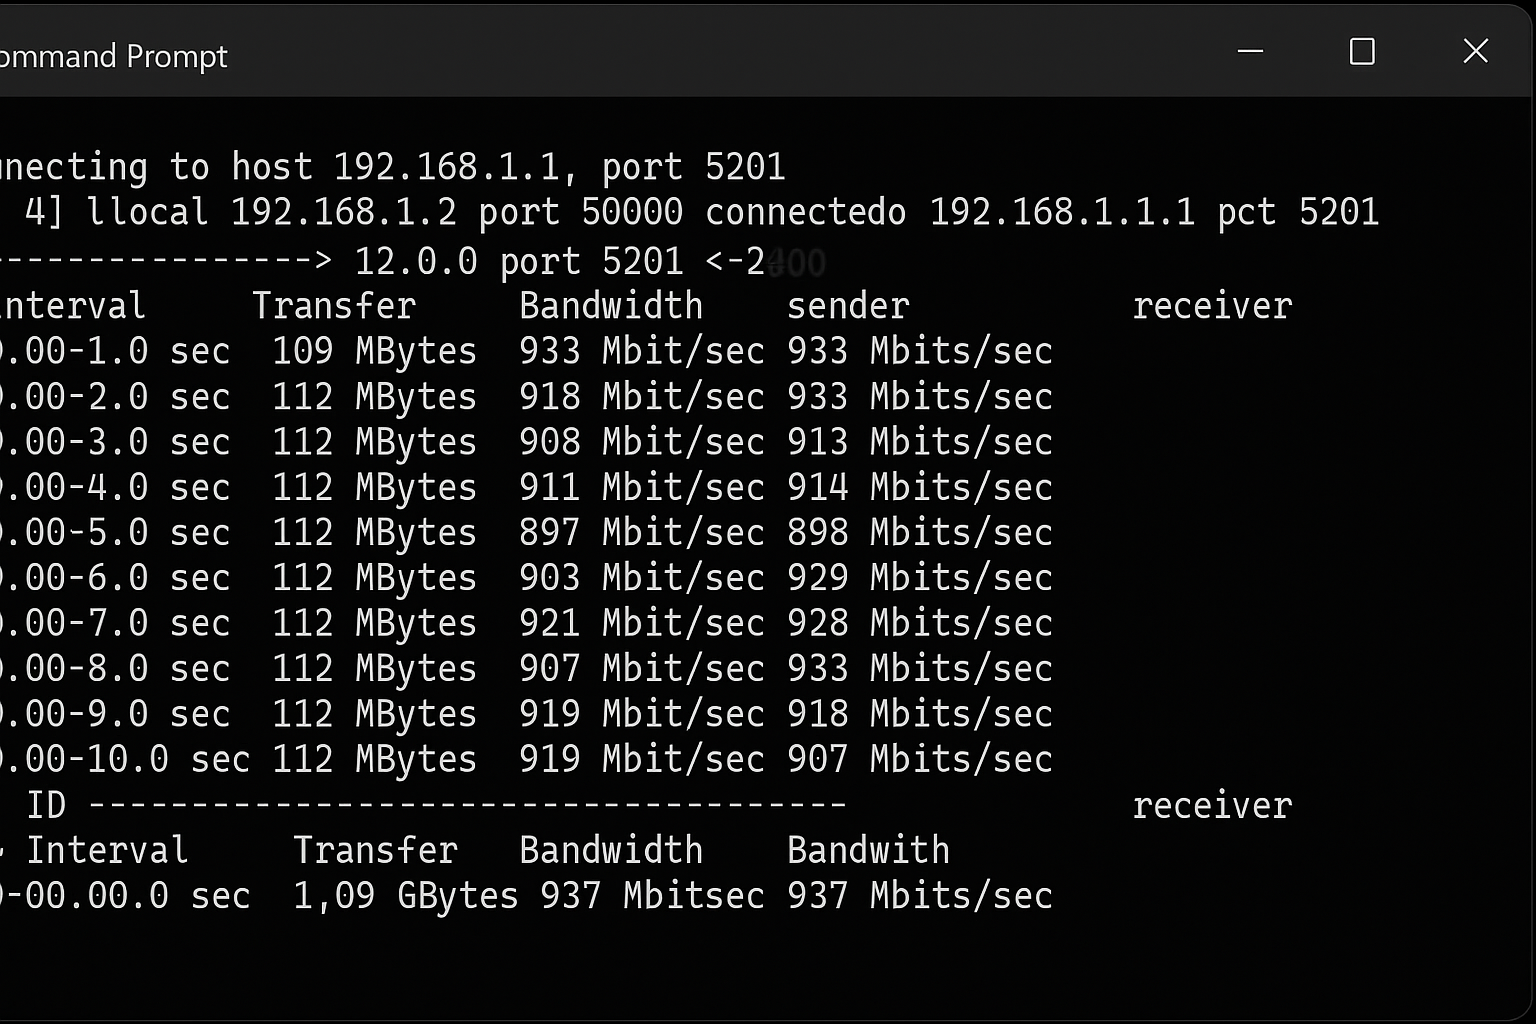
Method 2: Use iPerf3 for Precise Testing
iPerf3 is the gold standard for network testing. It’s free, cross-platform, and gives you detailed results.
Setup:
- Download iPerf3 from iperf.fr on both devices
- On your NAS or target computer, run:
iperf3 -s(starts server mode) - On your testing computer, run:
iperf3 -c [NAS_IP_ADDRESS] - Let it run for 10 seconds to get average speeds
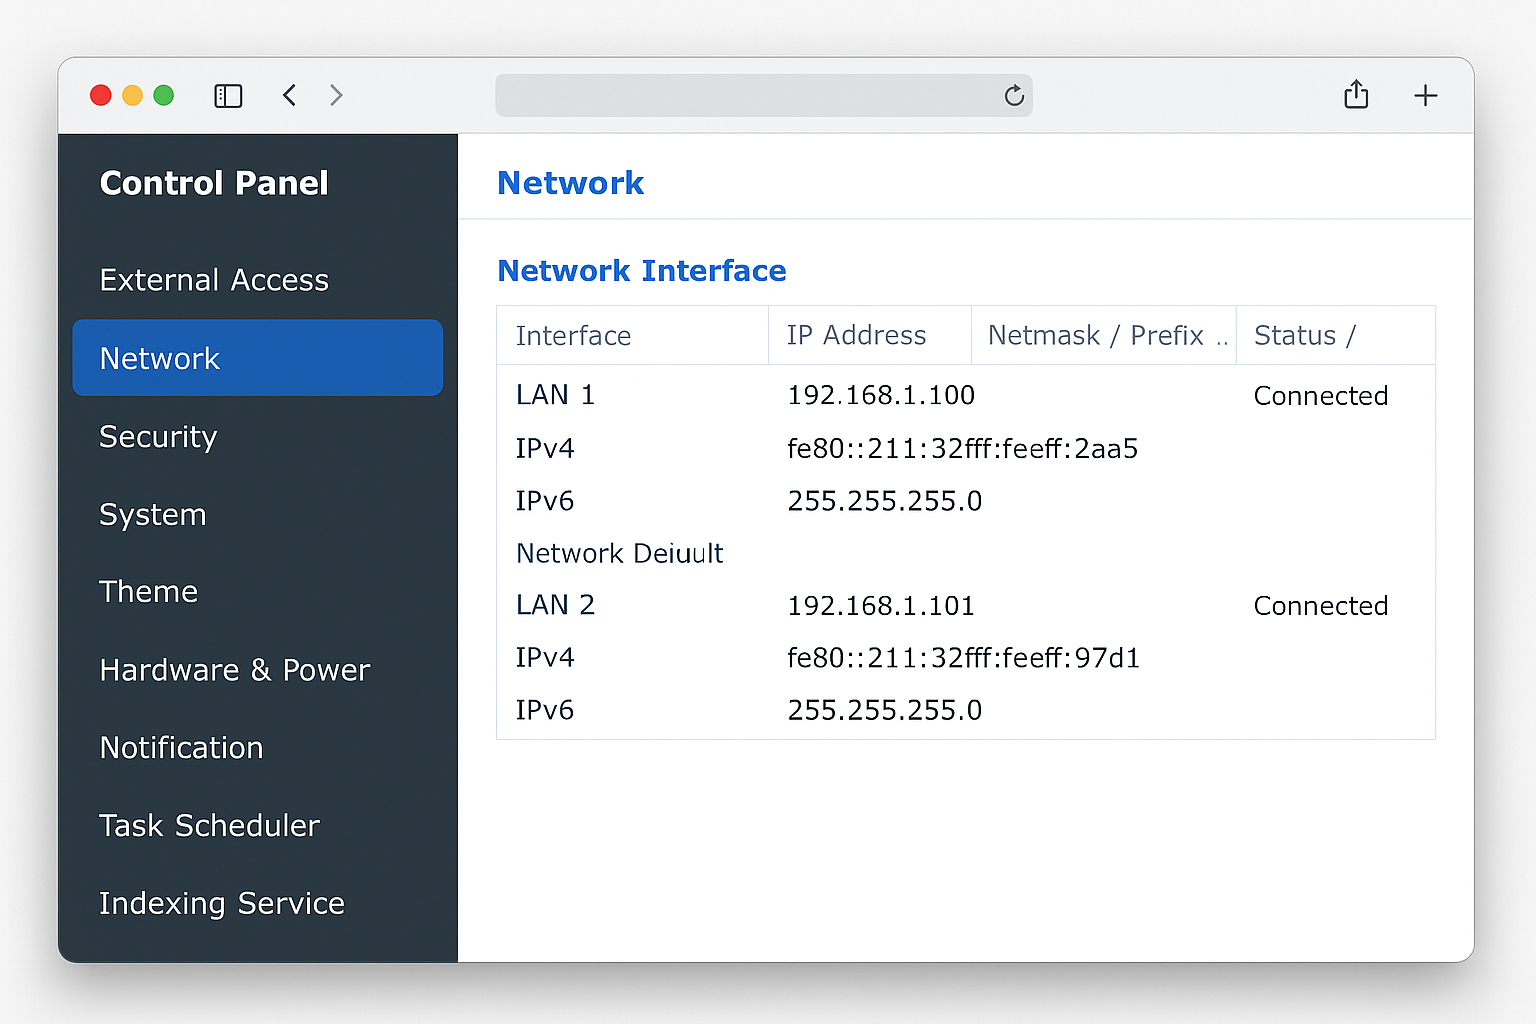
Method 3: Built-in NAS Tools
If you have a Synology NAS (or similar), you can use built-in speed tests:
- Log into your NAS web interface
- Go to Control Panel > Info Center
- Click Network > Network Interface
- Click the Test button next to your ethernet connection
What’s Actually Slowing You Down
Now that you know your actual speeds, let’s figure out why they might be disappointing. Here are the most common bottlenecks:
Hard Drive Speed (The Biggest Culprit)
Your storage is probably the limiting factor. Here’s what different drives can actually deliver:
- 5400 RPM traditional drives: 40-60 MB/s max
- 7200 RPM drives: 60-80 MB/s max
- SATA SSDs: 400-550 MB/s (way faster than gigabit can handle)
- NVMe SSDs: 1,000-7,000 MB/s (overkill for most networks)
If you’re stuck with traditional hard drives, that’s likely why you’re seeing slower speeds even on a gigabit network. The drives simply can’t keep up with what the network can deliver.
Network Hardware Mismatches
All your network gear needs to support the same speeds. If any piece is slower, that becomes your bottleneck:
- Check your cables: Cat5e works for gigabit, but you need Cat6a or Cat7 for multi-gigabit speeds
- Verify your switch/router: That old router might only have 100 Mbps ports
- Check network cards: Older computers might not have gigabit ethernet
You can check your connection speed on Windows by going to Settings > Network & Internet > Advanced network settings. On macOS, check System Settings > Network > Details.
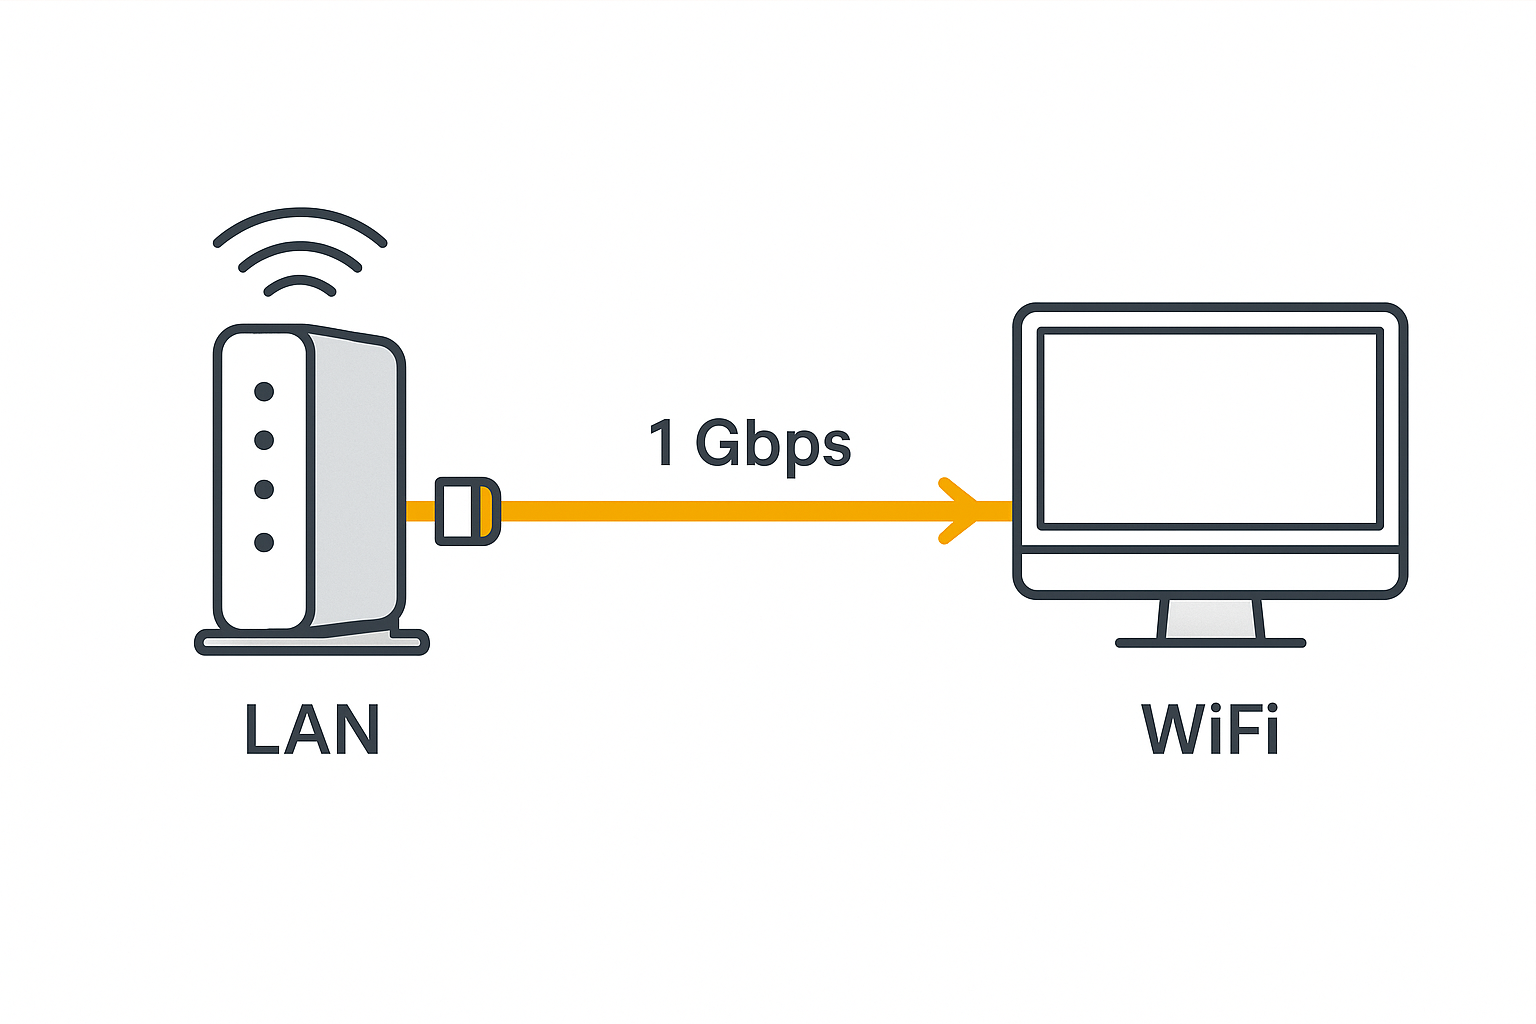
Wi-Fi vs Ethernet Reality Check
I see this mistake constantly: people testing “network speed” over Wi-Fi and wondering why it’s slow. Even Wi-Fi 6E rarely delivers more than 500-600 MB/s in real conditions and that’s under perfect circumstances.
For file transfers to a NAS, always use ethernet. Wi-Fi is convenient, but ethernet is faster, more reliable, and has lower latency.
How to Speed Things Up
Here are the fixes that actually work, ranked by how much difference they make:
Quick Wins
- Use Ethernet Instead of Wi-Fi: Plug in that cable for an instant speed boost
- Connect to the Same Switch: Don’t route through multiple devices if you can avoid it
- Transfer Larger Files: Copying one 10 GB file is faster than copying 1,000 small files
- Close Other Network Apps: Pause cloud backups, streaming, and downloads during big transfers
Hardware Upgrades That Matter
- Upgrade to an SSD: The single biggest improvement you can make
- Get a Dedicated Gigabit Switch: Often performs better than router ports
- Check Your Cables: Replace any Cat5 cables with Cat5e or better
- Consider Multi-Gigabit: If you transfer huge files regularly, 2.5G equipment is becoming affordable
Advanced Tweaks for Power Users
If you want to squeeze out every bit of performance:
Enable SMB Multichannel (Windows)
This can double your transfer speeds if both devices support it:
- Open PowerShell as Administrator
- Run:
Set-SmbClientConfiguration -EnableMultiChannel $true - On your NAS, enable SMB multichannel in the advanced settings
Adjust MTU Settings
If all your devices support it, enabling jumbo frames can help:
- Set MTU to 9000 on all network devices
- Test with:
ping -f -l 8972 [NAS_IP](Windows) orping -D -s 8972 [NAS_IP](macOS) - If packets drop, stick with the default 1500 MTU
Troubleshooting Common Issues

Speed Caps Below Hardware Limits
Problem: You have gigabit everything but only get 100 Mbps speeds.
Solution: Check Device Manager (Windows) or System Information (macOS) to verify your network adapter is actually running at gigabit speeds. Sometimes drivers need updating or auto-negotiation fails.
Speeds Drop During Large Transfers
Problem: Transfers start fast but slow down after a few minutes.
Solution: This usually means thermal throttling or buffer overflow. Make sure your NAS and router have good ventilation, and consider upgrading to devices with more RAM.
Inconsistent Performance
Problem: Sometimes fast, sometimes slow, no clear pattern.
Solution: Check for background processes, automatic backups, or other devices using the network. QoS settings on your router might also be limiting certain types of traffic.
The Reality Check
Here’s the thing that actually works: getting fast network transfers is nicely done when everything lines up, but it’s not magic. You need fast storage on both ends, proper network hardware, and realistic expectations.
I managed to get those 110 MB/s speeds because I had NVMe SSDs, a dedicated gigabit switch, and good cables. But honestly? For most people, getting consistent 60-80 MB/s is a perfectly good result that makes file transfers smooth and predictable.
The biggest lesson I learned is that network speed is only as fast as your slowest component. Fix the bottlenecks one by one, and you’ll see real improvements. This is definitely a gem of knowledge worth bookmarking if you work with large files regularly.
What speeds are you getting on your network? Try these tests and let us know in the comments!