
Need to spice up your PowerPoint presentation with a YouTube video? You’re not alone as video clips can turn a boring slideshow into something people actually want to watch. The good news is that modern PowerPoint makes this way easier than it used to be, with multiple built-in options that actually work reliably.
In this guide, you’ll learn three different methods to get YouTube videos into your presentations. Whether you need internet during your presentation or want everything stored locally, we’ve got you covered. No tech degree required, just follow the steps.
What Are Your Options for YouTube Videos in PowerPoint?
PowerPoint gives you three main ways to include YouTube content, each with different trade-offs:
Method 1: Insert Using URL — Copy the video’s web address and let PowerPoint handle the rest. Simplest option, but needs internet during playback.
Method 2: Embed Code — Use YouTube’s embed code for more control over playback settings. Still requires internet, but gives you options like custom start times.
Method 3: Download and Insert — Save the video file locally for offline presentations. More work upfront, but bulletproof during your presentation.
Method 1: Insert YouTube Video Using URL (Recommended)
This is the easiest method and works great if you’ll have reliable internet during your presentation.
Step 1: Copy the YouTube Video URL
Go to the YouTube video you want to include. Click in the address bar and copy the entire URL (it should start with “https://www.youtube.com/watch”).
Pro tip: You can also click the Share button under the video and copy the shorter URL from there — both work the same way.
Step 2: Open PowerPoint and Select Your Slide
Open your PowerPoint presentation and click on the slide where you want the video to appear.
Step 3: Insert the Online Video
Click the Insert tab on the ribbon, then select Video > Online Video.

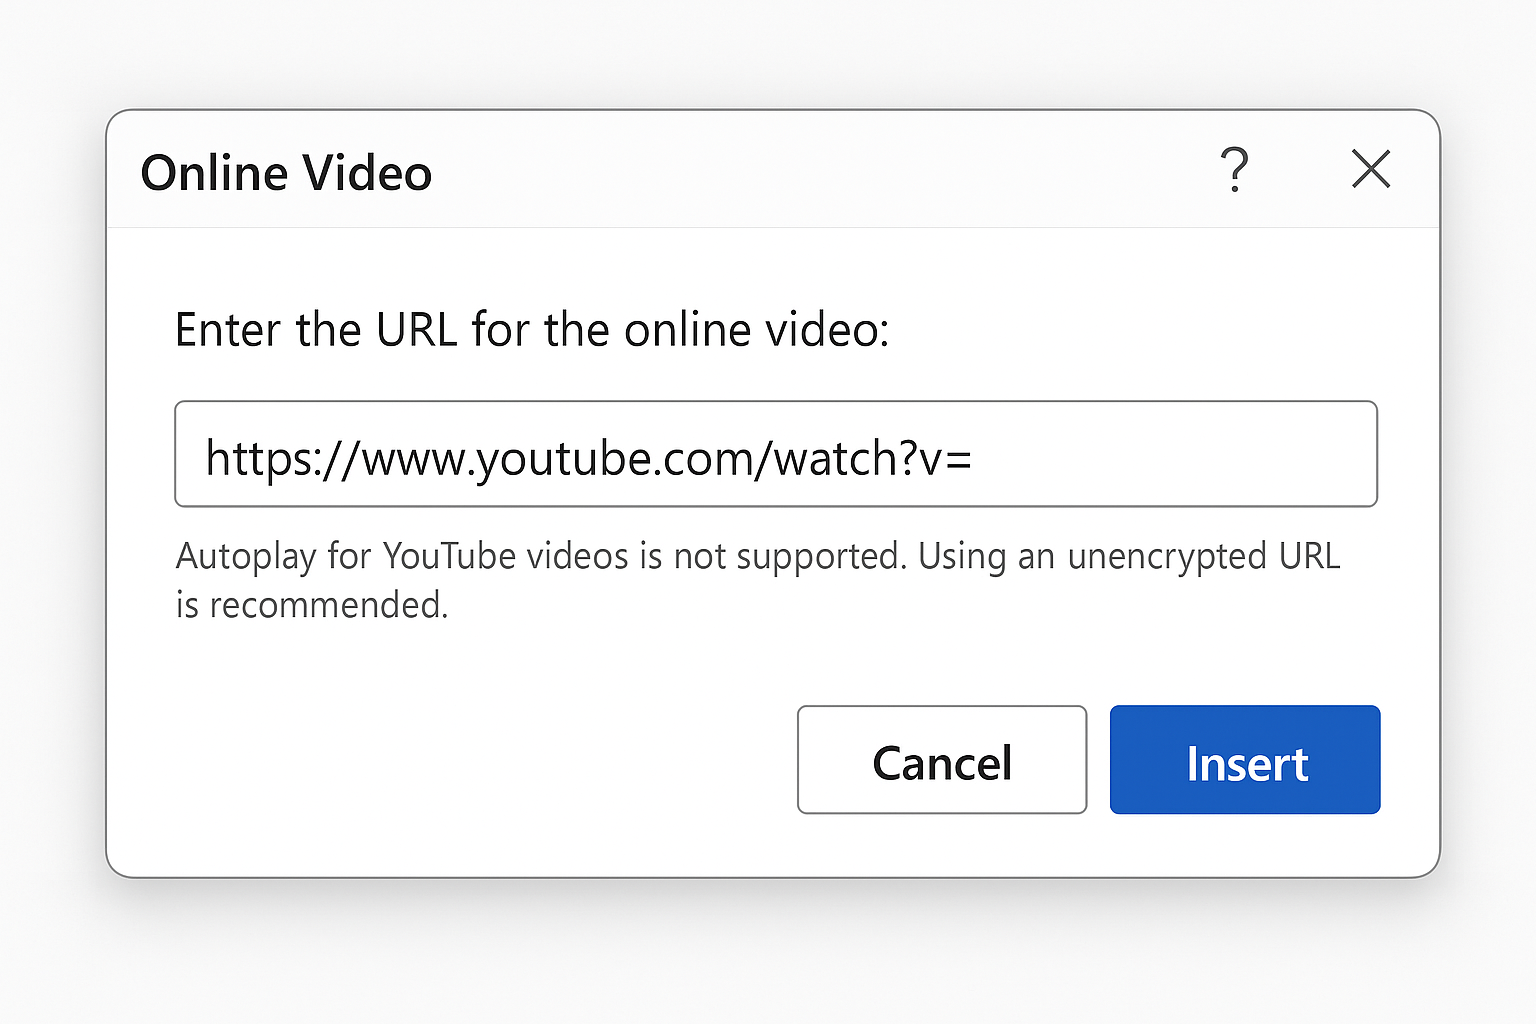
Step 4: Paste the URL
In the dialog box that appears, paste your YouTube URL and press Enter. PowerPoint will automatically fetch the video and create a preview.
Step 5: Position and Resize
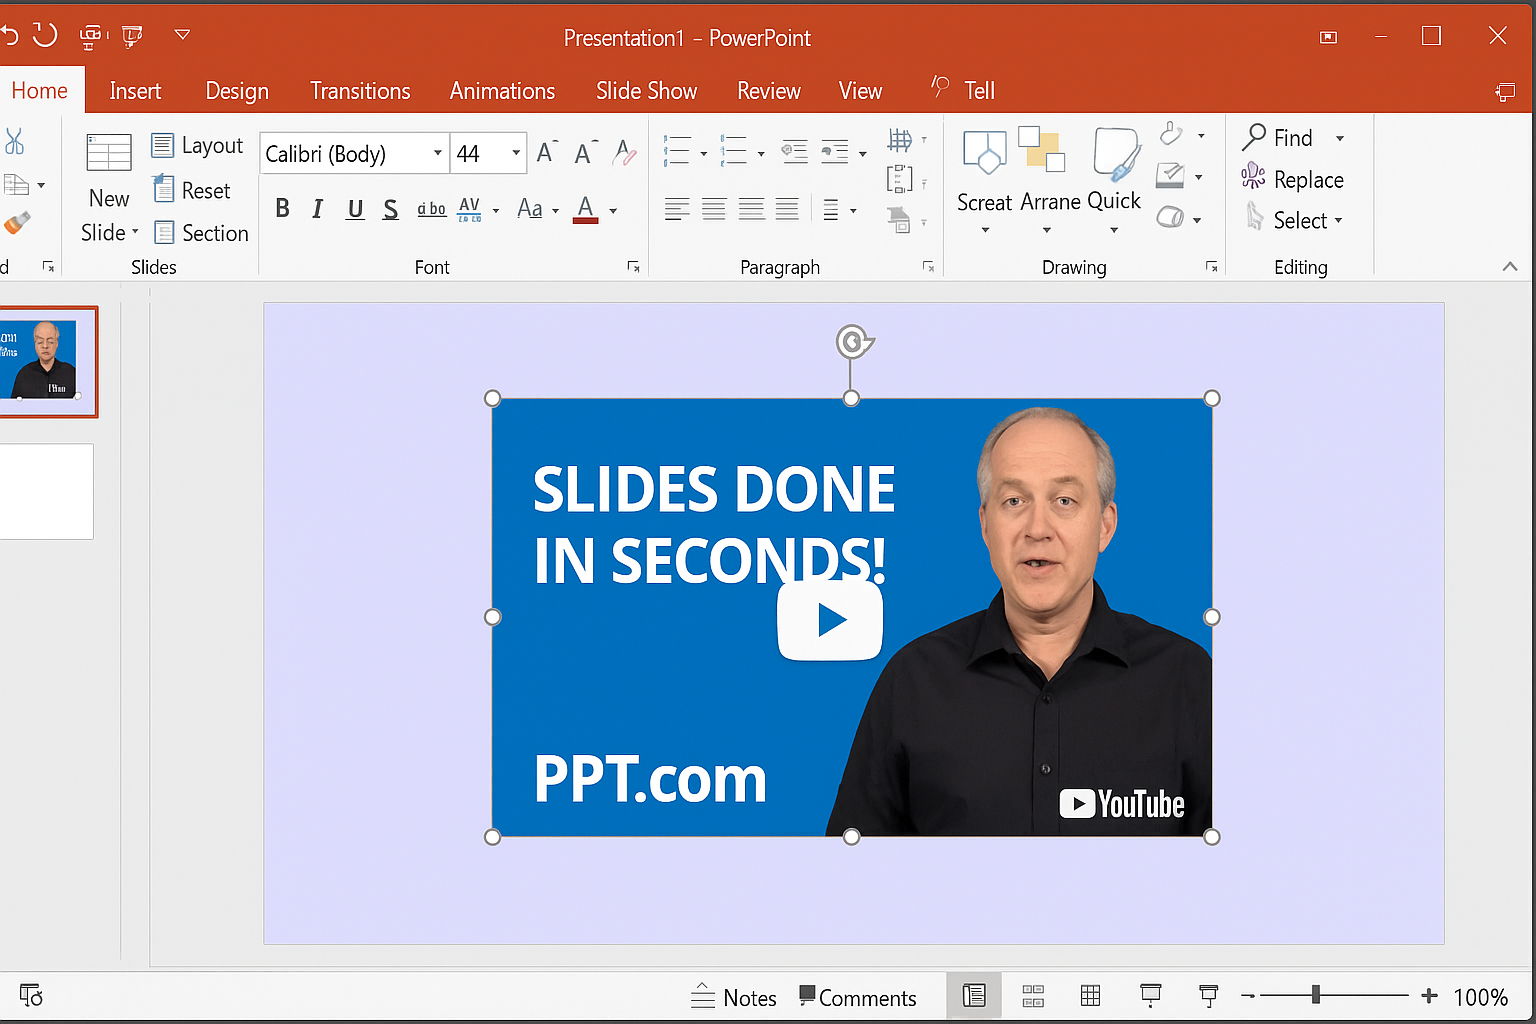
Click and drag the video to position it on your slide. Use the corner handles to resize it, just like any other PowerPoint object.
Method 2: Use YouTube Embed Code (For Advanced Options)
If you want more control over how the video plays (like starting at a specific time), the embed code method gives you those options.
Step 1: Get the Embed Code from YouTube
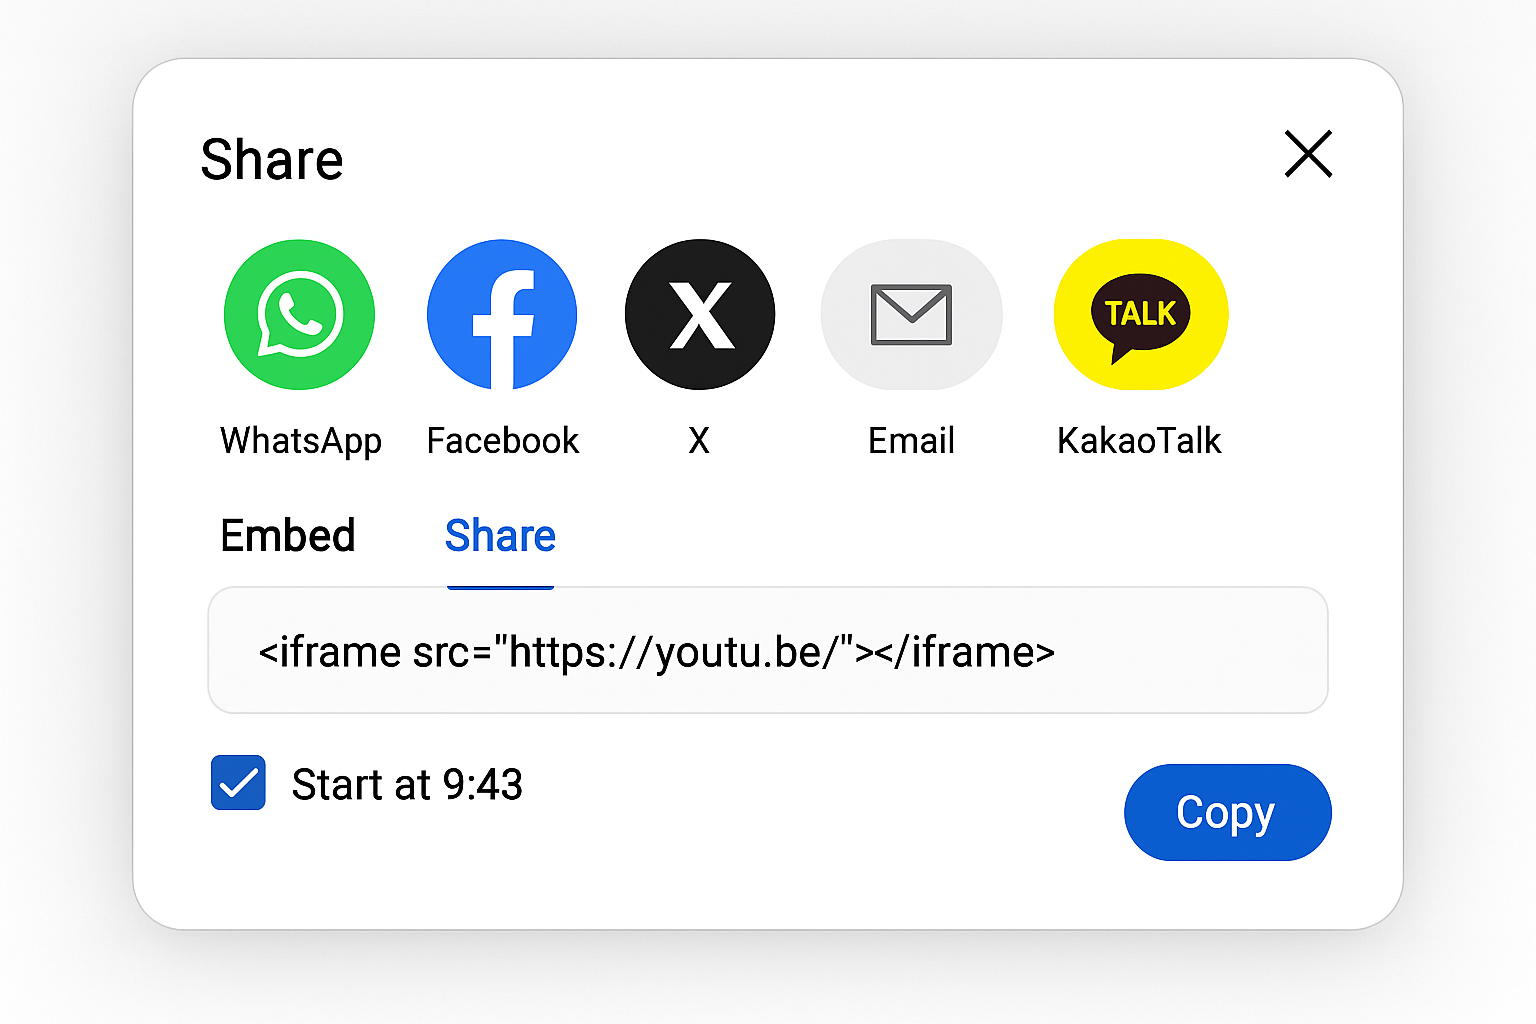
On your YouTube video, click Share, then click Embed. You’ll see a box with HTML code that starts with <iframe.
If you want the video to start at a specific time, check the Start at box and enter your desired timestamp before copying the code.
Step 2: Copy the Embed Code
Copy the entire code from the box. Make sure you’re copying the HTML code (starting with <iframe), not just the video URL.

Step 3: Insert in PowerPoint
In PowerPoint, go to Insert > Video > Online Video. Look for the option that says From a Video Embed Code and paste your HTML code there.
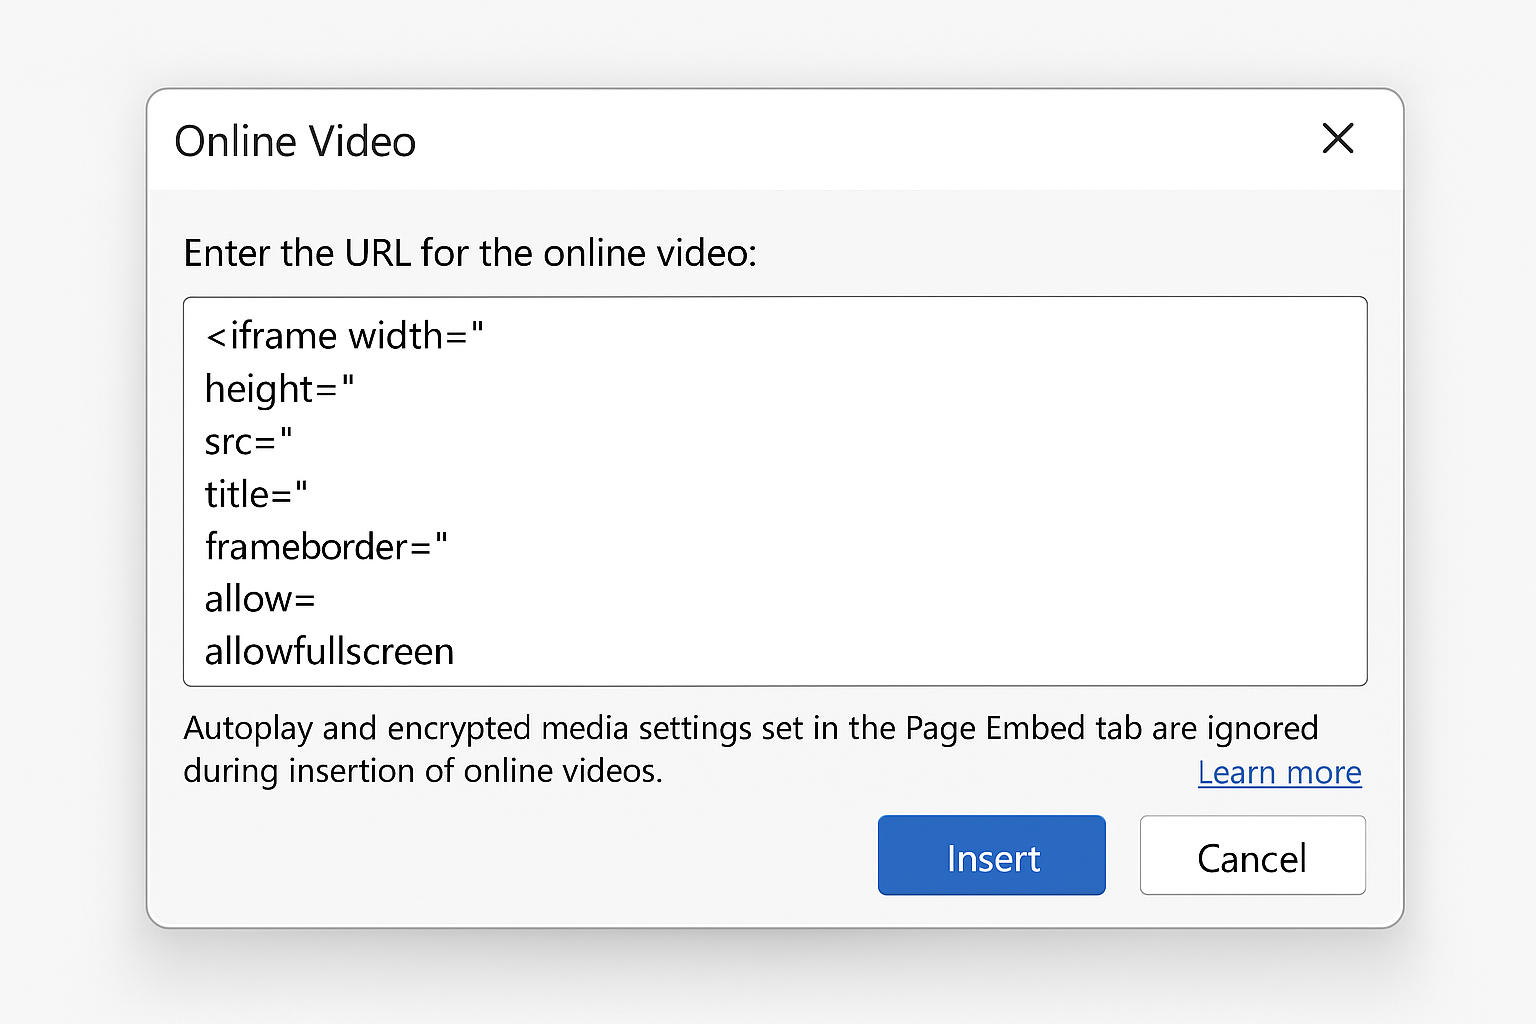
Step 4: Finalize the Video
Press Enter and wait a moment for PowerPoint to process the embed code. Once it appears, you can resize and position it just like in Method 1.
Method 3: Download Video for Offline Presentations
If you’re presenting somewhere without reliable internet, downloading the video locally is your best bet. This method requires a bit more work but guarantees your video will play.
Step 1: Download the YouTube Video
YouTube doesn’t offer direct downloads for most videos (except your own content). You’ll need to use a third-party tool or website to download the video file. Popular options include online converters or browser extensions, but be sure to respect copyright and only download videos you have permission to use.
For your own YouTube videos: Log into YouTube Studio, go to your video library, click the three-dot menu next to your video, and select Download.
Step 2: Check the Video Format
PowerPoint supports these video formats depending on your version:
- PowerPoint 2013 and later: MP4, M4V, MOV, AVI, MPG, MPEG, WMV, SWF
- PowerPoint 2010: AVI, MPG, MPEG, WMV, SWF (MP4 and MOV if QuickTime is installed)
- PowerPoint 2007: AVI, MPG, MPEG, WMV
If your downloaded video isn’t in a compatible format, you’ll need to convert it. MP4 is your safest bet for modern PowerPoint versions.
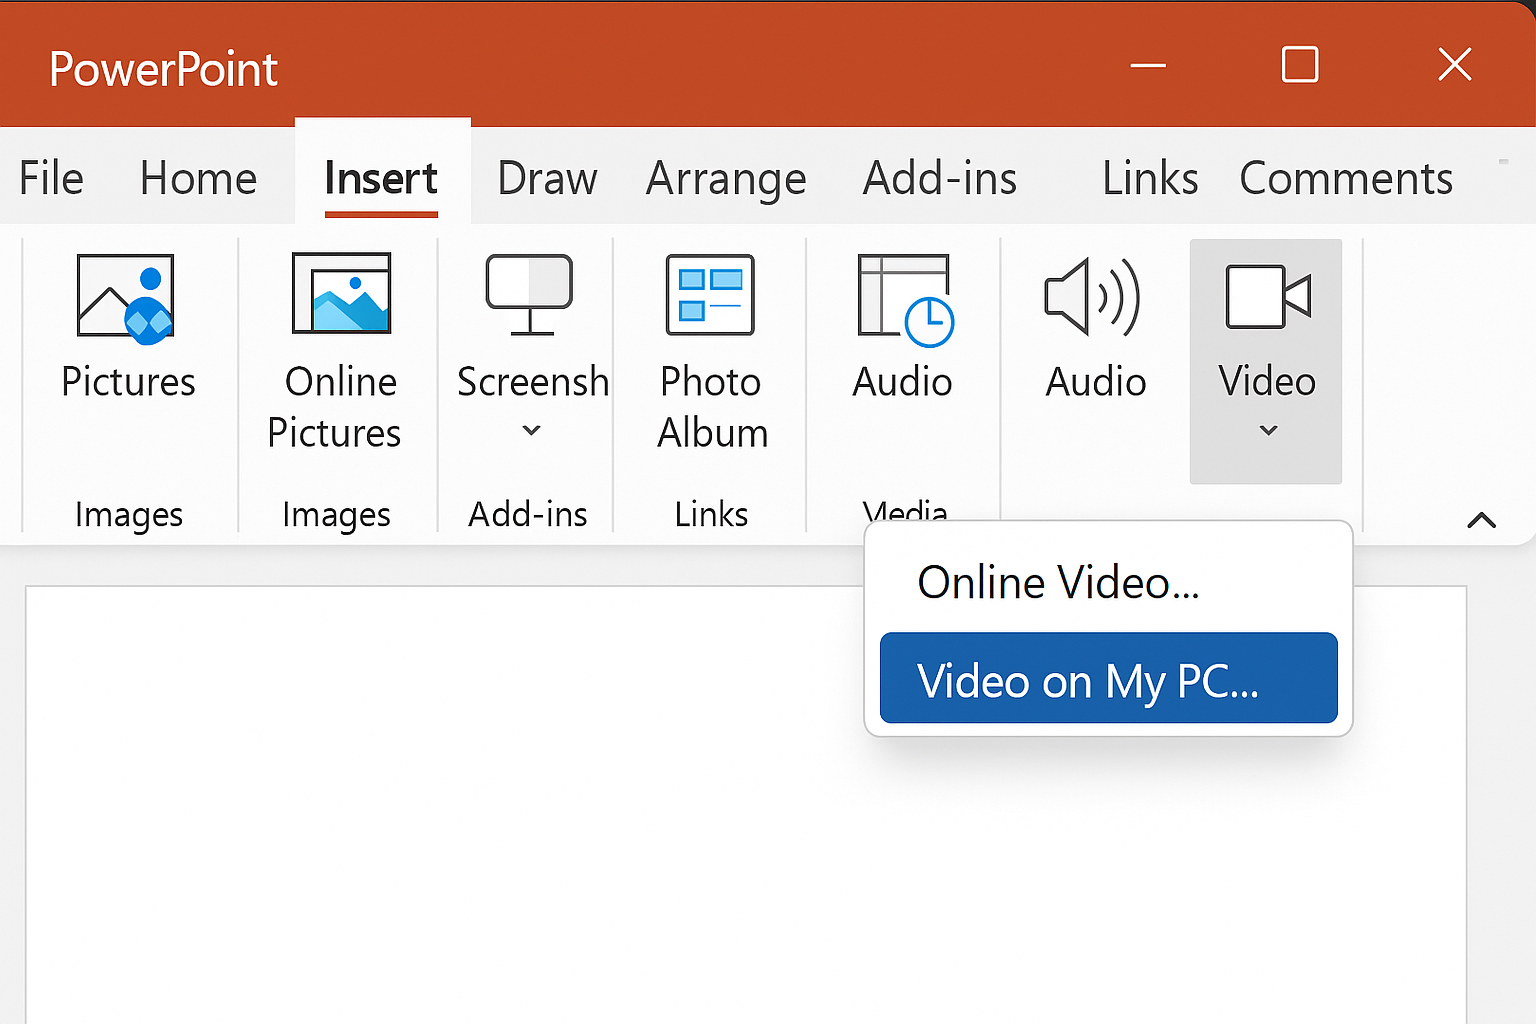
Step 3: Insert the Video File
In PowerPoint, click Insert > Video > Video on My PC (Windows) or Movie from File (Mac). Browse to your downloaded video file and select it.
Step 4: Test Playback
Click the play button on your inserted video to make sure it works properly. Local videos should play instantly without any loading delays.
Tips and Troubleshooting
Common Issues
Video won’t play during presentation: This usually means you don’t have internet access and used Methods 1 or 2. For offline presentations, stick with Method 3 (local video files).
Wrong embed code error: Make sure you copied the HTML code (starting with <iframe) and not just the video URL. If you accidentally copied the share link, go back to YouTube and click Embed instead of Share.
Video quality is poor: YouTube automatically adjusts quality based on your internet connection. For consistently high quality, download the video locally using Method 3.
Ads appear during playback: YouTube ads may play even if you have YouTube Premium. Test your presentation beforehand so you know what to expect.
Pro Tips
- Test before presenting: Always run through your slideshow beforehand, especially if you’re relying on internet-based videos
- Have a backup plan: If your presentation is critical, consider downloading key videos locally even if you plan to use the online methods
- Check your internet: Hotel and conference Wi-Fi can be unreliable. Methods 1 and 2 need a stable connection throughout your presentation
- Respect copyright: Only download and use videos you have permission to use, especially in professional or educational settings
Which Method Should You Choose?
Here’s my honest take: Method 1 (URL insertion) is your best starting point for most situations. It’s dead simple, works reliably with modern PowerPoint, and handles all the technical stuff automatically. The embed code method (Method 2) is nice if you need specific playback controls, but most people won’t need those extra features.
Method 3 (downloading locally) is more work upfront, but it’s a lifesaver if you’re presenting in environments with sketchy internet. I’ve seen too many presentations derailed by Wi-Fi issues, so for anything important, having that local backup is worth the extra effort.
The bottom line? Start with Method 1 for simplicity, but keep Method 3 in your back pocket for when reliability matters more than convenience. Your future self (and your audience) will thank you when everything works smoothly during showtime.