

Do you have an iPhone that you need to reset or restore? Do you need to perform a factory reset and erase everything or do you just need to reset certain settings because the phone is acting up?
Or maybe you need to restore your iPhone from an iTunes backup or from iCloud? Also, you might just want to perform a hard reset of your iPhone, which is a quick way to fix issues like freezes, etc.
In this article, I’m going to walk you through the various types of resets, restores and backups you can do for your iPhone, iPad or iPod Touch.
For this article, I’m going to be using iOS 9 for all the examples as that is the latest version of the OS as of now. If anything changes in a later version, I’ll be sure to update this post.
Backup iPhone, iPad, iPod
Before you reset or restore anything, you should always make a backup just in case there is something you need at a later point or something goes wrong. I suggest making a backup to both iCloud and to iTunes. If you don’t have enough space in iCloud, then making just a local backup to iTunes will be fine. Let’s start with iTunes backups.
iTunes Backups
Backing up to iTunes is no longer really needed if you backup your phone to iCloud, but I have found that it’s still useful to create a local backup every couple of months.
iCloud is great, but it has a lot of glitches that can cause it to fail right when you need it the most. Plus, Apple is so miserly with their whopping 5 GB of free storage space. You can’t even store a single backup of a full 16 GB iPhone with that much space, so definitely use iTunes if you’re not sure if your phone is being properly backed up to iCloud.
Open iTunes, connect your Apple device and then click on the Back Up Now button.
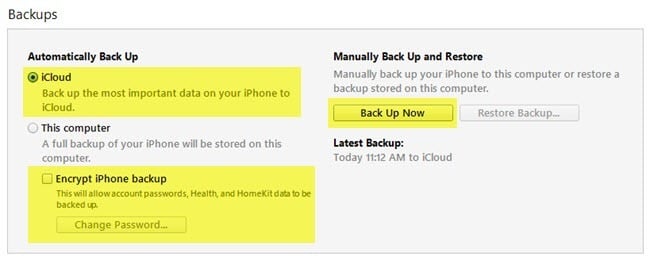
When you do this, you’ll get a message asking if you want to encrypt the backup or not. If you choose not to encrypt the backup, then sensitive data like your health data, homekit data and saved passwords will not be stored in the backup. You can also just check the Encrypt iPhone Backup box before backing up to ensure the backup is encrypted.
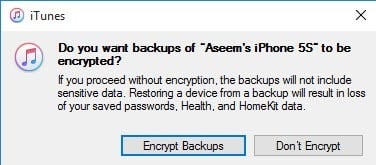
When you restore an unencrypted backup to your phone, you’ll have to enter all your passwords again, etc. That’s why if you have ever restored an iCloud backup as opposed to a normal iTunes backup, you might have noticed that you don’t have to type in all your passwords again after the restore.
The only thing you have to remember about encrypted backups is that you will need to use a password to encrypt the backup. In order to perform a restore, you’ll need that same password. If you forget it, then you won’t be able to restore that backup, so be careful and keep the password written somewhere.
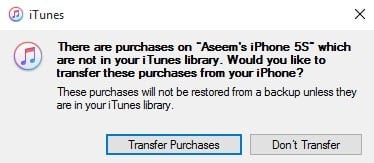
You might also get a message asking if you want to transfer purchases to your iTunes library. You should click Transfer Purchases, otherwise you might be missing music, apps, ringtones, etc. when you go to perform a restore later.
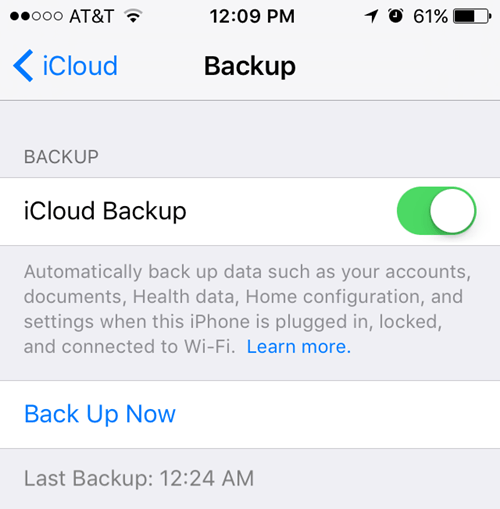
Also, note that you can leave the Automatically Backup Option set to iCloud and simply perform manual local backups every so often. iCloud should backup your phone automatically, but you can always perform a manual iCloud backup by going to Settings, iCloud, Backup and then tapping on Back Up Now. It should also show you the date and time of the last iCloud backup.
Now that you have your device properly backed up, we can go ahead and reset it. There are a couple of different ways to reset an Apple device, so let’s talk about that.
Reset iPhone, iPad, iPod
Let’s first talk about a hard reset, which doesn’t actually erase any data or reset any settings. A hard reset is when you press and hold the Home button (circle button) and the Power button located at the top or on the right at the same time until the phone restarts.

This is useful if your device is not behaving properly and is kind of like when you have to restart your Windows PC because it’s acting up. After a hard reset, there are the options to reset various settings on your phone.
Tap on Settings, go to General, scroll all the way to the bottom and tap on Reset.
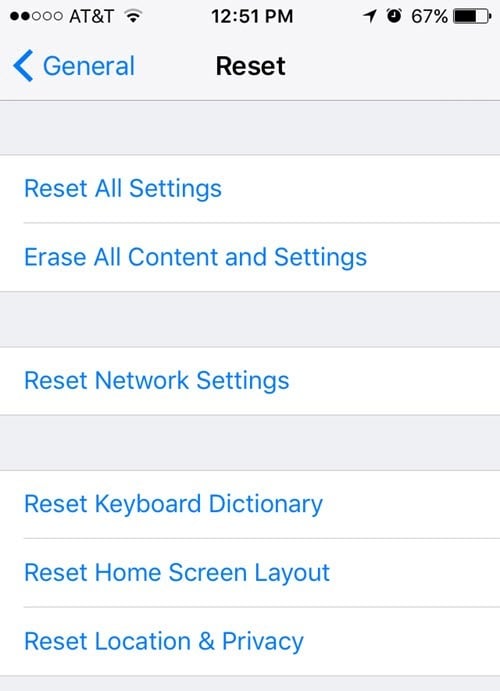
The main options most people end up using are Reset All Settings, Erase All Content and Settings and Reset Network Settings.
Reset All Settings – This will reset all of the settings under the Settings app. This means you’ll lose Wi-Fi data, Bluetooth connections, Do Not Disturb settings, keyboard settings, Notifications, Wallpapers, Privacy settings, etc.
It will NOT remove any of your data or apps. This means all your music, videos, photos, apps, iMessages, email accounts, calendars, etc will remain on the phone. You’ll get some warnings when you go to reset all settings, but don’t worry, your data will be safe.
Reset Network Settings – This option just resets anything related to your Wi-Fi and LTE connections. If you’re having connections issues, this is a good option to try.
Erase All Content and Settings – This is the factory reset option that will wipe out everything on your iPhone, iPad or iPod. Only use this option if you are sure you have everything backed up and if you want to wipe the device clean in order to give it to someone else or sell it.
You can also use this option if you are interested in performing a clean install of iOS. For example, if you upgraded your phone from iOS 7 to iOS 8 to iOS 9 and it just has a lot of issues, you can backup the phone, erase everything and then restore from the backup. Note that if you perform a clean install of a higher version of iOS than what was originally installed, you won’t be able to restore the backup.
For example, when iOS 10 comes out and you erase your iPhone before upgrading to iOS 10, then you won’t be able to restore the iOS 9 backup since your phone is now running iOS 10. To do a clean install of iOS 10 when it comes out, you would have to upgrade first, then backup, then erase and then restore.
Note that in order to erase the phone, you’ll have to turn off Find My iPhone first. You’ll also probably have to enter your iCloud password too. Your phone will then restart and once it has been erased, you’ll see the Hello or Welcome screen.
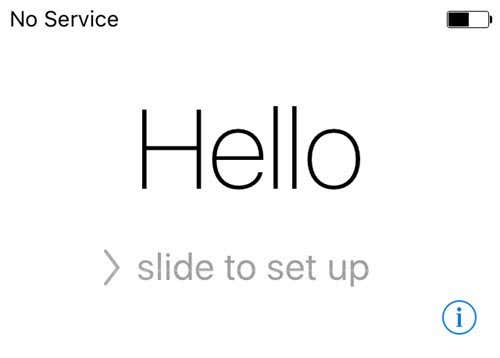
First you’ll have to pick your language, then your country, then choose a Wi-Fi network, then enable or disable location services, then add a passcode if you like and finally choose how you want to setup the phone. So now let’s talk about restoring your phone.
Restore iPhone, iPad, iPod
After you reset your phone to factory default settings, you will be asked how you want to restore it. Note that you can also restore your device without having to erase it by using iTunes, which I’ll explain further below.
However, if you ever want to restore from an iCloud backup, you always have to erase your device completely like shown above. It’s a little scary, but that’s the only way to restore an iCloud backup.
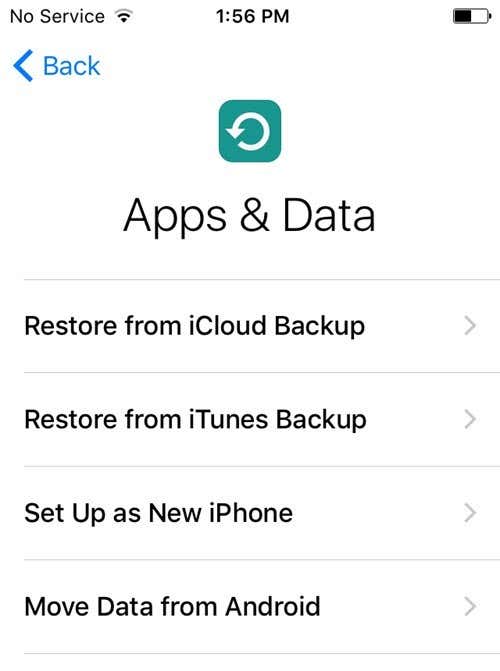
Here you’ll have the option to choose from Restore from iCloud Backup, Restore from iTunes Backup, Setup Up as New iPhone and Move Data from Android.
If you choose the first option, you’ll need to enter your Apple ID and password and then you’ll get a list of available iCloud backups.
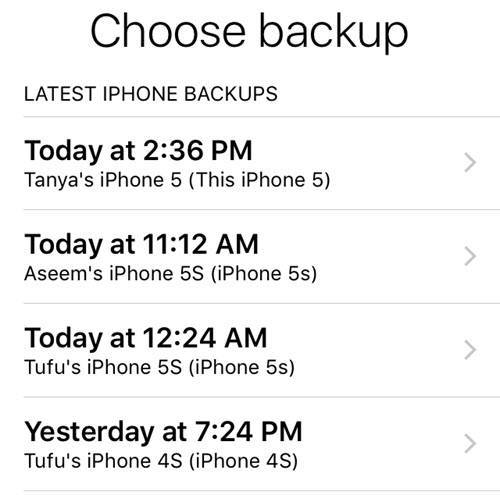
If you choose the second option, you’ll need to connect your computer to iTunes and then you’ll see a drop-down list of available backups on the computer once you sign in with your Apple ID.
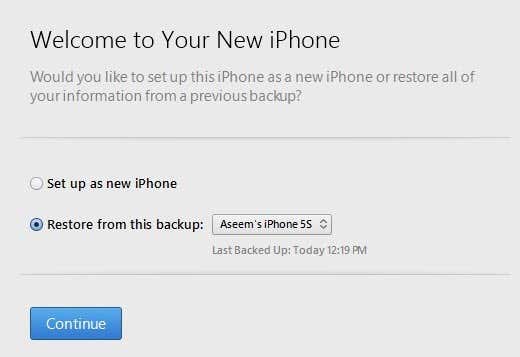
Setting up as a new iPhone will do exactly that and you’ll have a fresh install of iOS. You can always setup as a new iPhone and then restore from an iTunes backup later if you like. You won’t be able to restore from iCloud, though, once you set up as a new iPhone.
Finally, you can do all of this from iTunes itself. When connected, you’ll see the option to Restore Backup and Restore Phone.
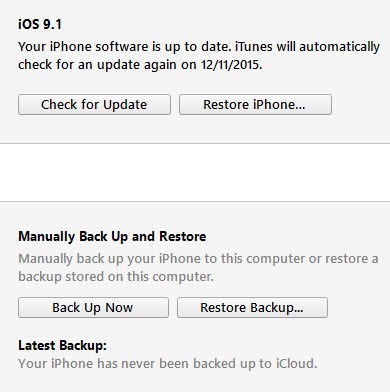
Restore Backup will allow you to pick from a local backup stored on the computer and restore that. It will simply restore the data and apps and not the iPhone firmware.
Restore iPhone is more interesting because it can work in two different ways depending on what you choose. Firstly, it’ll ask you if you want to create a backup or not. This is up to you, of course.
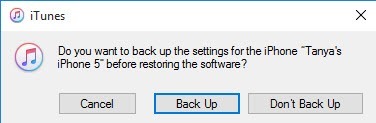
After this, what dialog you see will depend on whether or not your device is running an older version of iOS or not. If you don’t have the latest version of iOS, then you’ll see an option either to Restore or to Update. If you are running the latest version, you’ll just see the Restore button.
Restore will perform the same function as the Erase All Content and Settings option on your device. If you click Update, it will simply install the latest update onto your phone, just like if you were to go to Settings, General, Software Update. Your data would remain intact, iOS would just get updated.
So there you have it! All the different ways you can backup, reset or restore your Apple device. Hopefully, it clears up any confusions you may have about the entire process. If you have any questions, feel free to comment. Enjoy!