
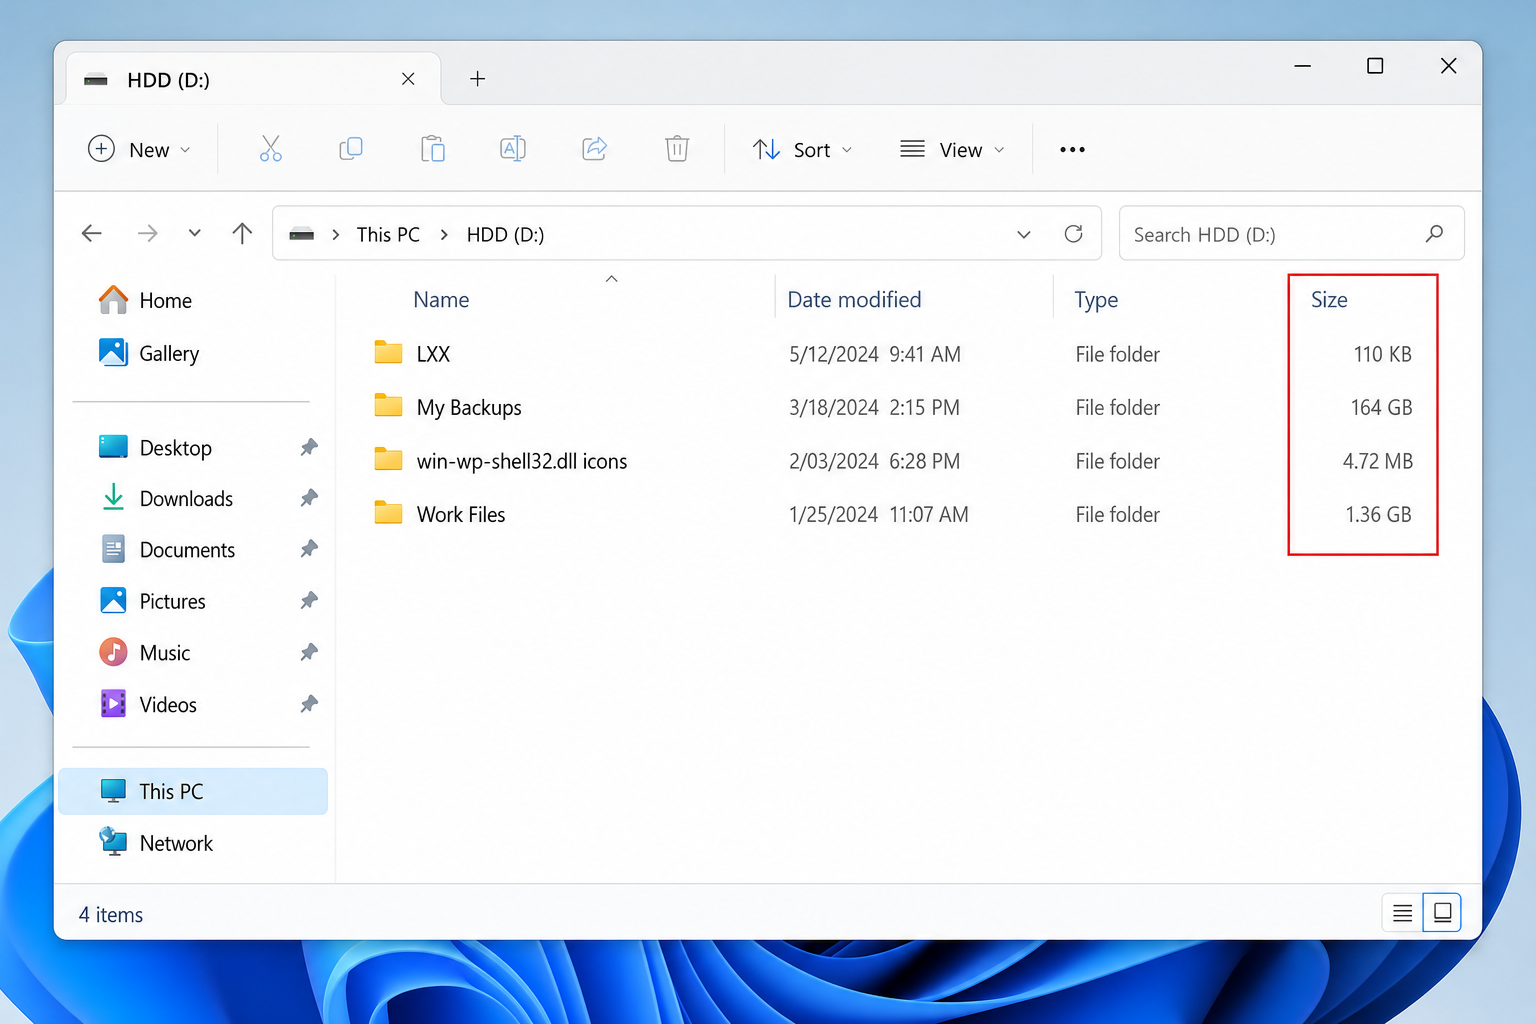
Running out of disk space and have no idea which folders are eating it all up? You’re not alone and the frustration is totally valid. Windows File Explorer shows you the size of individual files just fine, but when it comes to folders? Nothing. Just a blank column or the word “Folder” staring back at you.
The good news: in 2026, you have more options than ever to fix this. Whether you want a quick hover tooltip, a full Details view column right inside File Explorer, or a powerful standalone tool for deep-dive analysis, this guide covers all of it step by step.
Why Doesn’t File Explorer Show Folder Sizes?
This is actually a deliberate design choice by Microsoft, not a bug. Calculating the total size of a folder means Windows has to add up every single file inside it, including all the subfolders. On a large drive with tens of thousands of files, doing that for every folder in a list view would slow Explorer to a crawl. So Microsoft skips it to keep things snappy.
As of the latest Windows 11 updates, this still hasn’t changed in the Details view. But there are now some solid workarounds, including one that adds a proper Size column directly into File Explorer without much fuss.
Method 1: Use Hover Tooltips (Built-In, No Downloads)
This is the fastest option and it’s already baked into Windows, you just might need to turn it on. When you hover your mouse over a folder, Windows will pop up a small tooltip showing the folder’s total size after about a second.
Step 1: Open File Explorer Options
Open File Explorer by pressing Windows + E. Click the View tab at the top (or the three-dot menu in Windows 11), then click Options.
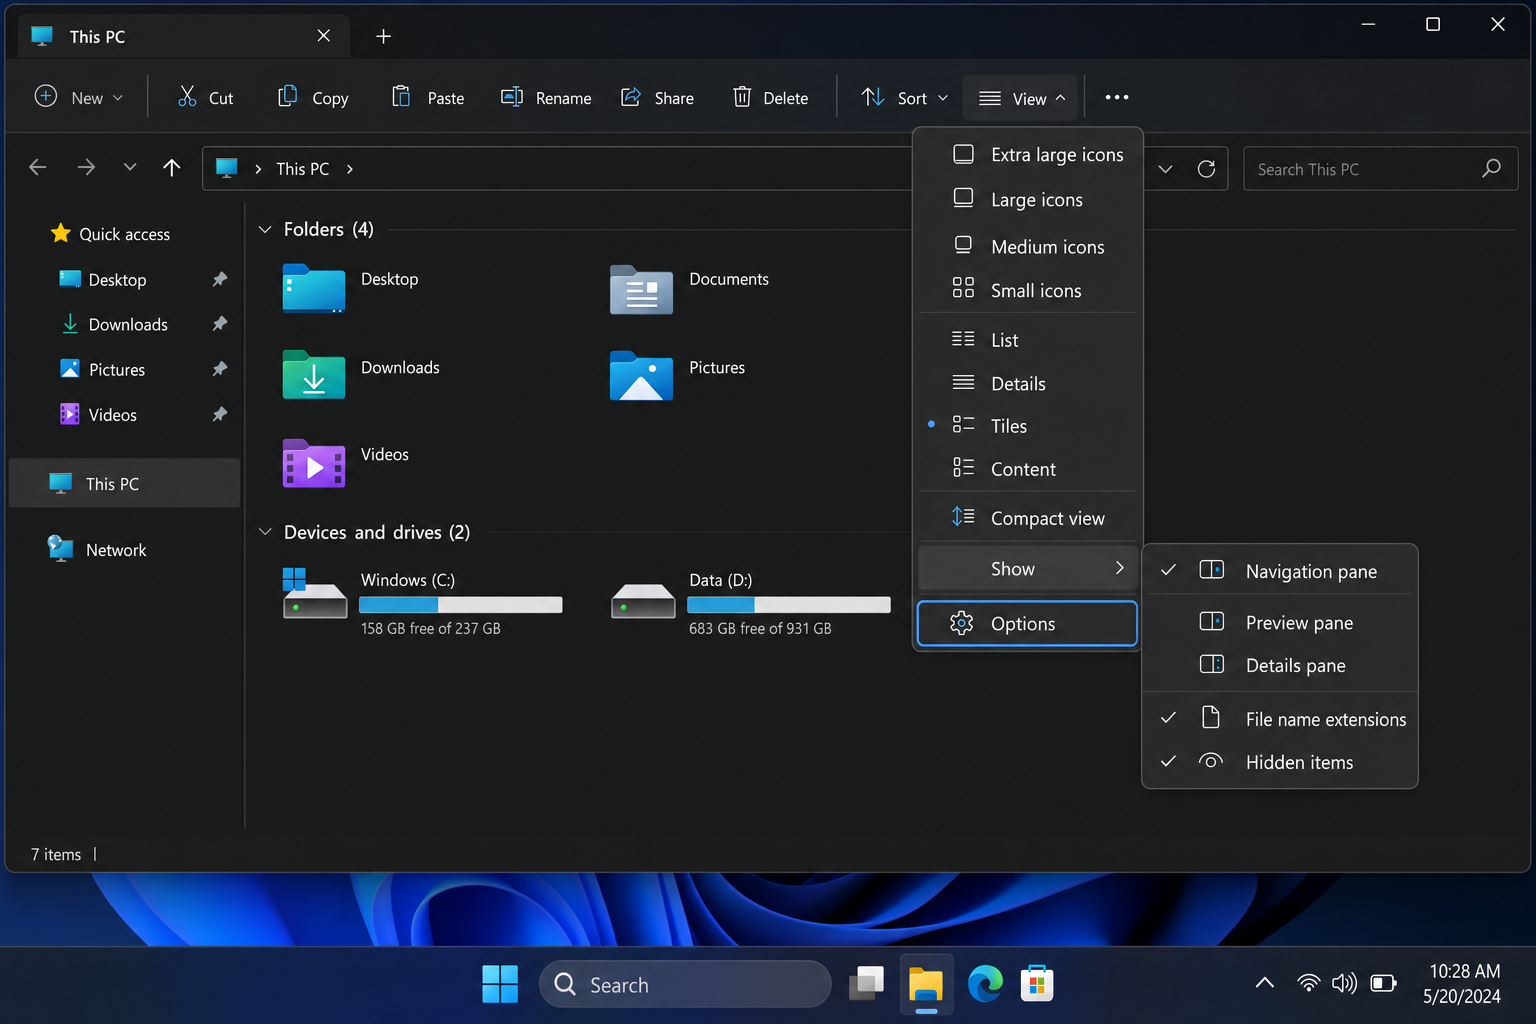
Step 2: Enable Folder Size Tooltips
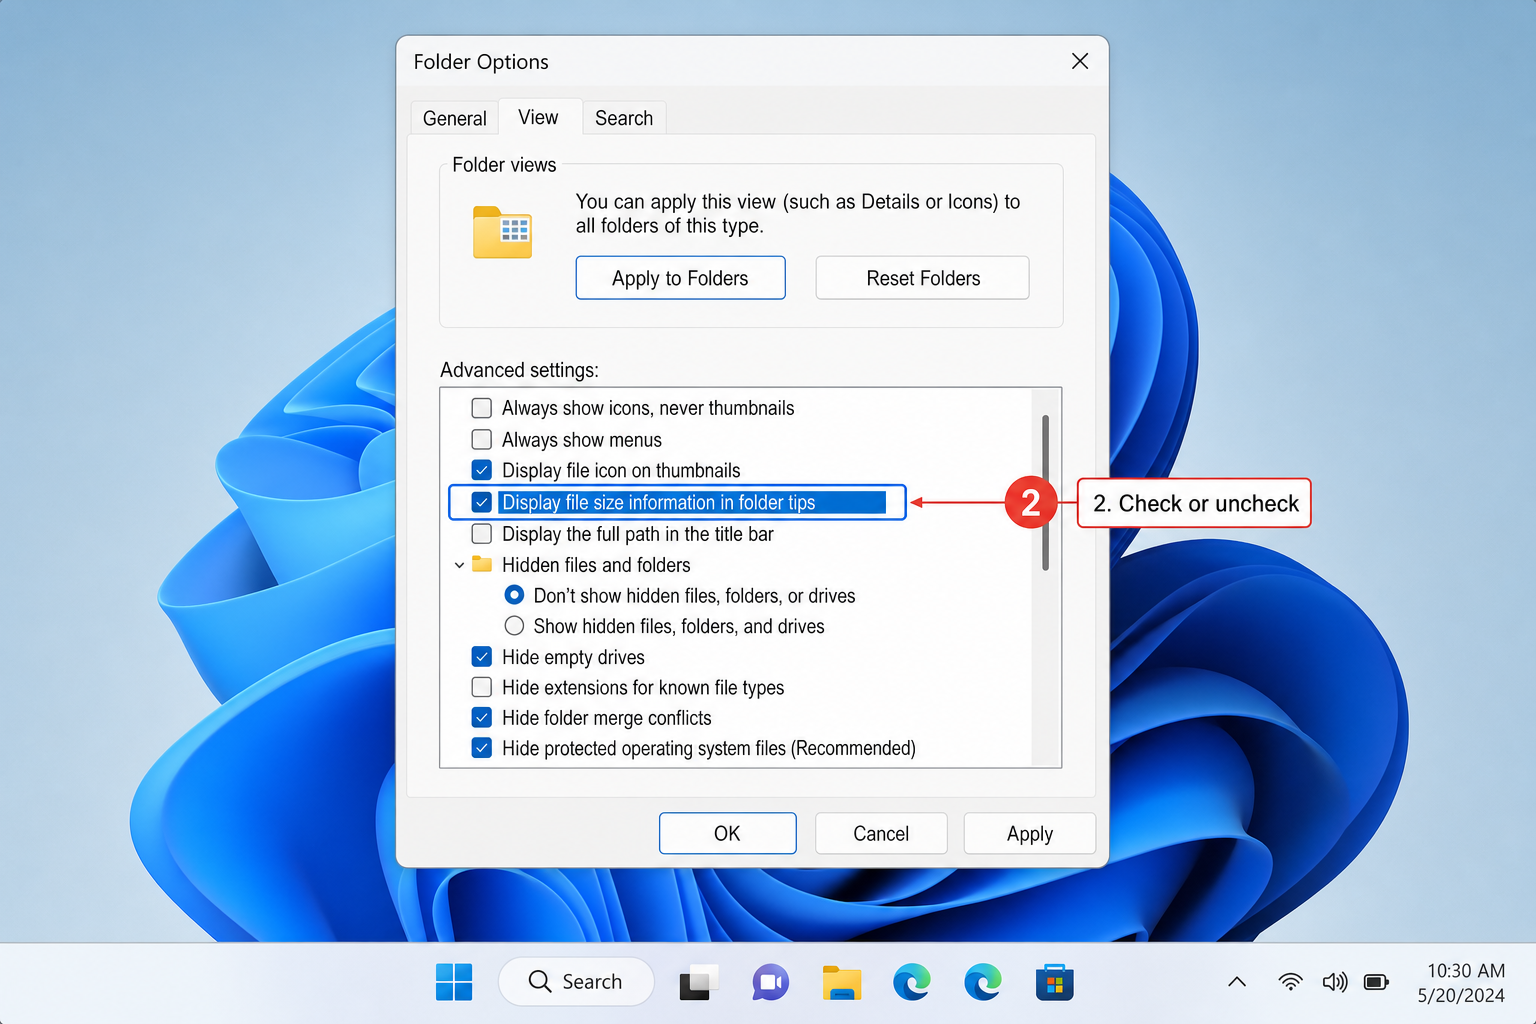
In the Folder Options window, click the View tab. Scroll down the list until you see “Display file size information in folder tips”. Make sure that box is checked, then click Apply and OK.
Step 3: Hover Over Any Folder
Go back to File Explorer, navigate to any folder, and hover your mouse over it without clicking. After about a second, you’ll see a tooltip showing the folder size, the number of files inside, and the date modified.

That’s it! No downloads, no installs. Keep in mind that tooltips may not appear for every folder type or in every view — some special or system folders may not show size information even with this option enabled. If that happens, use the Right-Click Properties method below or a disk analyzer tool for a reliable size reading.
Method 2: Right-Click Properties (Quick On-Demand Check)
If you just need to check the size of one specific folder and don’t want to install anything, this is your go-to. It’s been in Windows forever and it still works perfectly.
- In File Explorer, right-click the folder you want to check.
- Select Properties from the context menu.
- Look at the Size field — that’s the total size of everything inside the folder, including all subfolders.
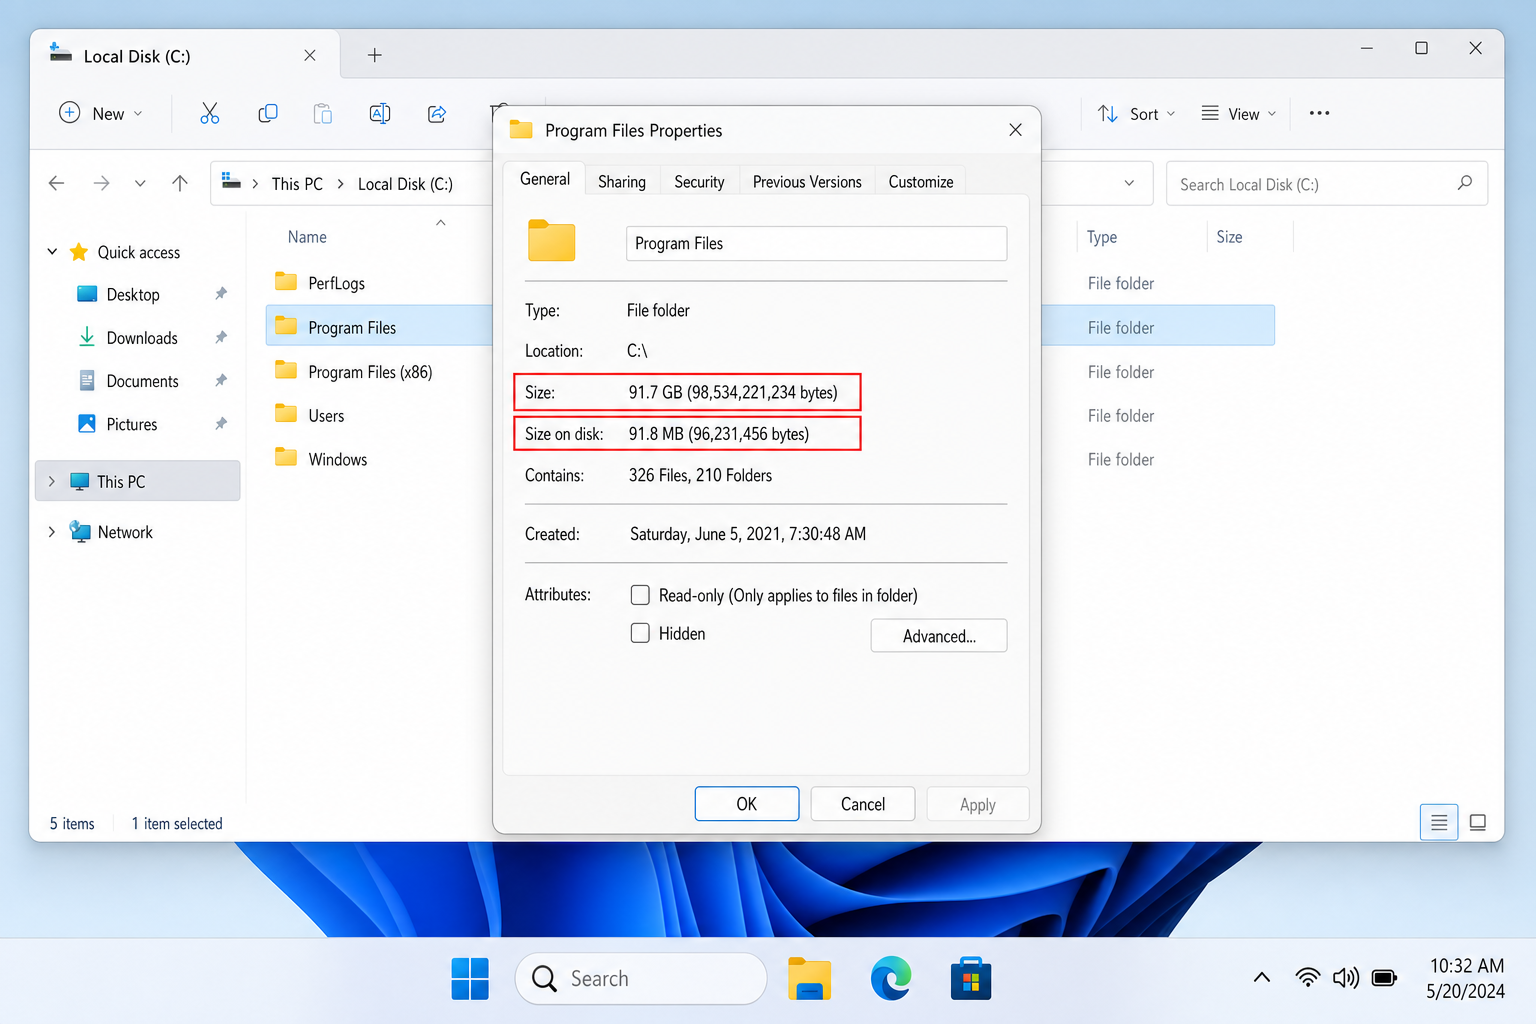
You’ll also see a Size on disk field, which can be slightly different — that’s how much actual drive space the folder occupies after accounting for how Windows stores files in blocks. (The two numbers are usually pretty close, so don’t stress about the difference.)
The catch? This gets tedious fast if you’re trying to compare multiple folders. For that, the next method is way better.
Method 3: Add a Folder Size Column with Windhawk (Best for Daily Use)
This is the option most people have been wishing for: a proper Size column in Details view that shows folder sizes right alongside file sizes, without opening a separate app. A free tool called Windhawk makes this possible through a mod (think of it like a small plugin) that patches File Explorer directly.
Windhawk is a popular open-source tool that works on Windows 10 and Windows 11 — including the latest 24H2 build.
Step 1: Download and Install Windhawk
Head to windhawk.net and download the installer. Run it and follow the on-screen steps — it’s a straightforward install with no bloatware.

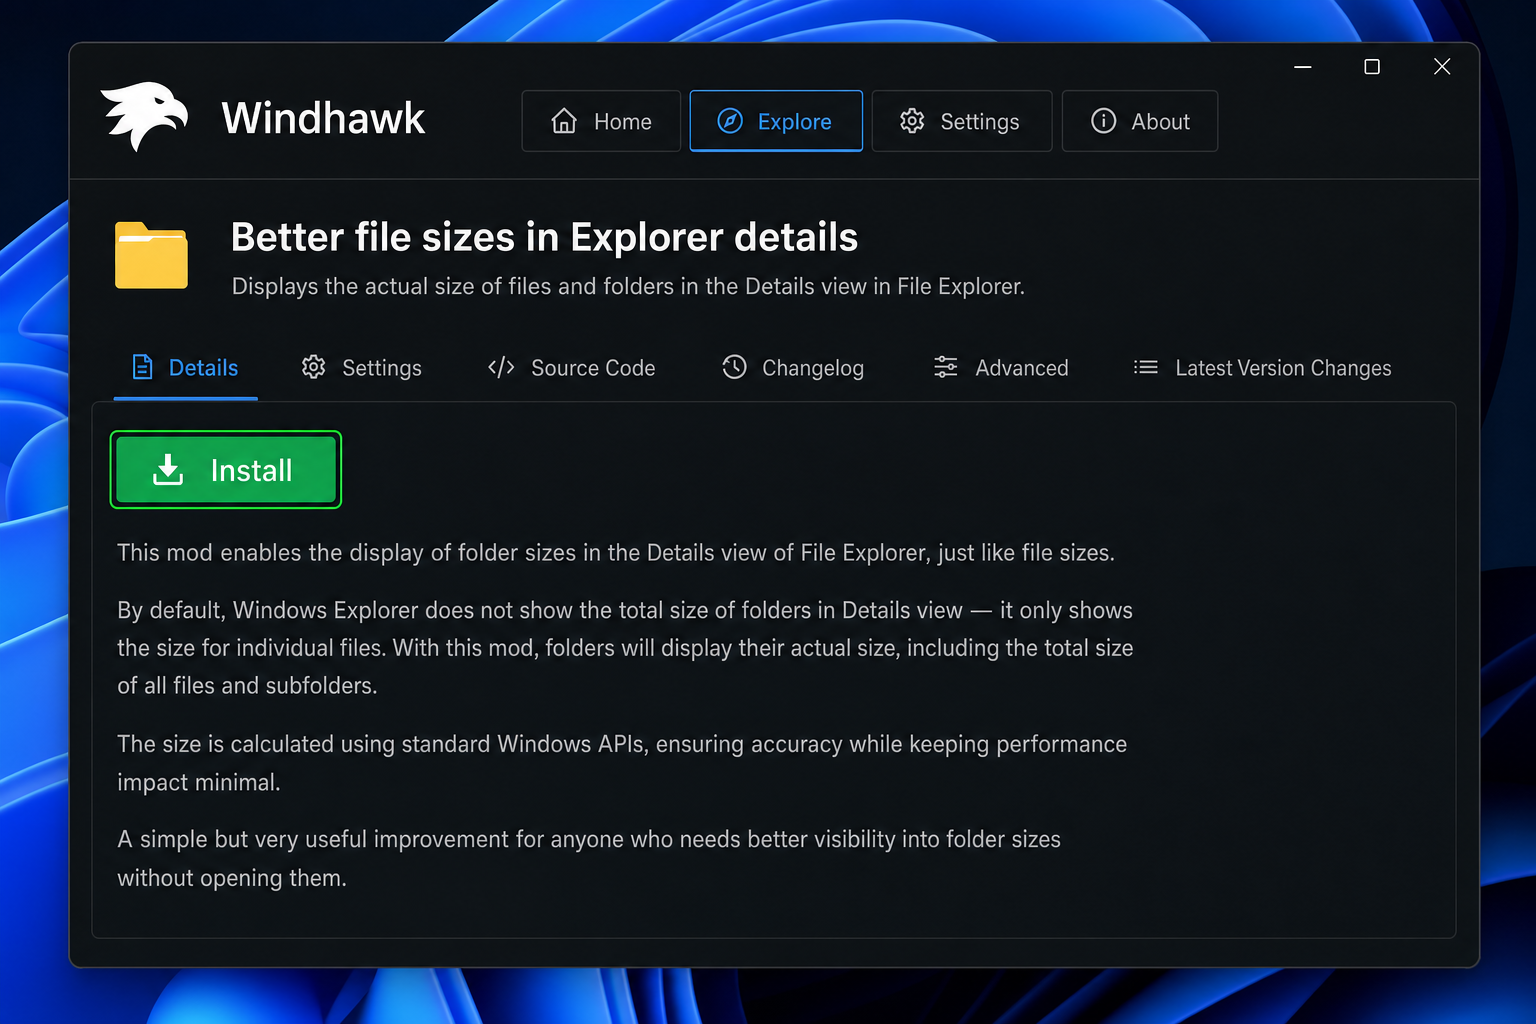
Step 2: Find and Install the Folder Size Mod
Once Windhawk is open, click the Explore tab and search for “Folder Size”. Click on the mod when it appears, then hit Install. Windhawk will apply it automatically — no restart required.
Step 3: Enable the Size Column in File Explorer
Open File Explorer and switch to Details view (click View > Details). Now right-click on the column header row at the top (where it says Name, Date modified, Type, etc.) and you should see Size in the list. If it’s not already checked, click it to enable it.
You’ll now see folder sizes right in the Size column, right next to your file sizes. Folders with lots of subfolders may take a second to calculate, but it works great for most everyday browsing.
To undo everything, just go back into Windhawk, find the mod, and click Uninstall. File Explorer goes right back to normal.
Method 4: Use WizTree for Fast Full-Drive Analysis (Best for Power Users)
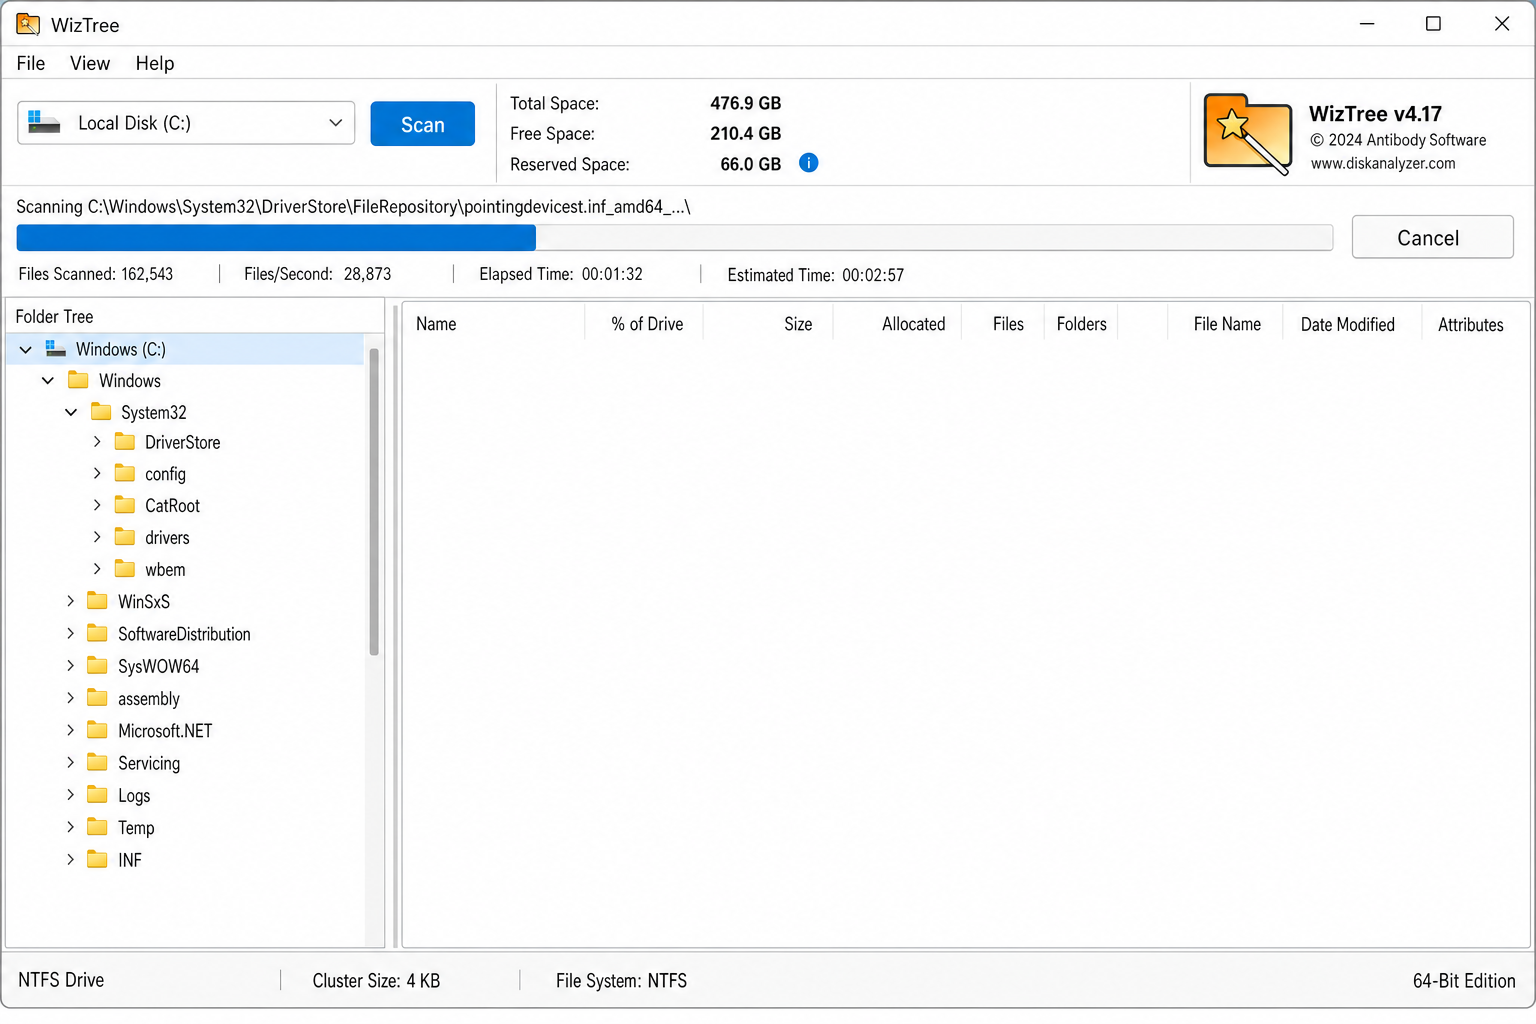
If you’re trying to figure out what’s eating up your entire drive — not just one folder — WizTree is the fastest tool for the job. It reads your drive’s file table directly (the part of Windows that tracks every file location), which means it can scan even a 2TB drive in just a few seconds. It’s genuinely impressive.
Step 1: Download WizTree
Go to the WizTree website and download the free version. There’s both an installer and a portable version (portable means you can run it without installing — handy if you’re on a work computer).
Step 2: Scan Your Drive
Open WizTree, select the drive you want to scan from the dropdown at the top (usually C:), and click Scan. It’ll be done in seconds.
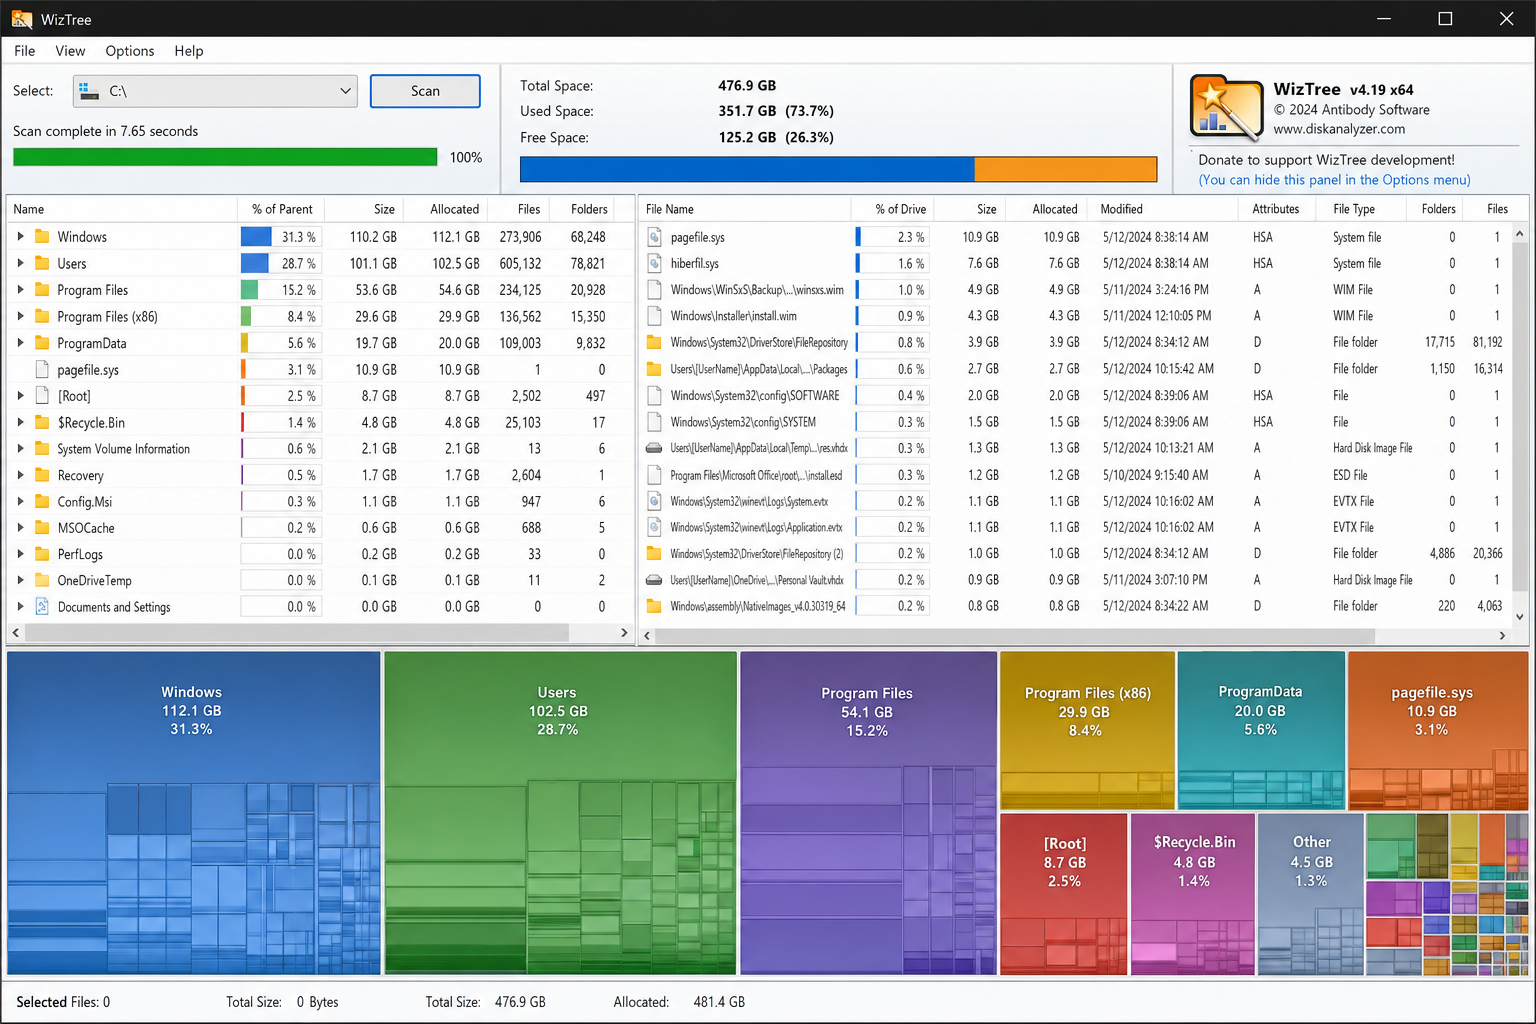
Step 3: Find the Space Hogs
WizTree sorts everything by size automatically, so the biggest folders and files float right to the top. You can also switch to the Treemap view for a color-coded visual of exactly where your space is going — bigger blocks mean bigger files.
Method 5: Use TreeSize Free for a Visual Tree View
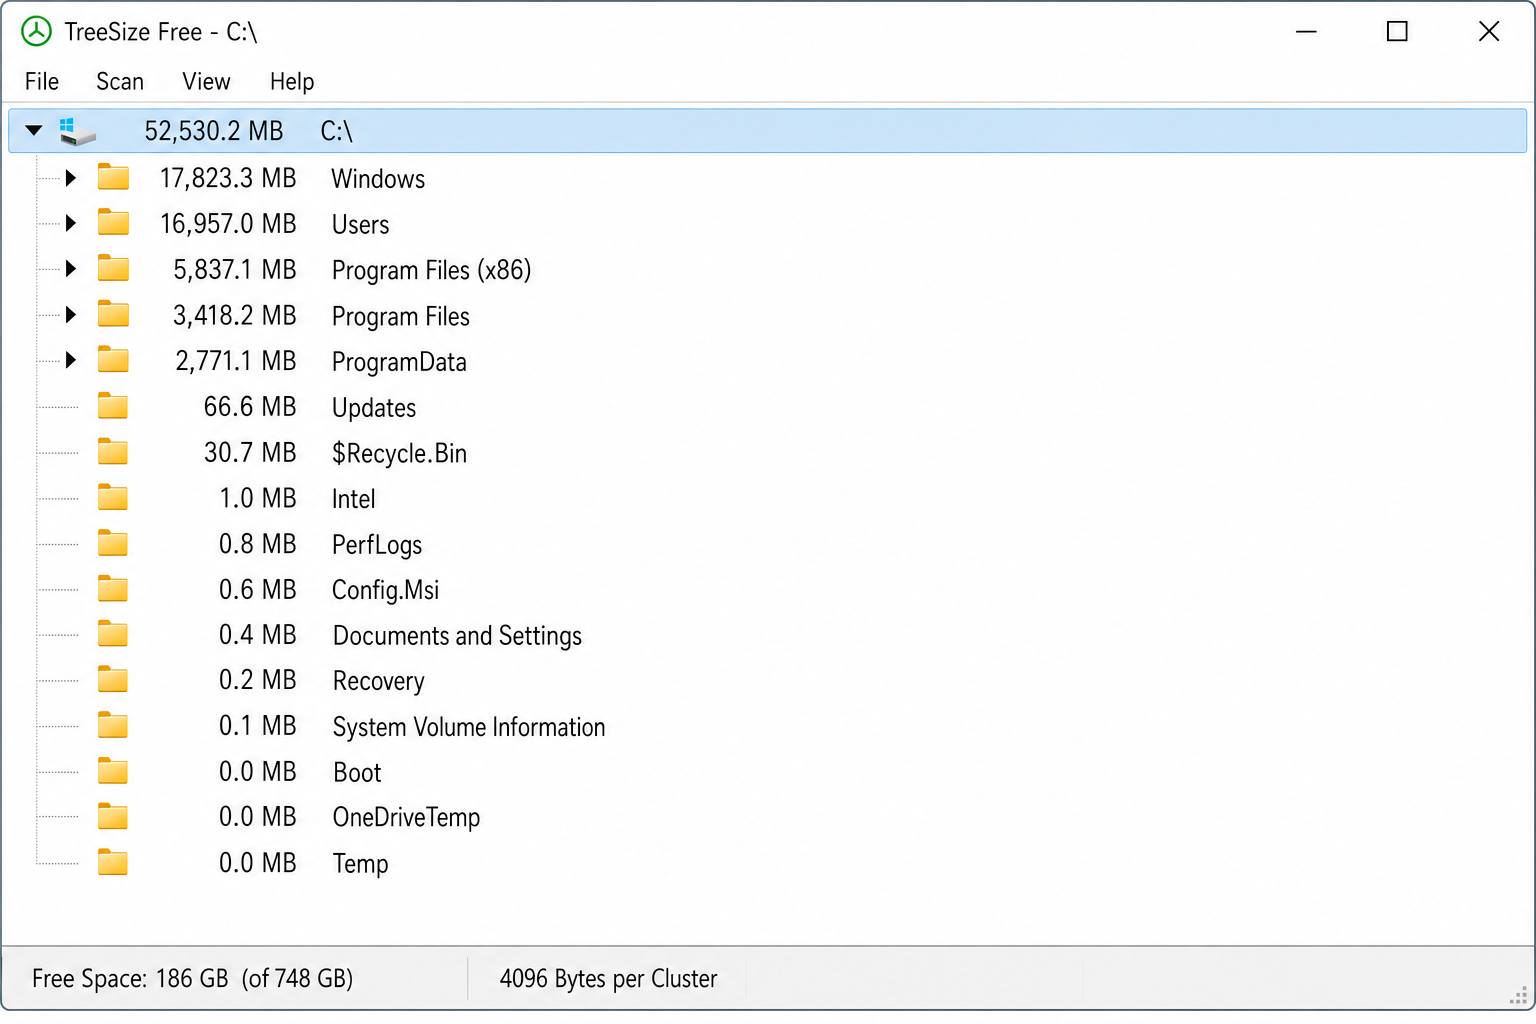
TreeSize Free is another solid option — it’s been around for years and is still actively updated. It gives you a tree-style breakdown of your folders, so you can drill down from a top-level folder all the way to the individual files taking up space.
Download it from the JAM Software website. After installing, right-click any folder in File Explorer and you’ll see a “TreeSize Free” option in the context menu — click it to instantly see a size breakdown of that folder and everything inside it.
Bonus: Windows Built-In Storage View (No Downloads Needed)
If you’d rather not install any third-party tools at all, Windows has a basic built-in option worth knowing about. Go to Settings > System > Storage. You’ll see a breakdown of how your drive space is being used by category (apps, temporary files, documents, etc.). It won’t give you a per-folder size list like WizTree or TreeSize Free, but it’s a great starting point for less technical users who just want a quick overview of what’s taking up space — and it’s already on your PC.
Quick Comparison: Which Method Should You Use?
| Method | Install Required? | Shows Size In Explorer? | Best For |
|---|---|---|---|
| Hover Tooltips | No | Tooltip only | Quick checks without any setup |
| Right-Click Properties | No | No (separate window) | Checking one folder at a time |
| Windows Storage Settings | No | No (separate app) | Basic overview, no installs |
| Windhawk Mod | Yes (free) | Yes — Size column! | Daily use in File Explorer |
| WizTree | Yes (free) | No (separate app) | Full-drive analysis, large drives |
| TreeSize Free | Yes (free) | No (separate app) | Visual folder tree breakdowns |
Tips and Troubleshooting
Running into issues? Here are the most common problems and how to fix them:
- Tooltips aren’t showing up: Double-check that “Display file size information in folder tips” is checked in Folder Options > View tab. Also make sure your Windows is up to date — older builds had some quirks with this setting. Note that some folder types may not show tooltips even with the option enabled; use Right-Click Properties as a reliable fallback.
- Windhawk mod causes Explorer to lag: This usually happens when you browse a folder with tens of thousands of files (like
C:\Windows). For those massive system folders, use WizTree instead and disable the Windhawk mod for those directories. - Size column is blank for folders: This is normal behavior without the Windhawk mod installed. If you have the mod and still see blanks, try restarting File Explorer: open Task Manager (
Ctrl + Shift + Esc), find Windows Explorer, right-click it, and select Restart. - Properties window is slow on big folders: That’s expected — Windows is counting every single file recursively. For anything over a few GB, WizTree will give you the same info almost instantly.
- Folder view keeps resetting: This was a known bug in earlier Windows 11 builds, but it has been addressed in recent updates. Make sure your Windows is fully updated by going to Settings > Windows Update > Check for updates.
Wrapping Up
Microsoft still hasn’t added native folder sizes to File Explorer’s Details view in 2026 — and honestly, that’s unlikely to change anytime soon given the performance tradeoffs. But between hover tooltips for quick checks, the Windhawk mod for a proper Size column, and WizTree for full-drive analysis, you’ve got everything you need to track down those space-hogging folders without breaking a sweat.
If you just want the simplest fix with no installs, turn on tooltips. If you want folder sizes to show up right in File Explorer like they always should have, grab Windhawk — it’s the closest thing to a native solution right now, and it works great.