
Running out of space on your C drive? Your Documents folder might be hogging more room than you think. By default, Windows stores everything in C:\Users\[YourName]\Documents, but you can easily move it to another drive to free up precious system space and keep your files safer if Windows ever crashes.
I stumbled upon this trick years ago when my main drive was getting dangerously full, and it’s been a lifesaver ever since. The best part? It takes about five minutes, and all your programs will still find your files exactly where they expect them to be.
Why Move Your Documents Folder?
Before we dive into the how-to, here’s why this is actually worth doing:
- Free Up System Drive Space: Windows updates, temporary files, and system restore points all live on your C drive. Moving Documents elsewhere gives Windows room to breathe.
- Better Data Protection: If your Windows installation gets corrupted (and trust me, it happens), your files stay safe on a separate drive or partition.
- Faster Backups: It’s much easier to back up a dedicated data drive than to sort through system files on your C drive.
Before You Begin
Make sure you have:
- A second drive or partition with enough free space for your Documents folder
- Administrator access to your Windows account
- A backup of important files (just in case something goes wrong)
OneDrive Warning: If you’re using OneDrive, Windows might have already moved your Documents folder to C:\Users\[YourName]\OneDrive\Documents. This can complicate things, so we’ll cover how to handle that too.
How to Move Your Documents Folder in Windows 11
Step 1: Check Your Current Documents Location
First, let’s see where your Documents folder currently lives. Press Windows + R, type shell:Personal, and hit Enter. This opens your actual Documents folder, wherever it’s currently located.
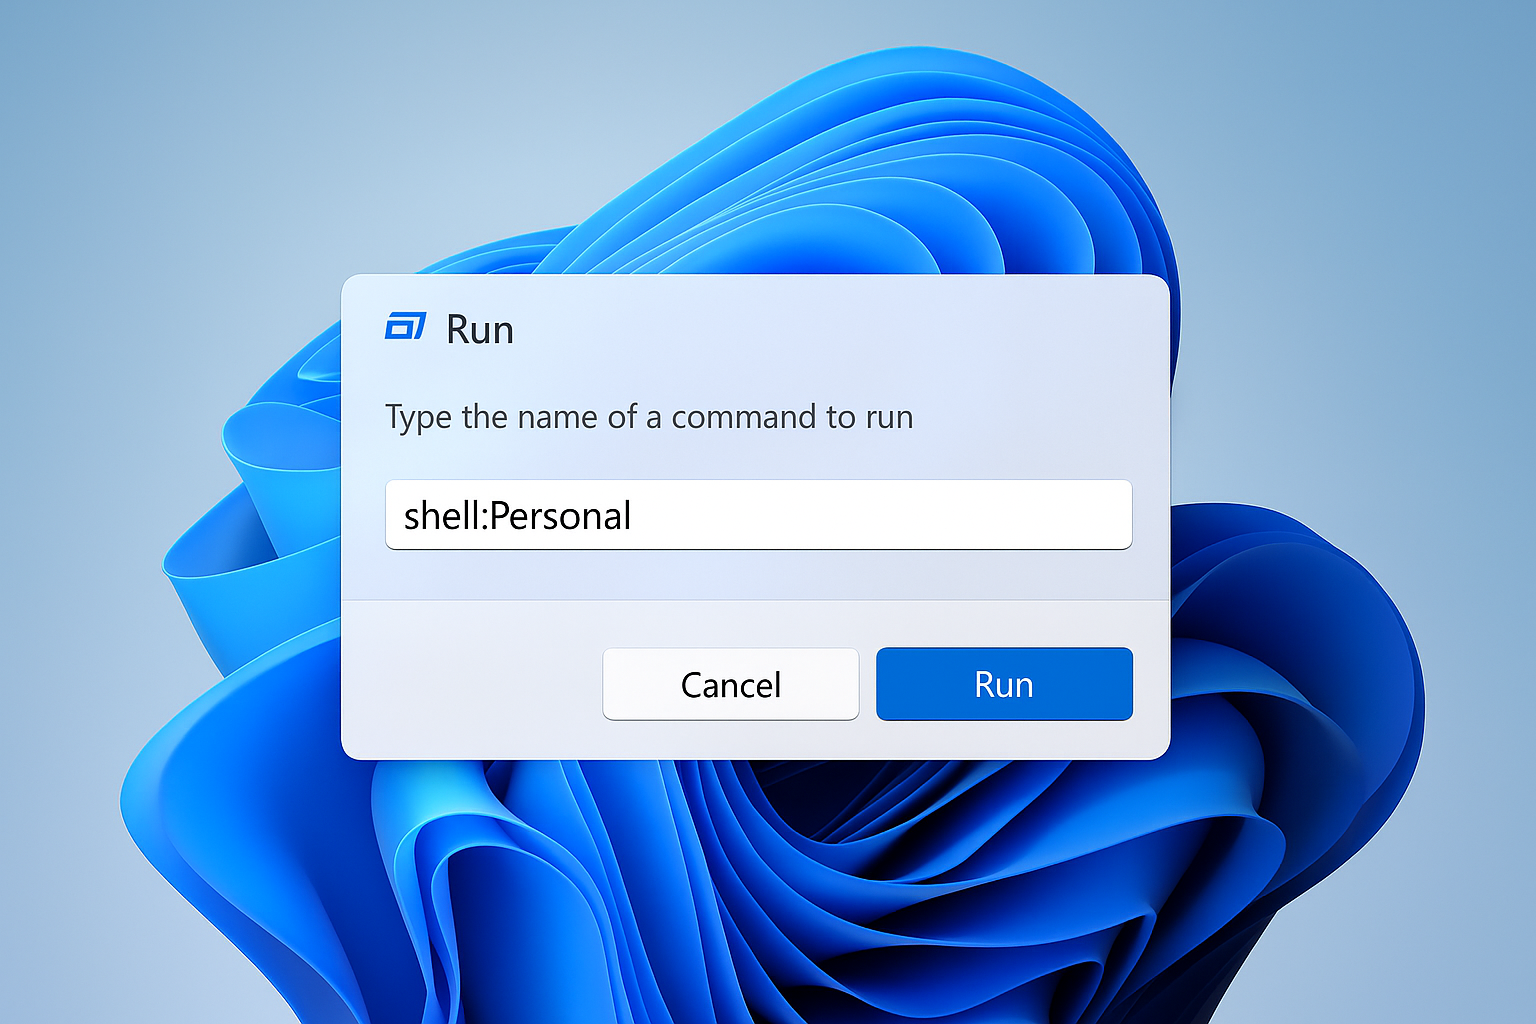
Take note of the path in the address bar. If it shows OneDrive\Documents, you’ll need to deal with OneDrive first (see the troubleshooting section below).
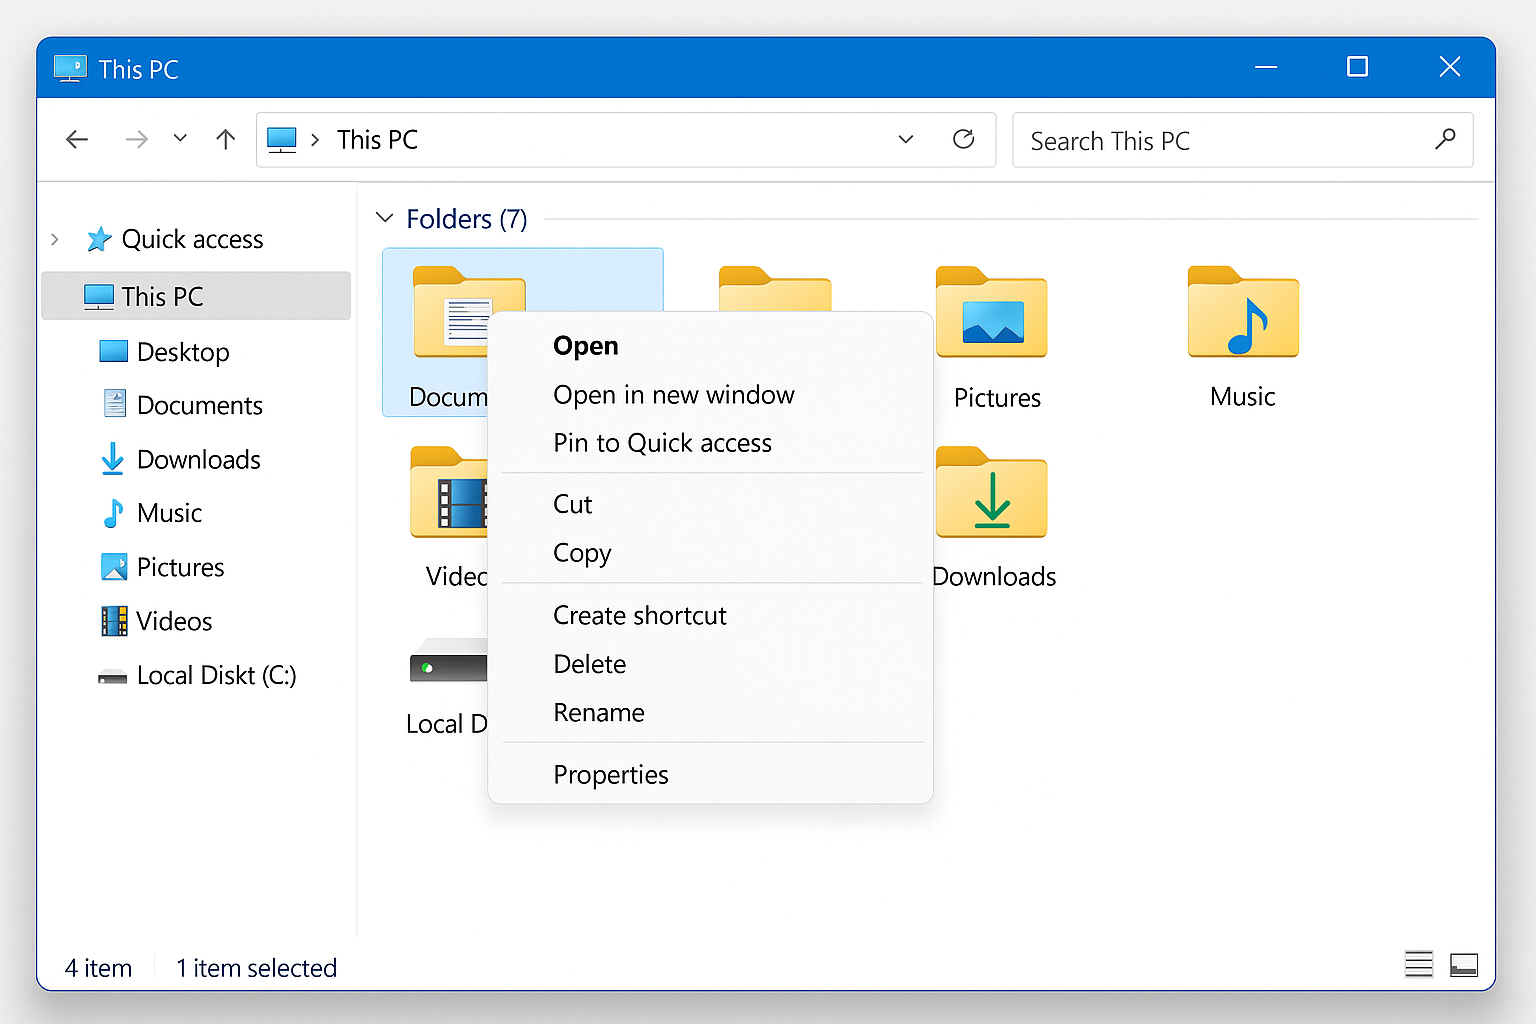
Step 2: Open Documents Properties
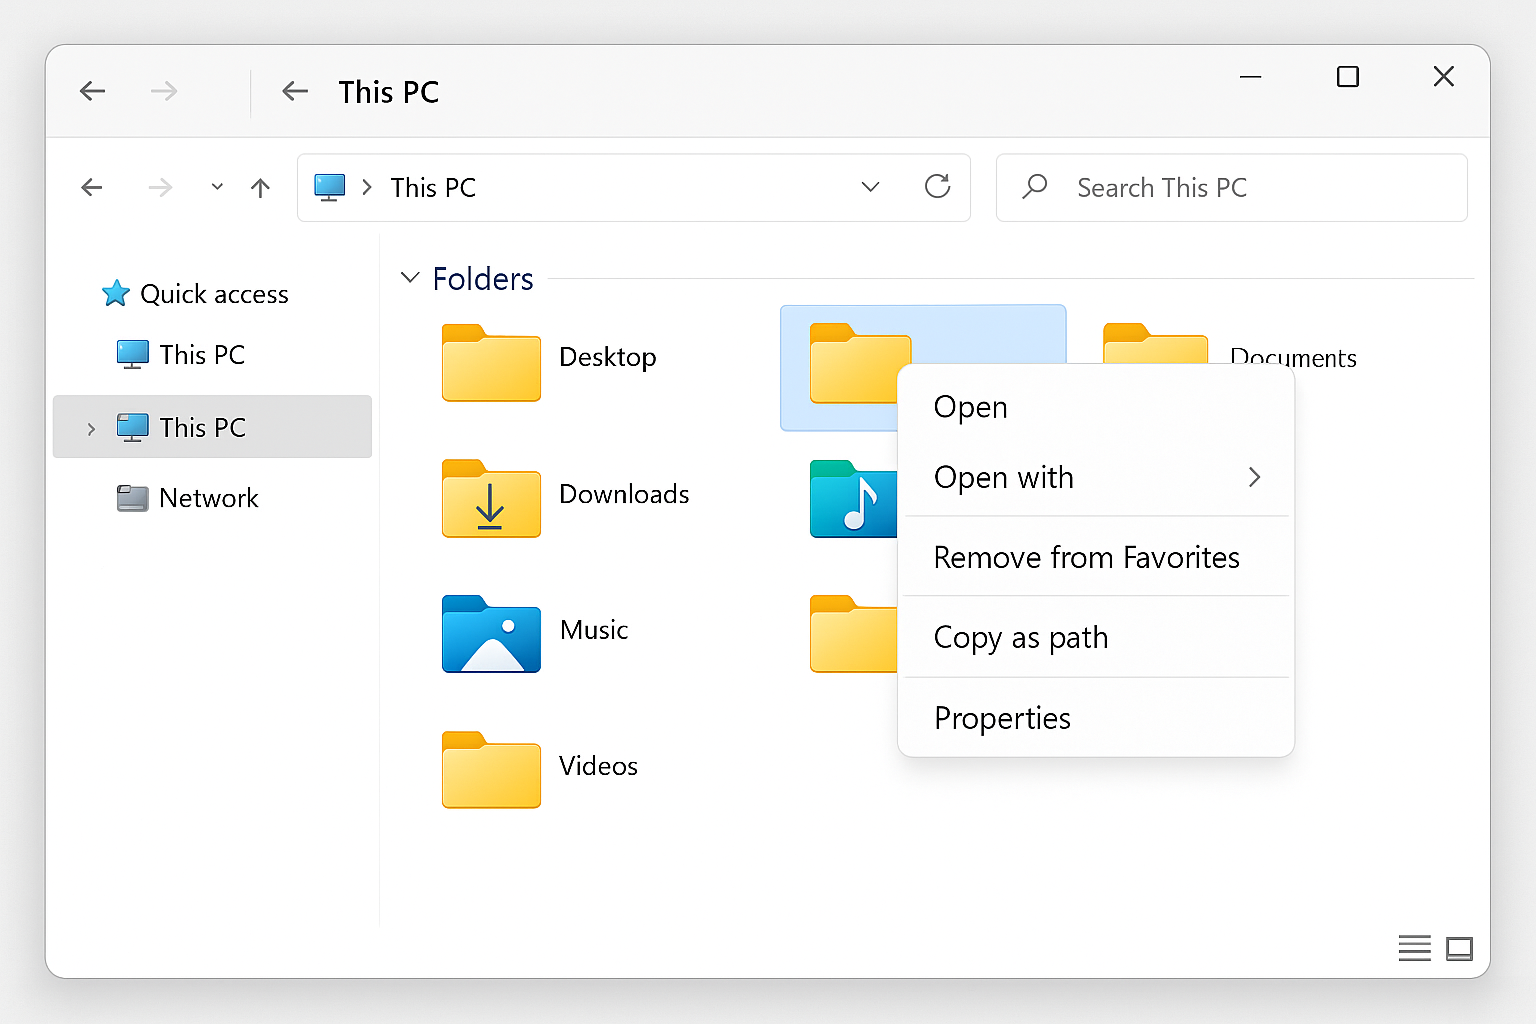
Open File Explorer and navigate to This PC. Right-click on the Documents folder and select Properties.
Step 3: Change the Location
In the Properties window, click the Location tab. You’ll see the current path to your Documents folder.
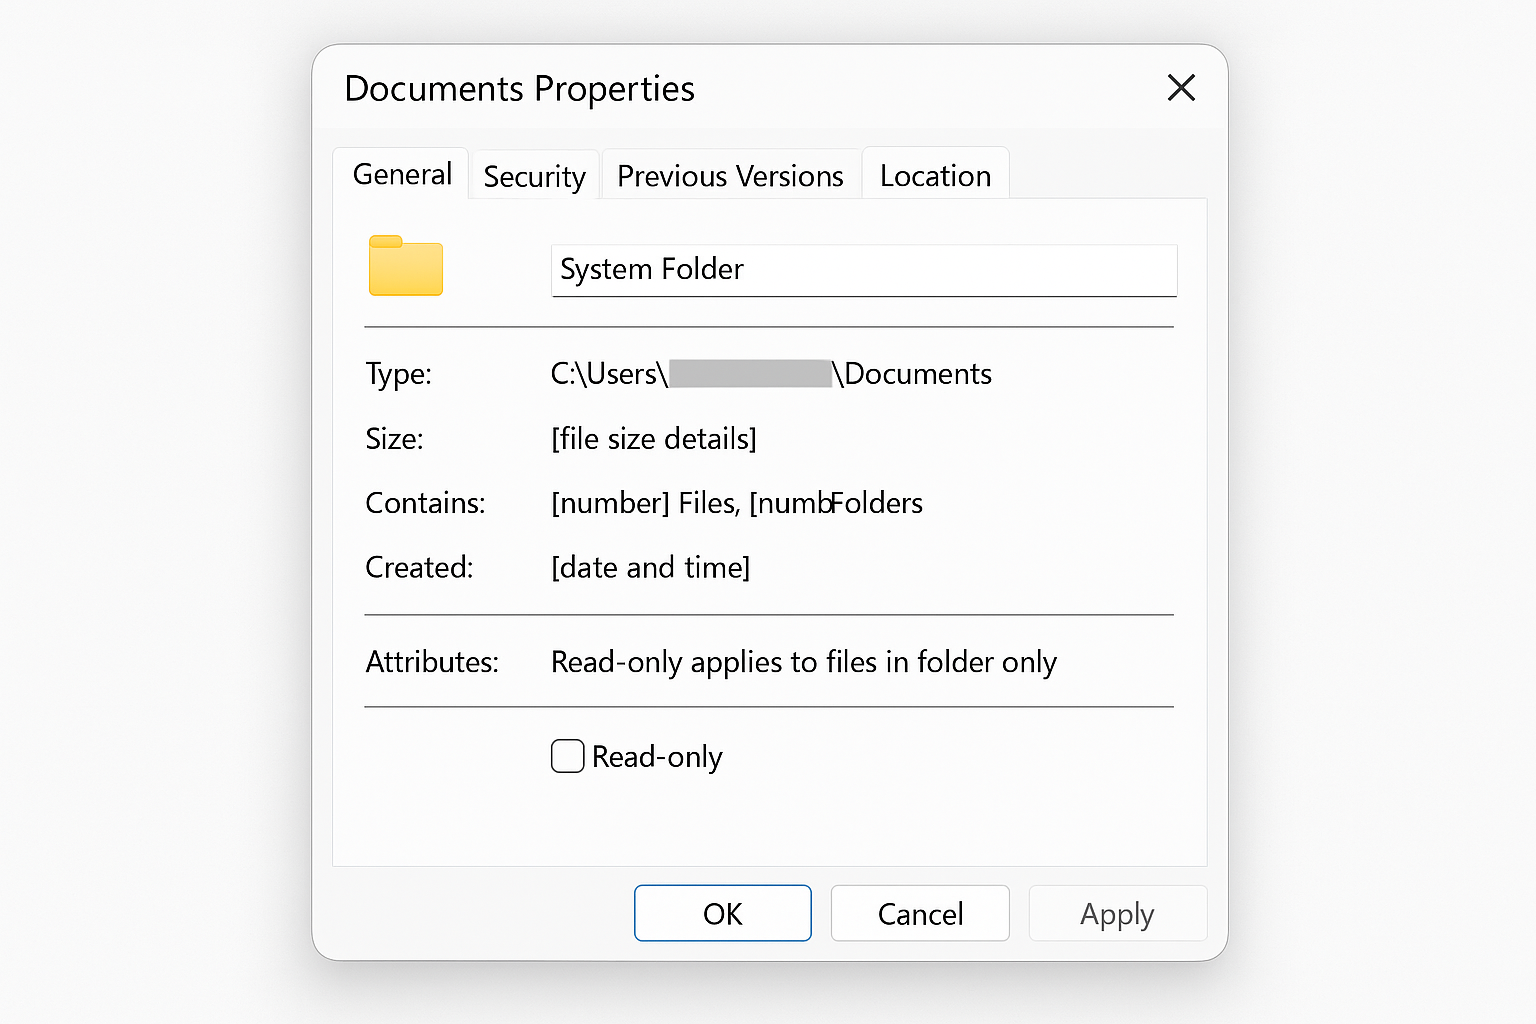
Click Move and browse to where you want your Documents folder to live. For example, if you have a D drive, you might choose D:\Documents or D:\My Files\Documents.

Step 4: Move Your Files
Click Apply. Windows will ask if you want to move all existing files to the new location. Click Yes unless you have a specific reason not to.
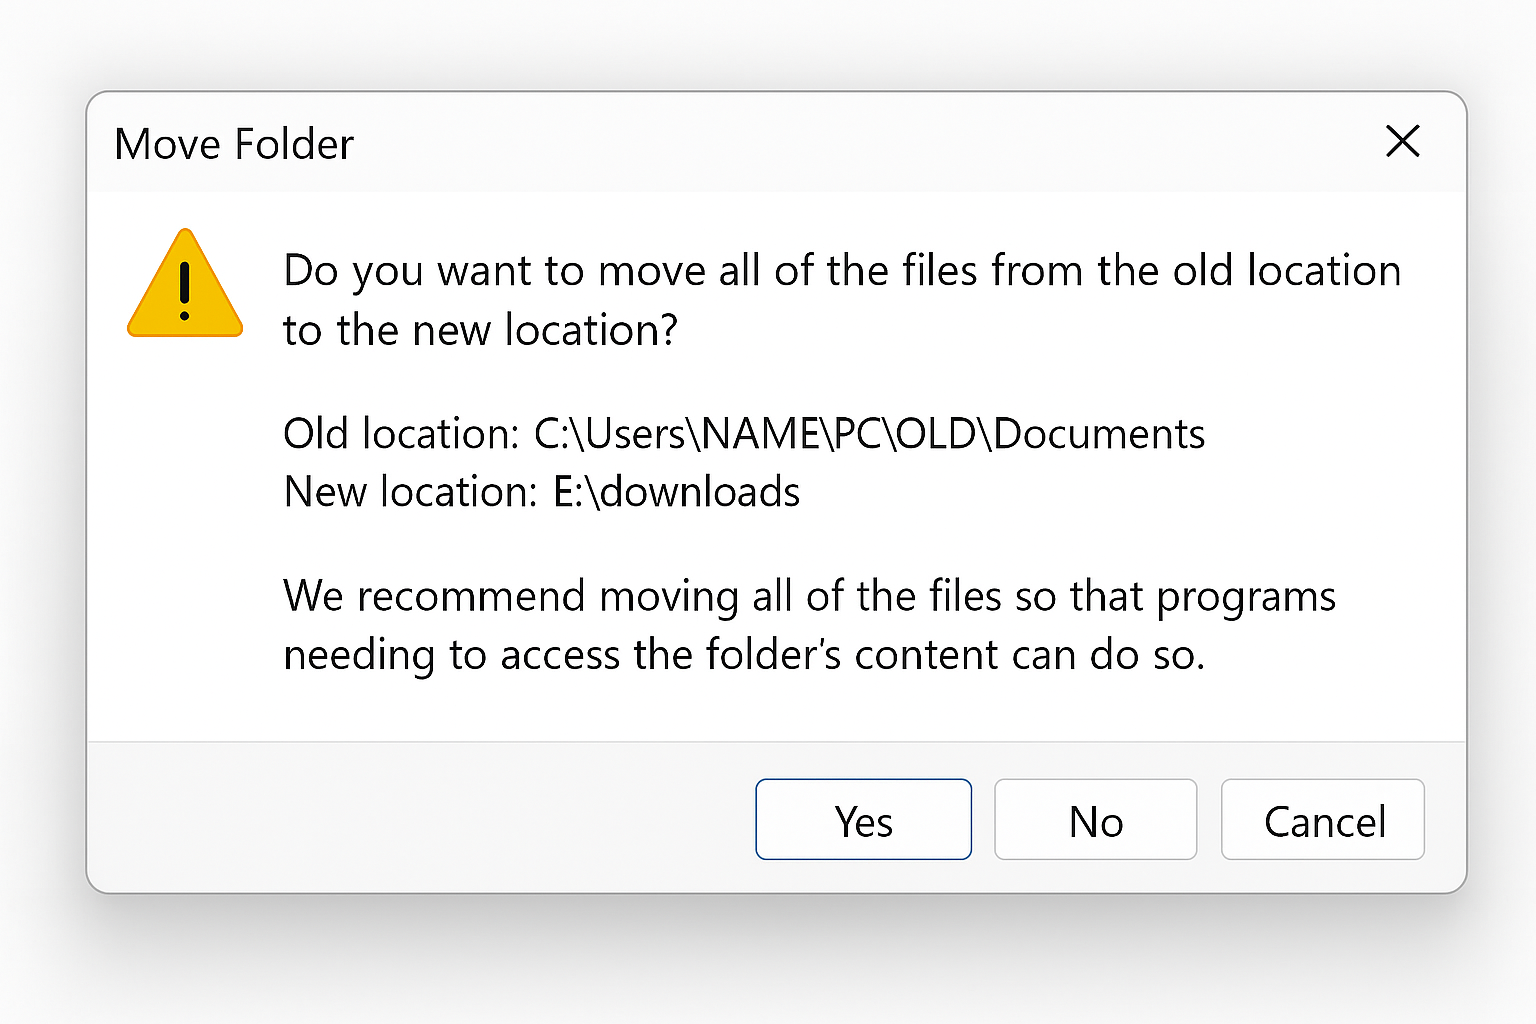
Windows will now copy everything over. This might take a few minutes depending on how much stuff you have in there.
For Windows 10 Users
The process is virtually identical in Windows 10. The only difference is that the File Explorer interface looks slightly different, but all the same options are in the same places.
Troubleshooting Common Issues
Missing Location Tab
Problem: The Location tab doesn’t appear in Properties, or you get an “Access denied” error.
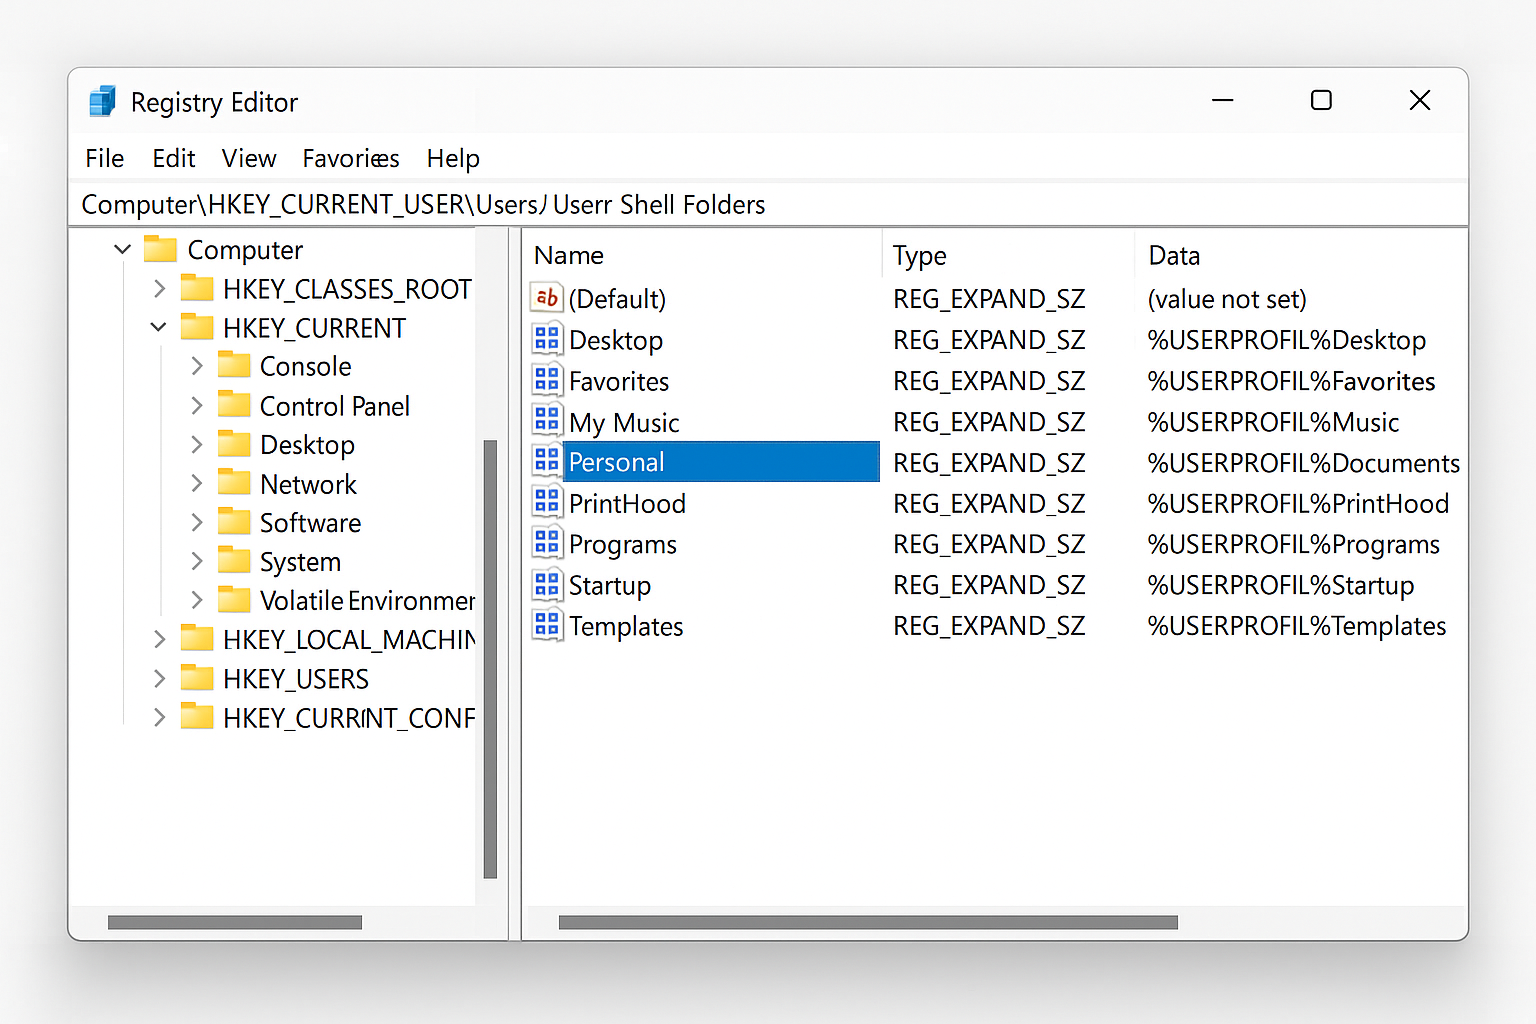
Solution: This usually happens when OneDrive has taken control of your Documents folder. Here’s the registry fix:
- Press
Windows + R, typeregedit, and press Enter - Navigate to
HKEY_CURRENT_USER\Software\Microsoft\Windows\CurrentVersion\Explorer\User Shell Folders - Find Personal in the right pane and double-click it
- Change the value to your desired path (e.g.,
D:\Documents) - Restart your computer
OneDrive Conflicts
Problem: Your Documents folder shows two different locations, or files seem to be in multiple places.
Solution: You can either embrace OneDrive’s cloud syncing or disconnect it entirely:
- To keep OneDrive: Let it handle the Documents folder location. Your files will sync to the cloud automatically.
- To disable OneDrive: Right-click the OneDrive icon in your system tray, go to Settings, and uncheck “Sync this PC” for Documents. Then use the Location tab method above.
Can’t Move Folder Error
Problem: Windows says it can’t move the folder because it’s in use.
Solution: Close all programs that might be accessing files in your Documents folder, including:
- Microsoft Office applications
- File Explorer windows
- Any programs with open/save dialogs
If that doesn’t work, restart your computer and try again immediately after logging in.
What About Other Folders?
You can move other user folders the same way:
- Desktop: Right-click Desktop in This PC > Properties > Location
- Downloads: Same process
- Pictures, Music, Videos: All use the same Location tab method
Just remember that each folder needs to be moved individually – there’s no “move all” option.
Restoring the Default Location
Changed your mind? You can always move everything back. Just follow the same steps, but in the Location tab, click Restore Default instead of Move. Windows will put everything back to C:\Users\[YourName]\Documents.
Tips for Success
- Create the folder first: If you’re moving to
D:\Documents, create that folder before starting the move process - Use a descriptive name: Instead of just “Documents,” try something like “My Files” or “Data” so you remember what it is
- Check your backup software: Make sure your backup program knows about the new location
- Be patient: Moving lots of files takes time. Don’t interrupt the process
Wrapping Up
Moving your Documents folder is one of those simple changes that actually makes a difference. Your C drive gets more breathing room, your files are better protected, and everything still works exactly the same way from your programs’ perspective. It’s a genuine win-win.
The process has stayed remarkably consistent since Windows 7, which is nice as there is no need to relearn everything with each Windows update. Just watch out for OneDrive trying to be helpful and redirecting things on its own. Once you get it set up the way you want it, though, you can pretty much forget about it and enjoy the extra space on your system drive.