
Is your computer running like it’s stuck in molasses, with the fan spinning like a jet engine? If you’ve opened Task Manager and seen svchost.exe hogging 50-100% of your CPU, you’re dealing with one of Windows’ most frustrating mysteries. Don’t worry though, you can actually fix this and it’s easier than you might think.
In this guide, you’ll learn exactly what’s causing your svchost problem and how to solve it in about 15 minutes. We’ll cover both the quick fixes that work 90% of the time and the deeper solutions for stubborn cases.
What is Svchost.exe?
Svchost.exe stands for “Service Host” and it’s basically Windows’ way of running multiple background services efficiently. Think of it like a shared office building, instead of each service getting its own building (which would waste resources), Windows groups related services together under one svchost.exe process.
Key things to know:
- It’s completely normal: You’ll always see multiple svchost processes running
- It hosts essential services: Windows Update, audio, networking, and dozens of other critical functions
- High CPU usage isn’t normal: When one svchost process starts eating up resources, something’s wrong
- It’s rarely a virus: Real svchost.exe files live in C:\Windows\System32 and are digitally signed by Microsoft
Check for Viruses First
Before diving into fixes, let’s rule out malware. Some viruses disguise themselves as svchost.exe to avoid detection.
Quick virus check:
- Open Task Manager with
Ctrl + Shift + Esc - Go to the Details tab
- Right-click any svchost.exe process and select Open file location
- The folder should be
C:\Windows\System32— if it’s anywhere else, that’s suspicious
If you don’t have antivirus software, run a quick scan with Windows Defender (built into Windows 10/11) or download Malwarebytes for a second opinion.
How to Identify Which Service Is Causing Problems
The key to fixing svchost issues is figuring out which specific service is the troublemaker. Windows makes this pretty easy with Task Manager.
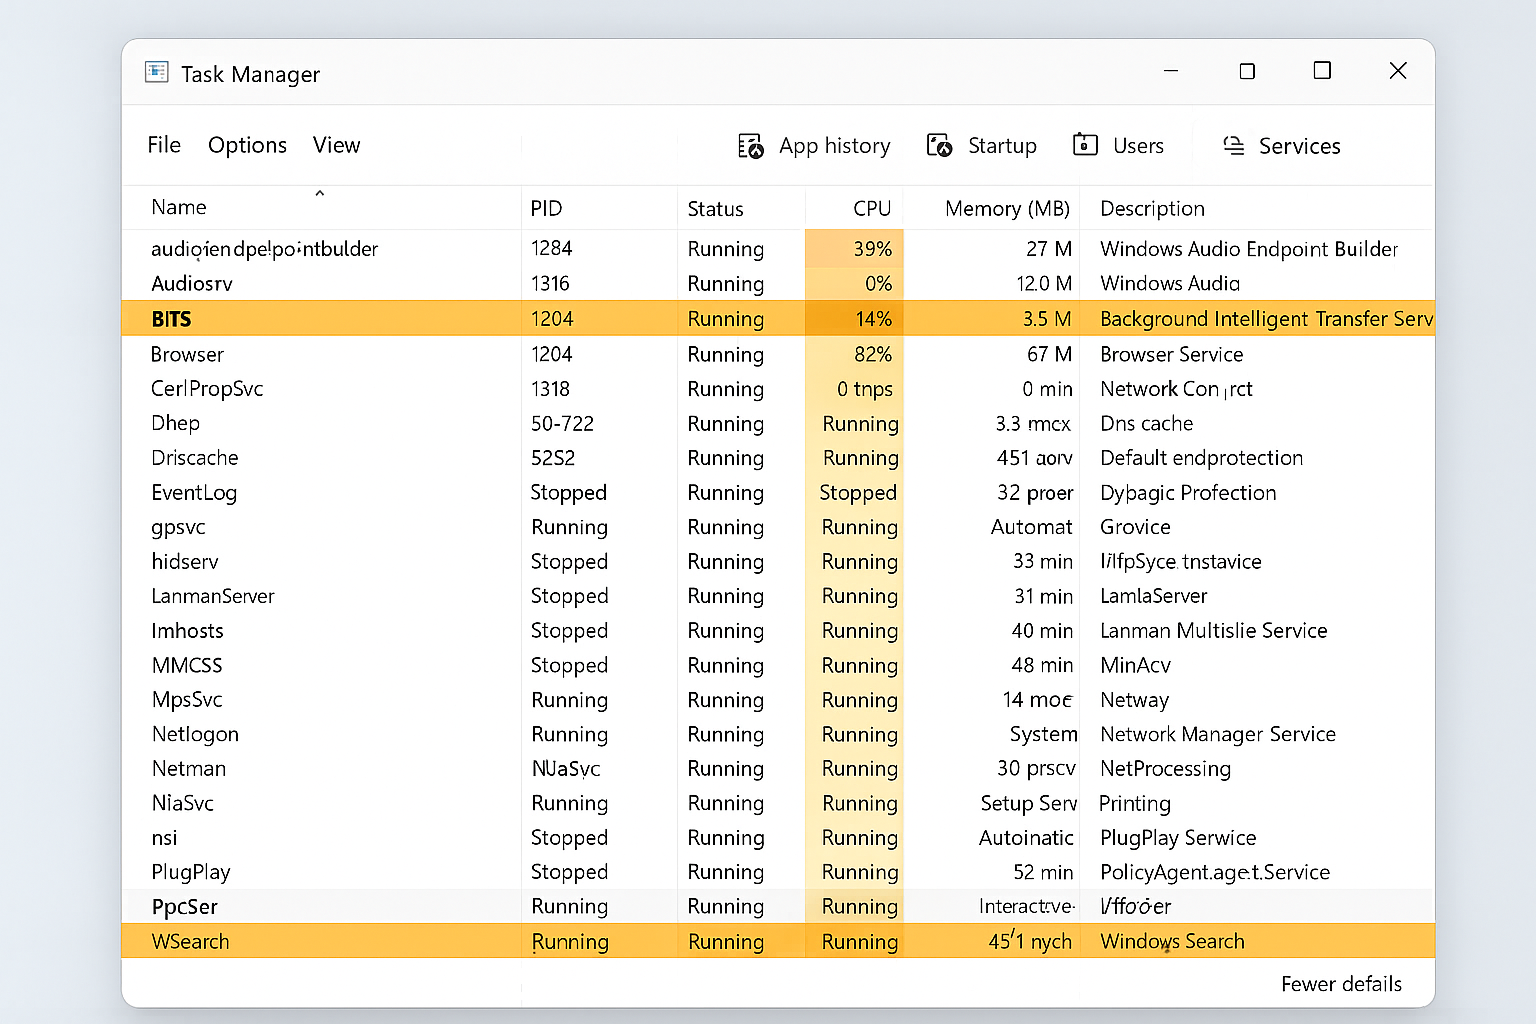
Using Task Manager (Windows 10/11)
- Press
Ctrl + Shift + Escto open Task Manager - Click the Details tab
- Click the CPU column header to sort by CPU usage (highest first)
- Find the svchost.exe process using the most CPU
- Right-click it and select Go to service(s)

This will automatically switch to the Services tab and highlight the specific services running under that svchost process. Now you know exactly what’s causing the problem!
Using Process Explorer (Advanced Option)
If you want more detailed information, Microsoft’s Process Explorer tool is fantastic. It’s free and gives you way more details than Task Manager.
- Download Process Explorer from Microsoft
- Run it as administrator (right-click > Run as administrator)
- Hover your mouse over any svchost.exe process
- A tooltip will show you exactly which services are running and which DLL files they’re using

Common Svchost Problems and How to Fix Them
Now that you know which service is causing trouble, here are the most common culprits and their fixes:
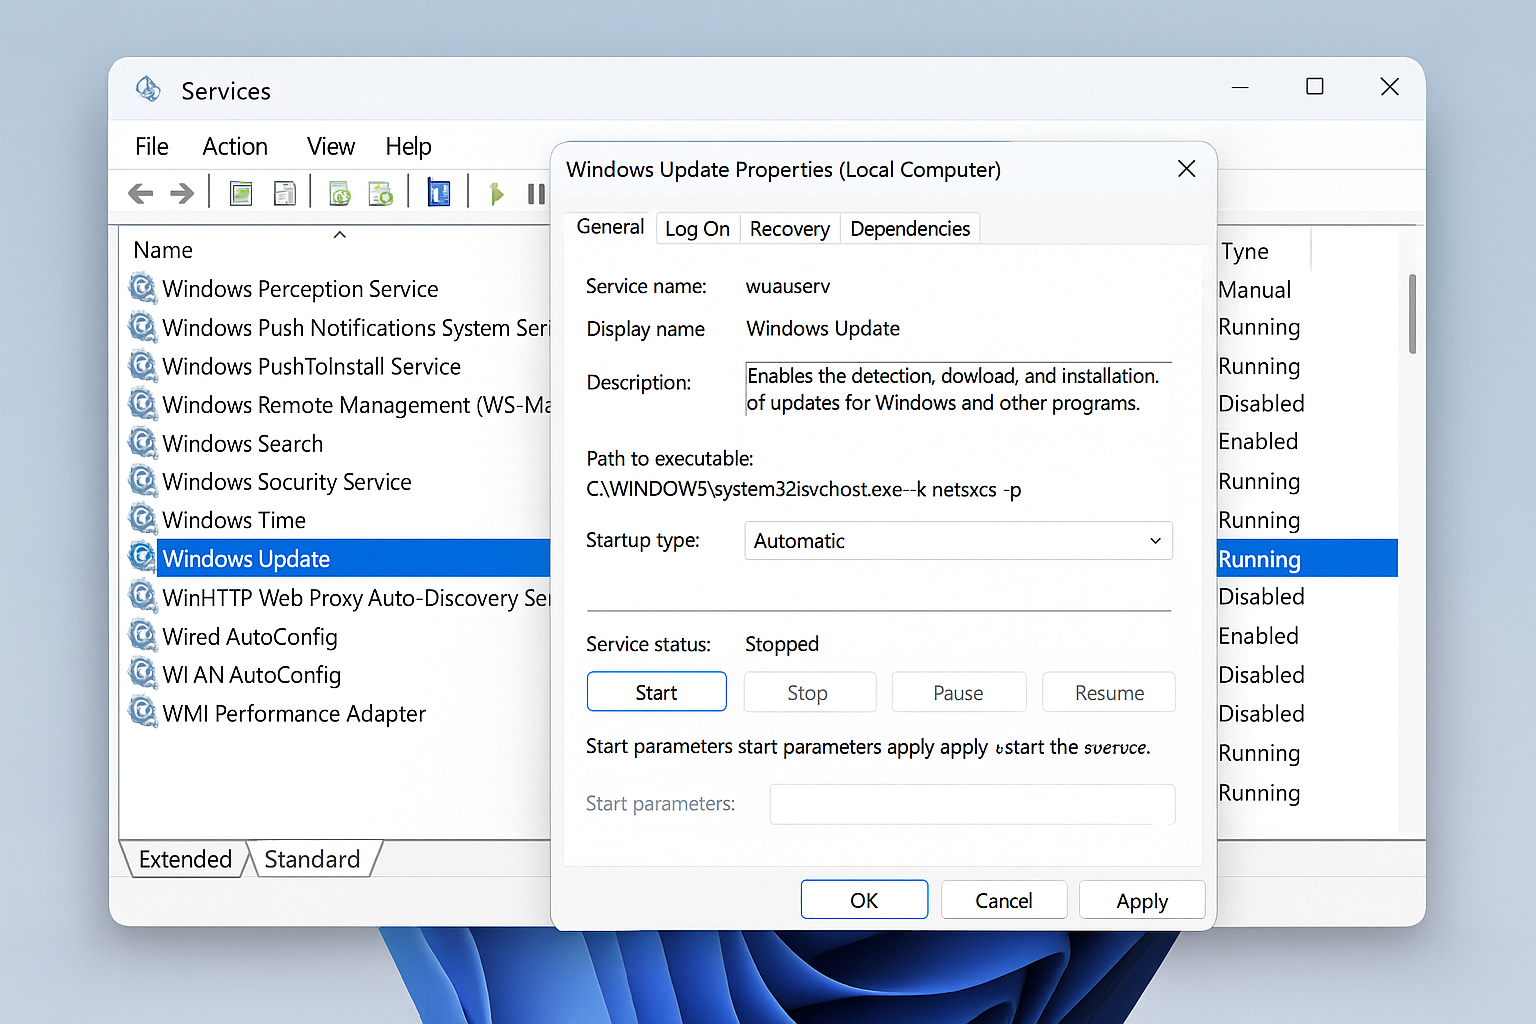
Windows Update Service (wuauserv)
The problem: This is the #1 cause of svchost CPU spikes. Windows Update gets stuck downloading or installing updates, causing the service to spin its wheels endlessly.
The fix:
- Press
Win + R, typeservices.msc, and press Enter - Find Windows Update in the list and double-click it
- Click Stop to stop the service
- Open File Explorer and navigate to
C:\Windows\SoftwareDistribution\Download - Delete everything in this folder (it’s safe — these are just temporary update files)
- Go back to services.msc, click Start to restart Windows Update
- Go to Settings > Windows Update and click Check for updates
SysMain (Superfetch)
The problem: SysMain tries to speed up your computer by preloading frequently used programs into RAM. On modern SSDs, this actually slows things down and wastes CPU cycles.
The fix:
- Open
services.msc(pressWin + R, typeservices.msc) - Find SysMain and double-click it
- Click Stop
- Change Startup type to Disabled
- Click Apply and restart your computer
Is it safe to disable? Absolutely. SysMain was useful back when computers had slow hard drives, but with modern SSDs it’s unnecessary and often counterproductive.
Network Services (netsvcs)
The problem: This group includes networking, themes, and various system services. High usage usually means one specific service in the group is misbehaving.
The fix:
- Use Task Manager’s “Go to service(s)” feature to see which specific services are in the netsvcs group
- Common troublemakers include:
- Themes service: Safe to disable if you don’t care about Windows visual effects
- Windows Push Notifications: Can be disabled if you don’t need app notifications
- IP Helper: Only needed for IPv6 transition technologies (most people don’t need this)
- Disable services one at a time in
services.mscand test to see which one fixes the problem
Advanced Fixes for Stubborn Cases
Registry Tweak for Low-RAM Systems
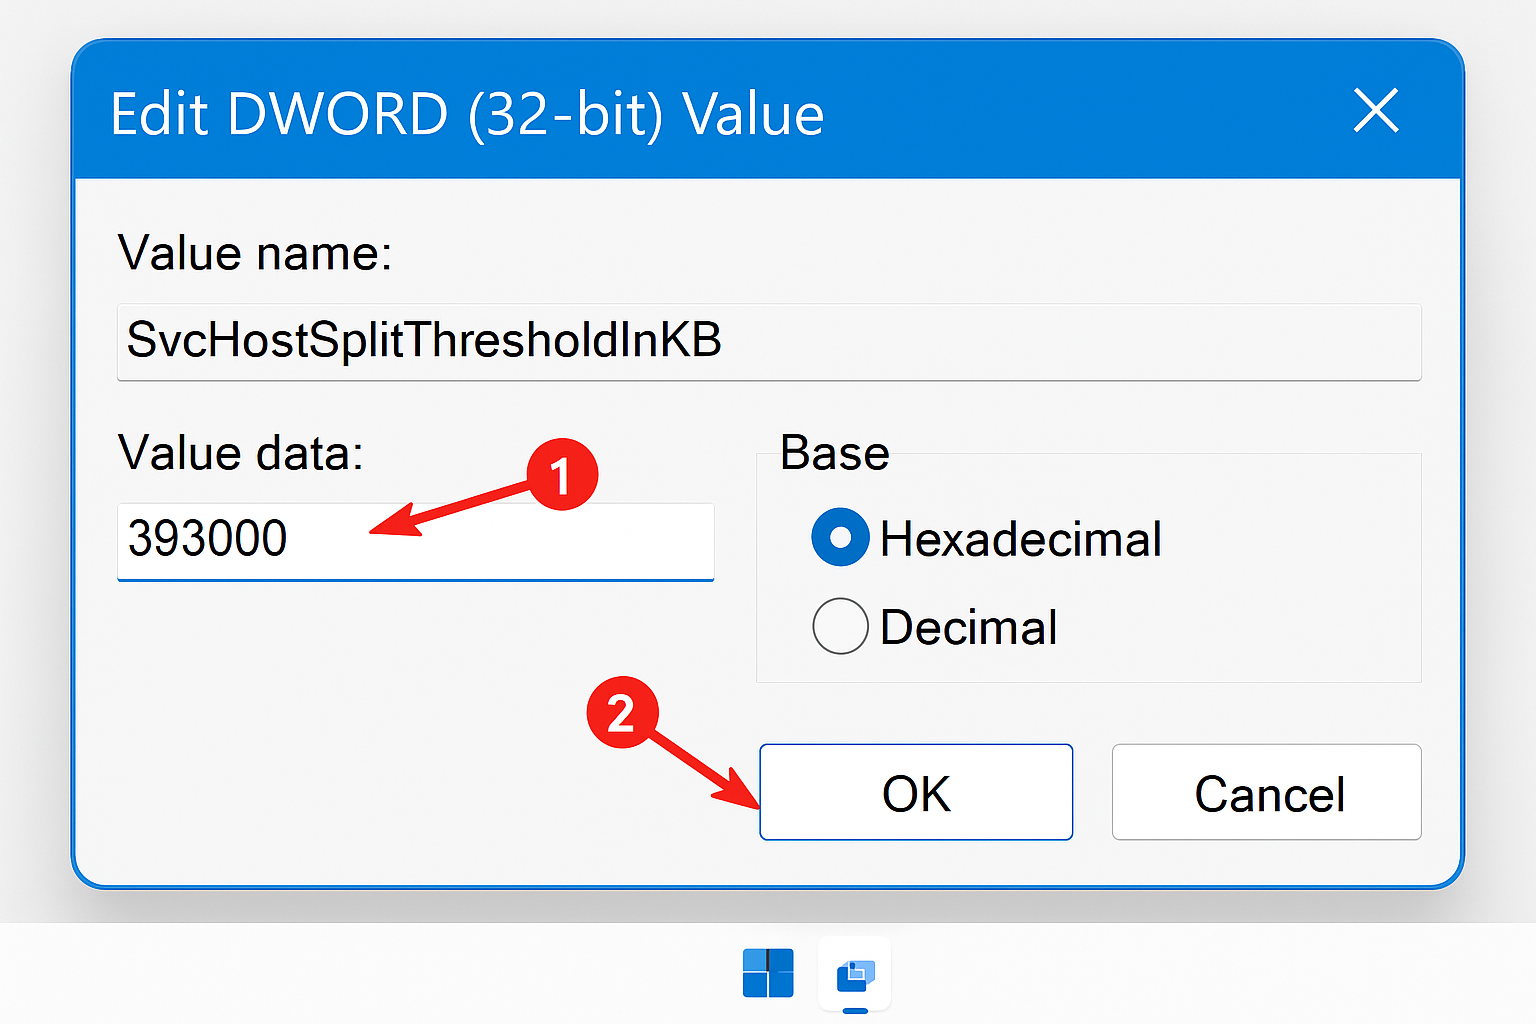
If you have 8GB of RAM or less, Windows might be cramming too many services into single svchost processes. You can force Windows to split them up:
- Press
Win + R, typeregedit, and press Enter - Navigate to
HKEY_LOCAL_MACHINE\SYSTEM\CurrentControlSet\Control - Right-click in the right panel > New > DWORD (32-bit) Value
- Name it
SvcHostSplitThresholdInKB - Double-click it and set the value to your RAM amount in KB:
- 4GB RAM = 4194304
- 8GB RAM = 8388608
- 16GB RAM = 16777216
- Restart your computer
PowerShell Diagnostic Command
For tech-savvy users, this PowerShell command shows exactly which services are running under each svchost process:
Get-Process svchost | Select-Object ProcessName, Id, @{Name='Services';Expression={(Get-CimInstance Win32_Service | Where-Object {$_.ProcessId -eq $_.Id}).Name}}
Tips and Troubleshooting
Common Issues
Problem: The high CPU usage comes back after restarting
This usually means the underlying issue wasn’t fixed. If it’s Windows Update related, make sure all updates actually installed successfully. Check Settings > Windows Update > Update history for any failed updates.
Problem: I can’t find the problematic service
Sometimes services are grouped under generic names. Use Process Explorer instead of Task Manager — it shows more detailed information about what’s actually running.
Problem: Disabling a service broke something
No worries! Go back to services.msc, find the service you disabled, double-click it, change Startup type back to Automatic, and click Start.
Pro Tips
- Monitor for 24 hours: Some svchost spikes are temporary (like during Windows updates). Give it a day before assuming there’s a real problem
- Check Windows Update manually: After any svchost fix, run Windows Update manually to make sure everything’s working properly
- Use Performance tab: Task Manager’s Performance tab shows CPU usage over time, helping you spot patterns in svchost spikes
- Restart vs. reboot: A full restart (not just sleep/wake) can resolve temporary svchost issues
When to Get More Help
If none of these fixes work, you might be dealing with:
- Corrupted Windows files: Run
sfc /scannowin an administrator Command Prompt - Hardware issues: Failing RAM or overheating can cause erratic svchost behavior
- Malware: Run a full system scan with Windows Defender and Malwarebytes
For these deeper issues, you might need to consider a Windows reset or clean installation.
Wrapping Up
Svchost.exe problems are annoying, but they’re almost always fixable with the right approach. In most cases, it’s Windows Update getting stuck or an unnecessary service like SysMain hogging resources. The key is using Task Manager’s “Go to service(s)” feature to identify the exact culprit, then either fixing or disabling the problematic service.
I’ve seen this fix work for everything from ancient Windows 10 machines to brand-new Windows 11 systems. The process is the same, and once you know which service is causing trouble, the solution is usually straightforward. Just remember to test your fixes and don’t be afraid to re-enable a service if disabling it causes other problems!