
Nothing’s more frustrating than trying to delete a file and getting slapped with an “Access is Denied” error. Or maybe you’re copying files and Windows tells you “the source file may be in use” – when you know darn well it’s not! These annoying permission problems can turn a simple task into a 30-minute headache, but the good news is you can usually fix them without calling your tech-savvy friend.
These errors typically happen for two main reasons: either you don’t have the right permissions for the file or folder, or another program is secretly using it in the background. Let’s walk through how to figure out which situation you’re dealing with and get your files back under control.
What Causes Access Denied Errors?
Access Denied errors in Windows stem from the NTFS permission system that controls who can do what with files and folders. Think of it like a bouncer at a club — even if you own the place, you still need to be on the list.
Common causes include:
- Missing ownership: You’re not listed as the file owner
- Insufficient permissions: You can see the file but can’t modify or delete it
- File encryption: Someone encrypted the file with their user account
- Corrupt user profile: Your Windows user account has gotten scrambled
- File in use: A program is actively using the file (even if it doesn’t look like it)
Before You Begin
Make sure you have:
- Administrator access to your Windows 10 or 11 computer
- About 10-15 minutes (some permission changes take a while to process)
- Patience — Windows permissions can be finicky!
Method 1: Try the Simple Fix First
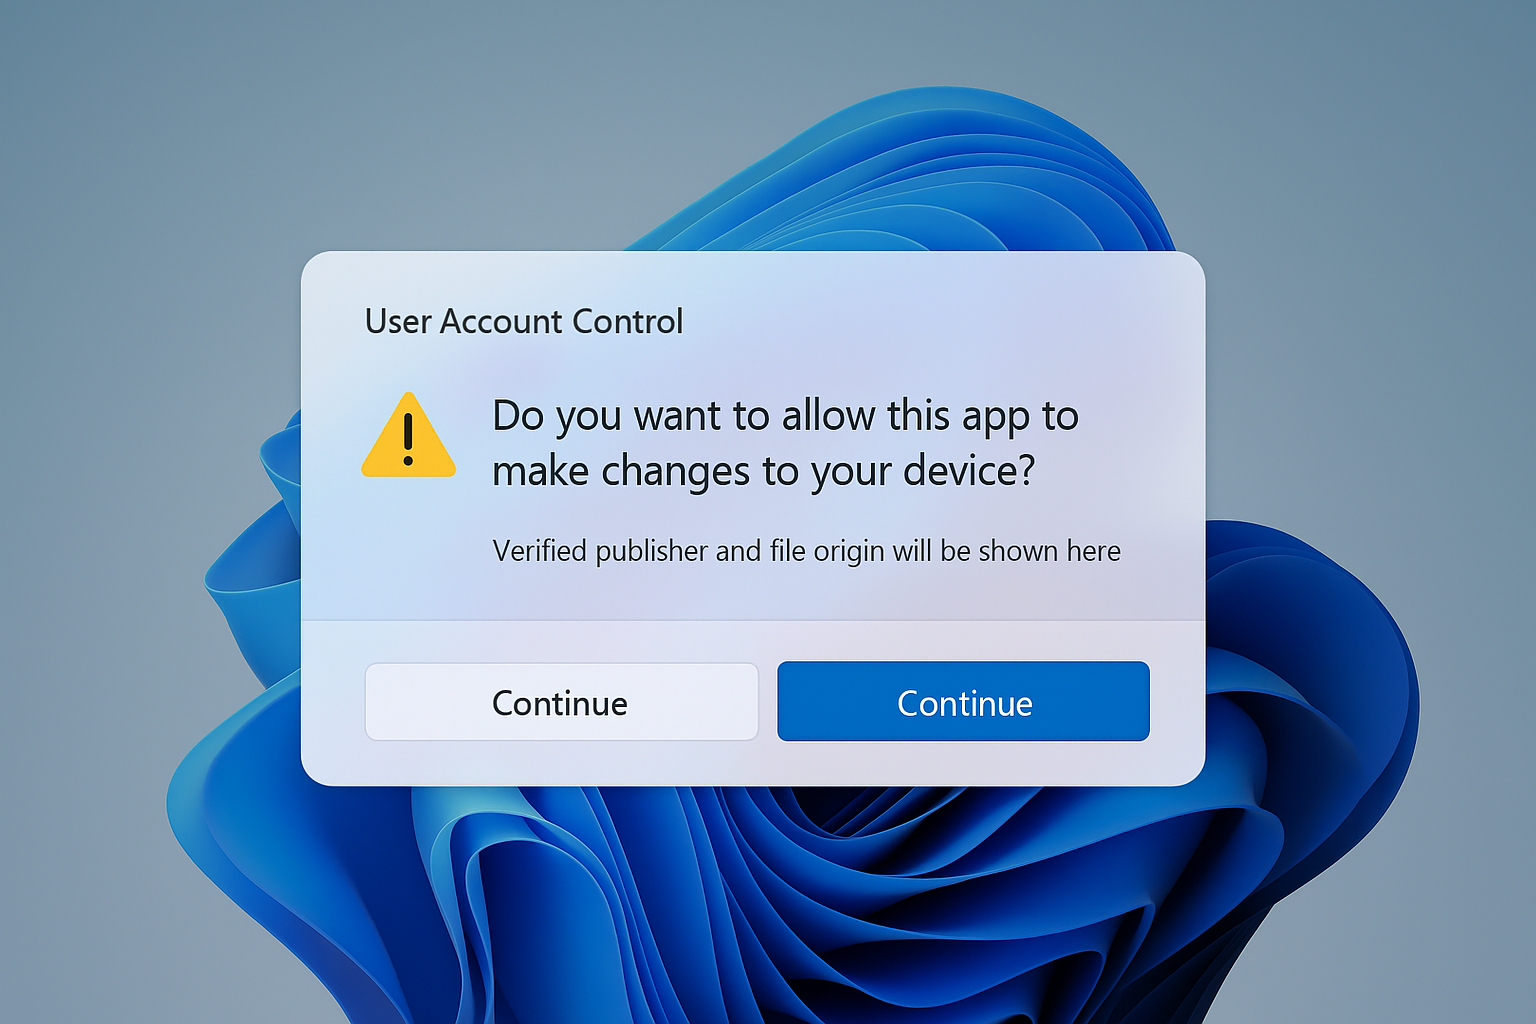
Before diving into the complex stuff, let’s try the easy button. When you see an “Access Denied” message, look for a Continue button in the dialog box.
Click Continue and Windows will attempt to automatically grant your user account the necessary permissions. This works if you’re the owner of the file but just don’t have explicit permissions set up.
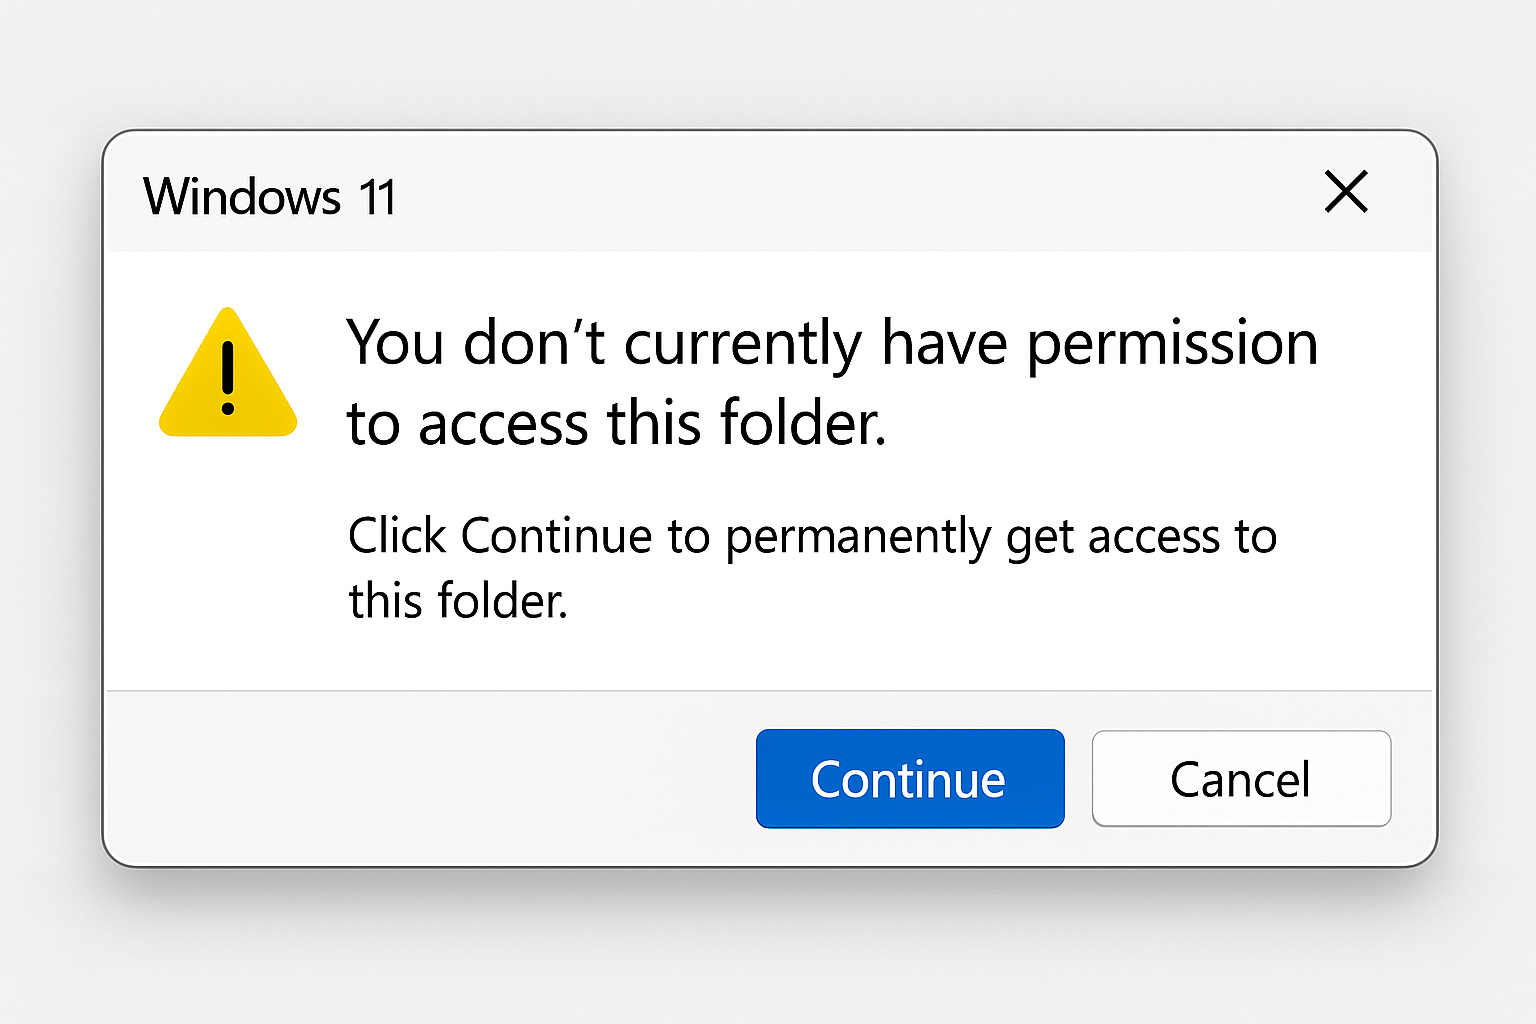
If that doesn’t work and you see “You have been denied permission to access this folder”, then we need to take ownership manually.
Method 2: Take Ownership of Files and Folders
This is where things get a bit more involved, but don’t worry, we’ll go step by step.
Step 1: Open File Properties
Right-click on the problematic file or folder and select Properties. Then click on the Security tab.
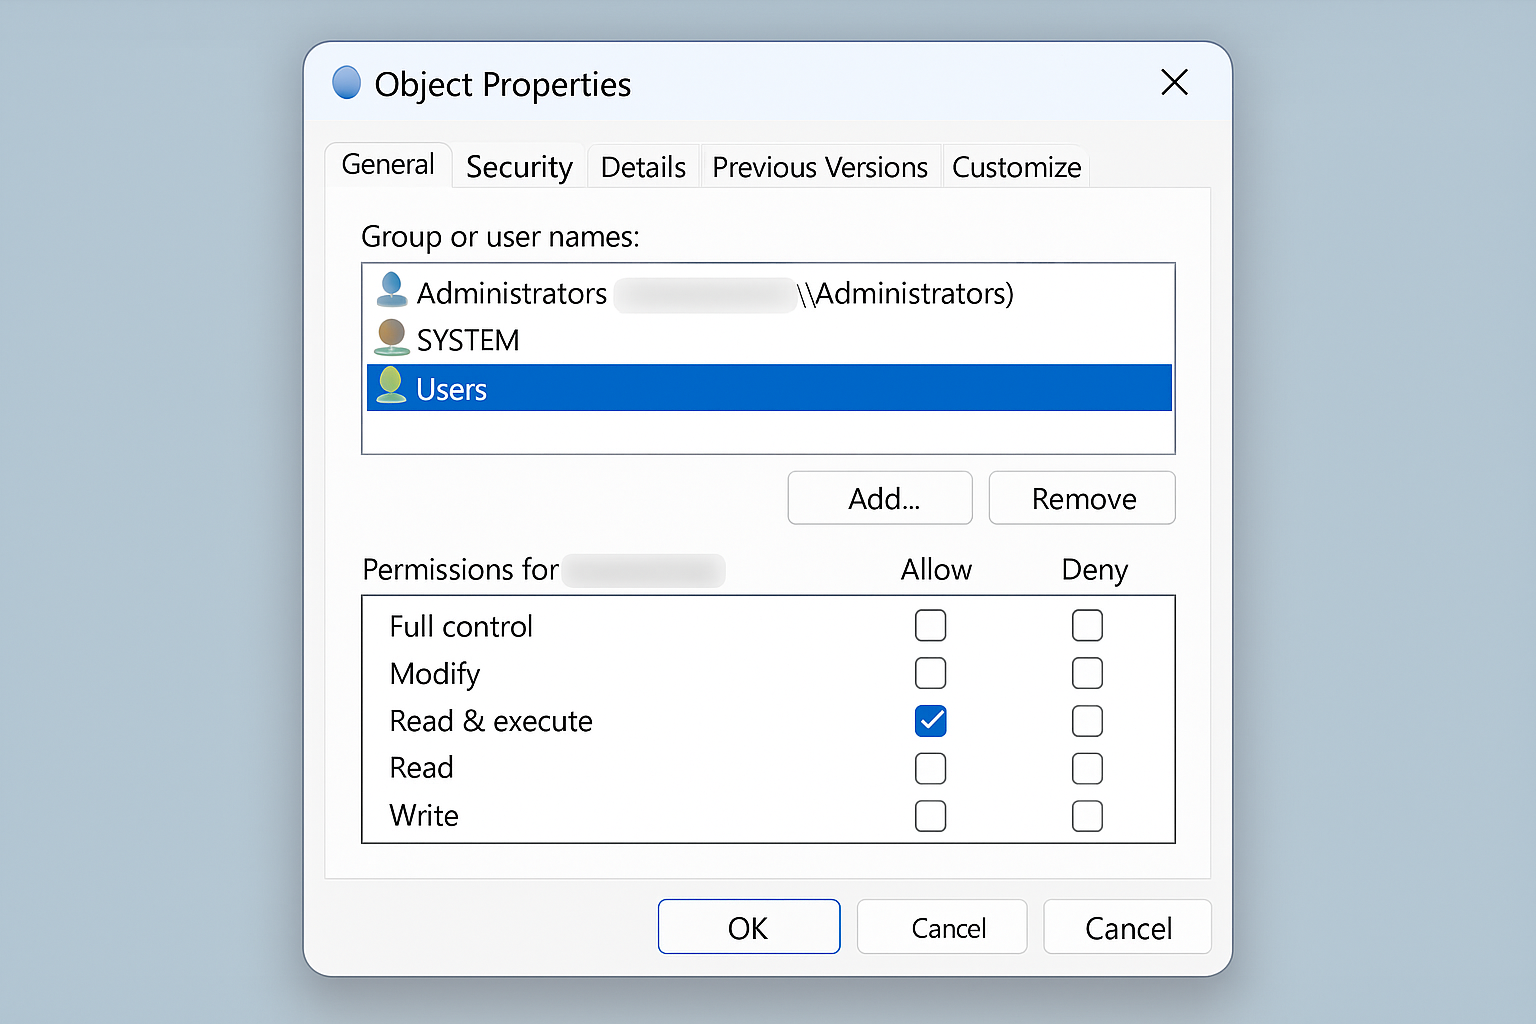
If you see a message saying you need to be an Administrator to view security properties, click Continue.
Step 2: Access Advanced Security Settings
Click the Advanced button at the bottom of the Security tab. This opens the Advanced Security Settings dialog where you can change ownership.
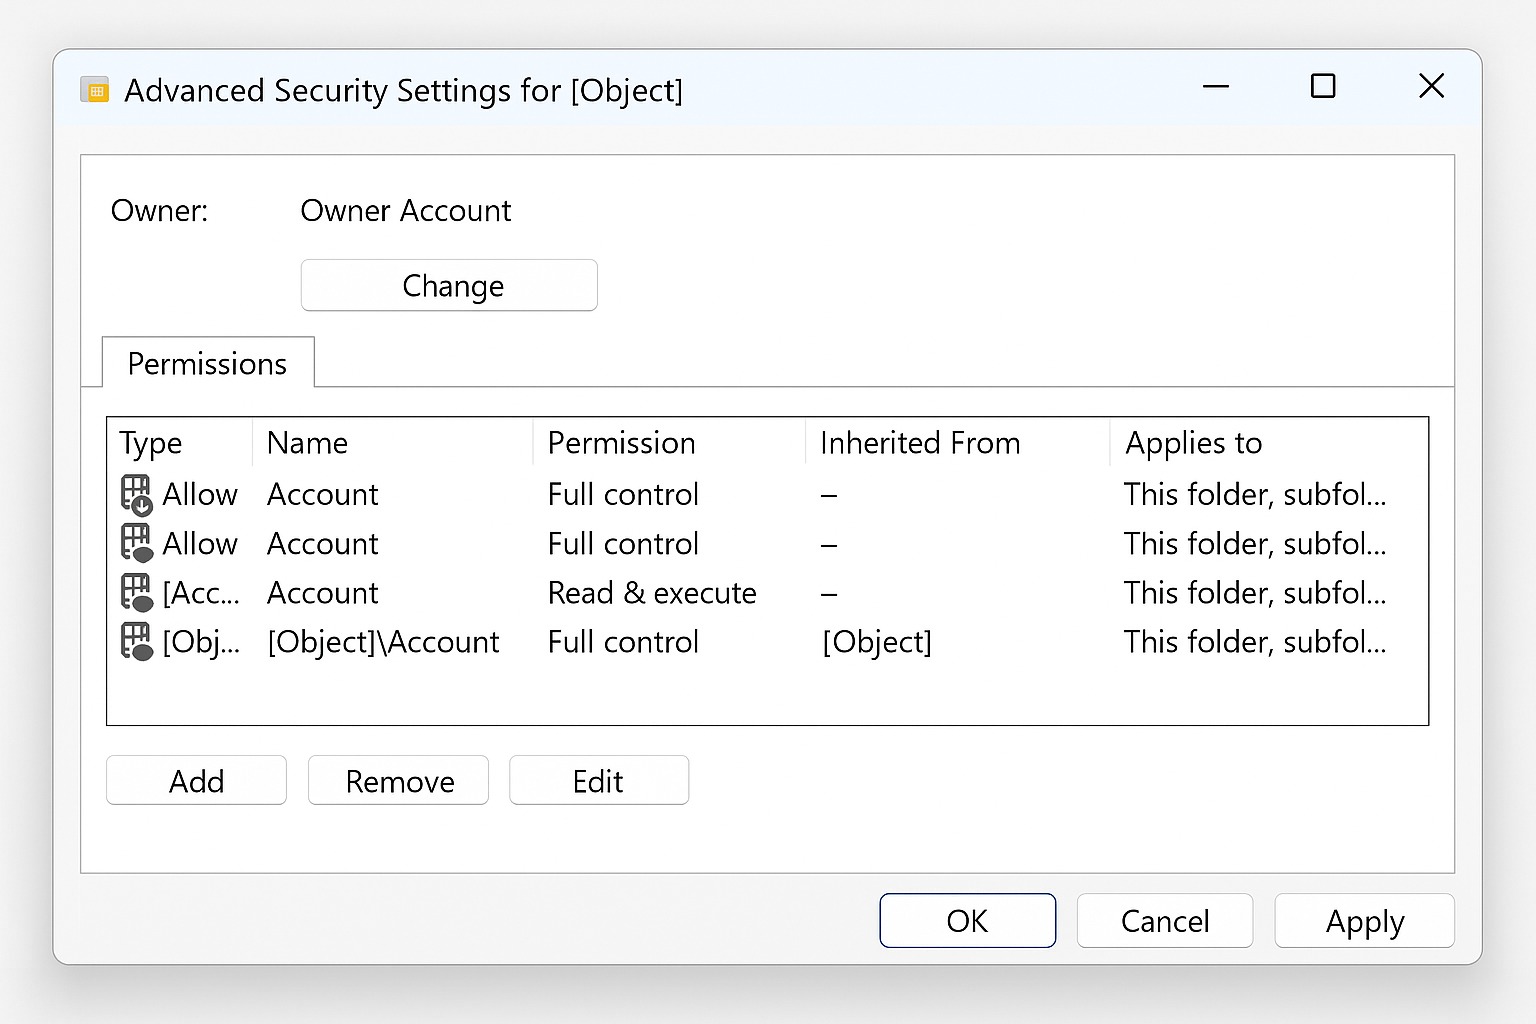
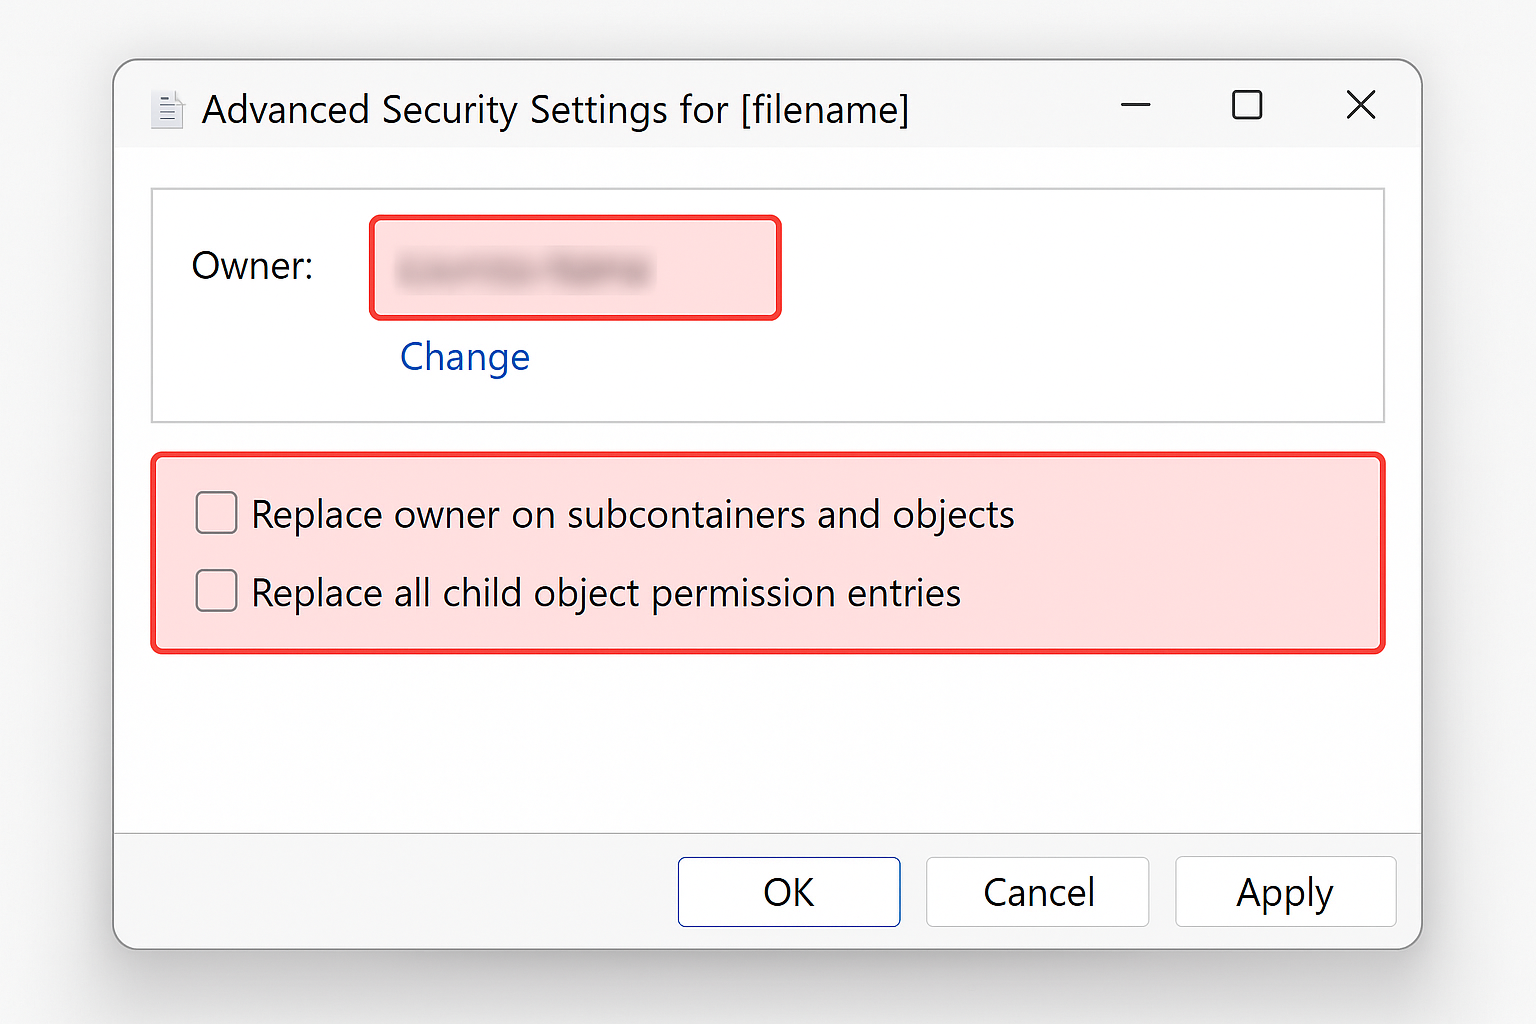
Step 3: Change the Owner
Look for the Owner field near the top and click Change. In the dialog that appears, type your username and click Check Names. Windows will verify your account and format it properly.
Make sure to check the box for “Replace owner on subcontainers and objects” — this applies the ownership change to everything inside a folder.
Click OK and you’ll likely see a message asking if you want to replace permissions and grant yourself Full Control. Click Yes.
Step 4: Close and Reopen Properties
Here’s the important part: close ALL the dialog boxes completely. Don’t try to change anything else yet. Go back to File Explorer, right-click the file again, and open Properties > Security tab fresh.
You should now see your user account listed and be able to access the file. If you want to restore proper Windows default permissions (recommended), continue to the next step.

Step 5: Reset Default Permissions (Optional but Recommended)
Click Advanced again, then Change Permissions. Remove all the current permission entries by selecting each one and clicking Remove.
Once the list is empty, check the box for “Include inheritable permissions from this object’s parent” and click Apply (not OK).
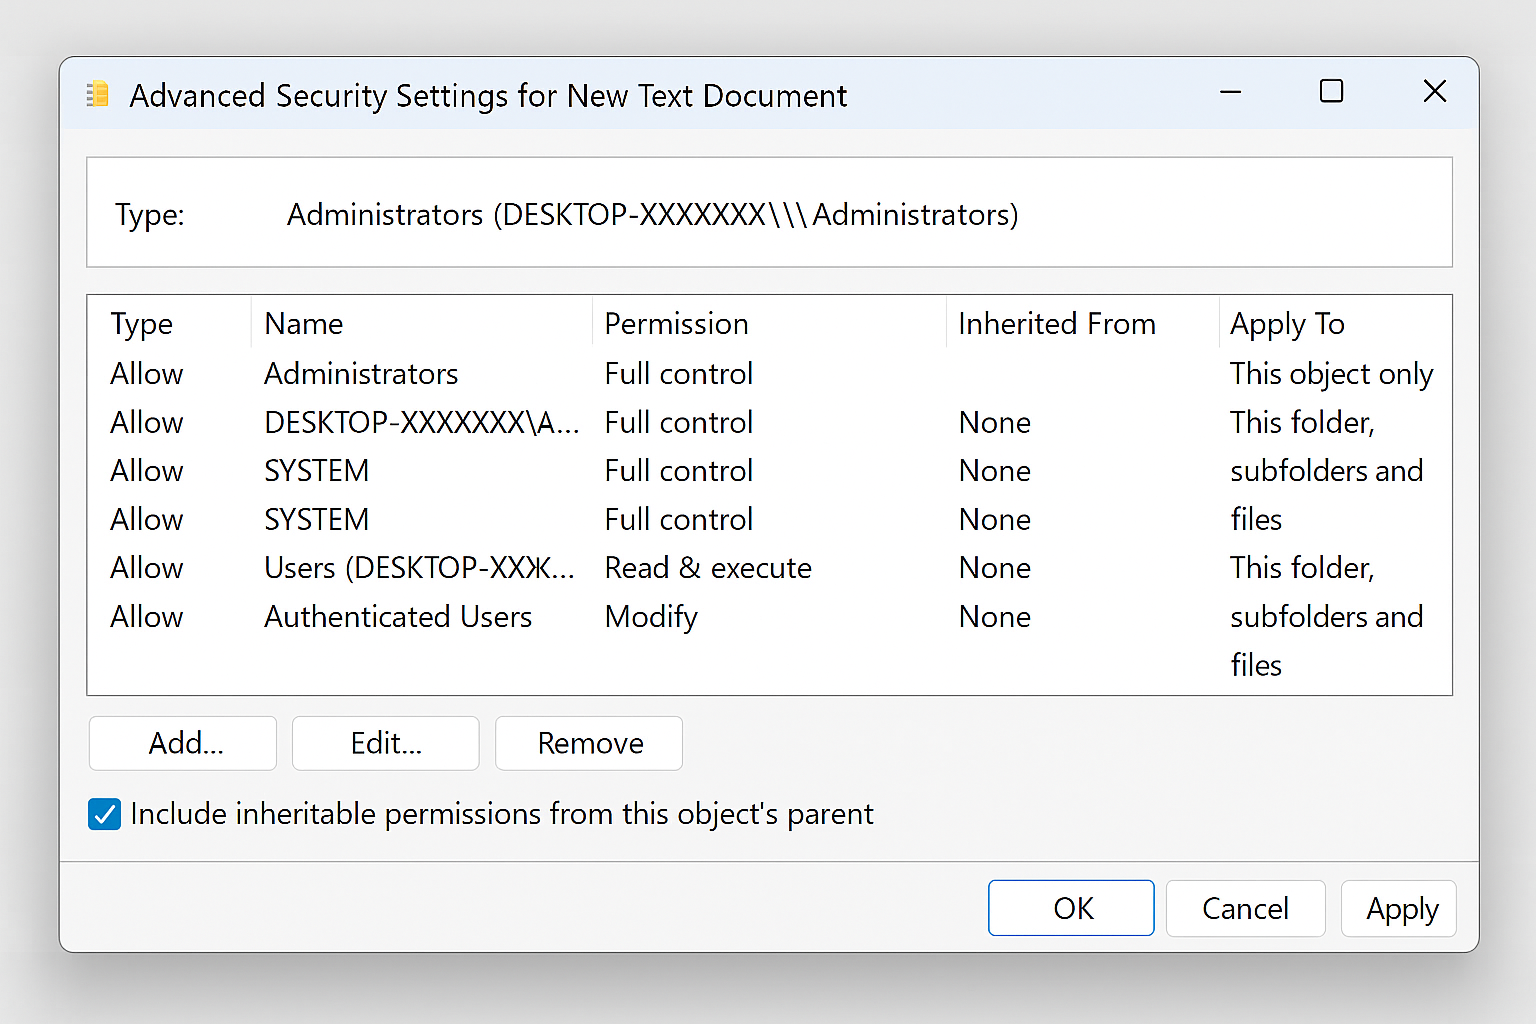
You’ll see several standard Windows permissions appear, including SYSTEM and Administrators. If you’re dealing with a folder that has lots of subfolders, you can also check “Replace all child object permissions” to fix everything at once.
Method 3: Command Line Ownership (Advanced Users)
If the GUI method isn’t working or you’re comfortable with Command Prompt, here’s a faster approach:
Step 1: Open Command Prompt as Administrator
Press Windows + R, type cmd, and press Ctrl + Shift + Enter to open Command Prompt with administrator privileges.
Step 2: Take Ownership via Command Line
Type this command, replacing “path_to_folder” with the actual path to your file or folder:
takeown /f "C:\path_to_folder" /r /d y
The /r flag applies to subfolders, and /d y automatically answers “yes” to prompts.
Step 3: Grant Full Permissions
Follow up with this command to give administrators full control:
icacls "C:\path_to_folder" /grant administrators:F /t
Restart your computer when done — sometimes Windows needs a reboot to fully apply permission changes.
Method 4: Fix “File in Use” Errors
Sometimes “Access Denied” really means “something else is using this file.” Here’s how to find out what’s hogging your file and shut it down.
Step 1: Download Process Explorer
Head to the Microsoft Sysinternals page and download Process Explorer. It’s a free tool from Microsoft that shows you exactly which programs are using which files.
Step 2: Run Process Explorer as Administrator
Right-click the downloaded file and select “Run as administrator”. Don’t be intimidated by all the colorful bars and processes, we’re just using one simple feature.
Step 3: Search for Your File
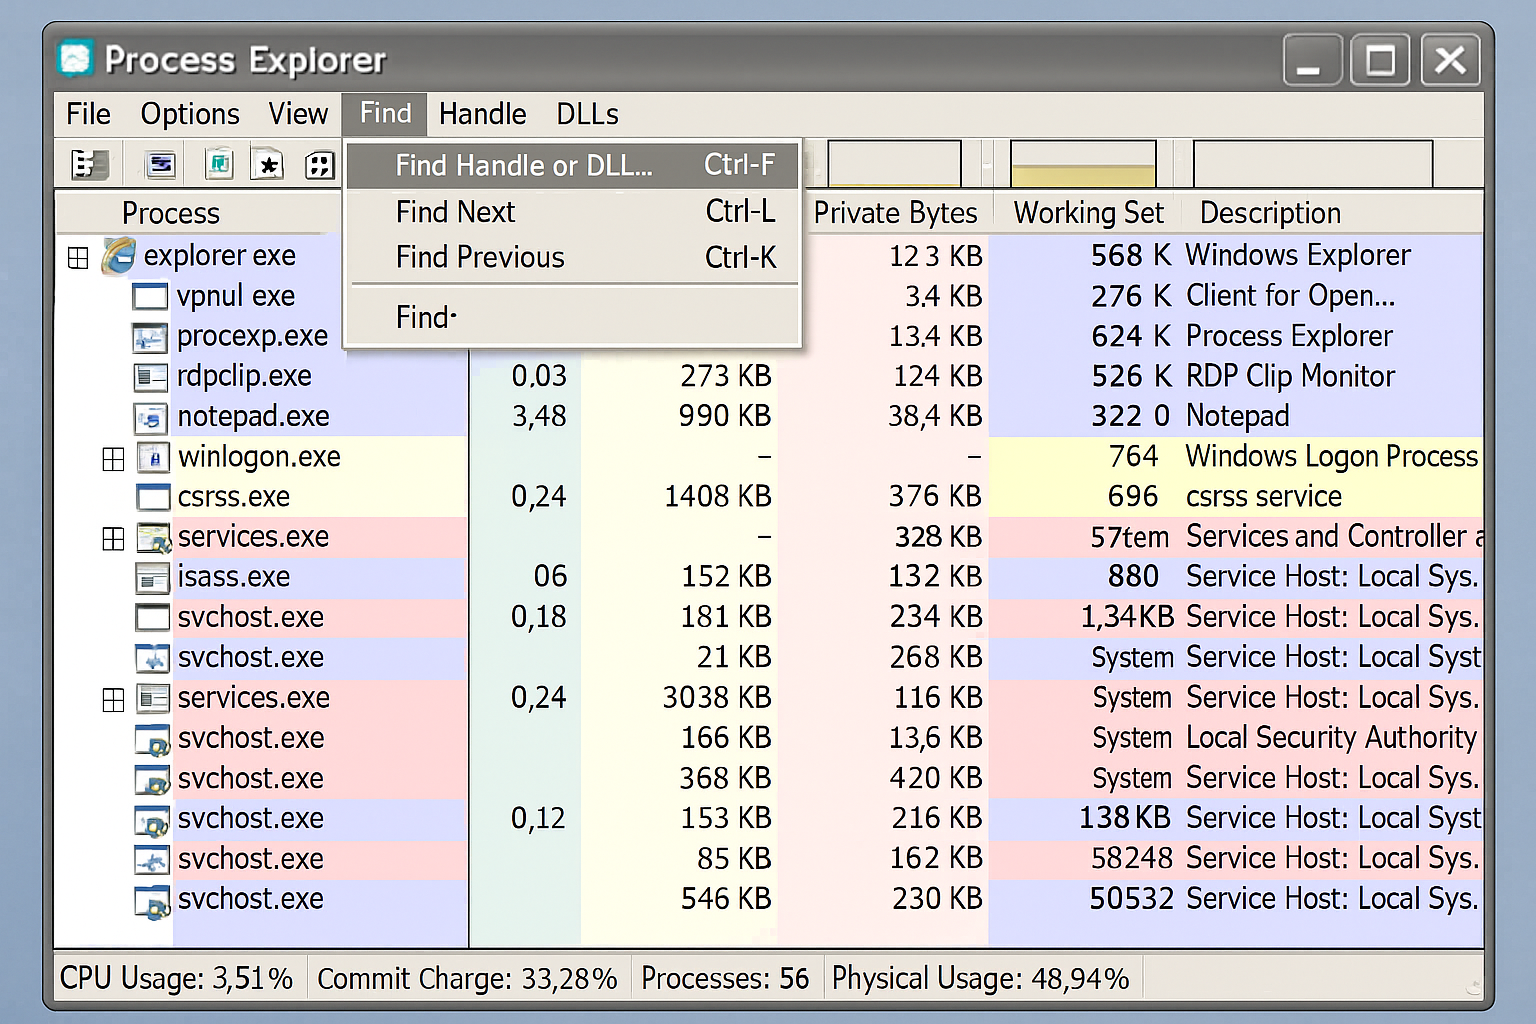
Click Find in the menu bar, then select Find Handle or DLL. Type part of your file name in the search box and click Search.

Step 4: Close the File Handle
If any processes show up in the results, that’s your culprit! Select the entry and close the search dialog. Back in the main Process Explorer window, you’ll see the process highlighted at the bottom.
Right-click on the highlighted row and choose Close Handle. This forcibly tells the program to let go of your file.
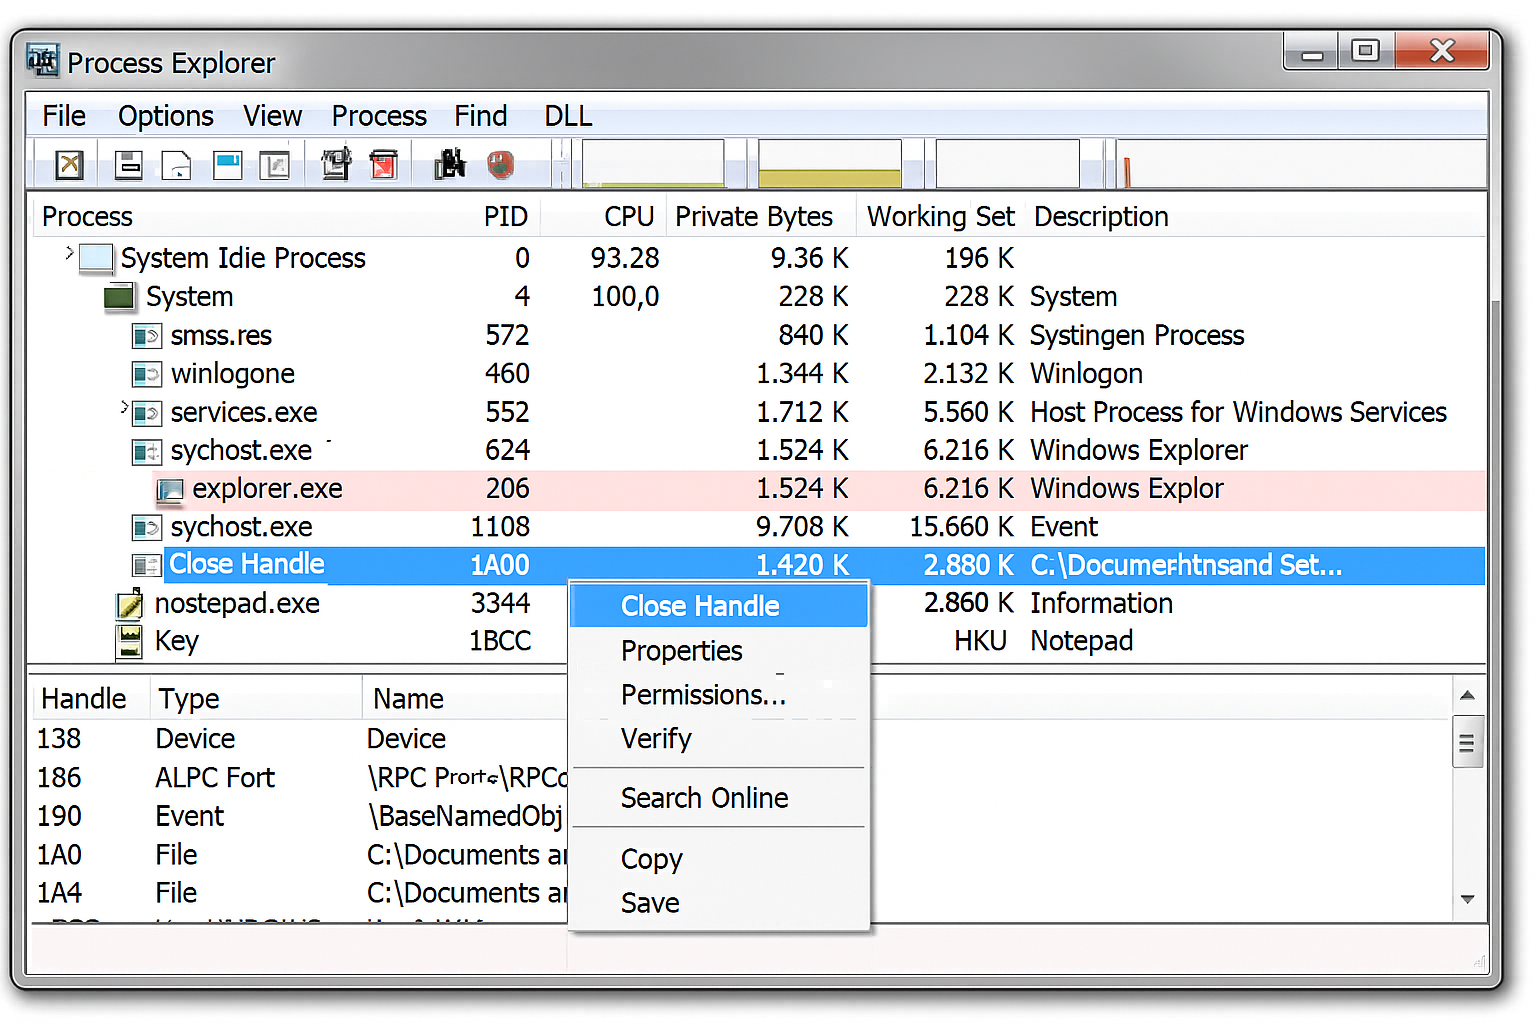
Repeat this for any other processes that showed up in your search. Once all handles are closed, you should be able to delete or modify your file normally.
Special Cases and Troubleshooting
If the methods above didn’t fully resolve your issue, one of the following scenarios may apply. These edge cases require slightly different approaches.
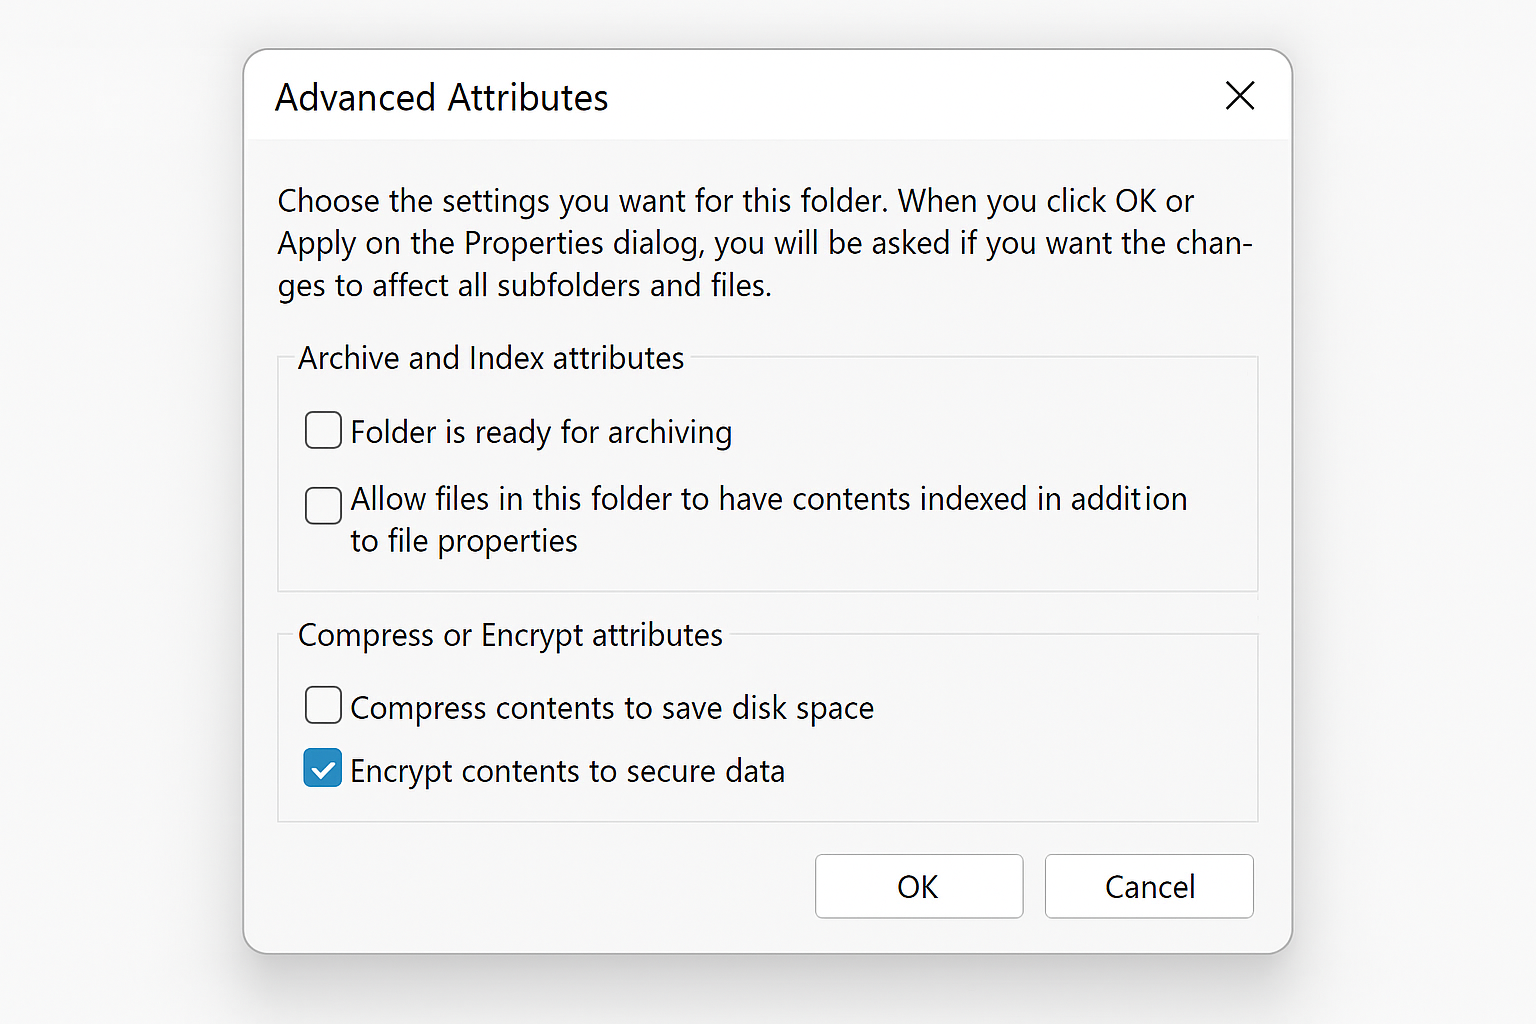
Encrypted Files
If someone encrypted the file using Windows’ Encrypting File System (EFS), you won’t be able to access it regardless of permissions, unless you’re using the account that originally encrypted it.
To check if a file is encrypted, right-click it, choose Properties, click Advanced from the General tab, and look for “Encrypt contents to secure data”. If it’s checked, you’ll need access to the original user account to decrypt it.
Network and Shared Drive Permissions
If the file or folder lives on a network share or mapped drive, local ownership changes won’t help as access is controlled by the server or NAS device hosting the share. In this case, contact your network administrator to adjust the share permissions, or ensure your Windows account has the correct credentials for the network resource. You can also try accessing the share via its UNC path (e.g., \\server\share) to rule out mapped drive credential issues.
Recent Windows 11 Update Issues
Some users have reported “C:\ is not accessible – Access is denied” errors following recent Windows 11 security updates, with conflicts involving Samsung Galaxy Connect and similar phone-syncing services cited as a possible cause. This has not been officially confirmed by Microsoft as of publication.
If you’re experiencing this specific issue, try booting into Safe Mode to recover your files, then disable any Samsung or phone-syncing services in the Services app.
Corrupt User Profile
Sometimes your Windows user profile gets corrupted, causing persistent permission issues. If nothing else works, try creating a new local administrator account and accessing the files from there.
Go to Settings > Accounts > Other users > Add account and create a local account with administrator privileges.
Common Error Messages This Fixes
These methods work for all these frustrating Windows error messages:
- Cannot delete file: Error 5 Access is denied
- There has been a sharing violation
- The source or destination file may be in use
- The file is in use by another program or user
- Make sure the disk is not full or write-protected and that the file is not currently in use
- You don’t currently have permission to access this folder
Wrapping Up
Permission errors in Windows can be a real pain, but they’re usually fixable with a bit of patience. The ownership method works for most “Access Denied” issues, while Process Explorer is your best friend for stubborn “file in use” problems. Most of the time, you’ll solve it with the simple Continue button or the ownership change process.
These techniques work reliably on Windows 10 and 11, though the interface has gotten a bit more streamlined over the years. If you’re still having trouble after trying these methods, it might be worth checking if you’re dealing with a corrupted user profile, a network share permission issue, or an encrypted file tied to a different user account.