For artists using the iPad, the art program Procreate is one of the most powerful applications available. There are thousands of brushes to choose from, endless color combinations, and a vast array of tools they can utilize.
One feature of Procreate that makes the program stand out among many other art apps is its animation capabilities. You can easily create short animations on Procreate and export them in multiple formats. This can be useful for animating larger projects in sections, storyboarding, YouTube intros, or just creating a simple animated GIF.
Procreate made this feature user-friendly, so you don’t have to worry if you’re a beginner. Let’s learn how to make your first Procreate animation.
How to Animate on Procreate
After opening Procreate, you’ll first need to start a new canvas. Follow the steps below to begin your animation project.
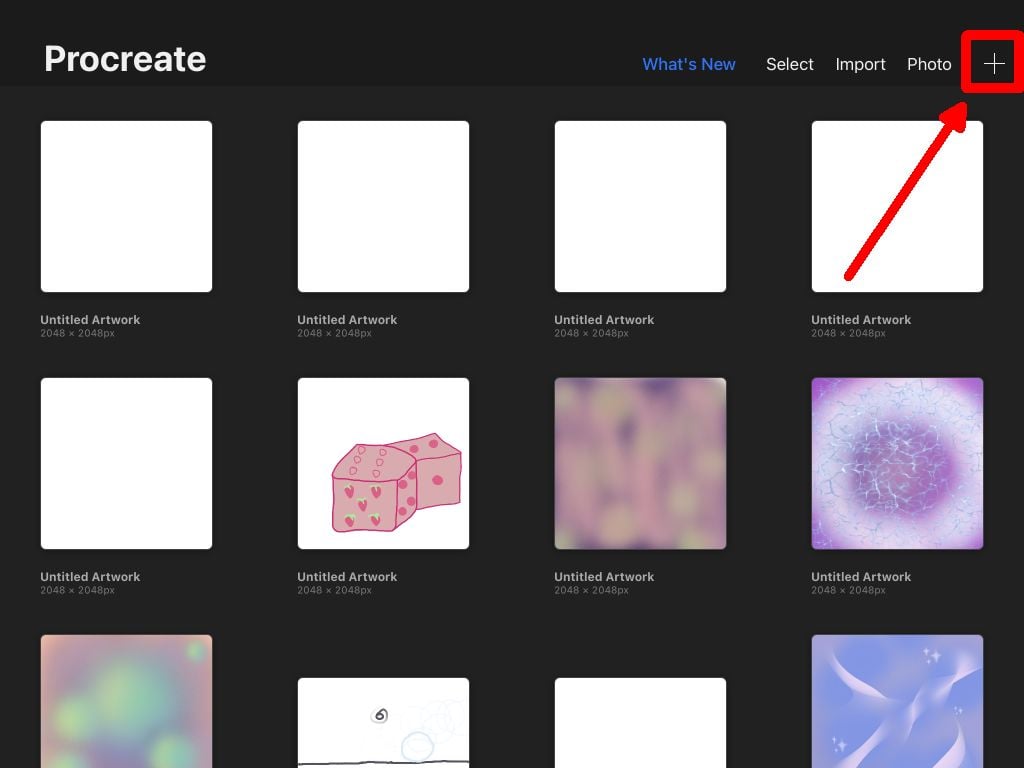
- Tap on the plus icon in the top-right corner.
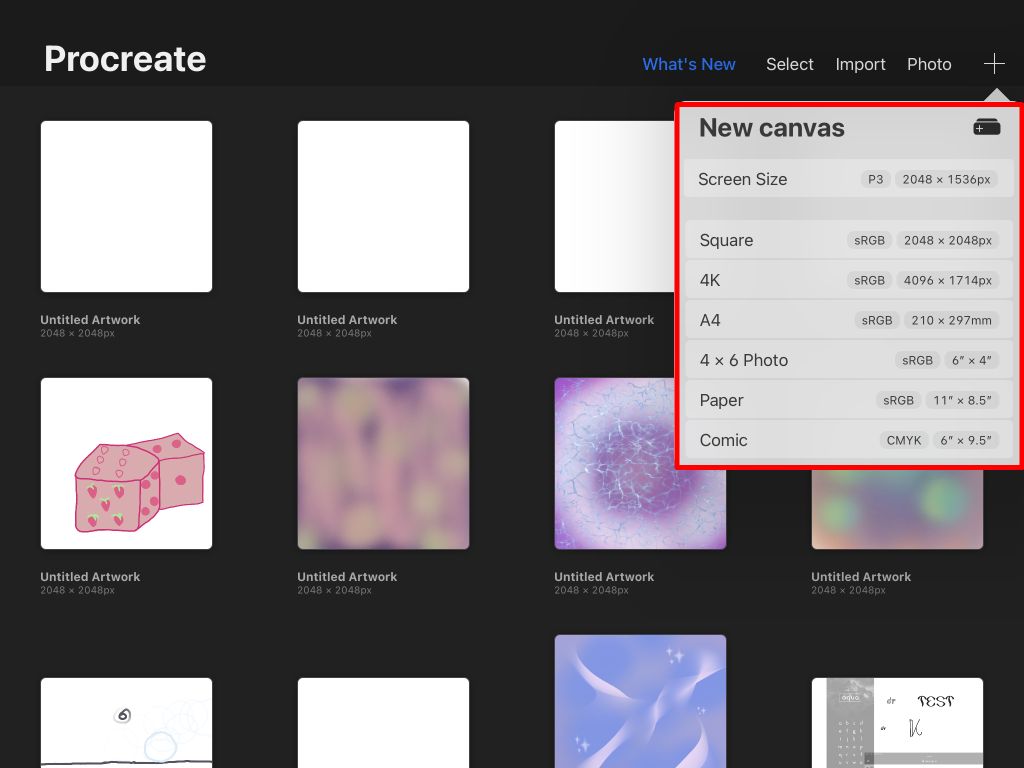
- Select the size of the canvas you want. Keep in mind that if you decide to export your animation, it will stay the same size.
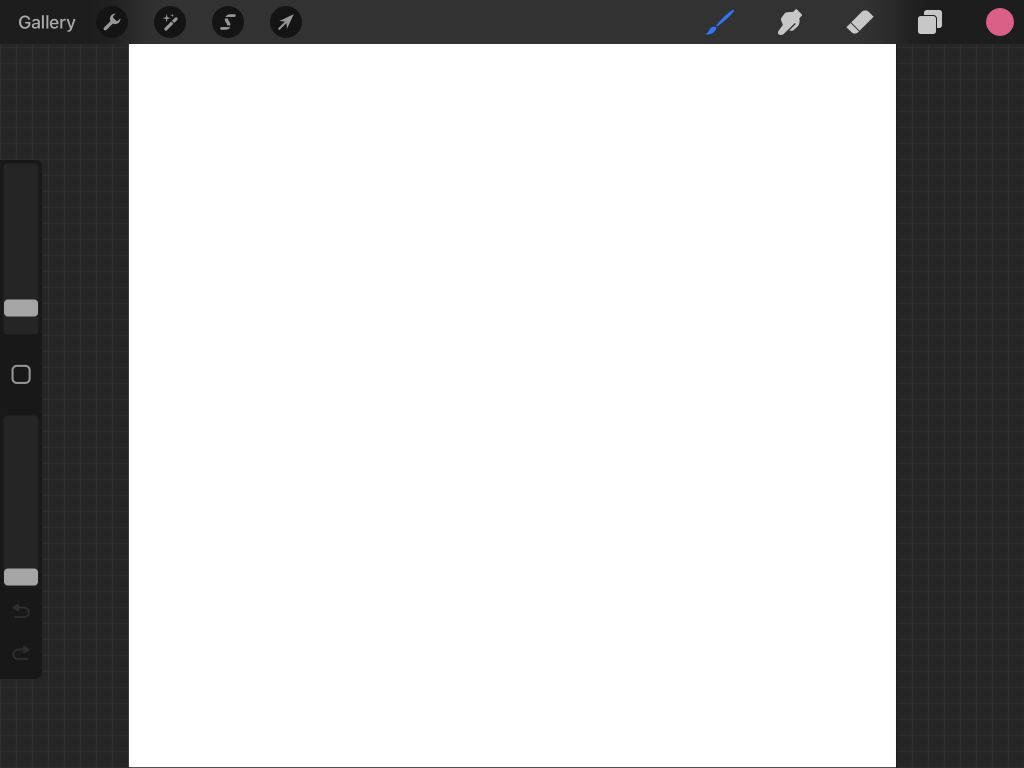
- Your new blank canvas will open.
If you’ve used Procreate before, you’re probably familiar with the tools here, and we can get started with the animation.
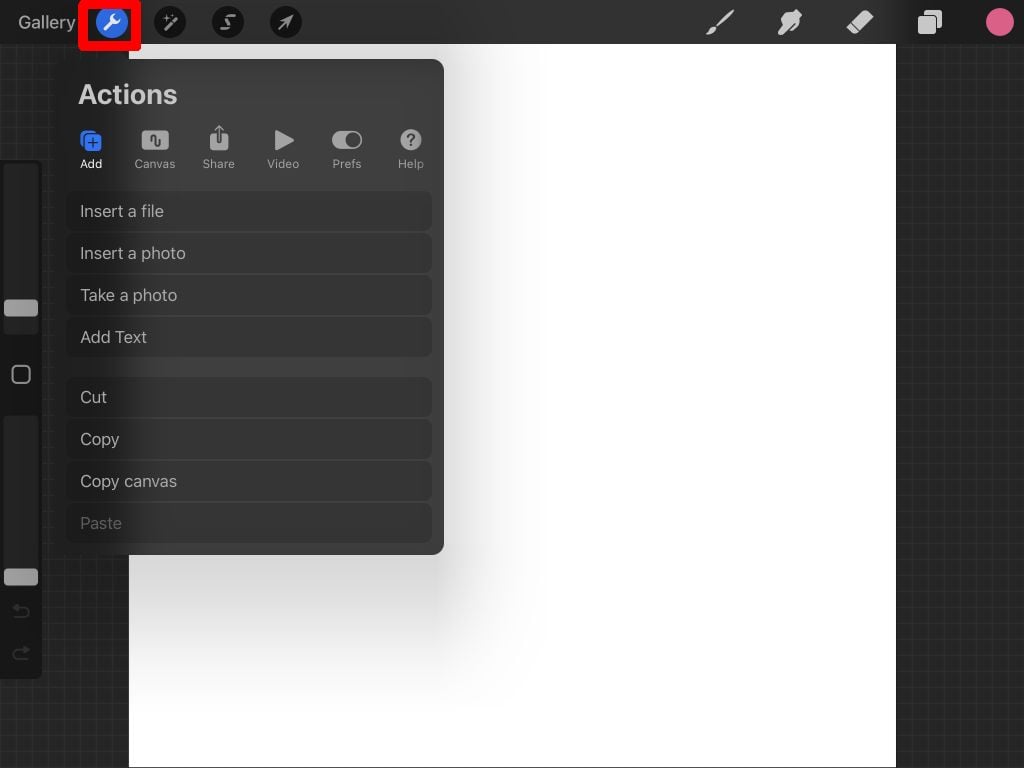
- Tap on the wrench icon in the top left to open the Actions menu.
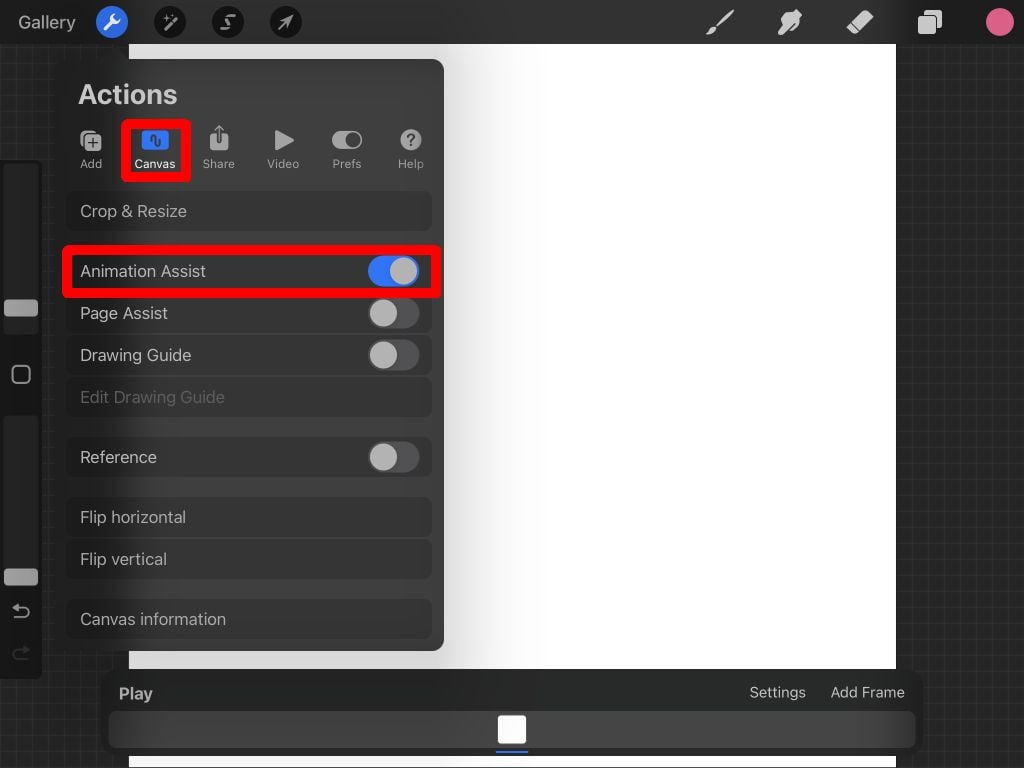
- Tap on Canvas.
- Turn on Animation Assist.
The Animation Assist Interface
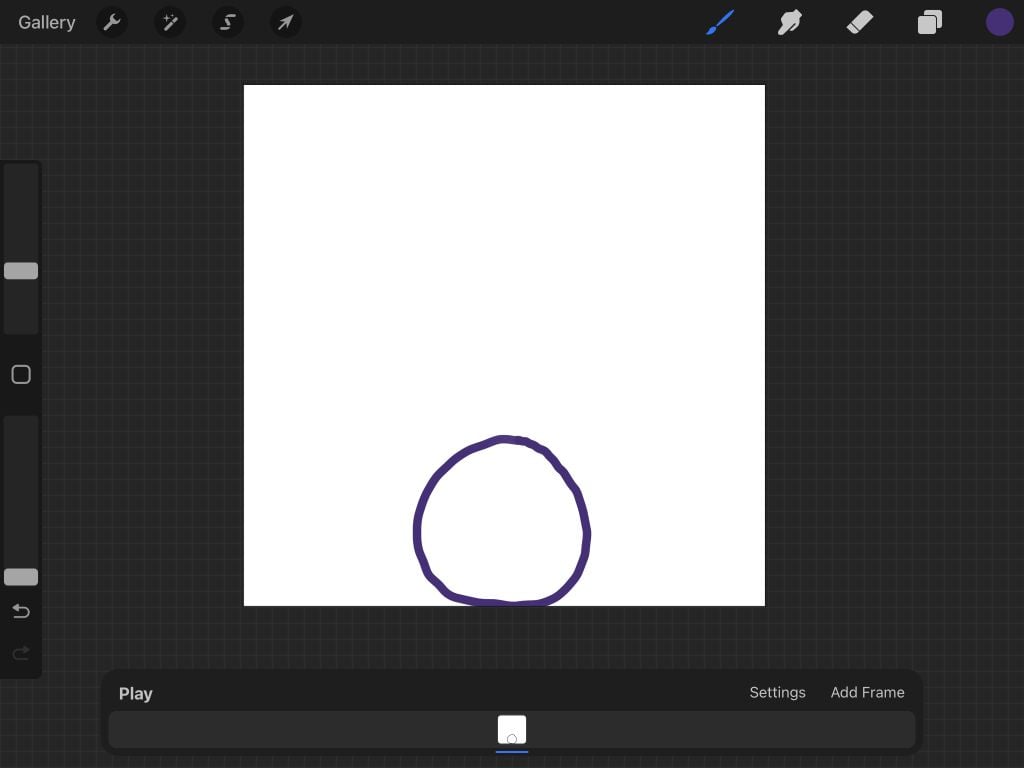
Once you enable the Animation Assist feature, you’ll see a new panel at the bottom of your screen. This is what you’ll want to focus on most while you’re animating. There are a few different parts of this panel you should understand.
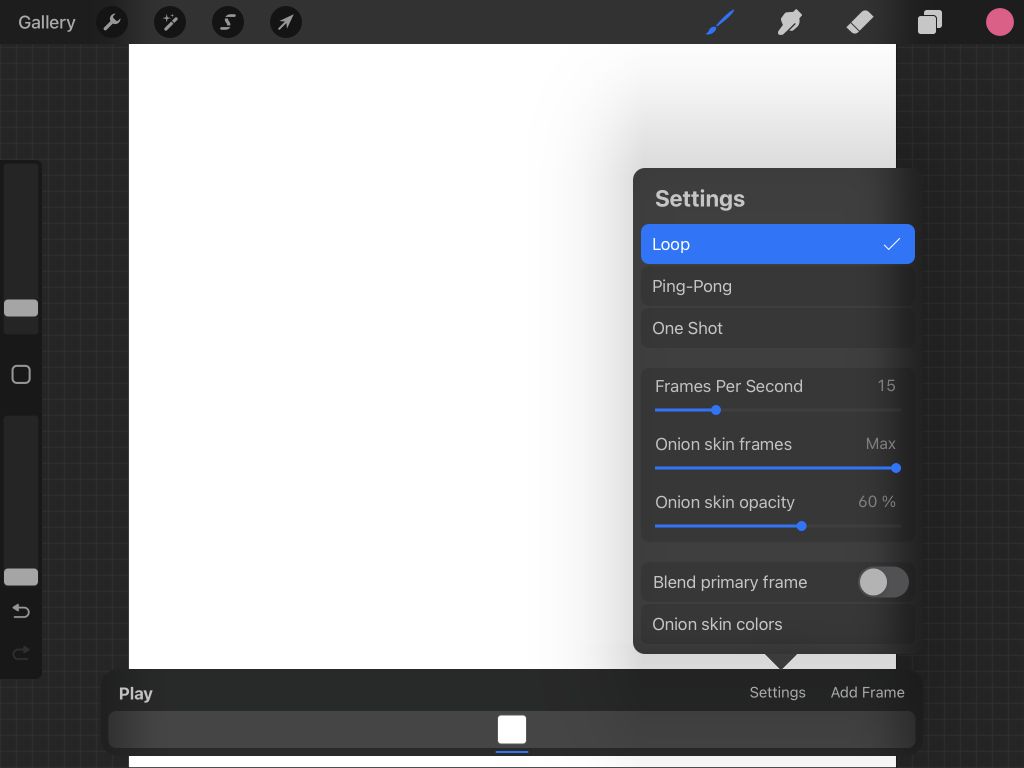
Settings: The Settings button allows you to change various animation and frame options, such as whether the animation loops or plays in one shot, the frames per second, and onion skin.
If you’re unfamiliar with animation terminology, onion skin lets you see all the other frames you have already drawn. It’s helpful to keep your animation smooth. Here you can change the amount of onion skin frames and the onion skin opacity.
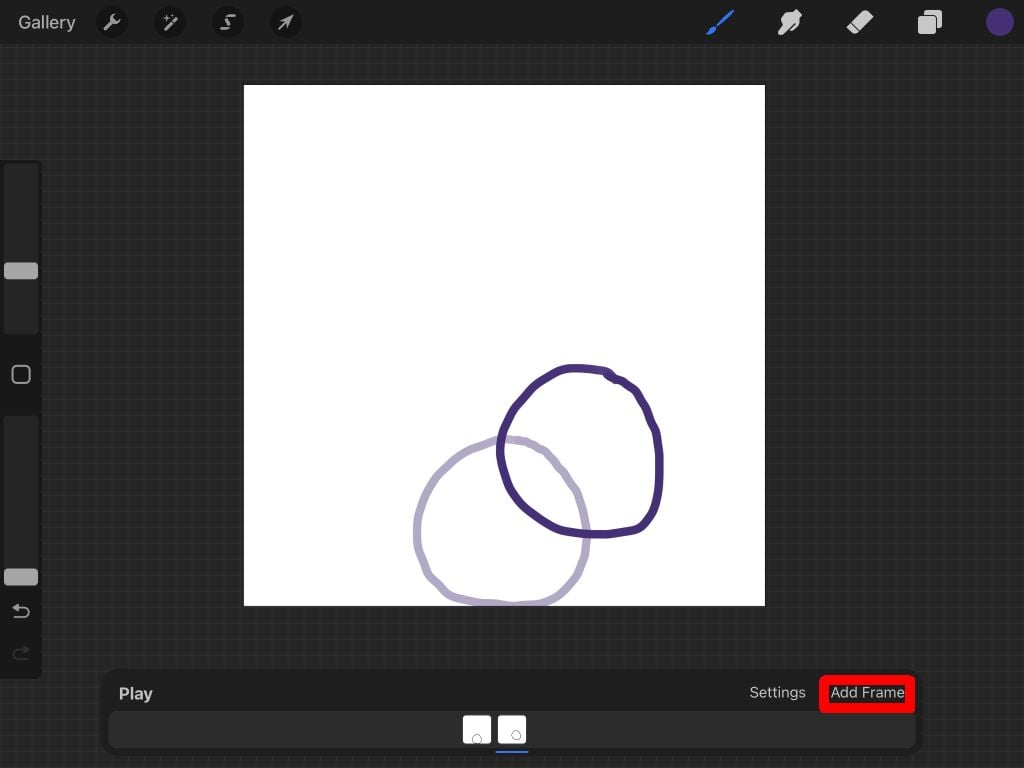
- Add Frame: This button on the animation panel adds your next frame to the timeline, which is just below.
- Timeline: The timeline shows all your frames and what you have drawn on them. You can tap on a frame to see it or tap and hold to move it somewhere else in the timeline. If you tap a frame you are viewing, you can change the hold duration of the frame, duplicate it, or delete it.
- Play: The Play button will play your animation back for you.
Drawing Your Animation in Procreate
Now comes the fun part. To start your animation, you just need to draw! In this tutorial, we’ll do a simple animation to show you how animation works in Procreate.
First, choose from the Procreate brushes, and then draw your subject in its starting position in your first frame.
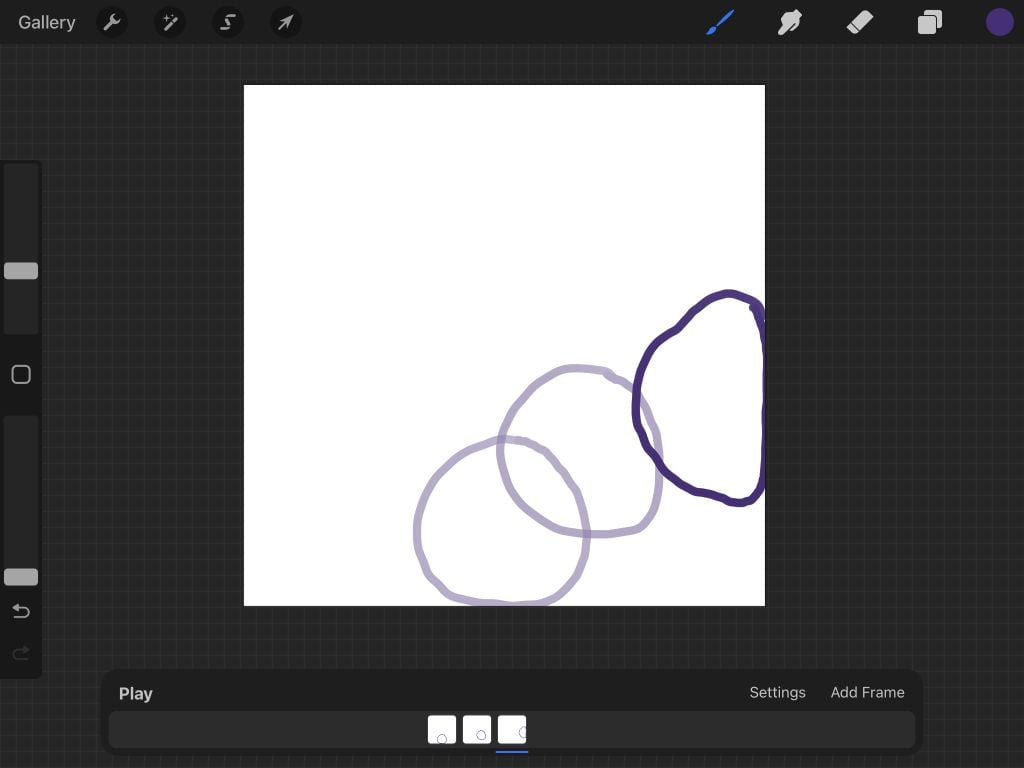
When you’re done, tap on Add frame to begin drawing the movement of your subject. By default, onion skin will be on, so you’ll see the last frame you drew as well.
When you draw your subject in its next position, tap on Add Frame again to continue the animation. Repeat this until you’ve finished your animation.
You can tap Play at any time to playback your animation. It will save automatically as you draw so that you can exit your project at any time.
How to Export Your Animation
Now that you’ve finished the animation, you can export it out in multiple formats. The format you’ll want to export will differ depending on where you’ll be using the animation. Follow the steps below to export your project.
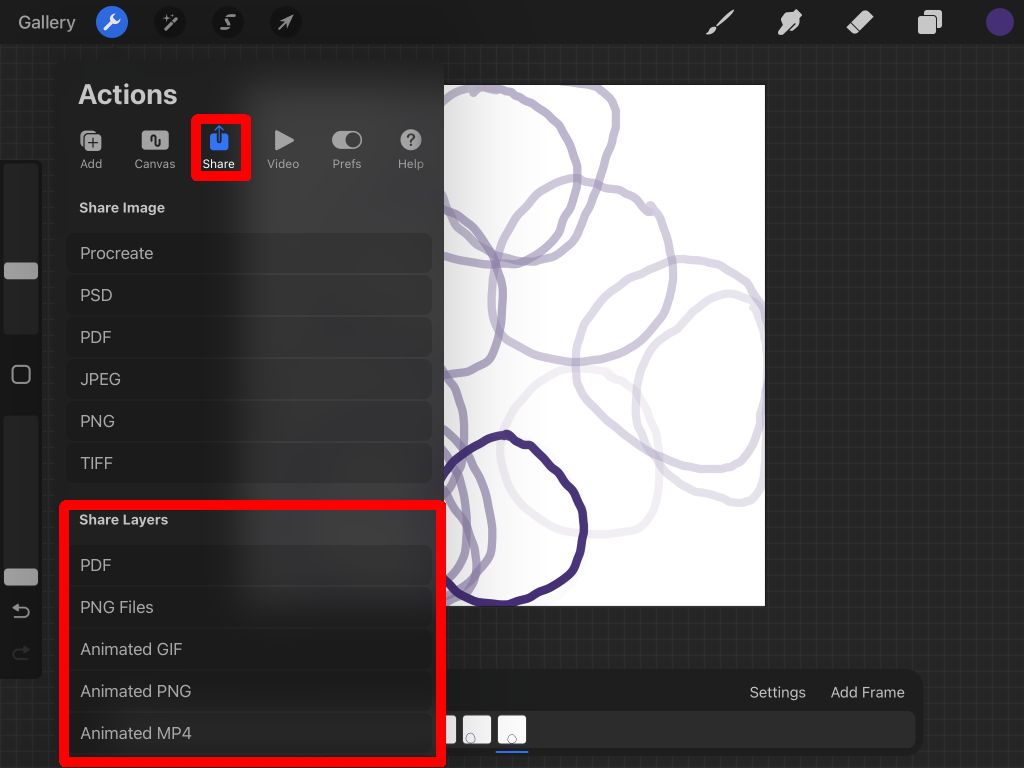
- Tap on the wrench in the top-left.
- Tap on Share.
- Underneath Share Layers, you’ll see options to export as an animated file, such as an animated PNG or HEVC. If you want to upload your animation to social media or other websites, the best option here is Animated MP4, as this format is supported almost everywhere.
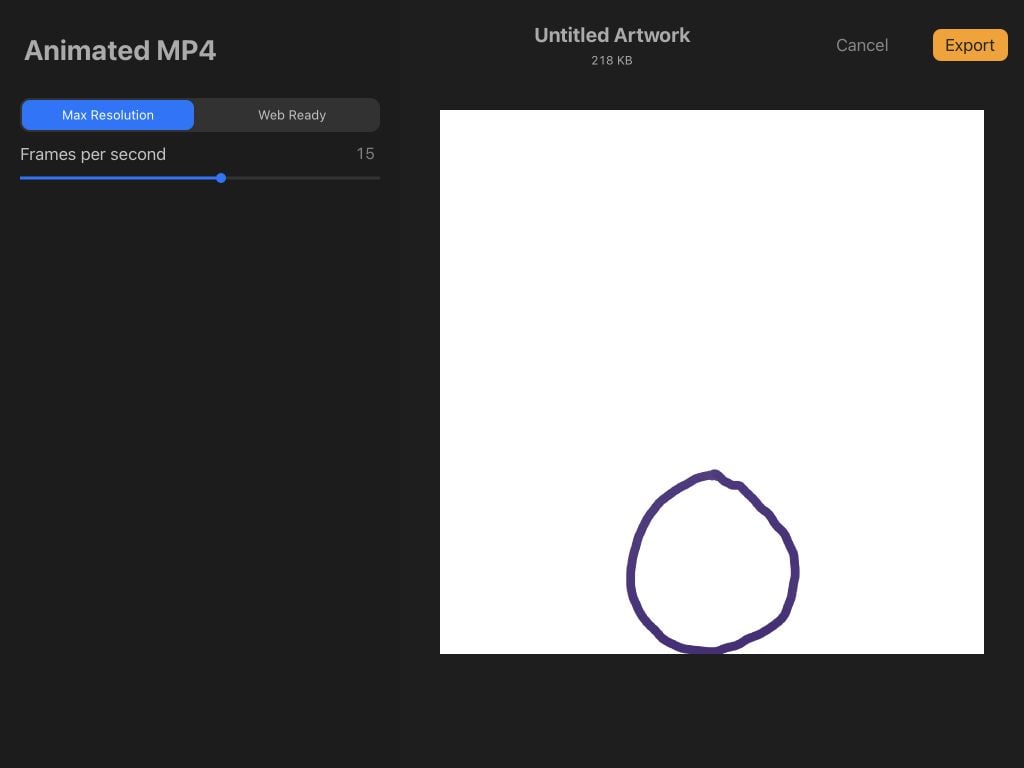
- Choose to export either at Max Resolution or Web Ready. Web Ready will make the file smaller, allowing for easier uploads. However, Max Resolution will retain more detail.
- You can also change the number of frames per second using the slider.
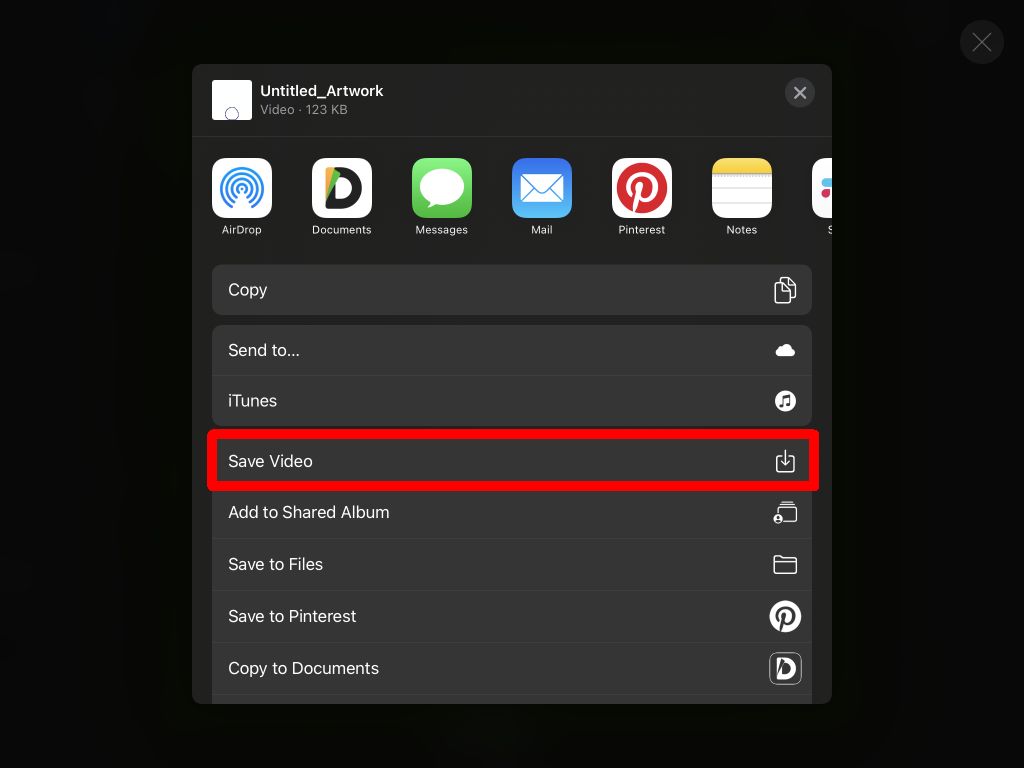
- When you’re ready, tap on Export. Then you can choose where to send or save the video. You can also tap the Save Video option to save it directly to your camera roll.
Now you can share your animation anywhere you wish. As you can see, Procreate is a powerful tool for both art and animation needs.
Tips for Animating With Procreate
The above steps outline the basics, but you’ll want to know more about using Procreate’s features to make genuinely good animation. Below are some tips you’ll want to keep in mind while creating your animation.
Duplicate Frames
You’ll notice that your lines will look shaky in the final animation if you start each frame from scratch. If you have some parts of your sequence that will be static, duplicating the frame will cut out a lot of work and prevent the shakiness. And, if you need to erase and redraw the moving subjects of the animation, you can use layer groups, which brings us to our next tip.
Use Layer Groups
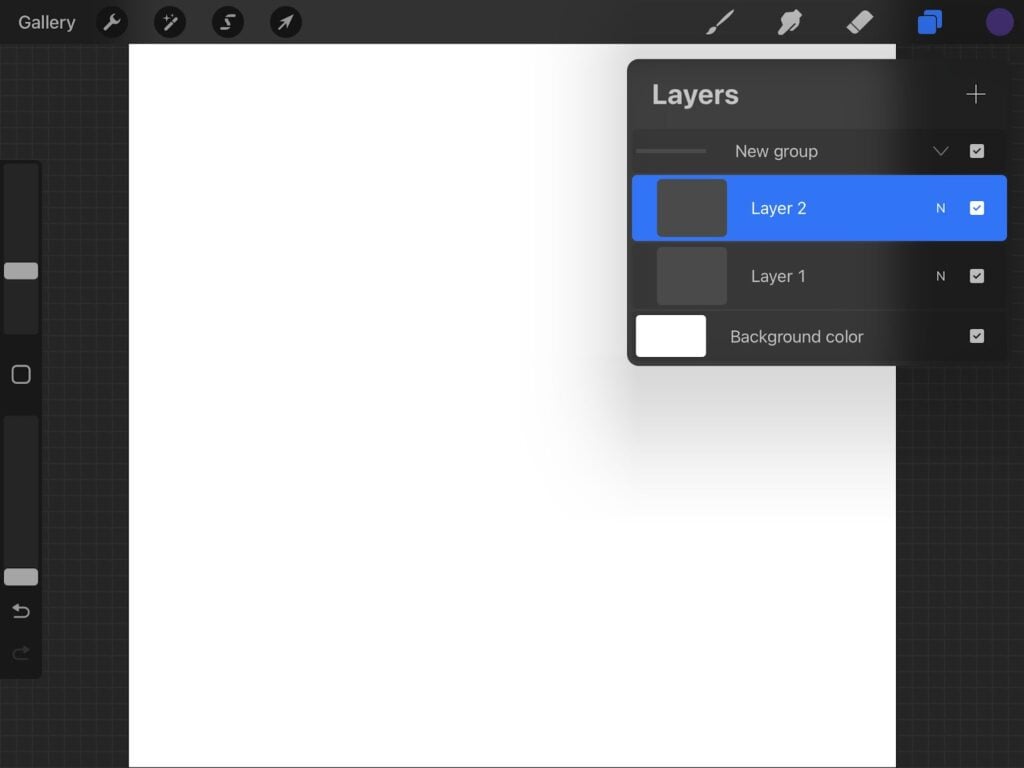
When adding a new frame on Procreate, it will appear in the Layers panel. If you want multiple layers within one frame, you can use layer groups.
First, open the Layers panel and tap on the plus icon to add a new layer. Then, drag it on top of an existing frame to start a layer group.
You can then work with the layers within this group as you normally would in Procreate. This is great for animating because you don’t have to worry about erasing parts of your animation that will stay static while drawing the moving portions.
Choose the Right FPS
Choosing a good speed for your frames is critical to getting a smoother animation. This will depend on the number of frames and the level of detail in your animation. Experiment with multiple speeds until you find one that looks smooth.
Ideally, you’ll want each frame to seem to flow into the next, but you also don’t want it to go too fast so your viewer can’t tell what’s happening.
Know the Layer Cap
Procreate is powerful, but there is a limit to how many frames you can have in a single animation. This limitation comes from how much your device can handle and the canvas size you’re using.
Generally, the frames will cap out at around 100-120. If you want to create longer animations, you could create multiple animation projects in the program and export them into a video editor to put them together.
Create Your Next Animation With Procreate
With the Procreate app, you can also make beautiful digital art and animate it. With the program’s intuitive design, animating is easy. So whether you’re a beginner with Procreate or a seasoned pro, you can make stunning animated pieces quickly and simply.
