Much of the time, showing is better than telling. If you’re trying to get something across visually but still want to explain what’s going on in your video, doing a voiceover can be a great tool.
In Adobe Premiere, creating a voiceover for your video can be done inside the program. You can speak as you watch your video being played. This is very helpful to ensure the voiceover is timed correctly.
Here’s how you can add your voiceovers to your projects in Adobe Premiere.
Set Up Your Project
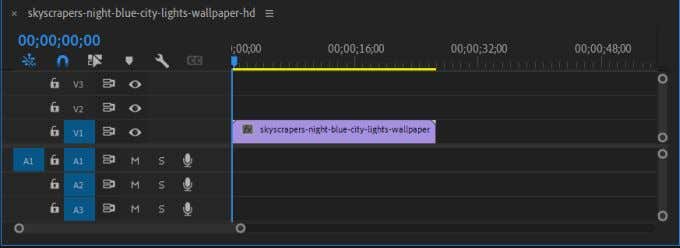
To begin creating your voice recording, first make sure your video is already placed in your timeline and edited the way you want in your final product. This will ensure that your voice recording goes with the video concisely so that viewers won’t get confused.
Next, set up or turn on your microphone. If you’re just using your computer’s built-in microphone, make sure it’s on and working. You may want to test it before you start recording to see how it sounds and if you need to adjust anything before you begin recording.
This could be the positioning of your microphone or settings it has, if any. You can test your microphone on a Windows PC by searching for the Voice Recorder app and using that. If you’re on a Mac, you can open the Voice Memos app and test your mic there.
Once you’re happy with how your recorded voice sounds, go back to Premiere.
How to Add a Voiceover
Before you start, make sure the timeline panel is selected. Then follow these steps to create a voiceover recording.
- Place the time marker in the timeline in the position you would like to start your voiceover.
- On the left side of the timeline, next to the audio tracks, there should be a microphone icon. Click on this when you’re ready to record.
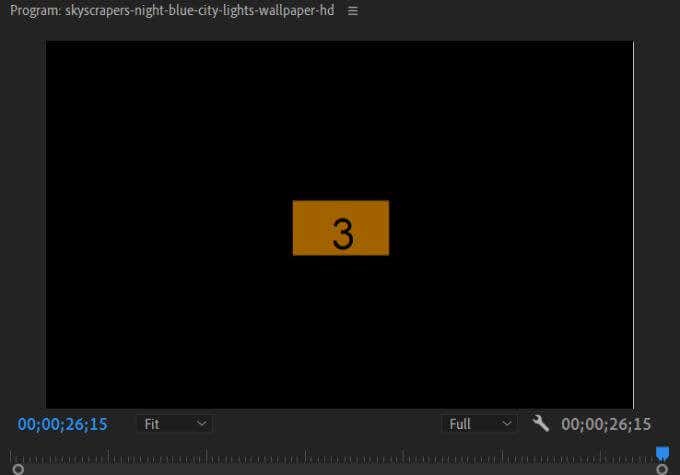
- You’ll see a countdown from 3 in the Program monitor, and then your project will begin to play while your microphone records. Do your voiceover now.
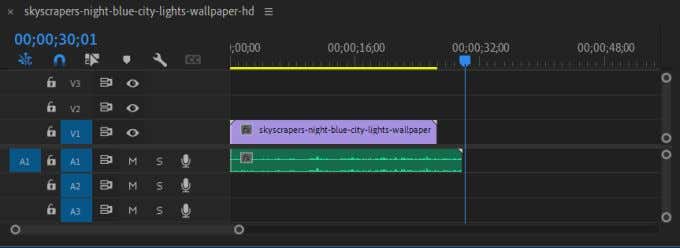
- When the recording is over, click again on the microphone icon. The playback and recording will stop, and you should see the audio clip appear in your timeline.
- You can now edit your audio clip as you wish.
You can edit, move and add effects to your audio clip the same as any other audio file you’d add to your project. If you want to delete the audio, just click on it and then hit Backspace.
Changing Voiceover Settings
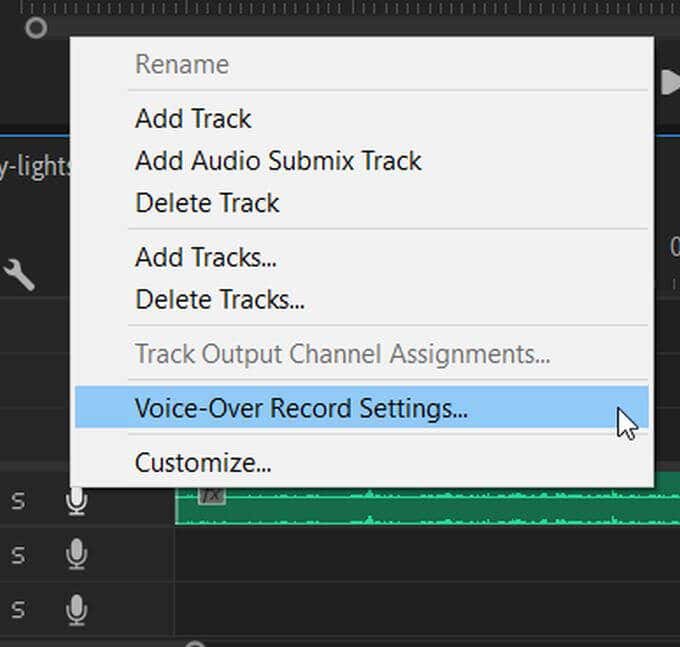
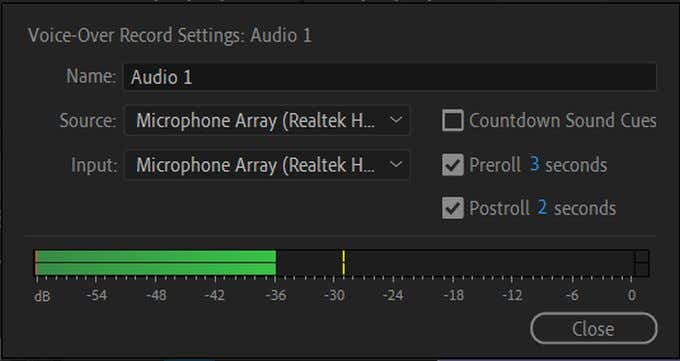
If you’re having trouble with your voice recording, you can troubleshoot some things by going into the Voice-Over Record Settings. To find this, right-click on the microphone icon in your selected audio track. Then select Voice-Over Record Settings from the list.
You can alter a few things in the window that appears on the screen to help you with your recording.
Name: Rename the audio recording.
Source and Input: Select the microphone you wish to record your voiceover into Adobe Premiere. Make sure to choose the correct one.
Countdown Sound Cues: Checking this off will add a sound cue along with the visual countdown.
Pre-Roll and Post-Roll Seconds: Here, you can change how long the visual countdown lasts before and after recording.
Audio Meter: You can check to see if your chosen source/input microphone is recording by watching the meter. If it moves when a sound is made, then it should be working. If it’s staying still, you may need to check your selected input or troubleshoot the microphone itself.
Saving Your Recorded Audio
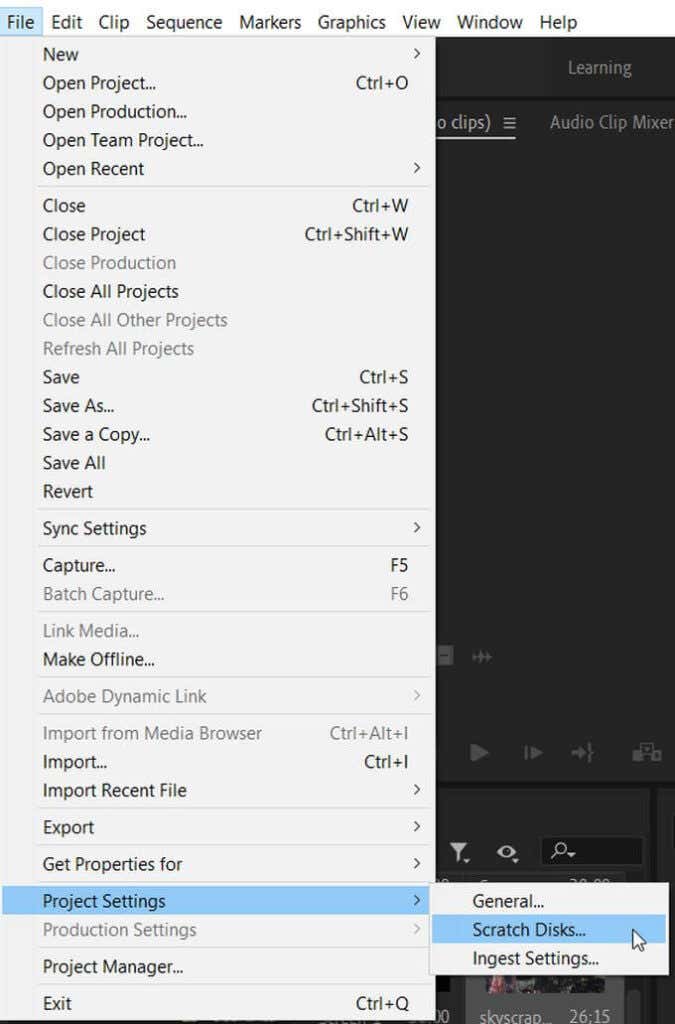
If you want to see or change the saved location for your voiceover audio, you can do this from Premiere in the Project Settings. Here’s how to find and change this.
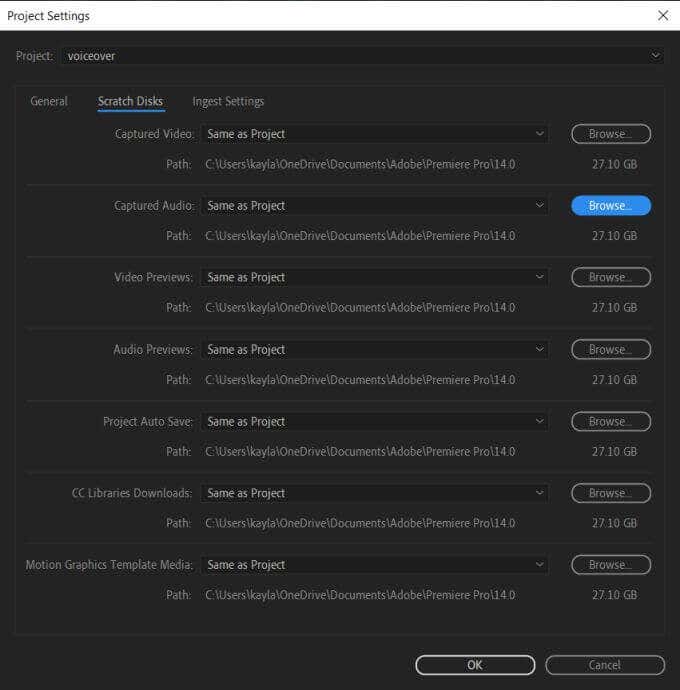
- In Premiere, go to File > Project Settings > Scratch Disks. A new window will open.
- Find the Captured Audio section. The pathway in the dropdown box is where Premiere saves your voiceovers. By default, they are saved in the same place as your project.
- To change the save location, click on the dropdown and choose either Documents, Same as Project, or Custom. You can use the Browse option to select a file where your voiceovers will be saved.
To keep your project straight, it’s usually best to save everything in one place. However, if you want to save your voiceovers to a different location, this is the most efficient way to do it.
Tips for Making Voiceovers
To make a voiceover sound clear and more high-quality, you can take some extra steps to upgrade your audio.
Use a Pop Filter
If you find a lot of background noise in your voiceovers, a pop filter attached to your microphone can help with this a lot. These are quite inexpensive and can make your recordings a lot clearer, especially helpful if you do voiceovers often.
Place Your Microphone Correctly
To get the best sound, you’ll want to try setting your microphone about 10 inches away from you. This allows your voice to sound clear while also not being too close to cause any interferences.
Write a Script Beforehand
To make your voiceover sound the most professional, so your words come out clear and concise, it’s best to write a script with what you want to say in your voiceover and have it on-hand when you’re recording. If you wing your voiceover, you could end up with many filler words and unclear speech.
Drink Some Water
Making a voiceover can be hard, especially if you do a lot of takes. If you’re not adequately hydrated, it can cause your voice to falter. You can remedy this easily by making sure to drink water before your recordings and in between any takes.

