
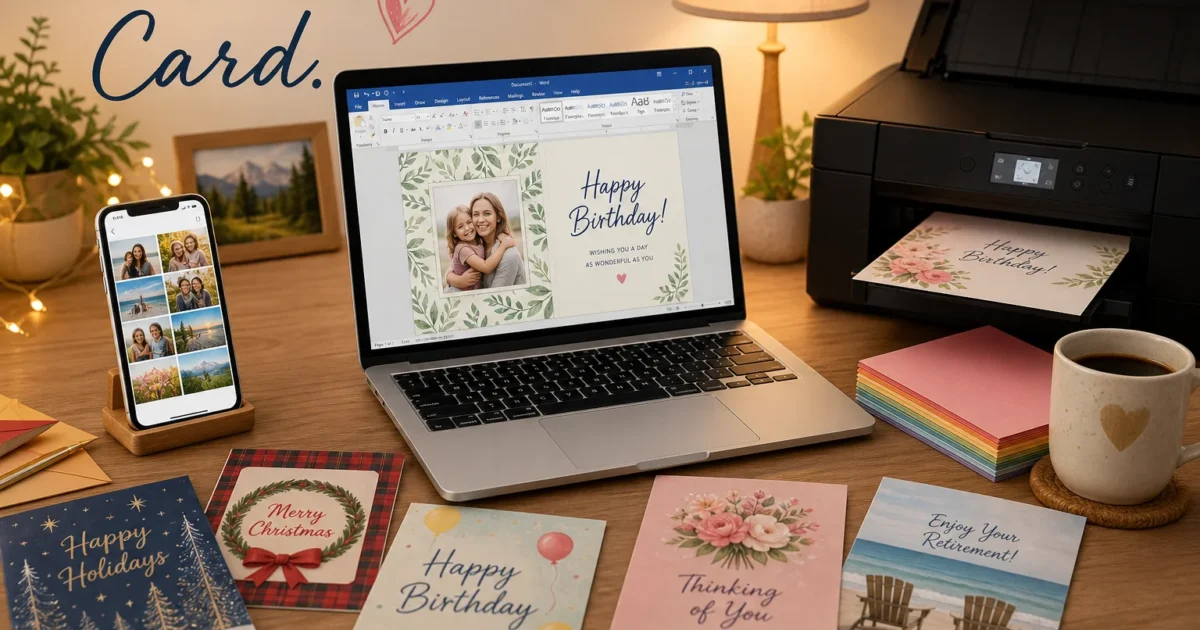
Spending $8 on a card that says roughly the same thing as every other card on the rack has always felt like a missed opportunity. Word can fix that. Making your own greeting card in Microsoft Word is easier than you’d think, especially with the template options Microsoft includes right in the app.
Word has enough graphic tools for a solid greeting card: photos, text boxes, WordArt, shapes, and background fills are all built in. The template gallery makes it even faster. There are two approaches: grab a pre-built template and customize it, or build from a blank document for full creative control. This guide covers both.
Before You Begin
Make sure you have:
- Microsoft Word installed (Microsoft 365 or Word 2021) or access to Word for the web
- A printer and card stock paper if you’re printing physically; 65 lb or heavier holds up well when folded
- Any personal photos you want to include saved on your computer
The Quick Way: Use a Greeting Card Template
Word’s template gallery has free greeting card designs for birthdays, holidays, thank-you notes, and more. The results look polished with minimal effort. It’s worth trying this route first; you can always go custom if nothing fits.
On Windows
- Open Word and click New from the home screen.
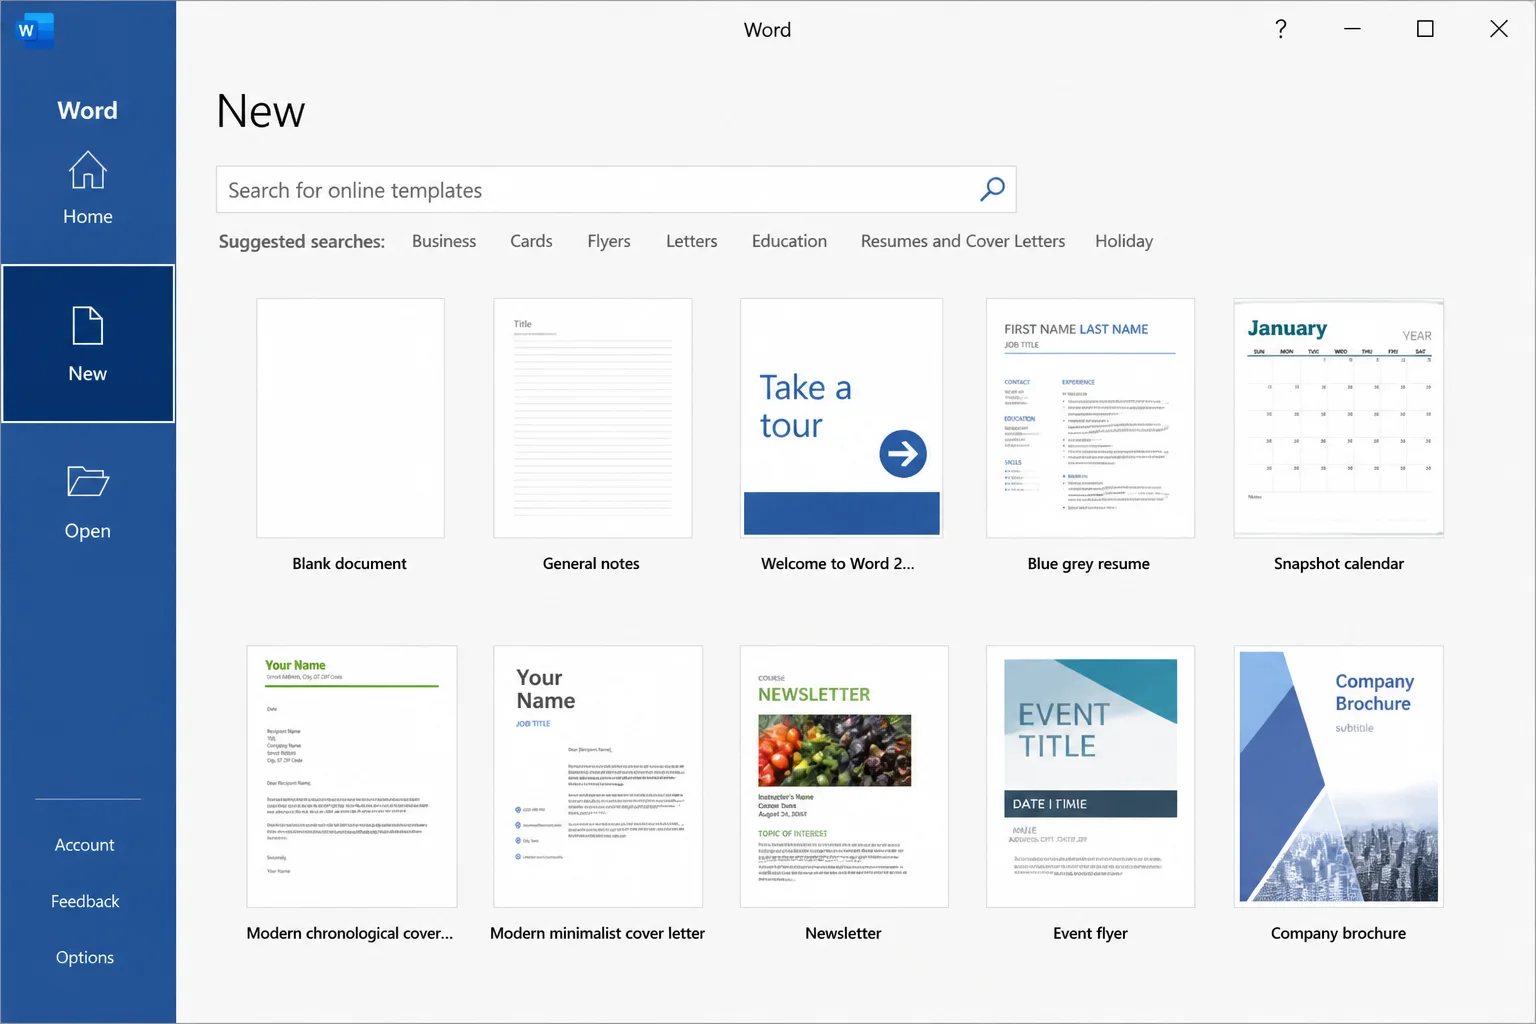
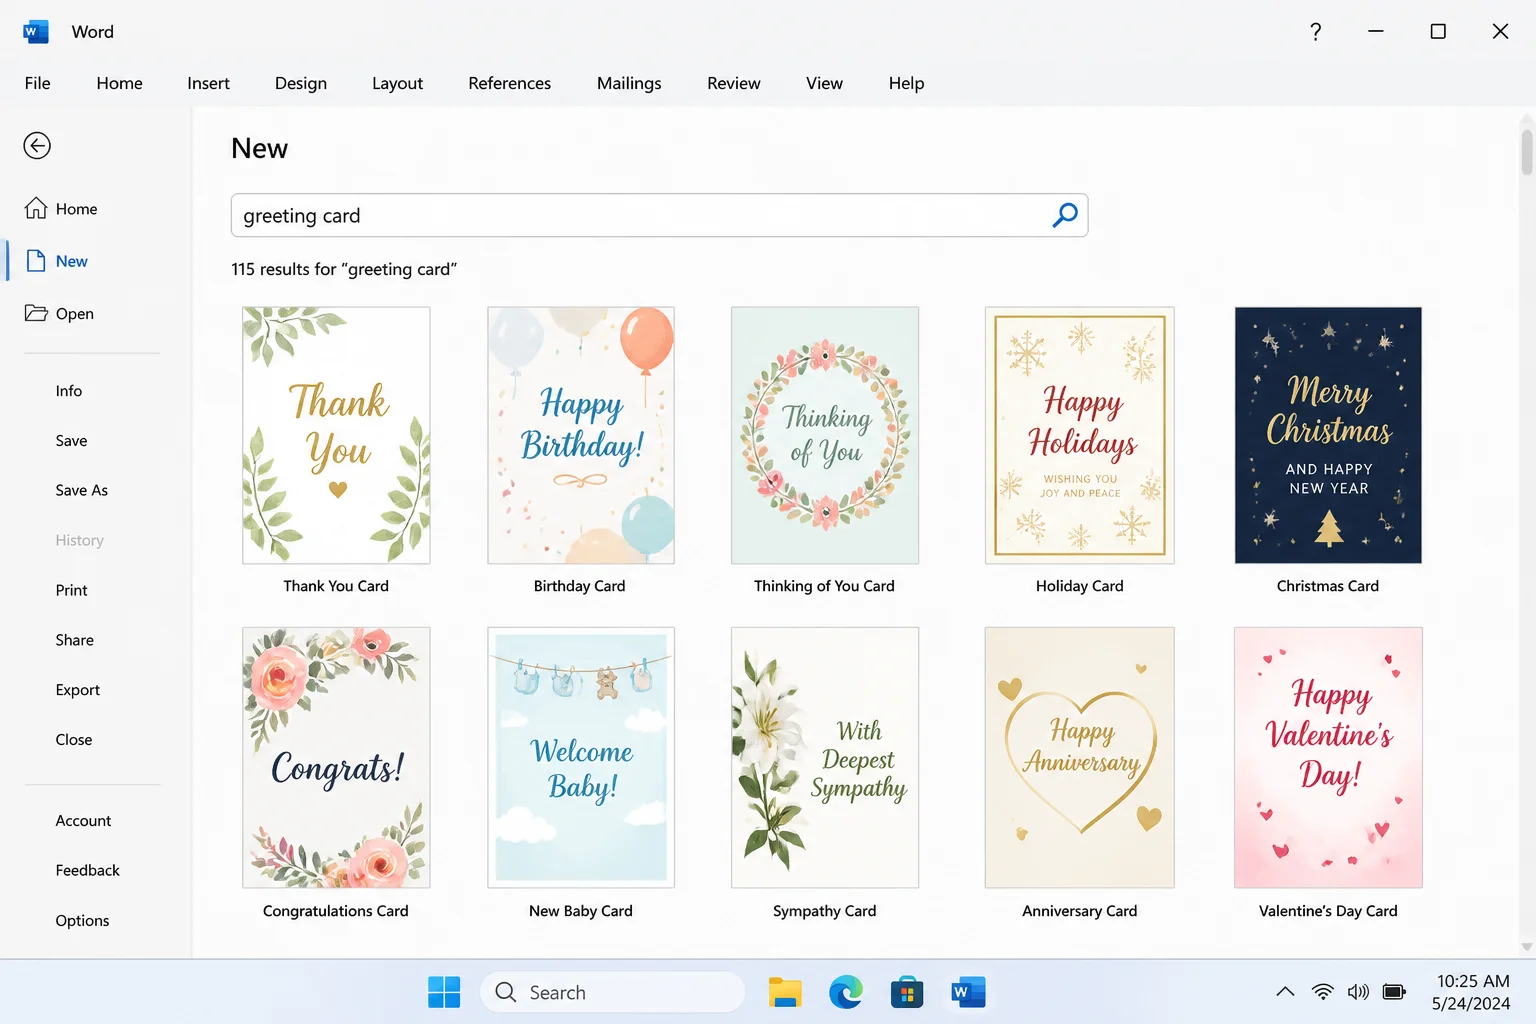
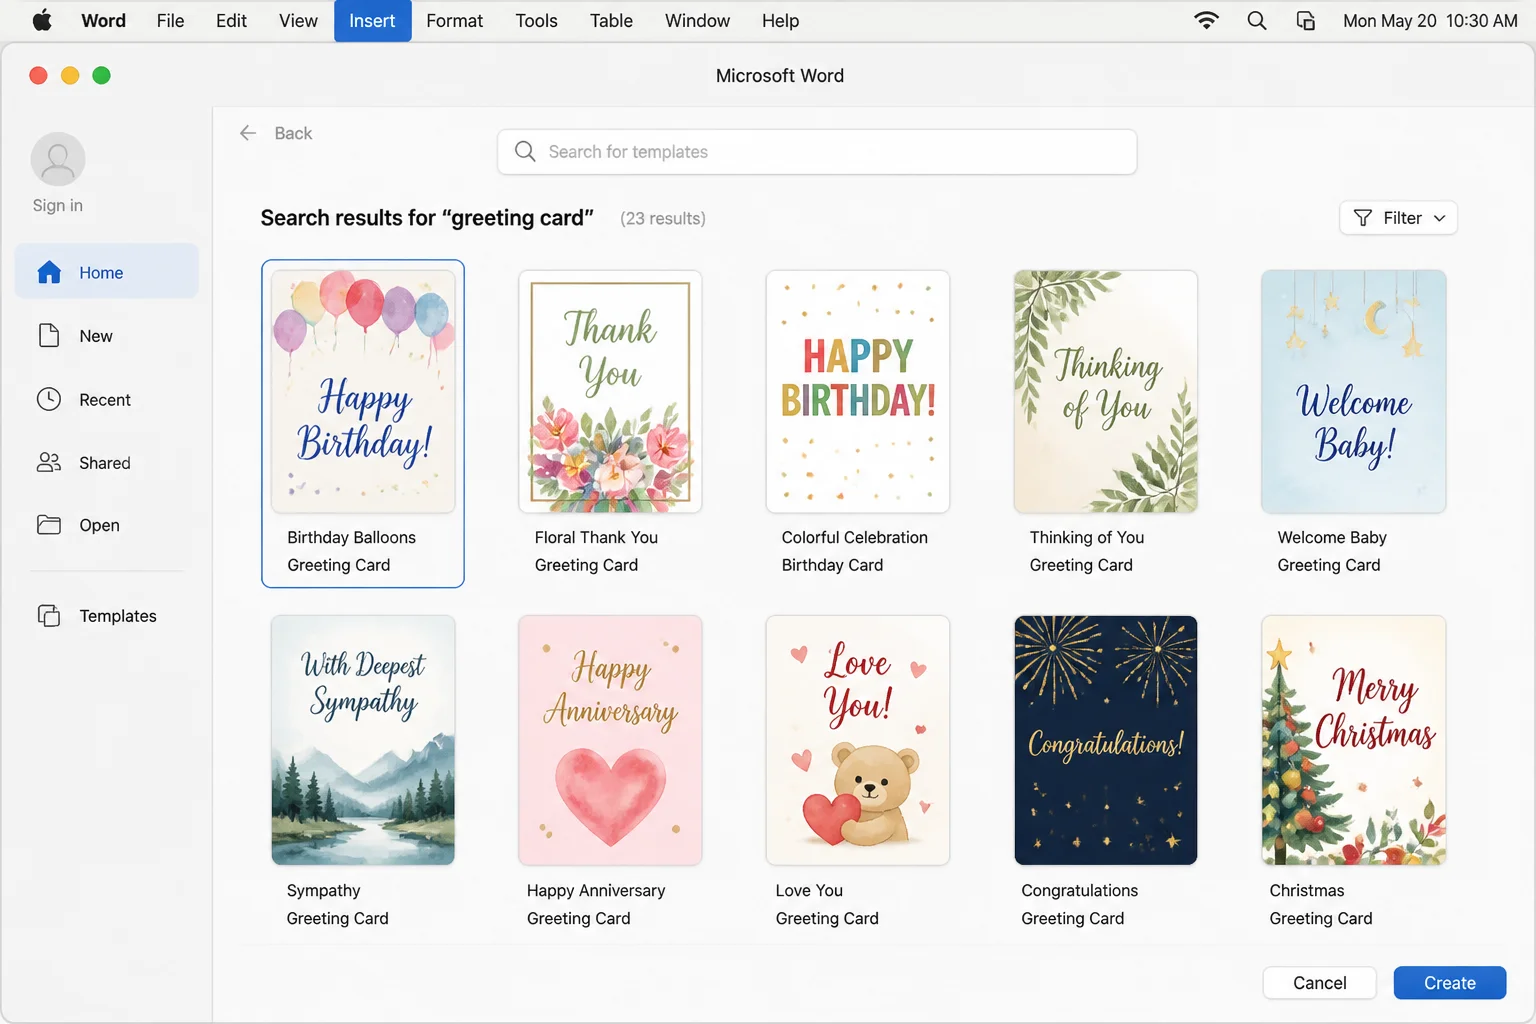
- Type greeting card (or something specific like “birthday card”) in the search box, then press
Enter. - Browse the results and click a design that fits the occasion.
- Click Create to open it as a fully editable document.
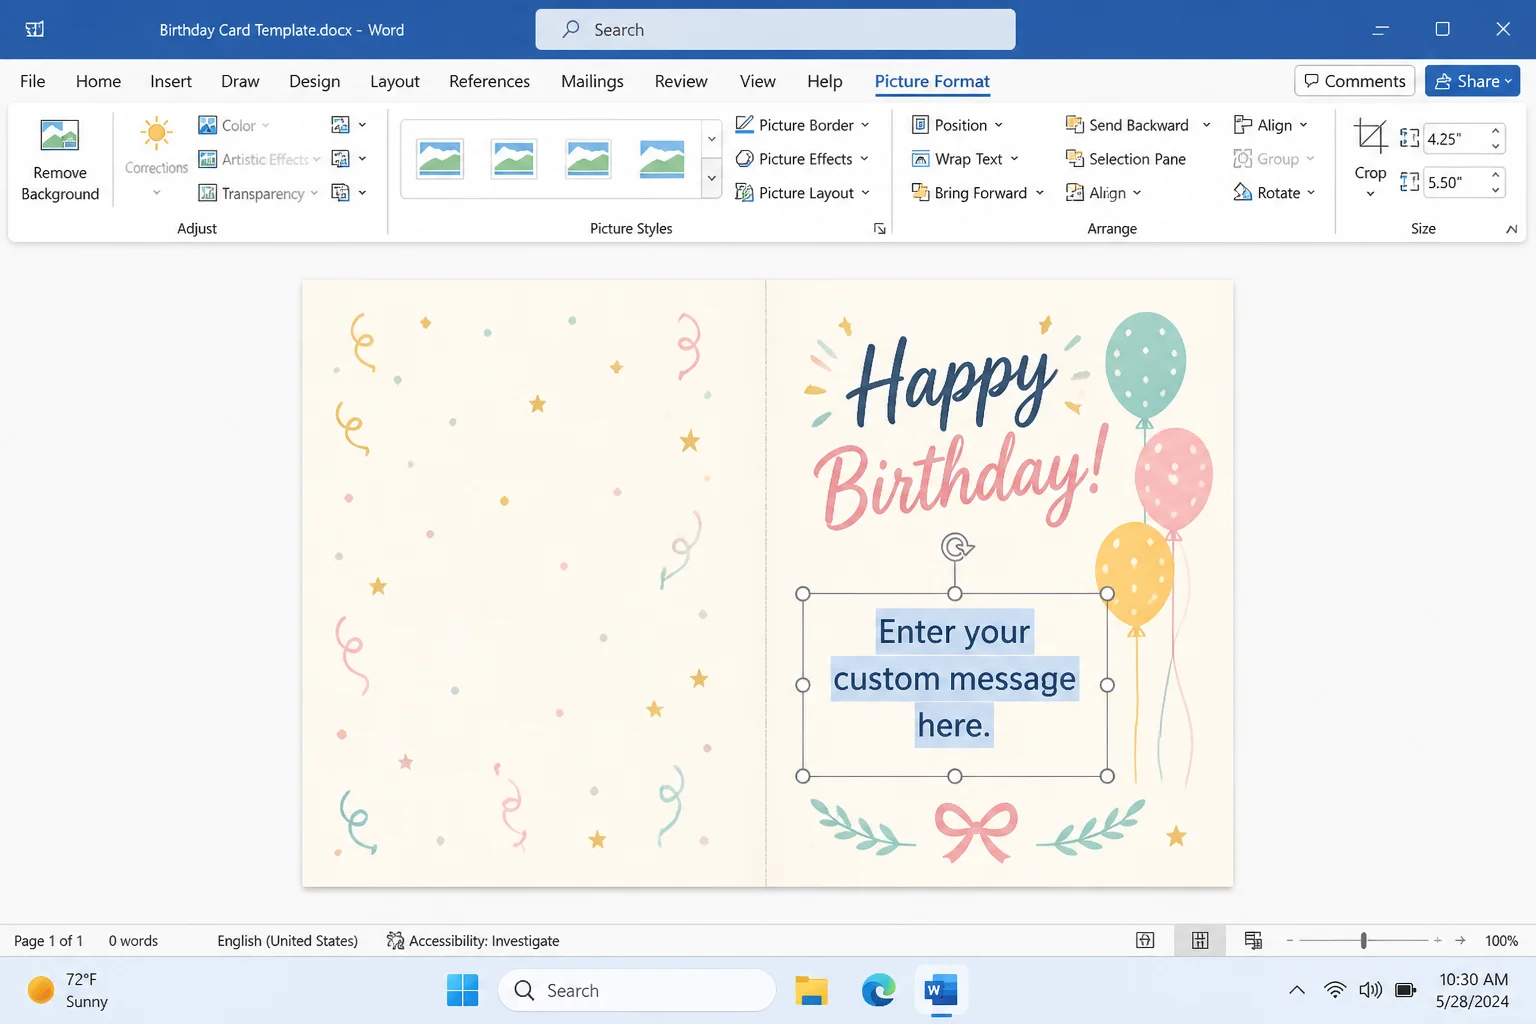
- Click any placeholder text and type your own message directly over it.
- To swap out a photo, click the image in the template. The Picture Format tab appears in the ribbon; use Change Picture to replace it with your own.
- Go to File > Save to keep an editable copy, or File > Export > Create PDF/XPS to save a print-ready file.
On Mac
The steps are the same in Word for macOS. The ribbon tabs match what you see on Windows closely enough that you won’t get lost.
- Open Word and click New, then search for greeting card.
- Pick a template, click Create, and edit the placeholder text and images.
- Export a final file via File > Export.
In Word for the Web
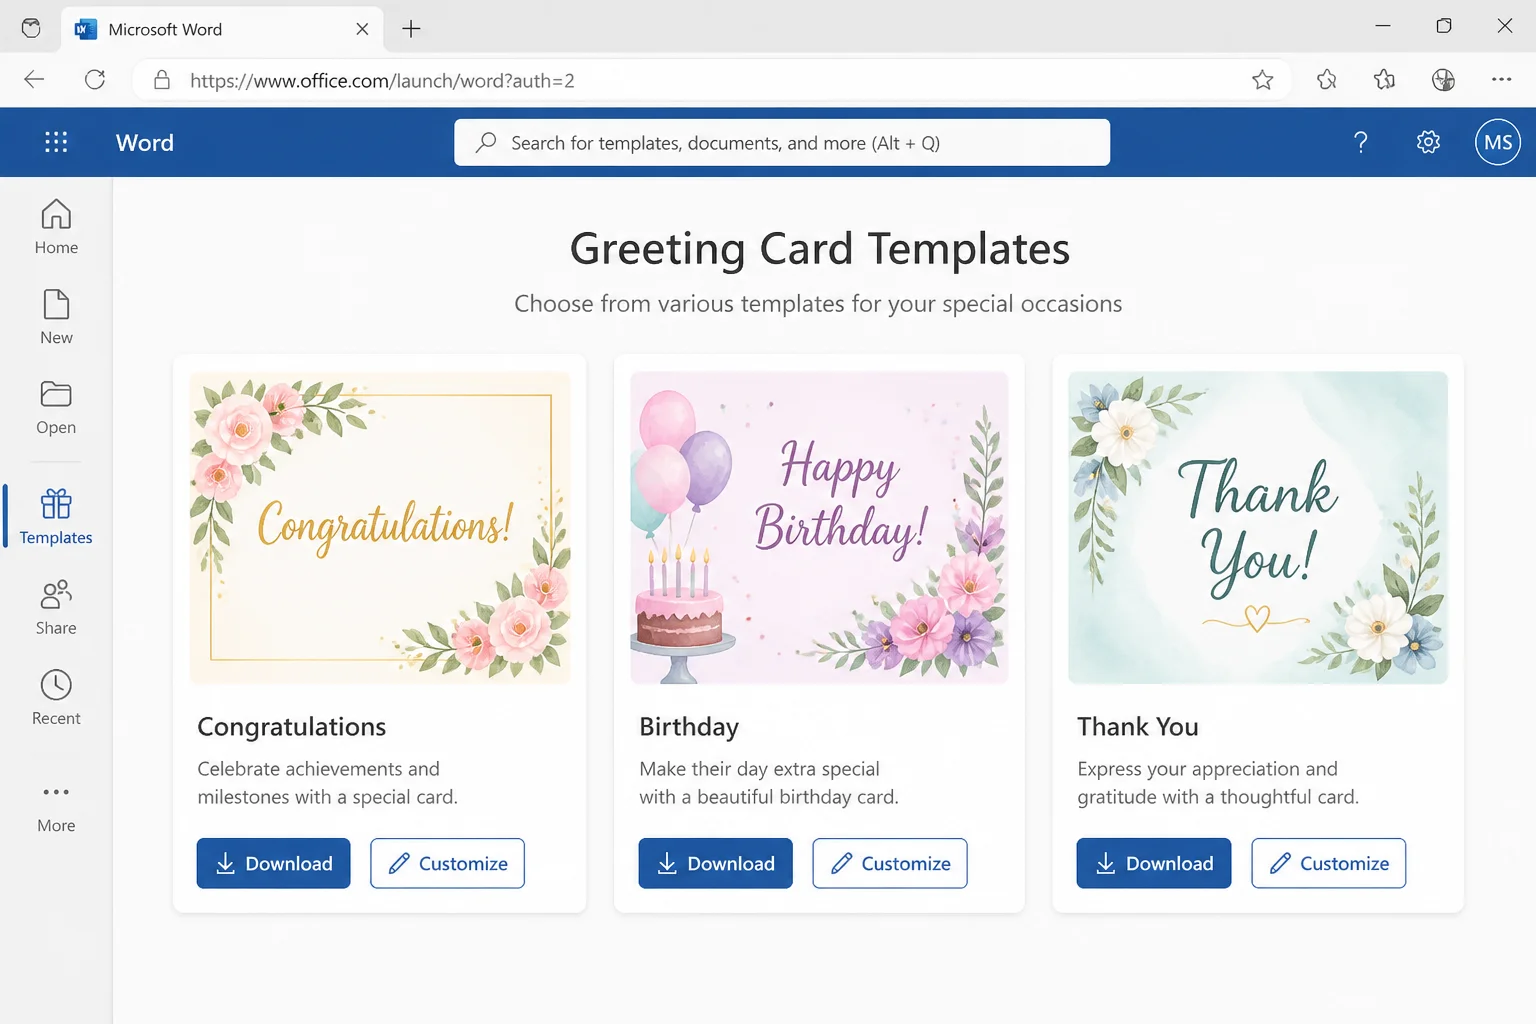
The Word for the web template gallery is a solid option if you don’t have Word installed locally. The templates are free and everything edits right in the browser.
- Go to the Word for the web card templates page.
- Pick a design and click Edit in browser or Customize in Word, depending on which option appears.
- Edit the text and images, then download your card as a Word file or PDF.
So far so good. Templates get you a polished card in about five minutes. Swapping in personal text and photos makes them feel much less generic than anything off the store shelf.
Building a Greeting Card in Word from Scratch
Want something completely custom? Building from a blank document takes more time, but the card ends up entirely your own.
Step 1: Open a Blank Document
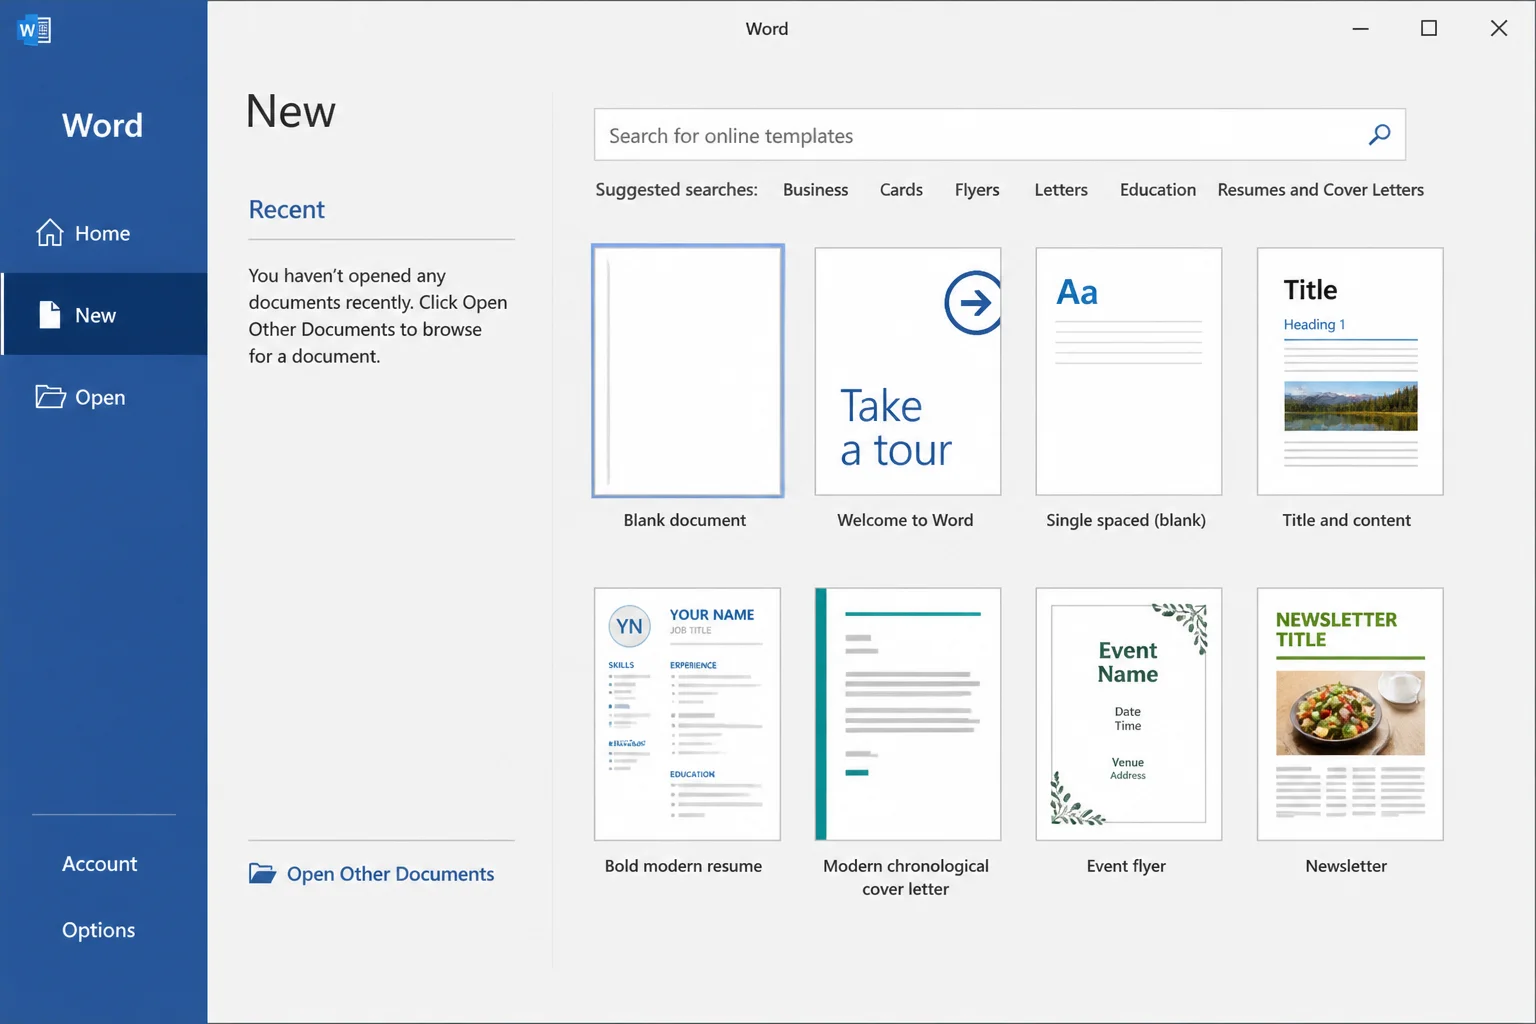
Open Word and click New > Blank document. From the Insert tab, you can add photos, text boxes, WordArt, shapes, and icons.
Step 2: Set Up the Page Layout
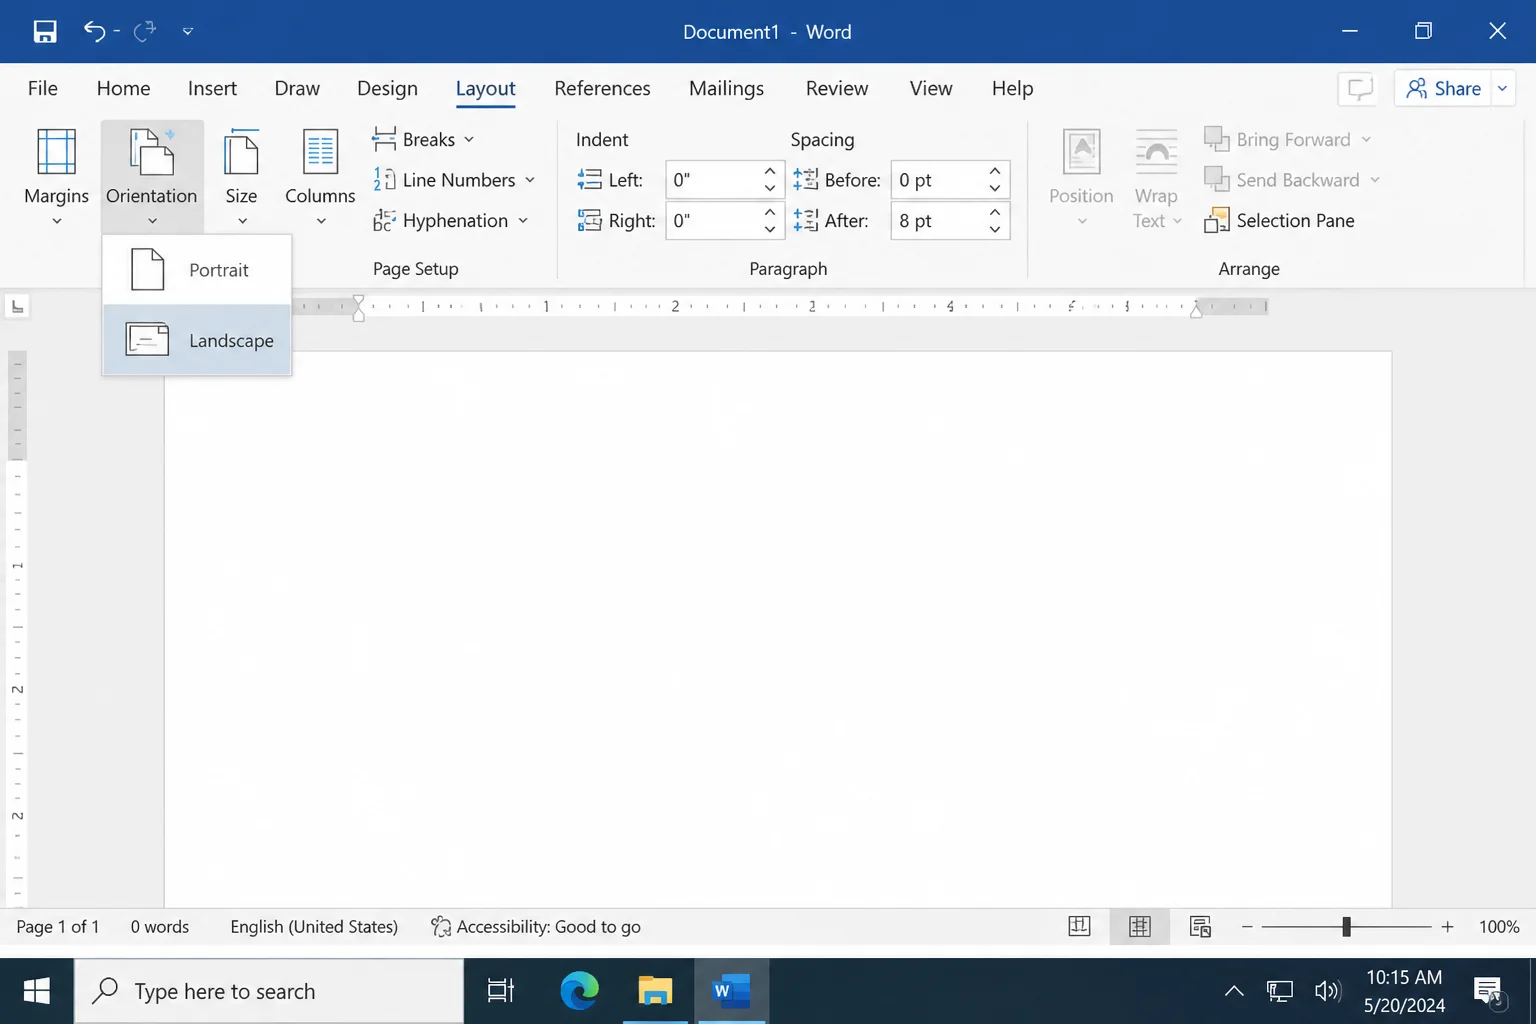
Most greeting cards look better in landscape orientation; it gives the design more room and works well with photos.
Go to Layout > Orientation > Landscape.
Then set your paper size. Letter (8.5 x 11 inches) works on most home printers. A4, A5, and custom sizes are also available.
Go to Layout > Size and pick from the list. For a custom size, select More Paper Sizes at the bottom of the dropdown.
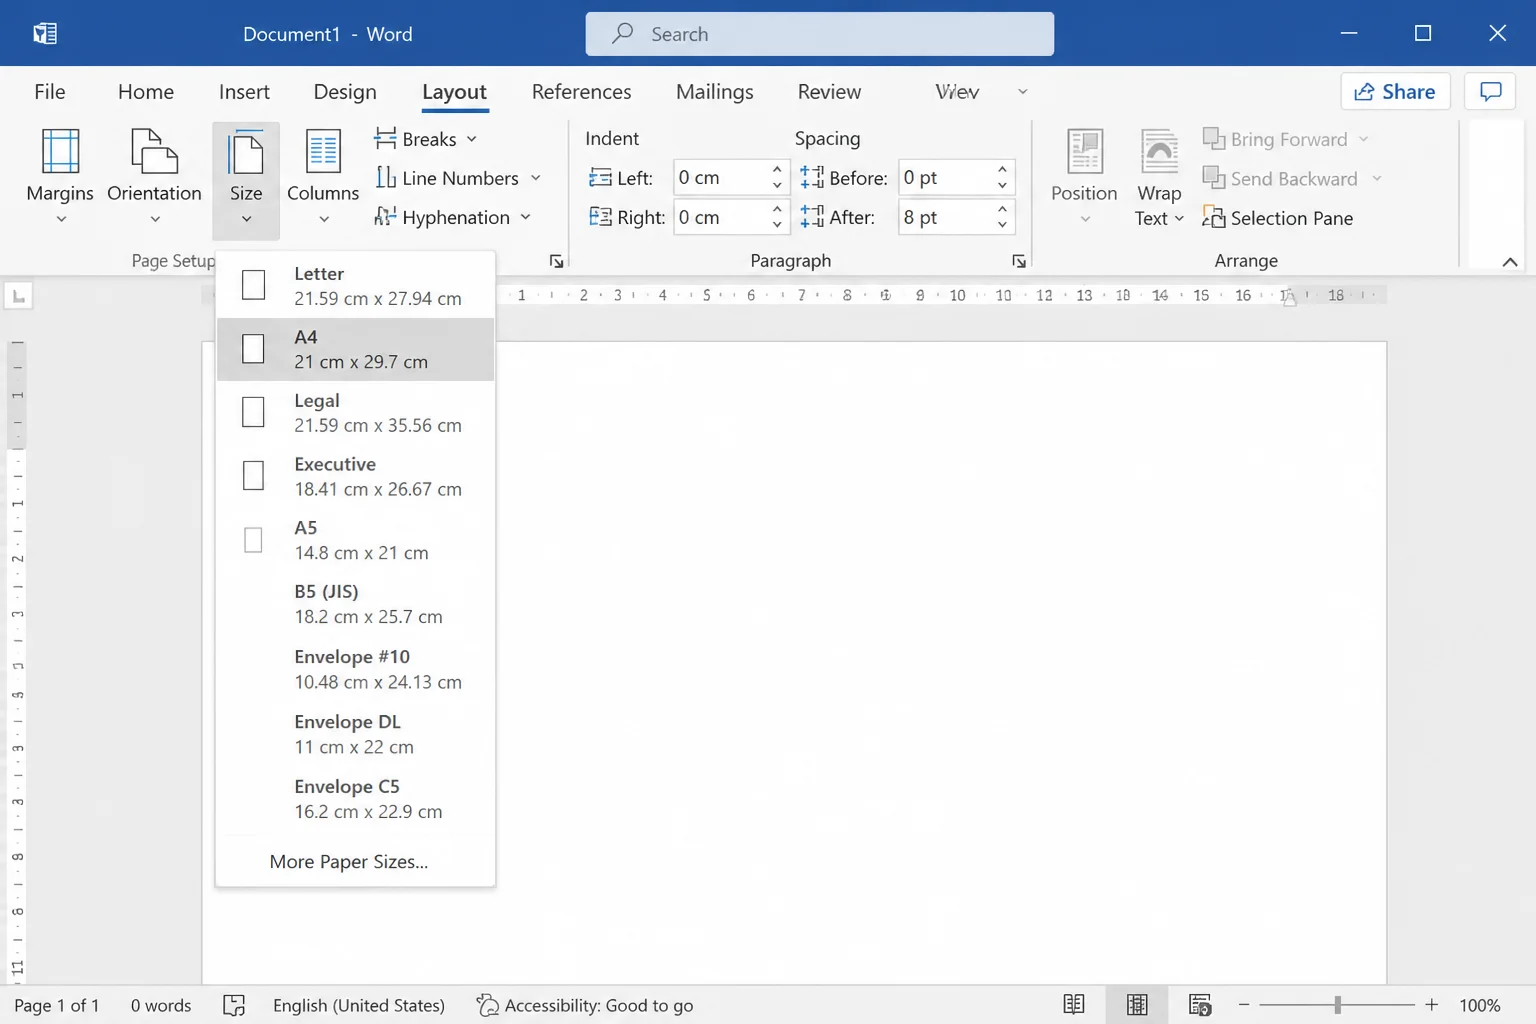
Tip: To get an image closer to the edge of the page, reduce your margins. Go to Layout > Margins > Custom Margins and set them to 0.25 inches, or smaller if your printer supports borderless printing.
Step 3: Turn On Gridlines
Gridlines overlay a faint grid on your document to help you line up elements without guessing. They don’t print, so turn them on freely.
Go to View > Gridlines.
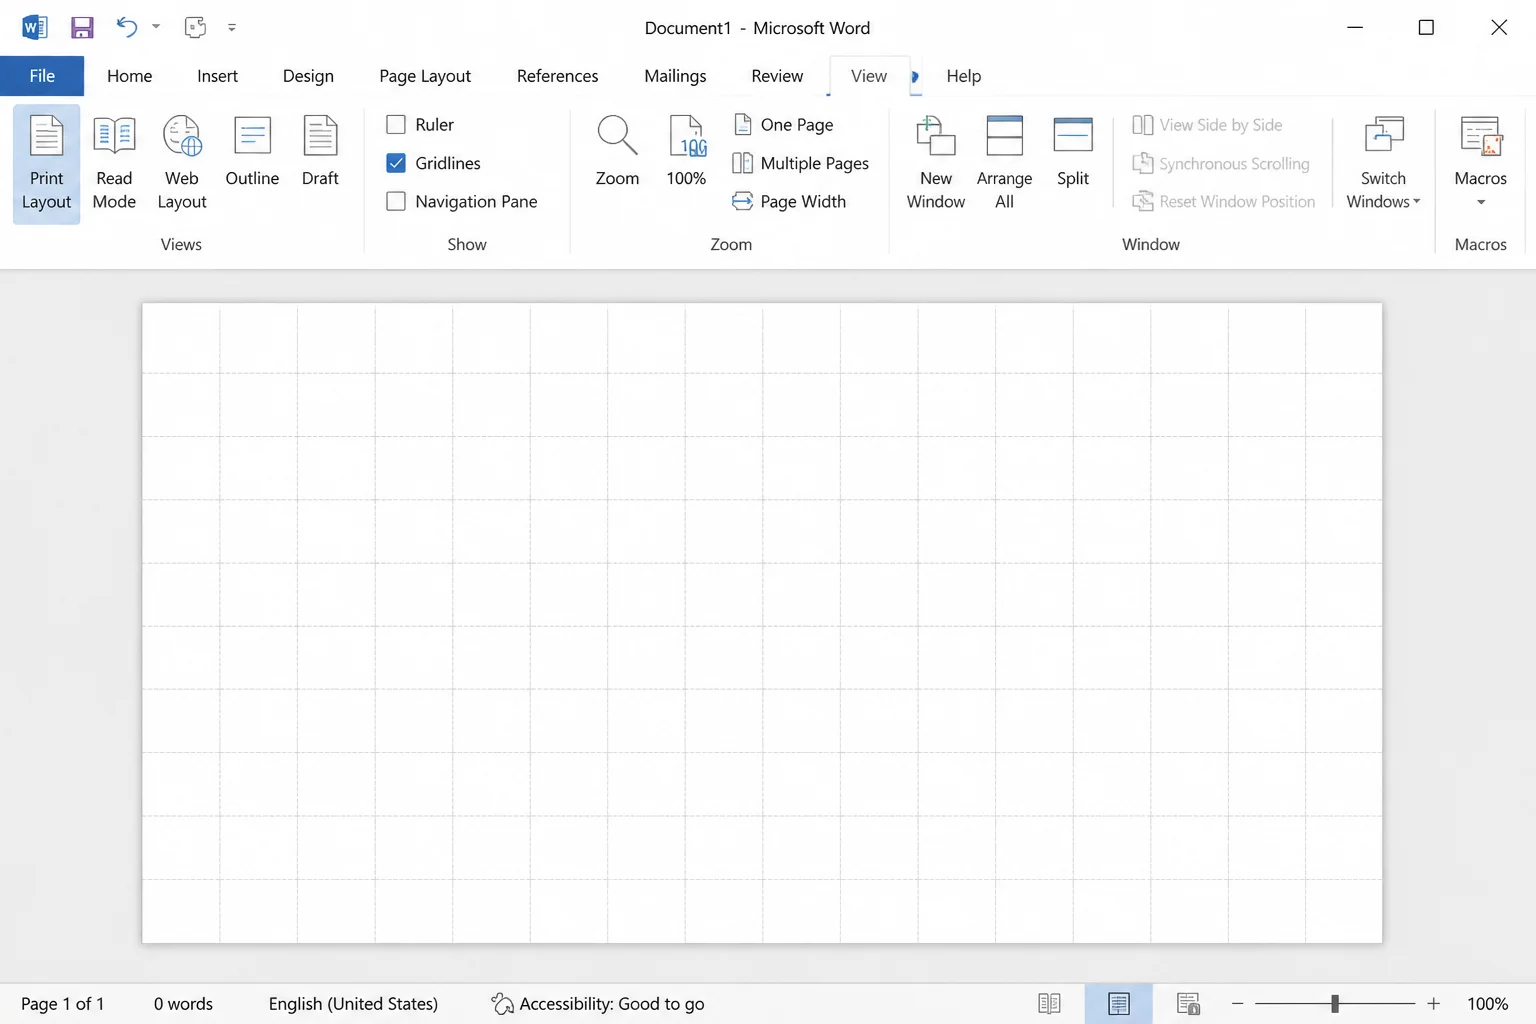
To have objects snap to the grid automatically, click any shape or image, open the Shape Format tab, then go to Align > Grid Settings and enable Snap objects to grid. The Microsoft support article on grid snapping has more detail, though it’s worth noting that the Snap To feature only works in Print view.
Step 4: Mark the Fold Line
For a card that folds down the middle, a guide line in the center keeps your design from accidentally crossing the fold.
- Go to Insert > Shapes and choose the straight Line.
- Hold
Shiftwhile drawing to keep the line vertical. Place it in the center of the page. - Click the line to select it, then click the Layout Options icon that appears next to it.
- Choose Fix position on page, then click See more.
- In the Layout dialog, set the horizontal position so the line sits at the exact center of your page width.
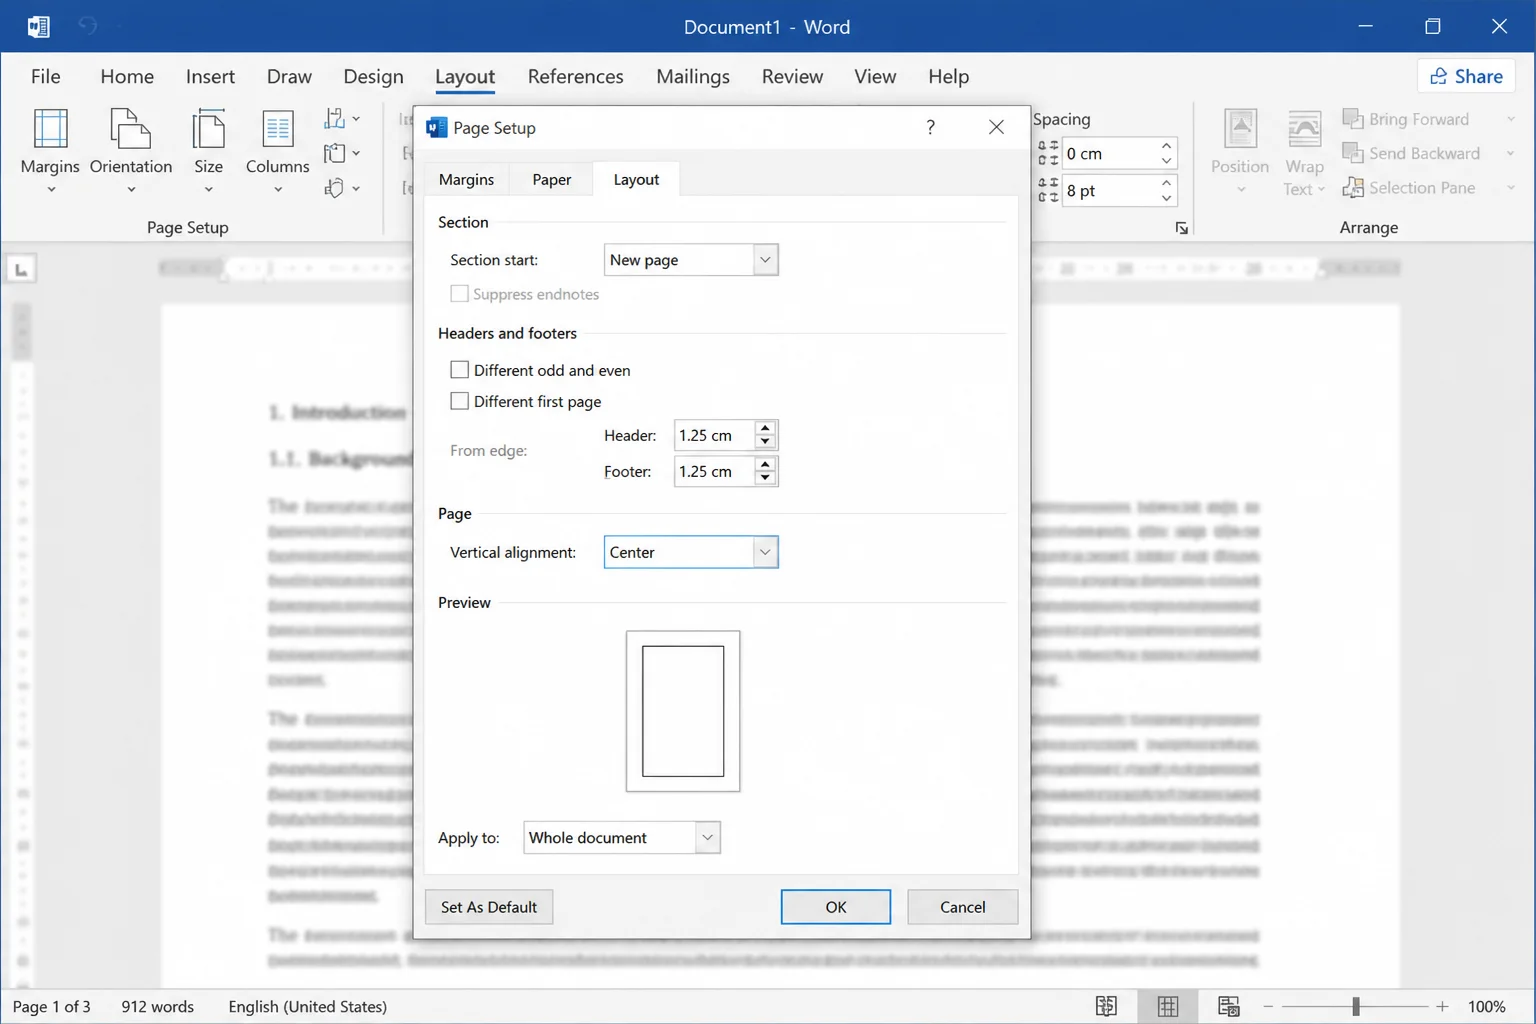
The line stays put even as you add content around it. Print it as a fold guide, or delete it before your final print; either works fine.
Step 5: Add Images and Graphics
This is where the card starts looking like a card. Three easy options:
- Your own photos: Go to Insert > Pictures > This Device and select your file.
- Stock images: Go to Insert > Pictures > Stock Images to browse Word’s free library of photos and illustrations.
- Icons: Go to Insert > Icons for clean, scalable graphics that work well as accents.
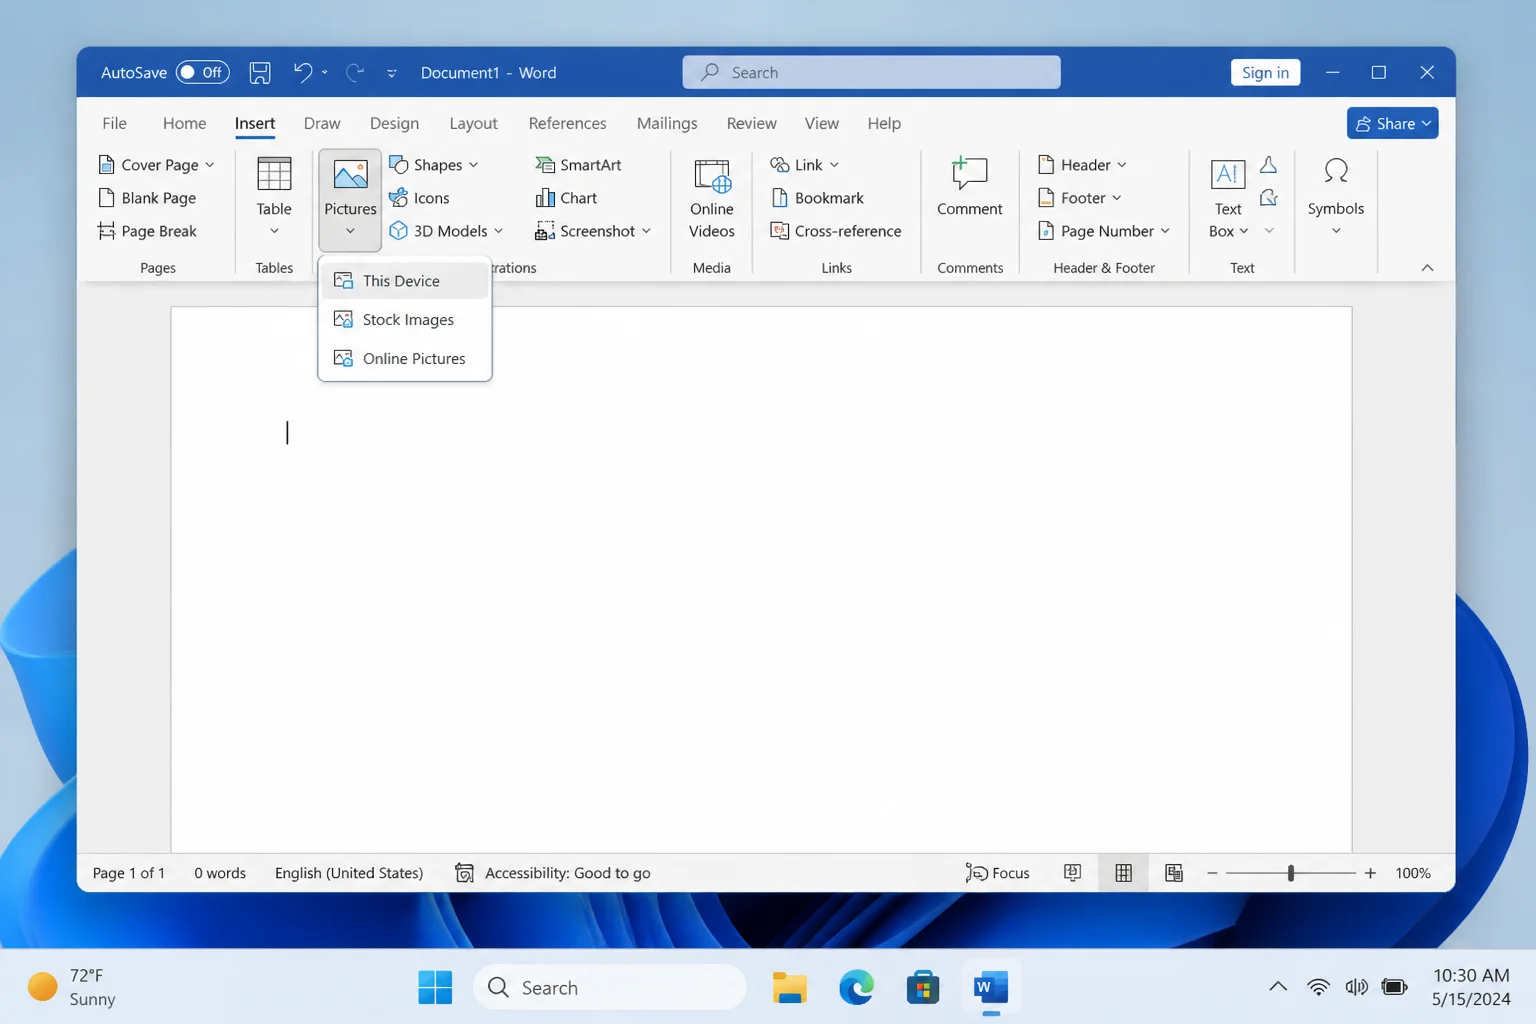
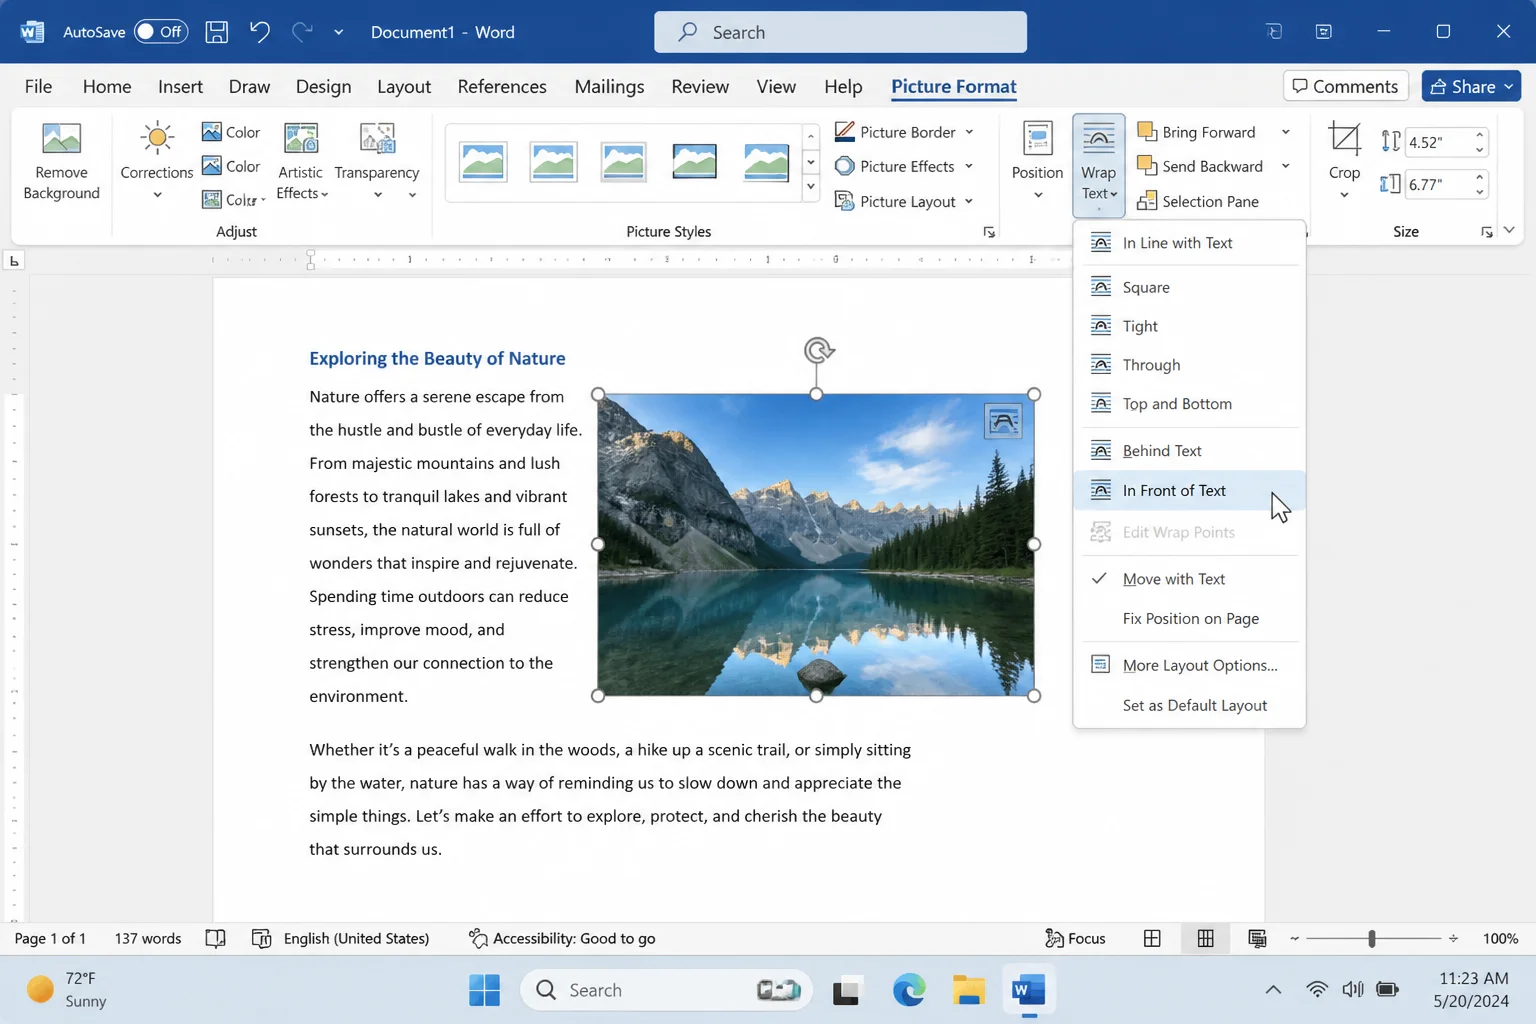
After inserting an image, you’ll almost certainly need to change how Word positions it. By default, images are treated as inline elements that are tricky to move. Click the image, go to Picture Format > Wrap Text, and select In Front of Text. After that, you can drag it anywhere on the page.
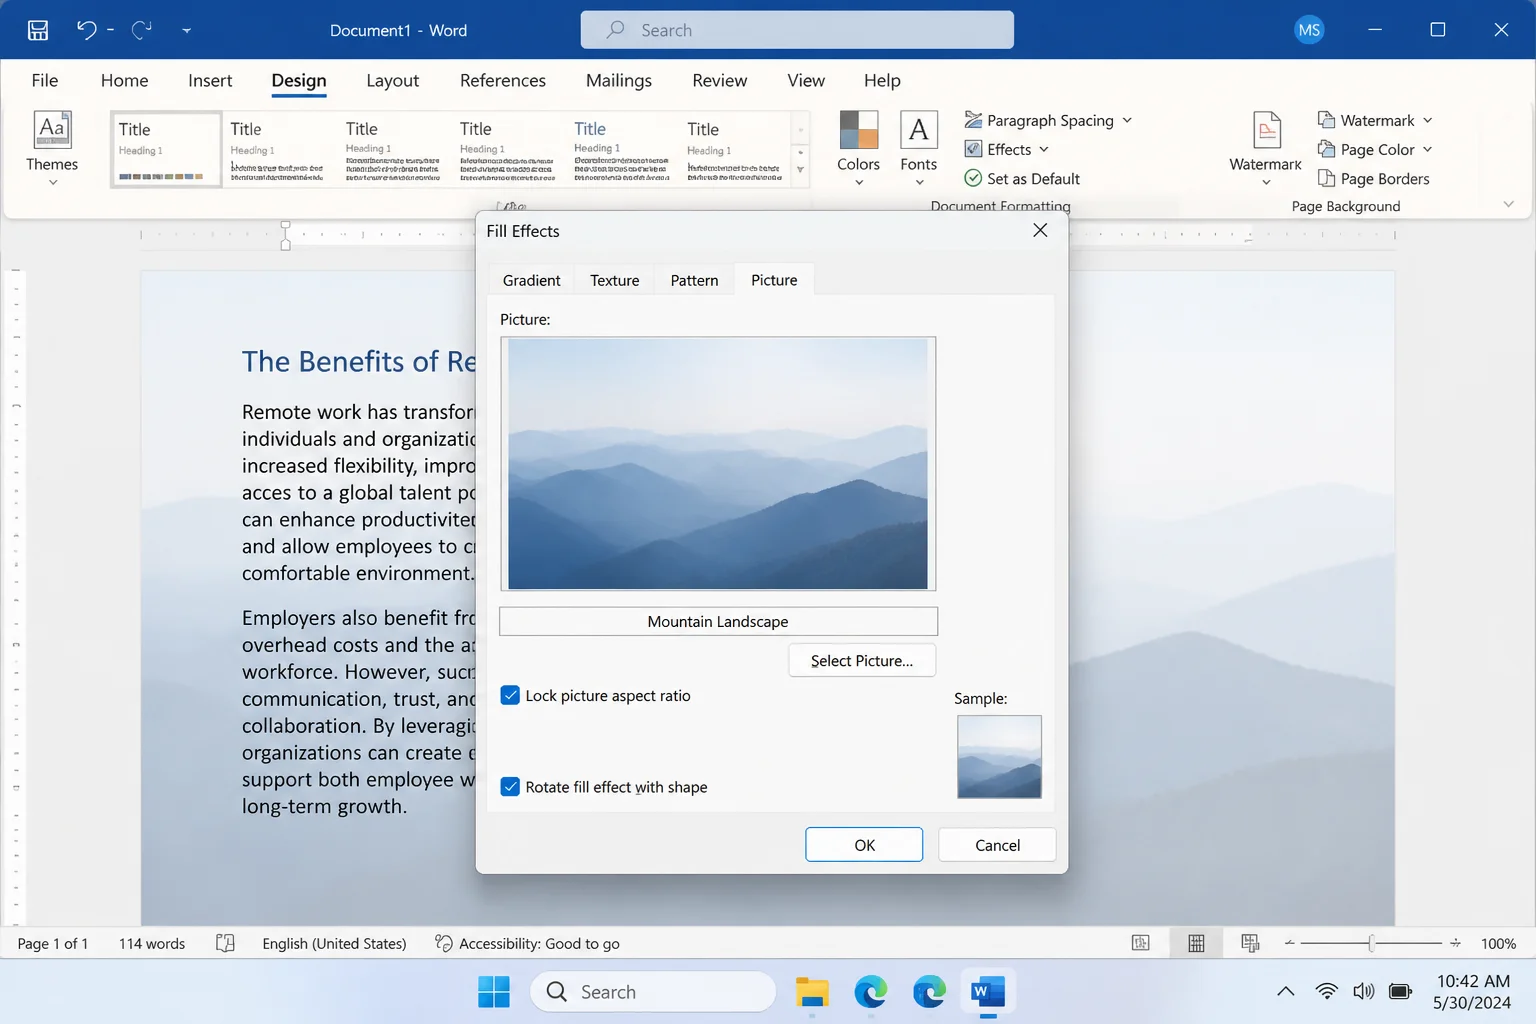
To use a photo as a full-page background instead, go to Design > Page Color > Fill Effects, click the Picture tab, choose your image, and hit OK. You’ll see a preview before it applies.
Step 6: Add Your Text
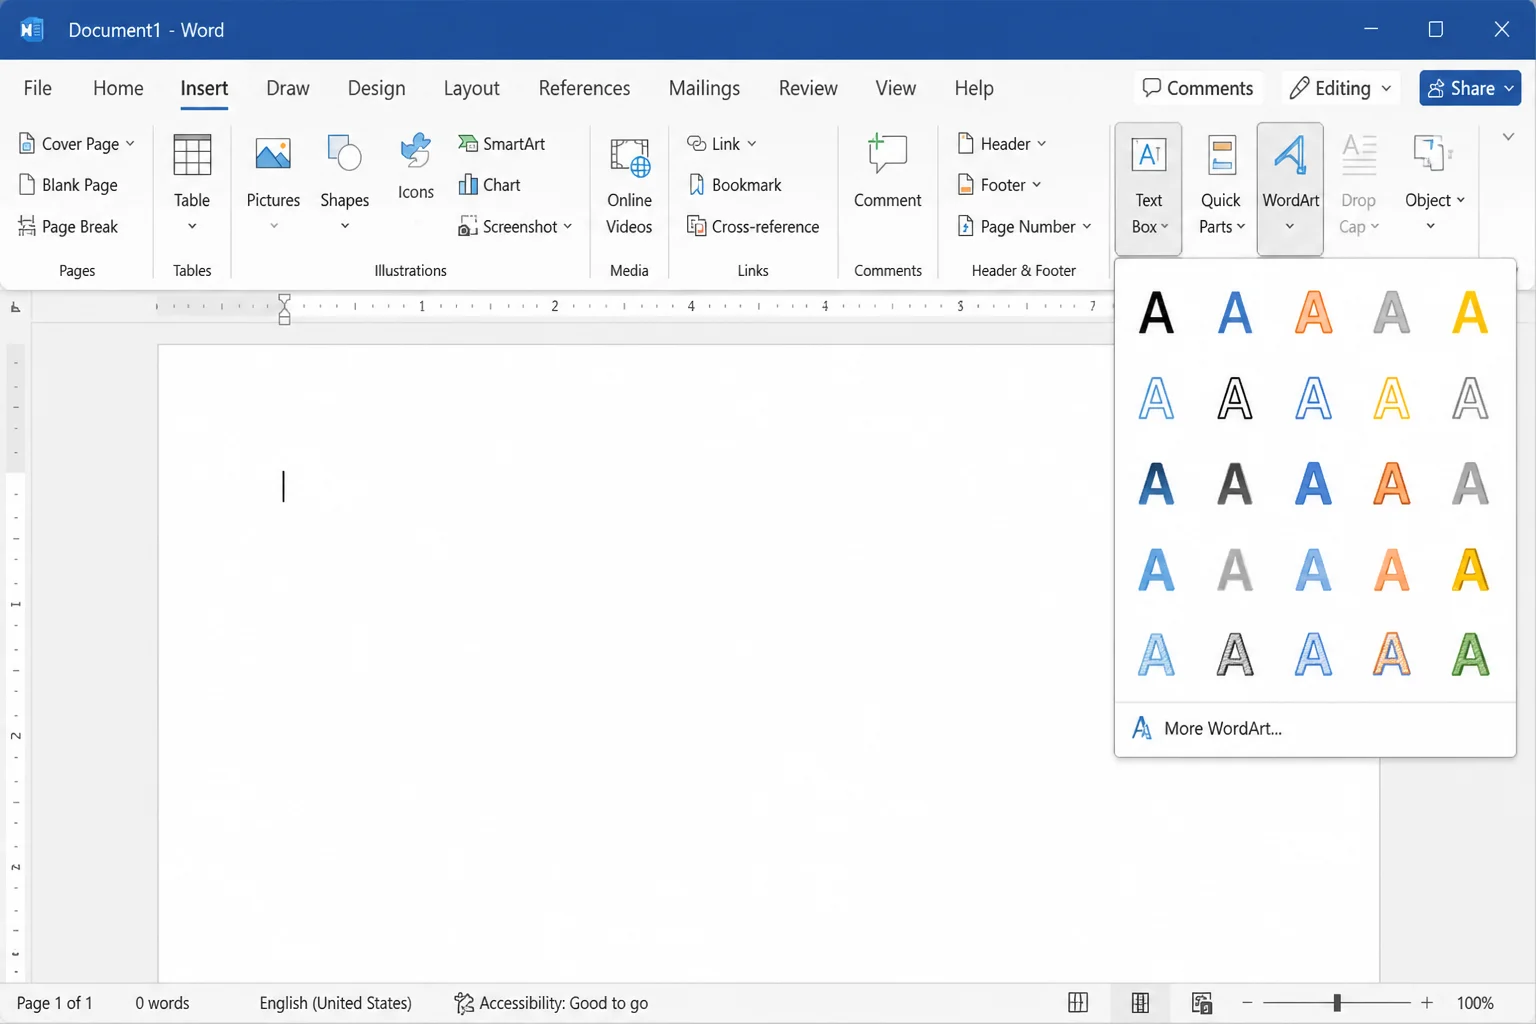
Go to Insert > Text Box and draw a box where your message should go. For text with built-in personality, try Insert > WordArt; pick a style from the gallery and type your message.
Right-click any text box and select Format Shape to open a sidebar. The Text Options section breaks down into three areas:
- Text Fill & Outline: color, gradients, and outlines
- Text Effects: shadows, glows, and reflections
- Layout & Properties: padding and alignment inside the box
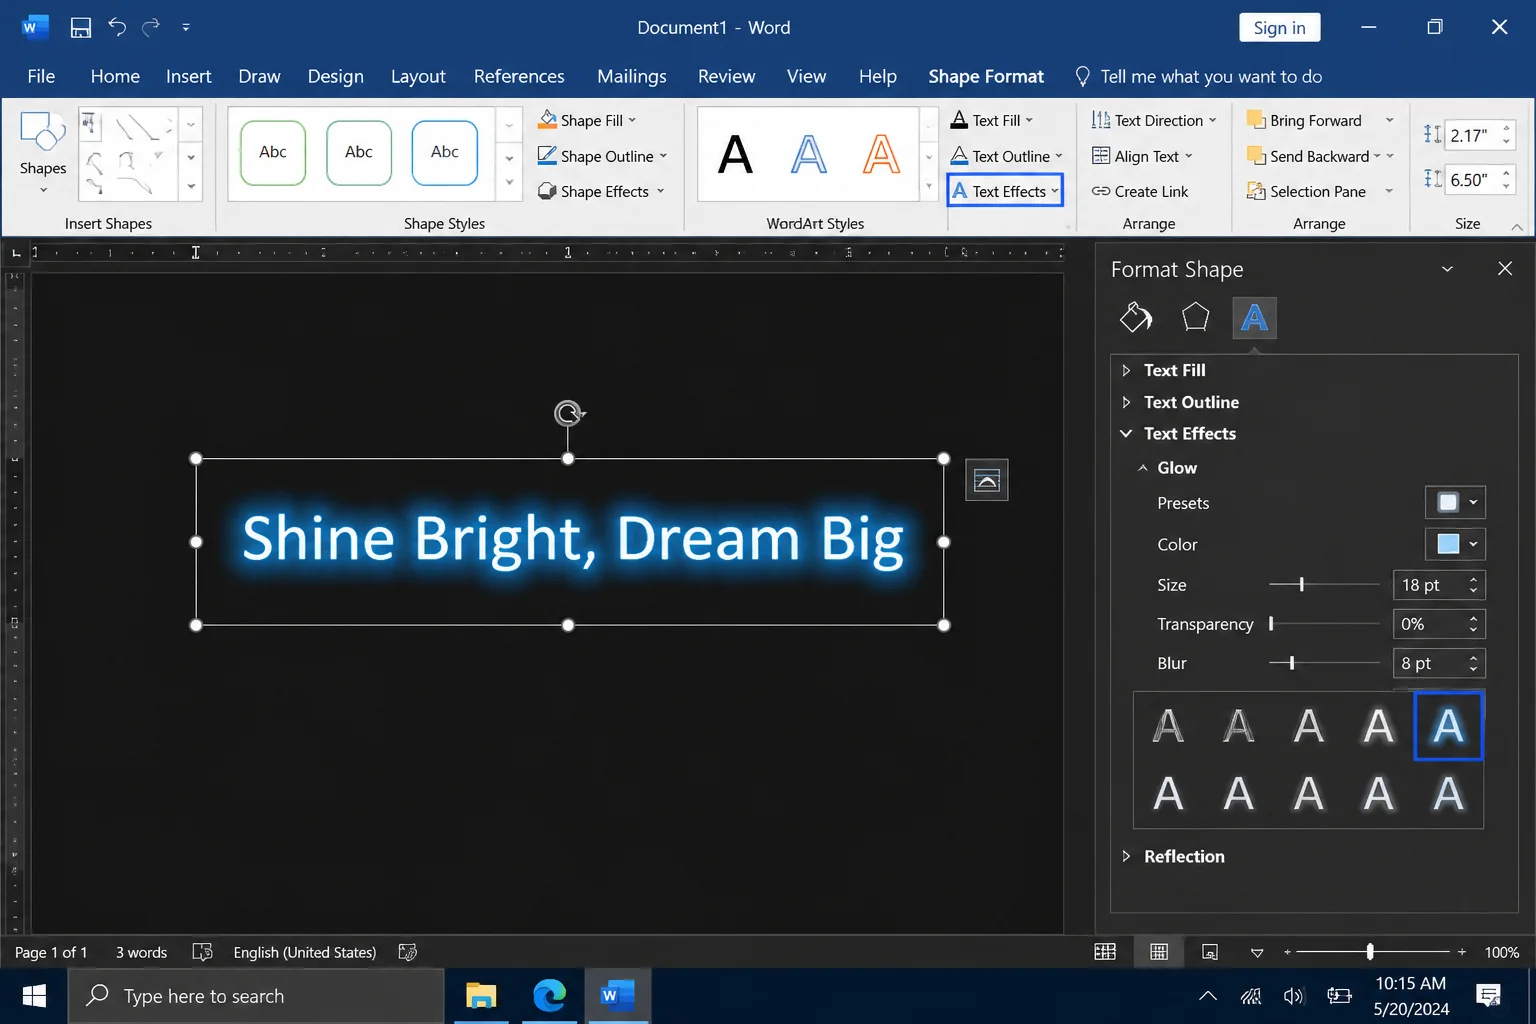
A subtle glow on text placed over a dark background photo can look surprisingly polished. Stick to one or two fonts, though. More than that, and the card starts looking cluttered rather than designed.
Step 7: Preview and Print
Run a test copy on plain paper before you load your card stock. Check for:
- Typos (they’re easier to catch on paper)
- Elements sitting too close to the edges
- The fold line landing where you planned it
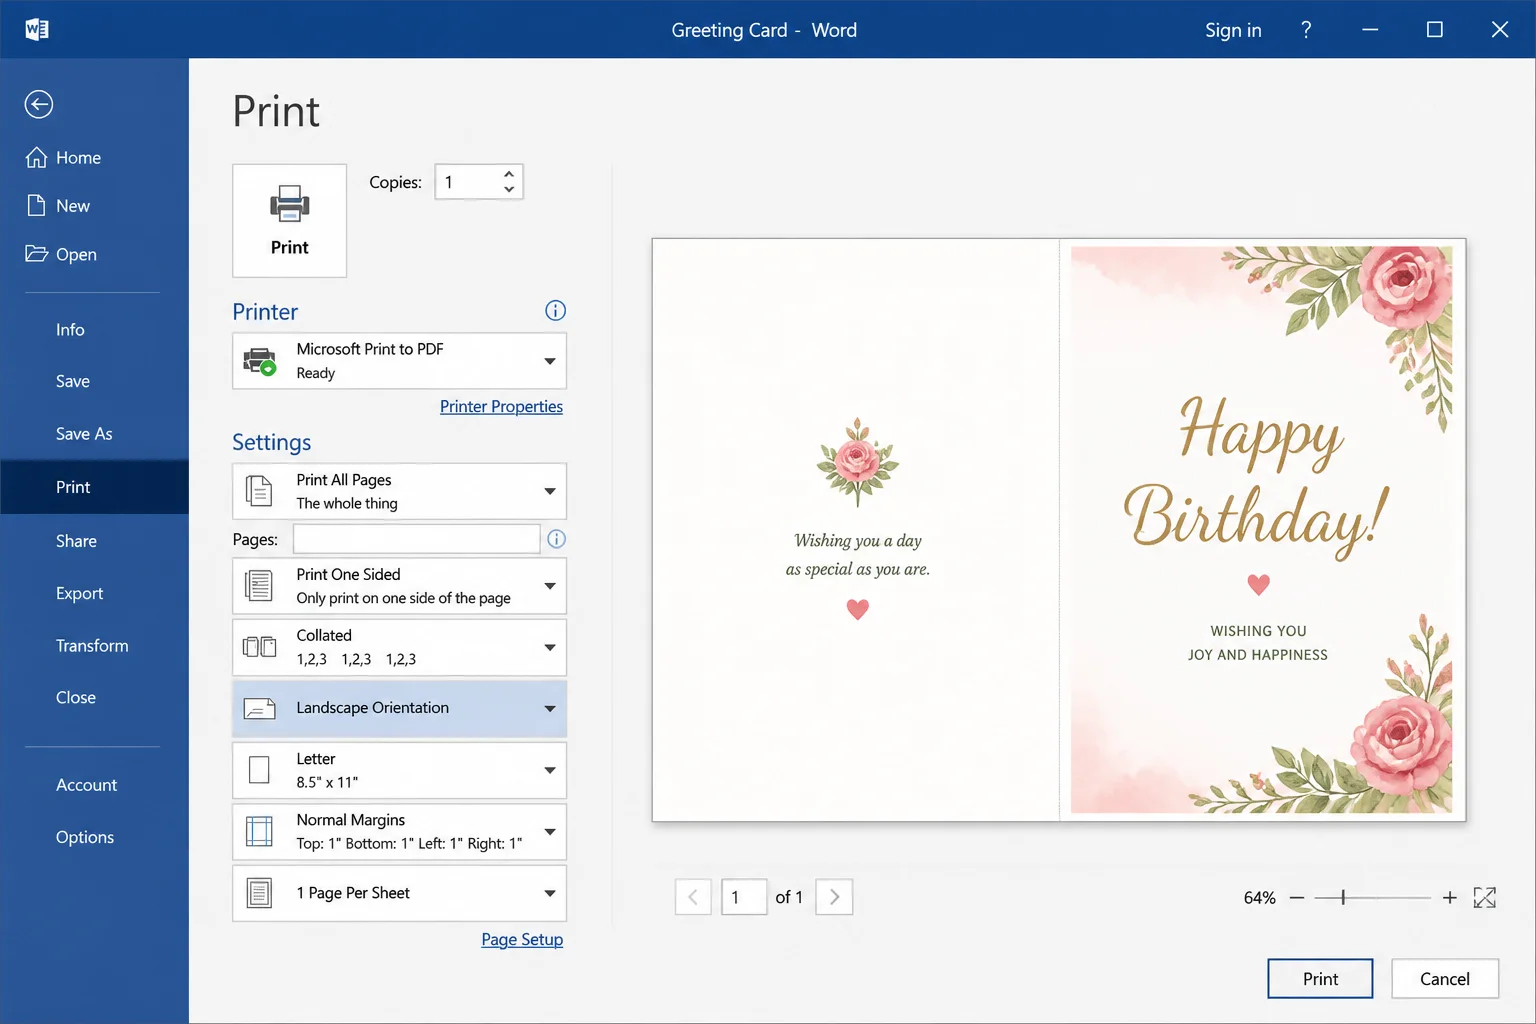
When the test copy looks right, go to File > Print. Confirm the paper size and orientation in the print settings match your actual paper; a mismatch there can throw the whole layout off. Print the final version on 65 lb card stock or heavier for a card that holds up when folded.
Tips and Troubleshooting
Common Issues
Problem: The image won’t move freely on the page
Click the image, go to Picture Format > Wrap Text, and select In Front of Text. That switches it out of inline mode so you can position it anywhere.
Problem: The fold doesn’t line up when printed
The paper size set in Word needs to match the paper loaded in your printer’s tray. Go to Layout > Size to verify. Fold a test print on plain paper before committing card stock.
Problem: Content is getting cropped near the edges
Home printers generally can’t print right to the edge of the page. Set all margins to at least 0.25 inches under Layout > Margins, or check your printer’s settings for borderless print support.
Problem: The background image doesn’t appear when printing
Word skips background images by default. Go to File > Options > Display and check Print background colors and images, then try again.
Pro Tips
- Save the Word file before exporting: Keep an editable .docx copy so you can tweak the design later. Export a separate PDF for printing or sharing; editing a PDF afterward is a headache.
- White space is your friend: A single strong photo and a clean font almost always looks better than a card packed with decorations. Don’t feel like you need to fill every corner.
- Check ink quality mid-run: Printing multiple copies? Look at the output after the first few sheets. Running low on toner or ink mid-batch is a real waste of card stock.
- Canva and Adobe Express are worth a look: If you want more templates or a proper drag-and-drop canvas, those browser-based tools have a real advantage over Word for card design. Word is a good option for quick personal cards, but they’re better for anything more elaborate.
Wrapping Up
Word’s built-in tools are good enough to make a greeting card that actually looks like you made an effort. The template route gets you something polished in minutes; the from-scratch approach takes longer but the result is completely yours. Both are a solid choice over a generic store card.
One honest note: for elaborate layouts or high-quality graphic work, a dedicated design tool gets you further. For a heartfelt card to print and hand to someone, Word handles it well.