
So you’ve signed up for a VPN, hoping this will finally keep your browsing private from prying eyes. The app says you’re connected, your IP address changed, and everything seems to be working. But here’s the thing, how do you actually know your data is encrypted and not just rerouted through another server?
I get it. With all the data breaches and privacy concerns these days, you want to be absolutely sure your VPN is doing its job. How to verify? There are several ways to verify your connection is properly encrypted and you don’t need a computer science degree to do it. We’ll walk you through modern testing methods that work on both Windows and Mac, plus some quick online checks that take just a few minutes.
What Does VPN Encryption Actually Mean?
VPN encryption scrambles your internet traffic so that even if someone intercepts it, they can’t read what you’re doing online. Modern VPNs use military-grade encryption like AES-256-GCM or ChaCha20-Poly1305, basically unbreakable codes that would take billions of years to crack.
Key things your VPN should encrypt:
- Web browsing data: Every website you visit and what you do there
- DNS requests: Which websites you’re looking up
- File downloads: Anything you’re downloading or uploading
- App traffic: Data from your apps and programs
The best VPNs in 2026 also include post-quantum encryption (PQE) to protect against future quantum computer attacks. If your VPN was set up before 2025, it might be worth checking if your provider has updated their encryption standards.
Quick Online Tests (Start Here)
Before we dive into technical packet analysis, let’s run some simple tests that’ll catch most VPN issues. These take about 5 minutes total and work on any device with a web browser.

Step 1: Check Your IP Address
First, make sure your VPN is actually masking your real location.
- Connect to your VPN and choose a server (pick one in a different country for obvious results)
- Visit ipinfo.io or whatismyipaddress.com
- Confirm the displayed location matches your VPN server, not your actual location
If you see your real city or ISP name, your VPN isn’t working properly.
Step 2: Run a DNS Leak Test
Even with a VPN, your DNS requests (which websites you’re visiting) might leak to your ISP.
- Go to dnsleaktest.com
- Click Extended test and wait for results
- All DNS servers should belong to your VPN provider, not your ISP
Seeing your ISP’s name here? That’s a DNS leak, and it means your browsing history isn’t fully private.
Step 3: Test for WebRTC Leaks
Your browser might accidentally reveal your real IP address through WebRTC, even with a VPN connected.
- Visit browserleaks.com/webrtc
- Look for any IP addresses that don’t match your VPN server
- If you see your real IP, install a WebRTC blocker extension or disable WebRTC in your browser settings
Most top VPN providers (NordVPN, ExpressVPN, Surfshark) automatically block WebRTC leaks in their apps, but it’s worth double-checking.
How to Verify Encryption with Packet Analysis
For a deeper look at whether your data is actually encrypted, we’ll use network monitoring tools to examine the traffic leaving your computer. Don’t worry, this sounds scarier than it is.
On Windows: Using Wireshark
Wireshark is the gold standard for network analysis, and the 2026 version makes it much easier to spot VPN encryption.
- Download Wireshark from wireshark.org (it’s free)
- Install and launch Wireshark
- Click Capture > Options
- Select your active network interface (usually the one showing traffic activity)
- Click Start to begin capturing packets

Now open your web browser and visit a few websites. After about 30 seconds, click Stop in Wireshark.
- Look for packets with your VPN protocol (search for “openvpn”, “wireguard”, or “ikev2” in the filter bar)
- Click on any VPN packet and examine the data in the bottom panel
- The payload should look like complete gibberish – random characters and symbols
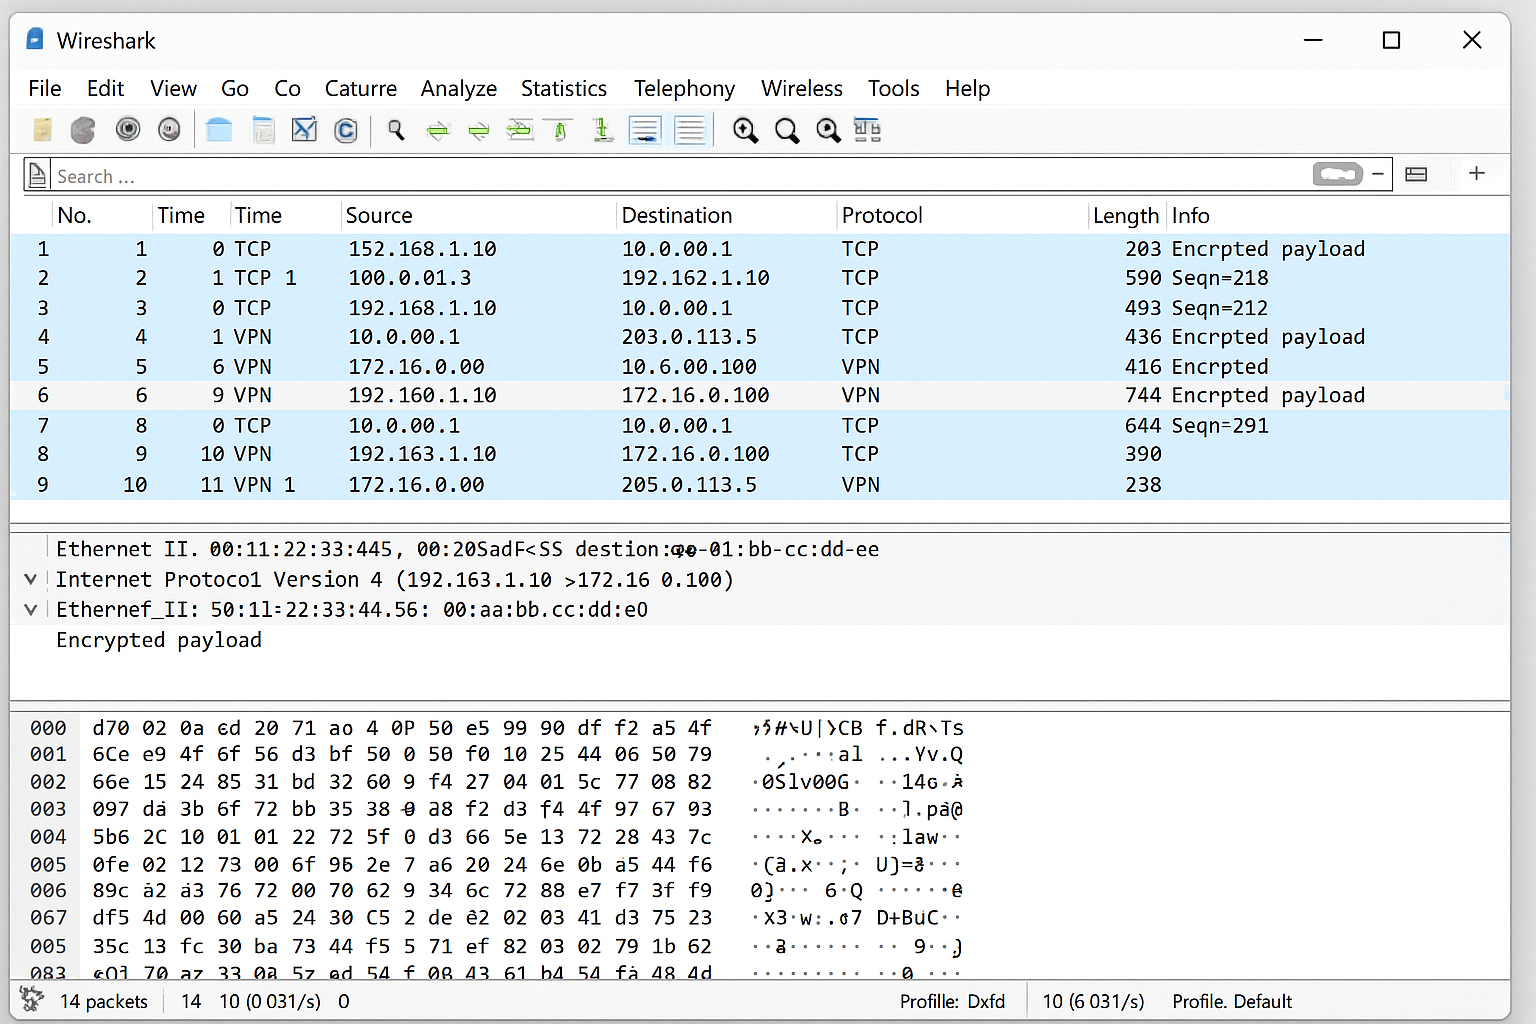
If you can read website names, login credentials, or any plain text in the packets, your VPN encryption isn’t working properly.
On macOS: Using Built-in Network Tools
macOS Sequoia includes improved network monitoring that works great for VPN verification.
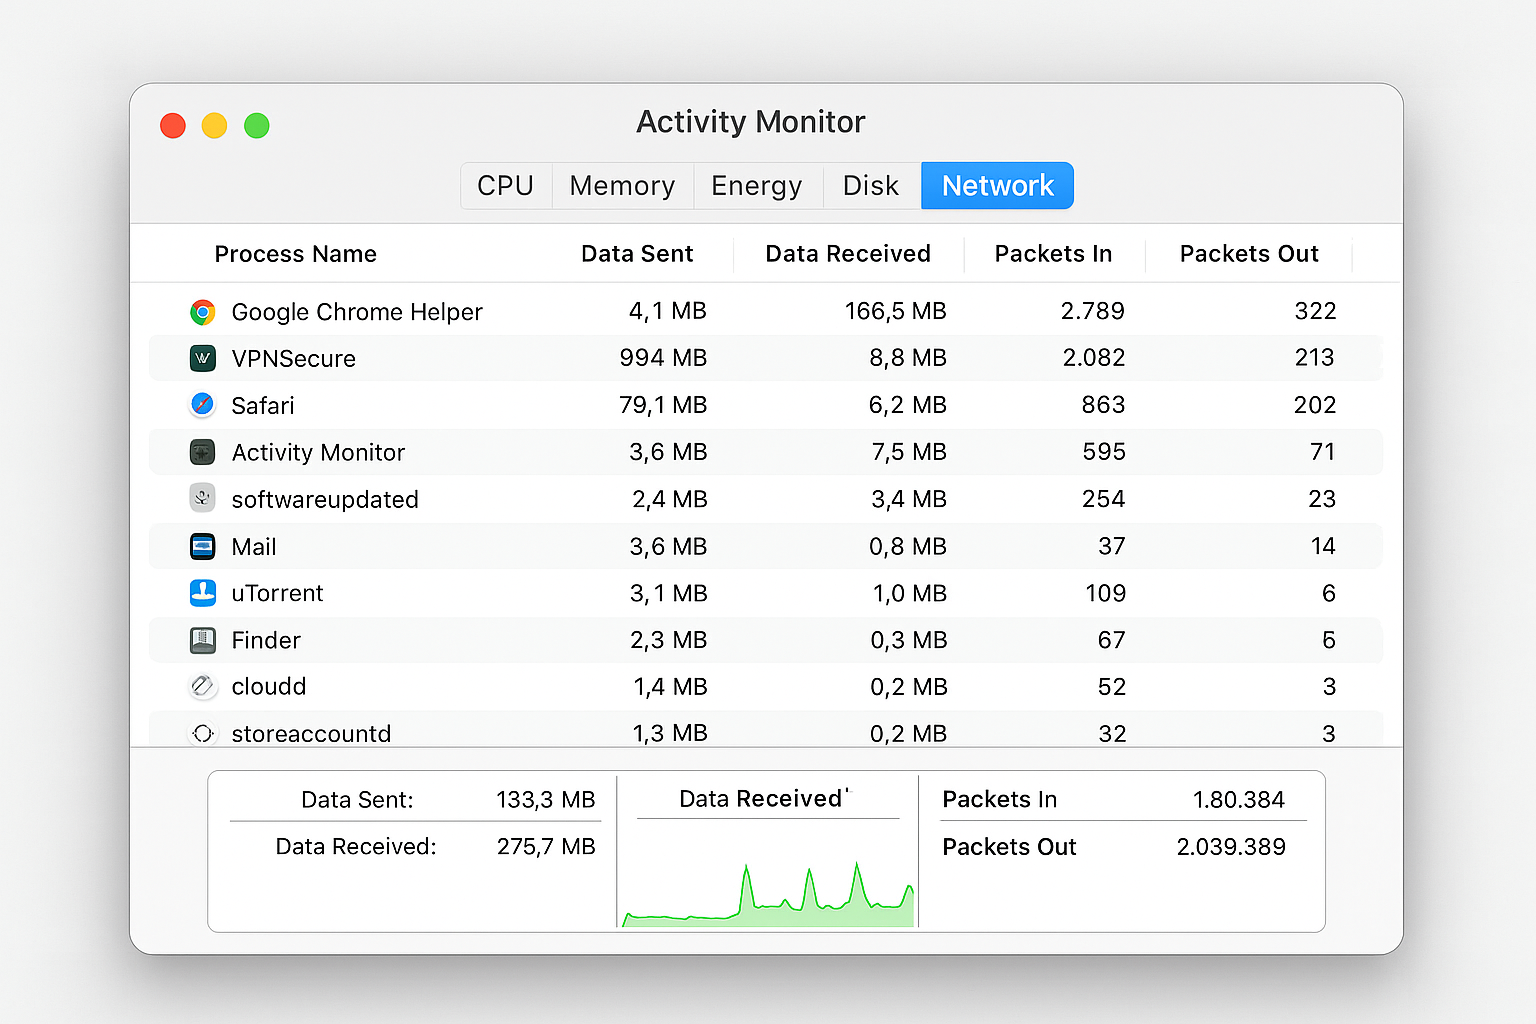
- Open Activity Monitor (Applications > Utilities)
- Click the Network tab
- Connect to your VPN
- Look for processes with names like “openvpn”, “wireguard”, or your VPN app name
- These should show encrypted data transfer (you’ll see bytes sent/received but no readable content)
For more detailed analysis, you can also install Wireshark on macOS and follow the same steps as Windows.
Check Your VPN Protocol and Encryption Settings
Modern VPN apps make it easy to see exactly what encryption you’re using. Here’s how to check:
In Your VPN App
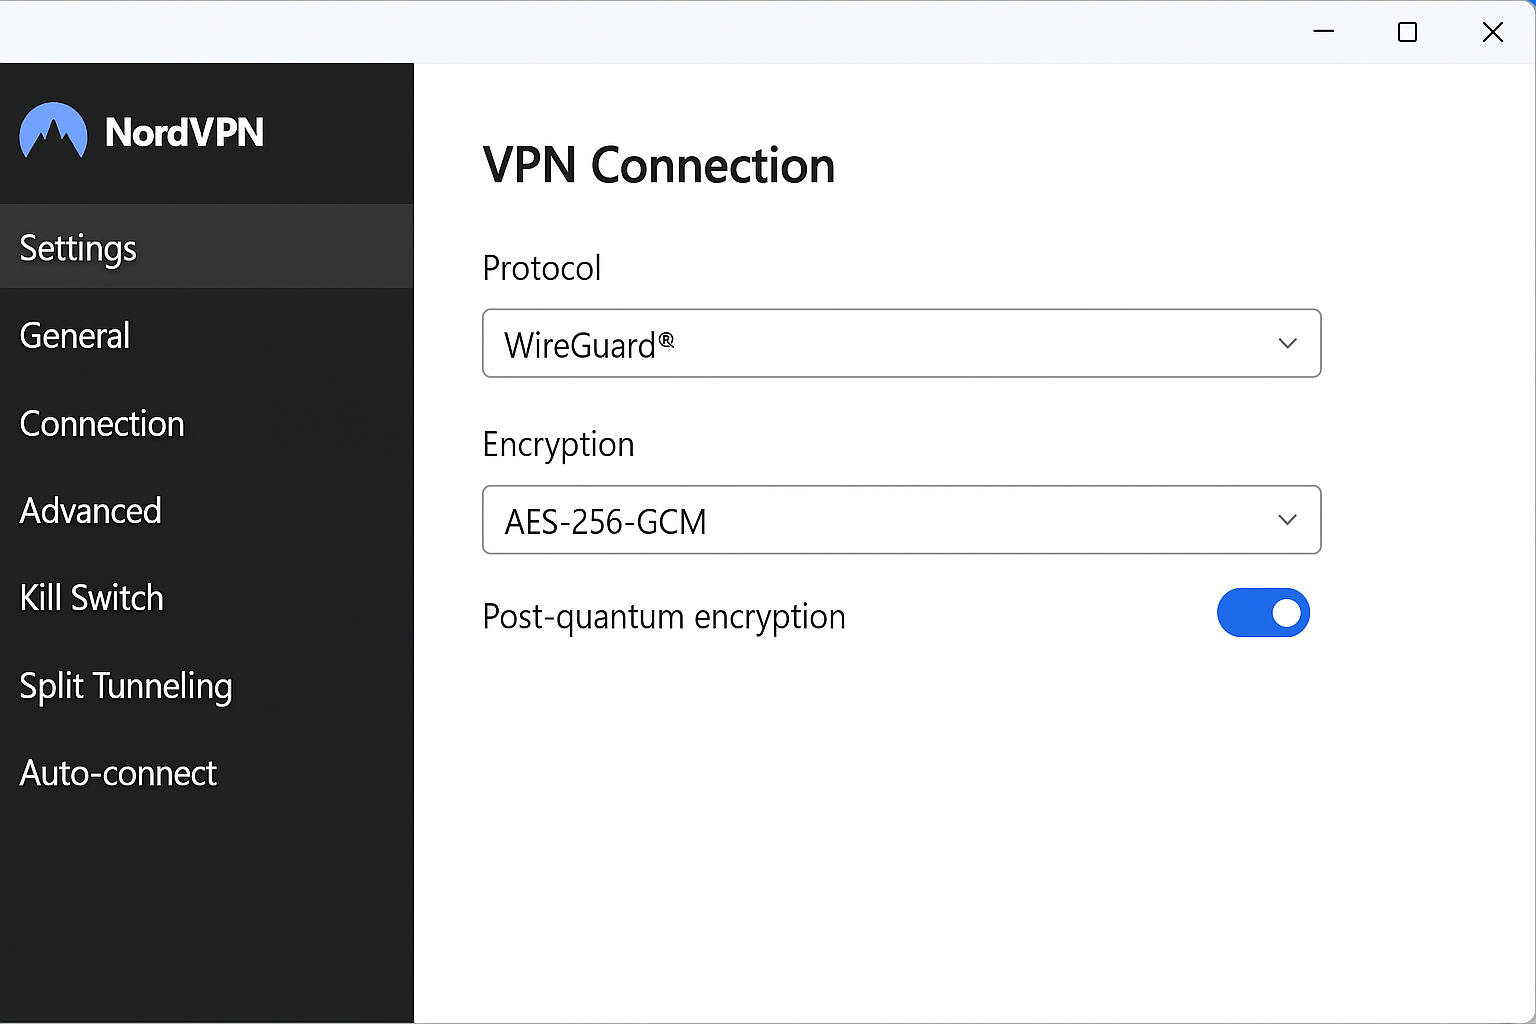
- Open your VPN app and look for Settings or Advanced options
- Find the Protocol or Connection section
- You should see something like:
- WireGuard with ChaCha20-Poly1305
- OpenVPN with AES-256-GCM
- IKEv2 with AES-256
- Avoid older protocols like PPTP or L2TP as they’re not secure enough for 2026
Many top providers now show a real-time “encryption status” badge that confirms your connection is using modern ciphers with Perfect Forward Secrecy (PFS).
Advanced Verification: Command Line Tests
If you’re comfortable with command line tools, here are some quick tests that work on both Windows and macOS:
Check Your External IP
Open Command Prompt (Windows) or Terminal (macOS) and run:
curl ifconfig.meThis should return your VPN server’s IP address, not your real one.
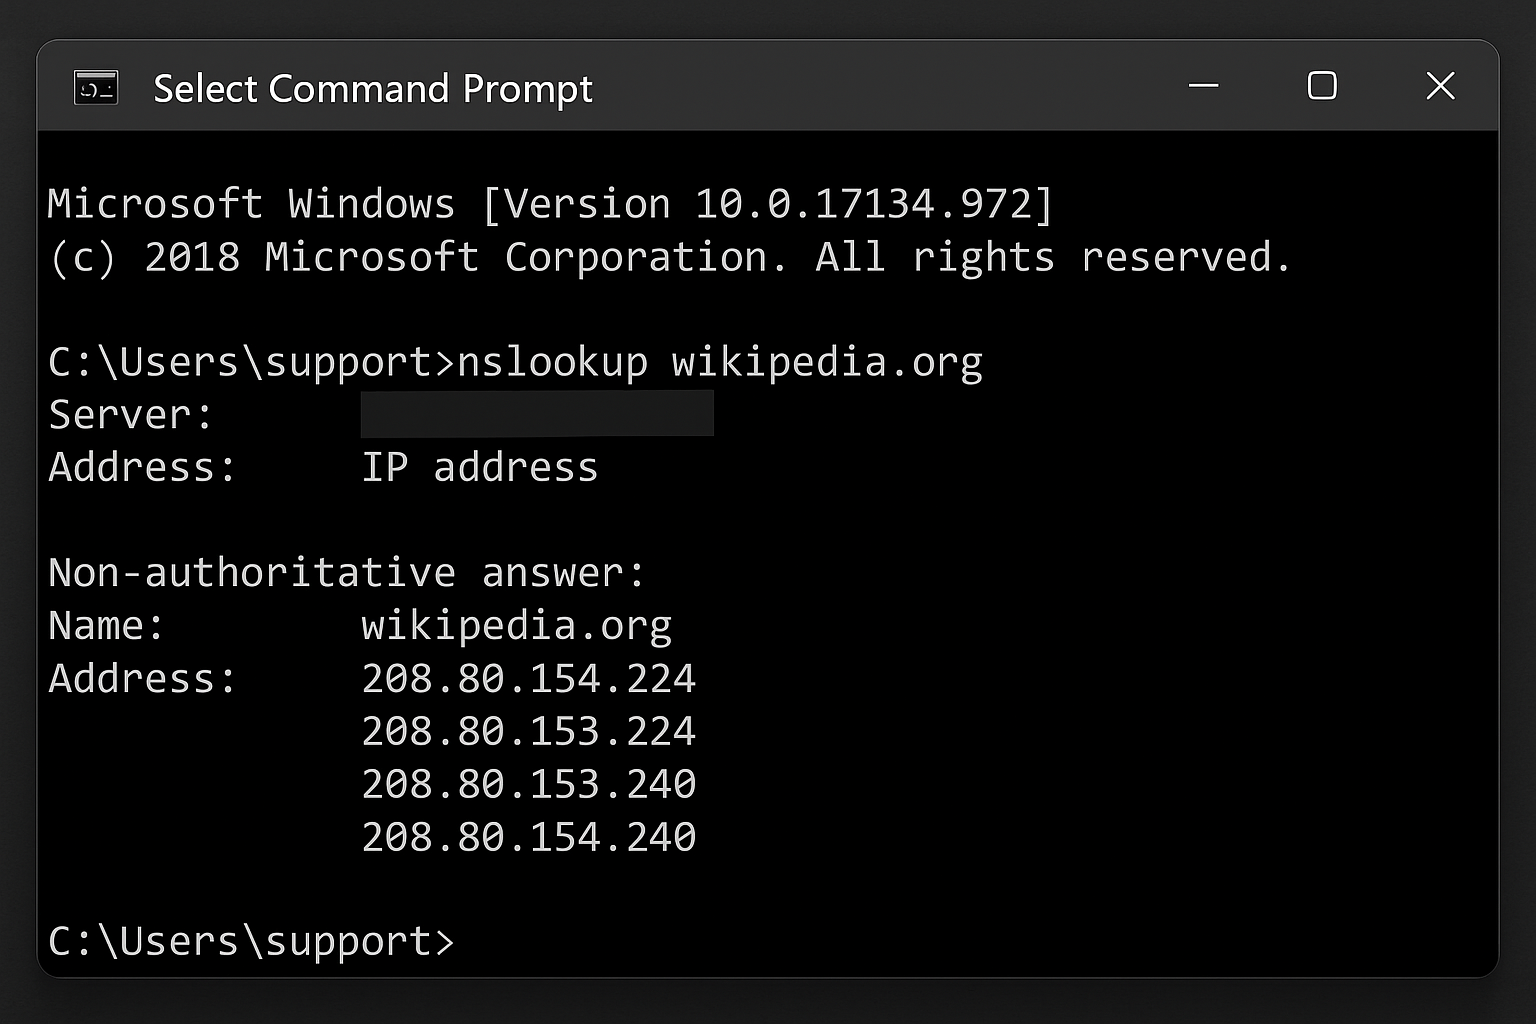
Test DNS Resolution
nslookup whoami.akamai.netThe response should come from your VPN provider’s DNS servers.
Monitor VPN Traffic
On Windows PowerShell:
netstat -b | findstr "openvpn\|wireguard"On macOS Terminal:
lsof -i | grep -E "openvpn|wireguard"These commands show active VPN connections and confirm your traffic is going through the encrypted tunnel.
What to Do If Your VPN Isn’t Properly Encrypted
Found issues during testing? Here’s how to fix the most common problems:
DNS Leaks
- Enable DNS protection in your VPN app settings
- Use your VPN’s DNS servers instead of Google or Cloudflare DNS
- Enable “Block connections without VPN” to prevent leaks during reconnection
WebRTC Leaks
- Install a WebRTC blocker extension like WebRTC Leak Prevent
- Disable WebRTC in Firefox: Type
about:config, search for “webrtc”, and setmedia.peerconnection.enabledto false - Use your VPN’s browser extension if available — most block WebRTC automatically
Weak Encryption
- Update your VPN app to the latest version
- Switch to WireGuard or OpenVPN if you’re using an older protocol
- Contact your VPN provider if they don’t offer modern encryption — it might be time to switch
Tips and Troubleshooting
Common Issues
Problem: Tests show my real IP sometimes
This usually happens when your VPN connection drops briefly. Enable the kill switch in your VPN app to block all internet traffic when the VPN disconnects.
Problem: Packet analysis shows some unencrypted traffic
Local network traffic (like printer communication or file sharing) might not go through the VPN. This is normal. Look specifically for web traffic (HTTP/HTTPS) to your external websites.
Problem: VPN is slow after enabling stronger encryption
WireGuard is usually faster than OpenVPN. If you’re on an older device, try switching protocols or connecting to a closer server.
Pro Tips
- Test regularly: Run these checks monthly, especially after VPN app updates
- Use multiple test sites: Different leak test websites might catch different issues
- Check on different networks: Test your VPN on both home Wi-Fi and mobile data
- Consider split tunneling carefully: If enabled, some apps might bypass the VPN entirely
Wrapping Up
Verifying your VPN encryption might seem technical, but these modern tools make it pretty straightforward. The quick online tests catch most issues, and packet analysis gives you the complete picture of what’s really happening with your data.
With VPN technology advancing rapidly in 2026, especially with post-quantum encryption rolling out, it’s worth checking that your provider is keeping up with the latest security standards. A properly encrypted VPN should pass all these tests easily, and if yours doesn’t, it might be time to consider an upgrade.
The peace of mind is worth the few minutes it takes to verify everything is working correctly. After all, if you’re paying for privacy protection, you deserve to know you’re actually getting it!