
Ever wanted to turn your photos into one of those fun animated GIFs but got stuck trying to figure out Photoshop? I feel you. When I first tried this, I thought it would be simple: just throw some images into layers and save as GIF. Wrong! Turns out there’s a specific workflow you need to follow, or you’ll end up staring at greyed-out animation options wondering what went wrong.
Well, once you know the trick (it’s called Frame Animation), creating animated GIFs in Photoshop is actually pretty straightforward. Whether you’re using the old CS6 or the latest 2026 version with its enhanced AI-powered optimization features, the core process is the same. In this guide, I’ll walk you through exactly how to turn your images into animated GIFs that actually work.
What is Frame Animation in Photoshop?
Frame Animation is Photoshop’s built-in tool for creating animated GIFs and simple animations. Think of it like a digital flipbook, each layer in your document becomes a frame that plays in sequence.
Key Features:
- Layer-based frames: Each layer becomes one frame of your animation
- Timing controls: Set how long each frame displays (from 0.1 to several seconds)
- Loop options: Choose whether your GIF plays once, forever, or a specific number of times
- Preview playback: Test your animation before exporting
- Export optimization: Control file size and quality through the Save for Web dialog
- AI-enhanced compression (2024+): Newer versions include smart compression that maintains quality while reducing file size
What’s New in Photoshop 2026 for GIF Creation
If you’re using Photoshop 2026, you’ll benefit from several improvements to the GIF creation workflow:
- Smart Frame Optimization: AI automatically suggests optimal frame timing based on content analysis
- Enhanced Preview: Real-time preview shows exactly how your GIF will look across different devices
- Improved Compression: New algorithms reduce file sizes by up to 30% without quality loss
- Batch Processing: Create multiple GIFs from video sequences with one-click automation
- Cloud Sync: Save and access your GIF projects across devices through Creative Cloud
Requirements and Preparation
Make sure you have:
- Photoshop (CS6 or newer — this works in all versions through 2026)
- Your images ready to animate (ideally the same size and resolution)
- About 10-15 minutes to work through the process
Step-by-Step Guide: How to Make Animated GIFs from Images
Step 1: Import Your Images as Layers
First, you need to get all your images into one Photoshop document as separate layers. Here’s the easiest way:
Go to File > Scripts > Load Files into Stack. Click Browse, select all your images, and hit OK. Photoshop will automatically create a new document with each image on its own layer.
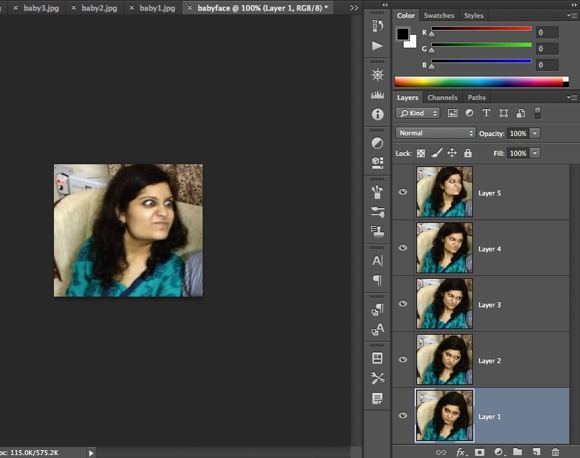
If you don’t see that option (it’s not available in CS6), you’ll need to manually copy and paste each image into a new document. Create a new file, then open each image and copy it (Ctrl + A, then Ctrl + C) and paste it into your main document (Ctrl + V). Each image should end up on its own layer.
Step 2: Open the Timeline Panel for Animation
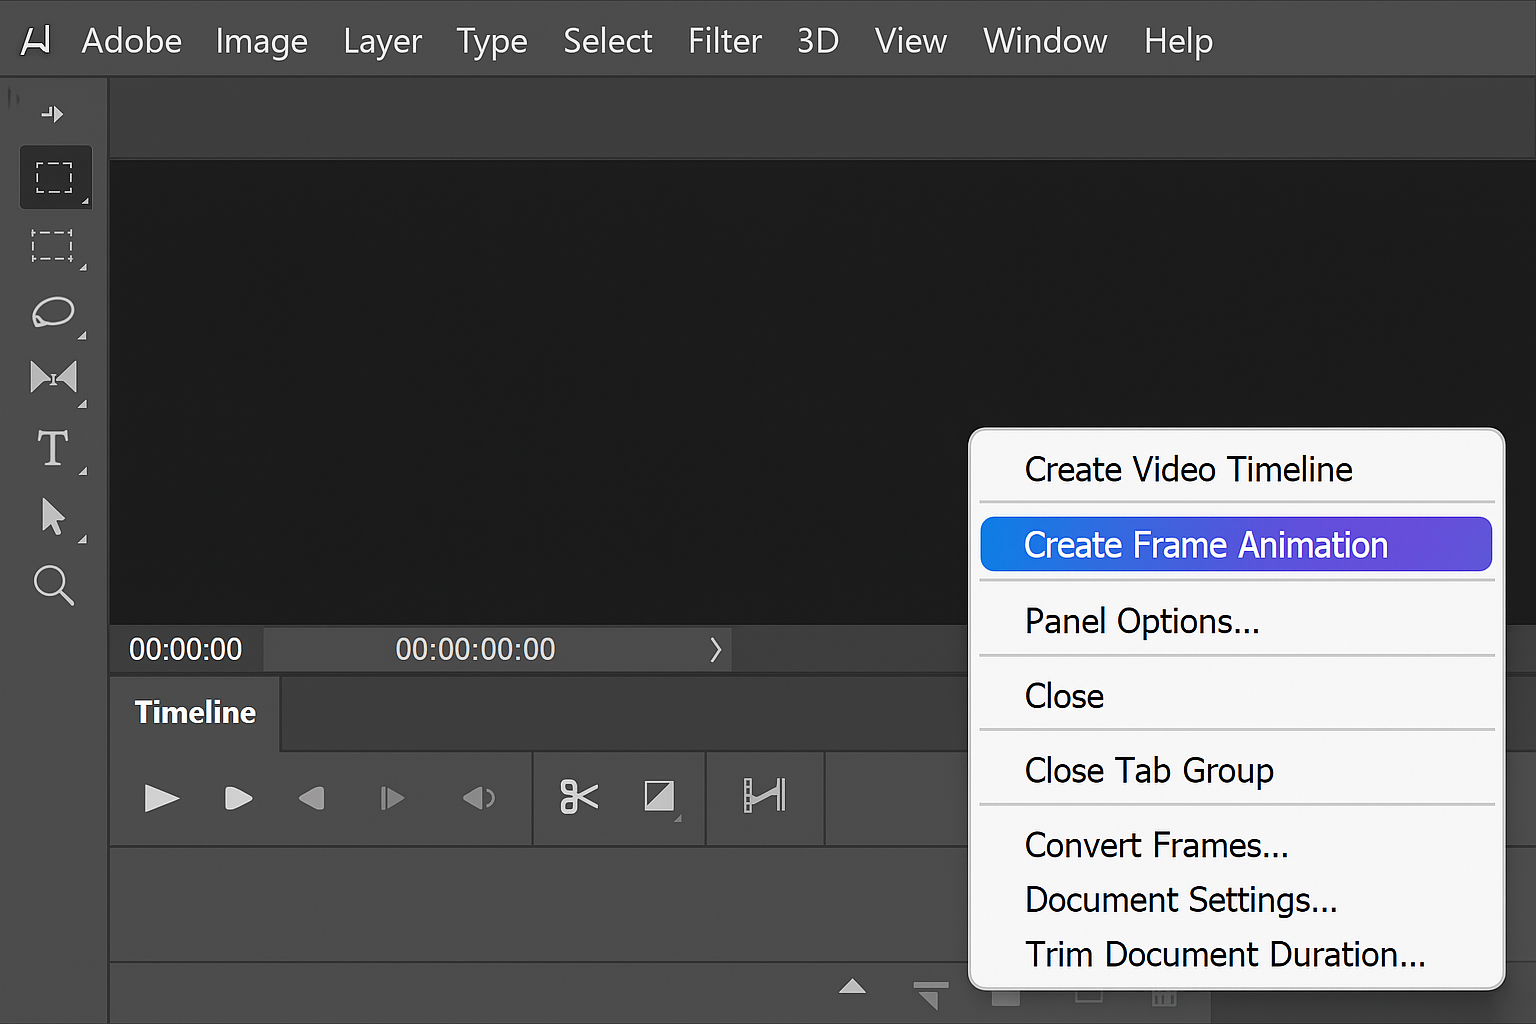
Now for the crucial part that trips up most people. Go to Window > Timeline to open the Timeline panel at the bottom of your screen.

You’ll see an empty Timeline panel. Here’s where the magic happens: click the dropdown arrow (looks like a small down arrow with lines next to it) in the Timeline panel, then select Create Frame Animation.
Step 3: Convert Layers to Animation Frames
After creating the frame animation, you’ll see just one frame in the timeline. That’s not what we want! We need all our layers to become frames.
Click that same dropdown arrow in the Timeline panel again, but this time select Make Frames From Layers.
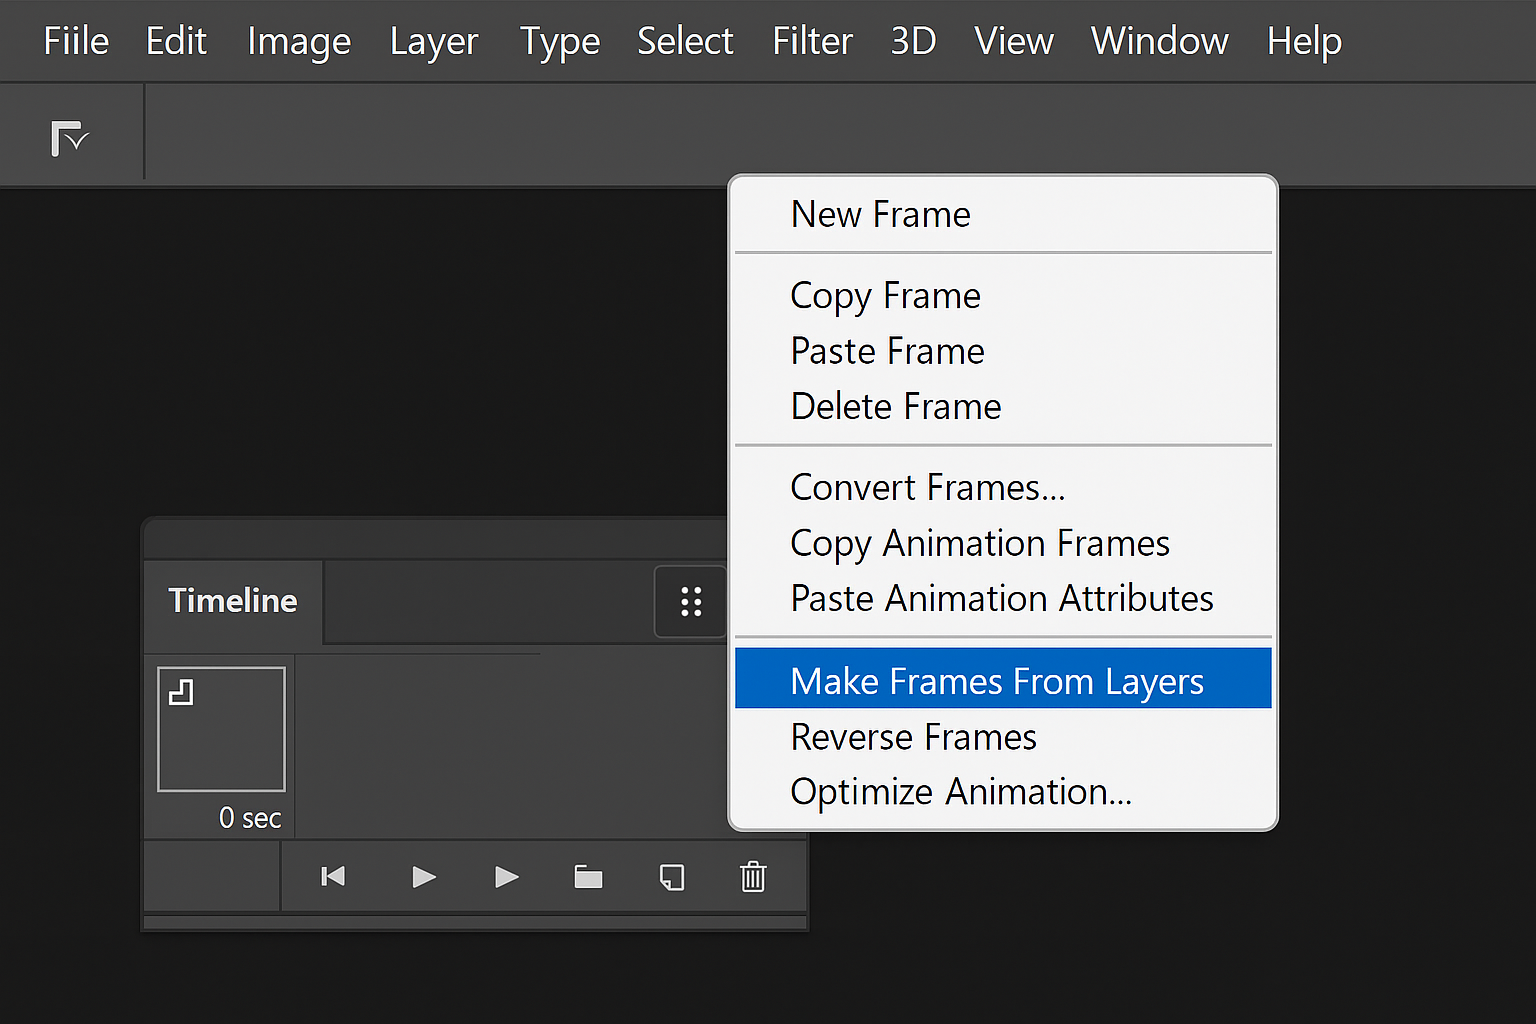
Boom! Now you should see a frame for each layer in your document. Each frame will show a small thumbnail of that layer’s content.
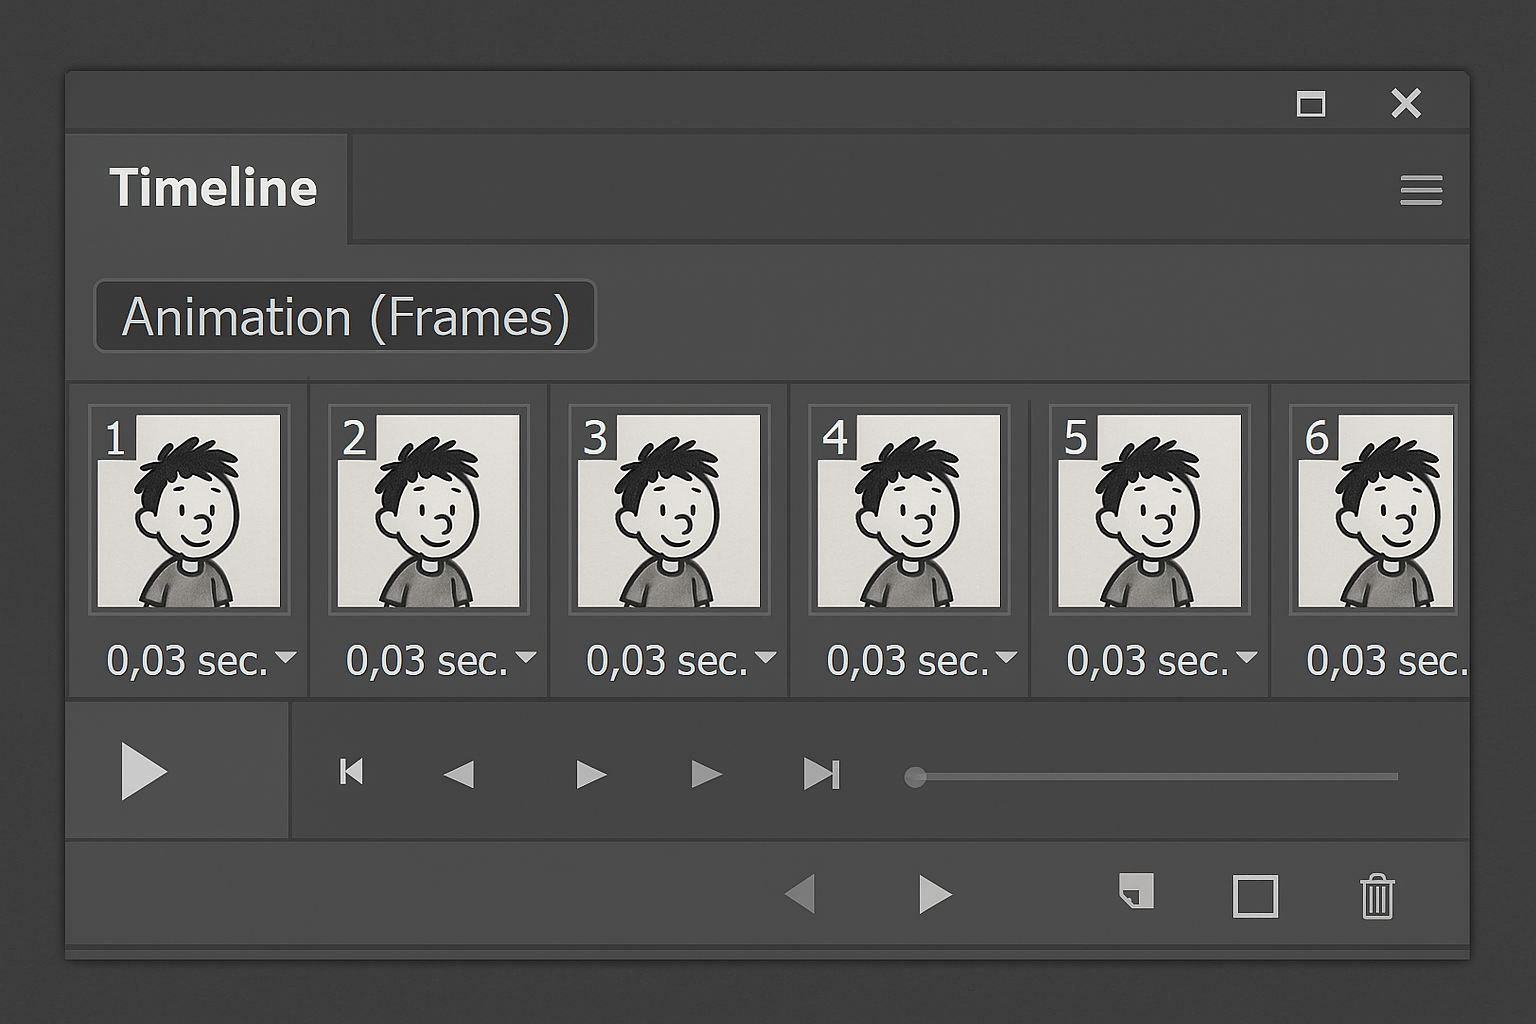
Step 4: Adjust Frame Timing and Duration
By default, your frames probably have weird timing (like 5 seconds for the first frame and 0 for the rest). Click the small time display under each frame to adjust how long it should appear.
For most animations, 0.2 to 0.5 seconds per frame works well. Too fast (0.1s) and it’ll be jarring; too slow (1s+) and it’ll feel sluggish.
Pro tip: Select multiple frames by holding Shift and clicking, then set the timing for all of them at once.
Step 5: Configure Loop Settings and Preview
At the bottom left of the Timeline panel, you’ll see a loop dropdown. Set this to Forever if you want your GIF to loop continuously (which you probably do).
Hit the Play button in the Timeline to preview your animation. If something looks off, you can adjust the timing or reorder frames by dragging them around.
Step 6: Export Your Animated GIF with Optimization
Here’s where that “greyed out animation section” problem gets solved. Go to File > Export > Save for Web (Legacy). (In older versions like CS6, it’s just File > Save for Web.)
Make sure the format is set to GIF. Now you’ll see the Animation section at the bottom is no longer greyed out — that’s because you properly created a frame animation!
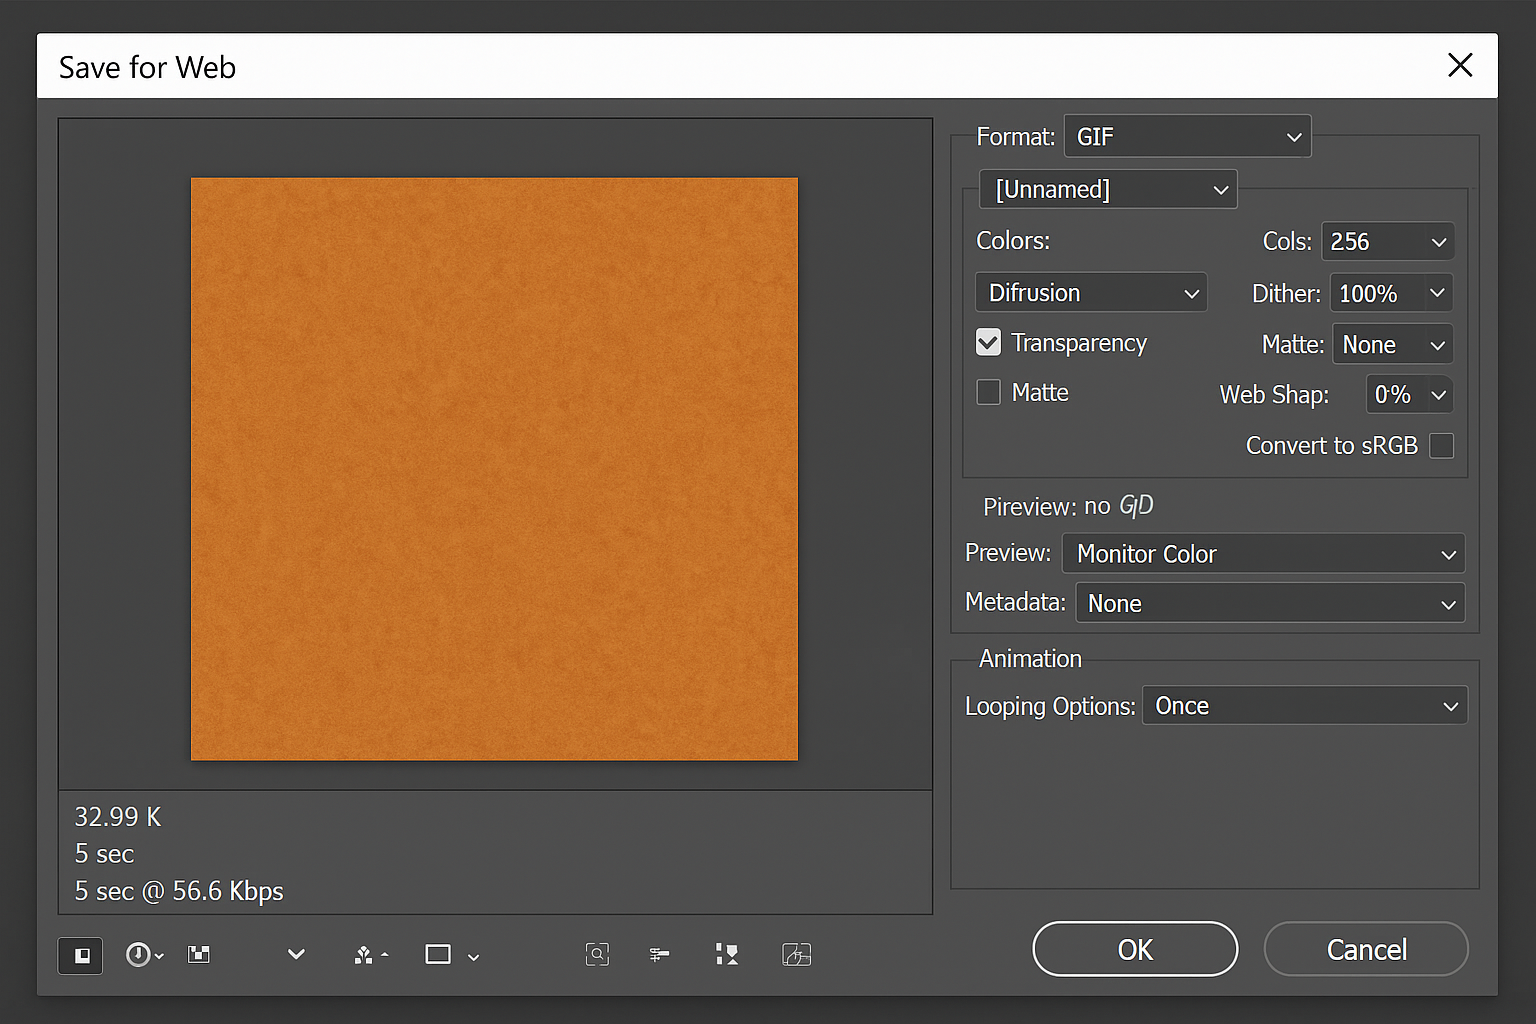
Set your quality preferences (256 colors is usually fine), make sure the loop is set to Forever, and click Save.
How to Create GIFs from Video Files in Photoshop
Got a video you want to turn into a GIF? Photoshop can handle that too, though the import process is slightly different.
Go to File > Import > Video Frames to Layers. Select your video file, choose which portion you want to convert (you can trim it), and set how many frames to import.
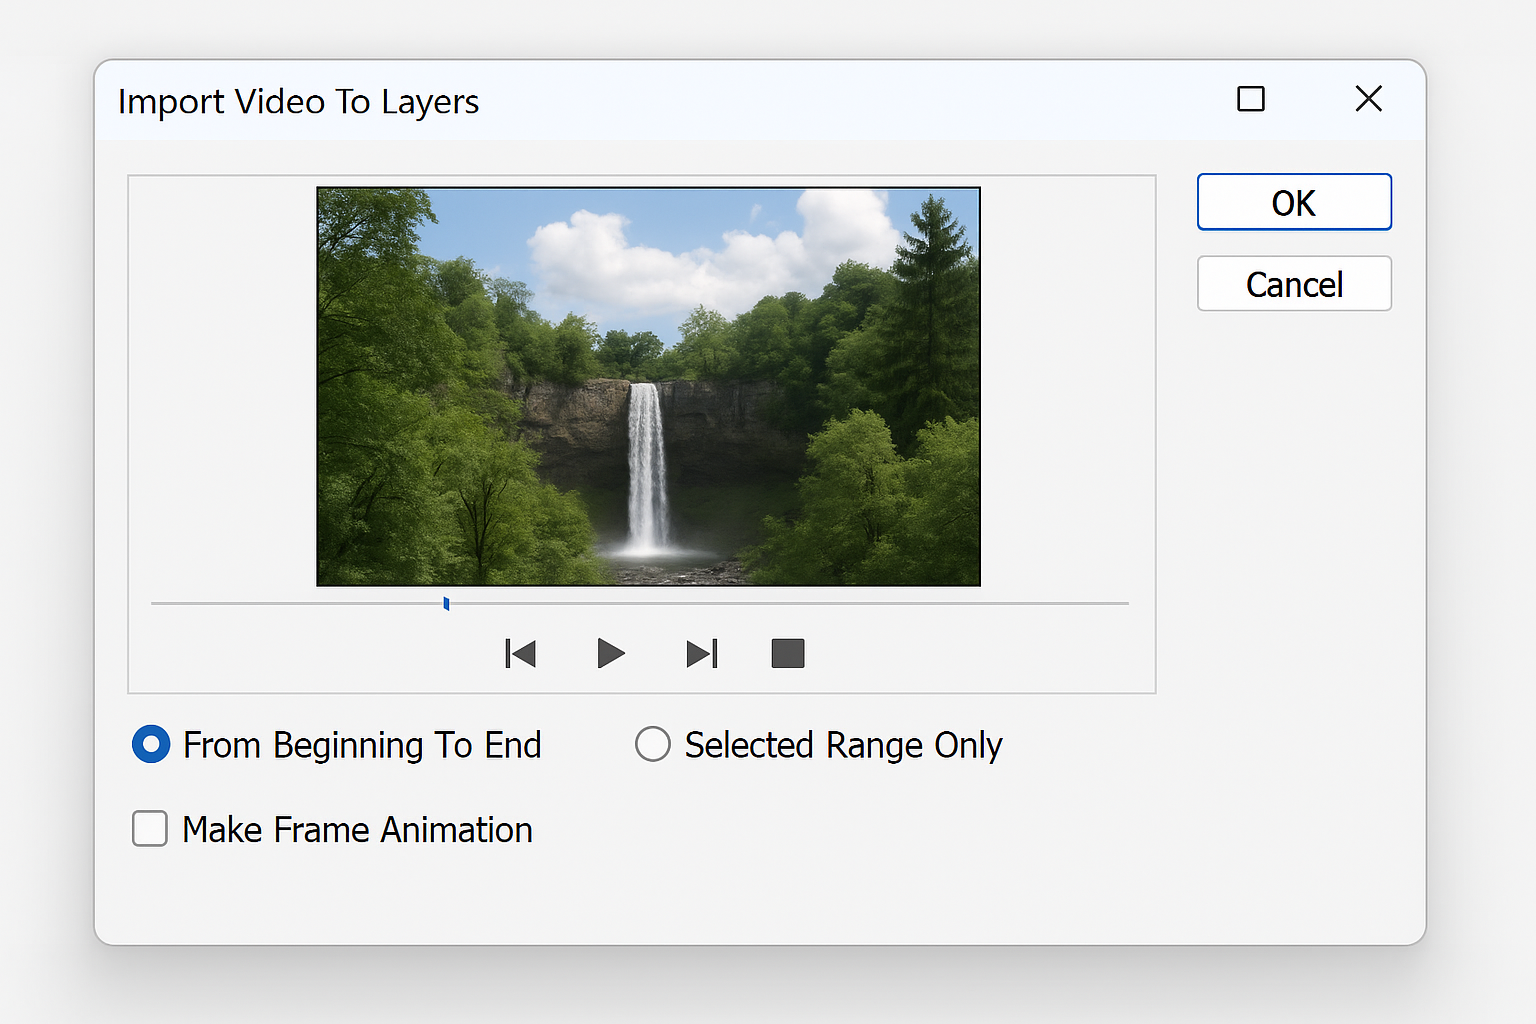
Once the video frames are imported as layers, follow steps 2-6 above to create your animated GIF.
Troubleshooting Common GIF Creation Problems
Common Issues and Solutions
Problem: Animation section is still greyed out in Save for Web
This happens when you skip the Frame Animation step. You can’t just have layers and expect them to animate, you must use the Timeline panel to create frame animation first.
Problem: GIF file is huge
Large GIFs usually mean your images are too big or you have too many colors. Try:
- Reducing image dimensions before importing
- Using fewer colors (128 instead of 256) in Save for Web
- Cropping your images to focus on the important action
- Using fewer frames (every other frame instead of every frame)
Problem: Animation plays too fast or too slow
Go back to the Timeline panel and adjust the frame durations. Most smooth animations work well at 0.2-0.5 seconds per frame.
Pro Tips for Better Animated GIFs
- Test in a browser: Photoshop’s preview might look different than how your GIF plays online
- Keep it short: GIFs work best for 2-5 second loops rather than long sequences
- Consider alternatives: For simple GIFs, online tools like EZGIF.com might be faster than Photoshop
- Save your PSD: Keep the original Photoshop file so you can easily make changes later
- Use Smart Objects (2024+): Convert layers to Smart Objects for non-destructive editing
Modern Alternatives Worth Considering
While Photoshop is still the gold standard for pixel-perfect control, several easier options have emerged since 2013:
- EZGIF.com: Upload images or video, automatically optimizes, no software needed
- Adobe Express: Simplified interface with AI enhancements (free tier available)
- GIPHY GIF Maker: Great for quick social media GIFs with built-in effects
That said, if you already have Photoshop and want full control over your animation, the process above still works perfectly in 2026.
Conclusion: Mastering Photoshop GIF Animation
Creating animated GIFs in Photoshop isn’t as intuitive as it should be, but once you know the Frame Animation workflow, it’s actually pretty straightforward. The key is remembering to use the Timeline panel because without it, you’ll just get static images no matter how many layers you have.
Whether you’re using CS6 from 2013 or the latest 2026 version with its AI-powered optimizations, this process works the same way. Sure, there are simpler online tools now, but Photoshop still gives you the most control over timing, quality, and optimization. Perfect for when you want your GIF to look exactly right!