
Got a PDF that’s too big to email or upload? You’re not alone. PDF files can balloon to ridiculous sizes when they’re packed with high-resolution images or scanned pages. What can you do about it? You can shrink them down dramatically without losing quality that actually matters.
I recently stumbled upon some surprisingly effective ways to compress PDFs: from dead-simple online tools to built-in tricks on Windows and Mac that most people don’t know about. Whether you’re dealing with a 50MB monster or just need to squeeze under an email attachment limit, these methods will get the job done.
What Makes PDFs So Large?
Before we dive into solutions, here’s what’s usually eating up all that space:
- High-resolution images: Photos and graphics at 300+ DPI when 120-150 DPI would look fine
- Scanned pages: Each scanned page can be several megabytes if not optimized
- Embedded fonts: Multiple font files stored within the document
- Metadata and annotations: Comments, bookmarks, and other “invisible” data
- Uncompressed content: Text and images stored without any compression
The methods below tackle these issues in different ways, and honestly, some work way better than others depending on your PDF type.
Method 1: Online PDF Compressors (Easiest)
Let’s start with the simplest approach, which are online tools that do all the work for you. These have gotten really good over the past few years.
Adobe Acrobat Online (My Top Pick)
Adobe’s free online compressor handles files up to 2GB and actually works well, which caught me by surprise given how bloated their desktop software can be.
- Go to
adobe.com/acrobat/online/compress-pdf.htmlin any browser - Drag your PDF file onto the page or click Select a file
- Choose your compression level: High, Medium, or Low
- Click Compress and wait for it to process
- Download your compressed file
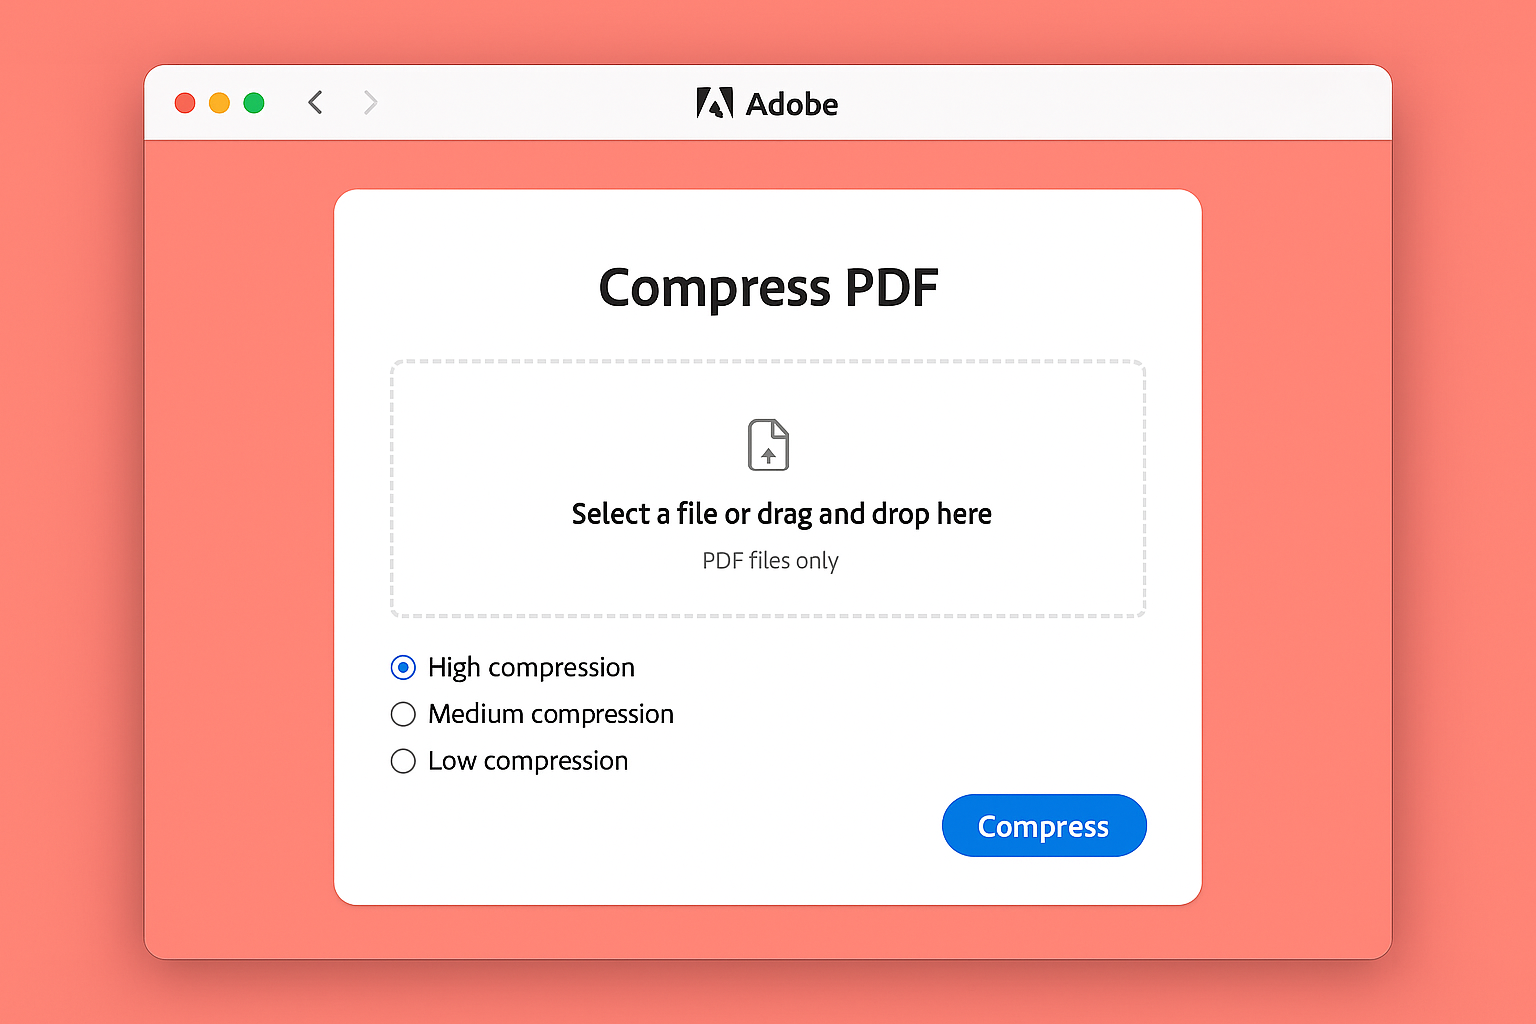
I tested this with a 15MB PDF full of scanned documents and got it down to 3.2MB with barely any visible quality loss. Pretty impressive for a free tool.
Other Solid Online Options
- Smallpdf: Clean interface, handles batch compression in the pro version
- HiPDF: Good for scanned documents with automatic OCR optimization
- ILovePDF: Supports multiple file formats and has useful preset compression levels
All of these work the same way, they upload, compress and then download. The main differences are file size limits (usually 100-200MB for free accounts) and how aggressively they compress your images.
Method 2: Built-in Windows Compression
Windows 11 has a sneaky good PDF compression trick that most people don’t know about. It uses the “Print to PDF” feature to strip out unnecessary data.
- Right-click your PDF file and select Open with > Microsoft Edge
- Once the PDF opens in Edge, press
Ctrl + Pto open the print dialog - Under Destination, select Microsoft Print to PDF
- Click More settings and change Quality to Draft or Normal
- Click Print and save the file with a new name
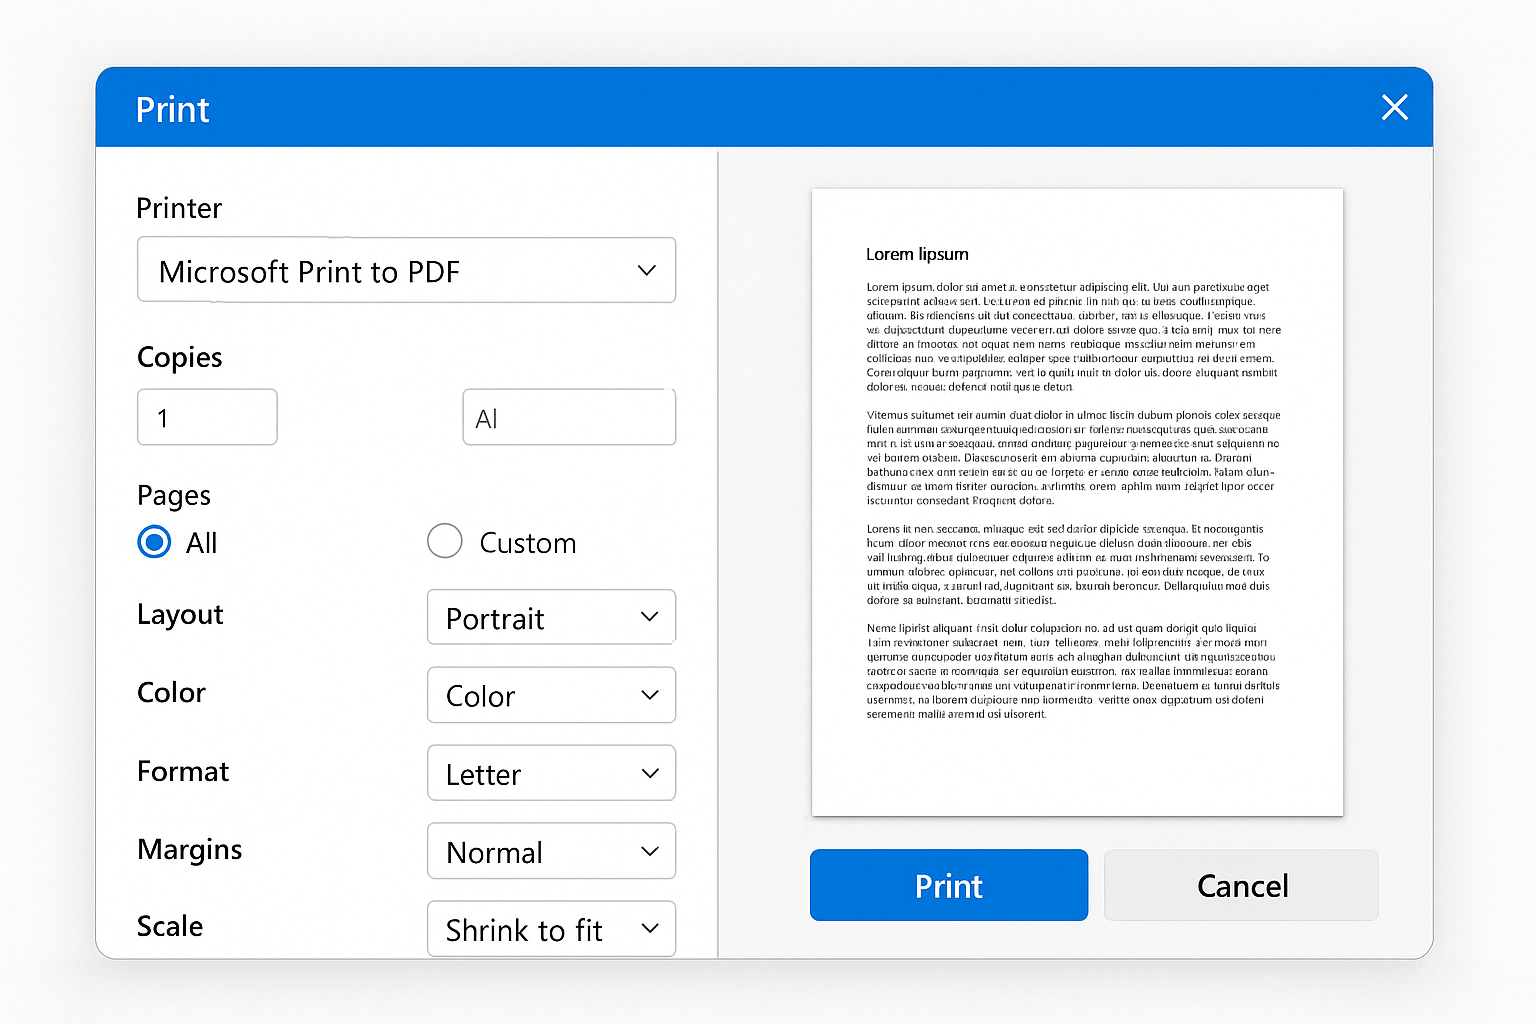
This method works surprisingly well for PDFs with lots of text and moderate image content. I’ve seen 10MB files shrink to 2-3MB without any noticeable quality loss.
Method 3: macOS Preview Magic
Mac users have it easy here as Preview has a built-in compression filter that works really well.
- Double-click your PDF to open it in Preview
- Go to File > Export
- In the export dialog, find the Quartz Filter dropdown at the bottom
- Select Reduce File Size
- Click Save
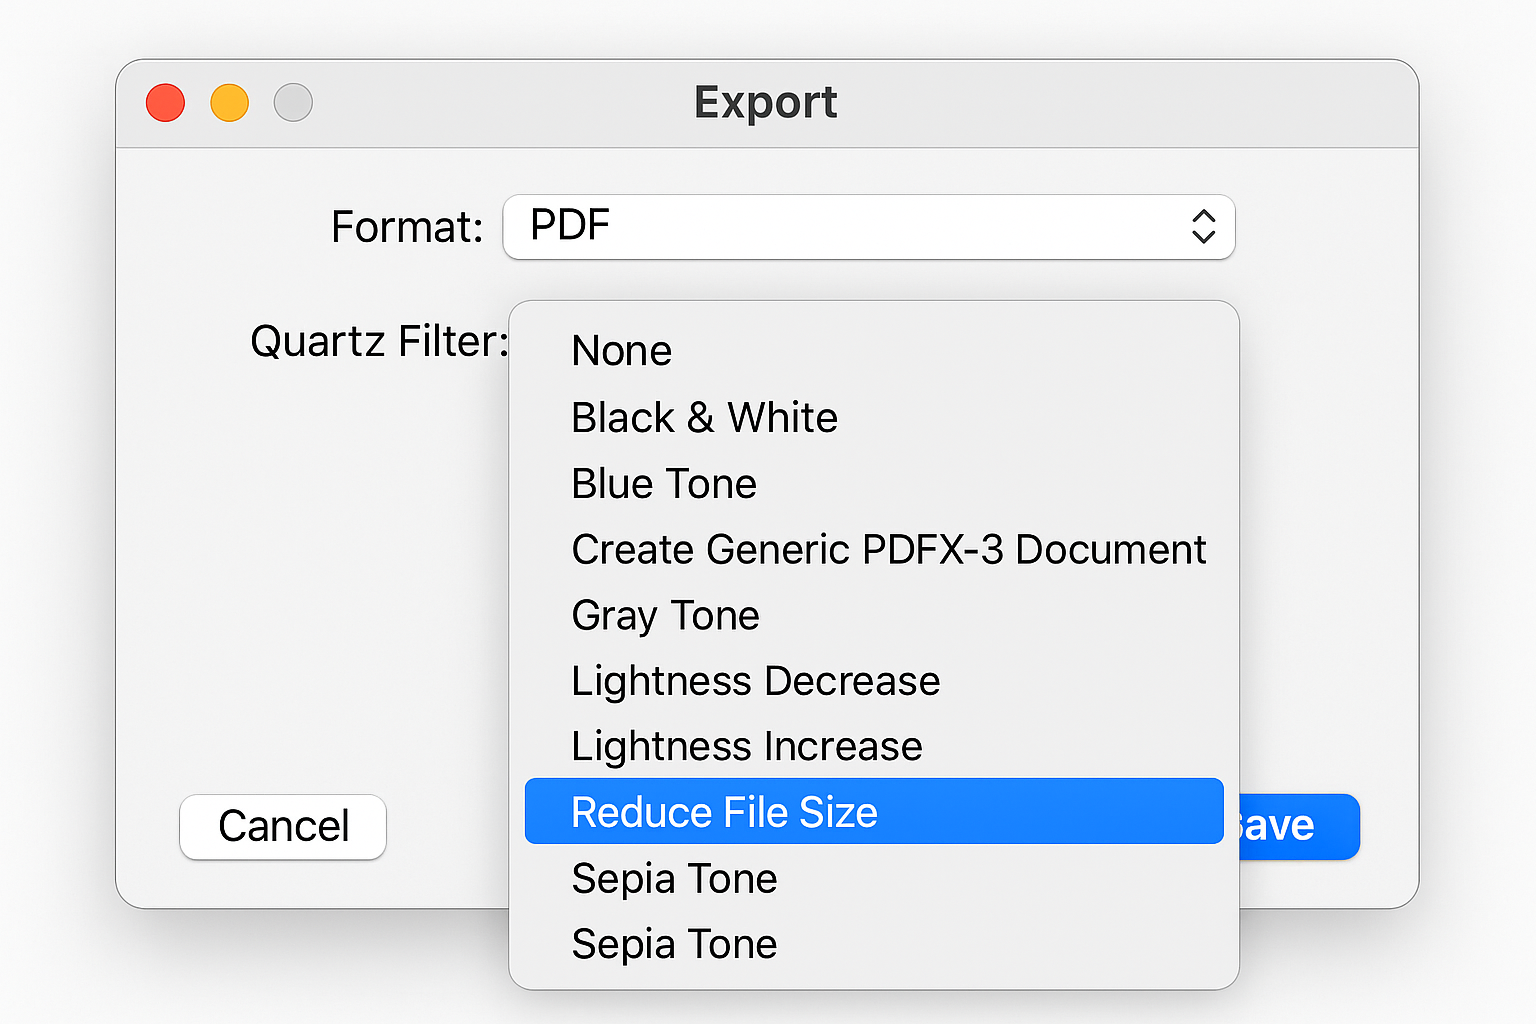
This is honestly one of the most effective compression methods I’ve tested. A 500KB PDF dropped to just 82KB using this filter. That’s an 84% reduction!
Fine-Tuning macOS Compression
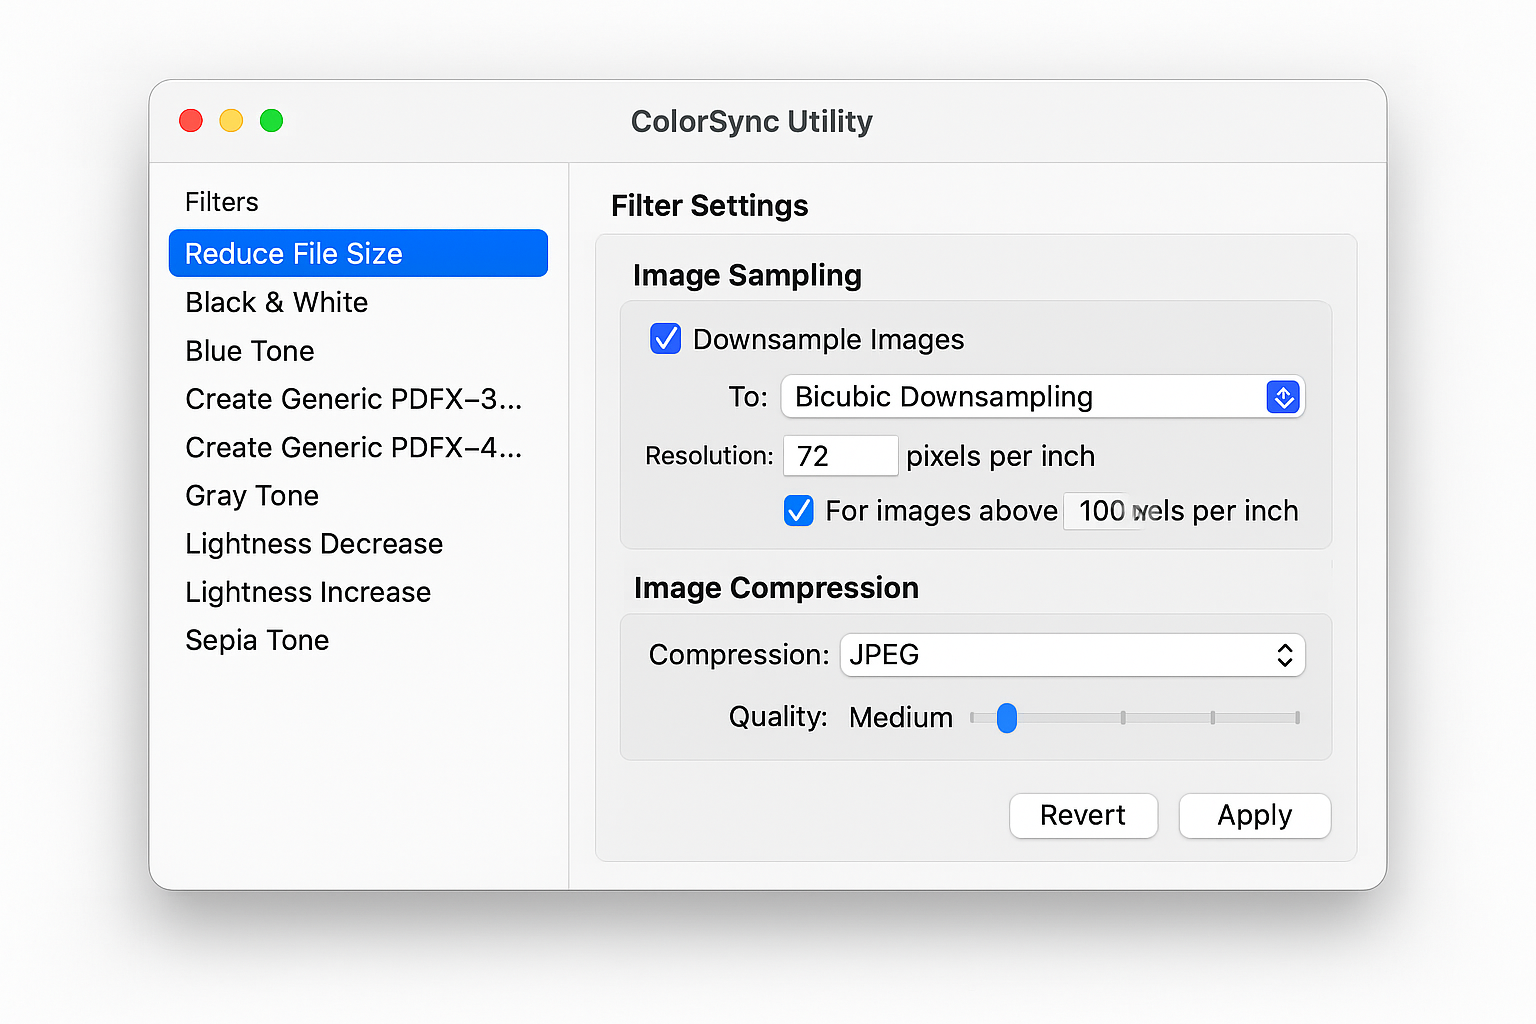
If you want more control over the compression settings:
- Press
Cmd + Spaceand type “ColorSync Utility” - Open the app and click Filters in the toolbar
- Select Reduce File Size from the list
- Adjust the Image Sampling resolution (try 120-150 DPI for good quality)
- Modify Image Compression settings if needed
Method 4: Desktop Apps for Power Users
If you’re dealing with PDFs regularly, a dedicated desktop app might be worth it. Here are the standouts:
Adobe Acrobat Pro
The full version of Acrobat has the most comprehensive PDF optimization tools:
- Open your PDF in Acrobat Pro
- Go to File > Optimize PDF (or Reduce File Size for quick compression)
- Click Audit space usage to see what’s taking up space
- Adjust settings for images, scanned pages, fonts, and metadata
- Click OK and save your optimized file
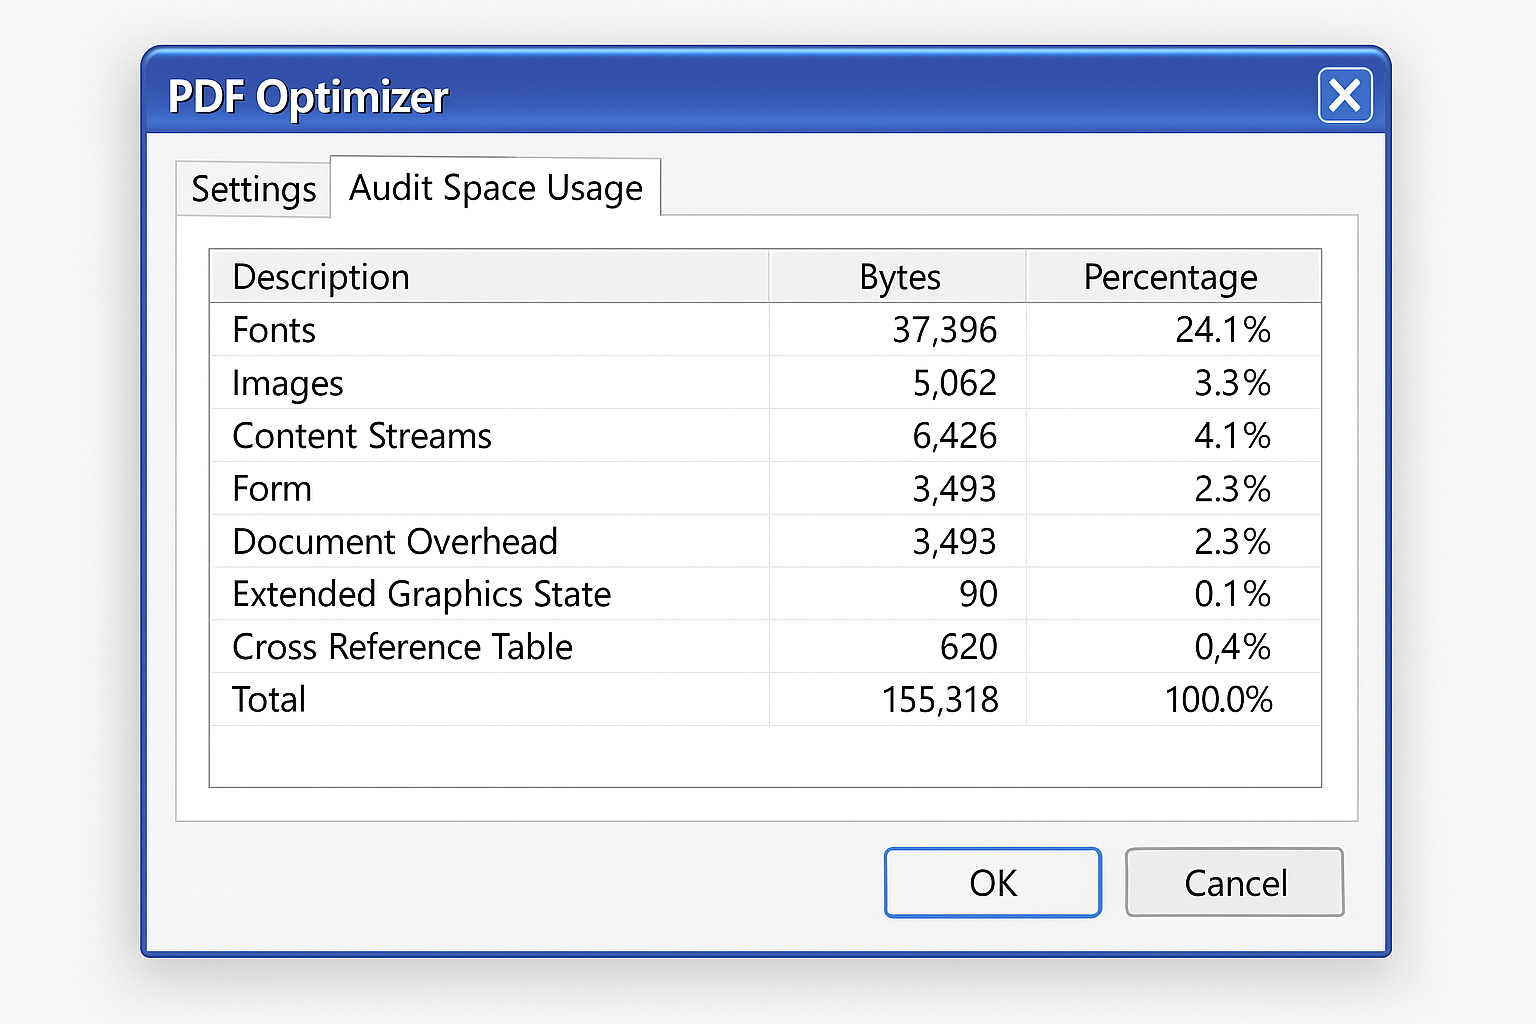
The audit feature is particularly clever as it breaks down exactly what’s using space so you can target the biggest culprits.
Free Alternatives
- MobiPDF: Simple interface with good batch processing
- Nitro PDF Pro: Professional features with adaptive compression
- PDFtk: Command-line tool for advanced users
Method 5: The “Print Trick” for Any Platform
This old-school method still works great and doesn’t require any special software:
- Open your PDF in any PDF viewer (Adobe Reader, browser, etc.)
- Press
Ctrl + P(Windows) orCmd + P(Mac) - Select a PDF printer as your destination
- Adjust quality settings to a lower level
- Print to a new PDF file
This essentially recreates the PDF without all the extra metadata and often recompresses images automatically. I’ve seen 20MB files drop to 3MB using this method.
Tips and Troubleshooting
Common Issues
Problem: Quality looks terrible after compression
You probably compressed too aggressively. Try a medium compression level first, and avoid compressing the same file multiple times (it creates artifacts).
Problem: File size barely changed
Your PDF might be mostly text, which doesn’t compress much. Or it could already be optimized. Try the “print trick” method to strip metadata.
Problem: Online tool says file is too large
Free tiers usually cap at 100-200MB. Either upgrade to a pro account or use a desktop method like the macOS Preview filter.
Pro Tips
- Keep your originals: Always save a copy before compressing in case you need the full quality later
- Start conservative: Try medium compression first — you can always go more aggressive if needed
- Know your use case: Files for email can be compressed more than files for professional printing
- Batch process: If you have multiple PDFs, tools like Smallpdf Pro or MobiPDF can handle them all at once
Which Method Should You Use?
Here’s my honest take on when to use each approach:
| Method | Best For | Compression | Quality |
|---|---|---|---|
| Adobe Online | Quick one-offs, any device | Good | Excellent |
| Windows Print to PDF | Text-heavy documents | Moderate | Good |
| macOS Preview | Mac users, best compression | Excellent | Good |
| Acrobat Pro | Professional use, fine control | Excellent | Excellent |
| Print Trick | Any platform, metadata removal | Good | Moderate |
Wrapping Up
PDF compression has come a long way from the clunky desktop tools of the past. These online services actually work well, and the built-in options on Windows and Mac are surprisingly effective. I’ve been using the Adobe online tool for quick jobs and the macOS Preview method for maximum compression, both have become go-to solutions in my workflow.
The best part? Most of these methods can shrink your PDFs by 50-90% without any quality loss you’ll actually notice. Give the online tools a shot first since they’re so convenient, but don’t sleep on those built-in OS features because they’re often the most effective option hiding in plain sight.