
Trying to save that perfect song from a livestream or capture audio from a podcast that doesn’t offer downloads? You’re definitely not alone. Whether it’s a rare track from an online radio station or audio from a video call, sometimes you just need to grab what you’re hearing and save it to your computer.
The good news? You can record pretty much any audio playing on your computer for free and it’s way easier than you might think. We’ll walk you through the best methods using tools that won’t cost you a dime, plus cover some paid options if you need extra features like automatic song splitting or high-quality downloads from streaming services.
What Is Audio Recording and Why Would You Need It?
Audio recording (also called audio capture) lets you save whatever sound is playing through your computer’s speakers or headphones. Think of it like taking a screenshot, but for sound instead of images.
Key Uses:
- Online radio and podcasts: Save episodes or songs that aren’t available for download
- Video calls: Record important meetings or interviews (with permission, of course)
- Streaming audio: Capture audio from websites, apps, or browser tabs
- System sounds: Record notification sounds, game audio, or app alerts
- Live streams: Save audio from Twitch, YouTube Live, or other platforms
The method works by capturing audio directly from your sound card — basically recording whatever your computer is “hearing” internally. If you can hear it through your speakers, you can record it.
Before You Begin
Make sure you have:
- ☐ A computer running Windows 10/11 or macOS Monterey or later
- ☐ An internet connection (for downloading recording software)
- ☐ About 10 minutes to set up your first recording
Important note: Recording copyrighted content might violate terms of service or copyright laws. This guide is for personal use, educational content, and legally available audio only.
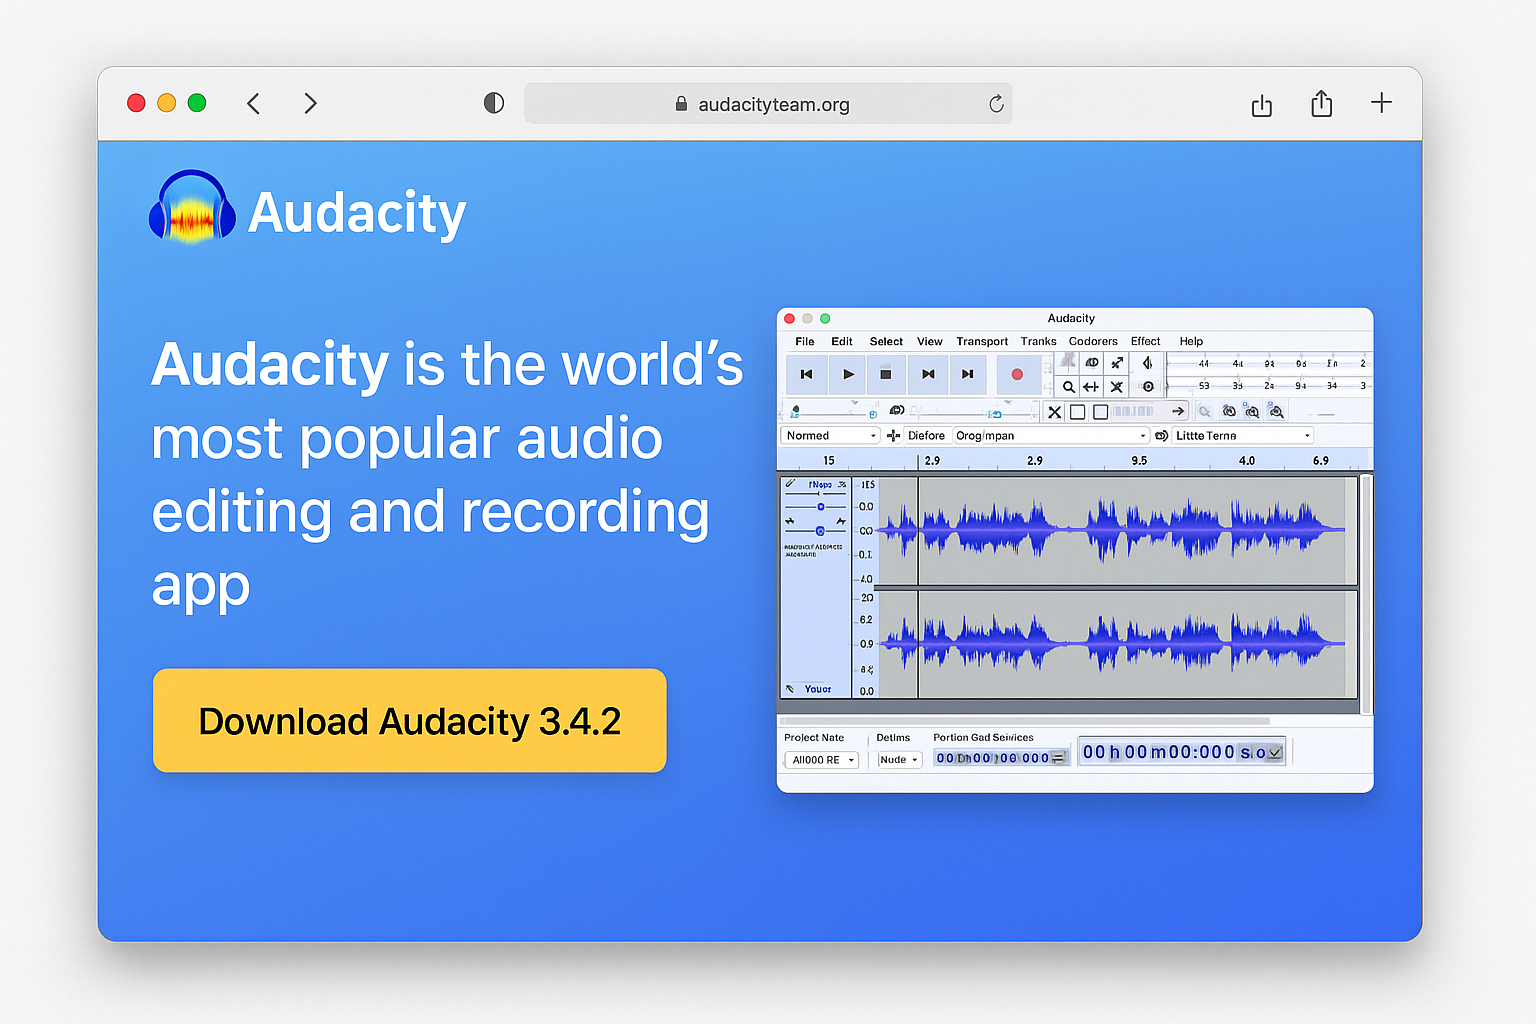
Method 1: Record with Audacity (Free & Best Overall)
Audacity is hands-down the best free option for recording streaming audio. It’s open-source, works on both Windows and macOS, and gives you full control over your recordings. Here’s how to set it up:
Step 1: Download and Install Audacity
Go to audacityteam.org and download the latest version (3.7.x as of 2026). Install it like any other program, just follow the setup wizard.
Step 2: Configure Audio Recording Settings
This is where Windows and macOS differ, so we’ll cover both:
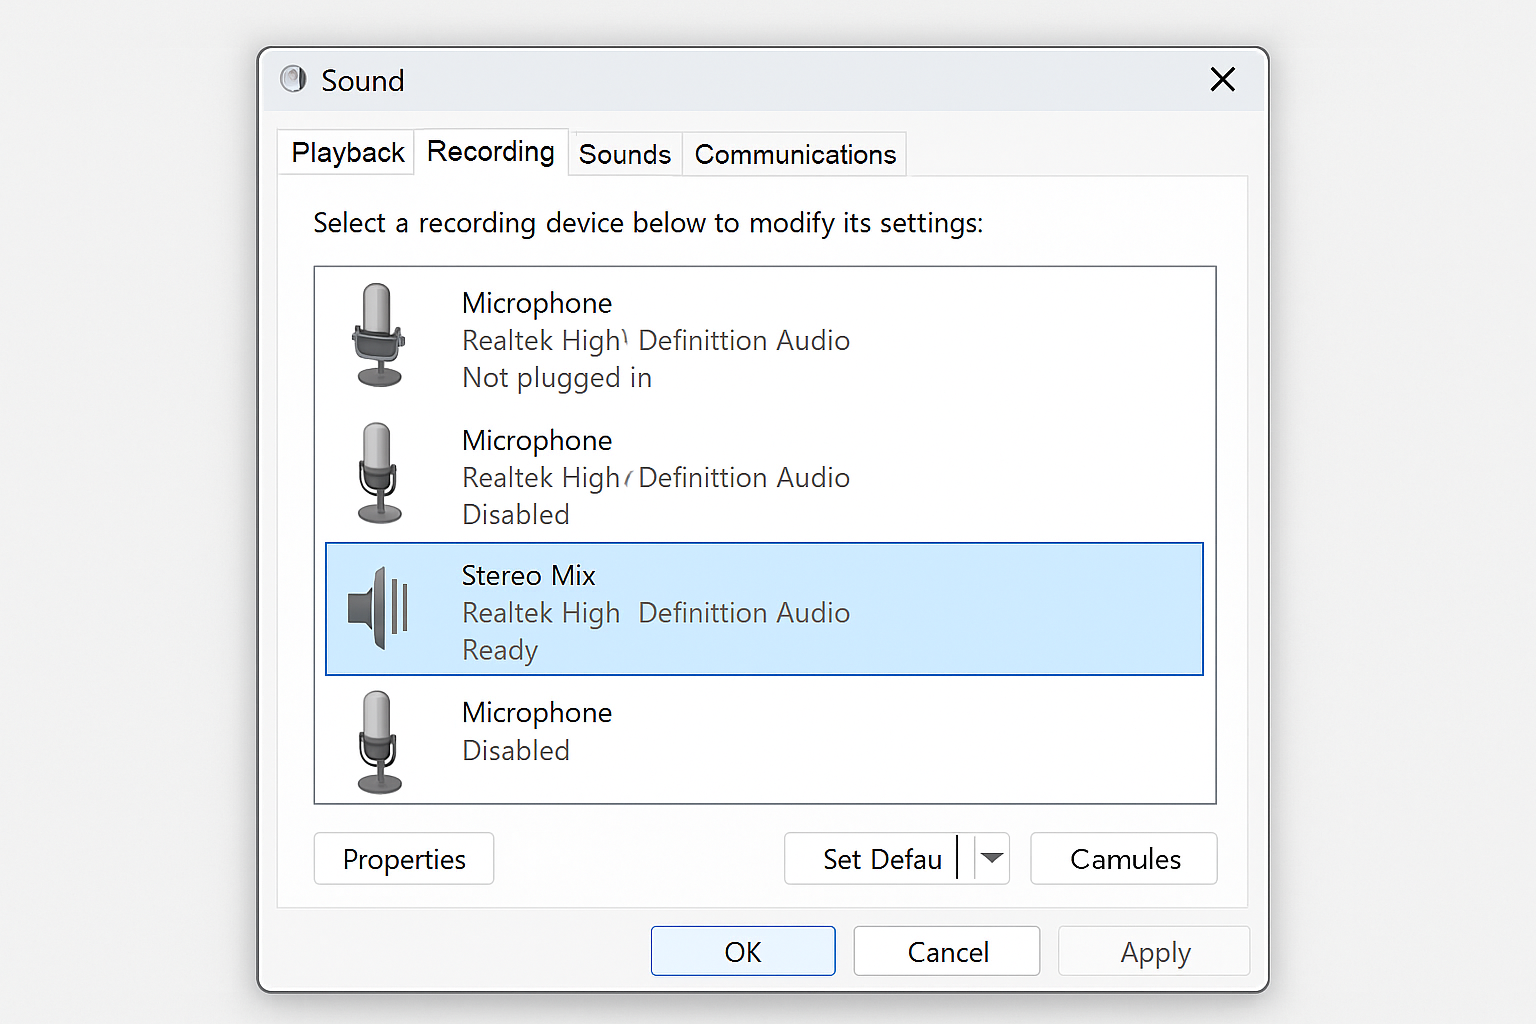
On Windows 11
First, enable “Stereo Mix” (this lets you record what’s playing through your speakers):
- Right-click the sound icon in your system tray and select Open Sound settings
- Scroll down and click More sound settings
- In the Sound Control Panel, click the Recording tab
- Right-click in the empty space and select Show Disabled Devices
- Right-click Stereo Mix and select Enable
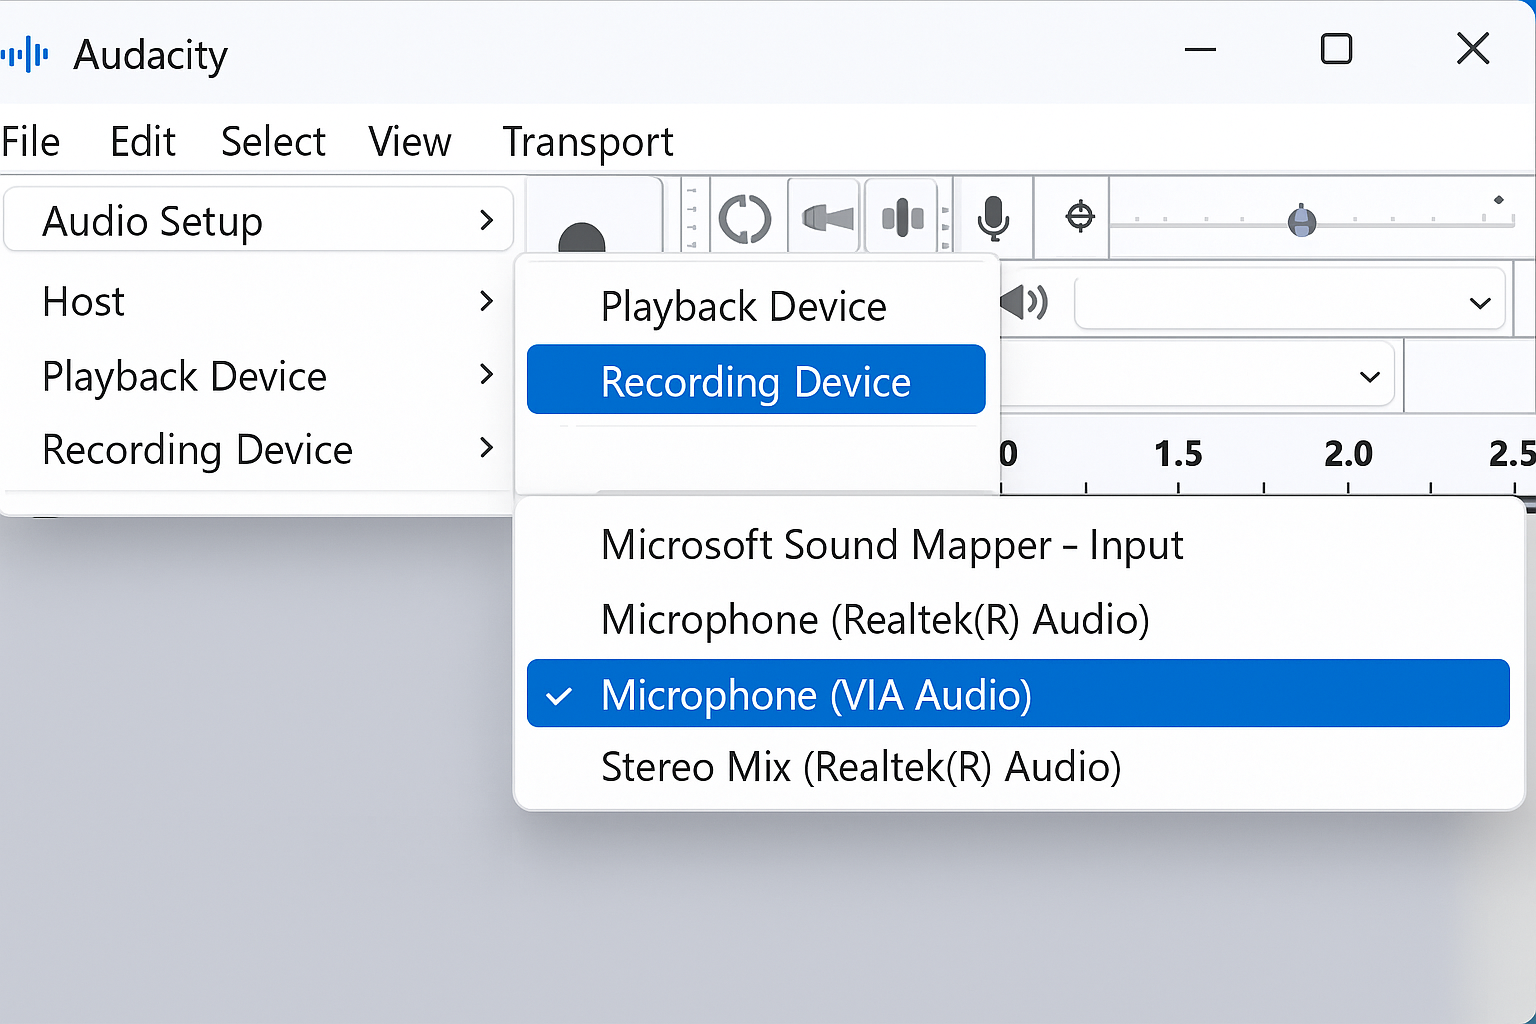
Now configure Audacity:
- Open Audacity
- Click Audio Setup in the toolbar
- Select Recording Device and choose Stereo Mix or Windows WASAPI: Speakers (loopback)
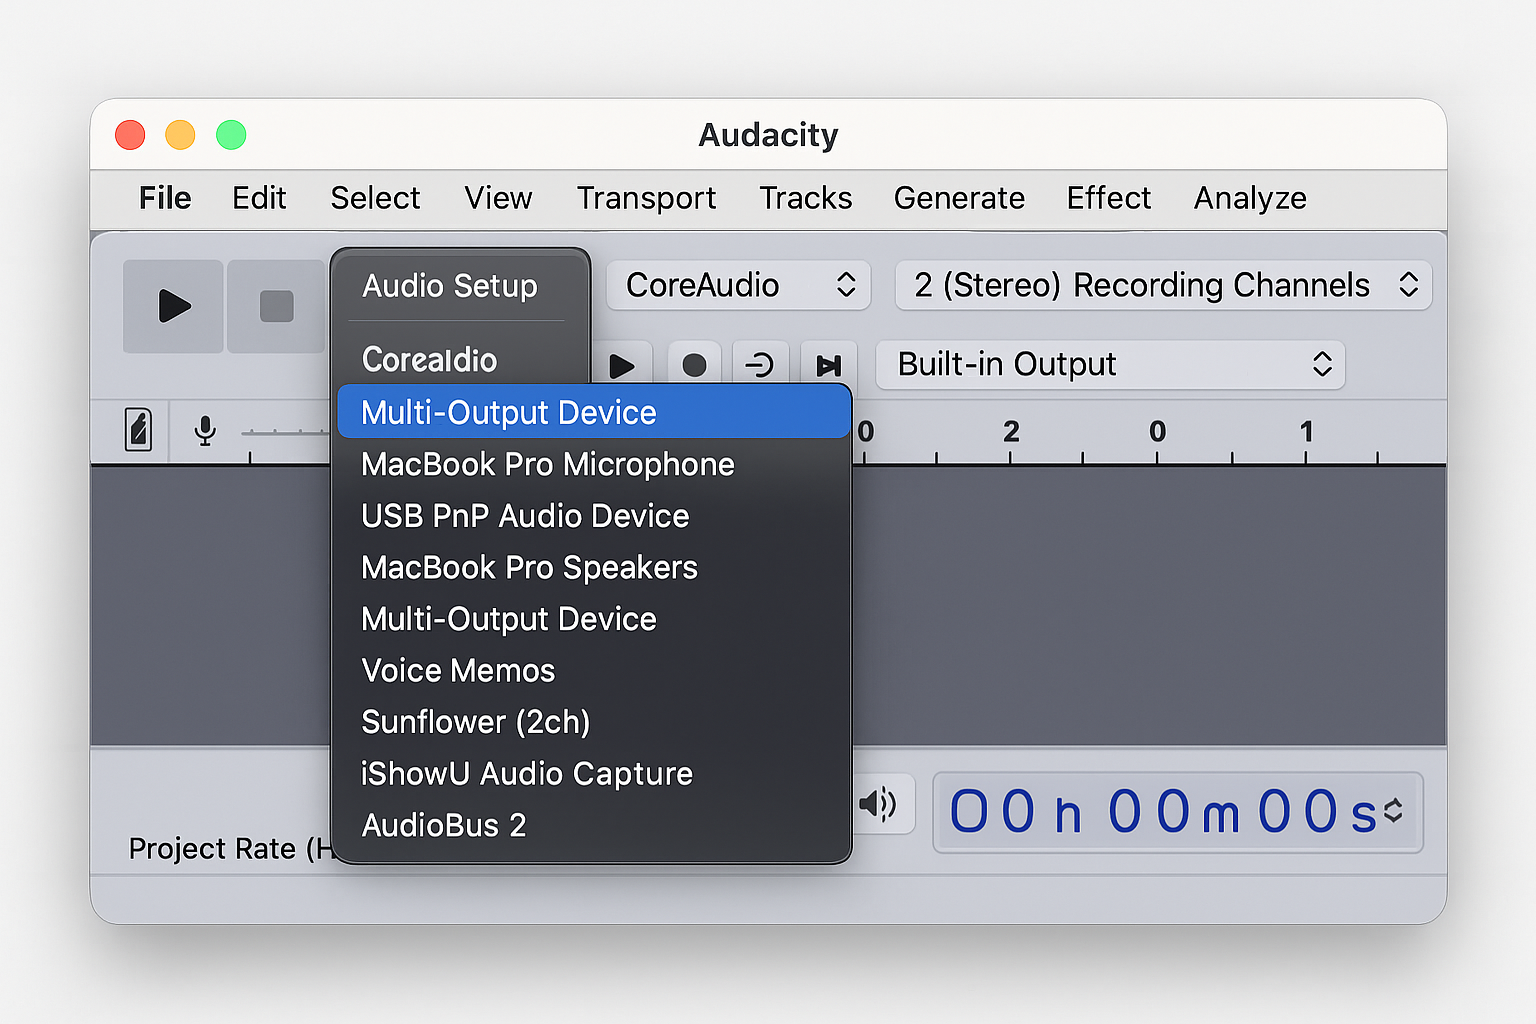
On macOS
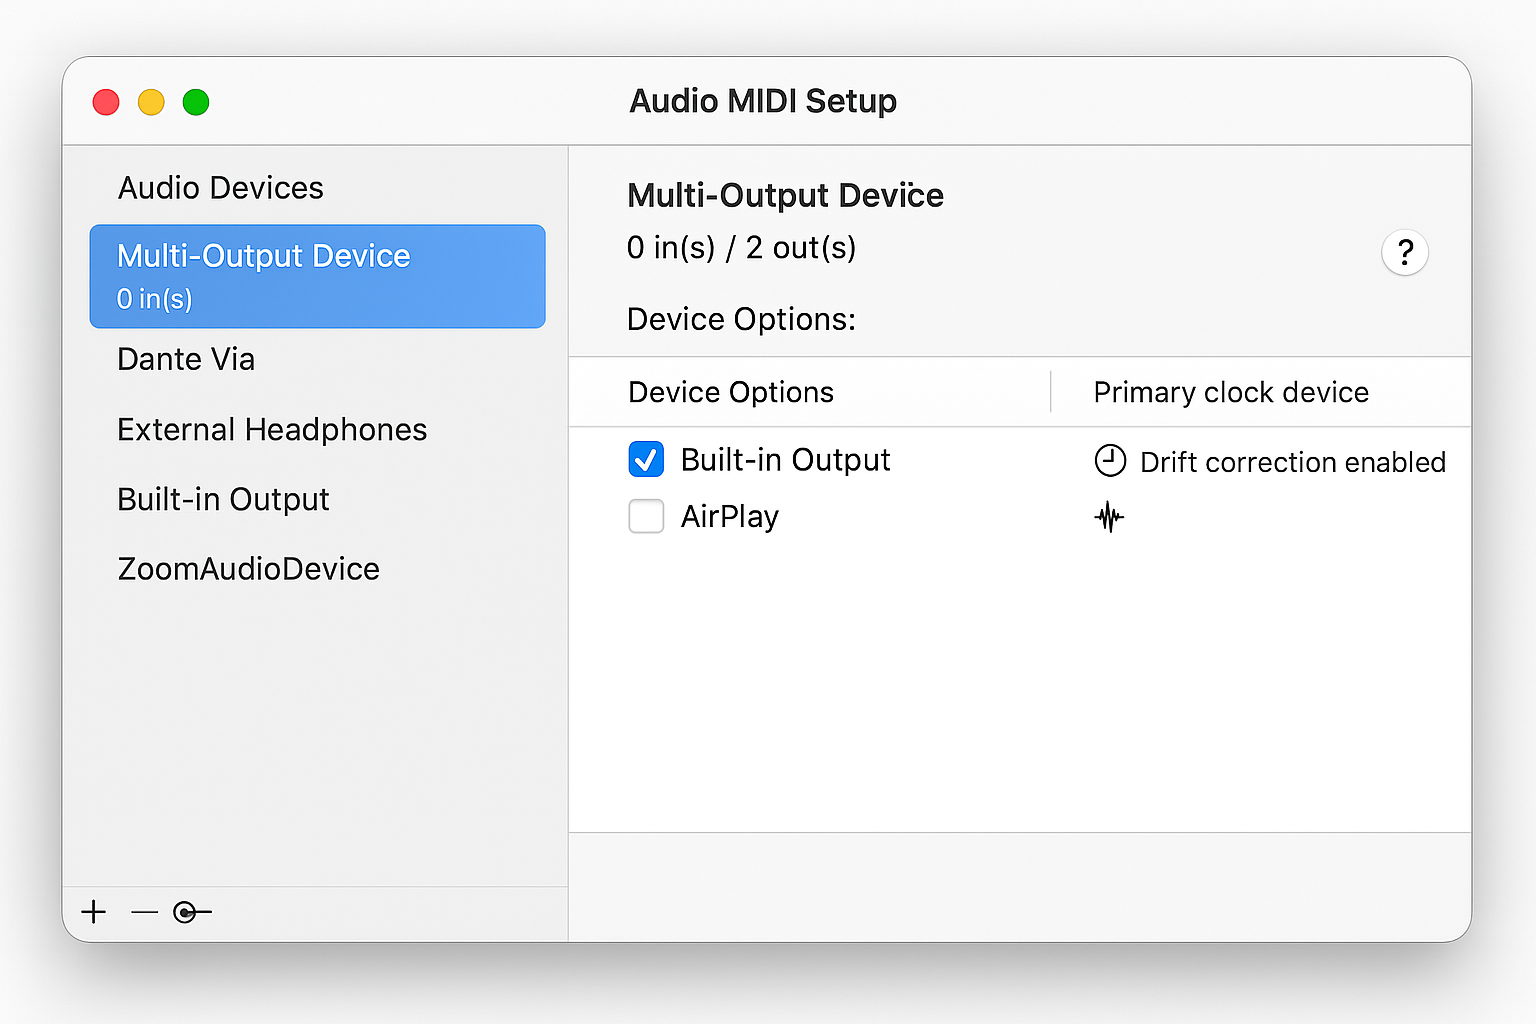
macOS requires a bit more setup since it doesn’t have built-in loopback like Windows:
- Open Audio MIDI Setup (search for it in Spotlight or find it in Applications > Utilities)
- Click the + button and select Create Multi-Output Device
- Check the box next to your built-in speakers or headphones
- Name it something like “Recording Output”
Then in Audacity:
- Open Audacity
- Click Audio Setup > Recording Device
- Select your Multi-Output Device or Built-in Input
Step 3: Test Your Setup
Before recording anything important, let’s make sure everything works:
- Play some audio in your browser (YouTube, Spotify, whatever)
- In Audacity, click the red Record button
- You should see audio waveforms appearing in real-time
- Click the square Stop button after a few seconds
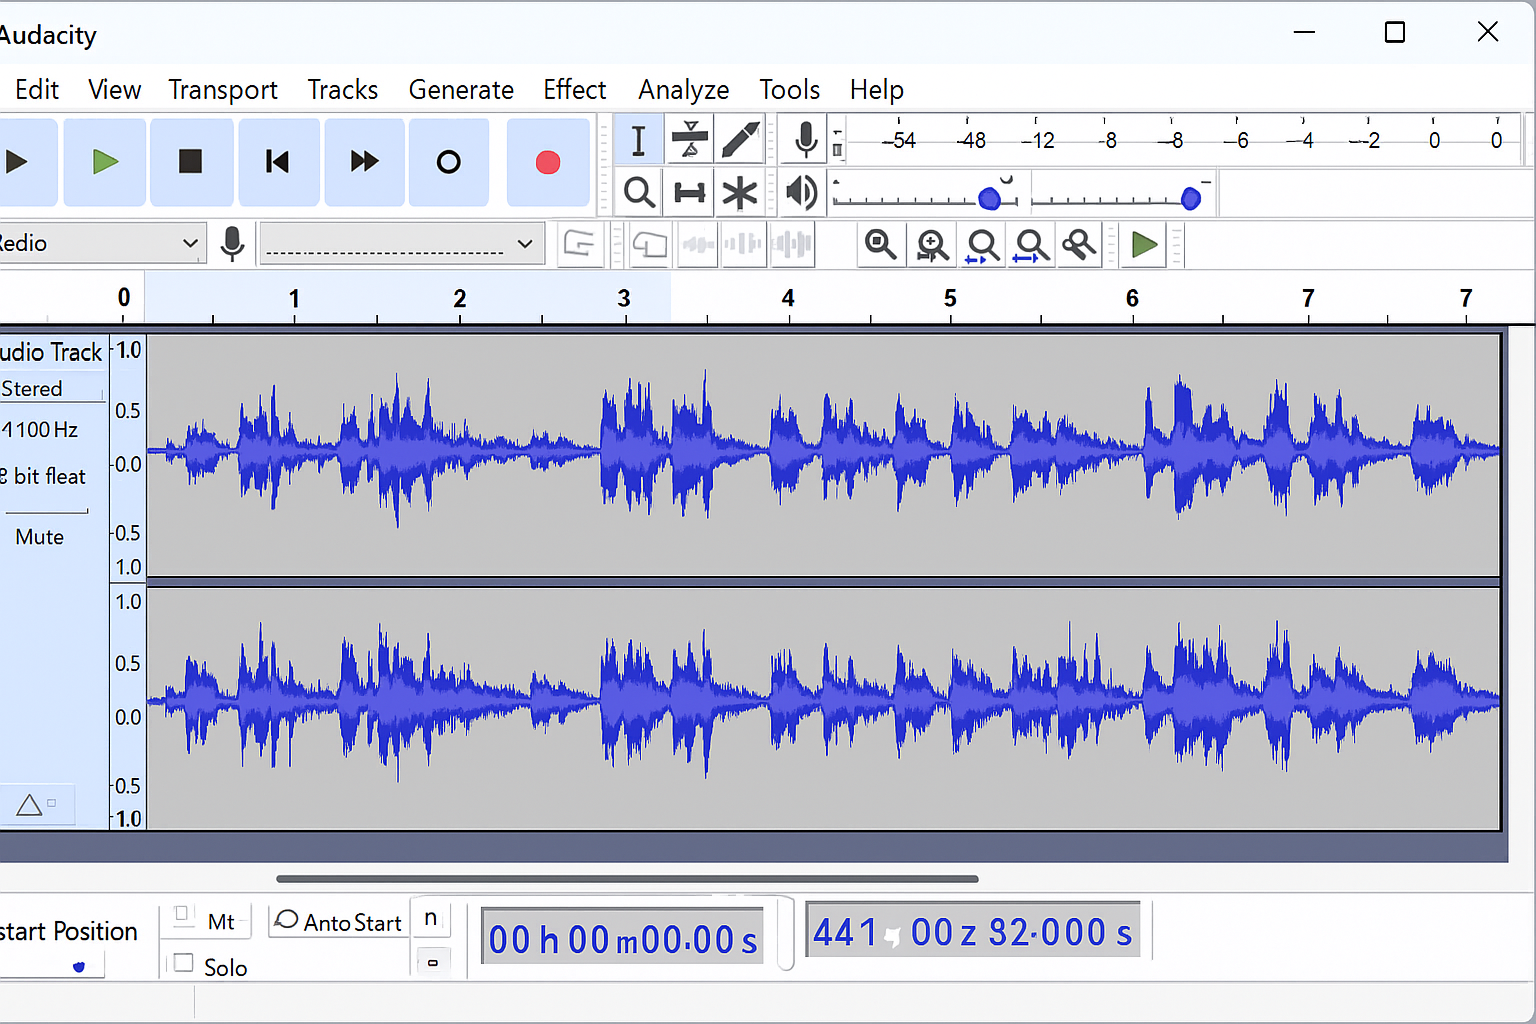
If you don’t see any waveforms, double-check your recording device settings or try the troubleshooting section below.
Step 4: Record Your Audio
Now for the actual recording:
- Start playing the audio you want to capture
- Click Record in Audacity
- Let the entire audio play (you’ll need to listen to it in real-time)
- Click Stop when finished
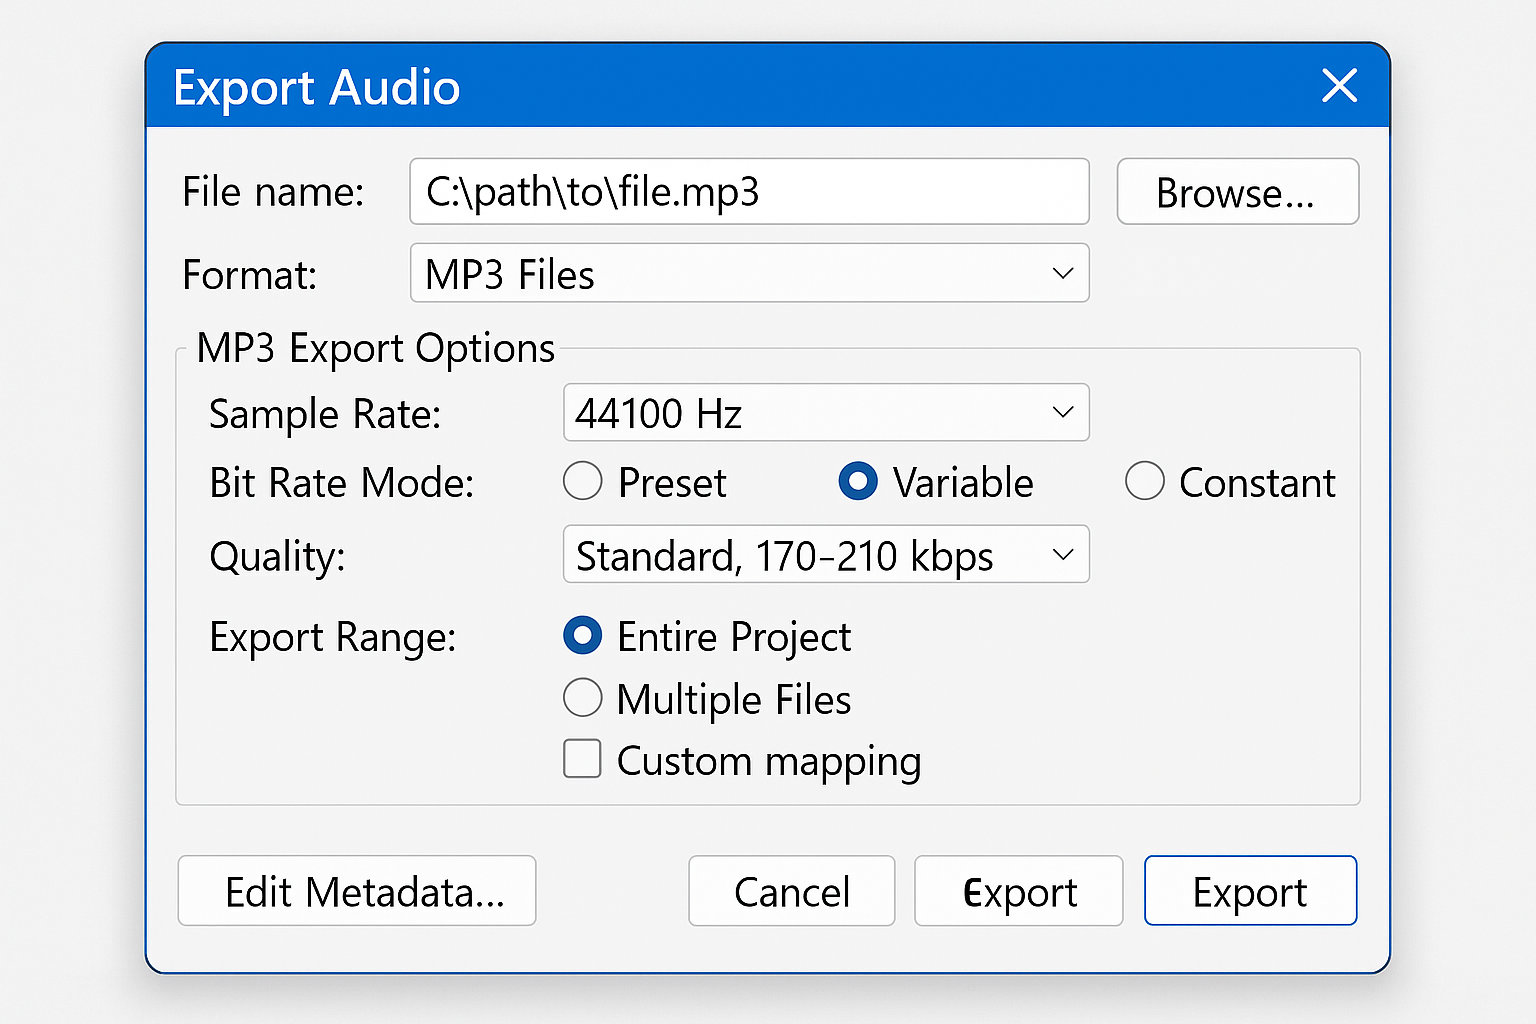
Step 5: Export Your Recording
To save your recording as an MP3 or other format:
- Go to File > Export > Export Audio
- Choose your format (MP3 is most common)
- Pick a location and filename
- Click Export
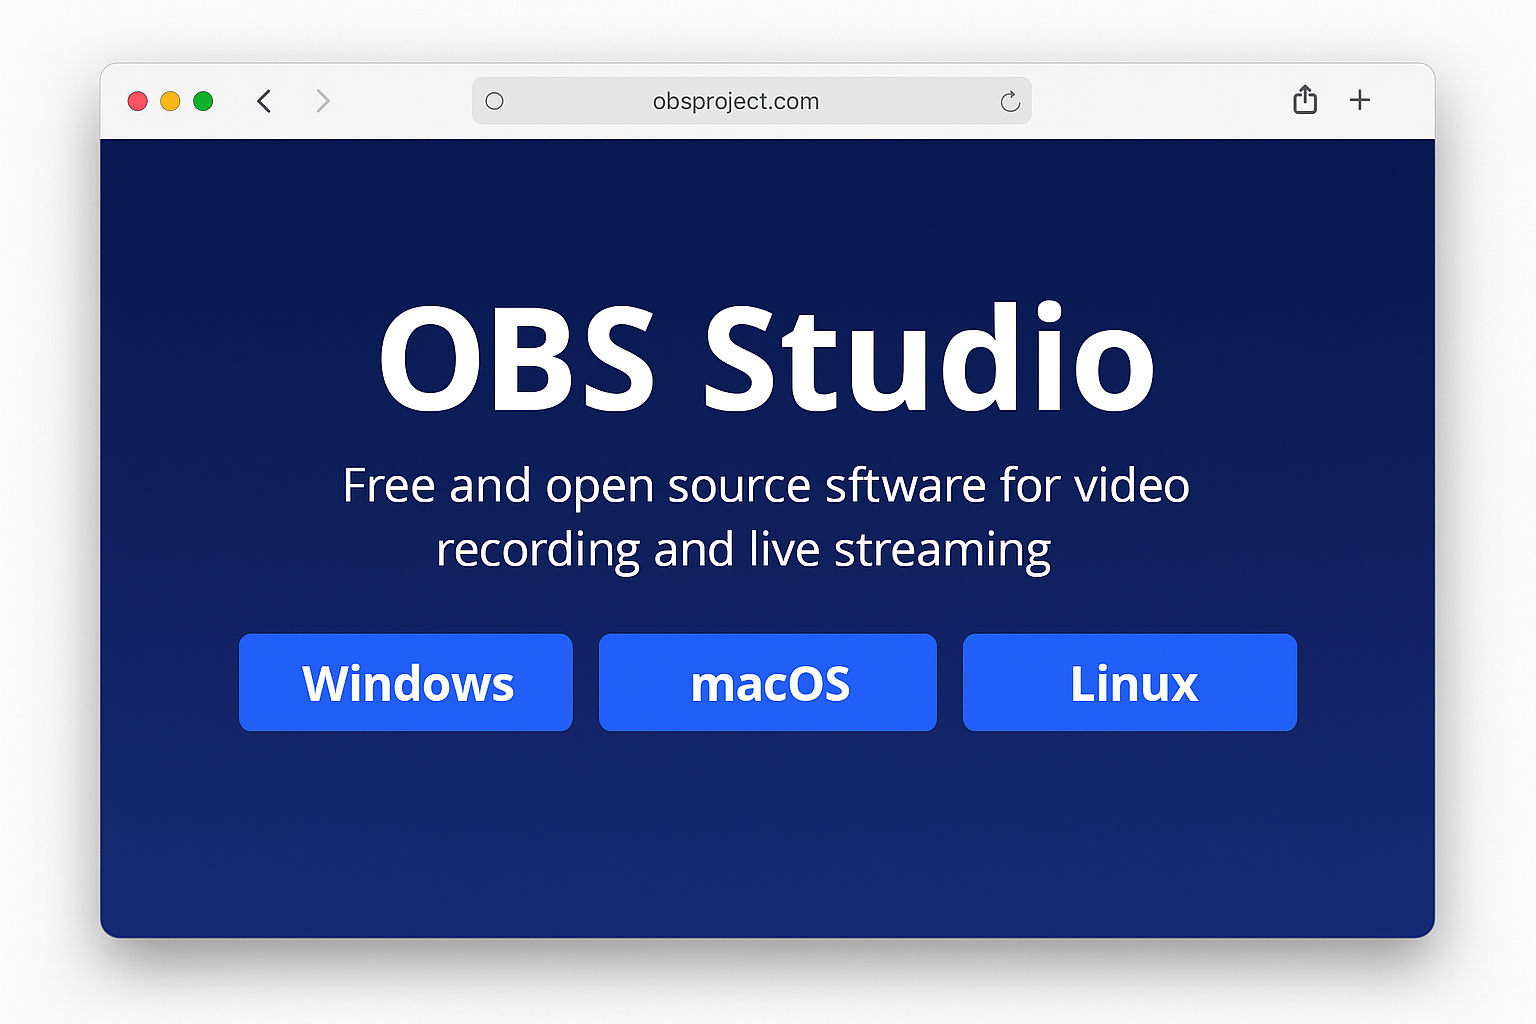
Method 2: Use OBS Studio (Free & Great for Live Streams)
OBS Studio isn’t just for streaming, it’s also excellent for recording audio, especially from live streams or when you need longer recordings without worrying about crashes.
Step 1: Download OBS Studio
Get it from obsproject.com as it’s completely free and works on both Windows and macOS.
Step 2: Set Up Audio-Only Recording
- Open OBS Studio
- In the Sources box, click the + button
- Select Audio Output Capture
- Name it something like “System Audio” and click OK
- Choose your default audio device and click OK

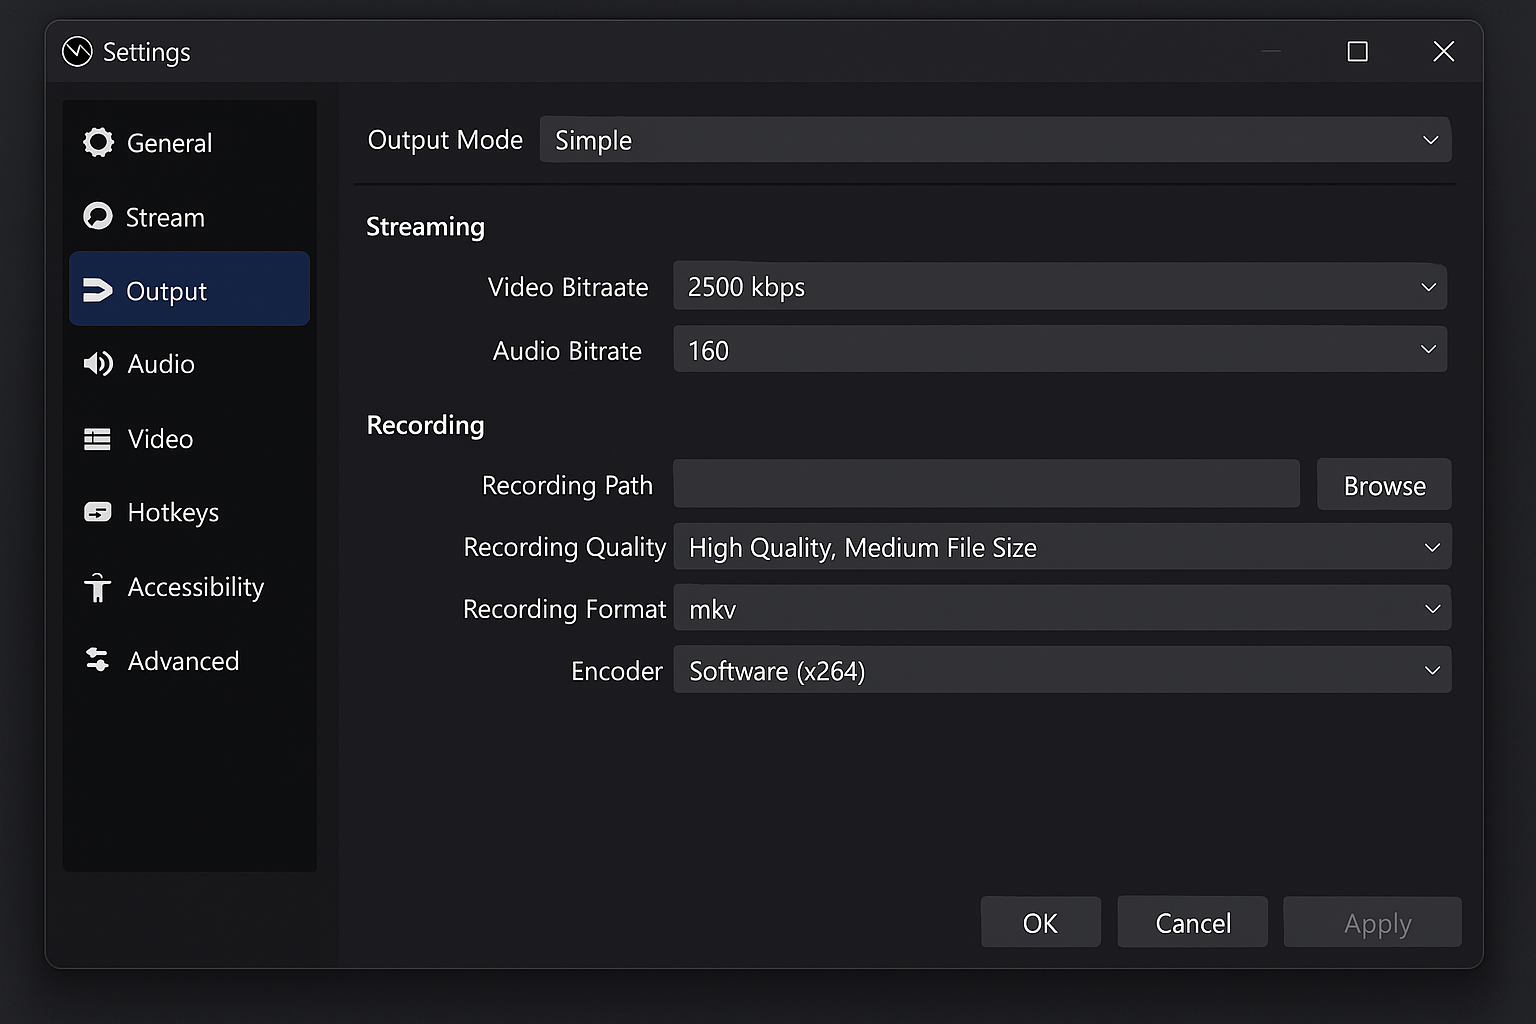
Step 3: Configure Output Settings
- Go to File > Settings
- Click Output in the left sidebar
- Set Recording Format to MP4 or MKV
- Under Audio, set Audio Bitrate to 192 or higher for better quality
- Click OK
Step 4: Start Recording
- Play your audio source
- Click Start Recording in the bottom-right corner of OBS
- You’ll see the recording timer start
- Click Stop Recording when done
Your recording will be saved to the default folder (usually Documents/OBS Studio/Recordings). You can extract just the audio later using a tool like VLC or convert it online.
Method 3: Browser-Based Recording (No Installation Required)
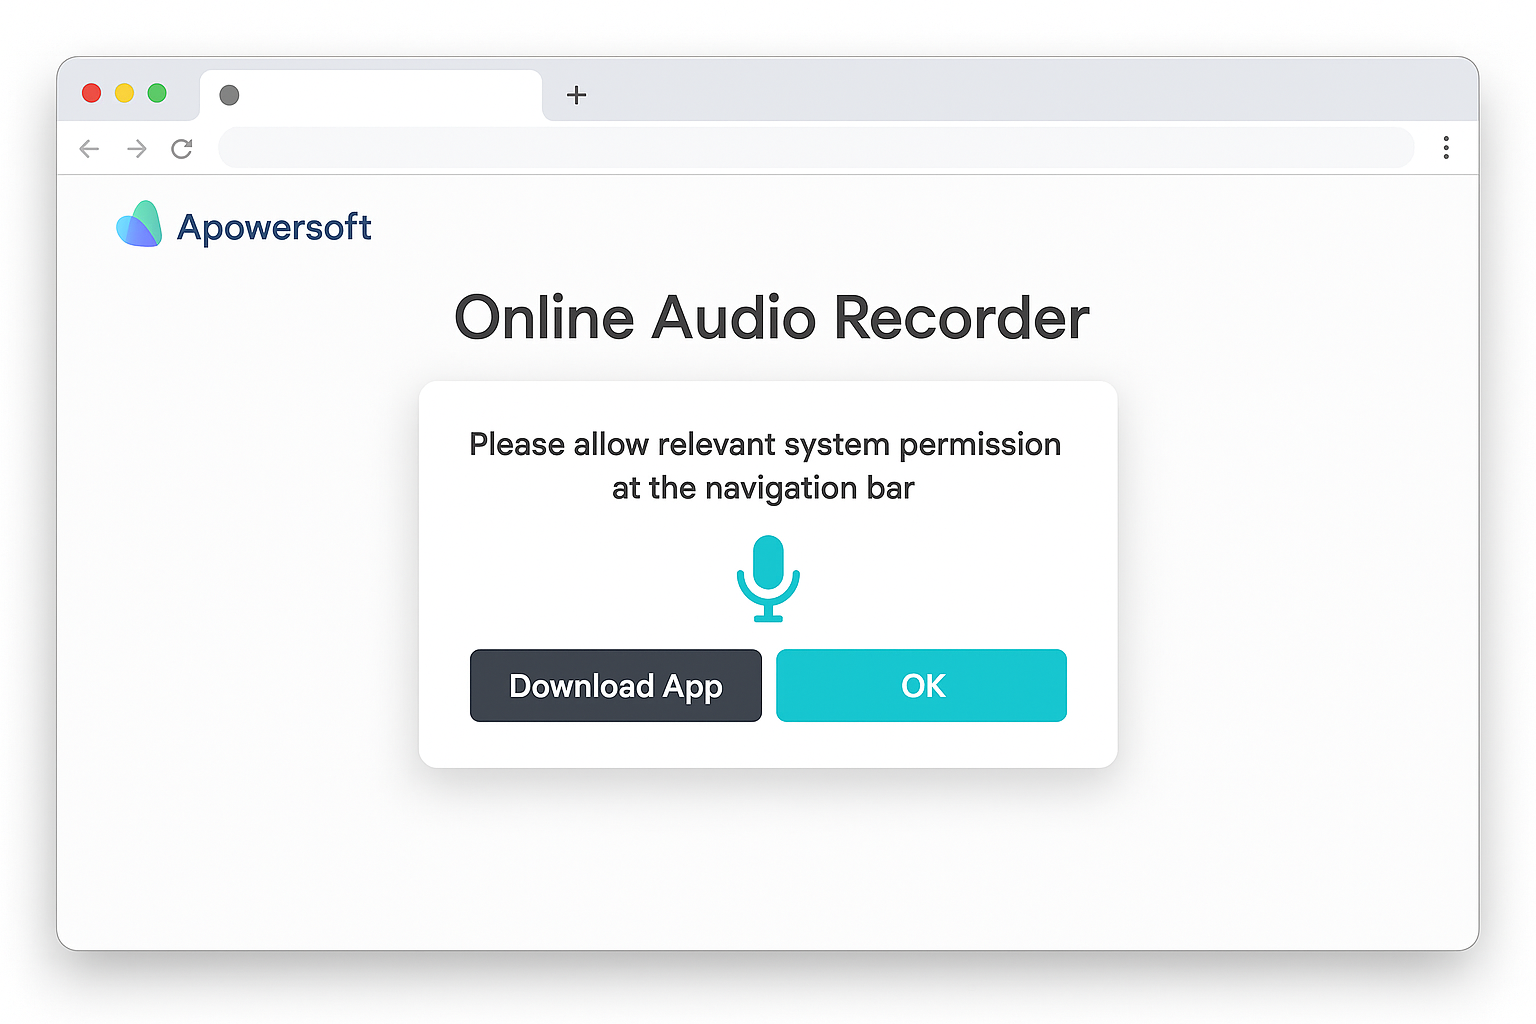
If you don’t want to install anything, try Apowersoft’s online recorder:
- Go to apowersoft.com/free-audio-recorder-online
- Click Start Recording
- Allow microphone and system audio permissions when prompted
- Play your audio in another browser tab
- Click Stop when finished and download the MP3
Paid Options for Streaming Services
If you’re trying to record from Spotify, Apple Music, or other DRM-protected services, free tools won’t work well. Here are some paid alternatives that handle these services specifically:
- NoteBurner Music One ($15-30): Downloads from 10+ streaming services including Spotify, Apple Music, and YouTube Music with original quality
- AudiCable ($20-40): All-in-one converter for most major streaming platforms
- ViWizard Music Converter ($20-35): Supports 6,000+ sites with batch downloading
These tools work by essentially automating the recording process and can preserve metadata like song titles and artist names.
Tips and Troubleshooting
Common Issues
Problem: No sound is being recorded
This usually means your recording device isn’t set up correctly:
- Windows: Make sure Stereo Mix is enabled in Sound Control Panel > Recording tab
- macOS: Check that your Multi-Output Device is created properly in Audio MIDI Setup
- Both platforms: Try switching to WASAPI mode in Audacity (Audio Setup > Host)
Problem: Recording sounds distorted or too quiet
- Adjust the recording level in Audacity (look for the microphone slider)
- Make sure your system volume isn’t too high (keep it around 50-70%)
- Check that no other apps are using your microphone
Problem: Browser won’t let me record audio from tabs
Chrome and Edge sometimes block system audio capture for security reasons:
- Grant microphone permissions to your browser
- Try using Firefox instead
- Use the browser extension method or online recorders
Pro Tips
- Test first: Always do a quick 10-second test recording before capturing something important
- Monitor levels: Keep an eye on the audio meters in Audacity — you want green/yellow, not red
- Close other apps: Shut down unnecessary programs to avoid recording notification sounds
- Use headphones: This prevents feedback loops and gives you better control over what gets recorded
- Backup important recordings: Save multiple copies of anything you can’t easily re-record
Wrapping Up
Recording streaming audio doesn’t have to be complicated! With tools like Audacity and OBS Studio, you can capture pretty much anything playing on your computer for free. The sound card method we covered works reliably across both Windows and macOS, and once you’ve got it set up, recording is just a matter of clicking a button.
For most people, Audacity is the sweet spot between features and simplicity. If you’re dealing with DRM-protected streaming services, you’ll probably need to invest in a paid tool, but for everything else, the free options work great. Just remember to respect copyright laws and only record content you’re legally allowed to capture!