

← Back to Part 1: How to Use AI to Optimize Your LinkedIn Profile for a Career Change: Setup & Strategy
In Part 1, you set up your AI session and extracted a target language glossary from real job postings in your new field. Now it’s time to put that glossary to work. This part covers two critical steps: first, mapping your existing experience onto your target industry’s vocabulary so you know exactly what to emphasize and what gaps to address honestly; second, using that translation map to generate a LinkedIn headline that positions your pivot as intentional and compelling — not apologetic.
Step 2: Identify Your Transferable Skills and Build a Translation Map
With your target language glossary in hand, the next step is to map your existing experience onto it. This is where most career changers either undersell themselves (assuming old skills don’t count) or over-claim (listing everything and hoping something sticks). The AI does the analysis so you don’t have to guess.
Step 2a: Send the Skills Excavation Prompt
Now I want you to analyze my background and identify my transferable skills.
Here are my past job descriptions and bullet points from my LinkedIn experience section:
[PASTE YOUR CURRENT EXPERIENCE BULLETS HERE — one role at a time is fine,
or all together if they’re not too long]Using my target language glossary as your reference, identify:
1. Skills I have that map DIRECTLY to glossary terms (same skill, different label)
2. Skills I have that map INDIRECTLY (related or adjacent, with some translation needed)
3. Any glossary terms I don’t appear to have experience with yetBe specific. For each transferable skill, show me both the language I currently use
and the equivalent term from my target industry.
Expected result: The AI returns three lists. The direct matches are your strongest selling points. The indirect matches need framing help — that’s what the next steps provide. The gaps are honest data: some can be addressed in your profile, others you may need to build through coursework or side projects.
A quick gut-check for the direct and indirect lists: a skill is genuinely transferable if you can point to a specific outcome you produced using it — not just a term that sounds similar. If the only justification for a match is the label itself (“I did stakeholder communication, so I did enterprise client relationship management”), treat it as indirect and keep the framing conservative until you can back it with a real example.
Step 2b: Send the Gap Analysis Prompt
Based on your analysis, please give me a gap assessment. For each gap you identified:
– Is it a hard requirement in the job postings, or a “nice to have”?
– Is there anything in my background that partially addresses it, even if it’s not a
perfect match?
– What’s the most honest way to handle this gap in my profile — acknowledge it,
frame around it, or leave it unaddressed?I want an honest assessment, not false reassurance.
Expected result: A realistic picture of where you stand. Genuine gaps are better to know now than to have a recruiter discover them later. Use this output to decide what to emphasize and what to address proactively in your About section.
In practice, how you handle a gap should depend on its type. A hard requirement you’re missing outright is usually better acknowledged briefly than dodged — recruiters notice a conspicuous omission faster than an honest gap paired with a plan. A “nice to have” gap where you have partial or adjacent experience is worth reframing through that adjacent experience rather than claiming the skill outright. And a gap in something rarely enforced or clearly minor, you can leave unaddressed rather than force a connection that isn’t really there.
Step 2c: Generate Your Translation Map
Finally, please create a two-column “translation map” for my profile rewrite.
Column 1: The language I currently use (from my old industry)
Column 2: The equivalent language I should use (from my target industry glossary)Include 10–15 rows covering my most transferable skills and accomplishments.
This map will guide every section I rewrite. Format it as a simple table.
Expected result: A table that looks something like this (your actual content will vary):
| Your Old Language | Target Industry Language |
|---|---|
| Cross-functional stakeholder communication | Enterprise client relationship management |
| Workflow redesign and process improvement | Operational efficiency / process optimization |
| Departmental budget oversight | P&L awareness / resource allocation |
| Staff onboarding and training | Internal enablement / team onboarding |
| Patient intake management | Client onboarding / account setup |
Save this table in your working document. It’s the master reference for Steps 3 through 6 — when you draft your headline next, pull directly from the “Target Industry Language” column for your keyword choices rather than reaching for new terms.
Step 3: Rewrite Your LinkedIn Headline as a Pivot Statement
Your headline is the highest-stakes real estate on your profile. It appears in search results, connection requests, and recruiter inboxes — often before anything else. It’s also one of the main fields LinkedIn’s search indexes when a recruiter searches by keyword, so the terms you choose affect whether you show up in results at all, not just how you look once someone clicks through. Most career-changer headlines fail in one of two ways: they cling to the old identity (“Former Teacher | Open to New Opportunities”) or overclaim the new one (“Marketing Strategist”) without building a bridge. You need a headline that does both — acknowledges where you’ve been and leads clearly with where you’re going.
Step 3a: Send the Bridge Headline Prompt
Please write 5 LinkedIn headline variations for my career change.
Requirements for all five:
– Each headline must be under 220 characters (LinkedIn’s limit)
– Each must include at least 2–3 terms from my target language glossary
– None should use phrases like “passionate about,” “results-driven,” “dynamic,”
or “thought leader”
– Each should communicate value, not just job titlePlease write one variation in each of these styles:
1. Direct/functional — leads with the target role and key skill
2. Skills-led — leads with transferable skills, mentions target industry
3. Aspiration-forward — frames the transition as intentional and forward-looking
4. Cross-industry differentiator — explicitly positions my old background as an asset
5. Concise/punchy — shortest possible version that still includes target keywordsUse my translation map and target language glossary as your keyword reference.
Expected result: Five distinct headline options you can evaluate side by side.
To show the tonal difference between the five styles, here’s a worked example for a marketing manager pivoting into UX research (your own results will use your own glossary terms, but the shape should look similar):
- Direct/functional: “UX Researcher | Former Marketing Manager Bringing Customer-Insight Rigor to Product Decisions”
- Skills-led: “Qualitative & Quantitative Research | Translating 8 Years of Customer-Facing Marketing Into UX Insight”
- Aspiration-forward: “Marketing → UX Research | Applying a Decade of Customer Empathy to Product Design”
- Cross-industry differentiator: “UX Researcher With a Marketing Background | Bringing Go-to-Market Context Most Researchers Don’t Have”
- Concise/punchy: “UX Researcher (Ex-Marketing) | Customer Insight, Now for Product”
Step 3b: Evaluate the Options
Before choosing or editing, run each headline through this three-question checklist:
- Does it use target industry language? Check against your glossary — at least two terms should appear.
- Does it communicate value, not just job title? A headline that just says “Aspiring Account Manager” tells a recruiter nothing about why you’re worth their time.
- Would a recruiter in your target field understand it immediately? Read it as if you know nothing about your old industry. If it requires context to make sense, it needs editing.
- Does it still read like something a person would say out loud? It’s possible to pass the first three checks and still end up with a keyword-stuffed headline. If your selected option strings together three or four glossary terms with no connecting language, rewrite it so a human recruiter — not just LinkedIn’s search algorithm — would actually want to read it.
Pick the option that scores best on all four questions, then do one manual pass to replace any phrasing that doesn’t sound like you. The AI’s draft is a starting point, not a final answer.
Step 3c: Add Your Headline to LinkedIn
On LinkedIn, click the edit pencil icon in your profile introduction card (the section at the top with your photo and name). Find the Headline field and replace your current headline with the version you selected.
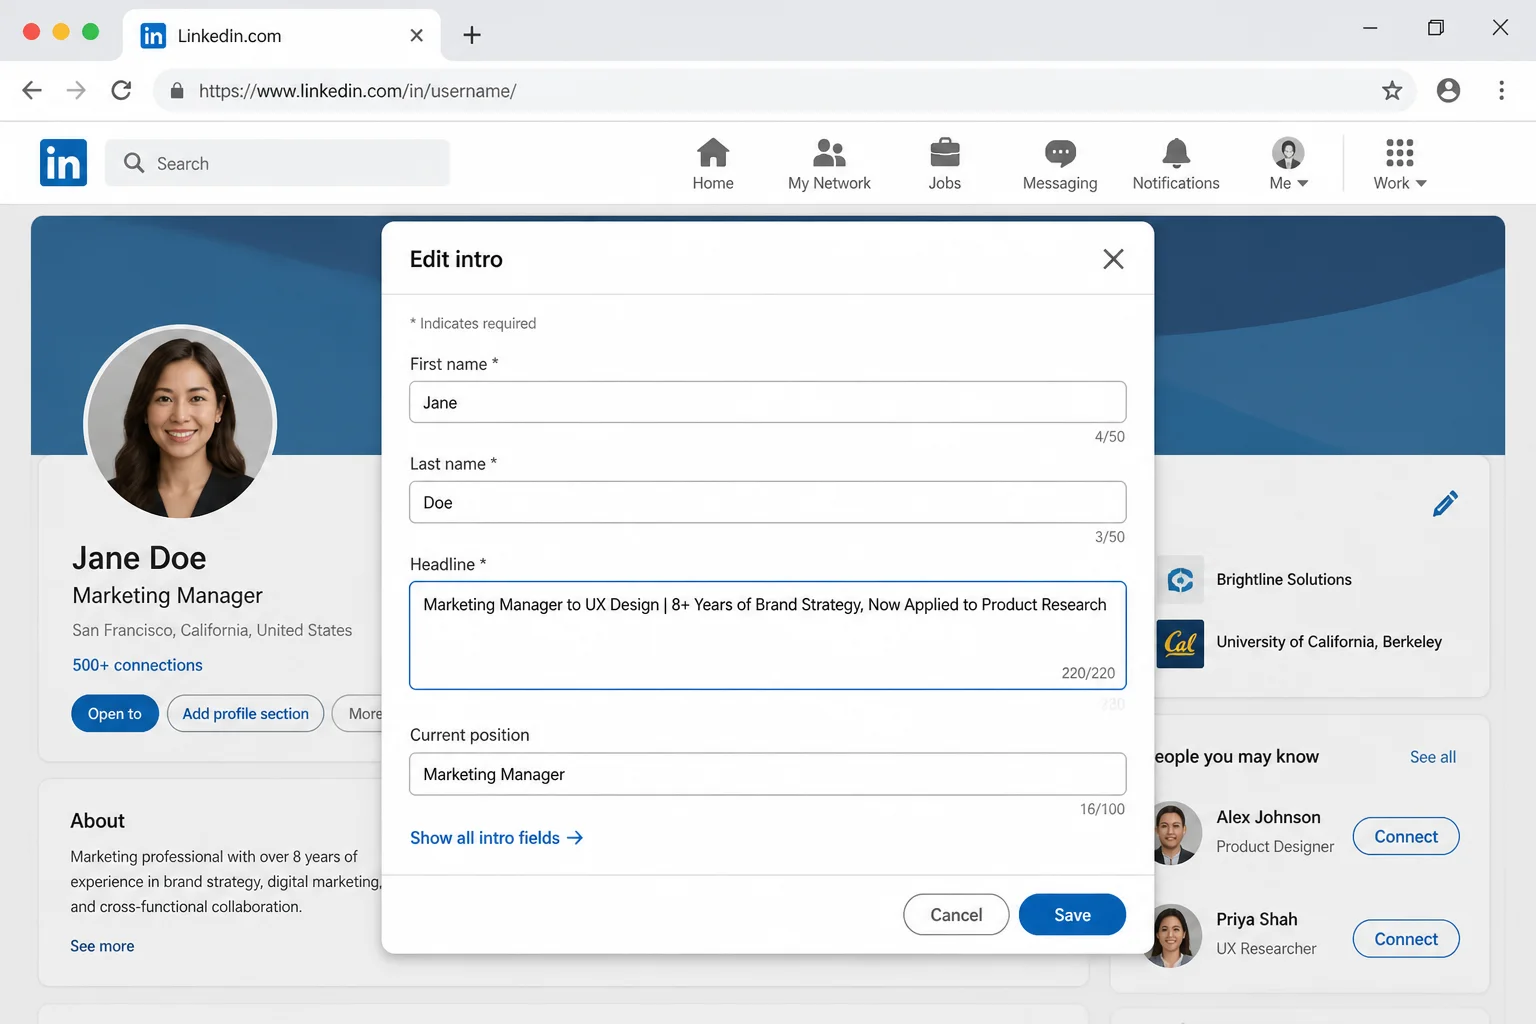
Click Save. Your new headline is live immediately.
You now have a translation map and a headline that leads with your target industry’s language. In Part 3, we’ll use both to tackle the two most narrative-heavy sections of your profile: the About section, which needs to tell a coherent pivot story, and the Experience section, which needs to be reframed — accurately — in your new field’s vocabulary.
Continue to Part 3: Rewrite Your LinkedIn About Section and Experience Bullets for a Career Change →
To learn more about creating a compelling LinkedIn profile, consider checking out resources on creating a group in LinkedIn or getting started writing on Medium. You can also explore external resources such as impactful LinkedIn headline examples or tips for optimizing your LinkedIn headline for recruiters. Additionally, you might find value in understanding the LinkedIn “Open to Work” feature and how to effectively utilize it in your job search strategy.