

Struggling with Windows displaying in the wrong language? Whether you bought a computer from another country or accidentally changed your settings, switching your Windows display language is easier than you might think.
In this guide, you’ll learn how to change both your system display language and keyboard layout in Windows 10 and 11. The whole process takes about 10-15 minutes, and you won’t even need to restart your computer. A quick sign-out does the trick.

What is Windows Display Language?
Your Windows display language (also called the system language) is what controls the text you see in Windows menus, settings, File Explorer, and built-in apps like Calculator and Paint. Think of it as the language Windows uses to “talk” to you.
Key things to know:
- System-wide change: Changes everything from the Start menu to error messages
- Language packs required: Windows downloads about 100-500MB of files for each language
- 100+ languages available: From Arabic to Vietnamese, Windows supports most major languages
- No restart needed: Just sign out and back in to apply changes
How to Change Your Windows Display Language
The process is nearly identical for Windows 10 and 11. Here’s how to switch your system language:
Step 1: Open Language Settings
Press Windows + I to open Settings, then navigate to Time & language > Language & region.
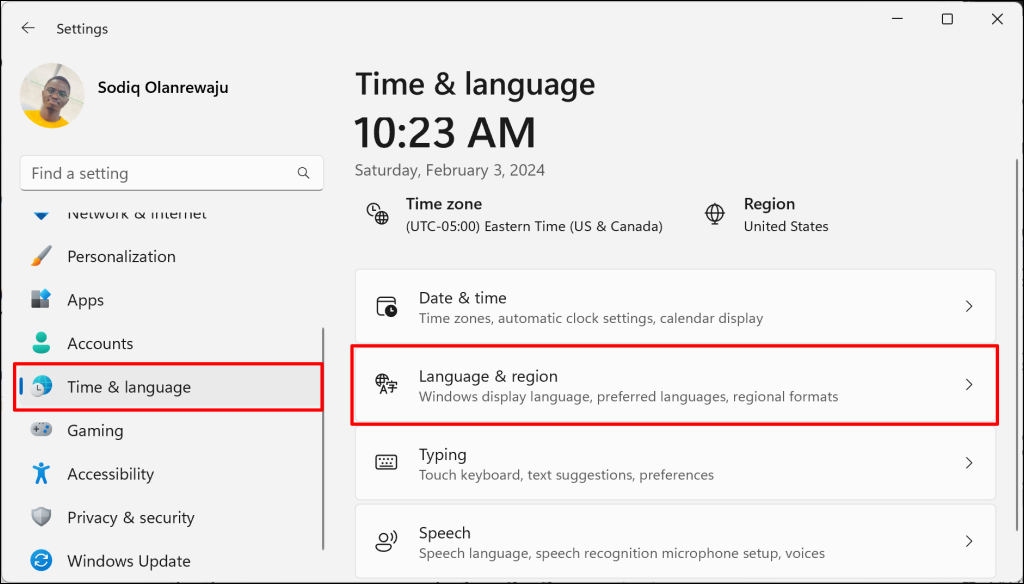
On Windows 10: Go to Start > Settings > Time & Language > Language instead.
Step 2: Check if Your Language is Already Available
Look at the Windows display language dropdown. If your preferred language is already there, select it and jump to Step 7. If not, you’ll need to install it first.
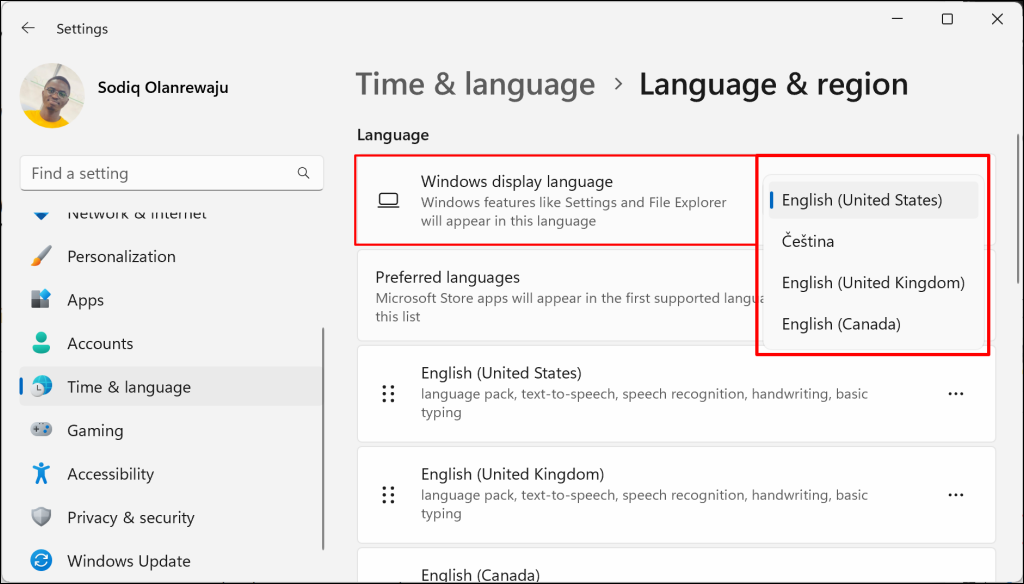
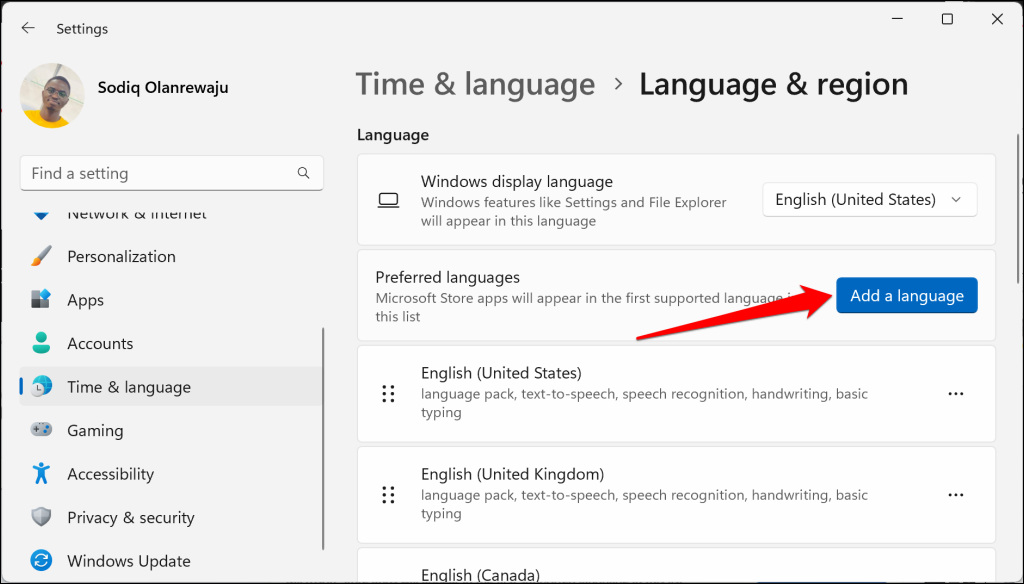
Step 3: Add a New Language
Click Add a language in the Preferred languages section.
Step 4: Choose Your Language
Browse the list or use the search box to find your language, then click Next.
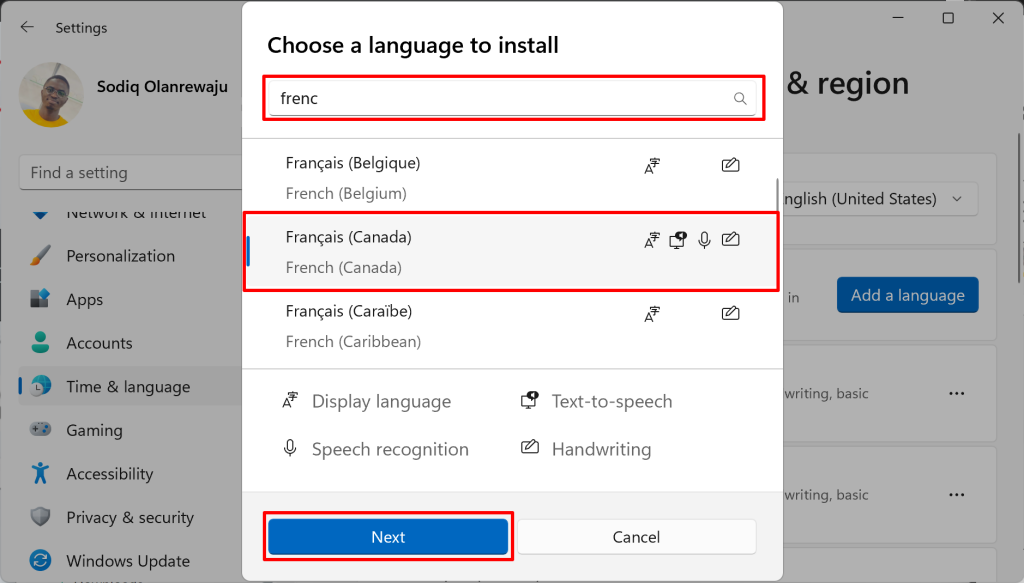
Step 5: Configure Language Features
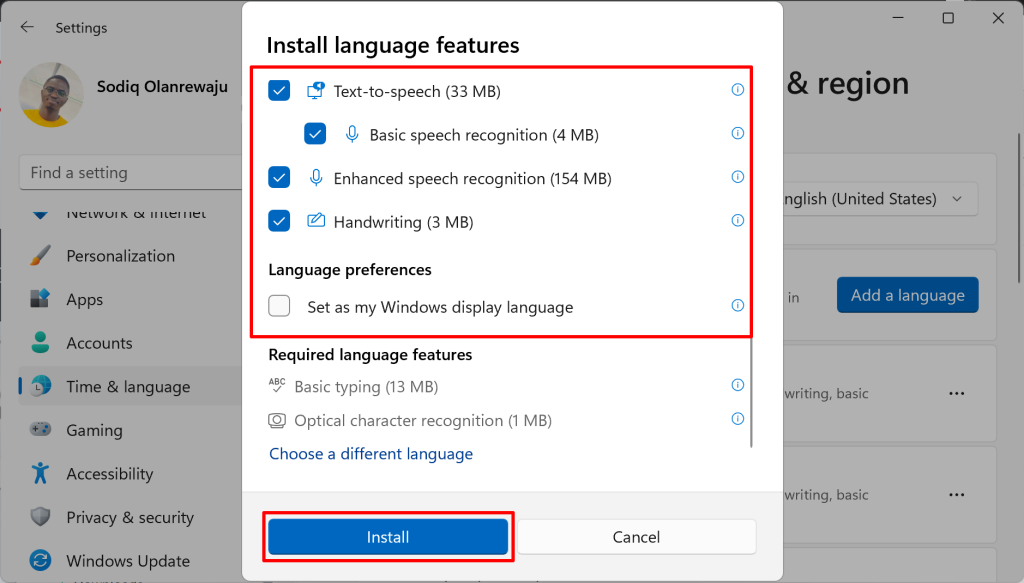
Here’s where you choose what gets installed. Make sure to check Set as my Windows display language if you want this to become your main system language right away. You can also add optional features like:
- Text-to-speech: For screen readers and voice features
- Handwriting: If you have a touchscreen or stylus
- Basic typing: Essential keyboard support (usually checked by default)
Click Install when you’re ready.
Step 6: Wait for Installation
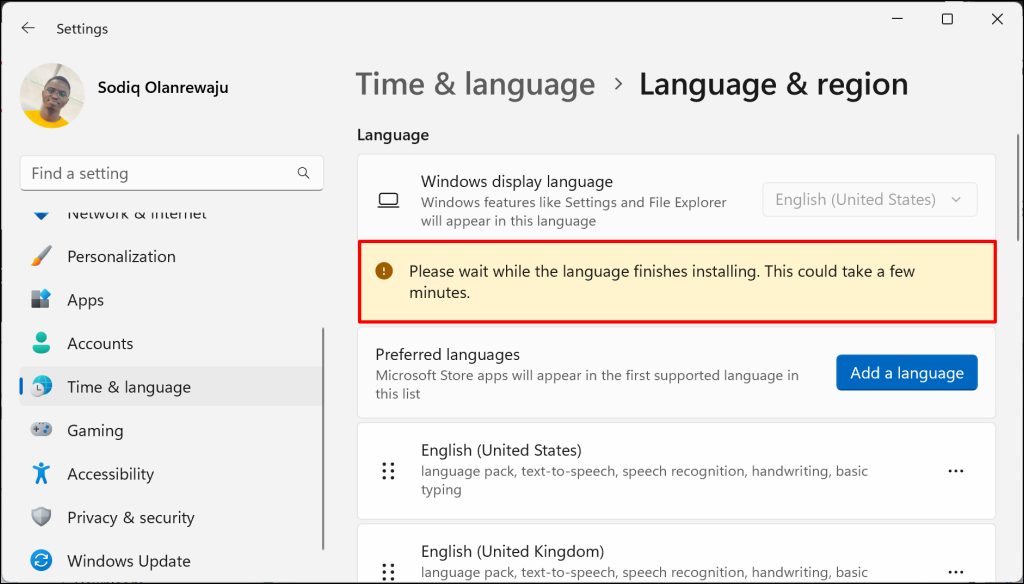
Windows will download and install the language pack. This usually takes 5-30 minutes depending on your internet speed and which features you selected. You can keep using your computer while this happens.
Step 7: Set as Display Language (if needed)
If you didn’t check the Set as my Windows display language box earlier, you can still change it now. Just select your new language from the Windows display language dropdown.
Step 8: Sign Out to Apply Changes
Windows will show a Sign out now button. Click it to apply your language change. Don’t worry, this just closes your current session and brings you back to the login screen. All your files and programs will be exactly where you left them.
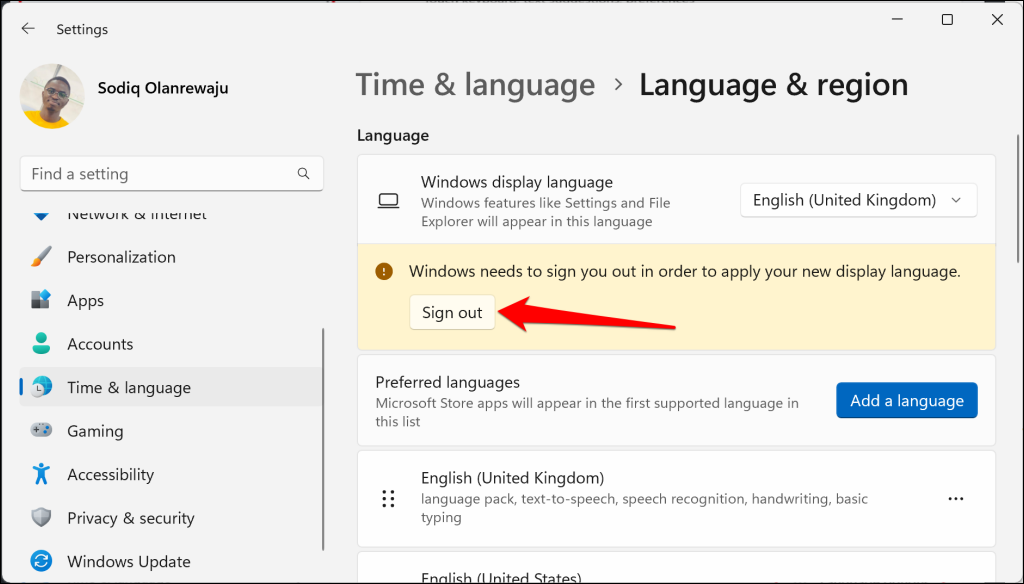
When you sign back in, Windows should be displaying in your new language!
How to Change Your Keyboard Language
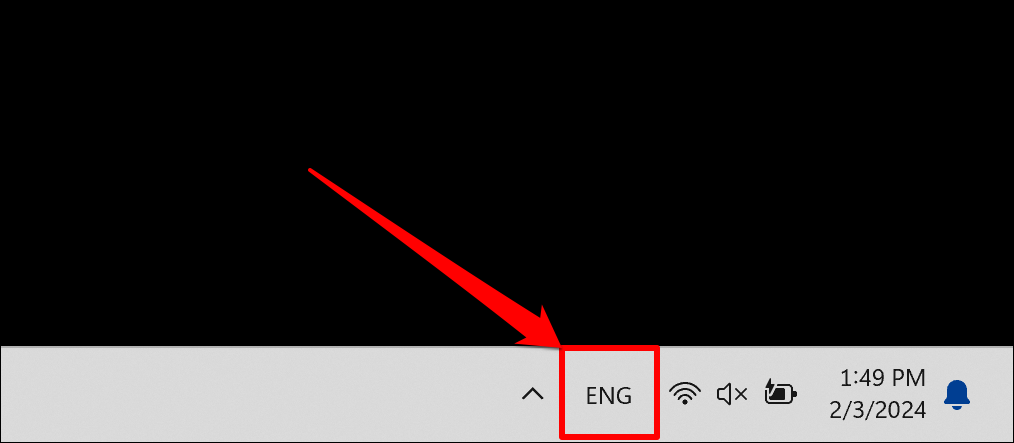
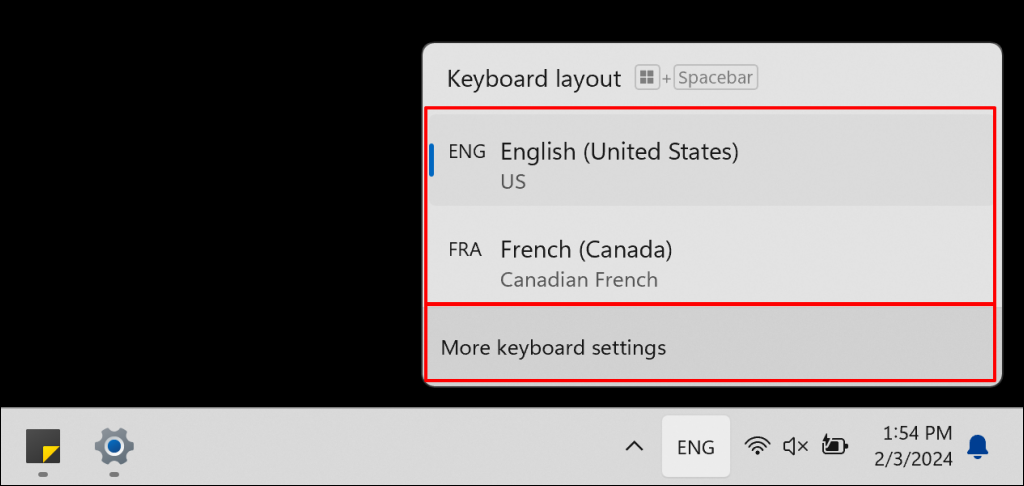
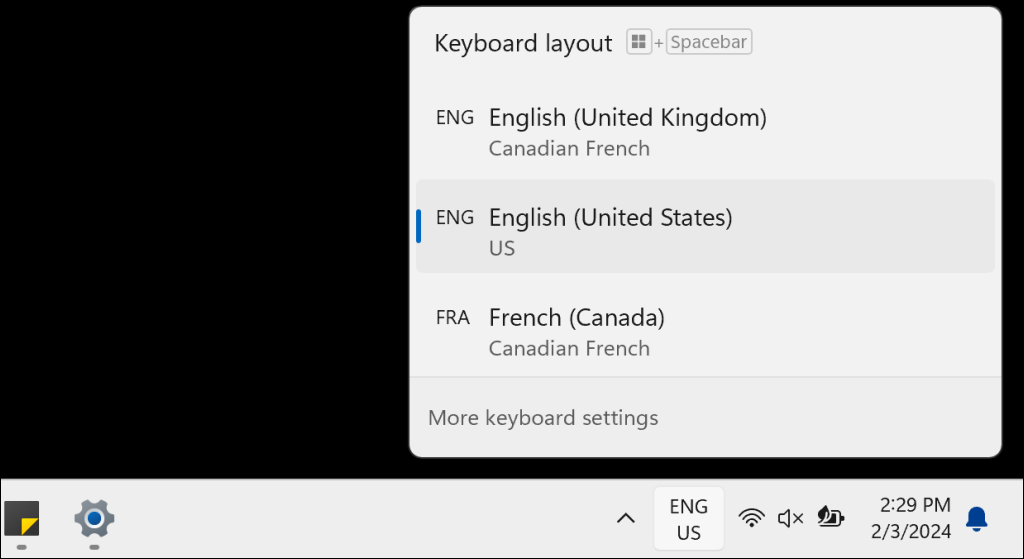
Your keyboard language is different from your display language. It controls what characters appear when you type. Windows shows your current keyboard language in the taskbar (it looks like a two-letter code like “EN” for English).
Quick Keyboard Switching
The fastest way to switch between installed keyboard languages is with keyboard shortcuts:
- Windows + Space: Cycles through all your keyboard languages
- Alt + Shift: Alternative shortcut that does the same thing
You can also click the language code in your taskbar to see a list of available keyboards.
Adding New Keyboard Layouts
If you need a keyboard layout that isn’t already installed, here’s how to add it:
Step 1: Access Language Options
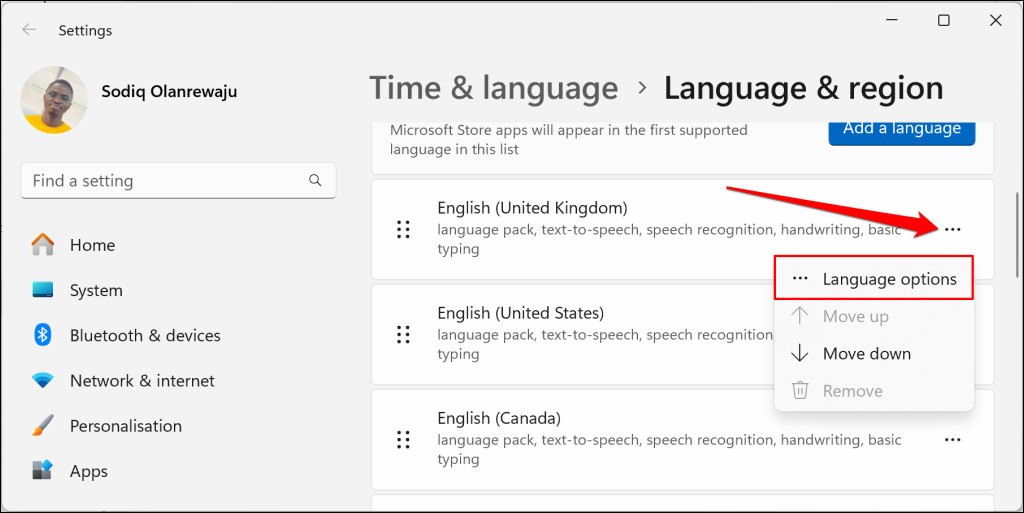
Go to Settings > Time & language > Language & region. Find your language in the Preferred languages list, click the three-dot menu next to it, and select Language options.
Step 2: Add a Keyboard
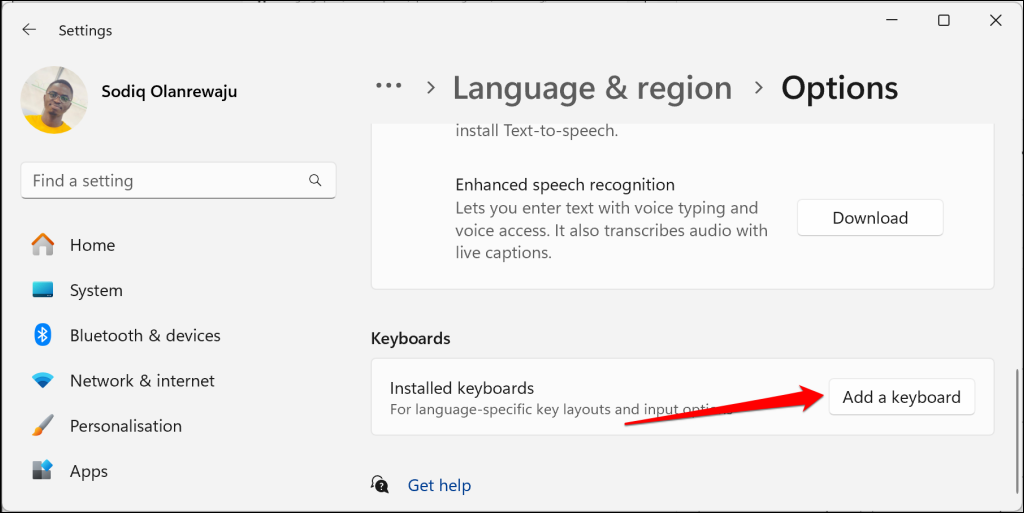
In the Keyboards section, click Add a keyboard.
Step 3: Choose Your Layout
Select the keyboard layout you want from the list. For example, if you’re typing in Spanish, you might want the “Spanish (International Sort)” layout for easy access to accented characters.
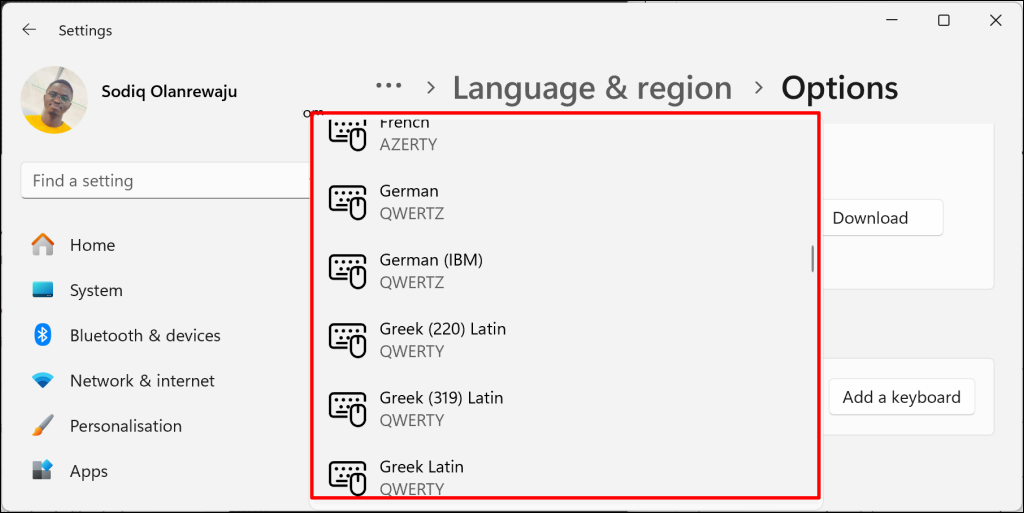
Your new keyboard layout should now appear in the taskbar menu.
Managing Language Priority
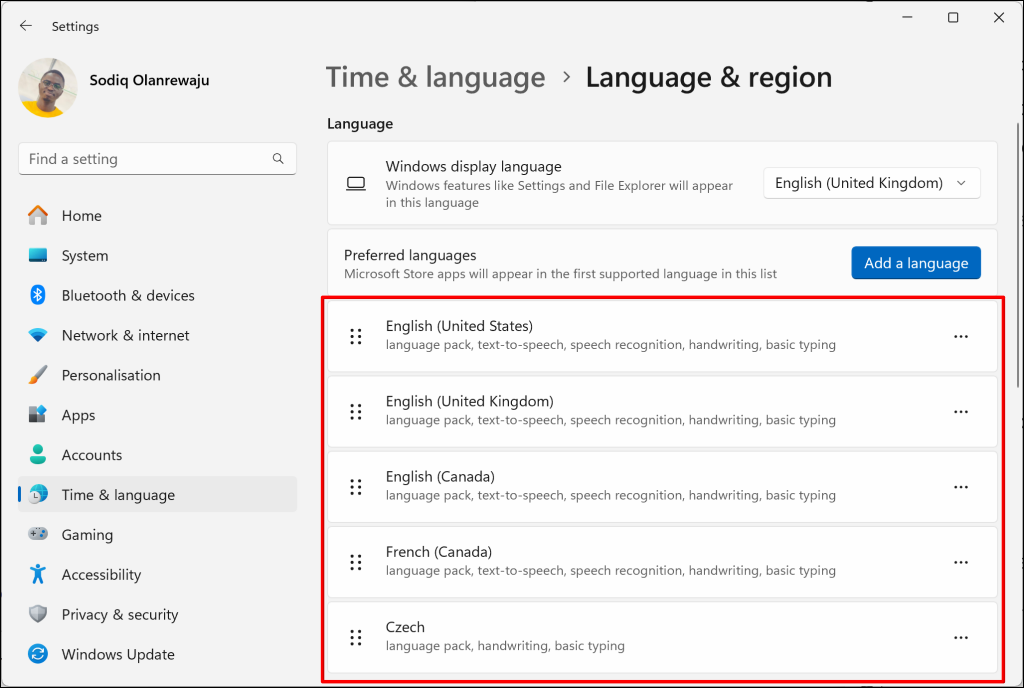
Windows uses your Preferred languages list to decide which keyboard layout to use by default. You can reorder this list by dragging languages up or down in Settings > Time & language > Language & region.
Tips and Troubleshooting
Common Issues
Problem: Some parts of Windows are still in the old language
This is pretty common, especially in admin settings or older apps. To fix it:
- Sign out and back in a couple more times
- Check if Windows has any pending updates (Settings > Windows Update)
- For stubborn cases, restart your computer completely
Problem: Language download keeps failing
Usually a network issue. Try:
- Check your connection: Make sure you have a stable internet connection
- Disable VPN: VPNs can sometimes interfere with Microsoft downloads
- Try later: Microsoft’s servers occasionally get overloaded
Problem: The sign-out button doesn’t appear
Just sign out manually: Click Start > Power > Sign out. The language change will still apply.
Problem: New users still see the old language
The Welcome screen and new user accounts require additional steps. You’ll need to use PowerShell with admin privileges and run Copy-UserInternationalSettingsToSystem -WelcomeScreen $True -NewUser $True, then restart.
Pro Tips
- Save time with shortcuts: Remember
Windows + Spaceto quickly switch keyboards while typing - Per-app keyboards: Windows remembers which keyboard you used in each app, so you can have English in your browser and Spanish in Word
- Remove unused languages: Clean up your language list by clicking the three-dot menu next to any language and selecting Remove
- Download over Wi-Fi: Language packs are big files, so avoid using cellular data if possible
Your Windows, Your Way
Changing your Windows language doesn’t have to be a headache. Whether you’re setting up a computer for a family member who speaks another language or just want to brush up on your Spanish, these steps will get you sorted in about 15 minutes.
The best part? Once you’ve got your languages installed, switching between them is as easy as pressing Windows + Space. No more digging through settings every time you want to type in a different language!