
Creating a panoramic photo from a handful of shots is one of those things that feels way more impressive than it actually is to pull off. Seriously. Stitch together five or six overlapping photos and suddenly you’ve got a sweeping wide-angle shot that looks like it came straight from a travel magazine. And you don’t need to spend a dime to do it.
Your phone’s built-in panorama mode is fine for quick shots, but if you want real control, better quality, custom projections, 360° output, or HDR blending, you’ll want dedicated desktop or web-based software. In this guide, we’ll walk you through the best free panorama tools available in 2026, how to use them, and which one is right for your situation.
Before You Start: Tips for Taking Better Panorama Photos
The best stitching software in the world can’t save a bad set of photos. Before you load anything into a program, keep these tips in mind when shooting:
- Keep your settings consistent: Lock your exposure, white balance, and focus before you start shooting. If your camera auto-adjusts between frames, you’ll end up with mismatched brightness and color that’s a nightmare to fix later. Use manual mode or AE lock.
- Overlap each shot by 30–50%: The software needs to find matching features between adjacent photos to stitch them together. Too little overlap and it’ll fail, or worse, produce obvious seams. Drone photographers often go even higher (60–70%).
- Keep the camera level: If you’re shooting a horizontal panorama, keep the camera at the same height for every shot. Moving up or down between frames makes alignment much harder.
- Shoot in portrait orientation: Rotating your camera vertically for each shot gives you more vertical resolution in the final panorama. It takes more frames, but the result is noticeably sharper.
- Rotate around the lens, not your body: If you’re using a tripod, try to rotate the camera around the lens’s nodal point (the optical center). This minimizes parallax, the misalignment that happens when nearby and distant objects shift relative to each other as you move.
Here’s an example of the kind of wide panoramic result you can create from a set of overlapping photos:

Now let’s get into the tools.
1. Hugin (Best Free Desktop Option, Windows, macOS, Linux)
Hugin is the gold standard for free panorama stitching in 2026, and honestly, it holds its own against paid tools too. Recent testing has shown Hugin outperforming even PTGui (a popular paid option) in reliability, with fewer stitching errors on tricky sets like drone photos. It supports a huge range of projection types, handles HDR panoramas, and runs on Windows, macOS, and Linux.
The catch? It can look a bit intimidating at first. But stick with the Assistant tab when you’re starting out and it’s actually pretty straightforward. Think of the advanced tabs as bonus features you can explore once you’re comfortable.
How to Create a Panorama with Hugin
Step 1: Download and Install Hugin
Head to the official Hugin download page and grab the installer for your OS. Install it like any standard desktop app, nothing unusual here.
Step 2: Open Hugin and Load Your Images
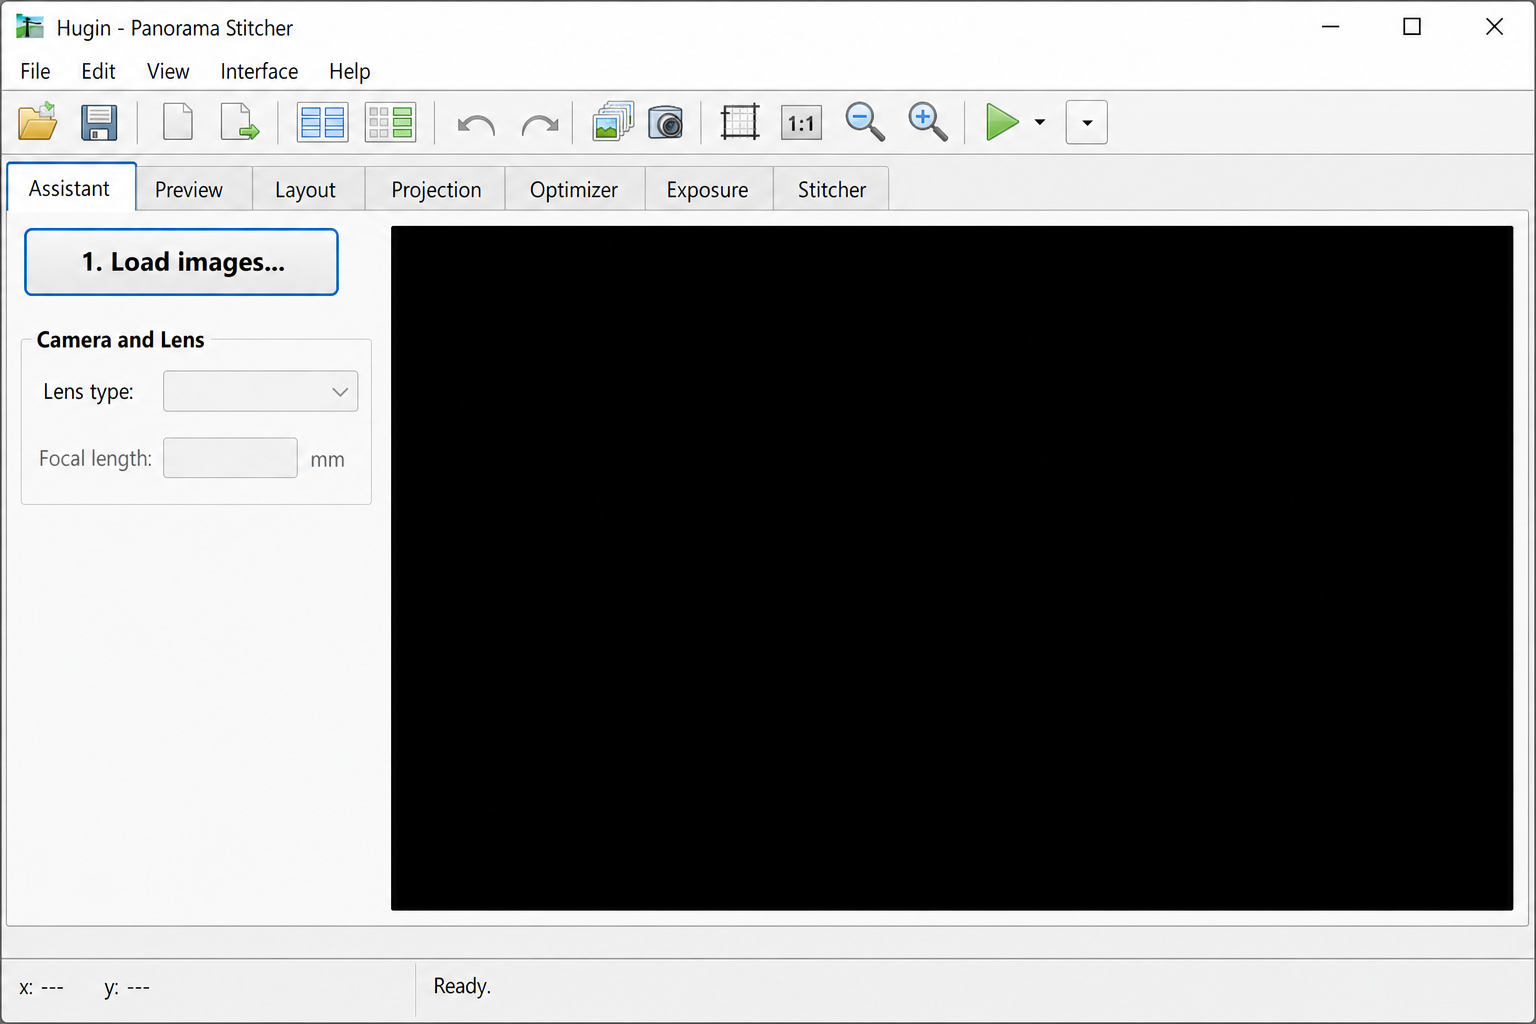
Launch Hugin. You’ll land on the Assistant tab by default, that’s exactly where you want to be. Click 1. Load images… and select all the photos you want to stitch.
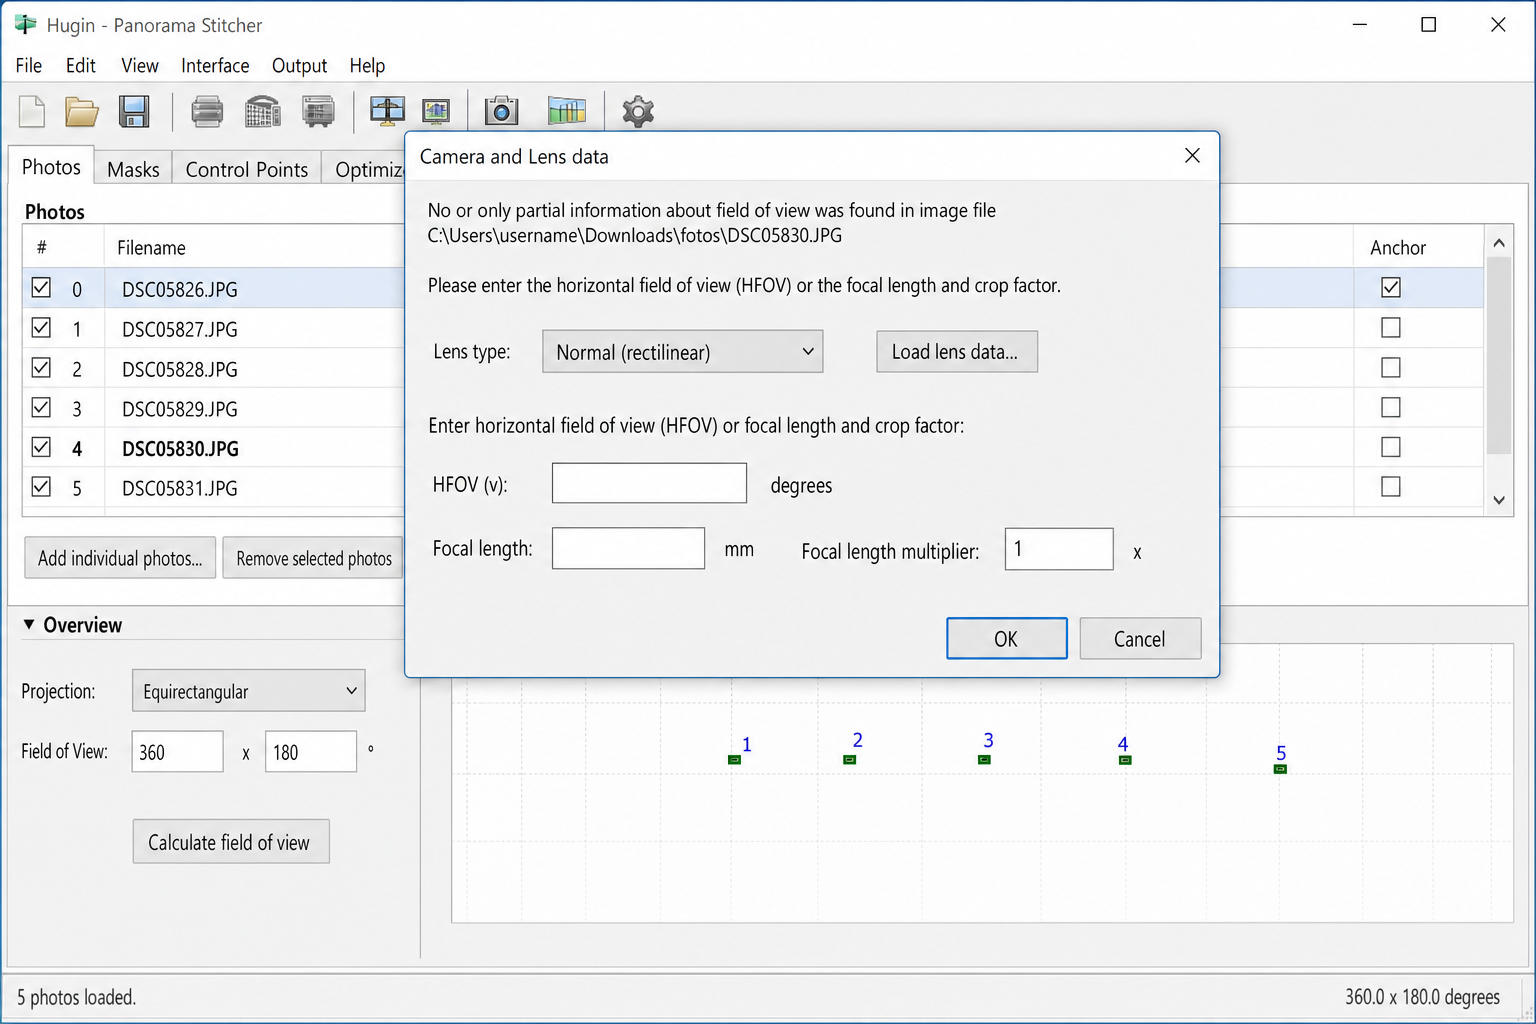
If Hugin asks about Lens type or Focal length, it’s pulling that info from your photo’s EXIF data (the technical details stored automatically by your camera). For most modern cameras and phones, it’ll fill this in correctly. If it can’t find the data, which can happen with some older cameras or manually-set lenses, just enter the focal length from your camera’s specs. For a typical smartphone, something in the 26–28mm range is usually a safe starting point.
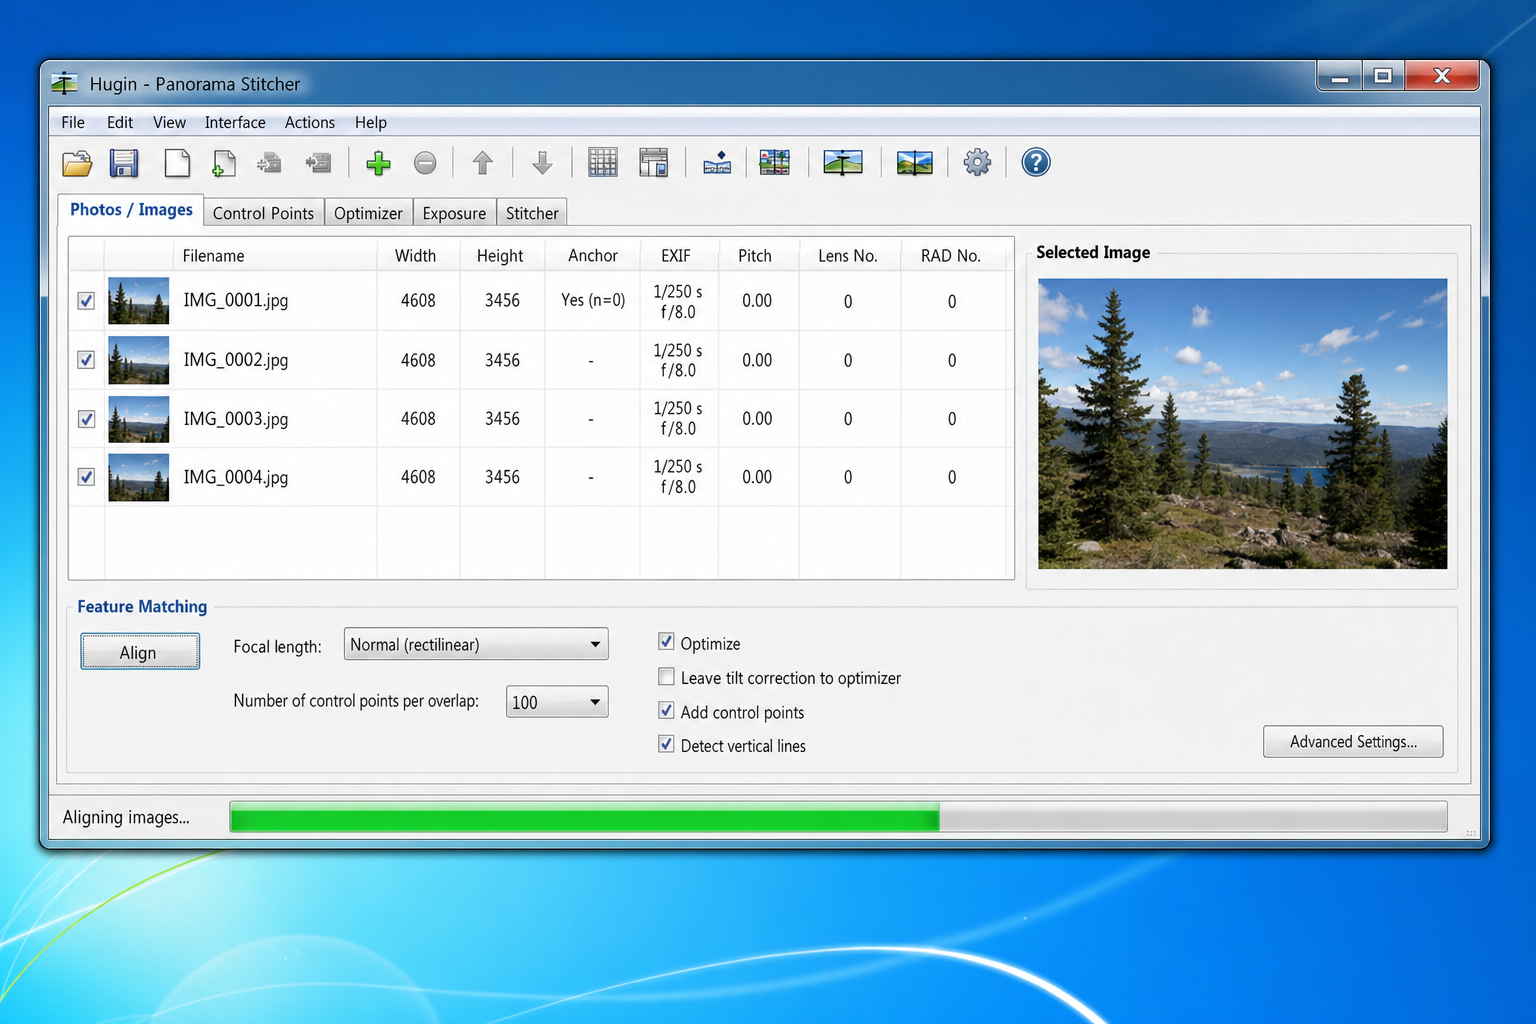
Step 3: Align Your Images
Once your photos are loaded, click 2. Align…. Hugin will analyze the overlapping areas between your photos and create control points, basically matching landmarks it uses to line everything up. This step can take a minute or two depending on how many photos you have, so be patient.
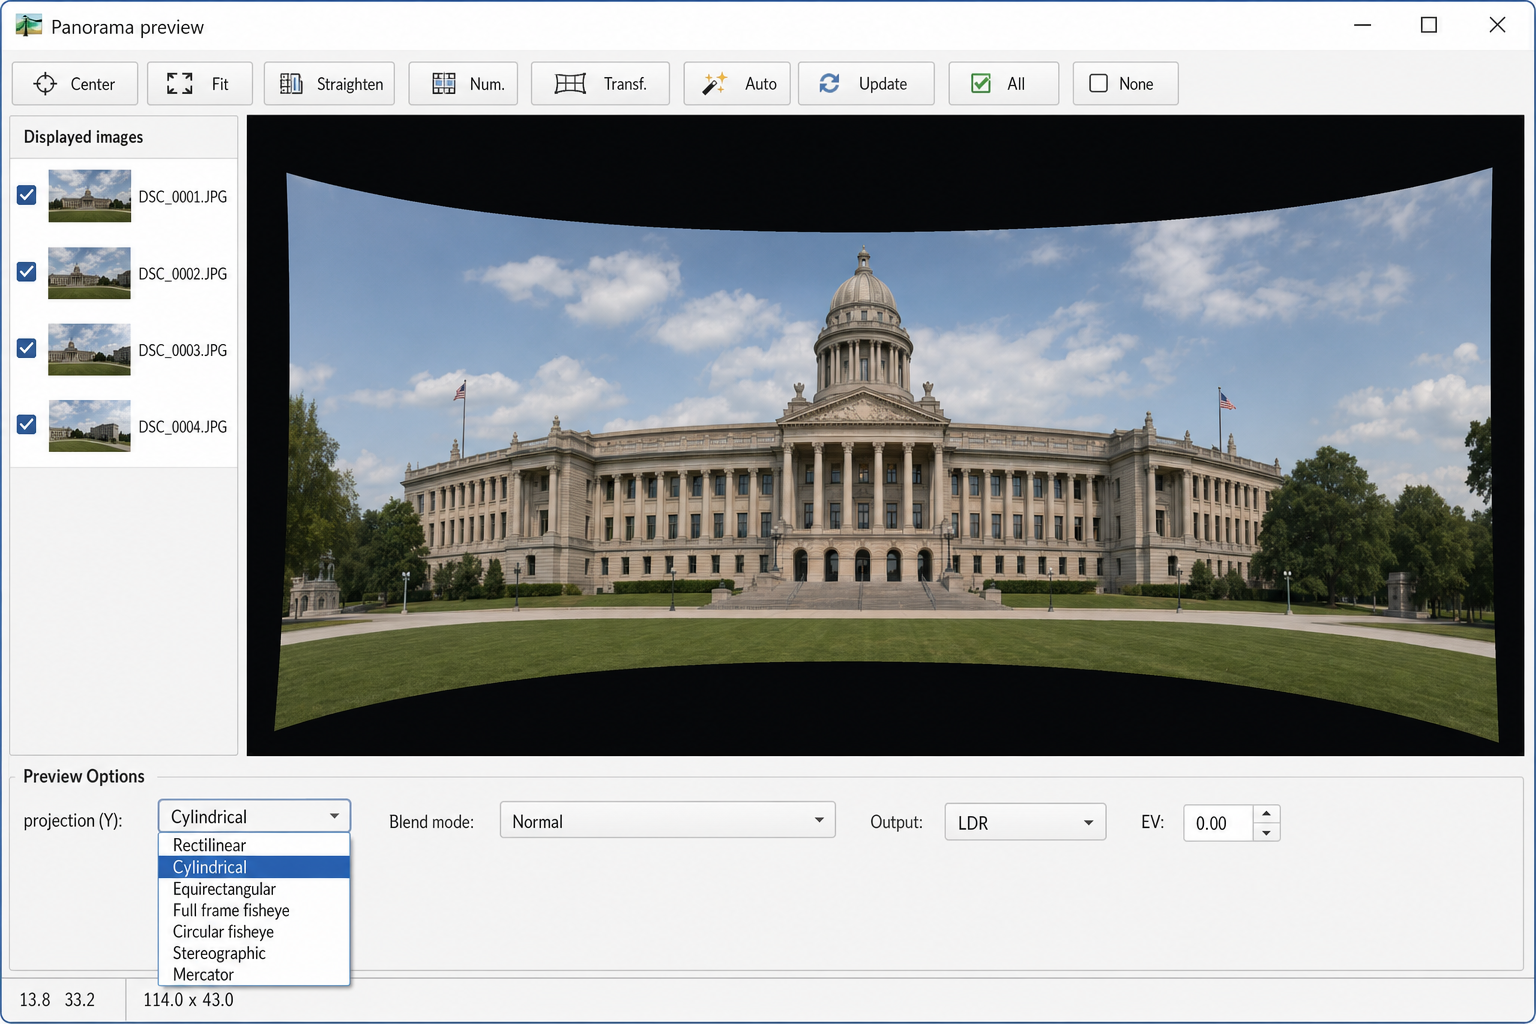
Step 4: Preview and Adjust
After alignment, Hugin will open a preview window. This is where things get interesting. Check the panorama for any obvious seams or misalignments. You can also try different Projection types here:
- Rectilinear: Good for panoramas up to about 100–120° wide. Straight lines stay straight, but edges can stretch.
- Cylindrical: Great for wide horizontal landscapes. Verticals stay straight, and it handles a wider field of view than rectilinear.
- Equirectangular: The go-to for full 360°×180° panoramas, the kind used in VR viewers and 360° photo platforms.
If something looks off, don’t panic. You can switch to the Control Points tab to manually add or fix matching points between problem images, then re-run the optimizer. It sounds technical, but Hugin walks you through it.
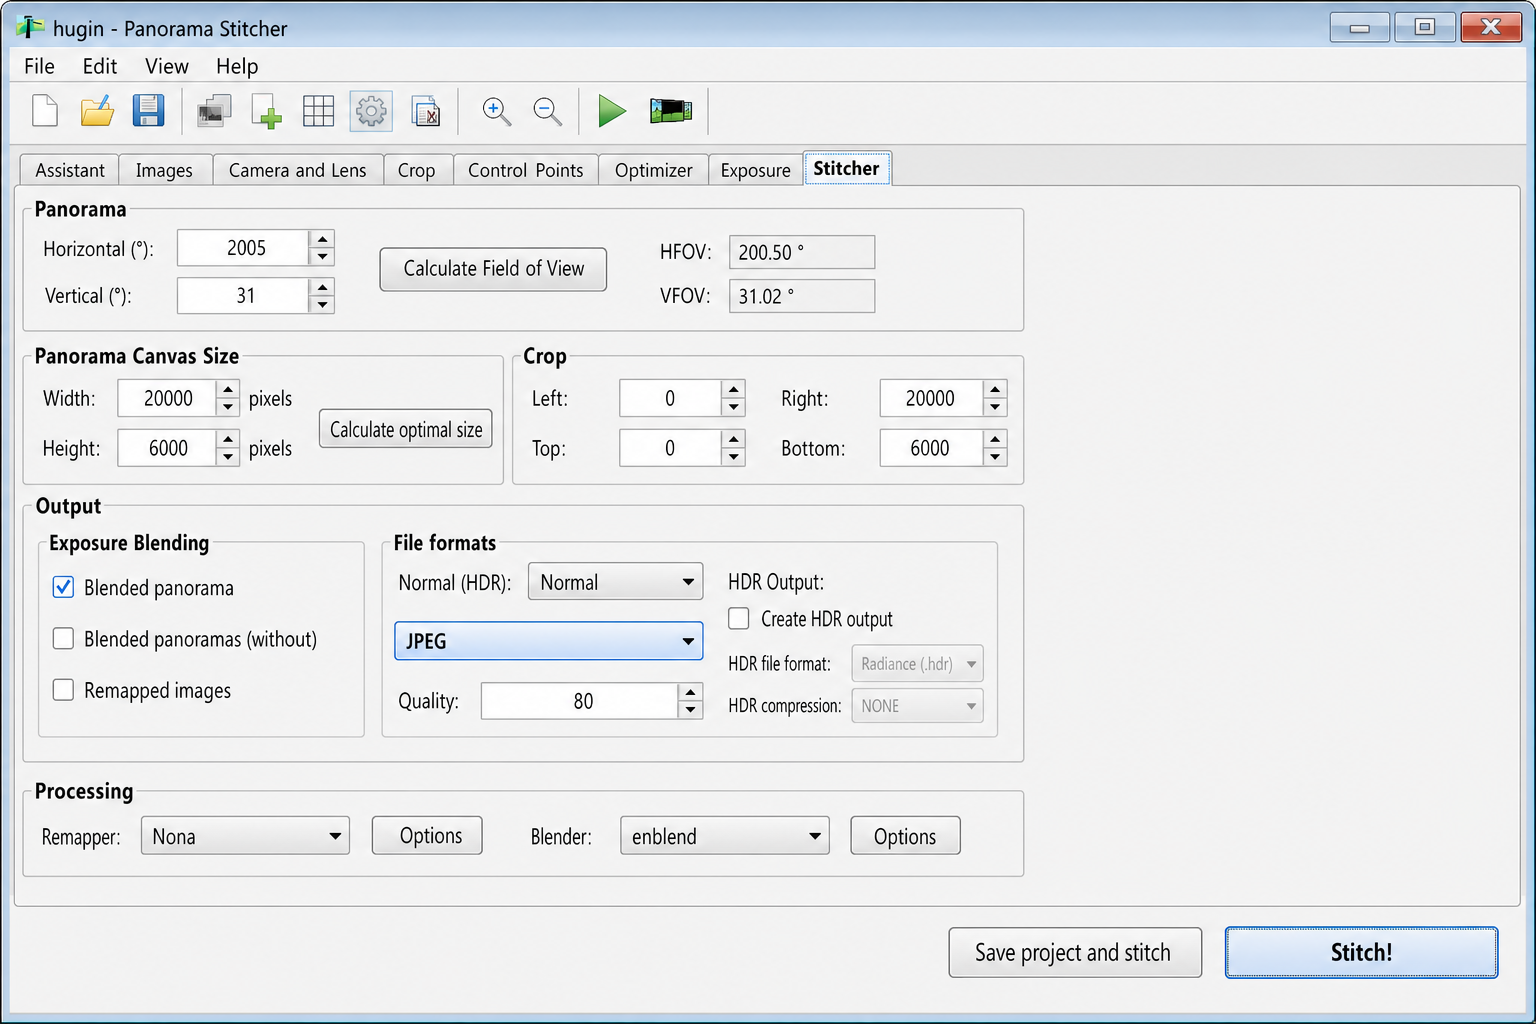
Step 5: Stitch and Export
Head to the Stitcher tab. Here you can:
- Set your output format (JPEG for sharing, TIFF for editing, EXR for HDR)
- Adjust the output resolution
- Use Auto crop to trim the black borders
When you’re happy with the settings, click Stitch! and wait for Hugin to do its thing. The final panorama will be saved to your chosen folder.
Pro tip for HDR panoramas: If you shot bracketed exposures (multiple shots at different exposures of the same scene), Hugin can handle those too. Load all the bracketed frames and enable exposure fusion in the project settings. This is actually one area where Hugin shines compared to some paid alternatives.
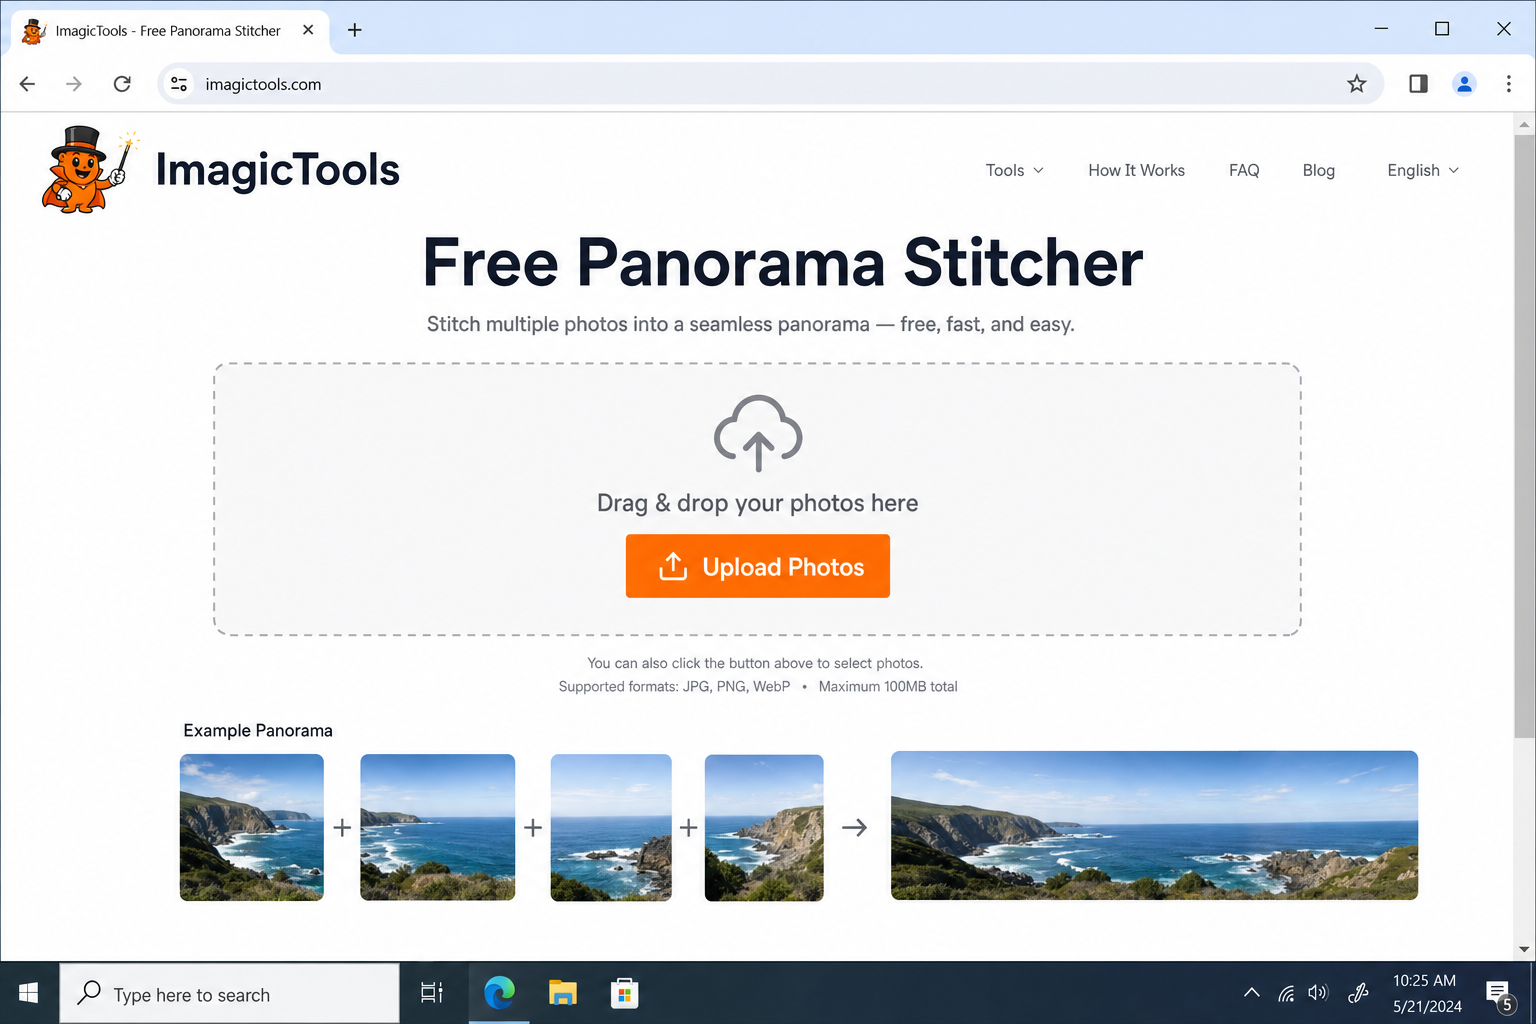
2. ImagicTools Panorama Stitcher (Best No-Install Option)
Don’t want to install anything? The ImagicTools free panorama stitcher runs entirely in your browser, with no download or account required. Just drag your photos in, let it process, and download the result. It’s not as powerful as Hugin, but for casual panoramas it gets the job done surprisingly well.
How to Use ImagicTools Panorama Stitcher
Step 1: Open the Tool
Navigate to imagictools.com/free-panorama-stitcher-tool in any modern browser (Chrome, Firefox, Edge, or Safari all work fine).
Step 2: Upload Your Photos
The page shows multiple upload slots. Drag and drop your photos into the slots, or click each one to browse for your files. The tool accepts standard formats like JPG and PNG.
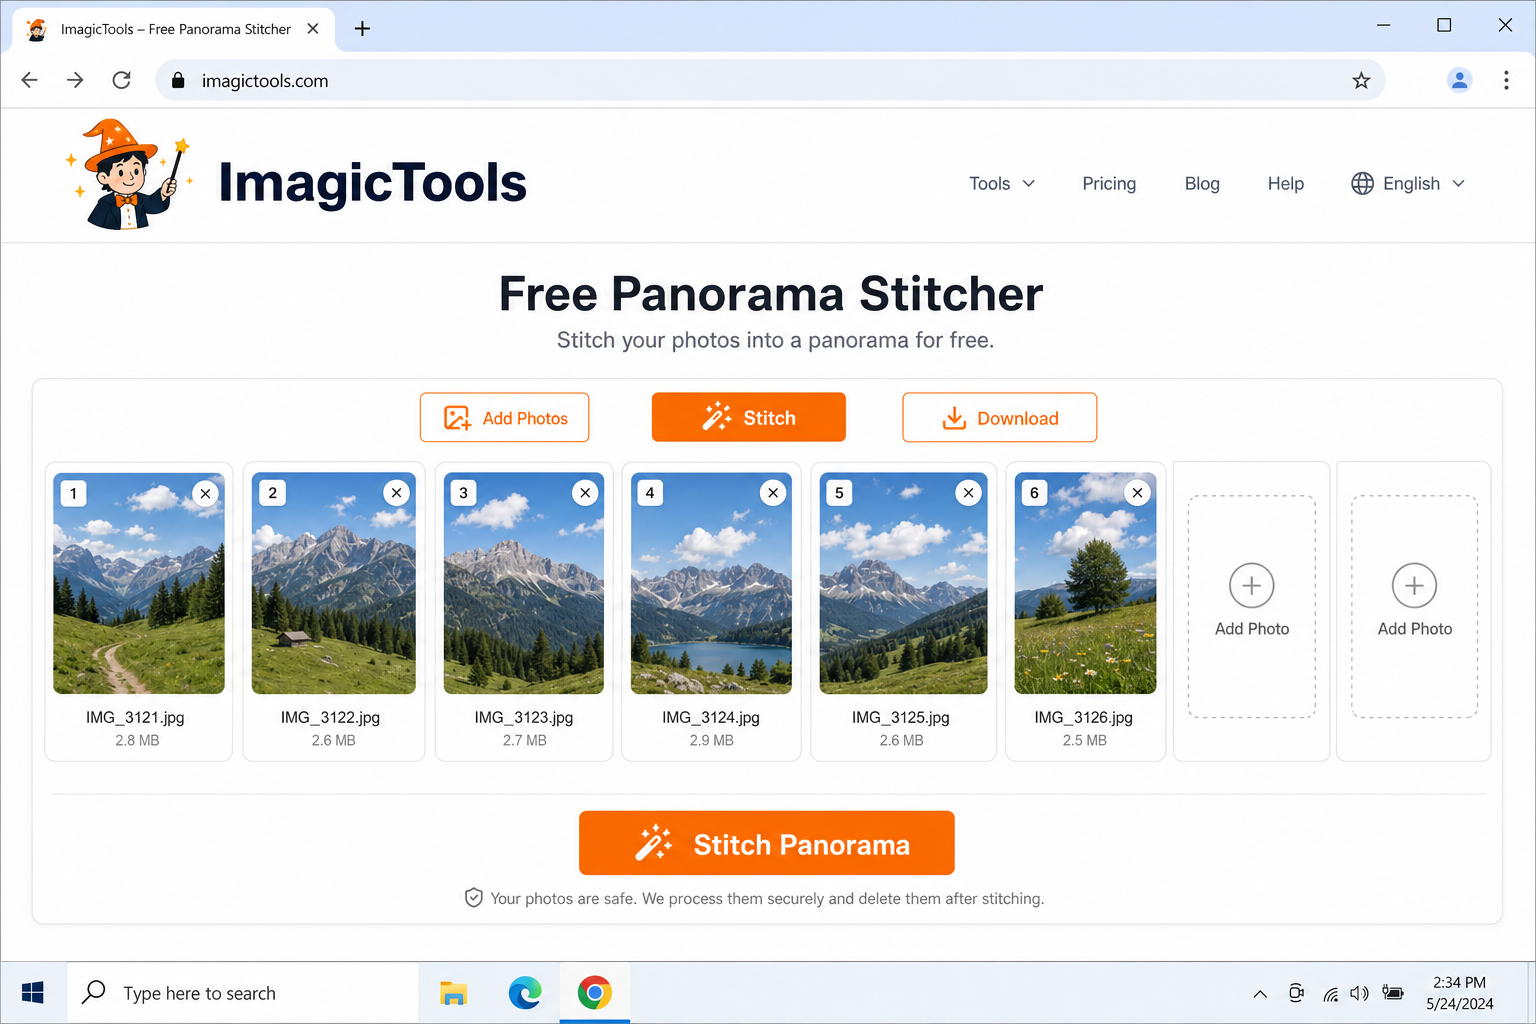
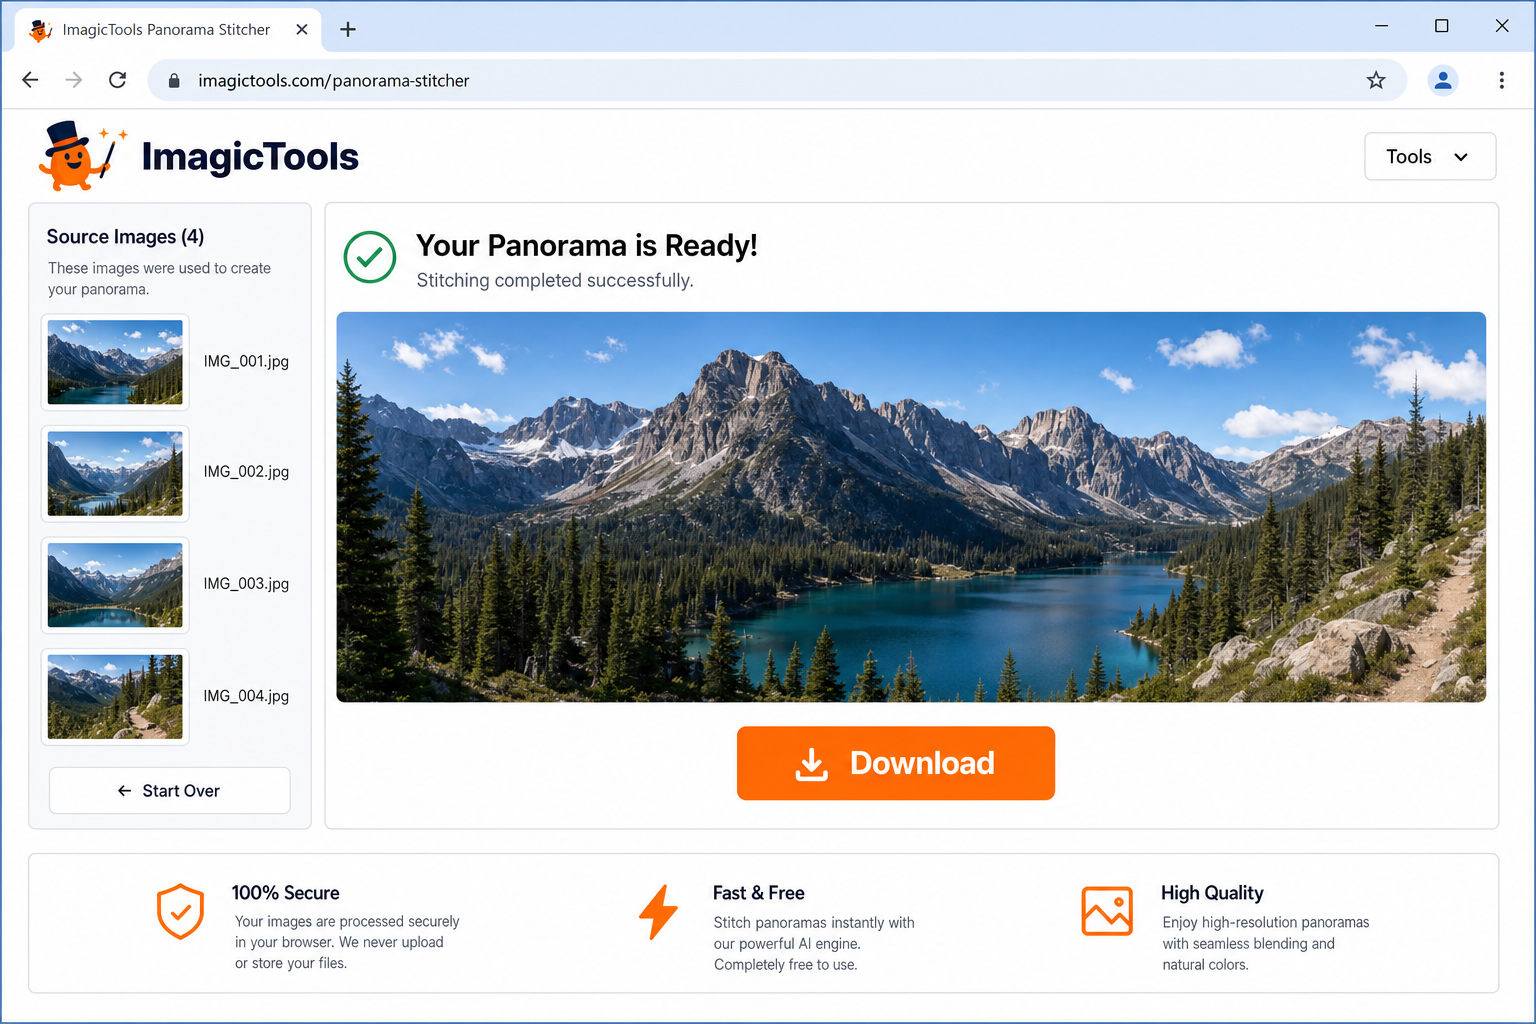
Step 3: Stitch and Download
Click Create Panorama. One thing worth noting: ImagicTools processes your images entirely in the browser — your photos are not uploaded to any external server, which is a genuine privacy plus. Processing time depends on your image sizes and your device’s speed, but it’s usually pretty quick for a handful of photos. When it’s done, download your finished panorama.
A couple of things worth knowing before you use any web-based tool: even with client-side processing, it’s still good practice to be mindful about using sensitive or private photos with online tools in general. There are also usually unspoken limits on file size and number of images. For anything beyond a simple casual panorama, Hugin is the better call.
3. PhotoStitcher (Simple Windows Option)
PhotoStitcher is available in the Microsoft Store and offers a free trial via the Microsoft Store and its website, but it is primarily paid software — some features and ongoing use require a paid license. It’s significantly easier to use than Hugin. You load your photos, click stitch, and it handles the rest. The tradeoff is that you get far less control over the output, and the free trial has limitations. But if you’re on Windows and want something between “phone panorama mode” and “full Hugin workflow,” it’s worth a look.
4. For Drone and Mapping Projects: Free Photogrammetry Tools
If you only care about simple landscape panoramas, you can skip this section — this is for advanced drone mapping and 3D projects.
If you’re working with aerial drone photos or need georeferenced output (think maps, surveys, or 3D models), traditional panorama software isn’t really built for that. Photogrammetry tools — software that reconstructs scenes from overlapping photos — are a better fit. Here are the main free options:
- OpenDroneMap / WebODM (Windows, macOS, Linux, free, open source): Takes aerial photos and outputs georeferenced orthomosaics (flattened, map-accurate aerial images stitched together into a single seamless view), point clouds (dense collections of 3D data points representing the surface of a scene), and elevation models. This is the go-to for drone mapping projects.
- Meshroom (Windows, Linux, free, open source): Reconstructs full 3D models from regular photos using Structure-from-Motion (a technique that builds 3D geometry by analyzing how features move across multiple 2D photos taken from different angles). Requires an Nvidia GPU with CUDA support. Not a traditional panorama tool, but incredibly powerful for 3D scanning buildings, objects, or landscapes.
- 3DF Zephyr Free (Windows, free tier): A friendlier entry point into Structure-from-Motion (3D reconstruction from photos). The free version is capped at around 50 photos, but the wizard-based interface makes it easy to get started.
These tools are in a different category from the panorama stitchers above. They’re overkill for a typical landscape pano, but if you’re doing anything with drone mapping or 3D modeling, they’re worth knowing about.
What About Microsoft ICE?
If you’ve done any research on free panorama software, you’ve probably come across Microsoft Image Composite Editor (ICE). It used to be a solid free option, but it’s been discontinued and is no longer officially available from Microsoft. Even if you track down an old installer, it’s not a tool we’d recommend for new users in 2026. Stick with Hugin or one of the alternatives above.
Tips and Troubleshooting
Common Issues
Problem: My panorama has curved or bent horizons
This is almost always a projection mismatch. Try switching to a different projection type in Hugin’s preview window. Cylindrical works well for wide horizontal landscapes; rectilinear is better for narrower fields of view. Equirectangular is specifically for full 360° panos.
Problem: There are visible seams or ghosting in the final image
This usually comes down to one of three things: not enough overlap between shots, moving objects in the scene (people, cars, waves), or inconsistent exposure between frames. Re-shoot with 30–50% overlap and lock your exposure settings. In Hugin, you can also use the control points editor to manually fix problem areas between specific image pairs.
Problem: Hugin looks overwhelming, I don’t know where to start
Stick to the Assistant tab for your first few panoramas. It gives you a simple three-step workflow: load images, align, create panorama. Ignore all the other tabs until you’re comfortable. If you just want something even simpler, use the ImagicTools web tool for casual shots and graduate to Hugin when you want more control.
Problem: Hugin is slow or my computer crashes on large projects
High-resolution photos from modern cameras can produce enormous output files. In Hugin’s Stitcher tab, try reducing the output scale to 50–70% or export as JPEG instead of 16-bit TIFF. For very large sets (especially drone photography), OpenDroneMap/WebODM is built to handle that kind of workload.
Pro Tips
- Want to make a 360° VR panorama? Use Hugin with the Equirectangular projection and make sure you’ve captured a full sphere of images (not just a horizontal strip). Once stitched, you can load the result into a free web viewer like Pannellum to create an interactive 360° experience.
- Shoot RAW if your camera supports it: RAW files give you much more flexibility to match exposure and white balance in post before feeding the images into your stitching software. If you’re unsure how RAW compares to other editing workflows, check out this guide on Lightroom vs Photoshop.
- Use a tripod for interiors: Handheld shots work fine for outdoor landscapes with distant subjects, but for indoor panoramas with nearby objects, a tripod makes a noticeable difference in alignment quality.
Quick Comparison: Which Tool Should You Use?
| Tool | Best For | Platform | Skill Level |
|---|---|---|---|
| Hugin | Best overall free stitching, HDR, 360° | Windows, macOS, Linux | Intermediate |
| ImagicTools | Quick stitching, no install needed | Web (any browser) | Beginner |
| PhotoStitcher | Simple Windows stitching | Windows | Beginner |
| OpenDroneMap / WebODM | Drone mapping, georeferenced output | Windows, macOS, Linux | Advanced |
| Meshroom | 3D reconstruction from photos | Windows, Linux | Advanced |
Wrapping Up
For most people, Hugin is the answer. It’s free, cross-platform, genuinely powerful, and once you get past the first-time learning curve, surprisingly capable of producing professional-quality results. If you just want something dead simple with no installation, the ImagicTools web stitcher is a solid starting point — and since it processes everything locally in your browser, you don’t have to worry about your photos leaving your device. And if you’re doing anything with drone photography or 3D modeling, it’s worth exploring OpenDroneMap or Meshroom.
The good news is that you really don’t need to spend money on panorama software in 2026. The free tools have gotten that good. Start with Hugin, follow the shooting tips above, and you might be surprised how impressive your results turn out.