
Ever finished a PowerPoint presentation and thought, “I wish I could share this without everyone needing PowerPoint installed”? You’re not alone. Whether you want to upload it to YouTube, email a clean PDF that nobody can accidentally edit, or burn it to a DVD for a venue that’s stuck in the past, there’s a simple way to do each one.
The good news: modern PowerPoint (Microsoft 365, PowerPoint 2021, and PowerPoint 2019) handles most of this stuff built-in, no sketchy third-party converters required. In this guide, we’ll walk through how to convert your PowerPoint presentation to an MP4 video, a PDF document, and a DVD, on both Windows and macOS.
What You’ll Need
Before we jump in, here’s a quick checklist:
- Microsoft PowerPoint (Microsoft 365, PowerPoint 2021, or PowerPoint 2019) on Windows or macOS
- Your finished .pptx presentation file
- For DVD burning: a blank DVD disc, a DVD drive, and third-party DVD authoring software (more on that below)
One quick note: if you’re still looking for a way to convert PowerPoint to Flash, that ship has sailed. Adobe Flash was officially killed off at the end of 2020, and no modern browser or device supports it anymore. MP4 video is the replacement. It works everywhere Flash used to, and then some.
How to Convert PowerPoint to PDF
This is the easiest one, and honestly the most useful for everyday sharing. A PDF locks in your slide layouts, fonts, and formatting so everything looks exactly the way you intended, no matter what device or app the recipient uses to open it. Animations won’t carry over (PDF is static), but for sharing slides, it’s perfect.
On Windows
There are two ways to do this in PowerPoint on Windows. Both work great, so pick whichever feels more natural.
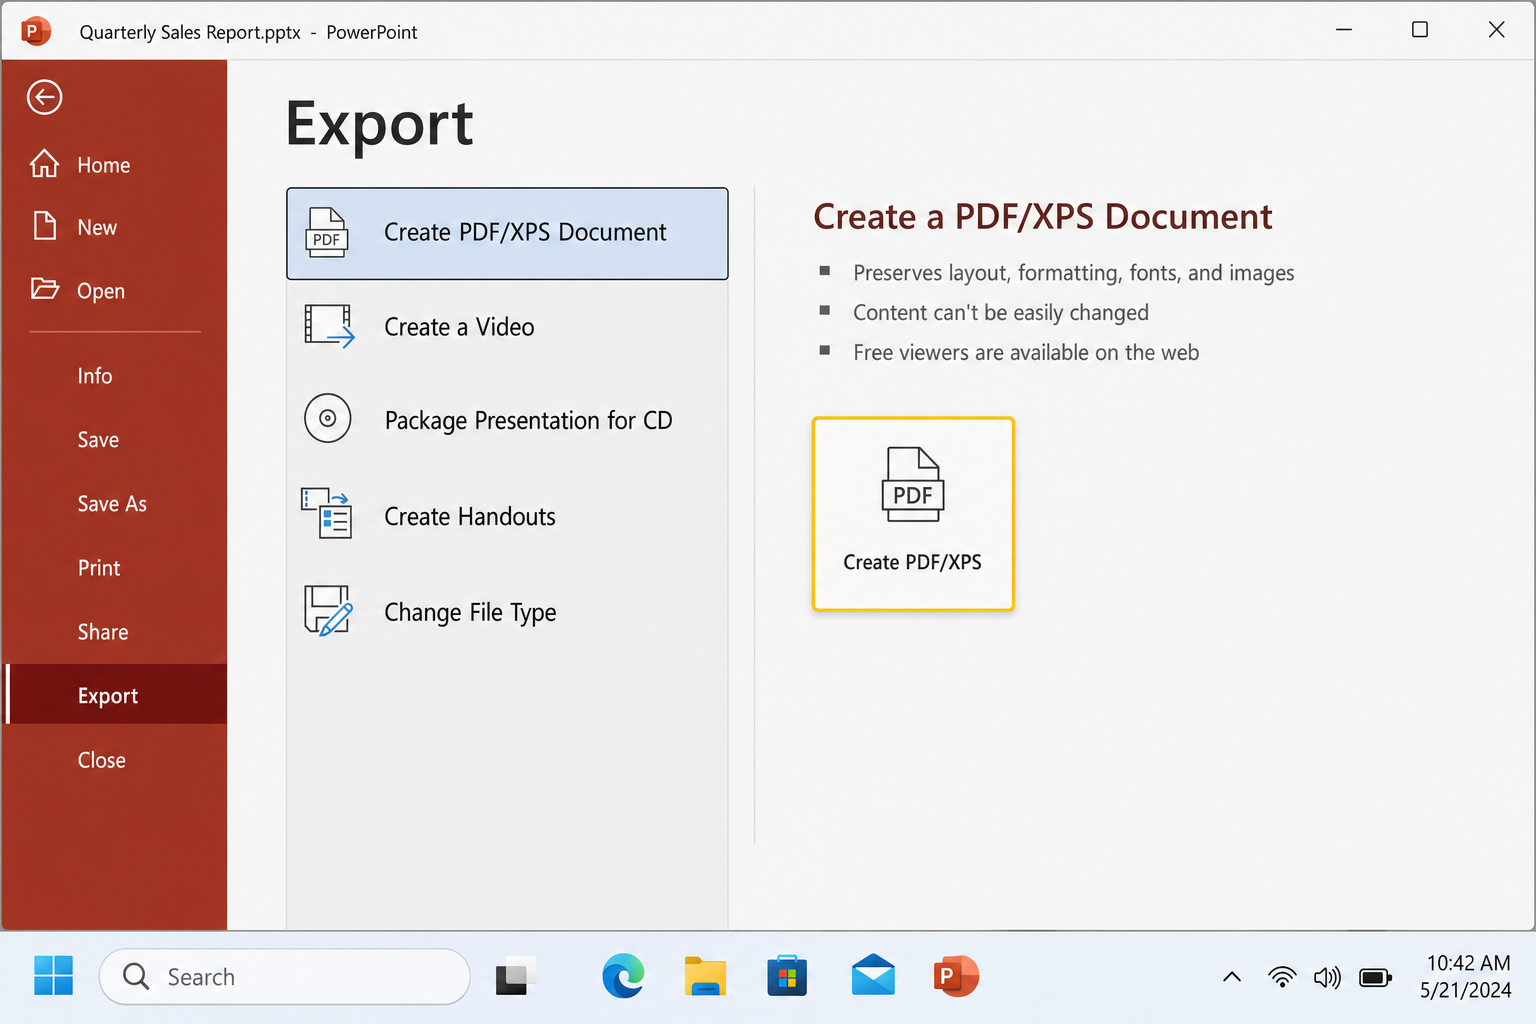
Method 1, Export (recommended):
- Open your presentation in PowerPoint.
- Click File in the top-left corner.
- Select Export from the left sidebar.
- Click Create PDF/XPS Document, then click the Create PDF/XPS button.
- Choose where to save the file, then click Publish.
Method 2, Save As:
- Click File > Save As.
- Choose your save location.
- In the Save as type dropdown, select PDF (*.pdf).
- Click Options… if you want to customize things. You can choose a specific slide range, export notes pages instead of slides, include or exclude comments, and more.
- Click Save.
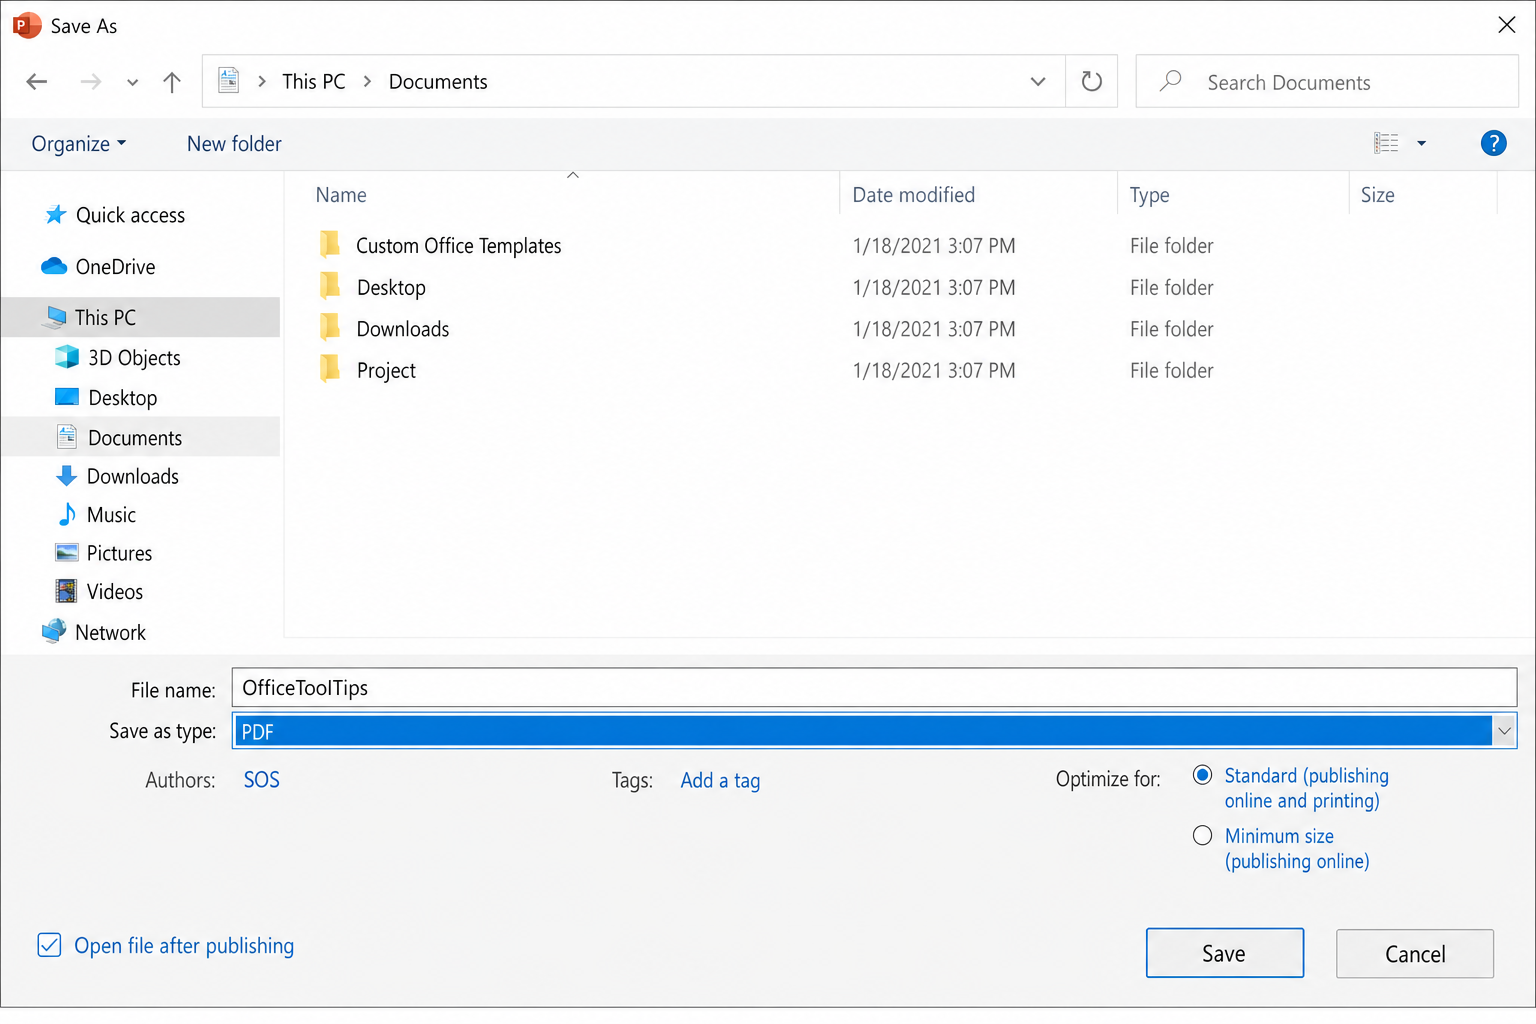
Want a smaller file size for emailing? In the Save As dialog, look for the Optimize for option and select Minimum size (publishing online) instead of Standard.
On macOS
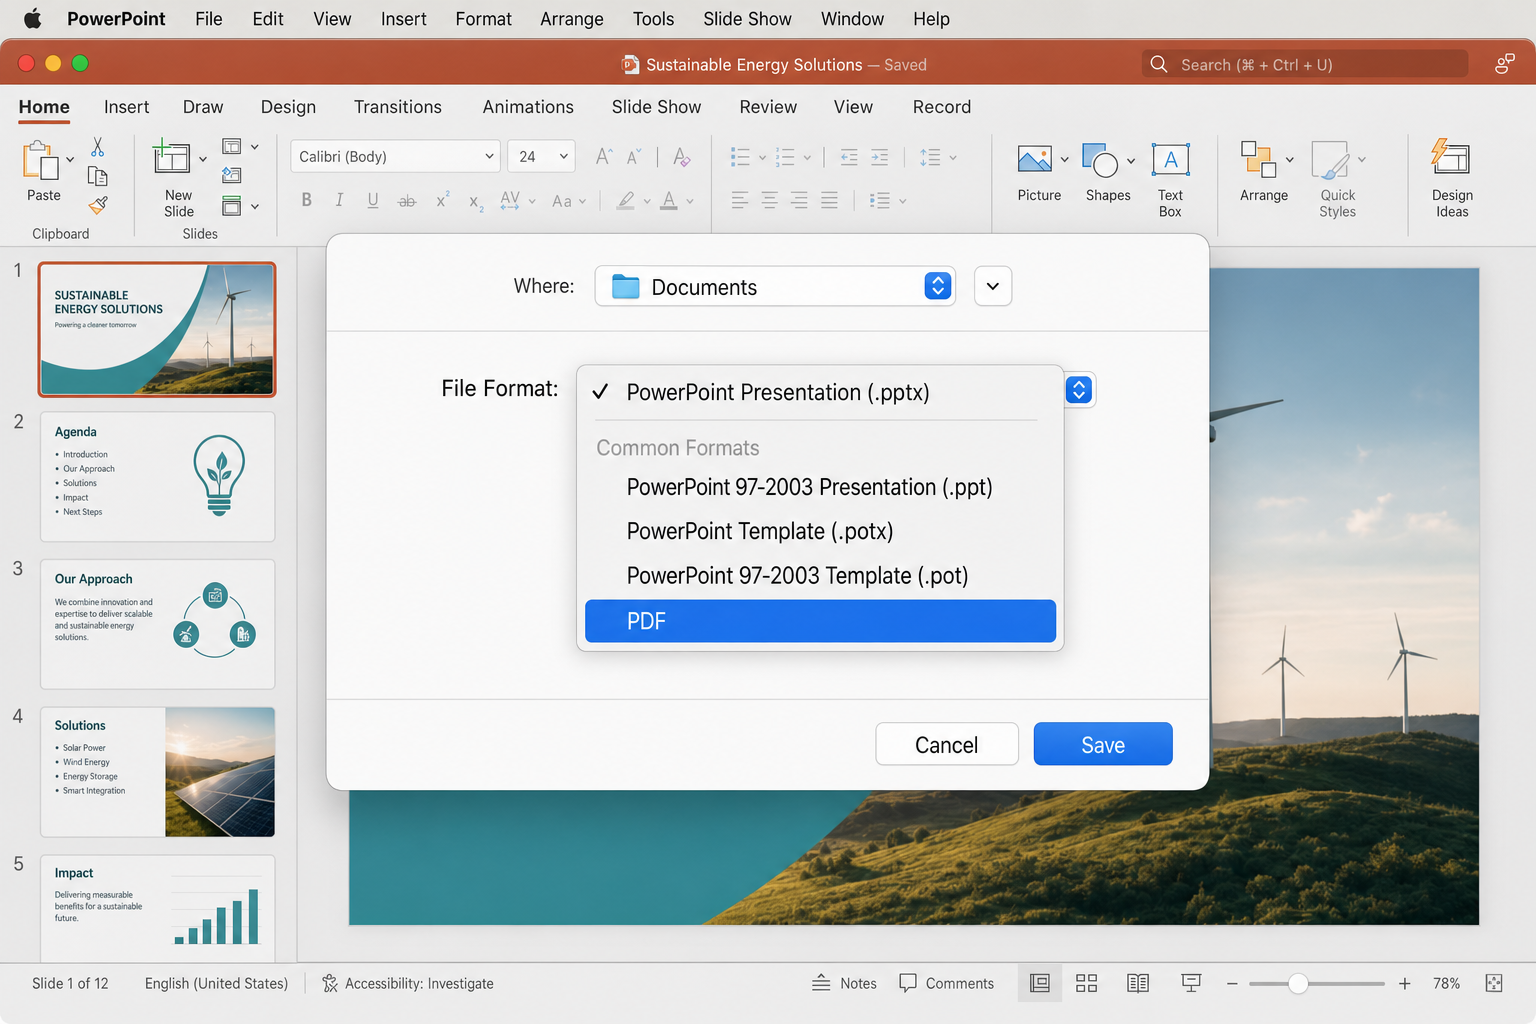
- Open your presentation in PowerPoint.
- Click File in the menu bar, then select Export…
- In the File Format dropdown, choose PDF.
- Adjust the print range if needed, then click Export.
That’s it. You’ll have a clean, shareable PDF in seconds. Just keep in mind that animations, transitions, and embedded videos won’t appear in the PDF. If those matter, video export (below) is your better option.
How to Convert PowerPoint to Video (MP4)
This one is genuinely impressive. Modern PowerPoint can export your entire presentation, including animations, transitions, narration, and all, as a proper MP4 video file, up to 4K resolution on Windows. You can upload it to YouTube, share it on social media, play it on any device, or use it as the source file for burning to DVD later.
Before you export, it’s worth setting up your slide timings. If you want the video to auto-advance through slides, you can either record narration with timings (more on that in a moment) or just set a fixed number of seconds per slide during export.
On Windows
- Open your presentation and make sure everything looks the way you want it.
- Optional but recommended: record your narration and timings by going to Slide Show > Record > Record from Beginning. This lets you talk through each slide and set the exact timing for when each one advances.
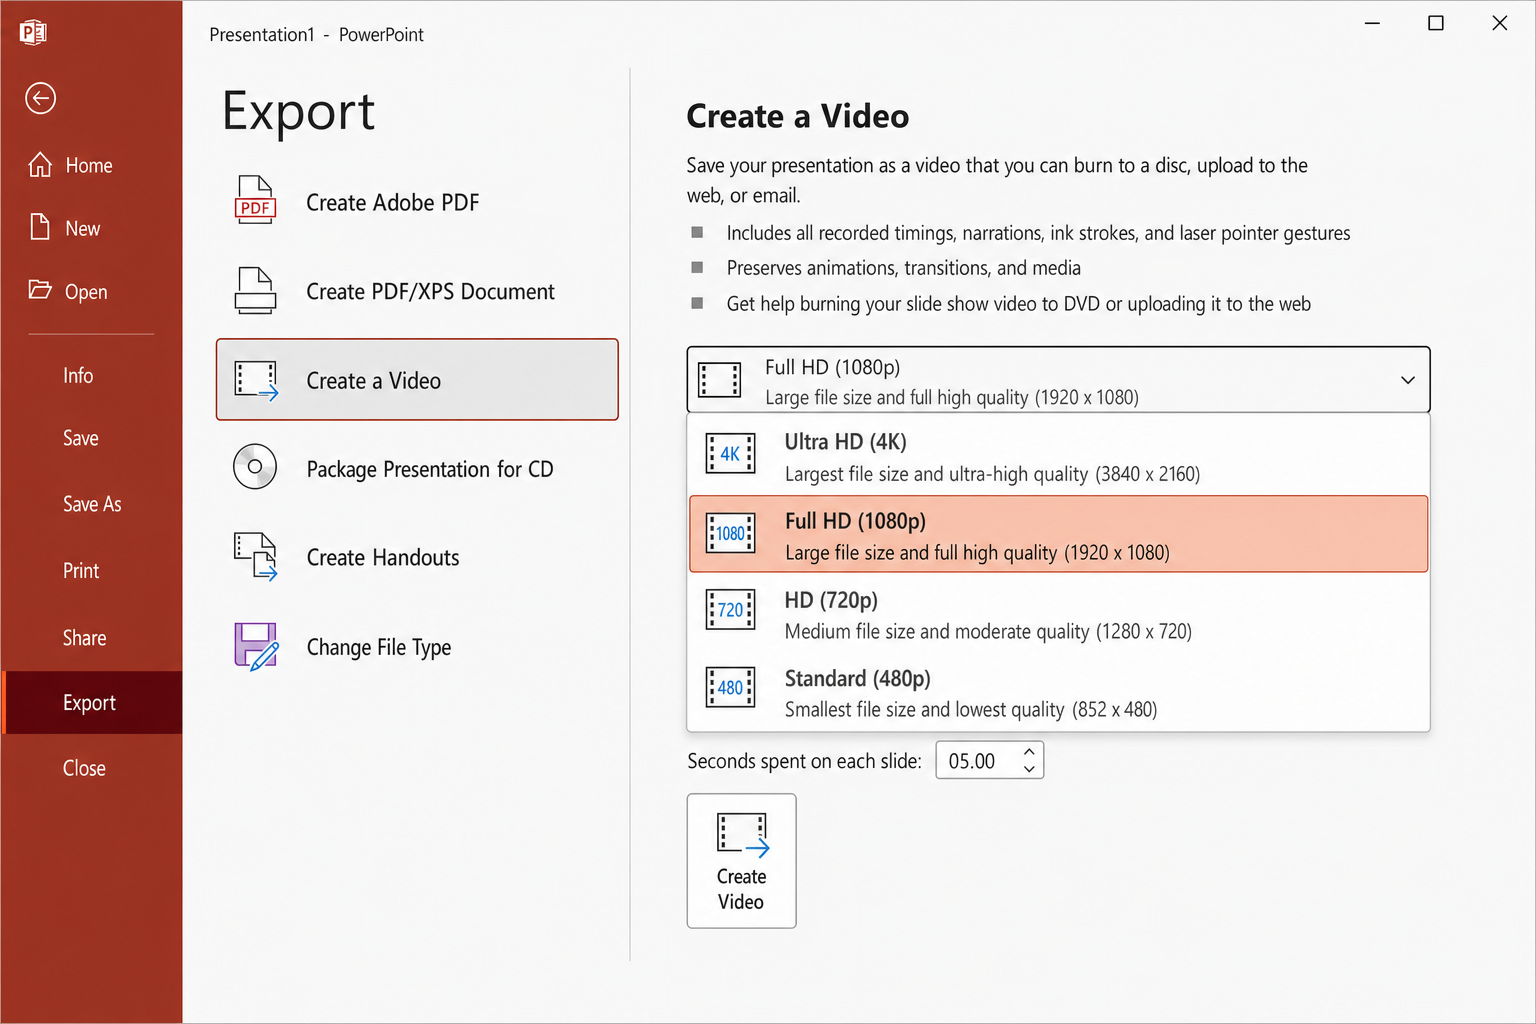
- Click File > Export > Create a Video.
- Choose your video quality from the dropdown:
- Ultra HD (4K), 3840×2160, best quality, largest file size (Windows 10/11 only)
- Full HD (1080p), 1920×1080, great for most uses
- HD (720p), 1280×720, good balance of quality and file size
- Standard (480p), 852×480, smallest file, lower quality
- In the next dropdown, choose Use Recorded Timings and Narrations if you recorded them, or Don’t Use Recorded Timings and Narrations if you want to set a fixed slide duration instead.
- If you chose fixed timing, set the number of seconds per slide using the spinner at the bottom.
- Click Create Video.
- Choose a save location, select MPEG-4 Video (*.mp4) as the file type (recommended over WMV), and click Save.
PowerPoint will start rendering the video. You’ll see a progress bar at the bottom of the screen. Depending on how long your presentation is and what quality you chose, this can take anywhere from a few seconds to several minutes.
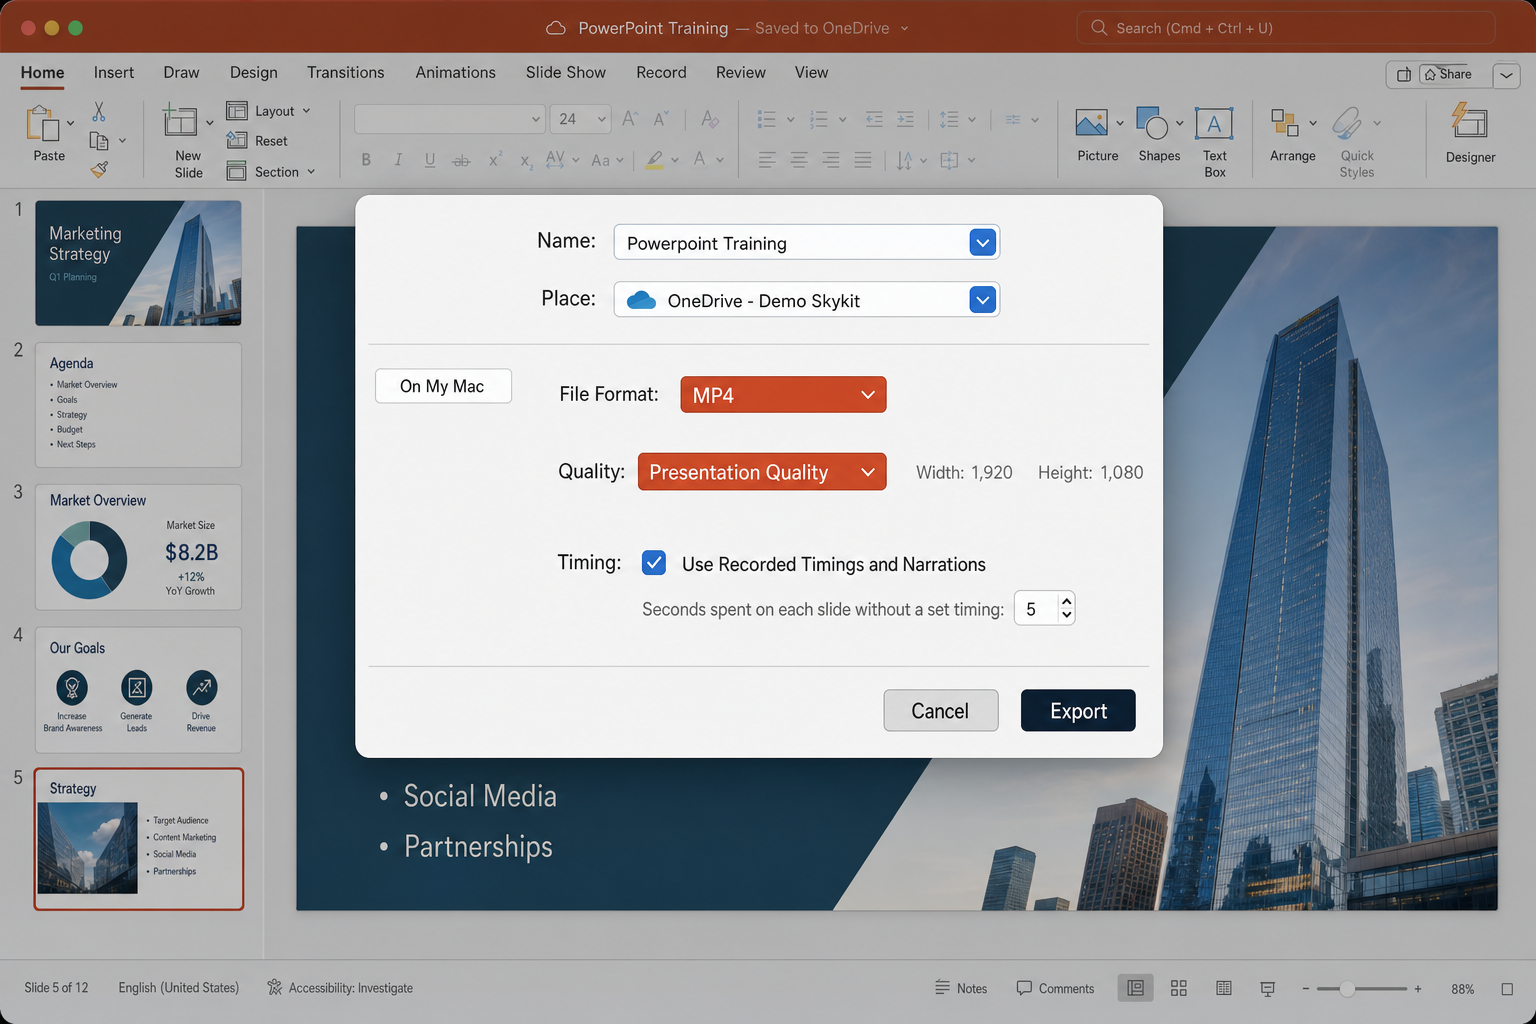
On macOS
- Open your presentation in PowerPoint.
- Optional: record narration via Slide Show > Record Slide Show.
- Click File > Export…
- In the File Format dropdown, choose MP4 (or MOV if MP4 isn’t listed in your version).
- Select your desired video quality and choose whether to use recorded timings or set a fixed slide duration.
- Click Export.
Once the export finishes, you’ve got a standalone video file that plays on any device, no PowerPoint required. Nice.
How to Convert PowerPoint to DVD
Let’s be real: burning presentations to DVD is pretty niche in 2026. But there are still legitimate use cases, such as training rooms without reliable internet, venues with older AV setups, or clients who specifically request a physical disc. If that’s you, here’s how it works.
The important thing to understand upfront: a DVD plays like a movie, not a slide deck. You won’t be able to click through slides one by one with a remote the way you would in PowerPoint. The presentation plays as a continuous video. You can set up DVD chapters (one per slide or section), but that’s about as interactive as it gets. If you need true slide-by-slide control, a laptop running PowerPoint or a PDF viewer will serve you better.
With that said, the process has two steps: export your presentation to MP4 (which you just learned above), then use DVD authoring software to burn that video to disc.
Step 1: Export Your Presentation to MP4
Follow the video export steps above to create an MP4 file from your PowerPoint. Use at least Full HD (1080p) for good DVD quality. You can always compress it down, but you can’t add quality back.
Step 2: Burn the MP4 to DVD
Neither Windows 10/11 nor modern macOS includes a built-in DVD authoring tool (Windows DVD Maker was removed way back in Windows 8, and Apple discontinued iDVD years ago). You’ll need third-party software.
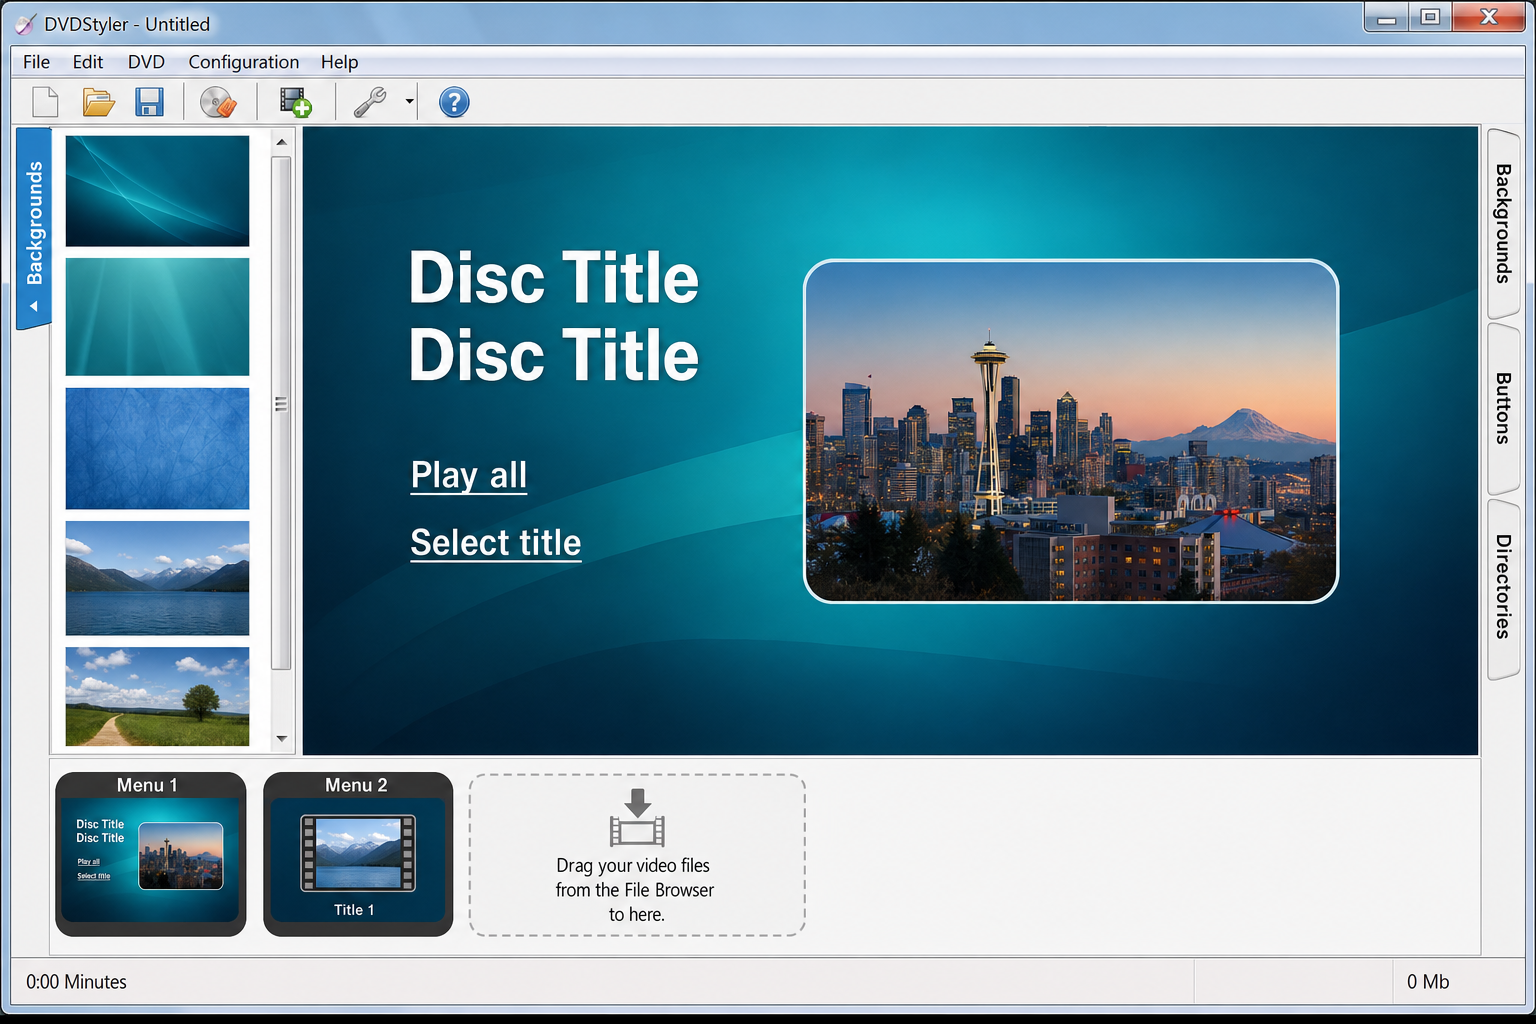
On Windows: DVDStyler (Free)
DVDStyler is a free, open-source DVD authoring tool that works on Windows 10 and 11. Here’s the basic workflow:
- Download and install DVDStyler from dvdstyler.org.
- Open DVDStyler and create a new project. Choose your DVD format. Use NTSC for North America and Japan, or PAL for most of Europe and elsewhere.
- Drag your MP4 file into the project.
- Choose a menu template or customize your own.
- Insert a blank DVD disc into your drive.
- Click Burn and wait for the process to complete.
On macOS: Wondershare DVD Creator or Roxio Toast
On Mac, your best options are paid tools like Wondershare DVD Creator or Roxio Toast Titanium. Both can import an MP4 and burn a proper DVD-Video disc with menus. The exact steps vary by app, but the general flow is the same: create a new project, import your MP4, choose a menu style, insert a blank disc, and burn.
Quick tip: Make sure you’re creating a DVD-Video disc (with the VIDEO_TS folder structure), not just copying the MP4 file to a data disc. A data disc won’t play in standalone DVD players. It’ll just look like a USB drive to them.
Bonus: Modern Alternatives Worth Knowing About
If you want to share a narrated video of your presentation but don’t want to record your own voice, there are some genuinely clever cloud tools worth a look in 2026.
- Synthesia: Upload your .pptx file and Synthesia can generate a narrated video using AI voices and optional AI avatars. Great for training content or product demos where you don’t want to appear on camera.
- Screen recording: Sometimes the simplest approach is the most reliable. Run your slideshow full-screen, hit
Windows + G(Xbox Game Bar on Windows) orCommand + Shift + 5(macOS) to start recording, and narrate live as you click through. The resulting video will capture everything exactly as it appears, including animations, embedded video, and everything else. - Google Slides: If you import your .pptx into Google Slides, you can share a link that anyone can view in a browser, with no PowerPoint or file download needed. PDF export is built in too.
Tips and Troubleshooting
Common Issues
Problem: No audio in the exported video
This almost always means the narration wasn’t properly recorded before export. Go to Slide Show > Record and make sure you see audio waveforms on each slide. Then when you export, make sure you’ve selected Use Recorded Timings and Narrations in the Create a Video options.
Problem: The video file is enormous
Try exporting at 1080p instead of 4K. Most people can’t tell the difference, and the file will be dramatically smaller. You can also compress images in your presentation before exporting: go to File > Info > Compress Media on Windows. For further compression after export, HandBrake is a free tool that does a great job.
Problem: Animations look wrong or are missing in the video
This usually happens with third-party add-in animations or embedded web content. Stick to PowerPoint’s built-in animations and transitions for the most reliable export. Test with a short export of a few slides before committing to the full render.
Problem: The DVD won’t play on a standalone player
Two common culprits: you burned a data disc instead of a DVD-Video disc, or there’s a PAL/NTSC mismatch. Double-check your DVD authoring software settings and make sure you’ve selected the right TV standard for your region. Also, use quality DVD media, as cheap discs can cause playback issues on older players.
Problem: Fonts look different in the PDF
This happens when fonts aren’t embedded in the file. Stick to common fonts like Calibri or Arial, or on Windows, go to File > Options > Save and check Embed fonts in the file before saving.
Pro Tips
- Test before the final export: Export just two or three slides first to check that audio, animations, and timing all look right. It saves a lot of waiting if something needs fixing.
- PDF for sharing, video for presenting: PDF is ideal when you just want people to read through your slides. Video is better when timing, animations, or narration are part of the experience.
- Keep a copy of the original .pptx: Always. Once you convert, you lose editability, especially with PDF.
Wrapping Up
Converting a PowerPoint presentation used to involve a bunch of sketchy third-party tools and crossed fingers. These days, PowerPoint handles PDF and video export natively and does a genuinely great job, especially with MP4 at 1080p or 4K. DVD is still doable if you need it, just expect a two-step process and a couple of extra tools.
If you’re regularly converting presentations to share or publish, the built-in Export options in Microsoft 365 or PowerPoint 2021 are all you really need. And if you want narrated video without recording your own voice, tools like Synthesia are worth a look. Either way, you’ve got options, and none of them involve Flash (thankfully).