
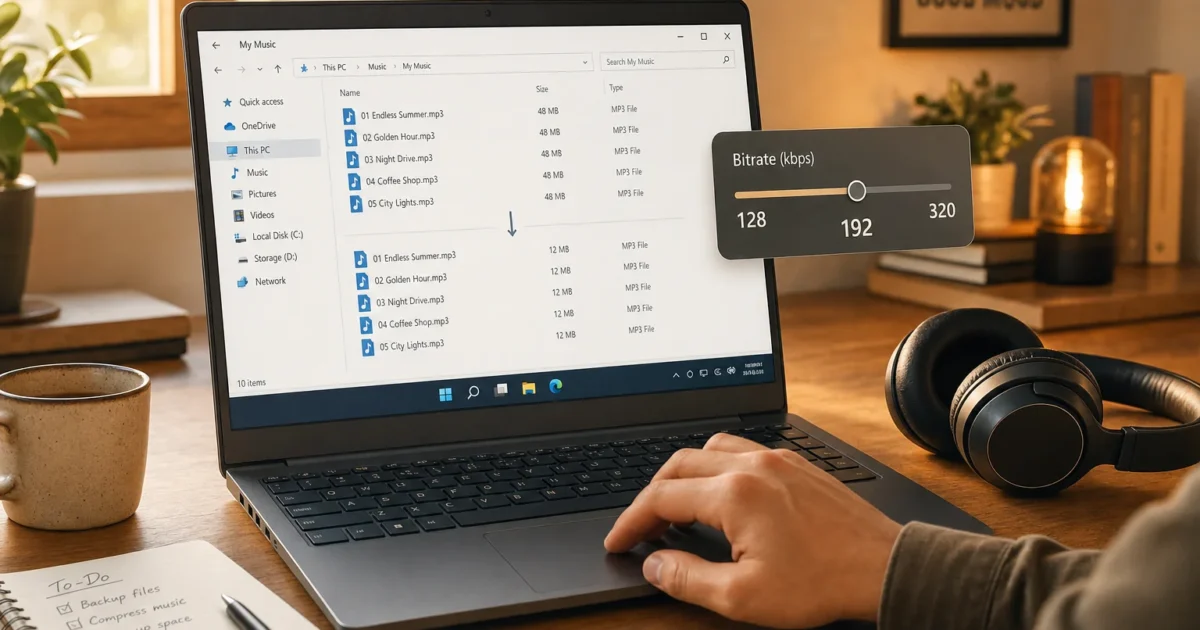
Got a folder full of massive MP3 files eating up your storage? Or maybe you’re trying to squeeze some audio onto a device with limited space? Changing the bitrate of your MP3 files is one of the quickest ways to shrink them down, but there’s a catch you really need to know about before you start clicking buttons.
In this guide, we’ll walk you through what bitrate actually means, what happens when you change it, and three free tools you can use to get the job done on Windows. (Fingers crossed your files come out sounding exactly how you need them to!)
What Is MP3 Bitrate, and Why Does It Matter?
Bitrate is basically how much audio data gets packed into every second of a music file. The higher the bitrate, the more detail is preserved, and the bigger the file. A 320 kbps MP3 is going to sound better and take up more space than a 128 kbps version of the same song.
Here’s a quick reference for common bitrate settings and when to use them:
| Bitrate | Quality Level | Best For |
|---|---|---|
| 128 kbps | Acceptable | Podcasts, speech, background music |
| 192 kbps | Good | Everyday music listening, balanced size/quality |
| 256 kbps | Very Good | Music you care about, decent speakers |
| 320 kbps | Best MP3 Quality | Archiving, audiophile-adjacent listening |
⚠️ The Big Thing You Need to Know First
Before you convert anything, here’s the honest truth: changing an MP3’s bitrate isn’t like resizing a photo. It’s more like making a photocopy of a photocopy. Every time you re-encode a lossy file like MP3, you lose a little more quality, and you can never get it back.
A few golden rules to keep in mind:
- Always keep your original files. Re-encoding is permanent and irreversible. Back up first, convert second.
- Never convert up to gain quality. Going from 128 kbps to 320 kbps won’t magically add detail. It’ll actually make things worse. If you need higher quality, go back to the original source (like a CD or a lossless file).
- Converting down is fine, with tradeoffs. Dropping from 320 kbps to 192 kbps will reduce file size noticeably, and most people on everyday headphones won’t hear much difference.
- Consider a better format if you have the option. If the device or platform you’re targeting supports it, modern codecs like AAC or Opus actually sound better than MP3 at lower bitrates. MP3 is still everywhere, but it’s not the only game in town anymore.
- Convert a single test file first. Pick one song, convert it, listen carefully, then decide if the bitrate setting is right before you batch-process your whole library.
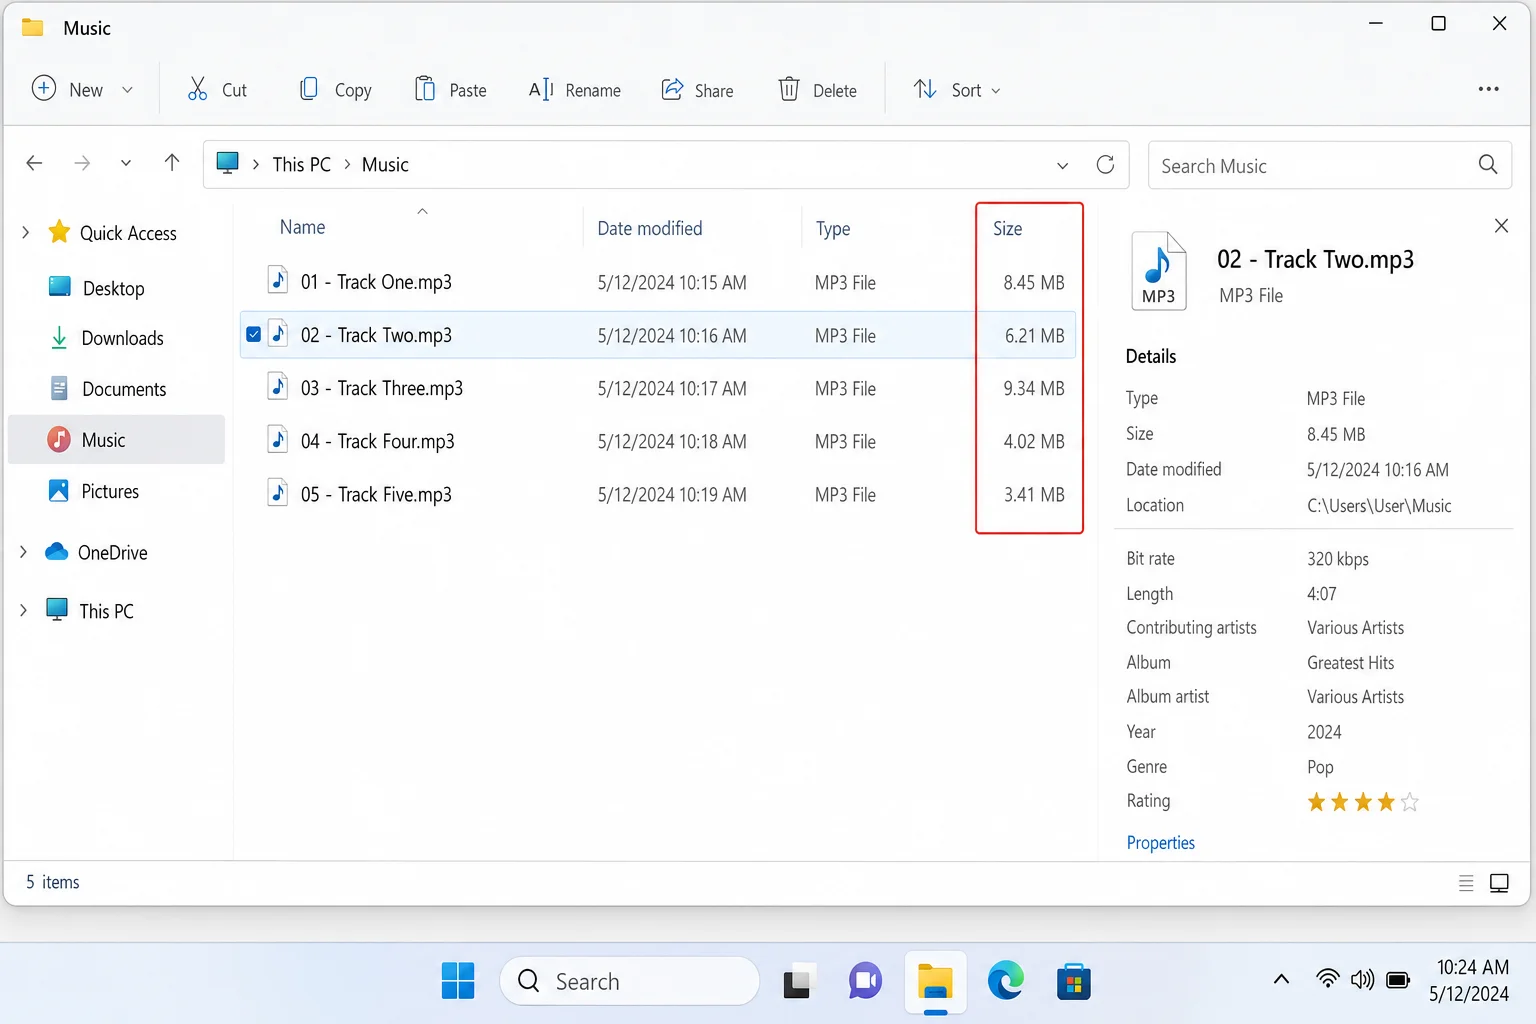
Method 1: fre:ac – Free Audio Converter (Best All-Around)
fre:ac is a free, open-source audio converter that handles MP3, WAV, FLAC, AAC, and a bunch of other formats. It’s actively maintained, works on Windows and macOS, and bundles all the encoders you need, so no separate downloads are required. This is the one we’d recommend starting with.
On Windows
- Download and install fre:ac from freac.org. Run the installer and follow the prompts.
- Open fre:ac. Click File > Add files and select the MP3 files you want to convert.
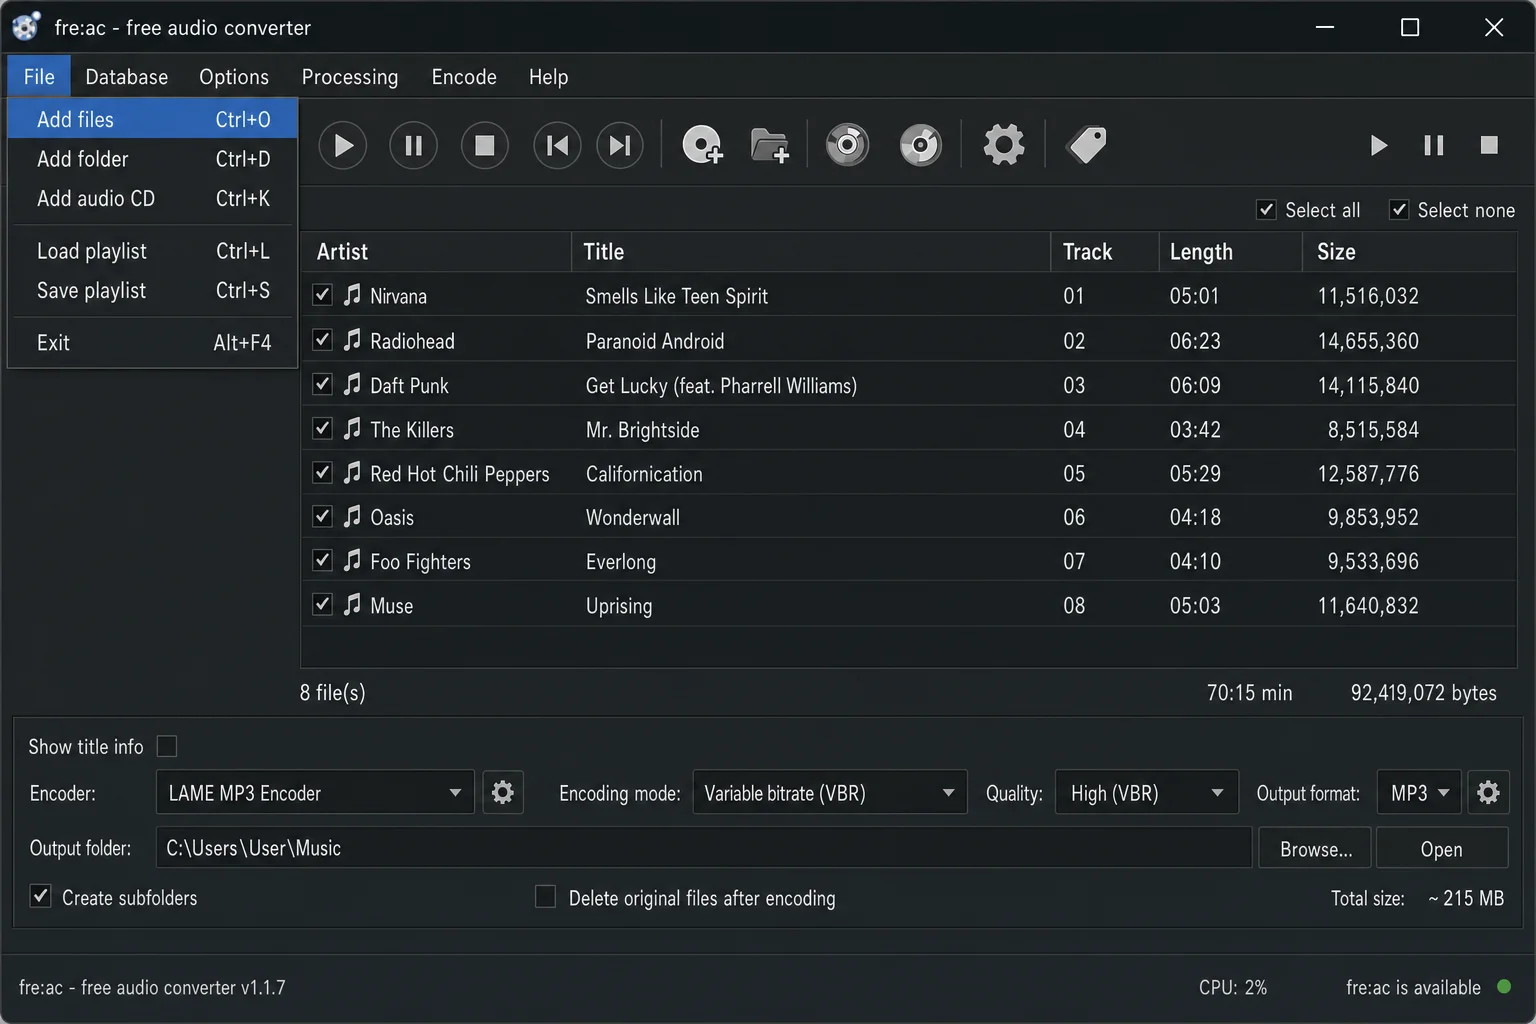
- In the toolbar at the top, click the dropdown next to the encoder name and select LAME MP3 Encoder as your output format.
- Click the small wrench/settings icon next to the encoder dropdown to open the encoder settings.
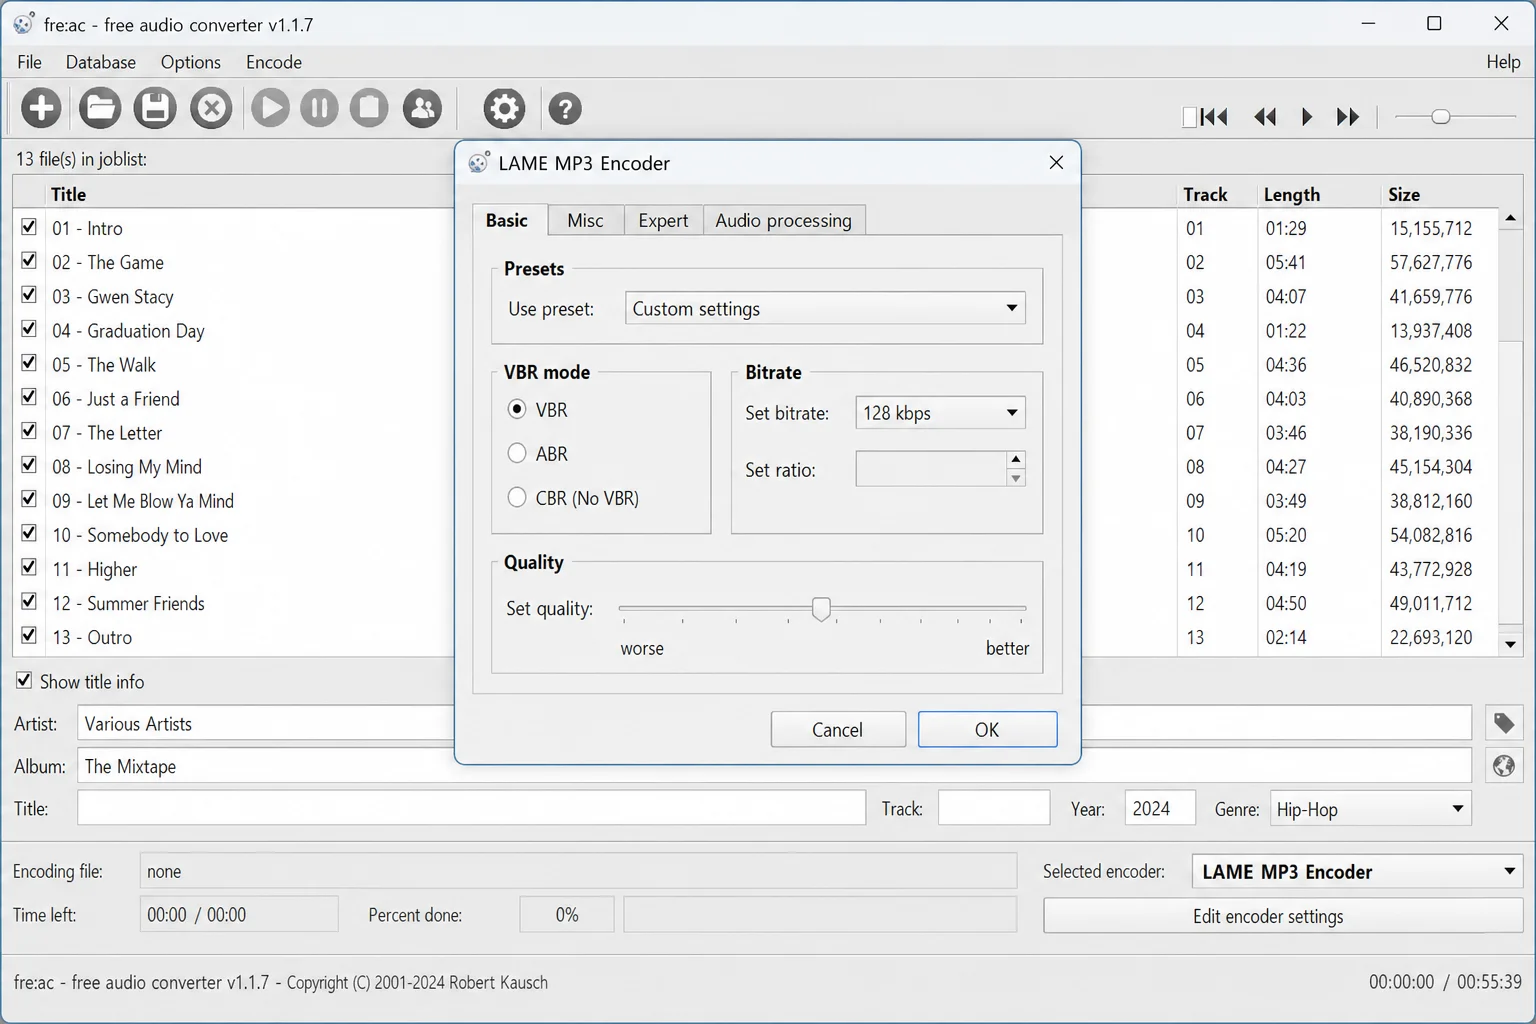
- In the encoder settings window, set the Mode to CBR (Constant Bit Rate) for the most predictable file size and quality. Then set your target bitrate. 192 kbps is a solid balanced choice; use 320 kbps if quality is the priority.
- Click OK to save the settings.
- Choose an output folder by clicking Options > General settings and setting the output path. Pick somewhere easy to find, like your Desktop.
- Click the green Play/Convert button to start encoding. A progress bar will show you how things are going.
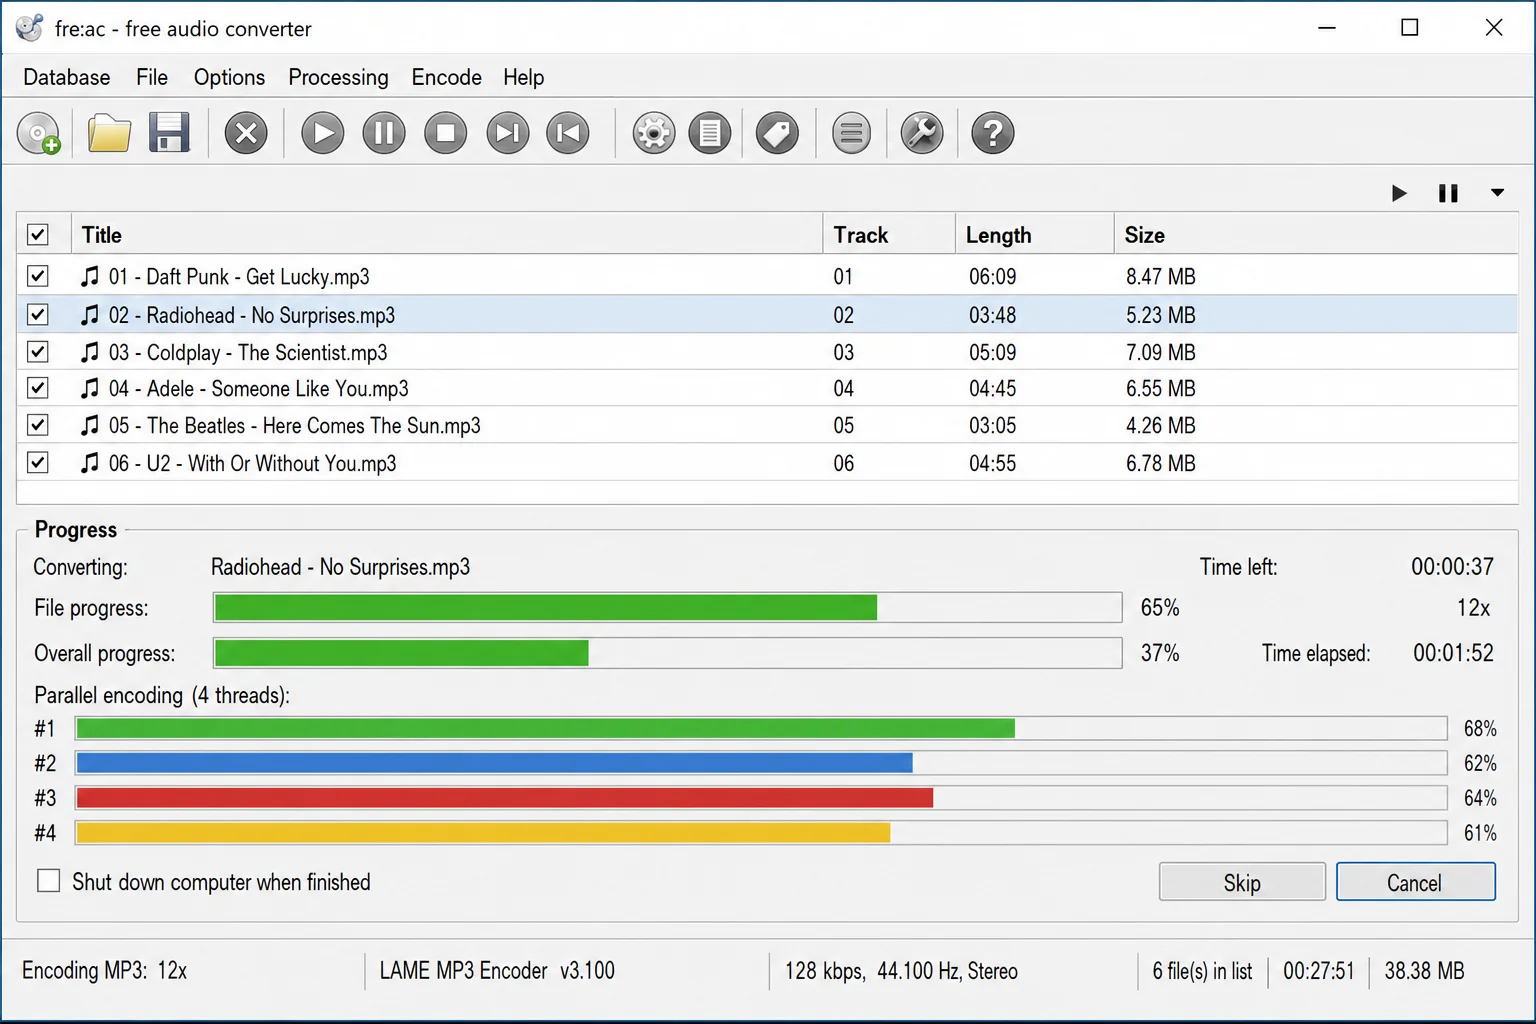
When it’s done, head to your output folder and give the converted files a listen before you do anything with the originals.
On macOS
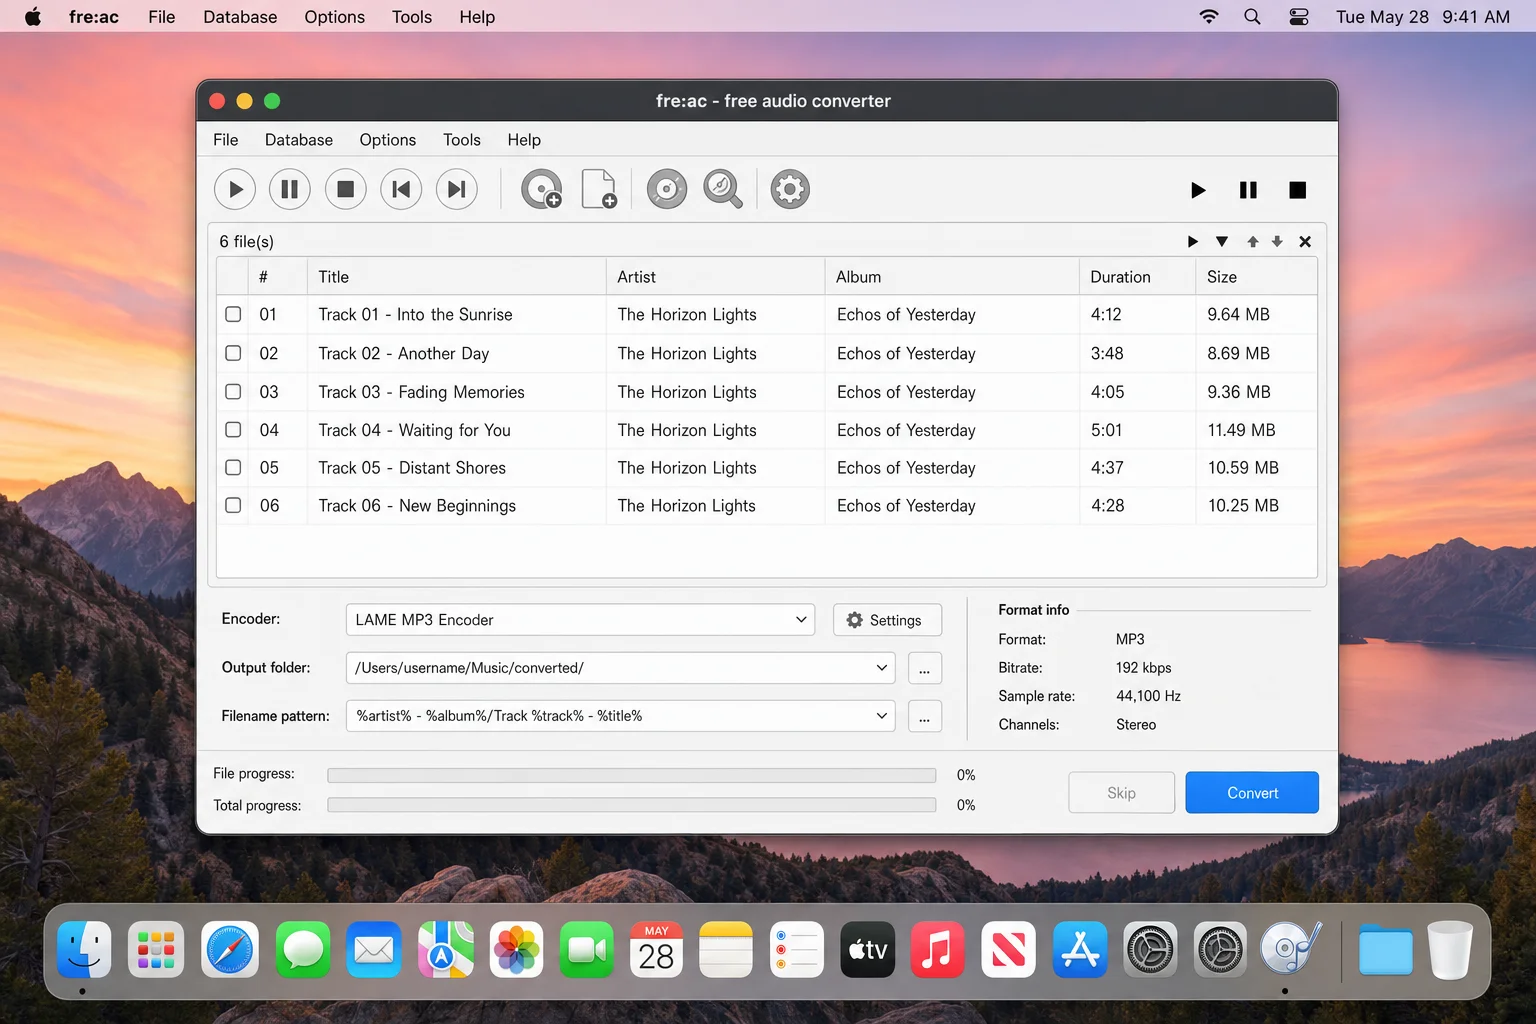
- Download the macOS version of fre:ac from freac.org and open the
.dmgfile. Drag fre:ac to your Applications folder. - Open fre:ac from your Applications folder (you may need to right-click and choose Open the first time, since it’s a third-party app).
- Click File > Add files and select your MP3 files.
- Select LAME MP3 Encoder from the encoder dropdown in the toolbar.
- Click the settings icon next to the encoder, set the mode to CBR, and choose your target bitrate.
- Click the green convert button to start.
Method 2: MP3 Quality Modifier (Windows Only, No Install Needed)
If you just need a quick, no-fuss option on Windows and don’t want to install anything, MP3 Quality Modifier is a handy little portable tool. Just download it, double-click the EXE, and you’re off. It only works with MP3 files (no WAV or FLAC), but for simple MP3-to-MP3 bitrate changes, it does the job.
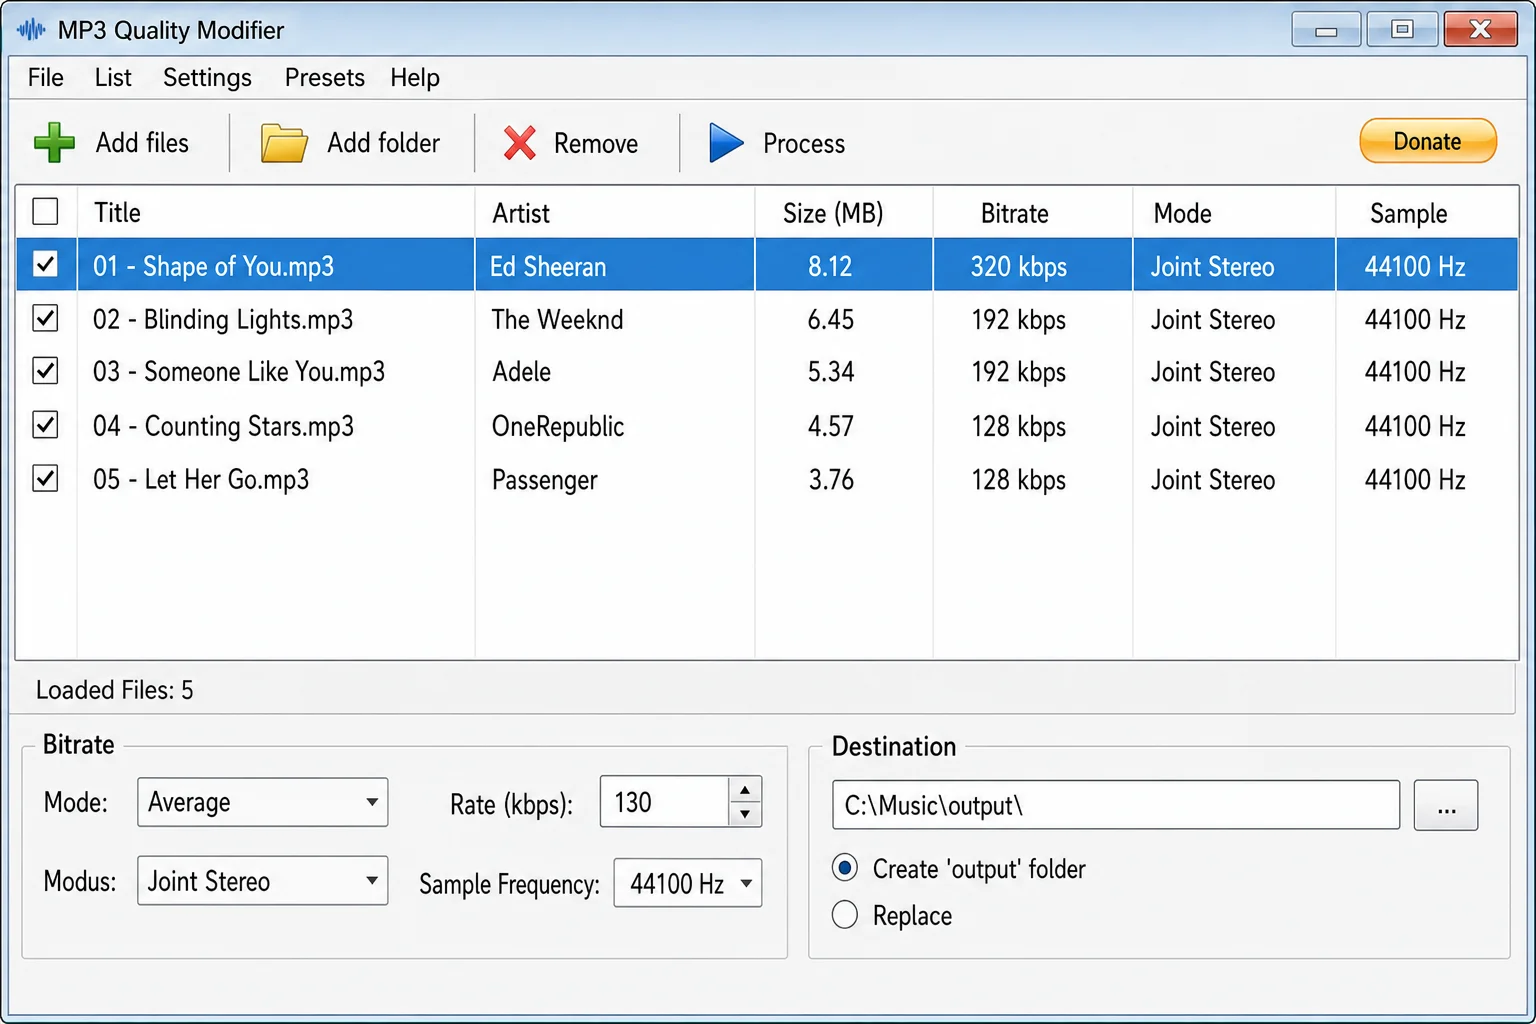
- Download MP3 Quality Modifier from Softpedia and run the EXE file directly. No installation needed.
- Click Add Files or Add Folder to load your MP3 files. You’ll see each file’s current bitrate, size, and sample frequency listed.
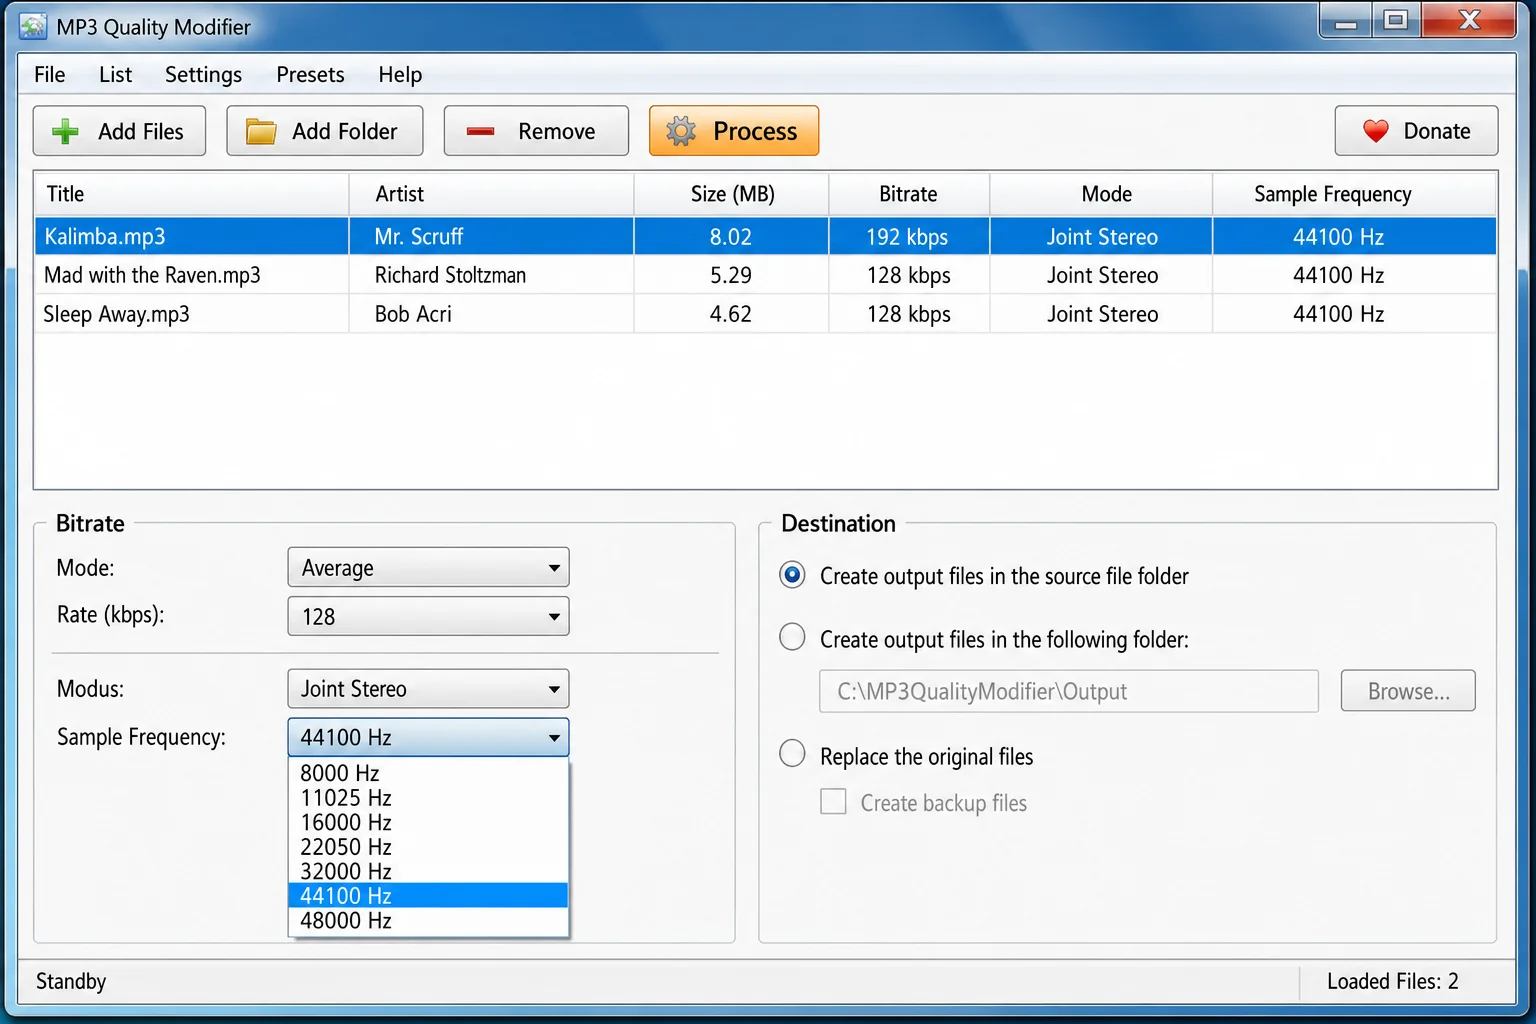
- Use the bitrate slider or dropdown to choose your target bitrate. Remember, only go lower, not higher. 192 kbps is a good starting point for a balance of quality and size.
- Optionally, click Presets to pick from preset options like Best Quality, High Quality, or Portable.
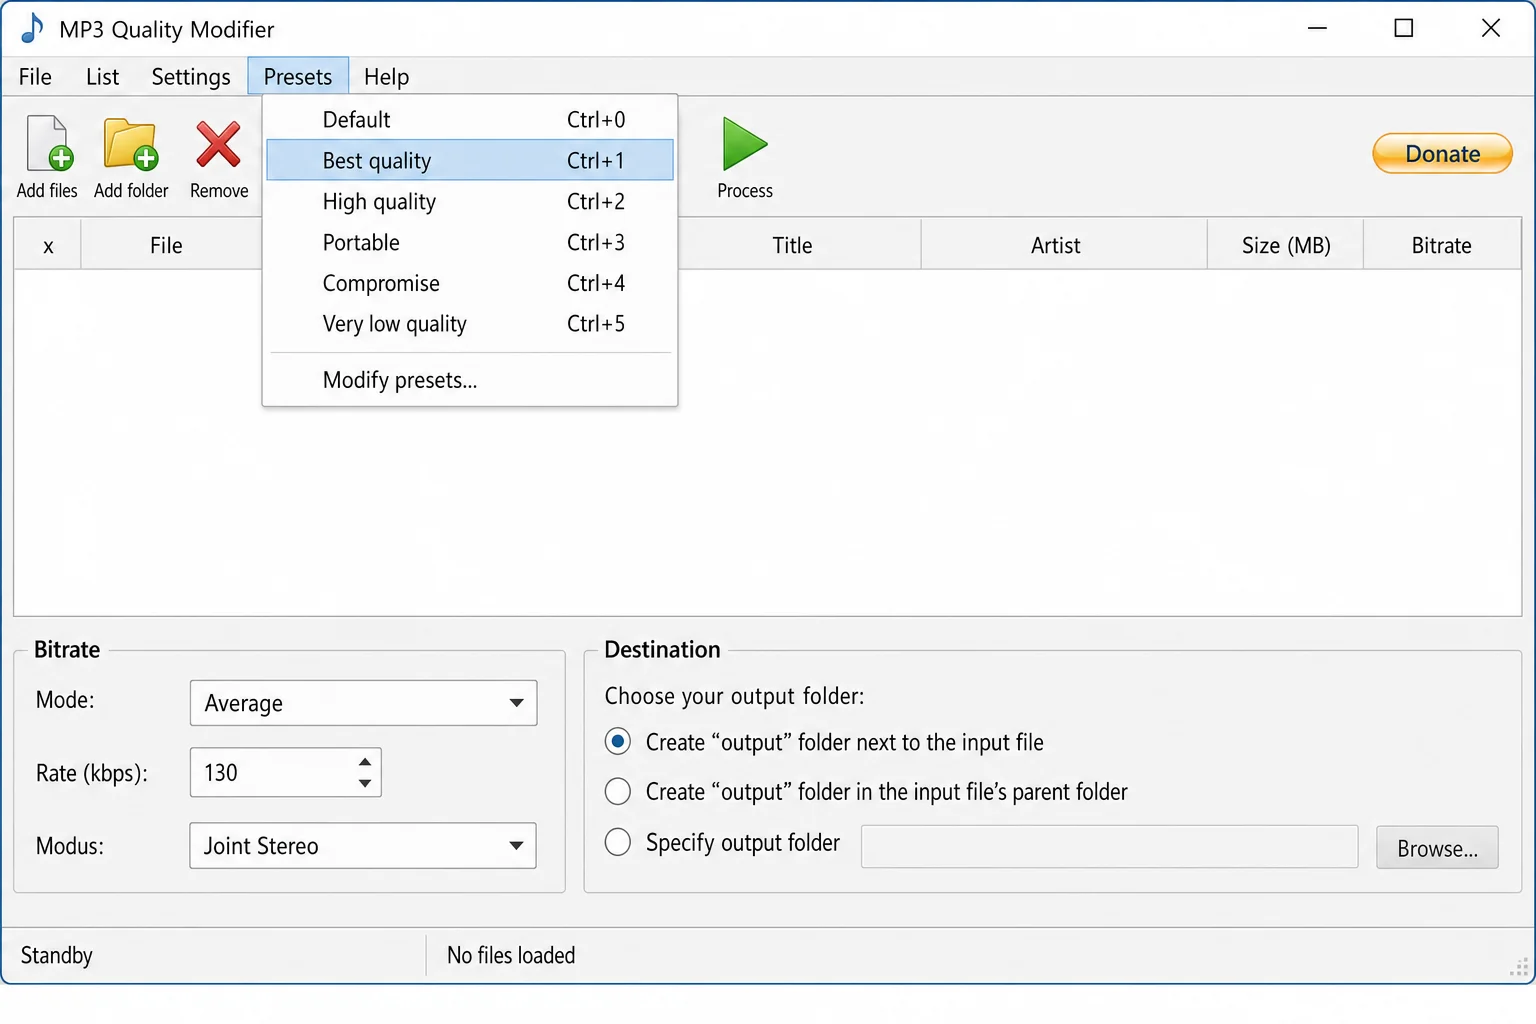
- Click the convert button and let it run. The tool will process your files and save them to the output location.
Quick note: this tool re-encodes your MP3 files in place or to a new folder depending on your settings, so make sure you’ve backed up your originals before you hit convert!
Method 3: VLC Media Player (Windows & macOS, You Probably Already Have It)
Here’s one you might not expect: VLC isn’t just for watching videos. It has a built-in audio converter that can handle MP3 bitrate changes, and chances are you’ve already got it installed. It’s a bit more buried in the menus, but it works great on both Windows and macOS.
On Windows and macOS
- Open VLC. In the menu bar, click Media (Windows) or File (macOS), then select Convert / Save.
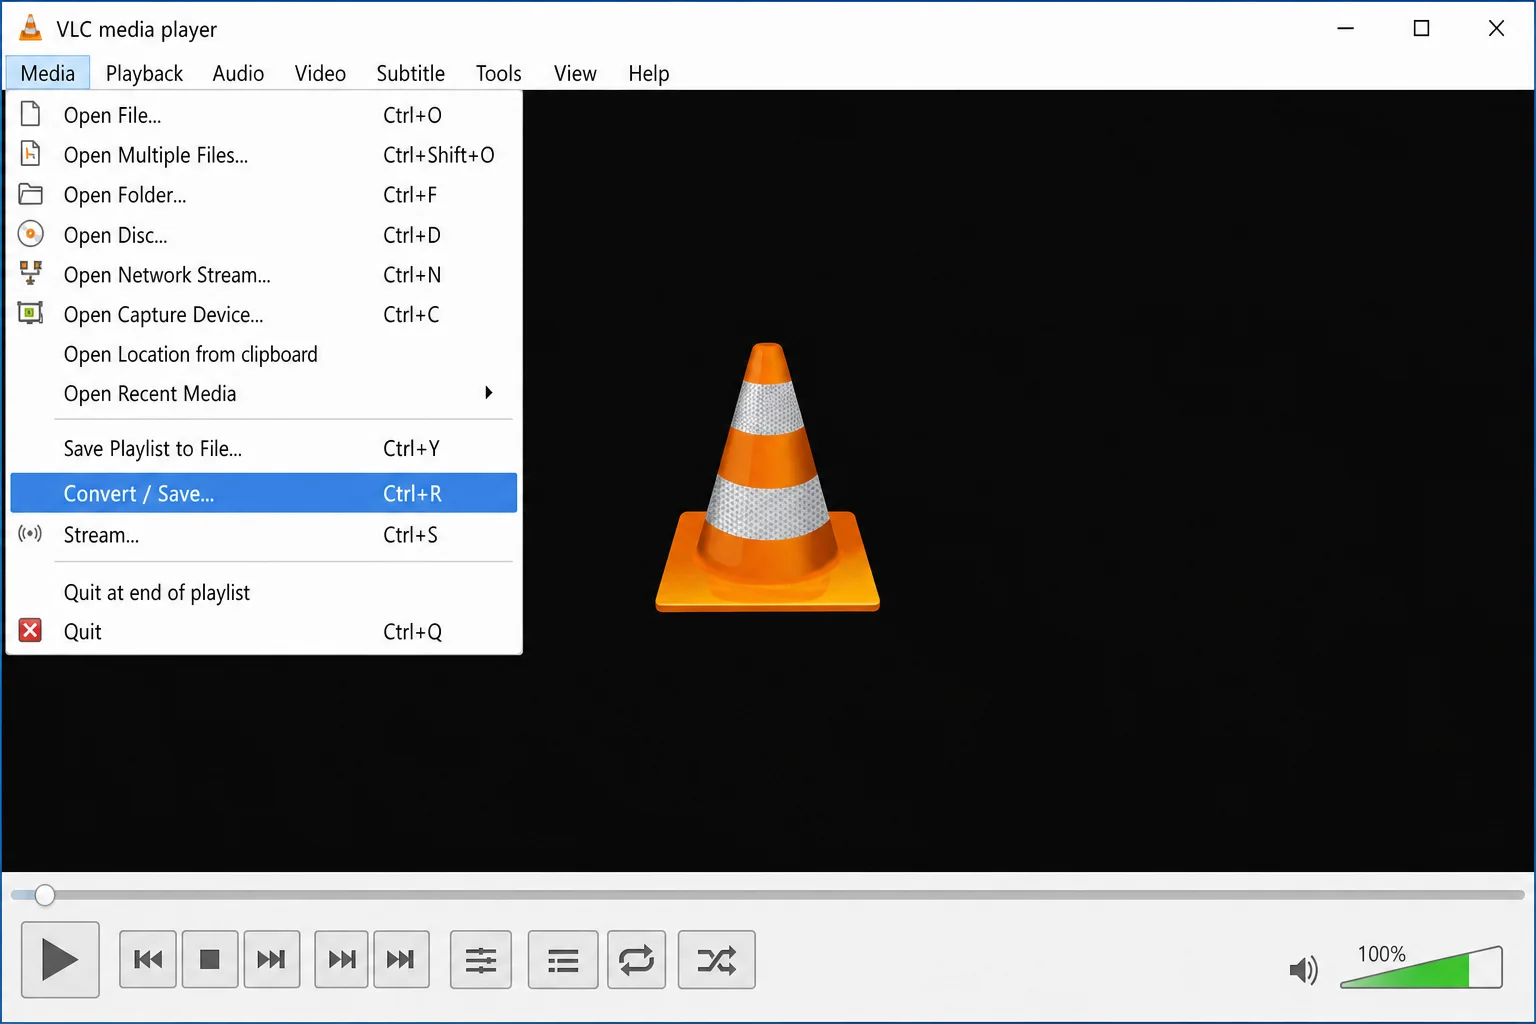
- Click Add and select the MP3 file(s) you want to convert. Then click Convert / Save at the bottom of the dialog.
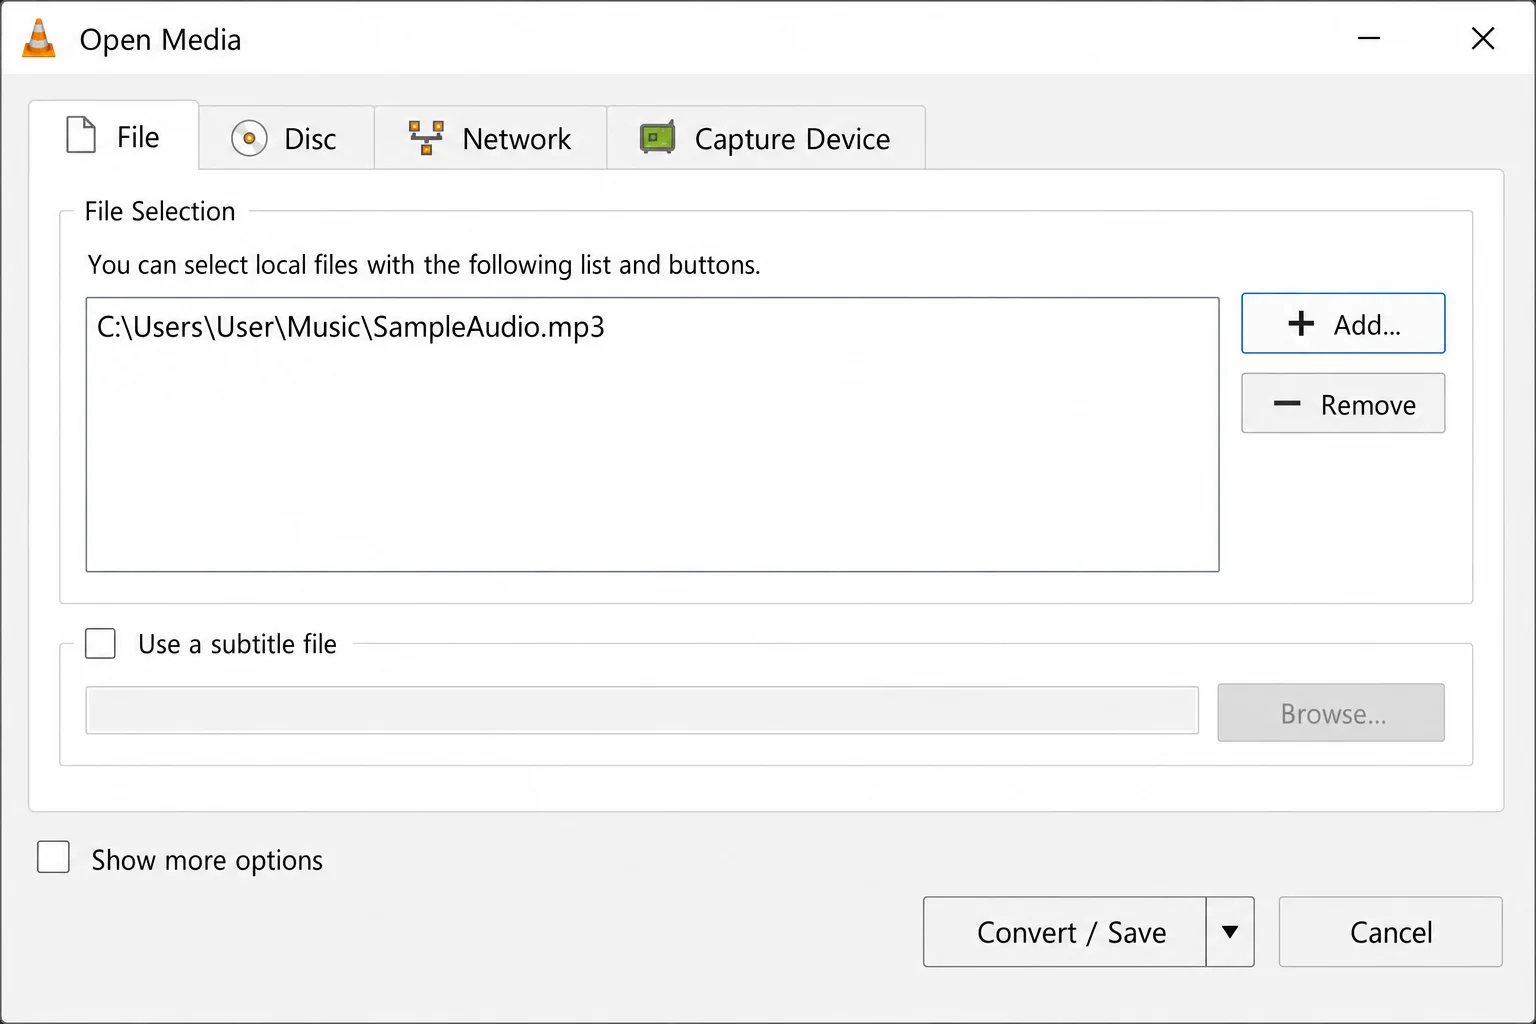
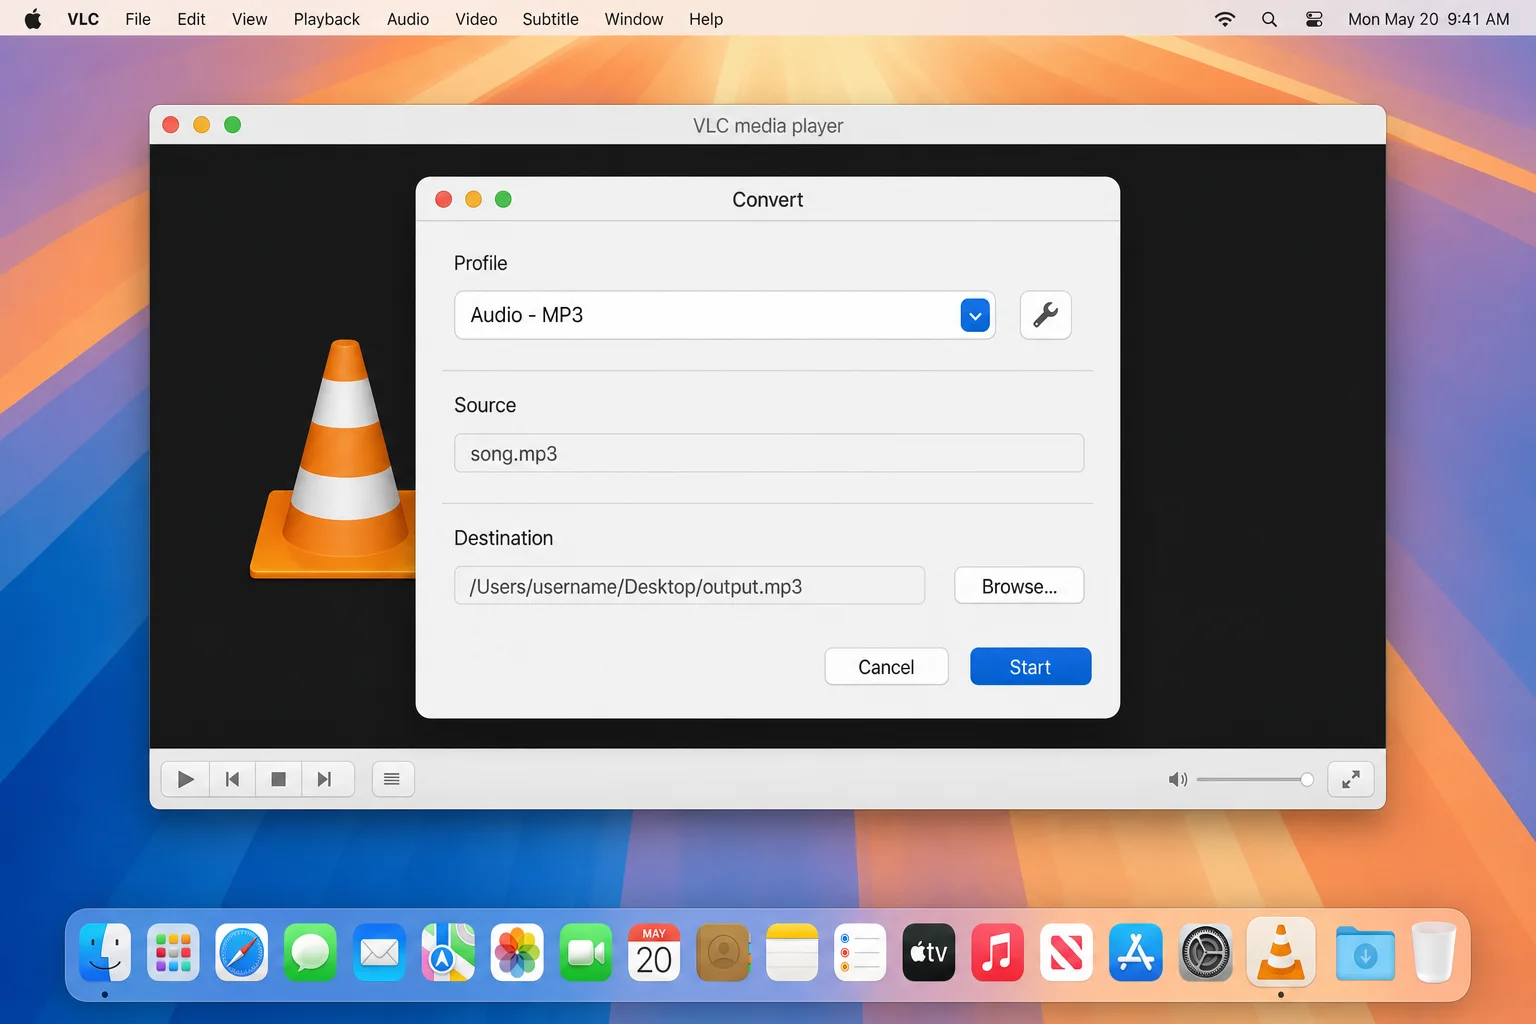
- In the Convert window, click the wrench icon next to the Profile dropdown to open the profile editor.
- Click the Audio codec tab. Make sure Audio is checked, then set the Codec to MP3 and adjust the Bitrate to your target value (e.g., 192 kbps).
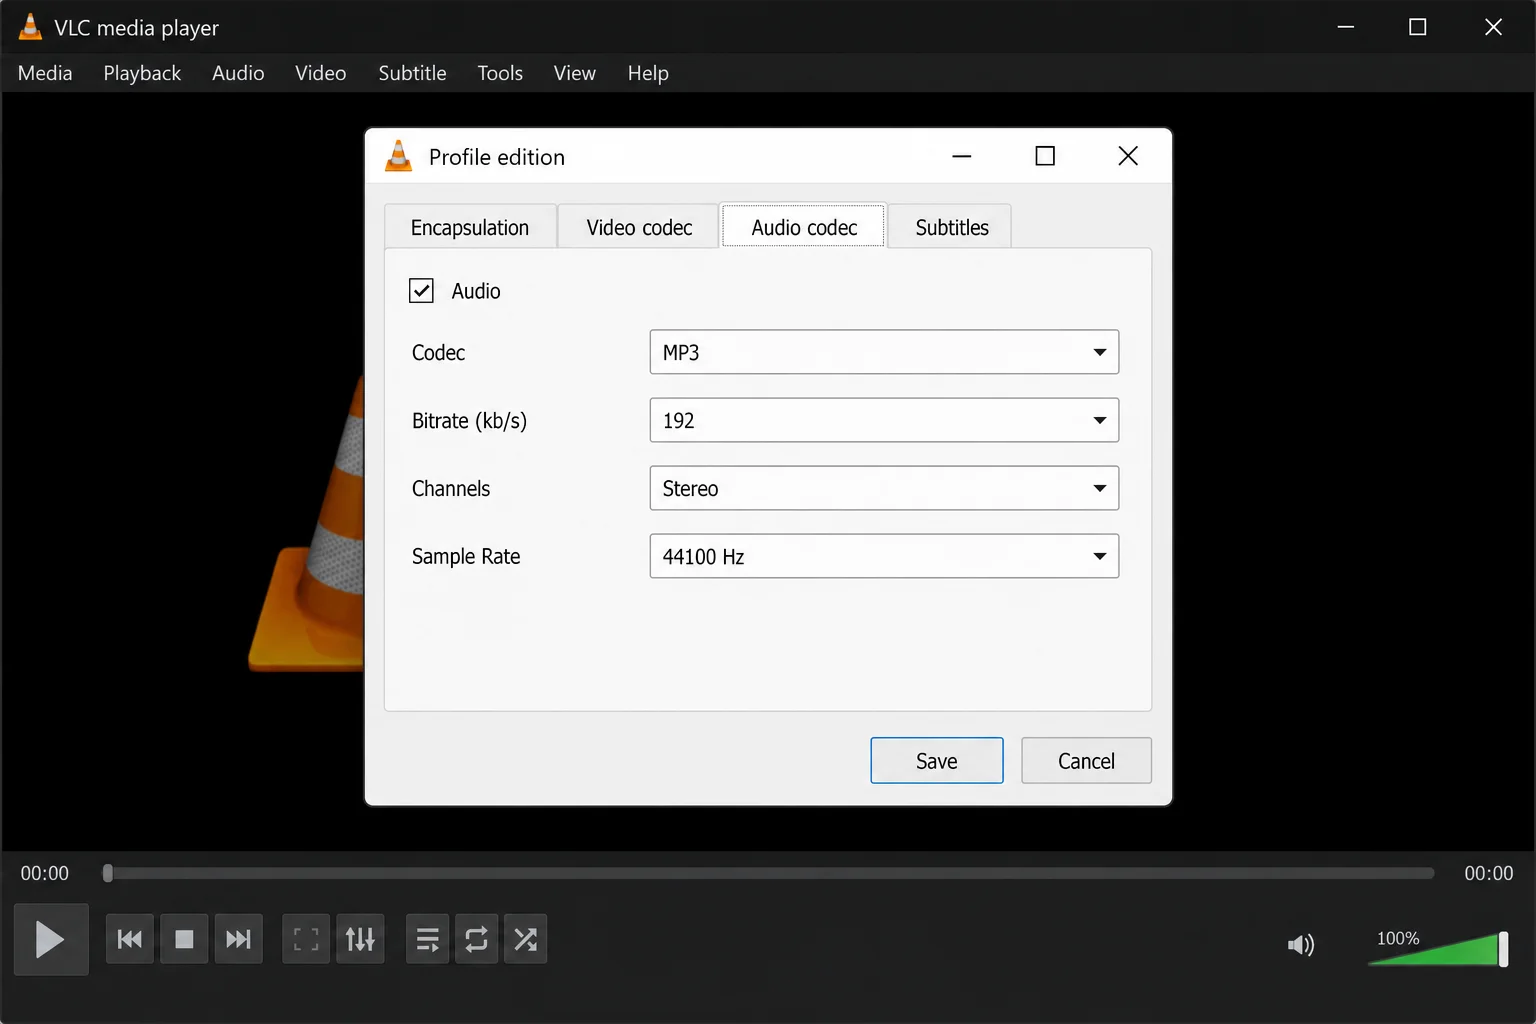
- Click Save, then choose a destination file name and location by clicking Browse.
- Click Start to begin converting. VLC’s progress bar will show you where things are at.
Tips and Troubleshooting
Common Issues
Problem: My converted MP3 sounds worse than the original
This is expected if you converted down to a much lower bitrate, or if you converted up (which actually makes things worse, not better). If quality matters, try a higher target bitrate like 192 or 256 kbps. And always convert from the best source you have, not from an already-compressed copy.
Problem: The converter fails or produces a broken file
Some bitrate and sample-rate combinations aren’t supported by the MP3 format. Try a different bitrate setting (128, 192, 256, or 320 kbps are the most reliable choices) and make sure your source file isn’t already corrupted.
Problem: My ID3 tags (artist, album, artwork) disappeared after converting
Some tools strip metadata during conversion. fre:ac has an option to copy tags, so make sure it’s enabled in the settings. If tags go missing, you can re-add them with a free tag editor like Mp3tag. You can also check out our guide on the 10 Best Tools to Tag MP3s and Edit Metadata for more options.
Pro Tips
- Always test one file first: Convert a single track, listen to it on your usual headphones or speakers, then batch-convert the rest if you’re happy with the result.
- Keep your originals: Create a backup folder before you convert anything. Re-encoding is a one-way street, and you can’t undo it.
- Consider AAC or Opus for smaller files: If the device or service you’re targeting supports it, AAC and Opus both sound noticeably better than MP3 at lower bitrates. fre:ac can encode to both. It’s worth considering if file size is the main goal.
- Don’t convert lossy-to-lossy repeatedly: Each generation of MP3-to-MP3 re-encoding stacks up quality loss. If you have a lossless source like FLAC or WAV, always start from that, not from an existing MP3. Our list of 10 Best Free Audio Converter Tools can help you find the right software for lossless formats too.
Wrapping Up
Changing an MP3’s bitrate is pretty straightforward once you know the rules, and the most important rule is to always keep your originals, because re-encoding is permanent. For most people, fre:ac is the best all-around tool since it works on both Windows and macOS, handles multiple formats, and gives you full control over the output settings. If you’re already a VLC user, that’s a solid no-download-needed option too.
If file size is your main concern and you have flexibility on format, it’s genuinely worth giving AAC or Opus a shot. You’ll get better quality at the same file size compared to MP3. But if you need MP3 specifically, 192 kbps is the sweet spot for most everyday listening. Finally, persistence paid off getting those files down to size!