
Ever tried to connect to your home computer from work, only to find the IP address has changed again? It’s one of those frustrating “so close, yet so far” moments. The good news is that Dynamic DNS (DDNS) can fix that, and you can set it up for free in about 20 minutes.
In this guide, you’ll learn exactly what Dynamic DNS is, which free providers are worth using in 2026, how to set everything up on Windows or macOS, and how to do it without leaving your PC wide open to the internet. We’ll also cover what to do if your ISP is using CGNAT (more on that below), which can trip up the whole process.
What Is Dynamic DNS (and Why Do You Need It)?
Most home internet connections come with a dynamic IP address, meaning your ISP assigns you a different public IP address every so often. That’s totally fine for normal browsing, but it becomes a headache the moment you want to connect to something at home from outside your network. You try to remote in, and the IP you wrote down last week is already gone.
Dynamic DNS solves this by giving your home connection a fixed, easy-to-remember hostname, something like mypc.ddns.net. A small piece of software (either on your router or your PC) watches for IP changes and automatically updates that hostname to point to your new address. So instead of chasing a moving IP, you just connect to the same hostname every time.
Common reasons people use Dynamic DNS:
- Remotely accessing files on a home PC via Remote Desktop
- Connecting to a home VPN server you’ve set up on your router
- Streaming media from a home server while traveling
- Monitoring an IP camera from anywhere in the world
- Hosting a personal website or game server on a home connection
Before You Begin: Check Your Network Situation
Here’s the thing. Dynamic DNS only works if your router actually has a real, public IP address. Some ISPs (especially mobile broadband and certain fiber providers) use something called Carrier-Grade NAT (CGNAT), which means multiple customers share a single public IP. If you’re behind CGNAT, classic DDNS + port forwarding simply won’t work over IPv4.
Here’s how to check:
- On your PC, visit ifconfig.me and note the IP address it shows.
- Log in to your router’s web interface (usually at
192.168.0.1or192.168.1.1) and find the WAN or Internet IP. - If those two IP addresses don’t match, or if your router’s WAN IP starts with
10.,100.64–100.127, or192.168., you’re likely behind CGNAT.
If you are behind CGNAT, skip down to the Modern Alternatives section, tools like Tailscale will serve you much better than traditional DDNS in that situation.
If the IPs match, you’re good to go. Let’s set things up.
Choosing a Free Dynamic DNS Provider
The old go-to for free DDNS, DynDNS, dropped its free tier back in 2014 and hasn’t looked back. Thankfully, there are solid free alternatives in 2026. Here’s a quick comparison of the most popular ones:
| Provider | Free Limit | IPv6 Support | Notes |
|---|---|---|---|
| Dynu | 4 domain names | Yes | Easy UI, flexible TTL, good router support |
| No-IP Free | 1 hostname | Yes | Very widely supported in routers; requires monthly confirmation |
| Duck DNS | 5 subdomains | Yes | Simple token-based setup; great for Linux/Raspberry Pi |
| dynv6 | Unlimited hosts | Yes (excellent) | DNSSEC support; more technical, great for IPv6 |
For most beginners, No-IP or Dynu are the easiest starting points, especially since many consumer routers already have them built in. Just be aware that No-IP’s free tier requires you to confirm your hostname every 30 days or it gets deactivated. (Set a calendar reminder. You’ll thank yourself later.)
For this guide, we’ll walk through No-IP in detail since it’s the most widely supported, but the general steps are nearly identical for other providers.
Step 1: Create a Free No-IP Account and Hostname
- Go to noip.com and click Sign Up.
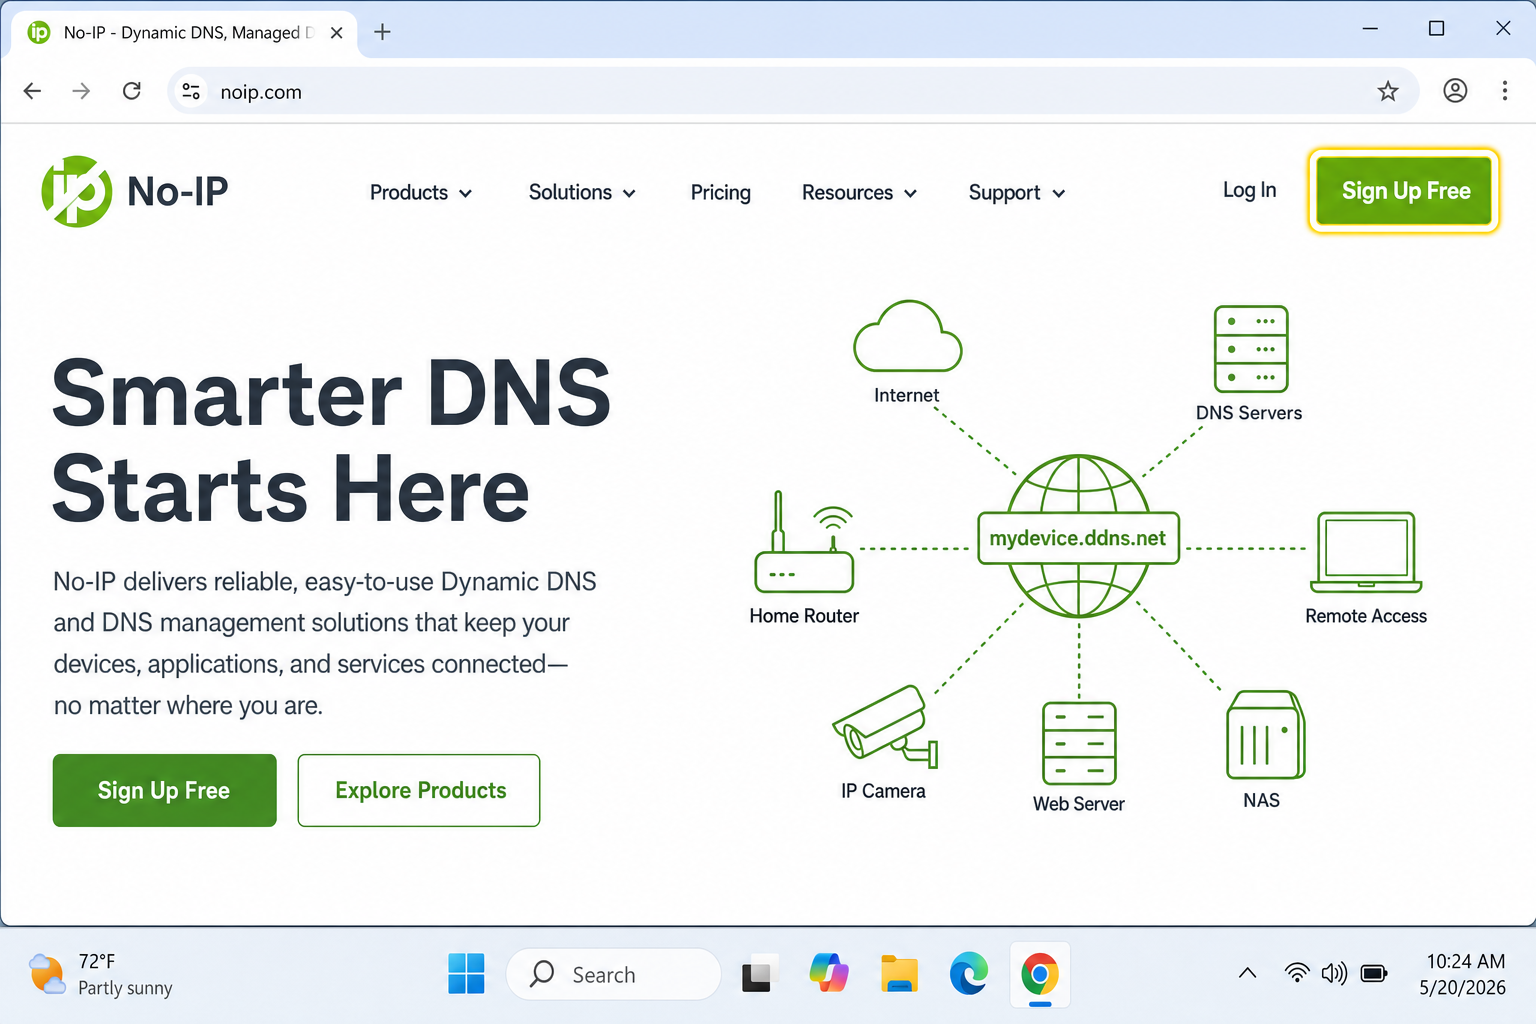
- Fill in your email address and create a password, then click Free Sign Up.
- Check your inbox for a confirmation email and click the activation link.
- Log in to the No-IP dashboard.
- In the left sidebar, click Dynamic DNS > Hostnames.
- Click Add Hostname.
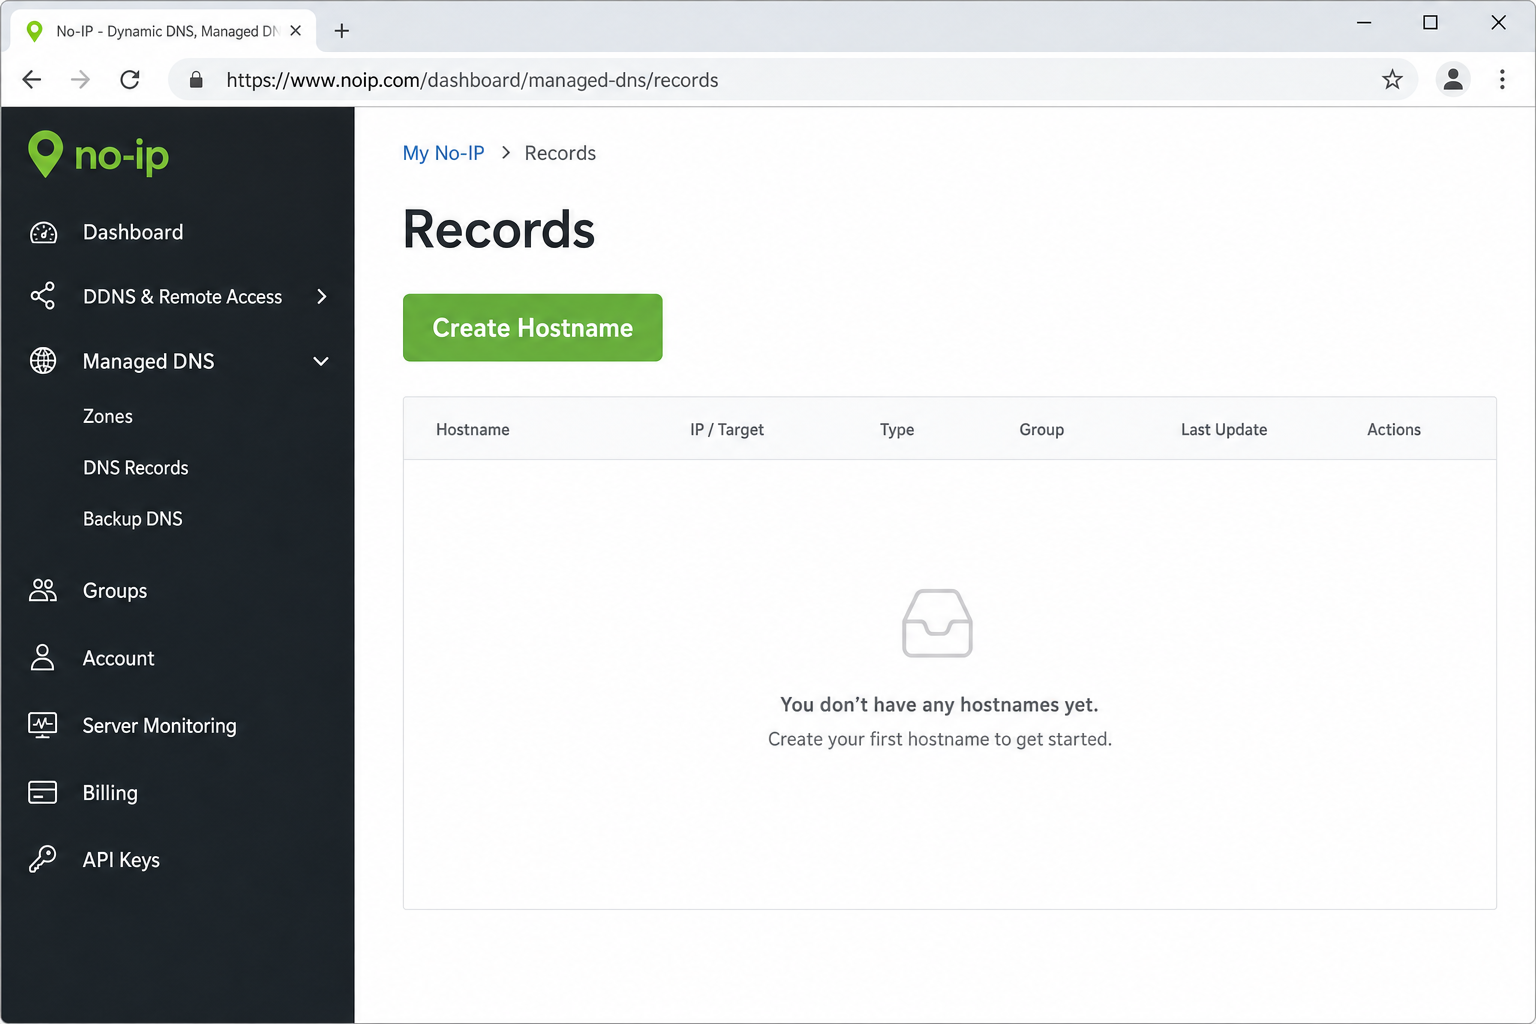
- Type your desired hostname in the first field (e.g.,
mypc) and choose a domain from the dropdown (e.g.,ddns.net). Your full hostname will look something likemypc.ddns.net. - Leave Host Type set to DNS Host (A), this is the standard IPv4 setting that works for 99% of people. If you also have IPv6, you can add an AAAA record separately.
- Click Add Hostname to save.
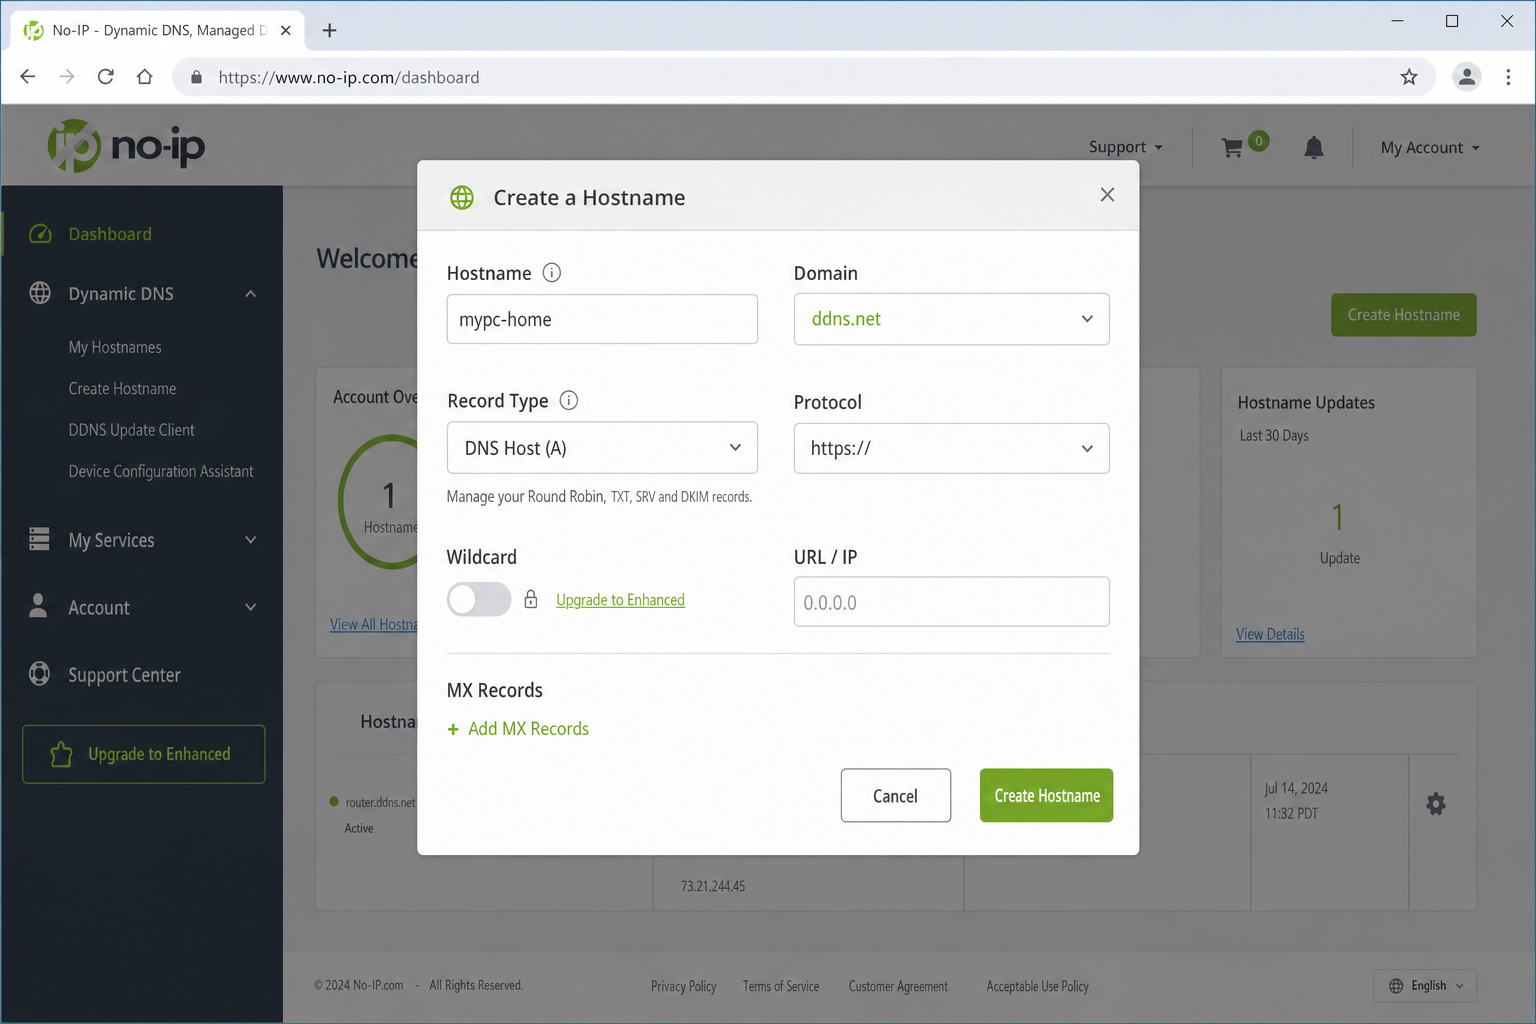
Your hostname is now registered. The next step is making sure it stays updated whenever your IP changes.
Step 2: Keep Your IP Address Updated
Having a hostname is only half the job. Something needs to watch your IP address and update the No-IP servers whenever it changes. You’ve got two ways to do this: through your router (the preferred method) or by installing a small app on your PC.
Option A: Use Your Router’s Built-In DDNS (Recommended)
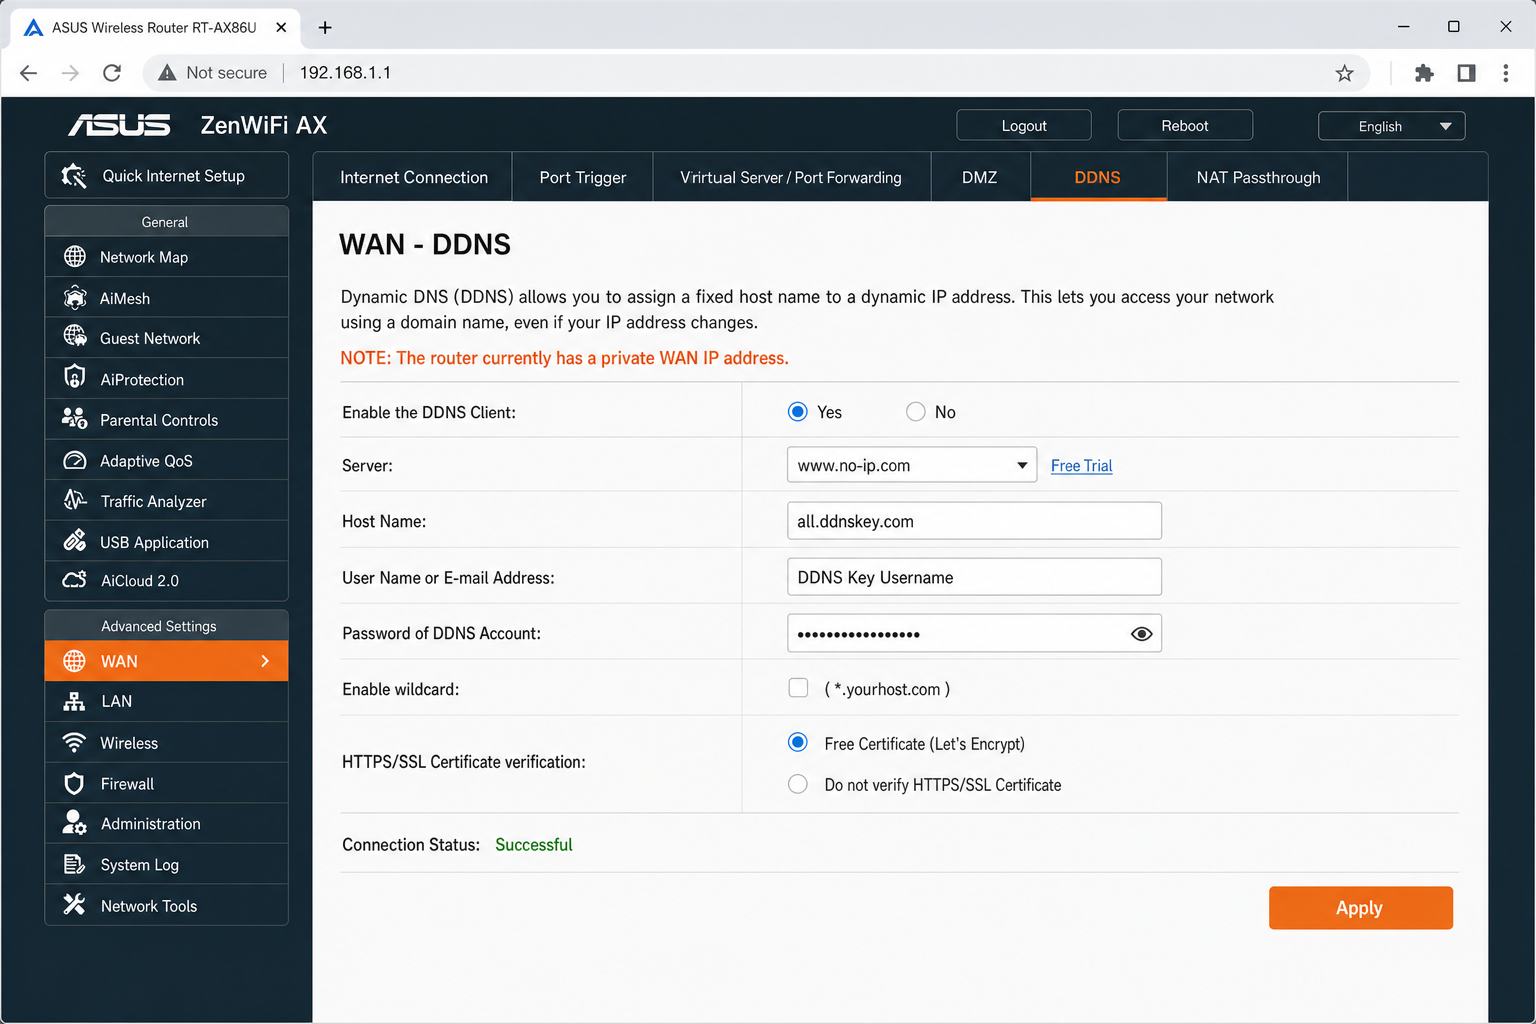
This is the better option if your router supports it, because it works 24/7 without needing your PC to be on. Most modern routers from ASUS, TP-Link, Netgear, and others have DDNS settings built in.
- Log in to your router’s web interface (typically
192.168.0.1or192.168.1.1check the label on your router if you’re not sure). - Look for a section called Dynamic DNS, DDNS, or similar. It’s often under Advanced or Network settings.
- Enable DDNS and select No-IP as the provider.
- Enter your No-IP credentials. Note: No-IP now recommends using a DDNS Key instead of your main account password. You can generate one inside your No-IP dashboard under Account > DDNS Keys.
- Enter the hostname you created (e.g.,
mypc.ddns.net). - Save the settings. Most routers will show a status like DDNS: Successful or Connected once it’s working.
Option B: Install the No-IP Dynamic Update Client (DUC)
If your router doesn’t support DDNS, or you’d rather manage it from your PC, the No-IP DUC app is a straightforward alternative. It runs quietly in the background and keeps your IP updated automatically.
On Windows
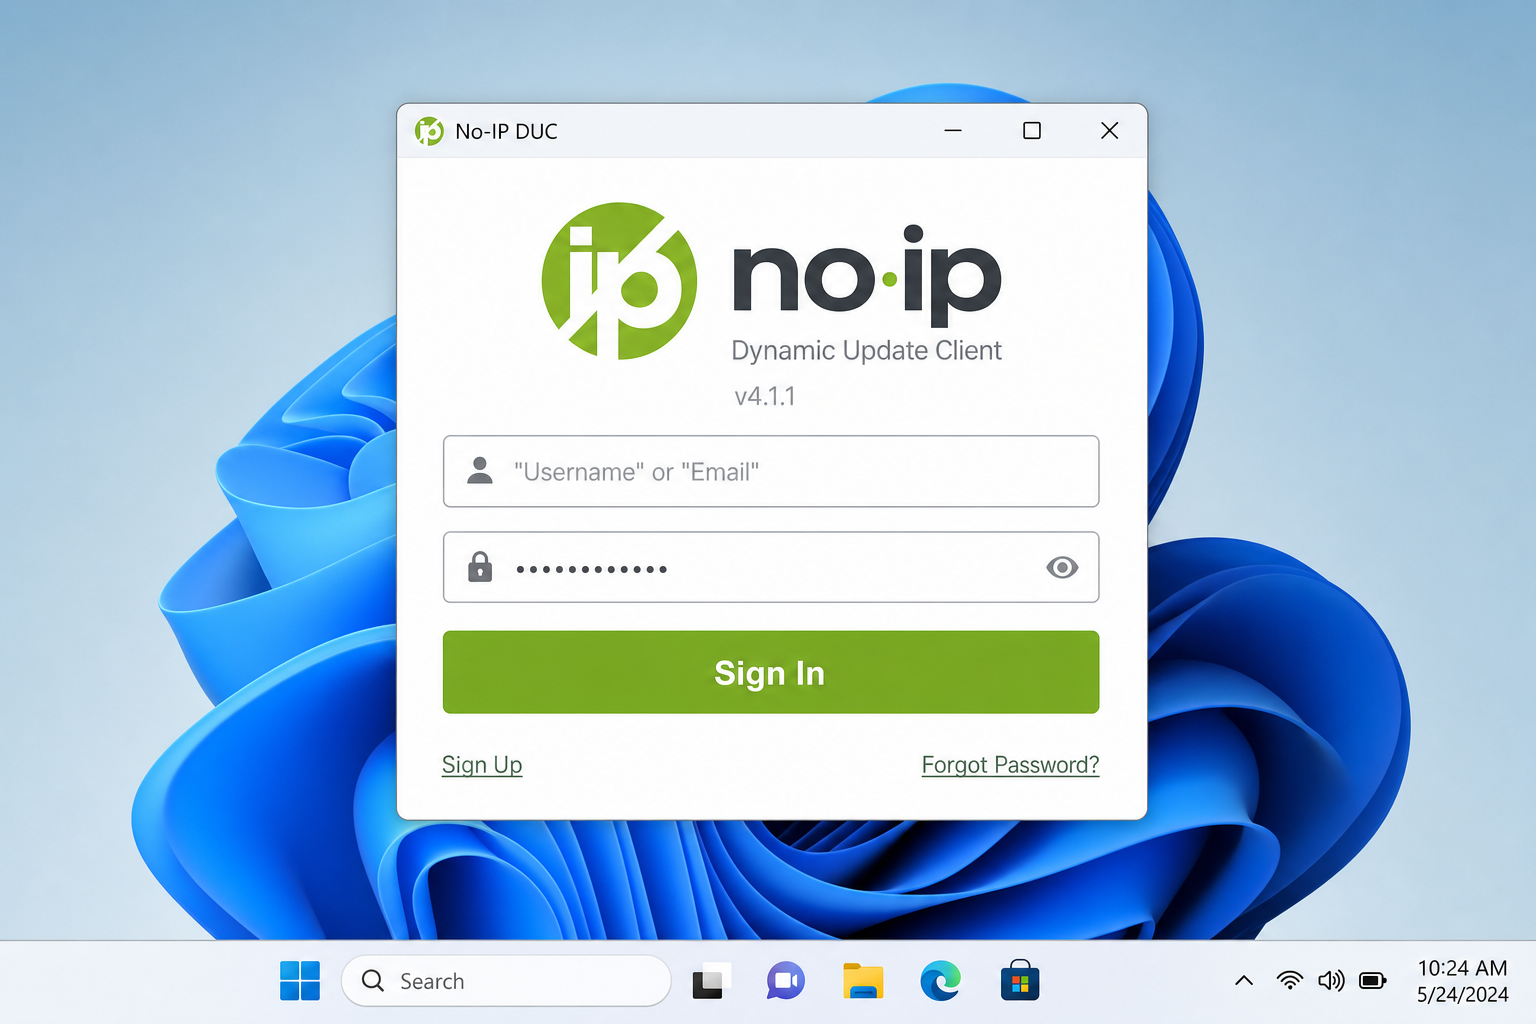
- Download the No-IP DUC from noip.com/download.
- Run the installer and follow the on-screen steps.
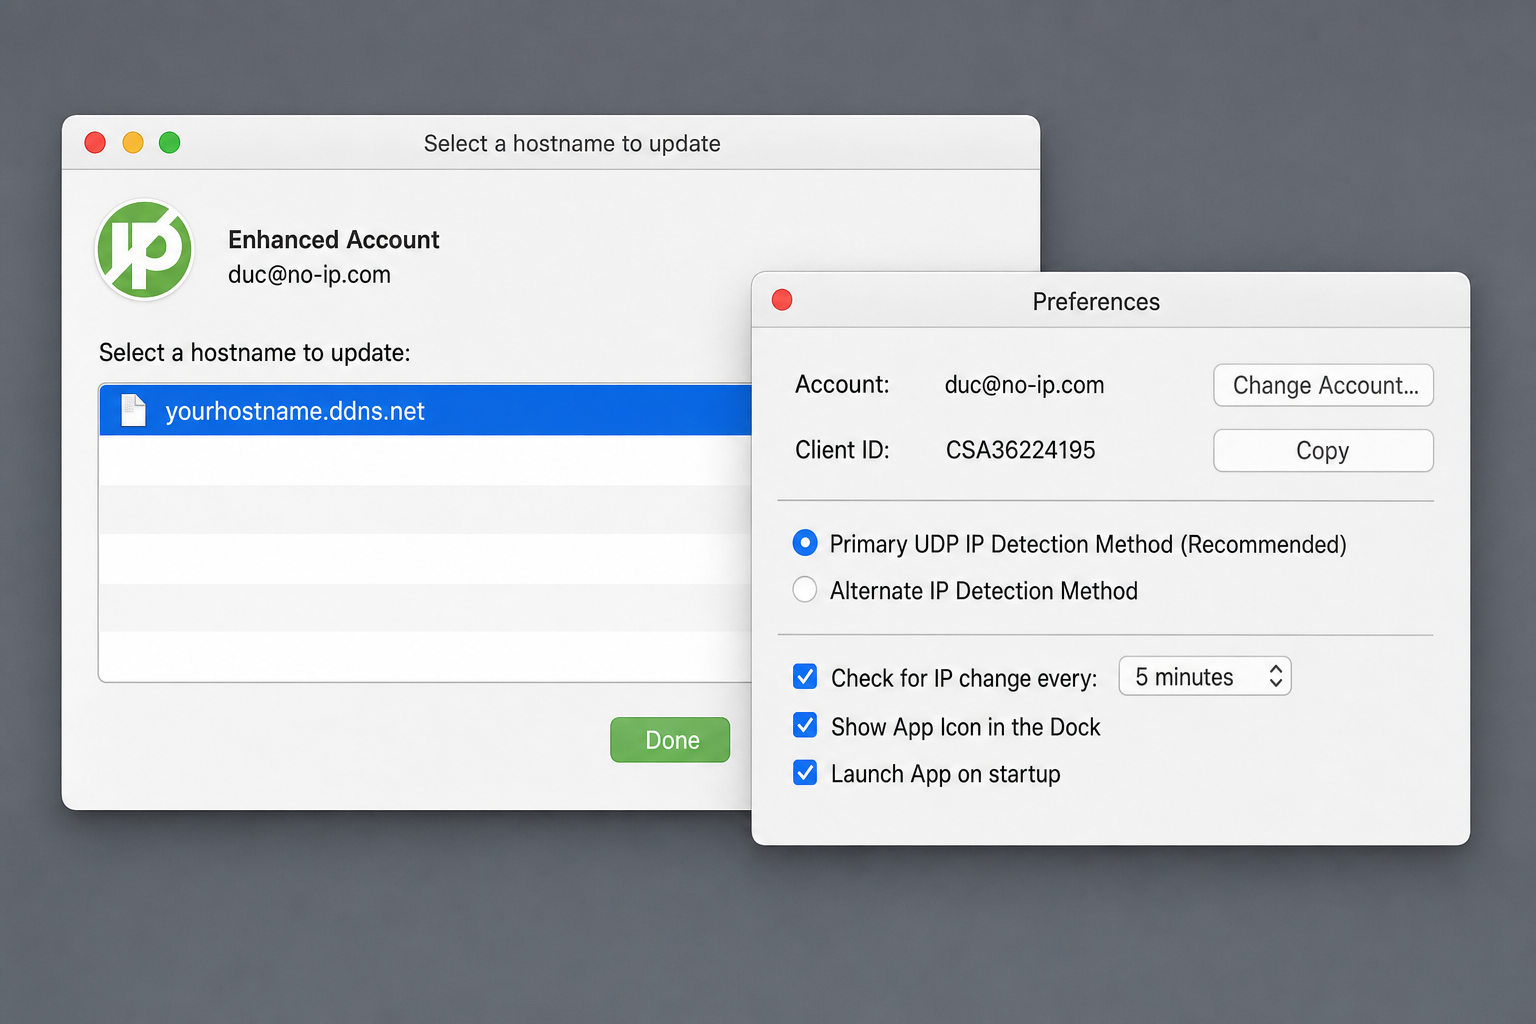
- When the app opens, log in with your No-IP account credentials (or your DDNS Key).
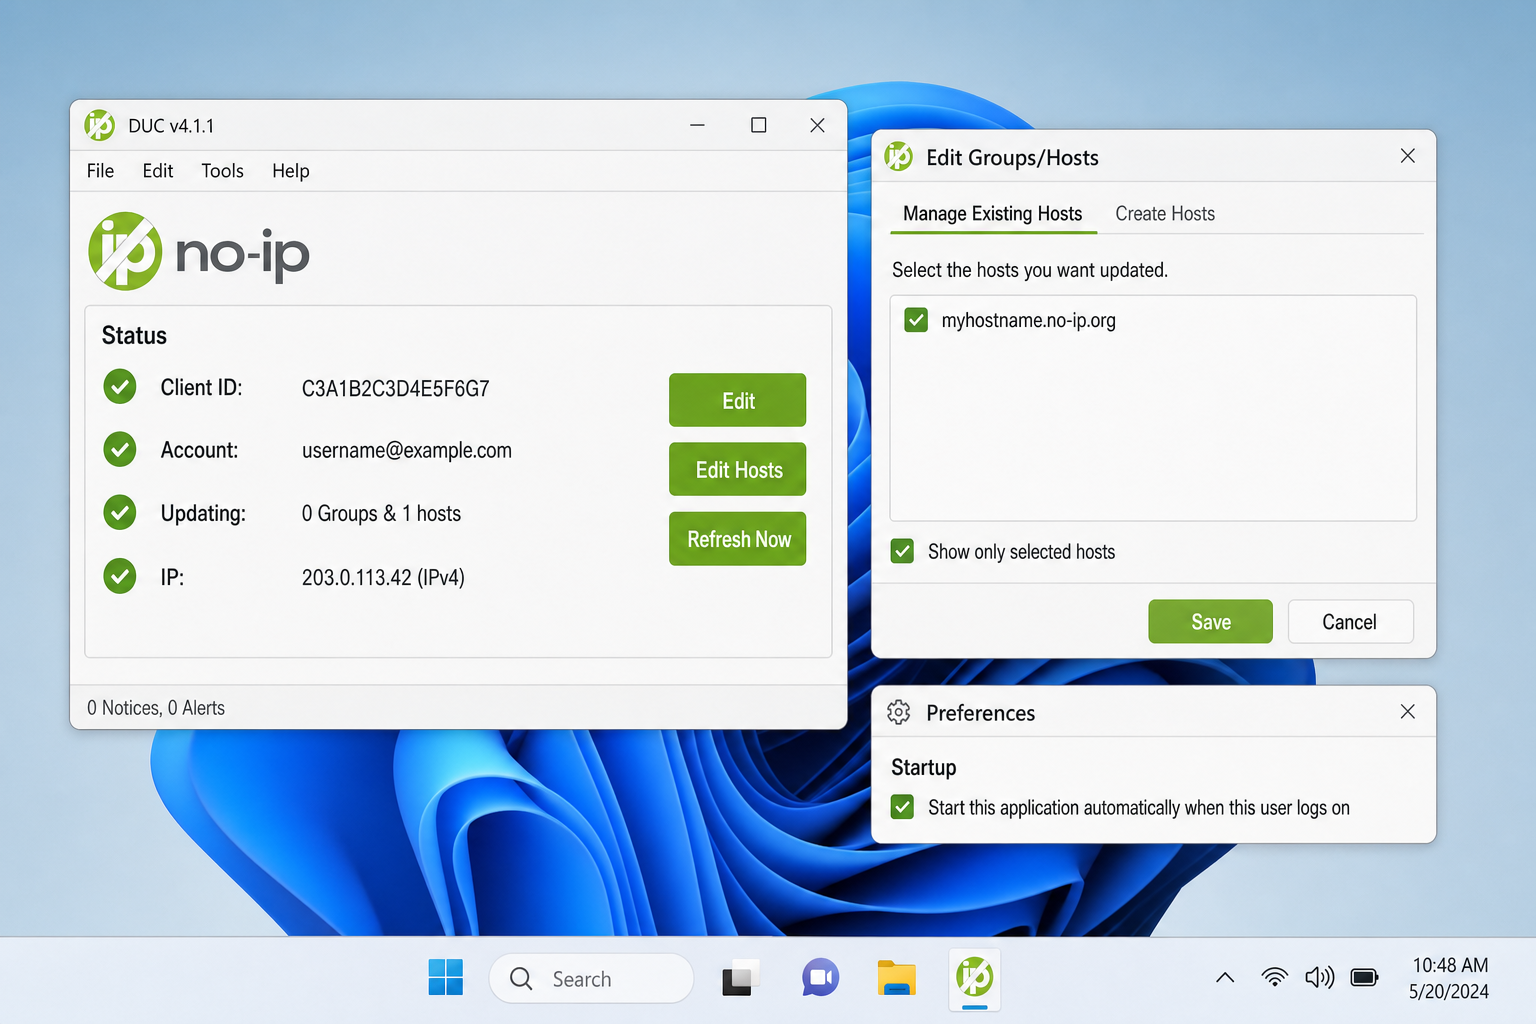
- Check the box next to the hostname(s) you want to keep updated.
- Click Save.
- In the app settings, enable Launch on system startup so it runs automatically whenever you boot your PC.
On macOS
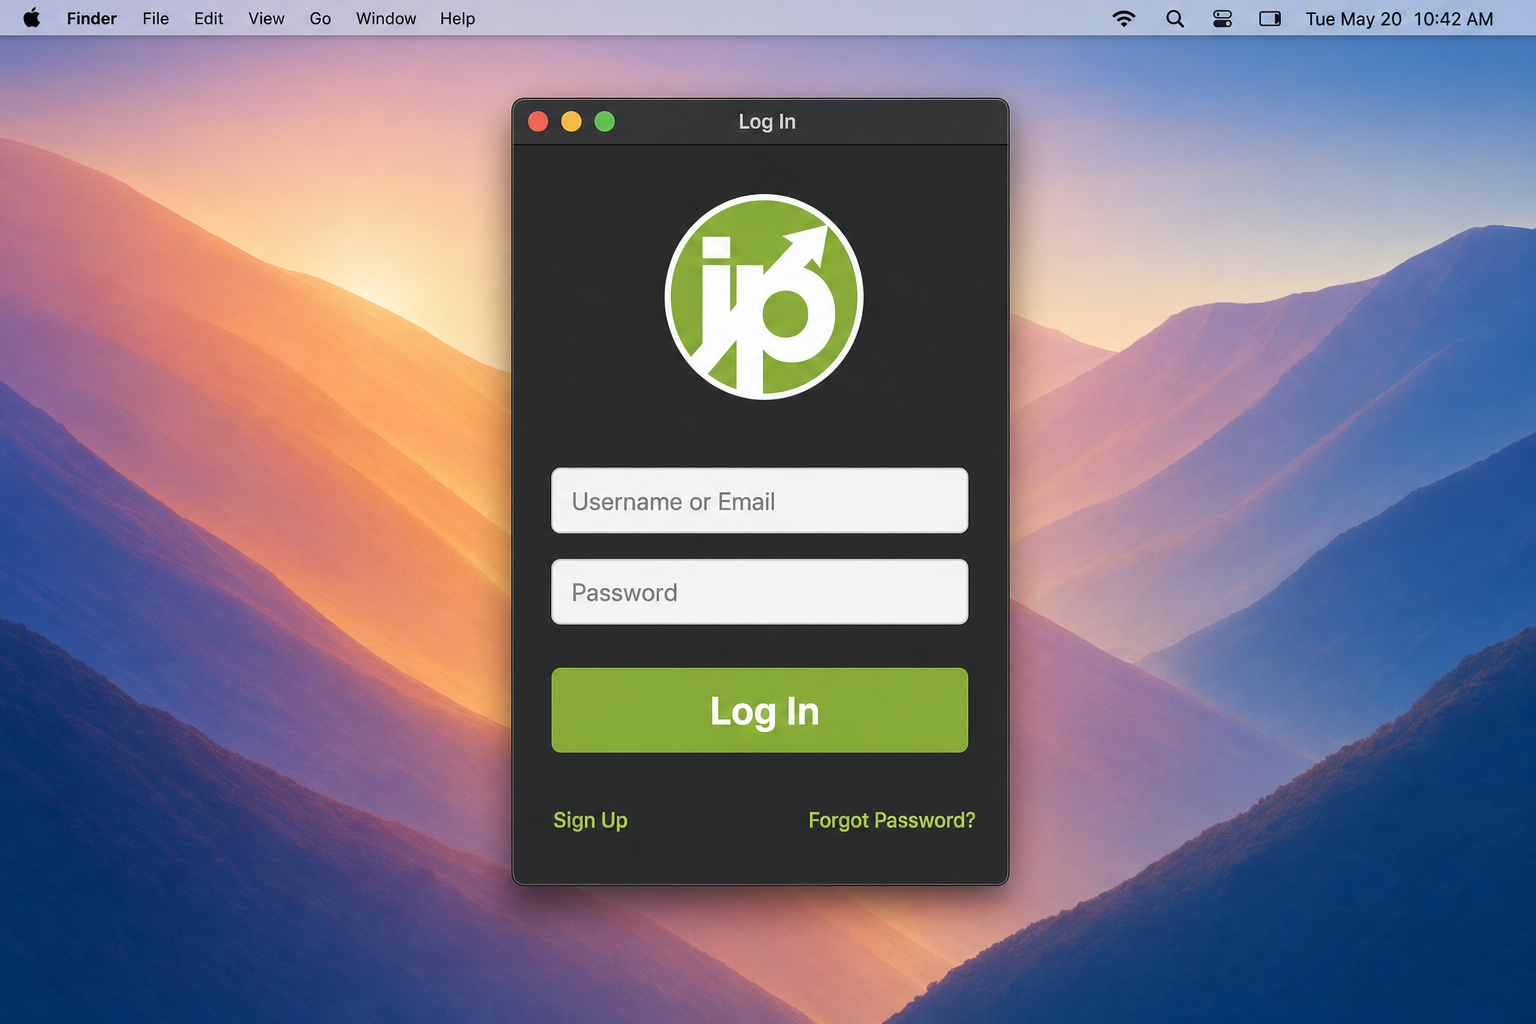
- Download the macOS version of the DUC from noip.com/download.
- Open the downloaded file and drag the app to your Applications folder.
- Launch the app and log in with your No-IP credentials.
- Select your hostname from the list and click Save.
- Open System Settings > General > Login Items and add the No-IP DUC so it starts automatically at login.
Step 3: Enable Remote Desktop on Your PC
Now that your DDNS hostname is live and updating, you need to set up the actual remote access. The most common use case is Windows Remote Desktop, here’s how to turn it on.
⚠️ Security heads-up: Exposing Remote Desktop (port 3389) directly to the internet is a real security risk. Automated bots constantly scan for open RDP ports. At minimum, use a strong password and a non-standard external port. Better yet, use a VPN, see the section below for safer alternatives.
On Windows 11
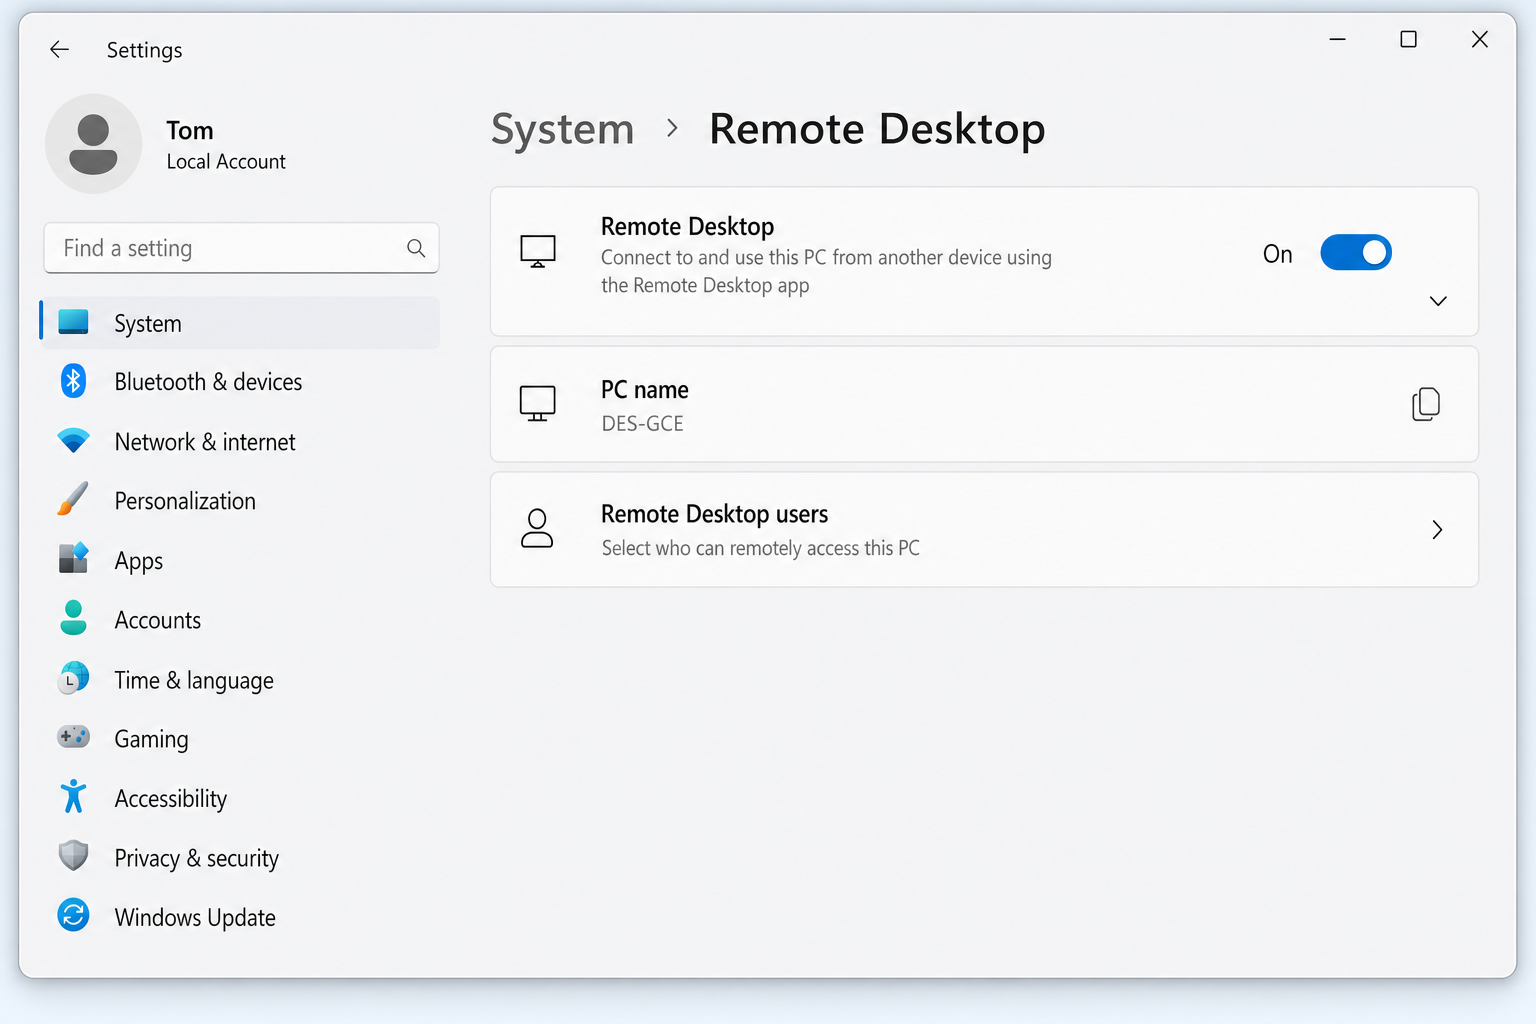
- Open Settings by pressing
Windows + I. - Click System > Remote Desktop.
- Toggle Remote Desktop to On and confirm when prompted.
- Make a note of the PC name shown on this page, you’ll need it when connecting.
On Windows 10
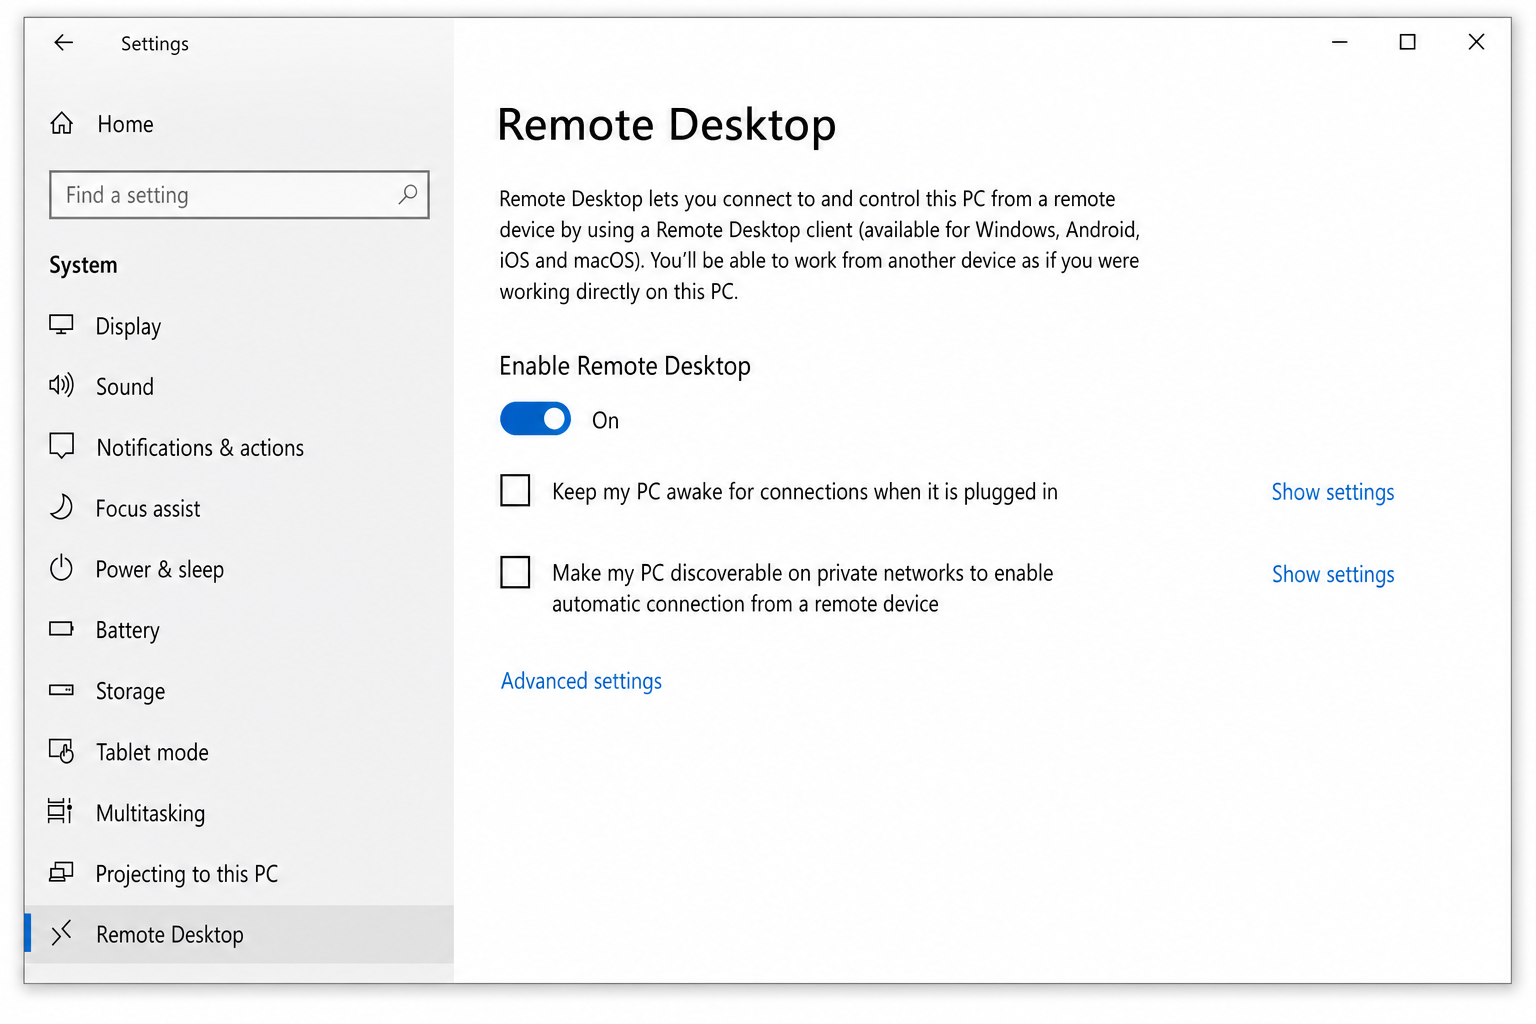
- Right-click the Start button and select System.
- Click Remote Desktop in the left panel.
- Toggle Enable Remote Desktop to On.
Step 4: Set Up Port Forwarding on Your Router
Your router needs to know which device on your home network should receive incoming remote desktop connections. This is called port forwarding. You’re essentially telling the router “when someone knocks on this door, send them to that specific PC.”
- Find your PC’s local IP address. On Windows, open Settings > Network & internet > Properties and look for the IPv4 address (something like
192.168.1.50). - Log in to your router’s web interface.
- Find the Port Forwarding section (sometimes under Advanced or NAT).
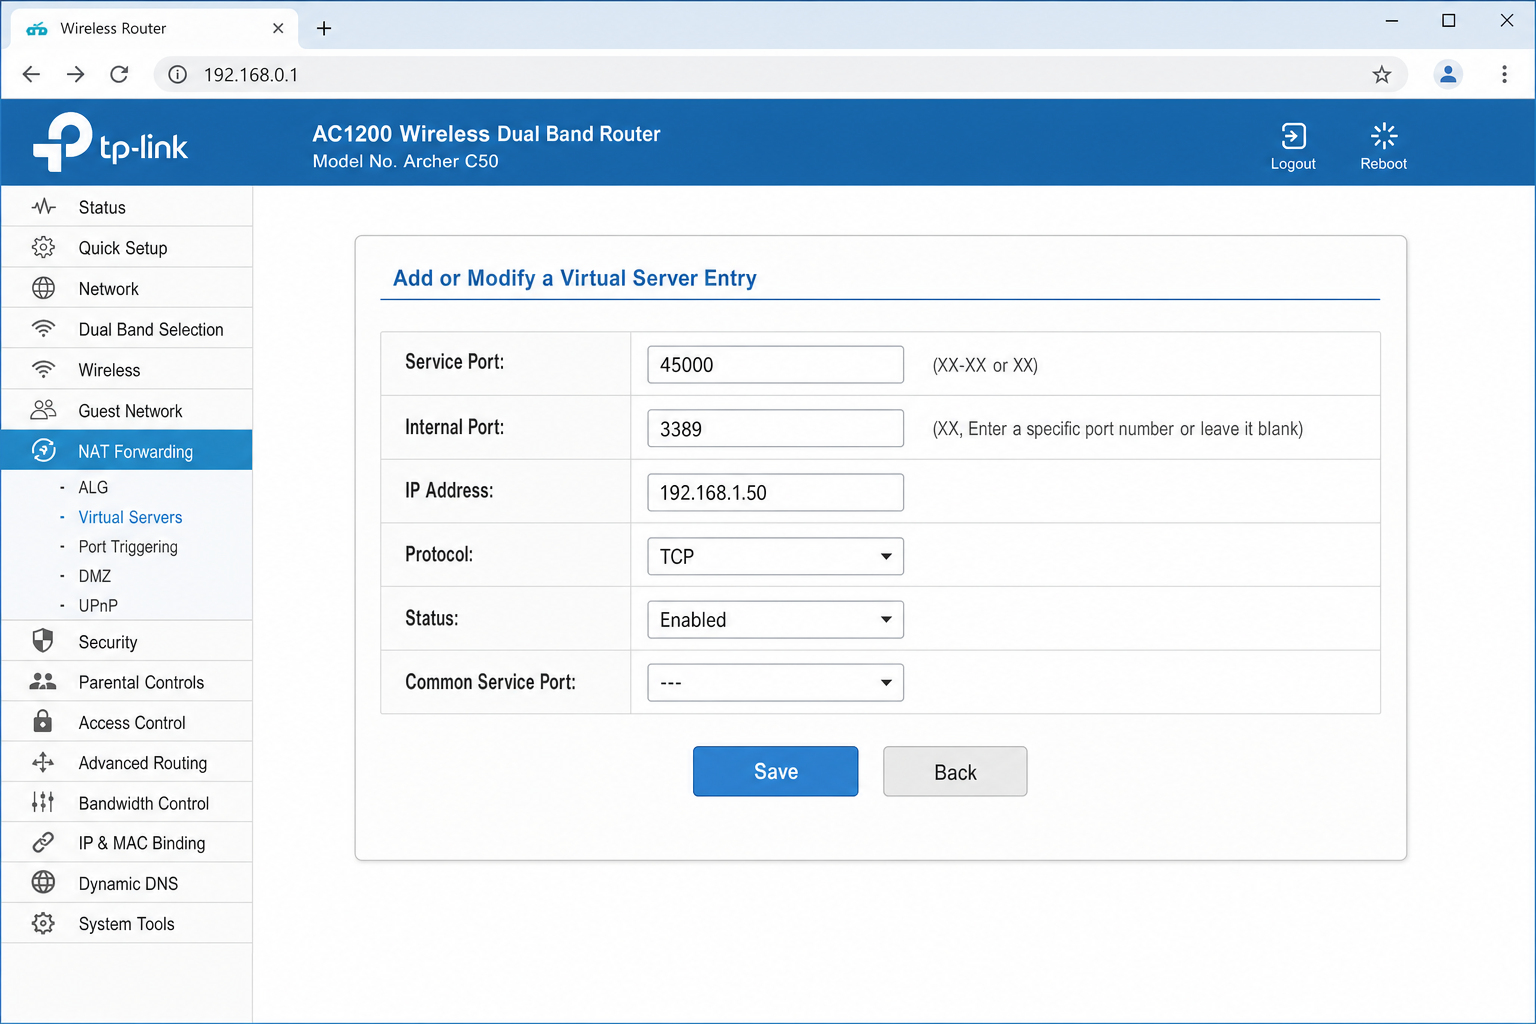
- Create a new rule with these settings:
- External port: Choose a high, random port number (e.g.,
45000), avoid using 3389 directly, as bots scan for it constantly - Internal IP: Your PC’s local IP address (e.g.,
192.168.1.50) - Internal port:
3389(the default RDP port) - Protocol: TCP
- External port: Choose a high, random port number (e.g.,
- Save the rule.
For a more detailed walkthrough of port forwarding, check out our guide on how to set up port forwarding on your router.
Step 5: Connect to Your PC from Outside Your Network
Time to test it. Grab your phone (switch to mobile data so you’re not on your home Wi-Fi) or use another computer on a different network.
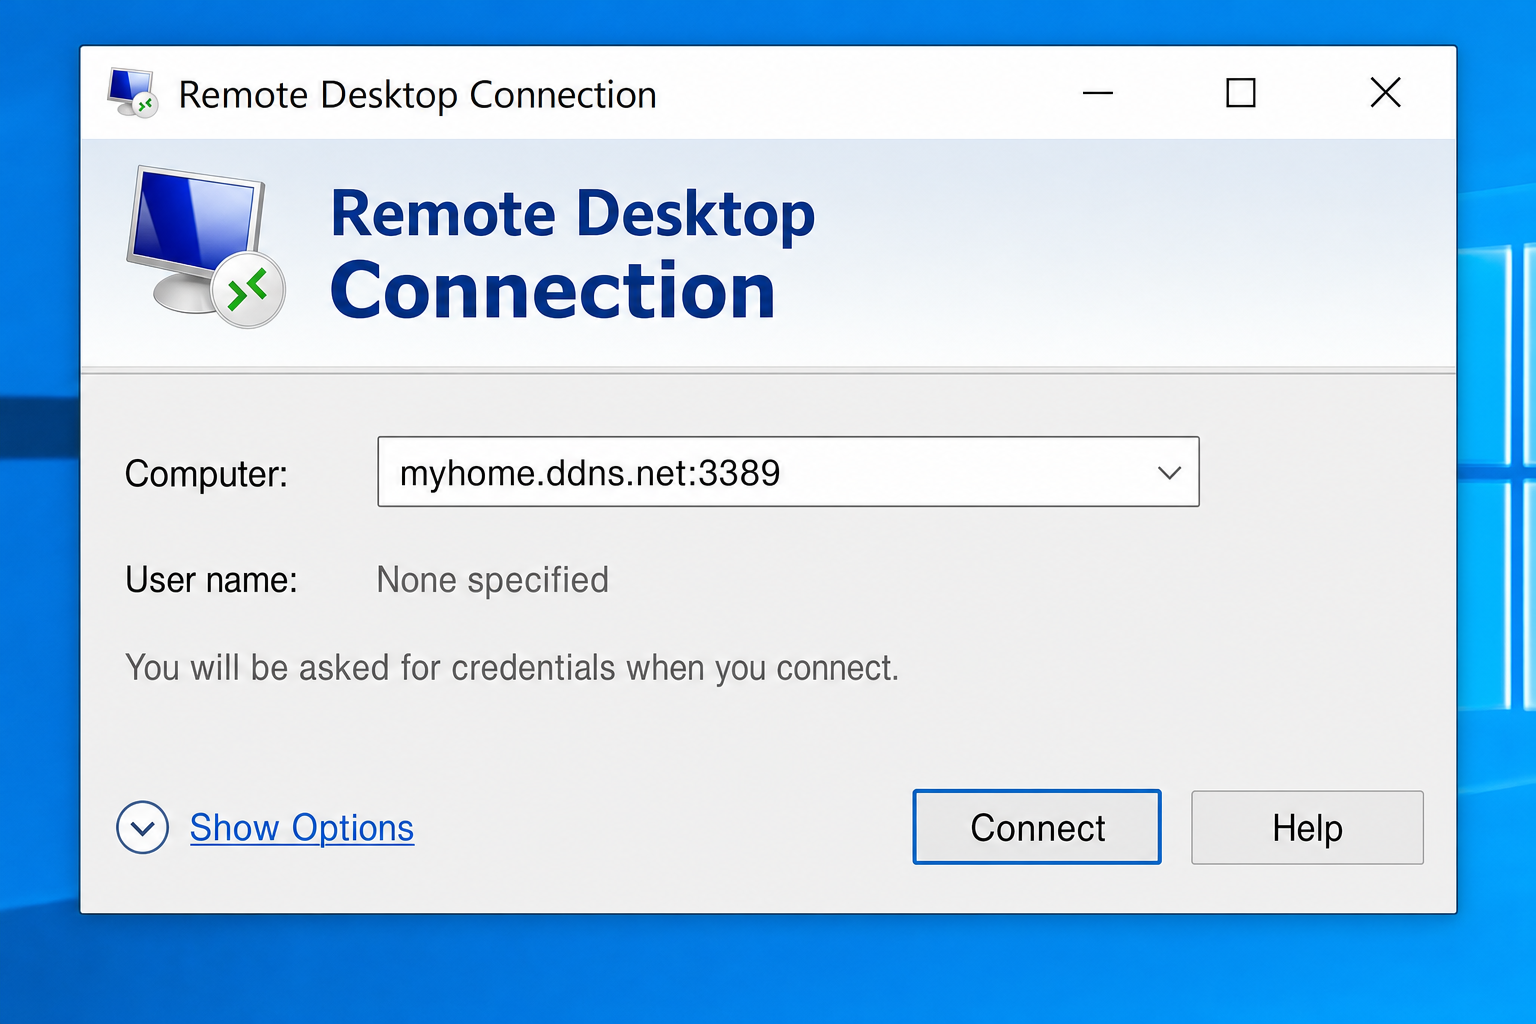
On Windows
- Press
Windows + R, typemstsc, and pressEnterto open Remote Desktop Connection. - In the Computer field, type your DDNS hostname followed by the external port you set, like:
mypc.ddns.net:45000 - Click Connect and enter your Windows username and password when prompted.
On macOS
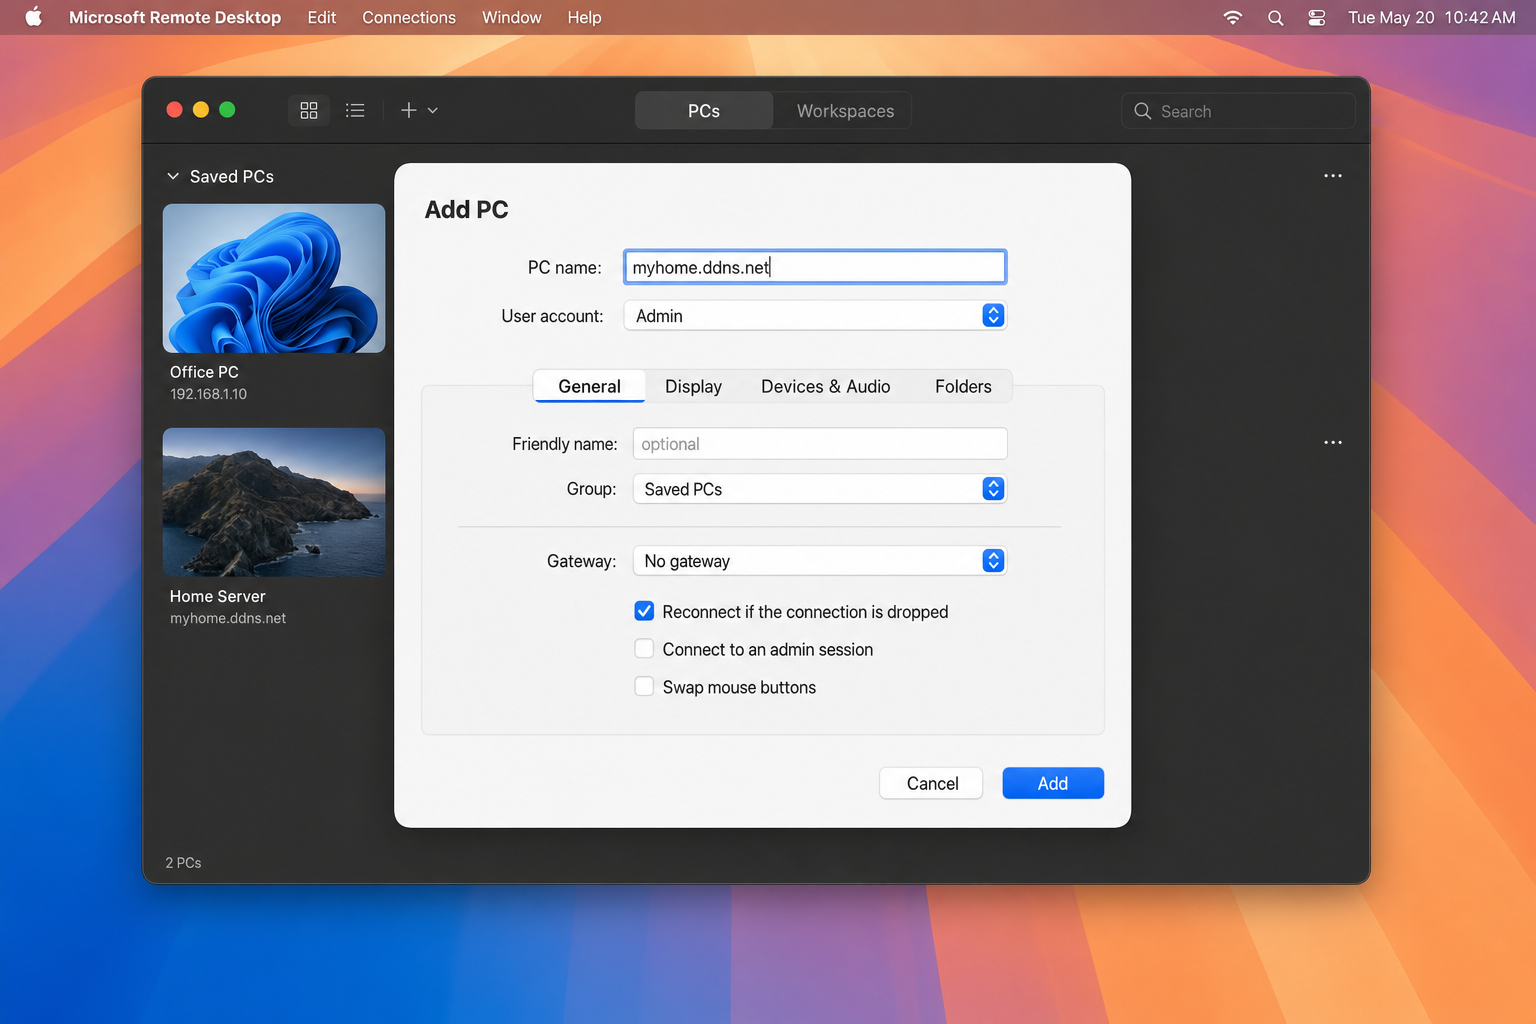
- Download Windows App (formerly Microsoft Remote Desktop) from the Mac App Store if you don’t have it already.
- Open the app and click the + button to add a new PC.
- In the PC name field, enter your DDNS hostname and port (e.g.,
mypc.ddns.net:45000). - Add your credentials and click Add.
- Double-click the connection to connect.
Tips and Troubleshooting
Common Issues
Problem: My DDNS hostname resolves, but I still can’t connect
This is usually a port forwarding issue. Double-check that:
- The internal IP in your port forwarding rule matches your PC’s actual local IP (it can change if your router reassigns it; consider setting a static local IP for your PC)
- Windows Firewall isn’t blocking incoming RDP connections
- Your ISP isn’t blocking the port, test with canyouseeme.org
Problem: No-IP deactivated my hostname
No-IP Free requires you to confirm your hostname every 30 days or it goes inactive. Set a monthly calendar reminder, or switch to Dynu or Duck DNS. Neither requires periodic reactivation.
Problem: I’m behind CGNAT and port forwarding doesn’t work
Classic DDNS + port forwarding won’t work if your ISP uses CGNAT. You have a few options:
- Contact your ISP and ask for a public IP (sometimes free, sometimes a small monthly charge)
- Use a VPN mesh tool like Tailscale (see below)
- Use a cloud remote access tool like Chrome Remote Desktop or AnyDesk
Problem: I have IPv6, does DDNS still apply?
Yes! IPv6 addresses are long and can still change. Providers like Dynu, Duck DNS, and dynv6 all support IPv6 (AAAA records). If your ISP gives you a public IPv6 address but uses CGNAT for IPv4, DDNS over IPv6 might actually be your best path forward.
Pro Tips
- Set a static local IP for your PC: If your PC’s local IP changes, your port forwarding rule breaks. Assign a reserved IP in your router’s DHCP settings so your PC always gets the same address.
- Use a strong password: If you’re exposing any service to the internet, make sure your Windows account has a strong, unique password. Enable Network Level Authentication (NLA) in Remote Desktop settings for an extra layer of protection.
- Test from mobile data: Always test your connection using mobile data (not your home Wi-Fi). Connecting from inside your own network can give false positives and doesn’t prove external access works.
- Check if your port is open: Use canyouseeme.org to verify your external port is reachable before blaming the DDNS setup.
Modern Alternatives: When DDNS Isn’t the Right Tool
Honestly, for a lot of people in 2026, there are easier and safer ways to access a home PC remotely than the traditional DDNS + port forwarding setup. Here’s a quick rundown:
- Tailscale: A free, incredibly easy VPN built on WireGuard. Install it on your home PC and your remote device, and they connect directly. No port forwarding, no DDNS, works even behind CGNAT. This is genuinely the easiest option for most people today.
- ZeroTier: Similar to Tailscale. It creates a virtual private network between your devices. Slightly more technical to configure but very powerful.
- Chrome Remote Desktop: Completely free, stupidly simple, works through your Google account. No networking knowledge required. The trade-off is you’re relying on Google’s servers as a relay.
- Cloudflare Tunnel: If you’re running a web service at home, Cloudflare Tunnel lets you expose it securely without opening any ports. More of a power-user option, but free and very secure.
DDNS + port forwarding still makes sense if you want full control, need to host a game server, or want to run your own VPN. But if you just want to grab files from your home PC, Tailscale or Chrome Remote Desktop will get you there faster with less hassle.
Wrapping Up
Setting up Dynamic DNS is a solid way to give your home connection a reliable, permanent address, and with free providers like No-IP, Dynu, and Duck DNS, there’s no reason to pay for it. Pair it with proper port forwarding and a strong password, and you’ve got a working remote access setup. That said, if security is a priority (and it should be), consider layering in a VPN or just going with something like Tailscale from the start. It removes a lot of the complexity and risk in one shot.
If you run into any issues getting connected, drop a comment below and we’ll help you troubleshoot.