
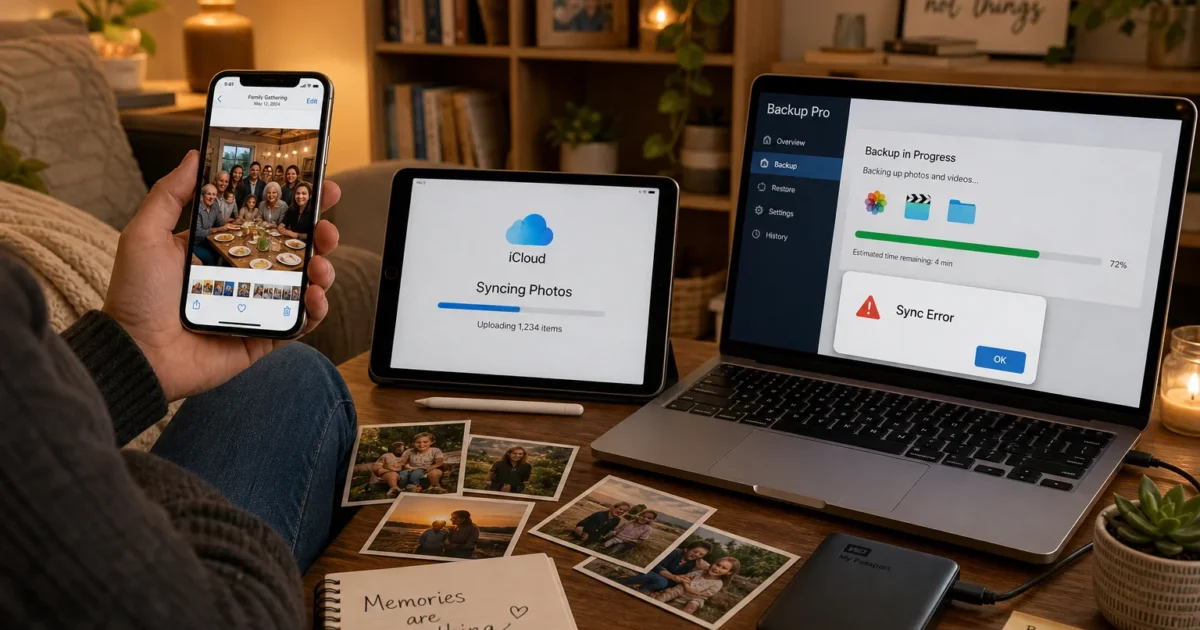
What’s more frustrating than losing years of photos because your iPhone disappeared, broke, or got wiped? Your camera roll probably holds birthdays, vacations, pets, and plenty of wonderfully pointless screenshots. Replacing the phone is easy. Replacing those memories isn’t.
I stumbled upon a simple solution while sorting out my own scattered photo library: use one service for everyday syncing and keep another independent copy. After following these four methods, you’ll have a safer photo setup that can survive a lost device, an accidental deletion, or a cloud account problem.
Syncing and Backing Up Aren’t the Same
Syncing keeps the same photo library on multiple devices. Add a photo on your iPhone, and it appears on your iPad and Mac. Delete it from one device, though, and that deletion syncs everywhere.
A backup is an independent copy you can recover later. It doesn’t immediately copy every change or deletion from your main library.
For the best protection, use:
- A syncing service: iCloud Photos or Google Photos keeps recent pictures available across your devices.
- An independent backup: An external drive, computer backup, or second cloud service gives you another copy.
- Account protection: A unique password and two-factor authentication help keep strangers away from your library.
That second copy may sound fussy. It actually works, and setting it up is easier than rebuilding a decade of missing photos.
Before You Begin
Make sure you have:
- Your iPhone or iPad passcode
- Your Apple Account password
- A reliable Wi-Fi connection
- Enough iCloud or computer storage for your library
- A charging cable for computer backups
- An external drive if you want an offline copy
Large libraries can take hours or days to upload. Keep the device charging and connected to Wi-Fi during the first backup.
Method 1: Use iCloud Photos
iCloud Photos is Apple’s built-in photo syncing service. It uploads your photos and videos to iCloud, then makes the same library available on devices signed in to your Apple Account.
It’s the smoothest option if you regularly switch between an iPhone, iPad, and Mac. Just remember that iCloud Photos mirrors deletions, so pair it with one of the independent backup methods below.
Turn On iCloud Photos
- Open Settings on your iPhone or iPad.
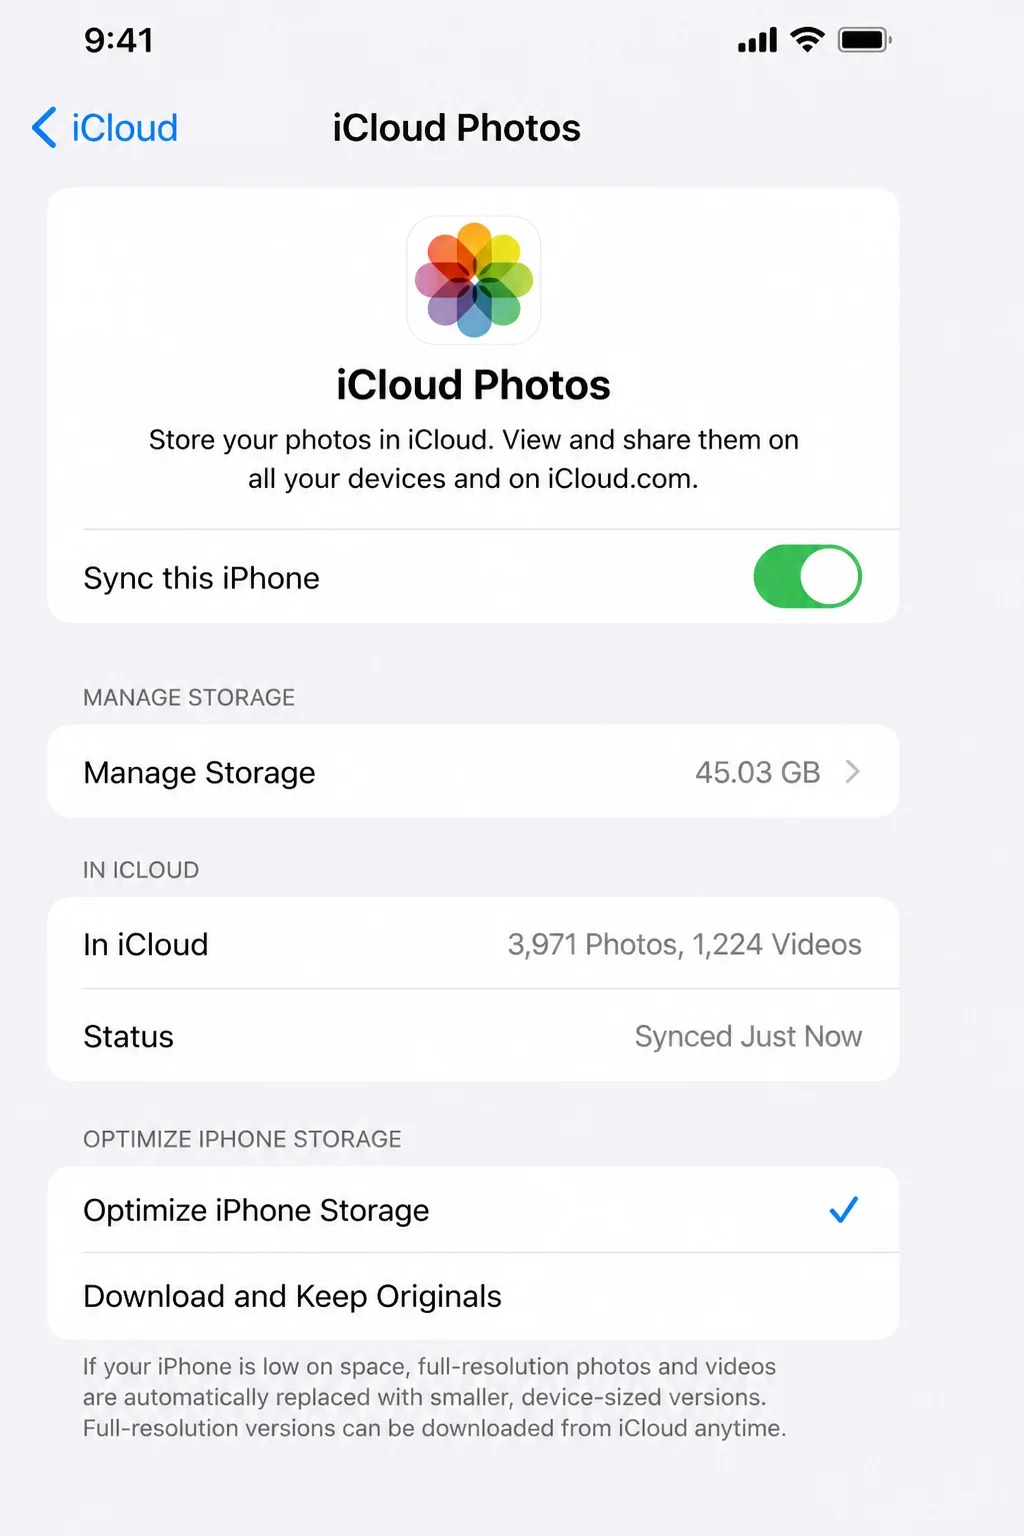
- Tap [your name] at the top.
- Tap iCloud > Photos.
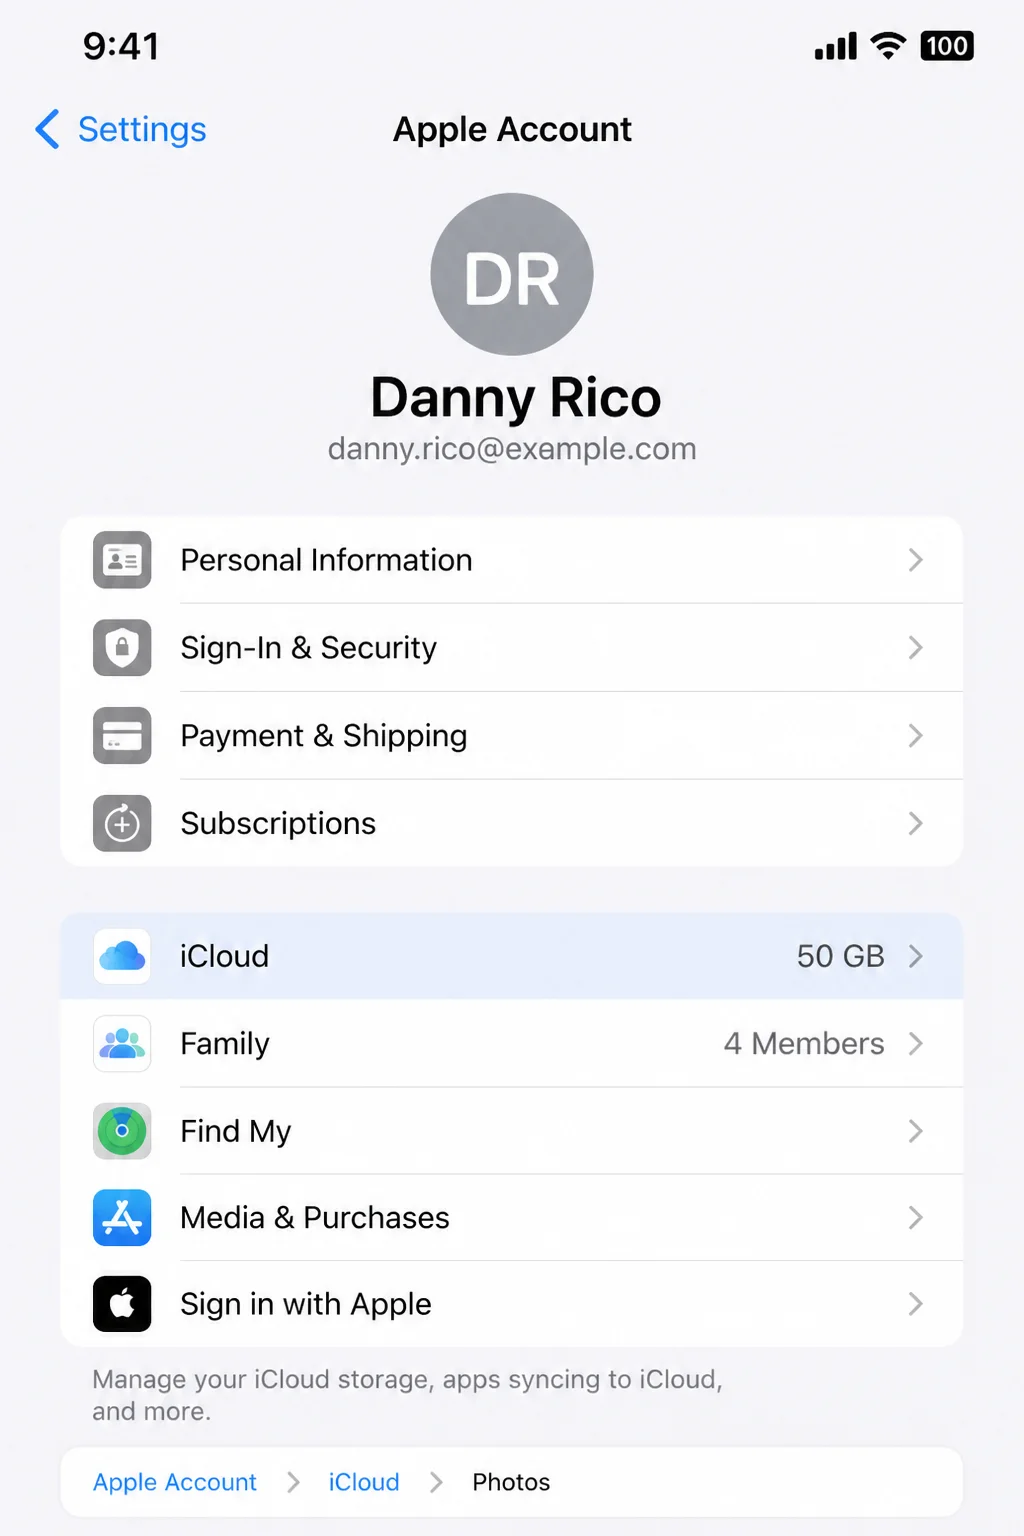
- Turn on Sync this iPhone or Sync this iPad. Your library will begin uploading to iCloud.
- Select Optimize iPhone Storage or Optimize iPad Storage if space is tight. Your device keeps smaller copies while full-resolution originals stay in iCloud.
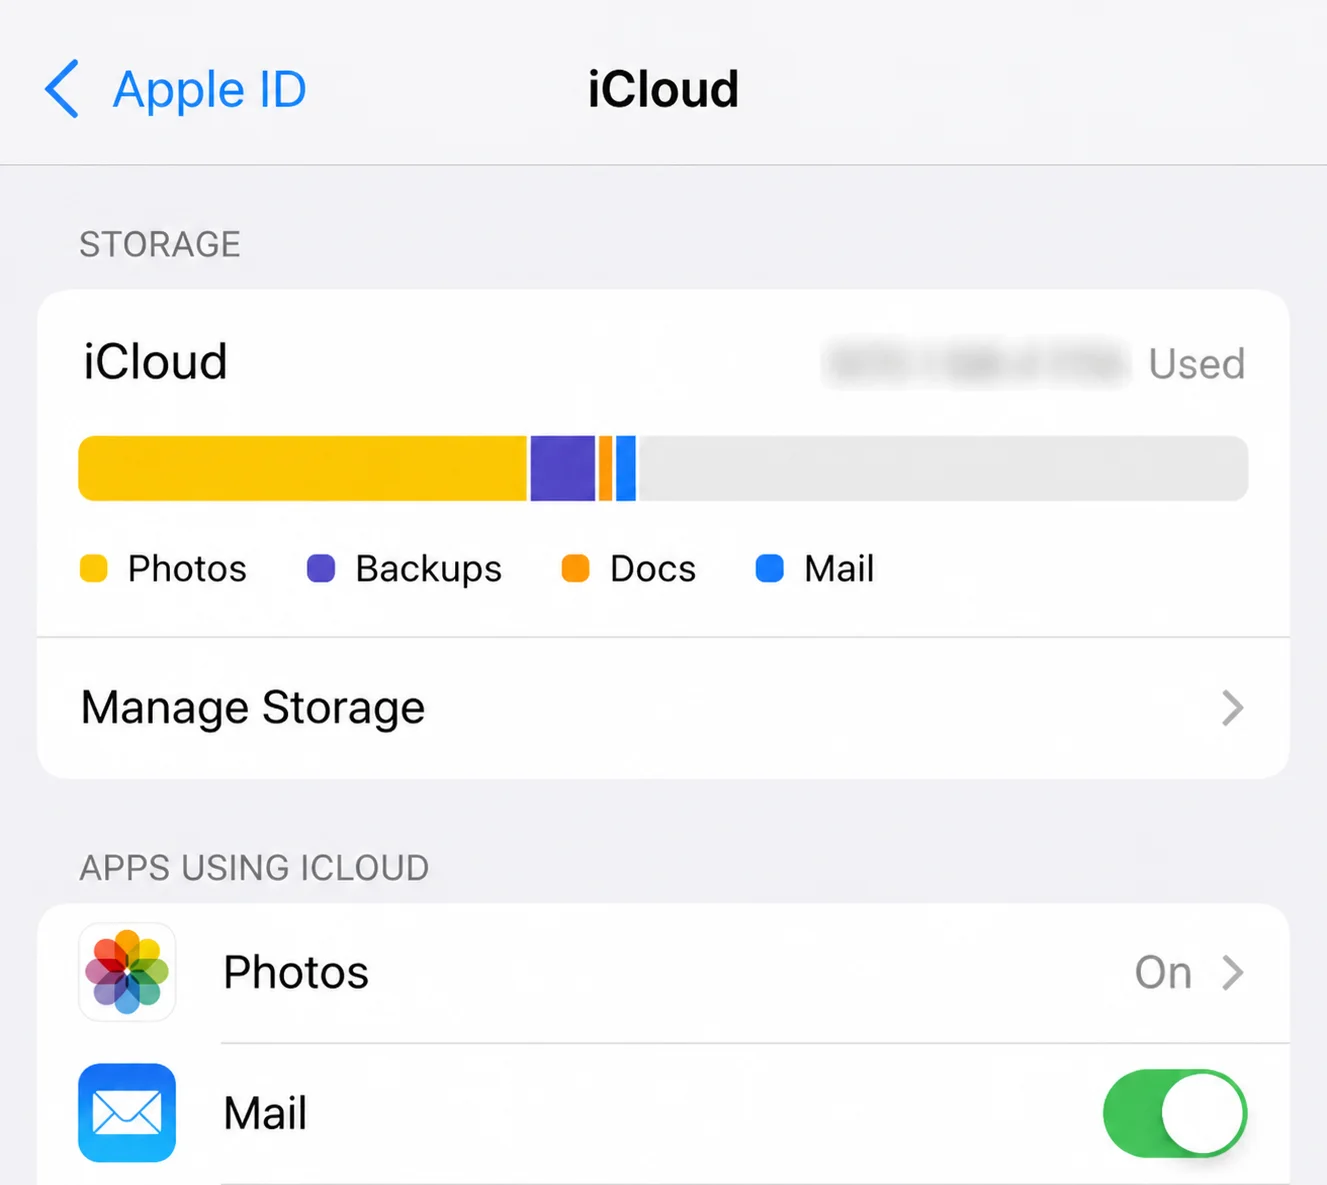
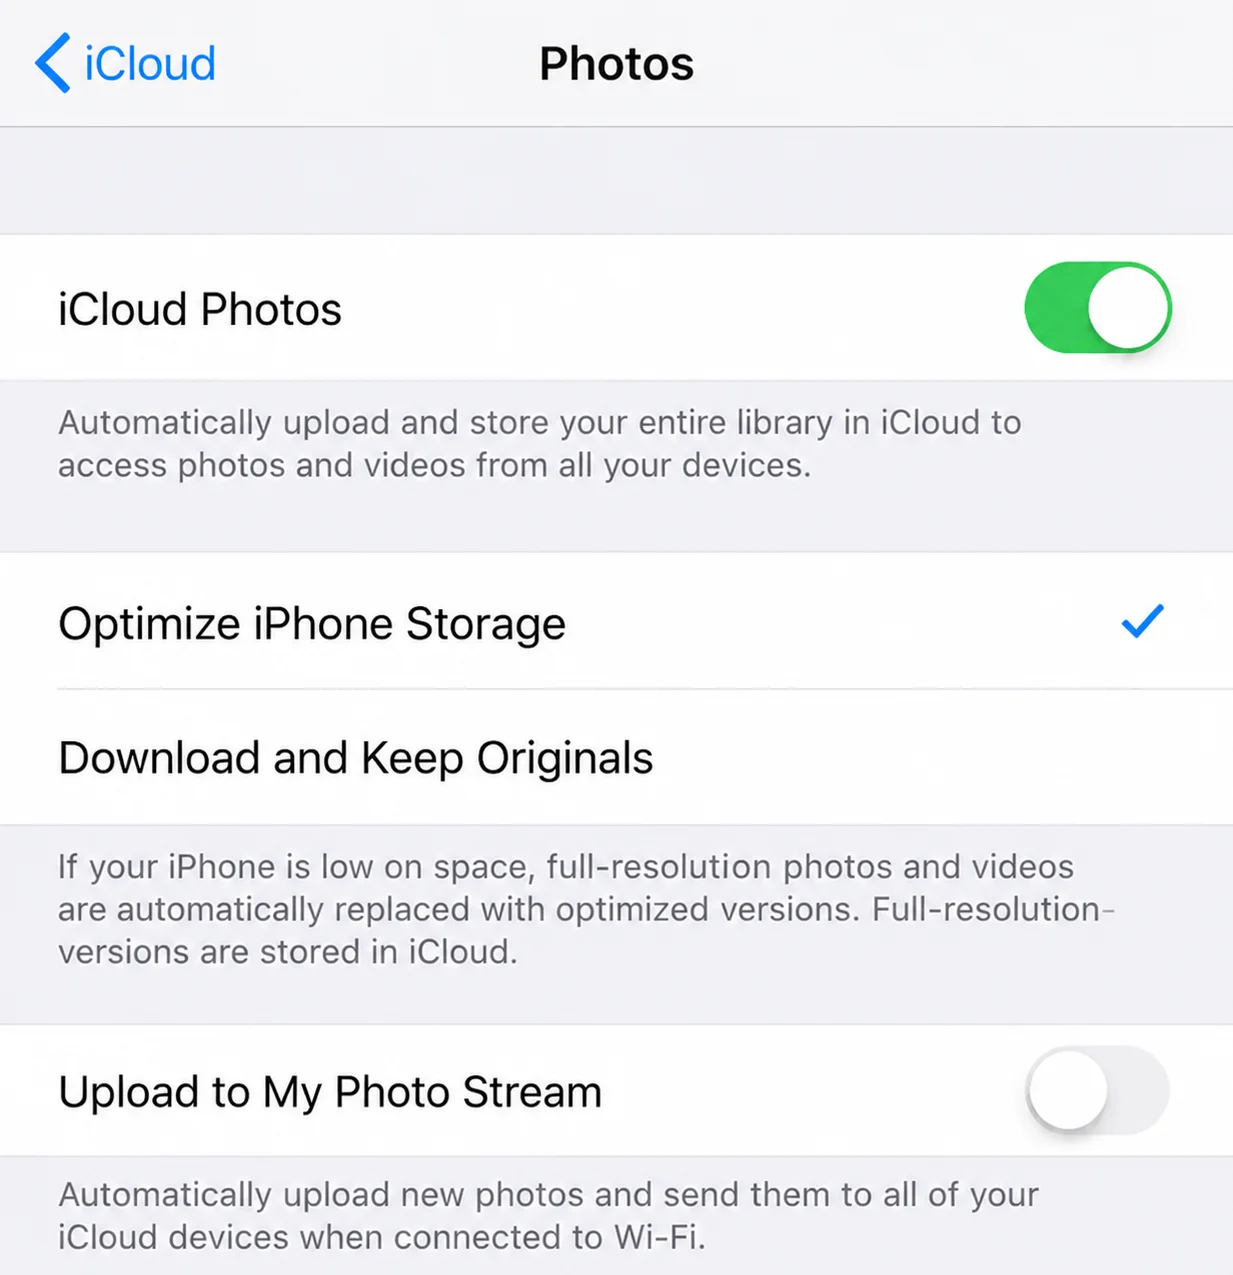
Apple includes 5 GB of free iCloud storage, which disappears quickly once videos get involved. If your library is larger, you’ll need an iCloud+ plan with enough room.
Check That Syncing Has Finished
- Open Photos.
- Tap your profile button. Depending on your current iOS or iPadOS version, you may also find the library status near the bottom of your photo collection.
- Check the sync message. If uploading is paused, connect the device to power and Wi-Fi, then follow the displayed option to resume it.
Don’t delete anything to test the system. That photo will also leave iCloud and your other synced devices (the trash can is very efficient when you don’t want it to be).
Method 2: Create a Full Device Backup
A full device backup helps you restore an iPhone or iPad after it gets lost, damaged, or erased. It includes settings and app data that aren’t already syncing with iCloud.
Photos stored through iCloud Photos aren’t duplicated inside an iCloud device backup. They’ll download from iCloud after you restore and sign in.
Back Up to iCloud
- Open Settings.
- Tap [your name] > iCloud.
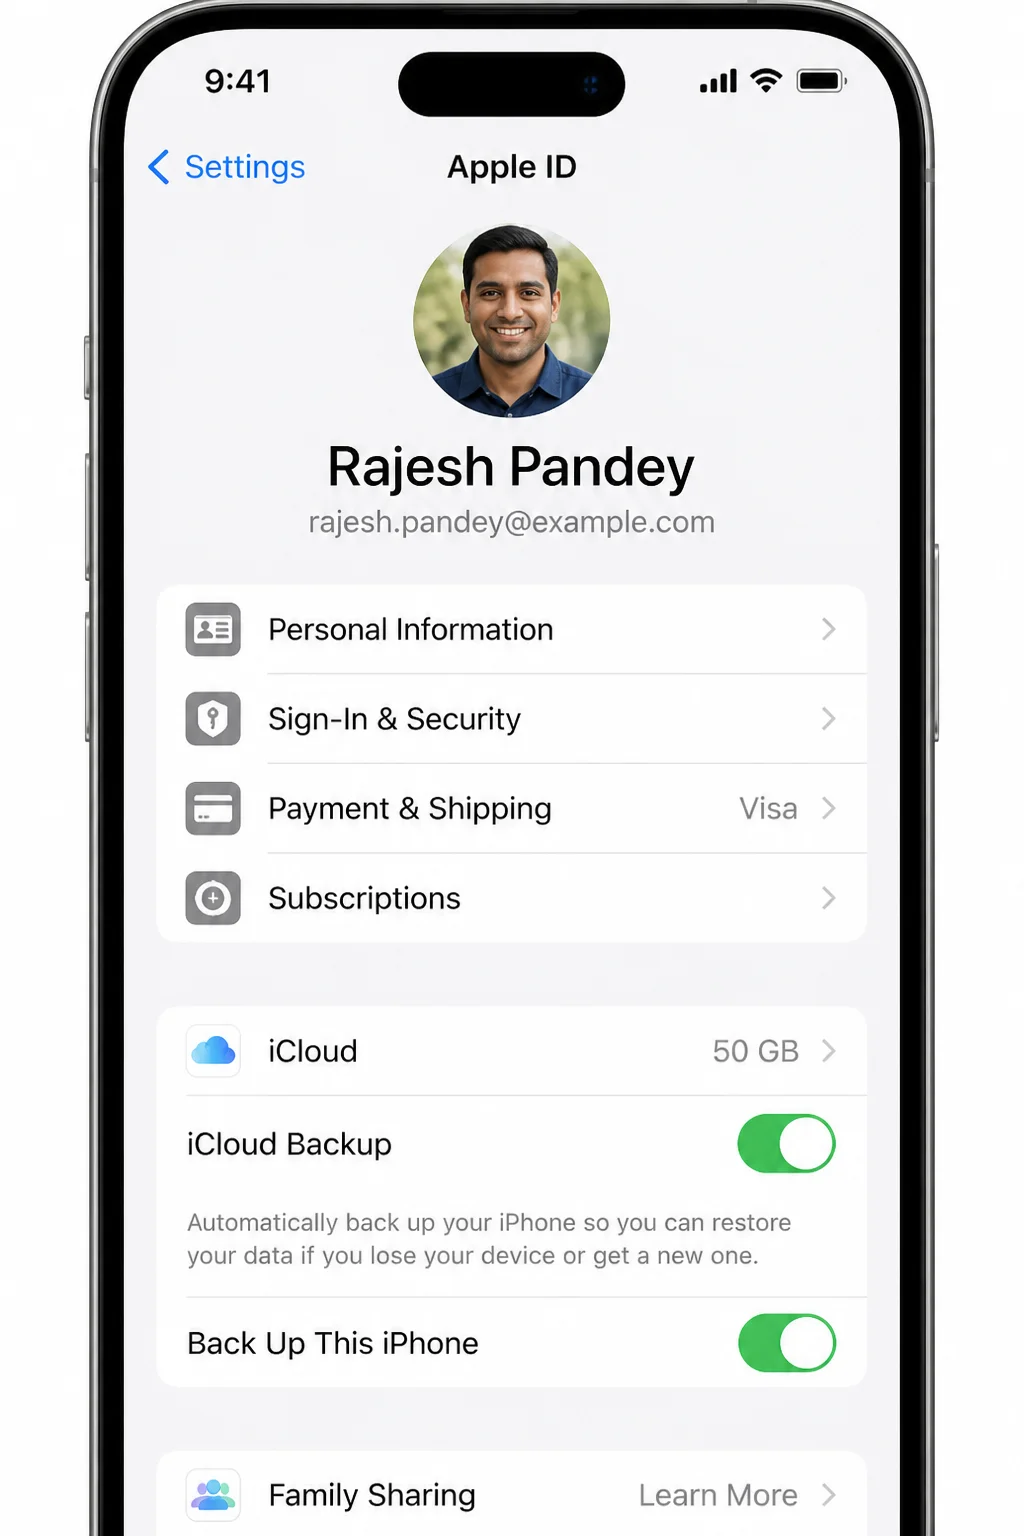
- Tap iCloud Backup.
- Turn on Back Up This iPhone or Back Up This iPad.
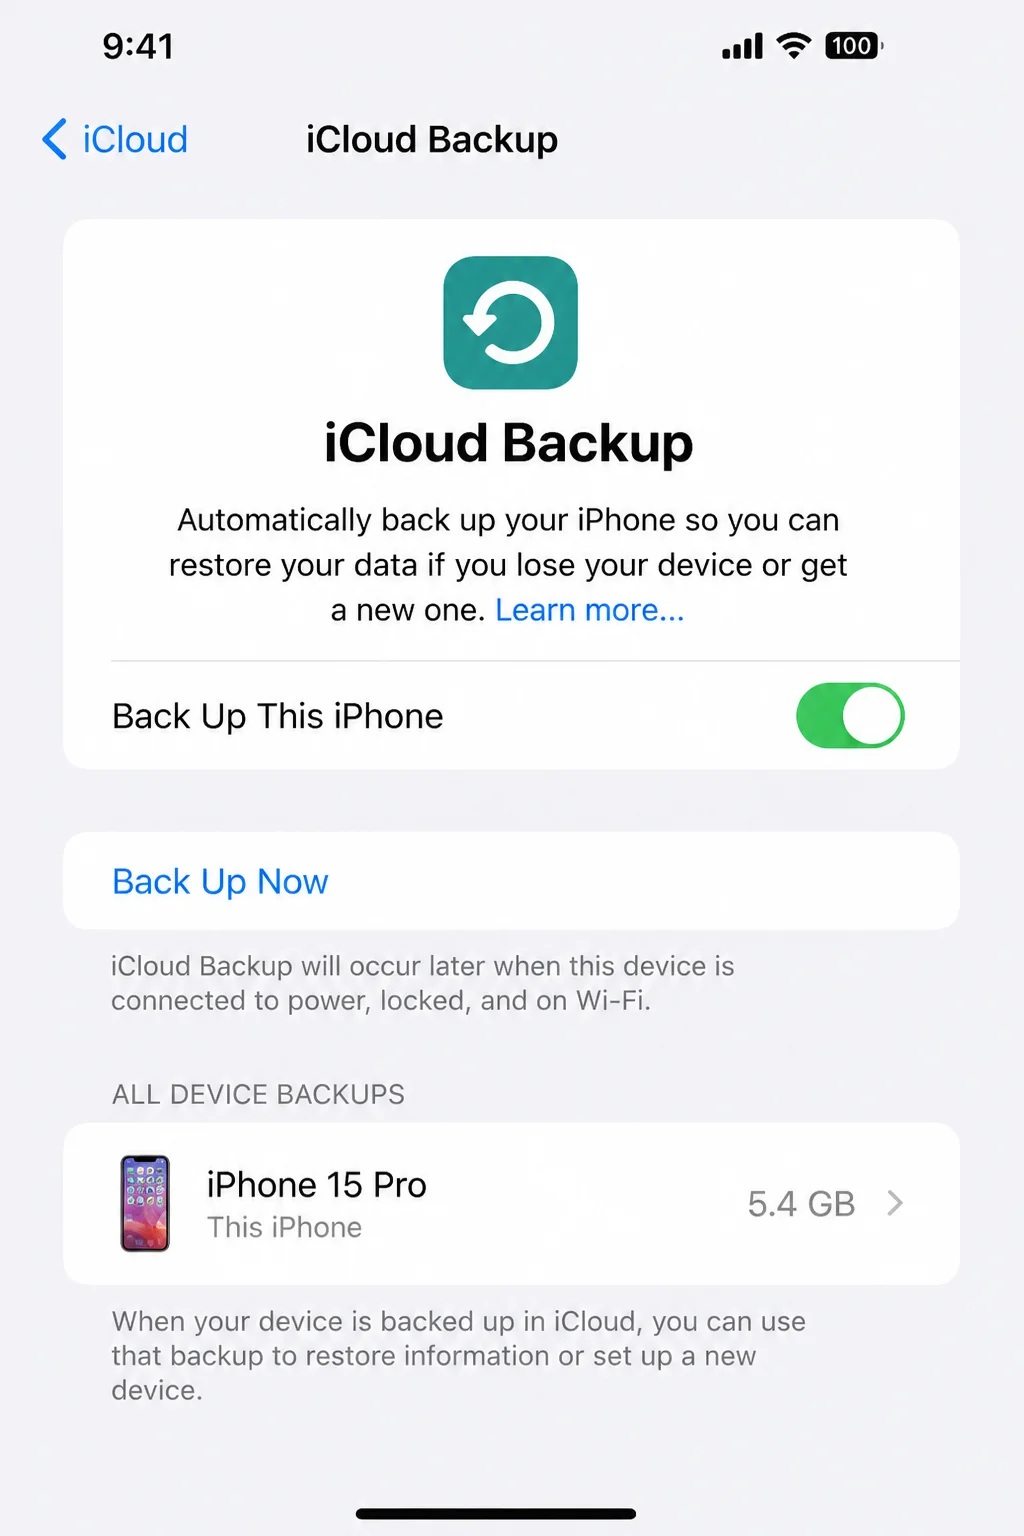
- Tap Back Up Now. Keep the device connected to Wi-Fi until the backup finishes.
Automatic iCloud backups normally run when the device is locked, connected to power, and on Wi-Fi. Return to this screen later and check the date beneath Back Up Now to confirm that it worked.
Back Up to a Mac With Finder
- Connect the iPhone or iPad to your Mac with a cable.
- Unlock the mobile device and tap Trust if asked.
- Open Finder.
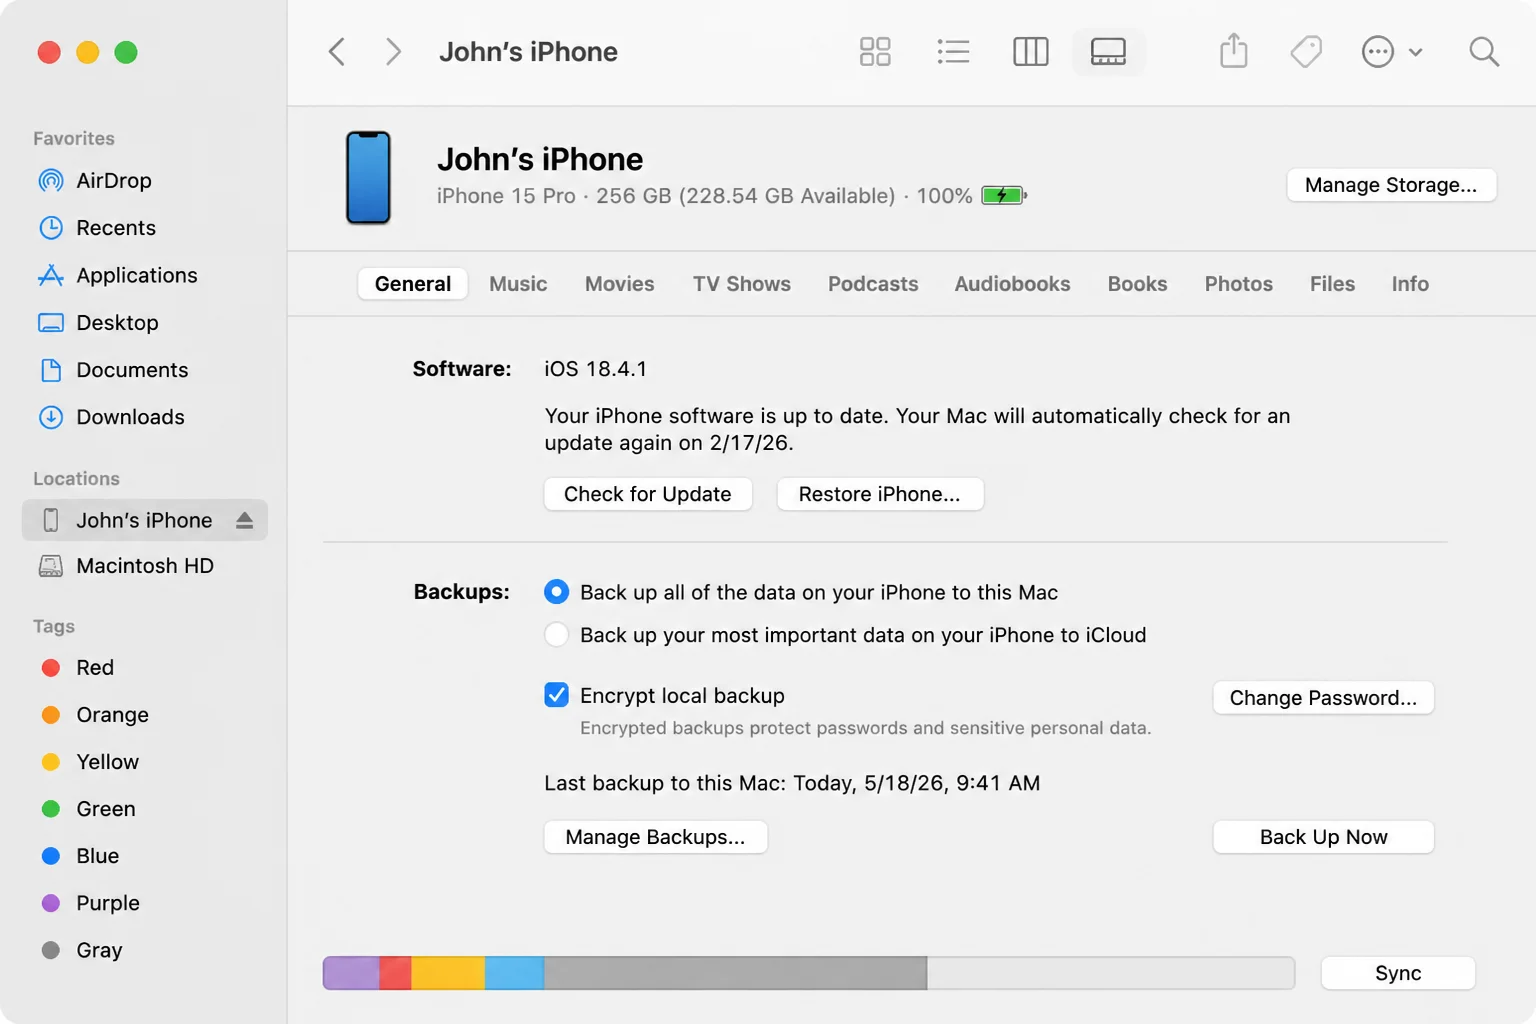
- Select your iPhone or iPad under Locations in the sidebar.
- Open the General tab.
- Select Back up all of the data on your iPhone to this Mac.
- Turn on Encrypt local backup if you want the backup to include saved passwords, Health data, and other sensitive information. Create a password you’ll remember; losing it can make the encrypted backup unusable.
- Click Back Up Now. The latest backup date will appear when the job finishes.
Back Up to a Windows PC With iTunes
- Install and open iTunes on your Windows PC.
- Connect the iPhone or iPad with a cable.
- Unlock the device and tap Trust if prompted.
- Click the device icon near the upper-left corner of iTunes.
- Select Summary in the sidebar.
- Under Backups, select This Computer.
- Select Encrypt local backup if you want a password-protected copy that includes sensitive data. Save that password somewhere secure.
- Click Back Up Now. Check Latest Backups afterward to confirm that the computer backup completed.
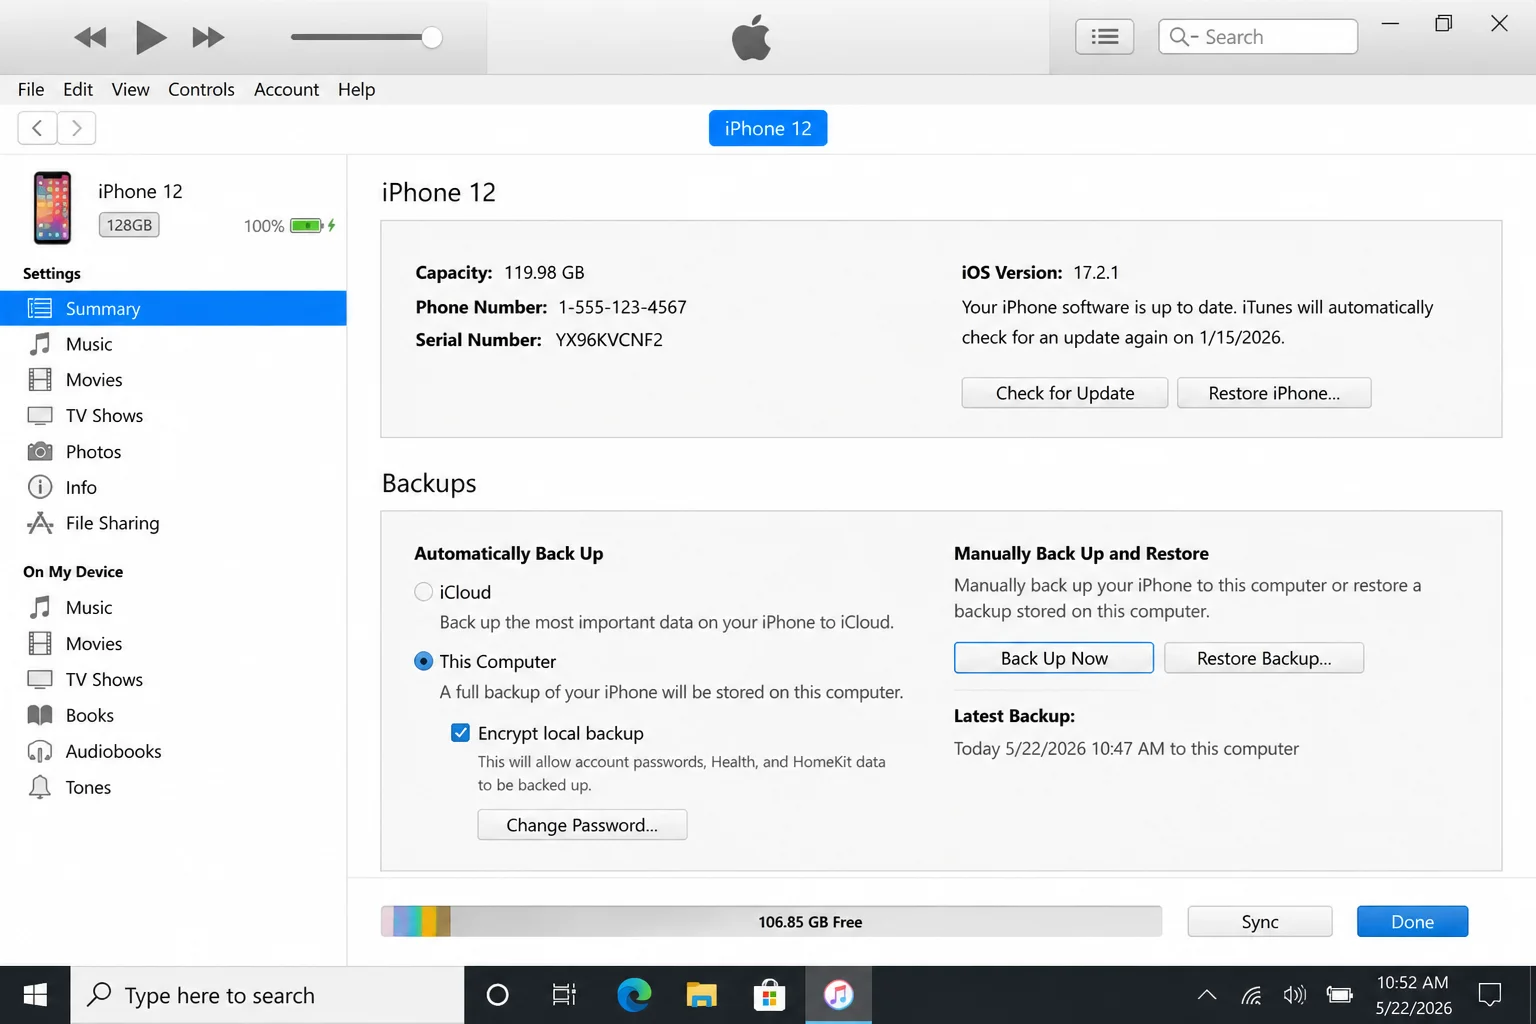
A device backup is excellent for disaster recovery, but you can’t browse it like a normal photo folder. Use the next method if you want individual files you can open and copy.
Method 3: Save an Independent Copy to a Computer or External Drive
An external drive gives you a separate copy that won’t follow accidental iCloud deletions. That’s the clever bit: once the drive is disconnected, a bad tap on your iPhone can’t erase it.
Portable SSDs are especially handy with USB-C iPhones and iPads. Lightning models may need a compatible adapter, and some drives need their own power source.
Export Photos Directly From an iPhone or iPad
- Connect a compatible external drive to your iPhone or iPad.
- Open the Files app and confirm that the drive appears under Locations.
- Open Photos.
- Tap Select, then choose the photos and videos you want to copy.
- Tap the Share button.
- Choose Export Unmodified Original if that option appears. Otherwise, choose Save to Files; the wording and placement can vary by iOS or iPadOS version.
- Tap Browse, then select your external drive under Locations.
- Open or create a destination folder, then tap Save.
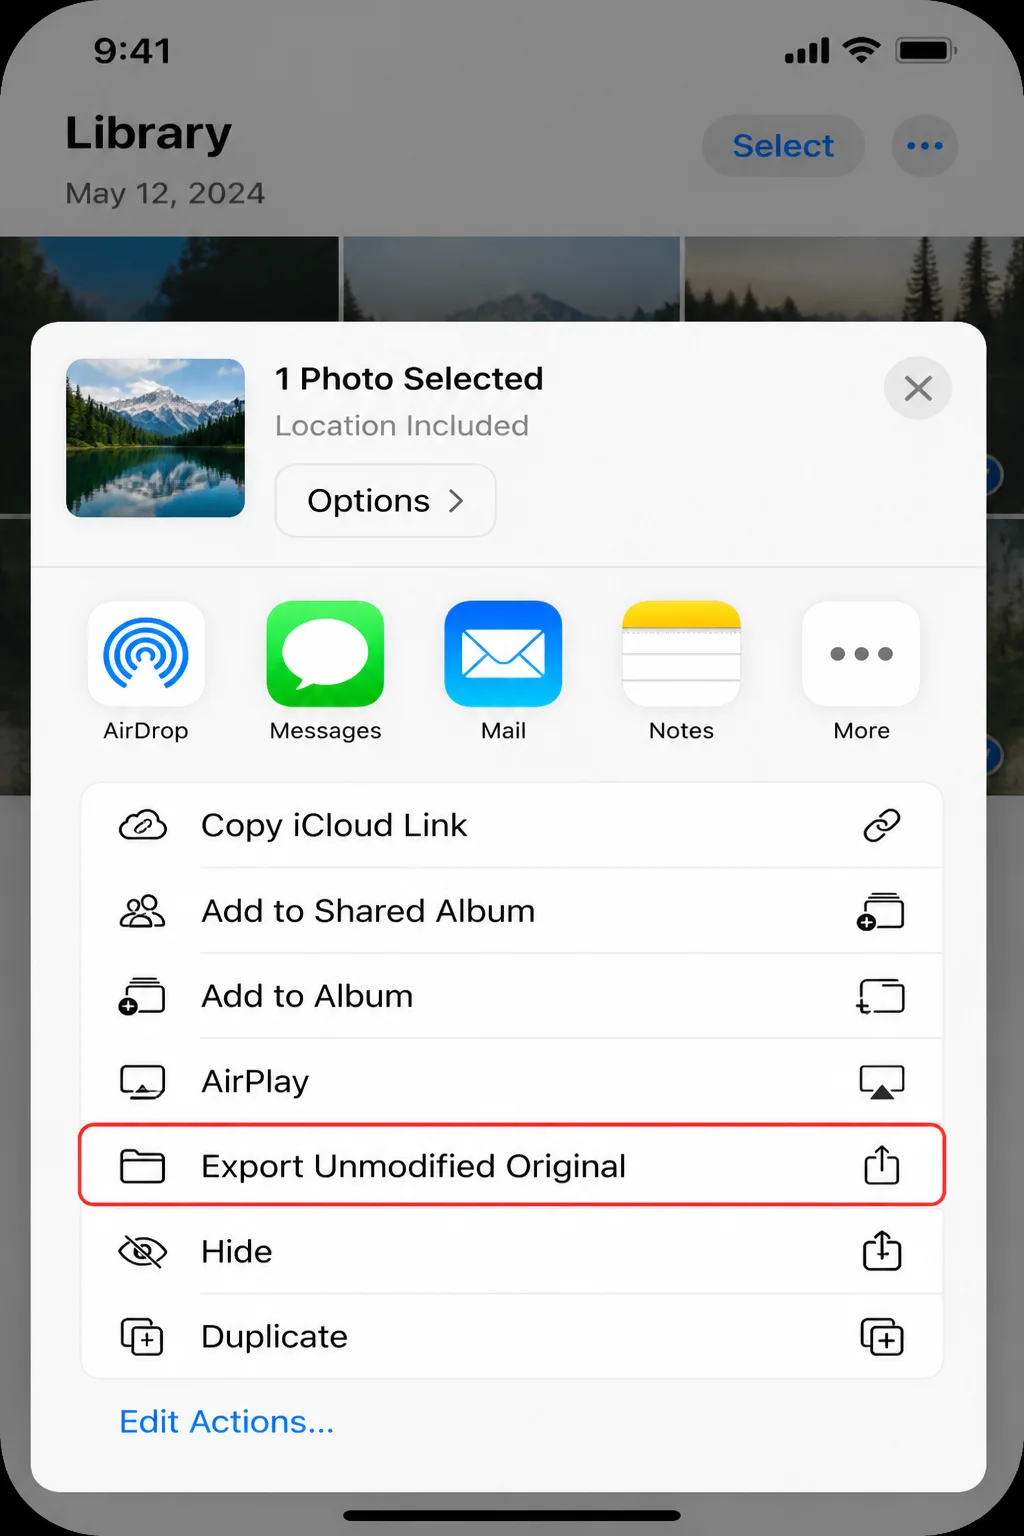
- Open Files, browse to the drive, and open a few copied items. Don’t disconnect the drive until you’re sure the transfer has finished.
Use folders such as Photos 2026, Family, or Trips to keep the archive manageable. A giant folder containing 30,000 mystery filenames becomes a digital junk drawer surprisingly fast.
Import Photos to a Mac
- Connect your iPhone or iPad to the Mac.
- Open Photos.
- Select the device in the Photos sidebar.
- Choose the items you want, then click Import Selected. To copy everything new, click Import All New Photos.
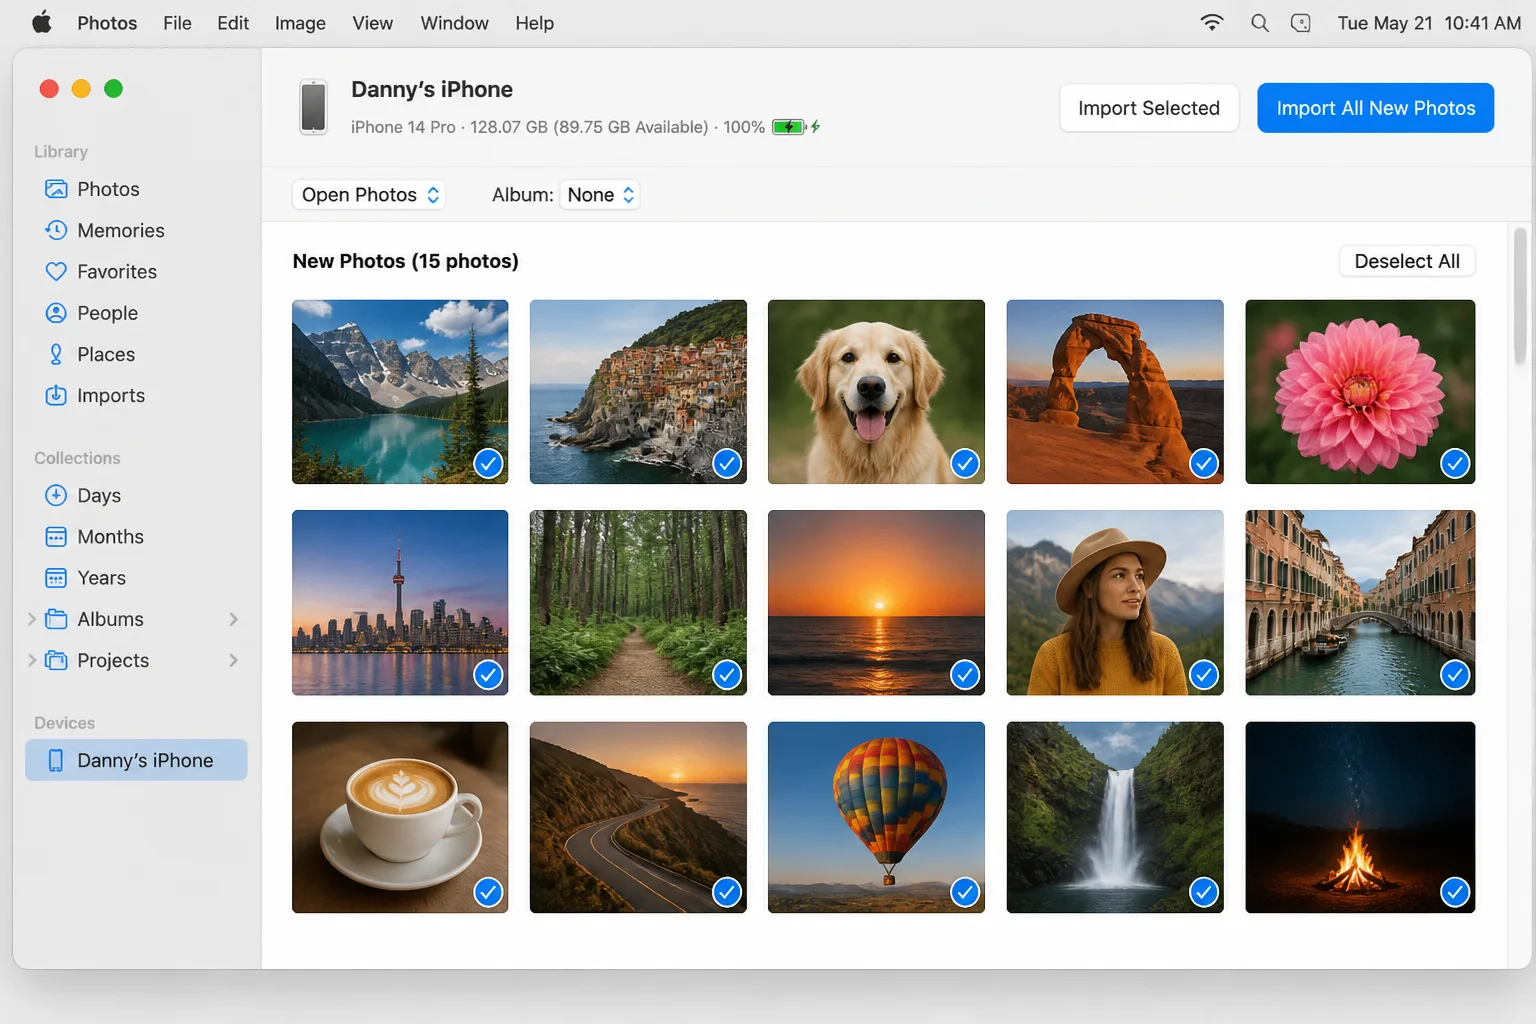
If iCloud Photos already syncs the entire library to your Mac, you don’t need to import the same items again.
Keep Full-Resolution Originals on Your Mac
- Open Photos on the Mac.
- Click Photos > Settings in the menu bar.
- Select iCloud.
- Choose Download Originals to this Mac. Wait for the full library to download before copying it elsewhere.
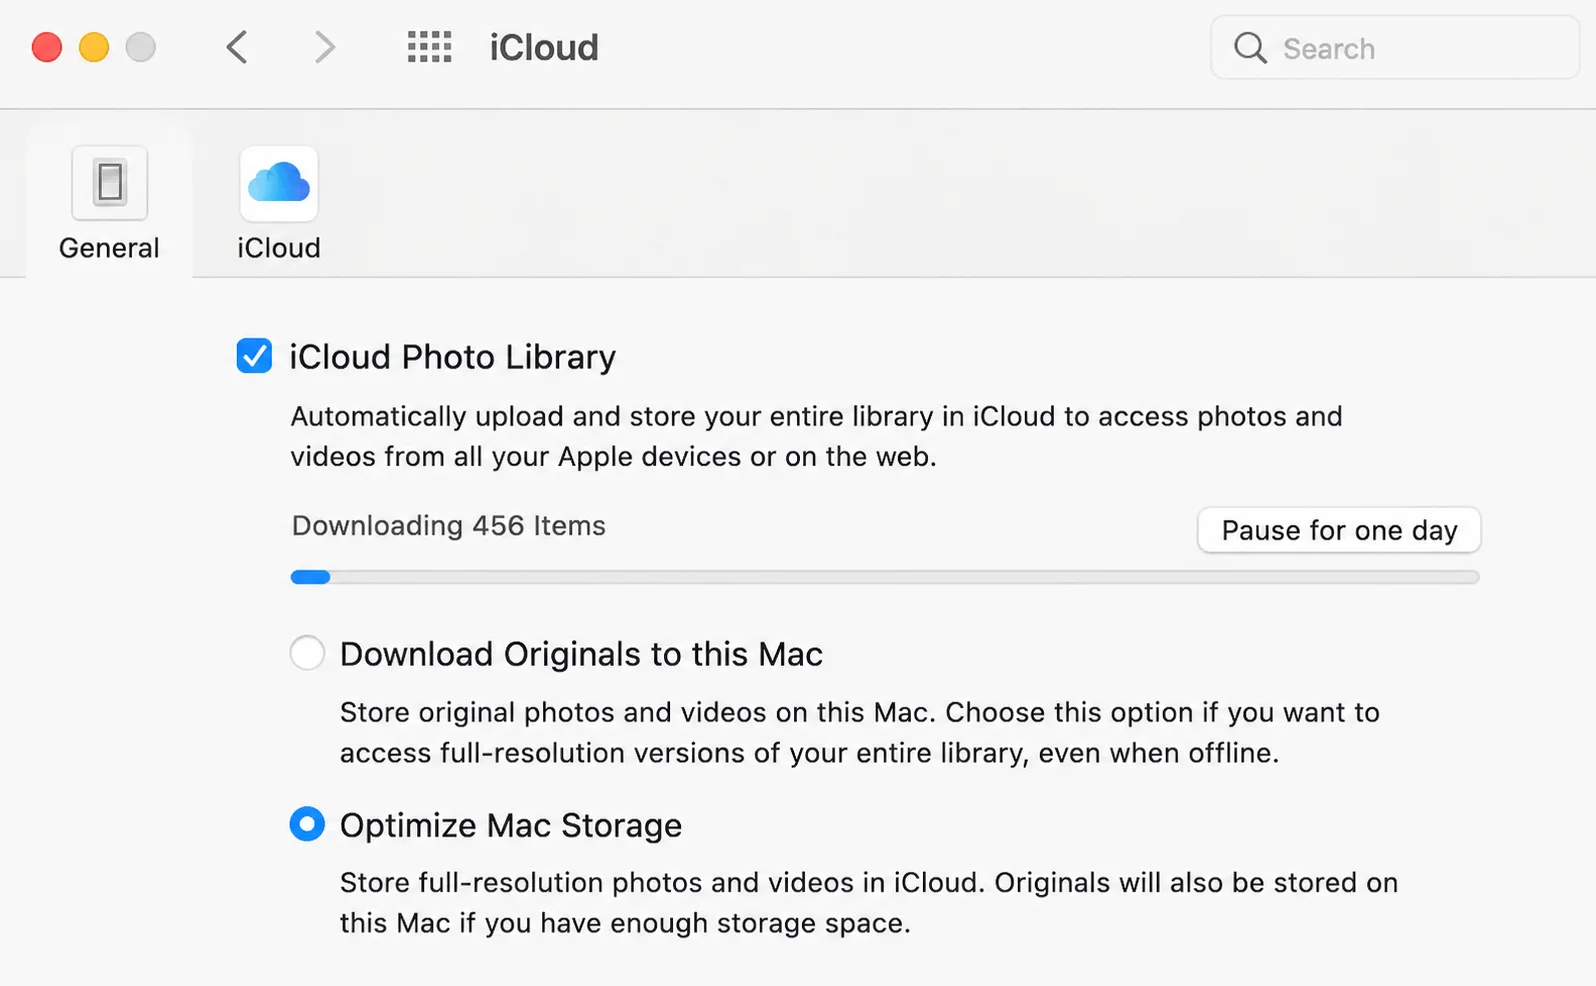
This option needs enough free Mac storage for the whole library. If your library is 300 GB and your Mac has 80 GB free, the math has already made the decision for you.
Copy the Mac Photos Library to an External Drive
- Quit Photos.
- Open your Pictures folder in Finder.
- Find the Photos library. Its name usually ends in
.photoslibrary.
- Drag the entire library to your external drive.
- Wait for the copy to finish, then compare the source and copied file sizes.
- Double-click the copied library to confirm that Photos can open it.
You can also include the Mac Photos library in a Time Machine backup. I’d use both an occasional external copy and Time Machine for a large, irreplaceable library.
Method 4: Add Google Photos or Another Cloud Service
A second cloud service puts another copy under a separate account. Google Photos is a popular choice, while OneDrive and Dropbox offer similar camera-upload options.
This method caught my eye because it runs quietly after setup. It also gives Windows users an easy way to browse their photo collection without relying entirely on Apple’s apps.
Back Up With Google Photos
- Install Google Photos from the App Store.
- Open the app and sign in to your Google account.
- Allow access to your photo library when iOS or iPadOS asks.
- Tap your profile picture.
- Open Google Photos settings > Backup.
- Turn on Backup.
- Choose Original quality if you want to preserve the original resolution and have enough Google storage.
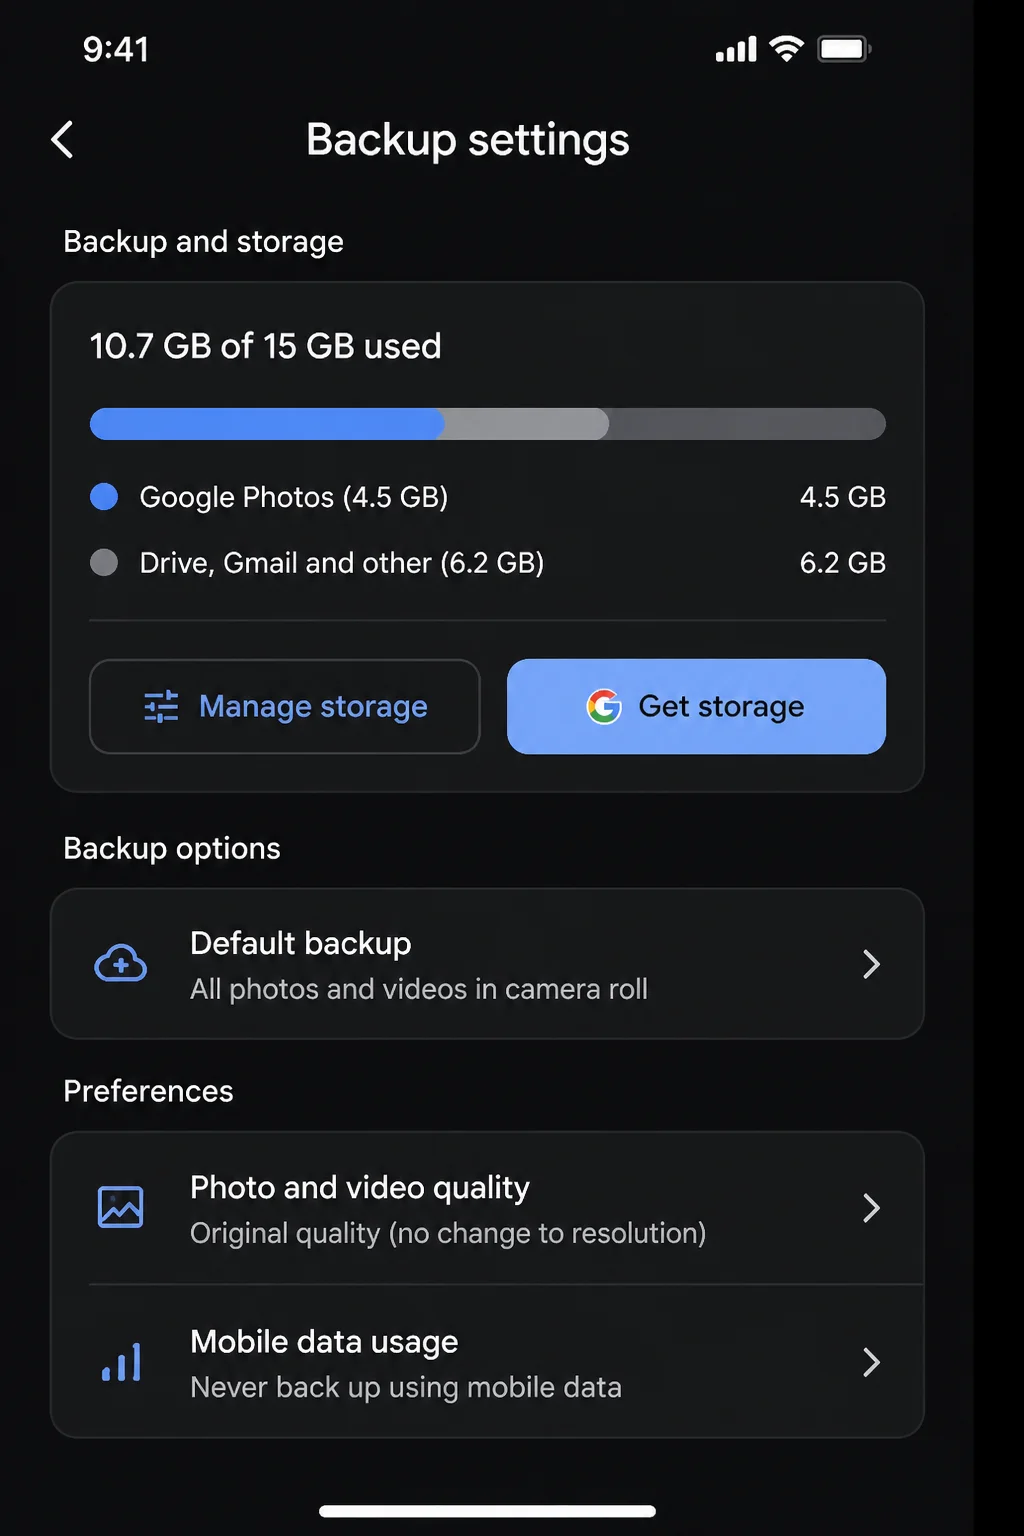
- Keep Google Photos open, connect the device to power, and stay on Wi-Fi during the first upload.
- Visit Google Photos from another device and open several recent pictures and videos. This confirms that the upload actually worked.
OneDrive and Dropbox follow the same basic pattern: install the app, sign in, grant photo access, and enable the camera or photo upload setting. Use a plan with enough space for your complete library.
The original Google Drive download page remains useful for accessing Google files on a computer. Apple also provides iCloud for Windows if you want your iCloud photos available on a PC.
Which Backup Combination Should You Use?
| Setup | Best For | Main Catch |
|---|---|---|
| iCloud Photos + iCloud Backup | Easy Apple device recovery | Synced deletions affect the iCloud photo library |
| iCloud Photos + external drive | Daily convenience with an offline copy | You must update the drive manually |
| iCloud Photos + Mac library backup | People who keep a Mac at home | Requires enough Mac and external-drive storage |
| iCloud Photos + Google Photos | Automatic copies in two clouds | Two storage subscriptions may be needed |
| External drive only | No monthly cloud bill | Easy to forget, lose, or damage the drive |
My favorite setup is iCloud Photos plus an external SSD or backed-up Mac Photos library. Add Google Photos if you want another automatic copy and don’t mind paying for extra storage.
Tips and Troubleshooting
iCloud Storage Is Full
Problem: Photos have stopped syncing because iCloud has no space
- Open Settings > [your name] > iCloud.
- Review the storage summary and recommendations.
- Alternatively, export older photos to a computer or external drive.
- Verify the exported files before deleting anything from Photos.
Deleting a synced picture removes it from iCloud Photos on your other Apple devices too. Check twice. Then check once more.
Photos Are Missing Everywhere
Open Photos, find Recently Deleted, and look for the missing items. Deleted photos and videos stay there temporarily before permanent removal.
If they aren’t present, check your independent external-drive or second-cloud copy. This is exactly why a disconnected backup earns its keep.
Google Photos Isn’t Finishing the First Backup
- Keep the app open: iOS can limit long background uploads, especially during the first run.
- Connect to power: A huge library can take a while, and a dead battery isn’t much of a backup strategy.
- Use reliable Wi-Fi: Large videos will expose a flaky connection quickly.
- Check Google storage: Uploads stop when the account runs out of space.
- Review photo access: Open Settings > Privacy & Security > Photos and confirm that Google Photos has access to the library.
The External Drive Doesn’t Appear in Files
- Reconnect the drive: Unplug it, wait a few seconds, and connect it again.
- Check the adapter: Lightning devices need a compatible adapter, and some drives need additional power.
- Try another cable: Charging-only cables can’t transfer data.
- Test the drive elsewhere: Connect it to a Mac or PC to confirm that the drive itself works.
Protect Your Cloud Accounts
The Mat Honan account compromise remains a useful warning: one compromised account can put several connected devices and services at risk.
Use a unique password for your Apple and Google accounts, then enable two-factor authentication. Keep your external backup disconnected when you aren’t updating it. Cloud sync is wonderfully convenient, but an offline drive can’t be remotely wiped through your account.
Keep More Than One Copy
A good photo setup doesn’t need to become a weekend project. Turn on iCloud Photos for daily syncing, create a full device backup, and keep one independent copy on an external drive or second cloud service.
That combination is a genuine gem: convenient when everything works and reassuring when something goes sideways. I’d recommend setting a monthly reminder to check the external copy, then bookmark this guide for the next time you replace your phone or change storage plans.