
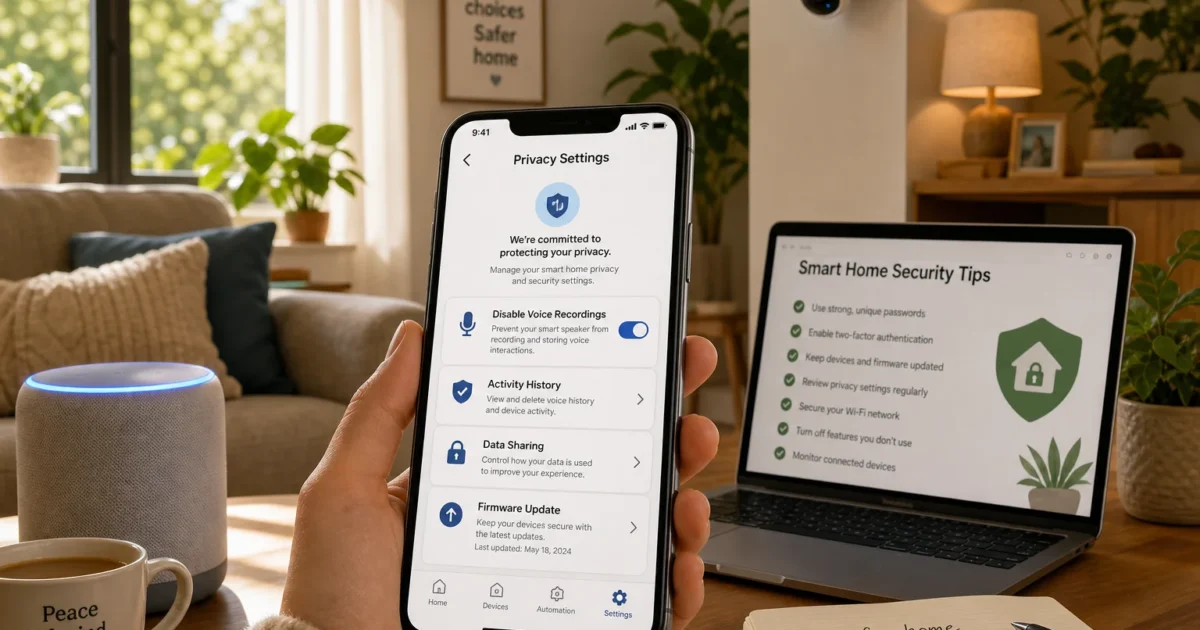
What’s more annoying than buying a smart gadget, then wondering who can see or hear its recordings? You don’t need a server rack, a networking degree, or a tinfoil hat to secure it.
The usual risks are simple: reused passwords, missed updates, loose sharing controls, exposed camera accounts, and old voice recordings. A careful setup can prevent many of them.
What Is Smart Home Security?
Smart home security is a mix of settings and good habits. It protects connected speakers, cameras, locks, lights, and appliances. Several small safeguards work together.
The main parts are:
- Account protection: Unique passwords and two-factor authentication help keep strangers out of your smart home accounts.
- Network separation: A guest or IoT Wi-Fi network can keep less-trusted gadgets away from personal computers.
- Device maintenance: Firmware updates fix security flaws inside the device.
- Privacy controls: Recording, sharing, communication, and storage settings limit the data kept about your home.
- Physical controls: Microphone-mute buttons and camera shutters give you privacy when software settings don’t feel convincing enough.
These steps help anyone with a smart speaker or connected camera. They matter even more in homes with indoor cameras, smart locks, children, or shared access.
Prerequisites
Before tearing into the packaging, make sure you have:
- The smart device and its power adapter
- An iPhone, iPad, or Android phone
- The official companion app from the Apple App Store or Google Play
- Access to your router’s app or administration page
- Your Wi-Fi name and password
- A password manager
- An email address you can access
- A phone or authenticator app for two-factor authentication
- About 30 minutes for setup and updates
- A compatible HomeKit-secured router if you want Apple accessory restrictions
- A supported camera and Apple services if you want HomeKit Secure Video
You won’t need Terminal, Command Prompt, or PowerShell. Smart home setup belongs in official apps and account pages, not mystery scripts from some dusty corner of the internet.
Step-by-Step Guide
Step 1: Make a Setup-Stage Checklist
Decide which options you’ll use before creating accounts or adding devices. For a camera, that may include recording, remote viewing, alerts, and household sharing. A speaker may need music and timers, but not purchases or Drop In.
Use this quick-start order:
- Create a unique account password.
- Enable two-factor authentication.
- Create or inspect a separate Wi-Fi network.
- Install the official app.
- Add and update the device.
- Review recordings, storage, sharing, and communication.
- Test the device from inside and outside your home.
It’s tempting to tap “Allow” through the whole setup and deal with it later. Later has a habit of becoming never.
Expected result: You know which options should stay enabled. You won’t accept every convenience setting without checking it.
Step 2: Create a Unique Password for Each Platform
Yes, every smart home platform needs a different password. Your Amazon, Google, Apple, camera vendor, and router accounts shouldn’t share one. When another website leaks a reused password, attackers often try it elsewhere. It’s like testing one stolen key in every door.
Open your password manager and create a password with at least 16 characters. Save it under the right account before you create or change the password. That small pause can keep you from locking yourself out five minutes later.
Use the provider’s official account security page or mobile app. Select Password, enter the new password, and save the change. Labels vary, so try the app’s Help section or settings search if you can’t find it.
Expected result: Each platform accepts its own generated password. Your password manager can fill it on your phone and computer.
Step 3: Turn On Two-Factor Authentication
Two-factor authentication, usually called 2FA, asks for a second sign-in check. It matters most for cameras and speakers. Those accounts may expose video, household activity, contacts, or communication tools.
Open each platform’s Account, Security, or Sign-in & security page. Select Two-factor authentication, Two-step verification, or a similar option. Pick an authenticator app or security key when offered. Text messages still protect you better than a password alone.
Store the recovery codes in your password manager. Don’t put them in a screenshot or shared note. That’s about as private as taping a spare key to the front door.
Expected result: A test sign-in from another browser or device asks for your password and a second confirmation.
Step 4: Prepare a Separate Wi-Fi Network
A separate SSID is another Wi-Fi name from your router. For example, laptops might use your main network while plugs and cameras use another one.
Open your router’s official app or administration page. Find Guest Network, IoT Network, Smart Home Network, or Additional SSID. Turn it on and give it a unique name. Choose WPA2 or WPA3 security, then create a strong password.
Check the router’s guide for Allow access to local network, Access intranet, Client isolation, or Allow guests to see each other. Keep local access blocked when practical. This puts your smart gadgets in their own waiting room instead of letting them wander through the whole house.
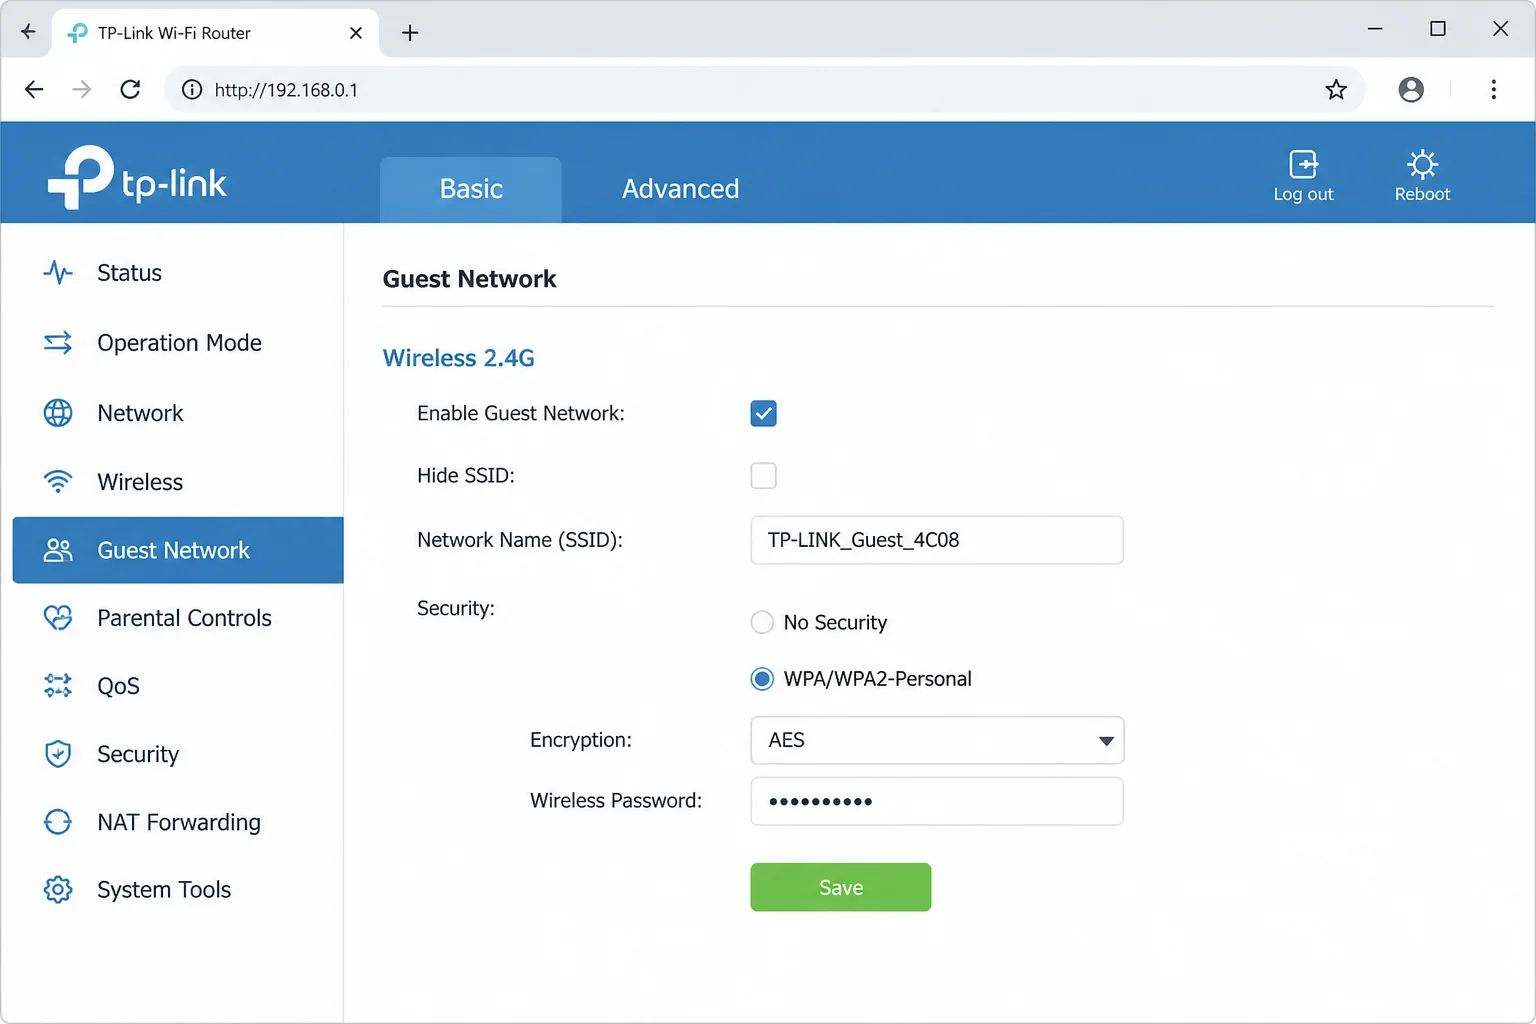
A guest network doesn’t always create a security wall. Some routers isolate guests from personal devices. Others give you another Wi-Fi name with little extra protection. Test yours instead of trusting the label.
A VLAN is a more advanced way to divide a network. It gives you tighter control, but beginners usually don’t need one. A well-configured guest or IoT network is a sensible place to start.
Expected result: Your phone can join the new network and reach the internet. If isolation is enabled, it can’t browse or connect to devices on your main network.
Step 5: Install the Official App
Install only apps published by the device maker. Check the publisher name, then follow the QR code or official web address in the product guide. App stores have plenty of look-alikes, and nobody needs that headache.
For iOS
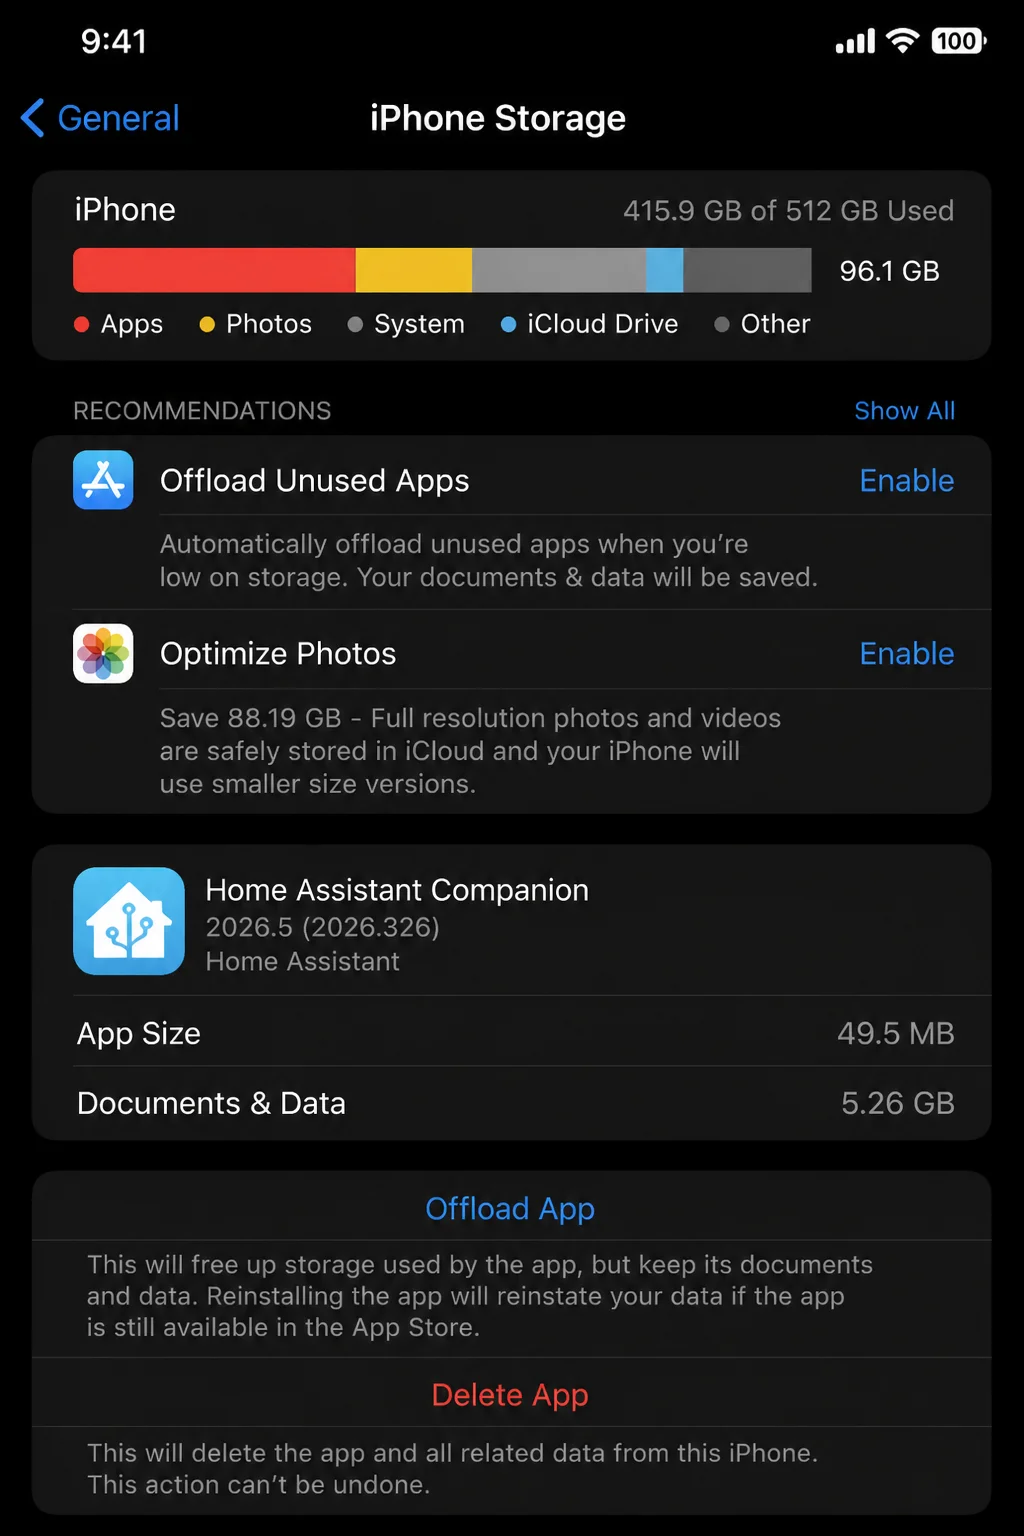
Open the App Store and search for the manufacturer’s app. Verify the publisher, then tap Get. Once it’s installed, open Settings > General > iPhone Storage. Select the app and confirm that it appears in the installed-app list.
For Android
Open Google Play Store and search for the official app. Verify the publisher, then tap Install. Open Settings > Apps, select the app, and confirm that it’s installed.
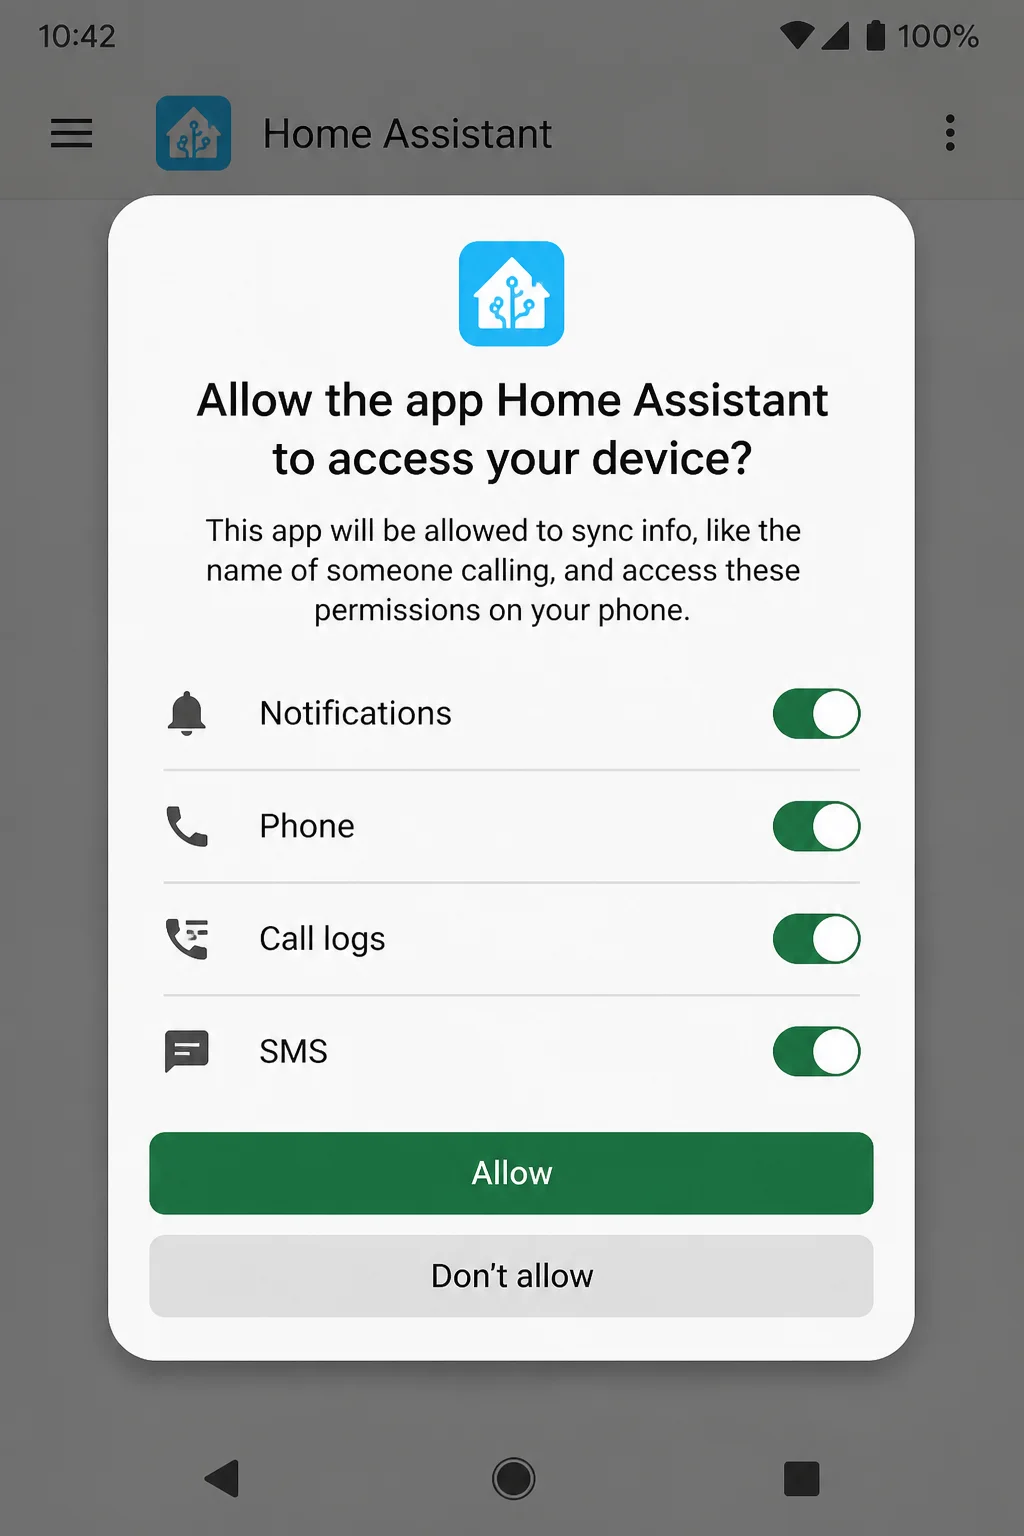
Approve only the permissions needed for setup. Bluetooth and local network access may help the app find your device. Contacts, precise location, and microphone access should have a clear purpose before you approve them.
Expected result: The official app opens and is ready to add a device.
Step 6: Add the Device to the Safer Network
Plug in the device and wait for its setup light or spoken prompt. In the official app, tap Add Device, the + button, or the device setup menu. Select the right product type and model.
When the app asks for Wi-Fi, choose the guest or IoT network you created. Follow the pairing steps and give the device a useful, non-sensitive name, such as “Hall Lamp.” Avoid names that identify a child’s room or show when part of the home is empty.
If setup fails because the phone and device need the same network, connect your phone to the IoT network. Then try again. Smart gadgets can be surprisingly fussy about introductions.
Expected result: The app says the device is connected. You can also perform its basic action, such as switching a light or viewing a camera.
Step 7: Install Firmware Updates
Firmware is the software built into the gadget. Updates close known security holes and fix bugs, including the occasional glitch that makes a smart bulb act rather dim.
Select the device in its companion app. Open Settings, Device Information, System, About, or Firmware Update. Tap Check for updates or Update when available. Keep the device plugged in until the update finishes.
Enable Automatic Updates if the product has that setting. Some gadgets update themselves without showing a switch. Check the manufacturer’s support page for details.
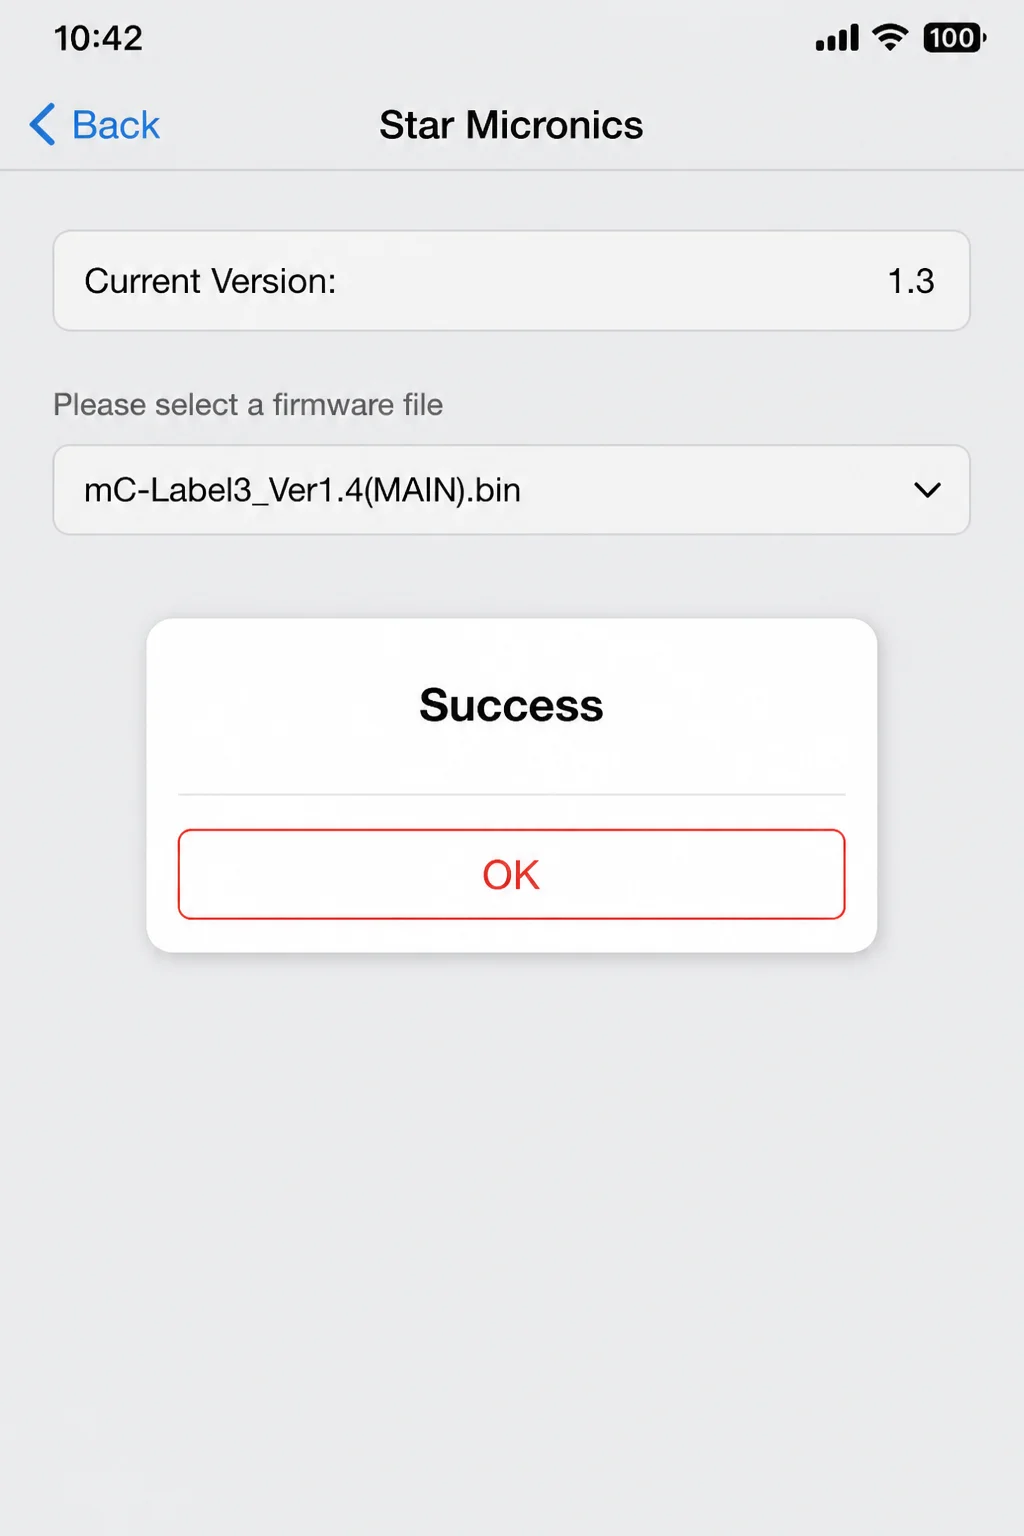
Expected result: The app says the firmware is current. If an automatic update setting exists, it shows the state you selected.
Step 8: Configure Amazon Alexa Privacy
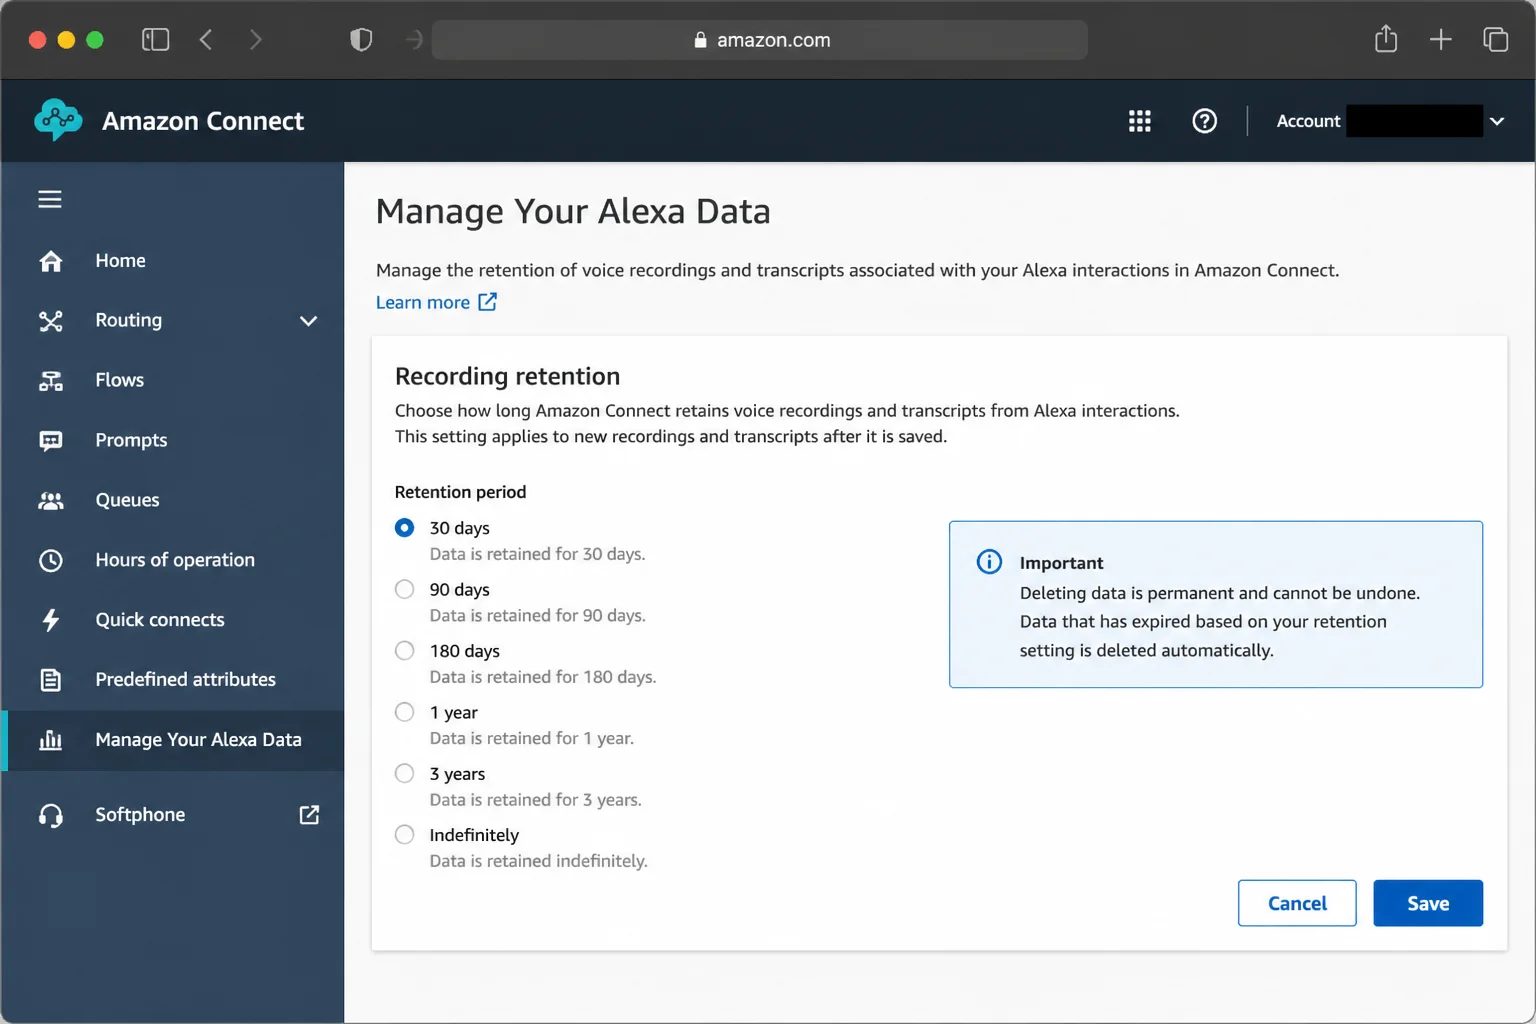
In the Alexa app, tap More > Settings > Alexa Privacy. Open Manage Your Alexa Data, then choose Choose how long to save recordings. Pick the shortest period that suits you, including no retention if that option appears.
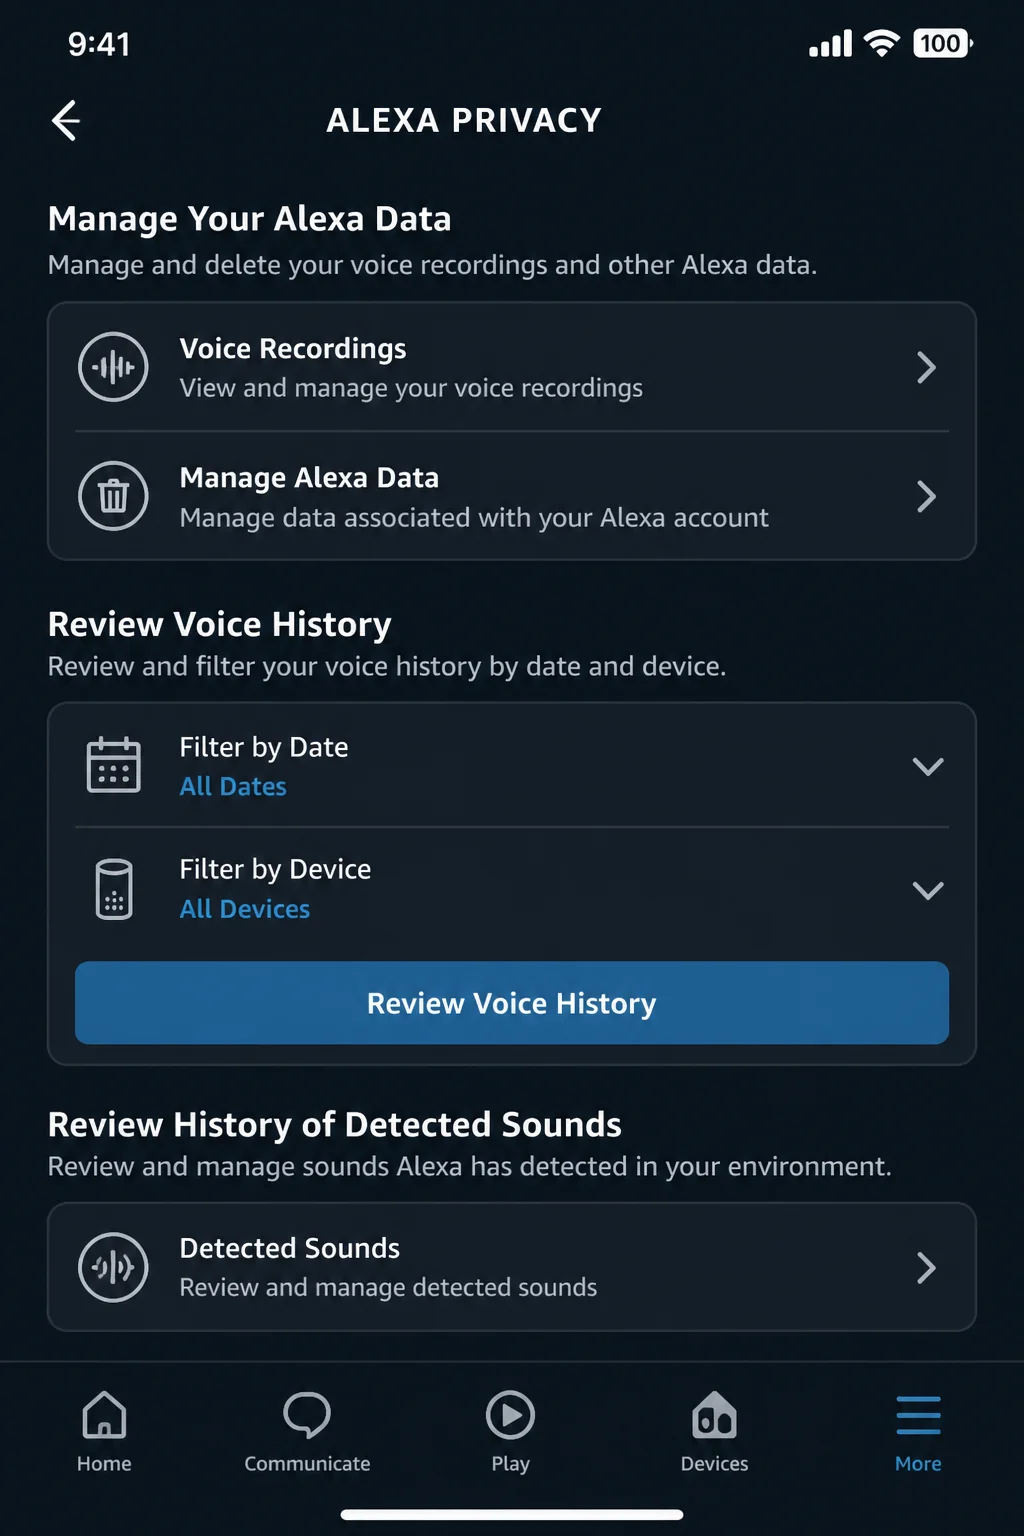
To remove old audio, open Review Voice History. Select Today, This Week, All History, or another period. Then use the deletion control shown in the app. Return to Alexa Privacy and review Smart Home Device History and Detected Sounds History separately.
Alexa audio goes to Amazon’s cloud for processing. Amazon ended the option for keeping voice requests fully local on March 28, 2025. Immediate deletion or no retention reduces stored history, but the first cloud transmission still happens.
If you don’t want any transmission, press the physical microphone button on the Echo. A red indicator means the microphones are muted. Physical buttons are wonderfully clear that way.
Next, open More > Settings > Account Settings:
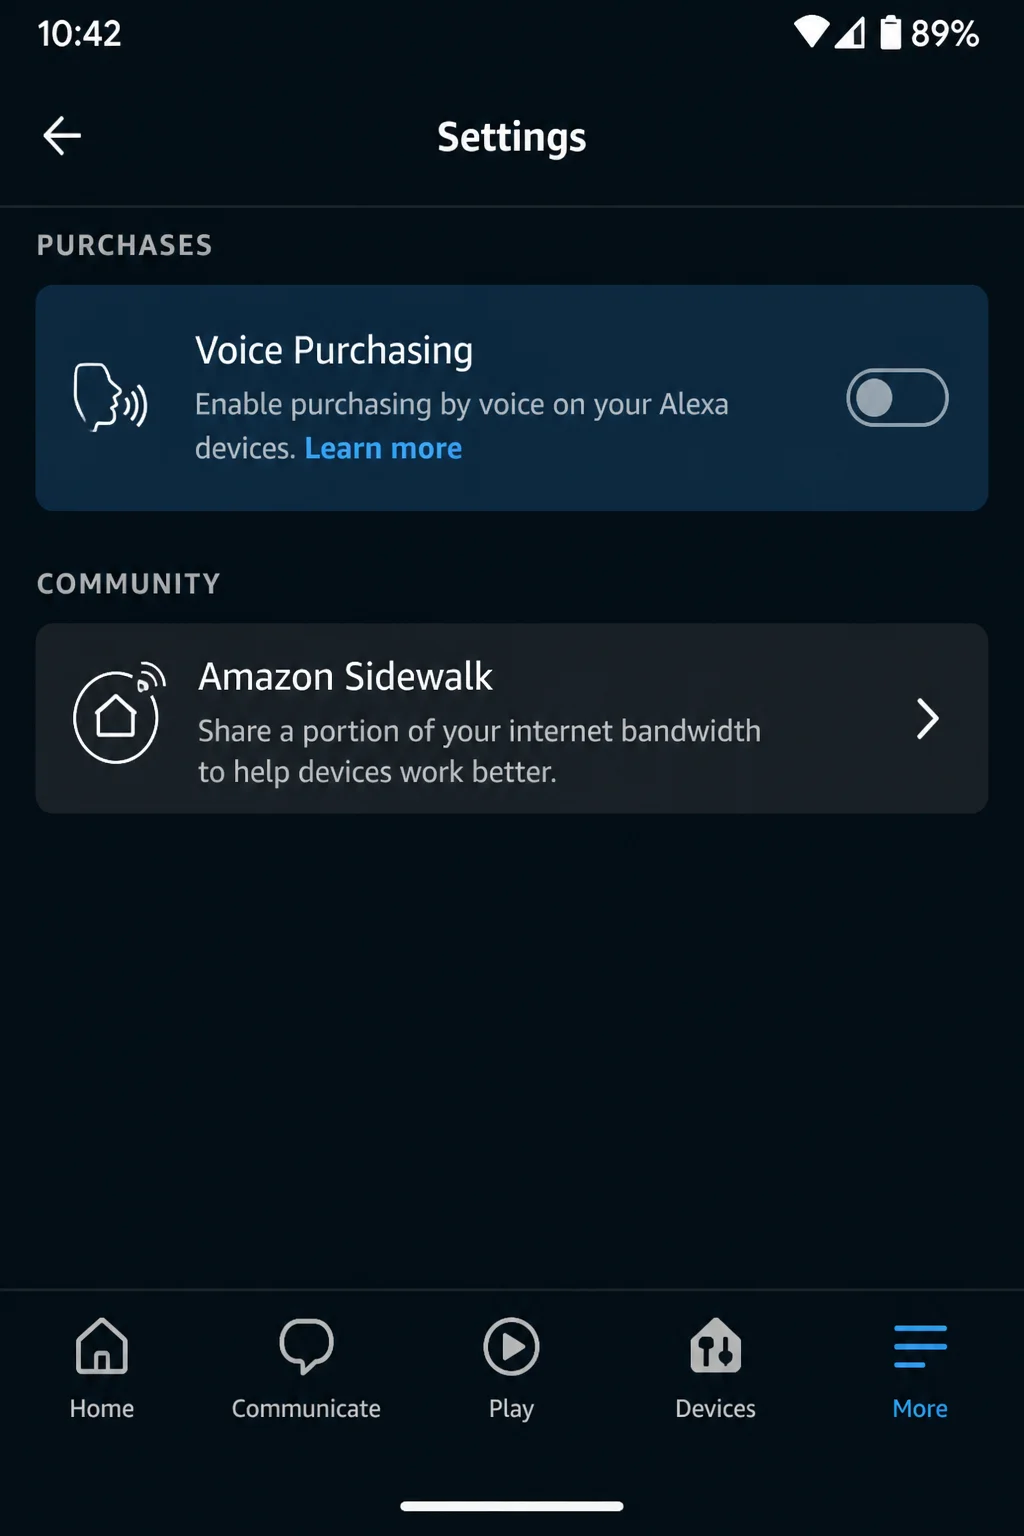
- Amazon Sidewalk: Open it and turn off participation if you don’t want compatible devices joining Amazon’s shared neighborhood network. Turning it off can reduce connectivity that depends on Sidewalk.
- Voice Purchasing: Open Purchase controls and limit orders to recognized voices, require a voice code, or disable purchasing if that control appears. Don’t show the code in a screenshot.
For each Echo, open More > Settings > Device Settings. Select the Echo, then choose Communications > Drop In. Pick Off or My Household, based on who should be allowed to connect.
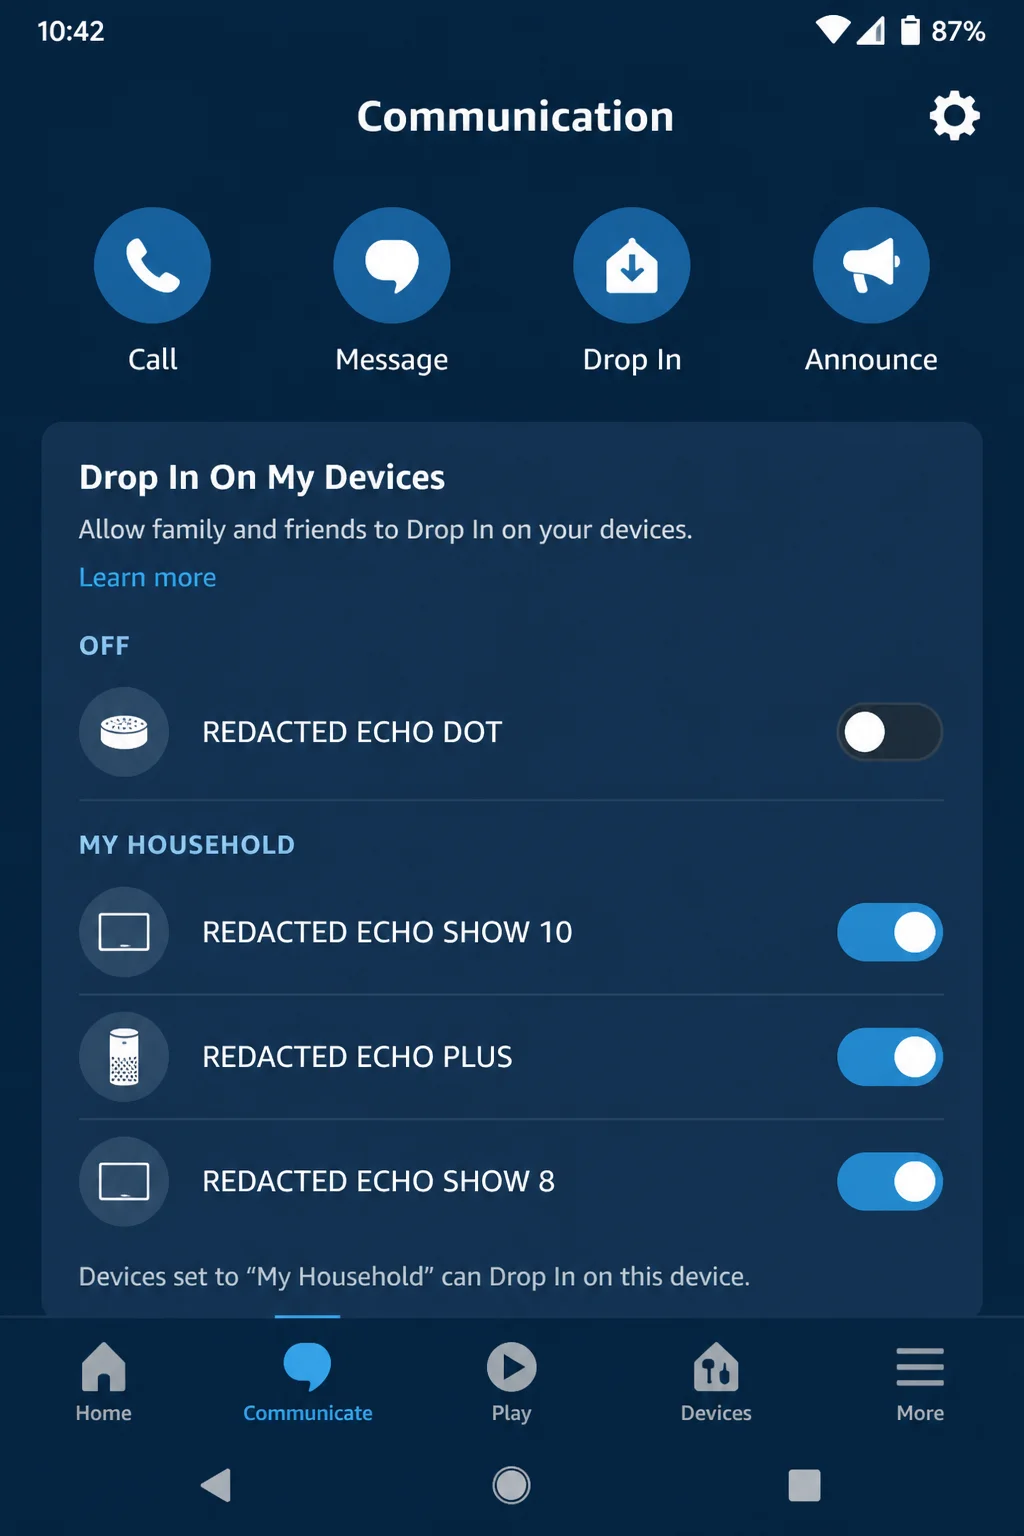
Expected result: Alexa keeps no more history than you want. Unused sharing and purchase tools are restricted. You also know how to mute the microphone.
Step 9: Review Google Home Privacy
Open the Google Home app and tap Settings. Under General, choose Privacy or Privacy settings at Home. If the entry isn’t there, update Google Home and use its settings search.
Review the sections for home activity, Assistant data, saved Wi-Fi networks, and saved home addresses. Remove old networks, addresses, or activity you don’t need. Check household members too. Remove anyone who shouldn’t control the home anymore.
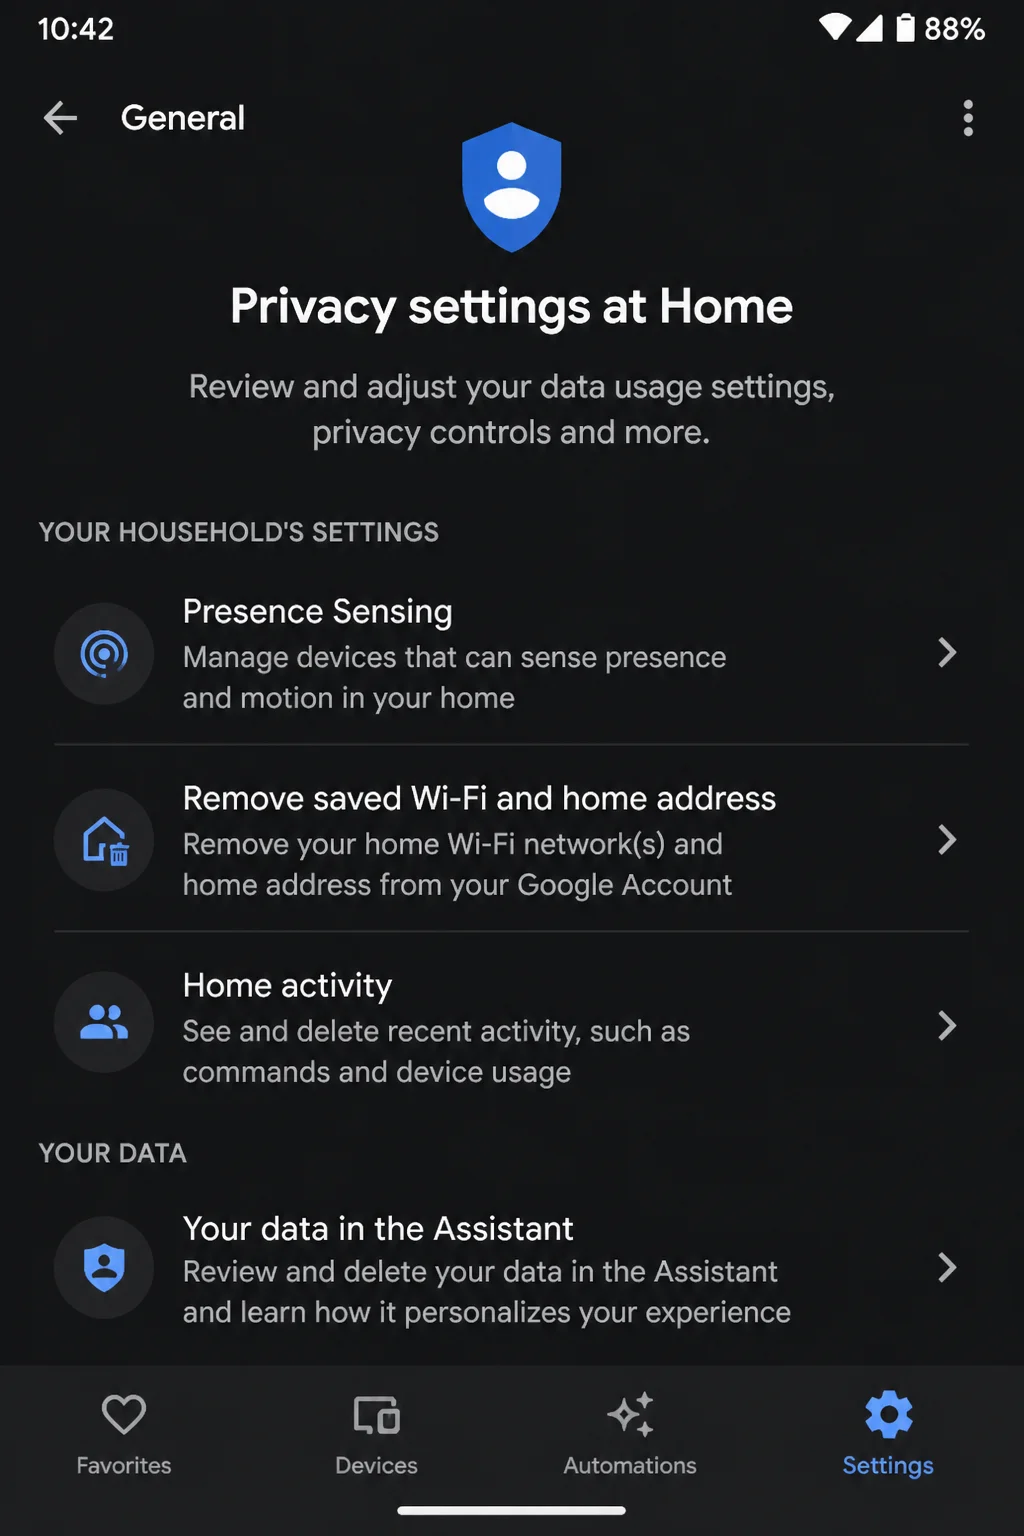
Old household access can sit unnoticed like a forgotten key in a junk drawer. A quick check after someone moves out is worth the time.
Expected result: Only current household members have access. You’ve also reviewed old home activity, network information, and addresses.
Step 10: Configure Apple Home Network Restrictions
Apple Home can restrict supported accessories if you have a compatible HomeKit-secured router. The option isn’t available with every router or accessory.
On an iPhone, iPad, or Mac, open Home > More (…) > Home Settings > Wi-Fi Network & Routers. Select an accessory and choose:
- Restrict to Home: The accessory communicates only with Apple Home through your Apple devices. Manufacturer updates and third-party cloud functions may stop working.
- Automatic: The router allows connections approved by the accessory maker. Apple lists this as the default.
- No Restriction: The accessory can communicate with any internet service or local device. This gives it wider access, so use it only when a required function won’t work otherwise.
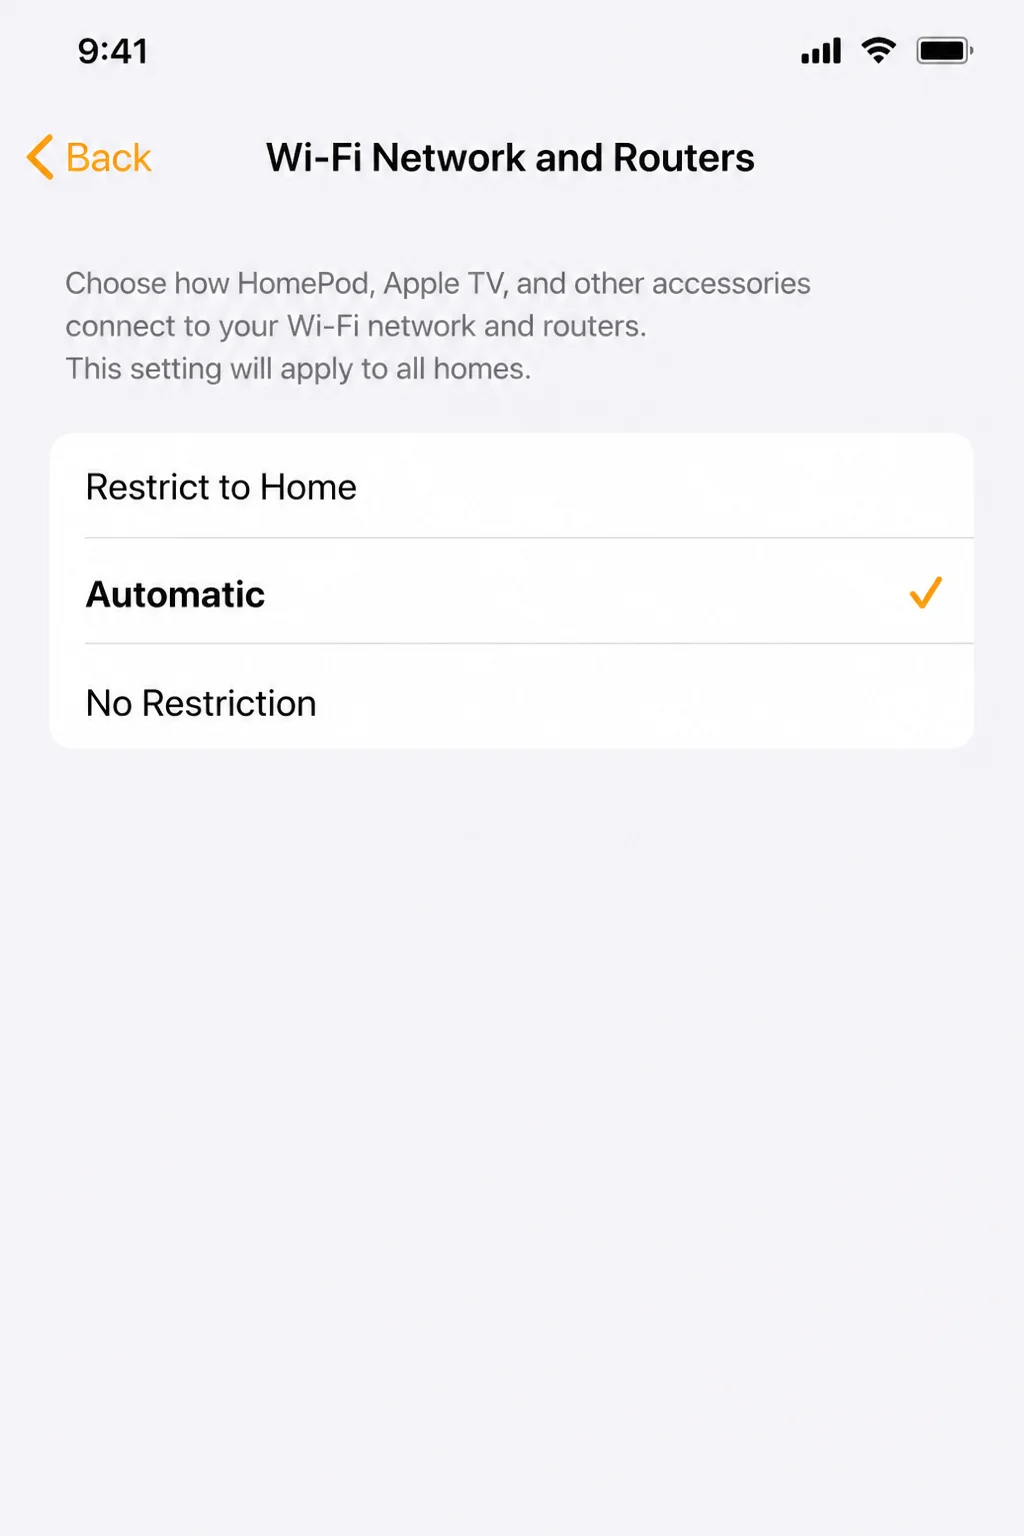
I’d start with Automatic unless you have a reason to lock down the accessory. Restrict to Home gives you tighter control, but it can interfere with updates and vendor cloud functions.
On macOS, open System Settings > Privacy & Security > Local Network. Review which installed apps can find devices on your network.
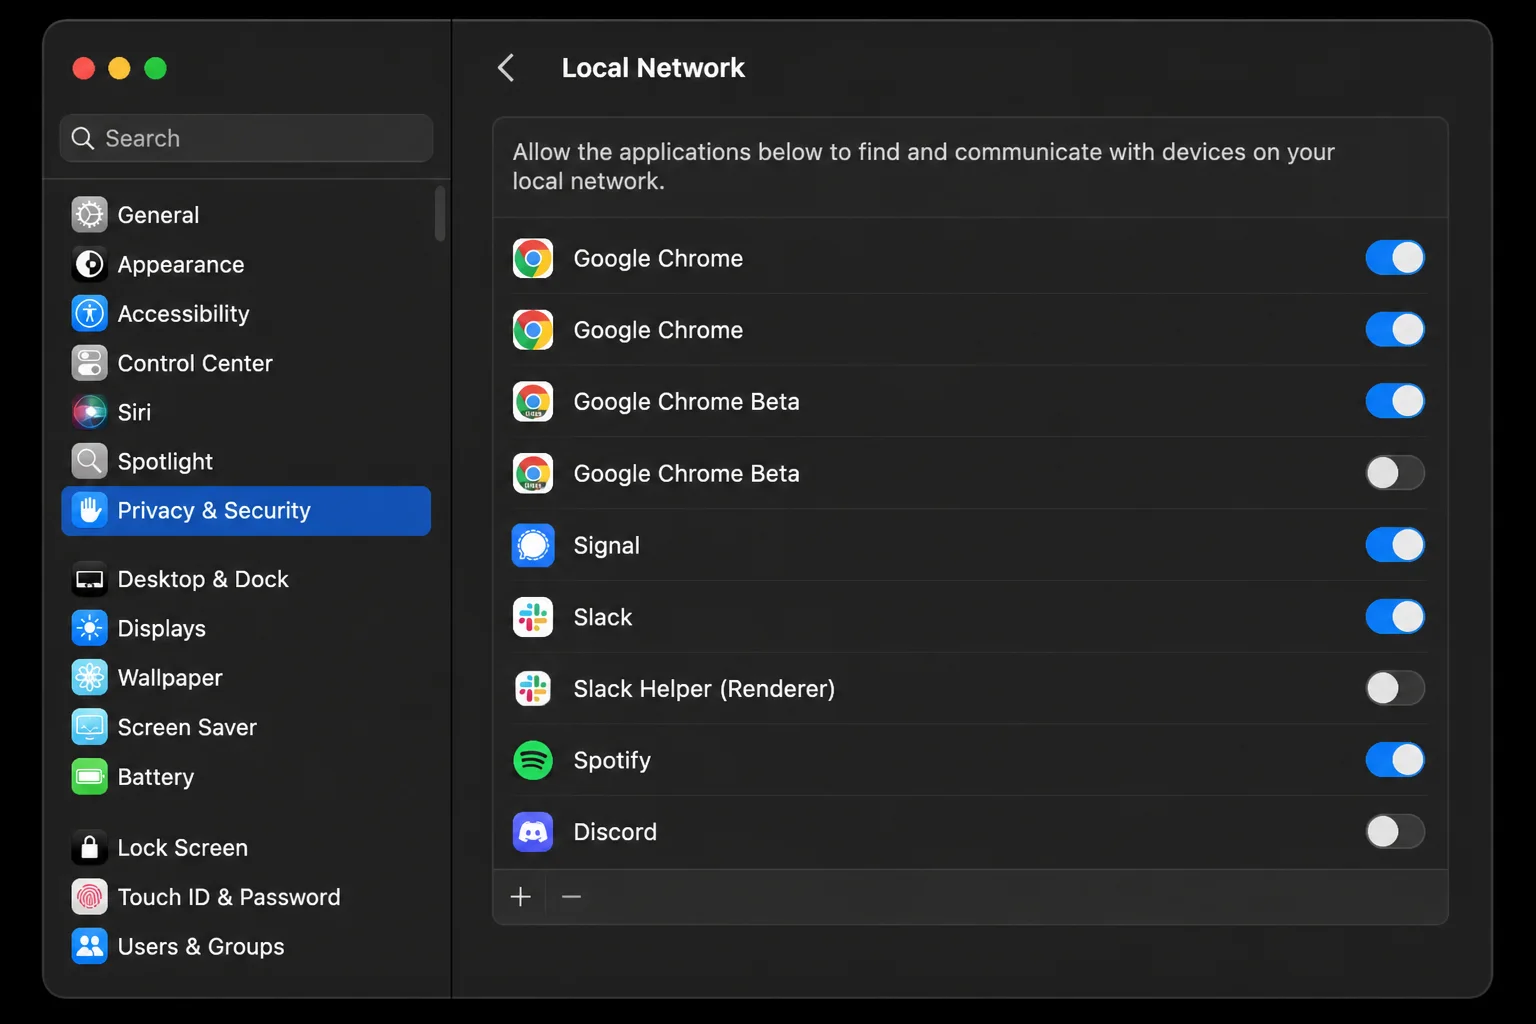
Expected result: Compatible accessories use Automatic or Restrict to Home. No Restriction is saved for a known compatibility need.
Step 11: Secure Camera Recording and Storage
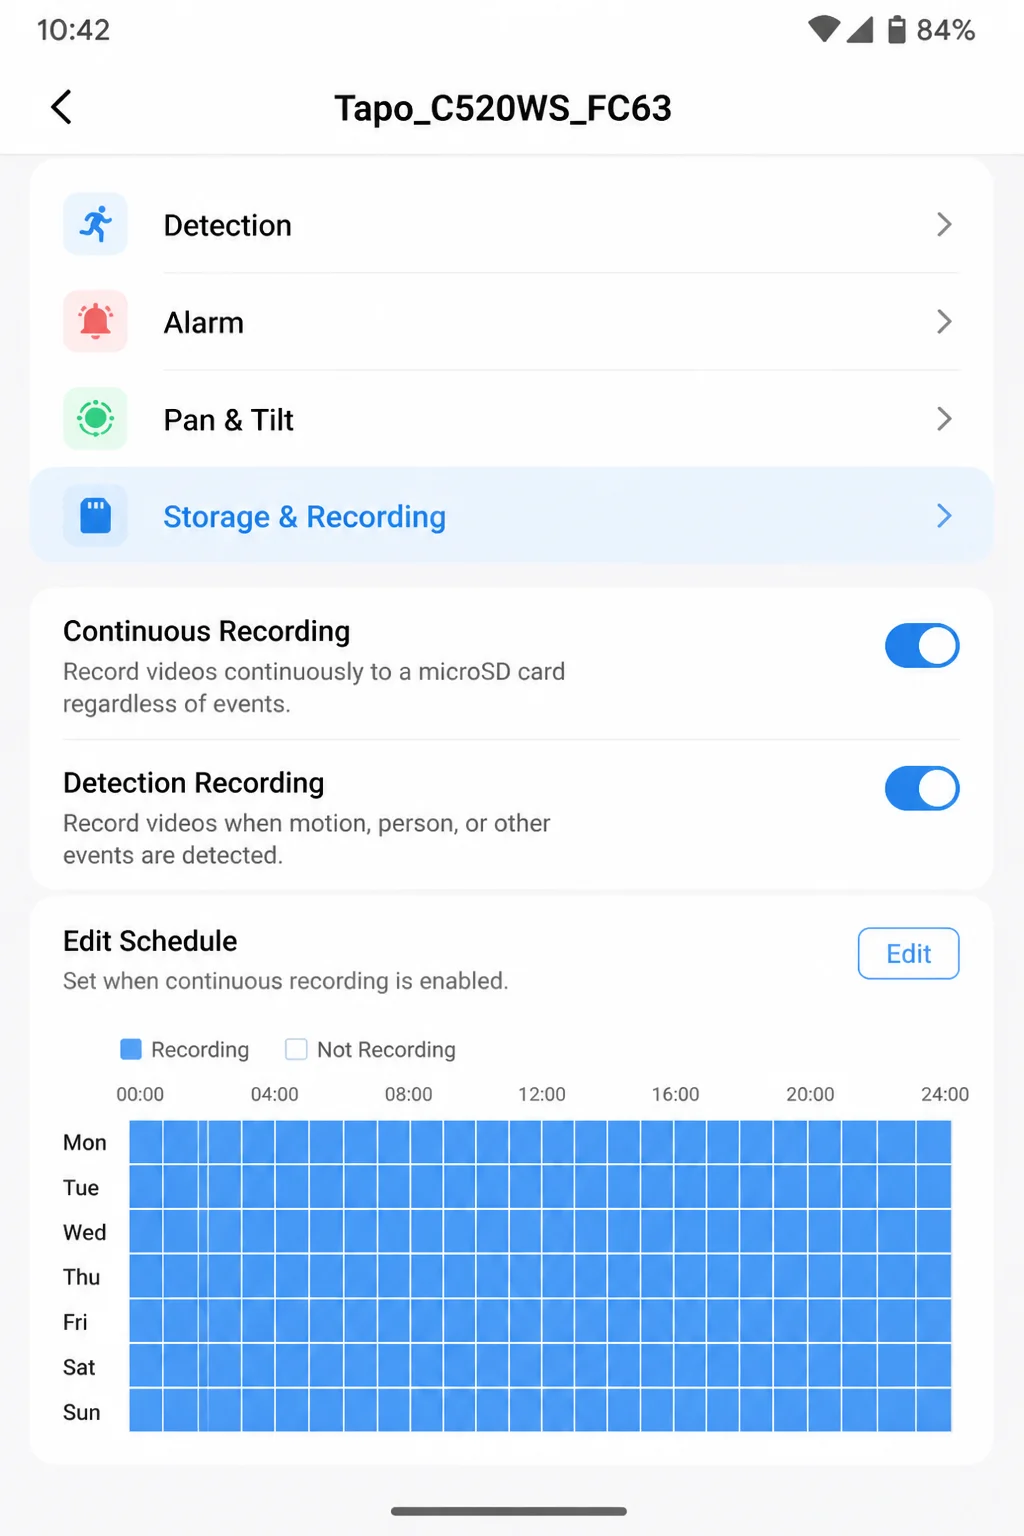
Open the camera app and select Settings > Recording, Storage, Privacy, or Encryption. Check where clips are stored and how long they’re kept. Also check who can view them and if the vendor clearly offers end-to-end encryption.
End-to-end encryption means only approved devices can decrypt footage during transfer and storage. It can’t protect an unlocked phone or an account that someone has taken over.
Choose local storage if you want to depend less on the vendor’s cloud. You’ll need to maintain the recorder or memory card yourself. Choose cloud storage if you prefer off-site backup and easy remote viewing. Cloud video may survive a stolen camera, but strong passwords and 2FA matter even more.
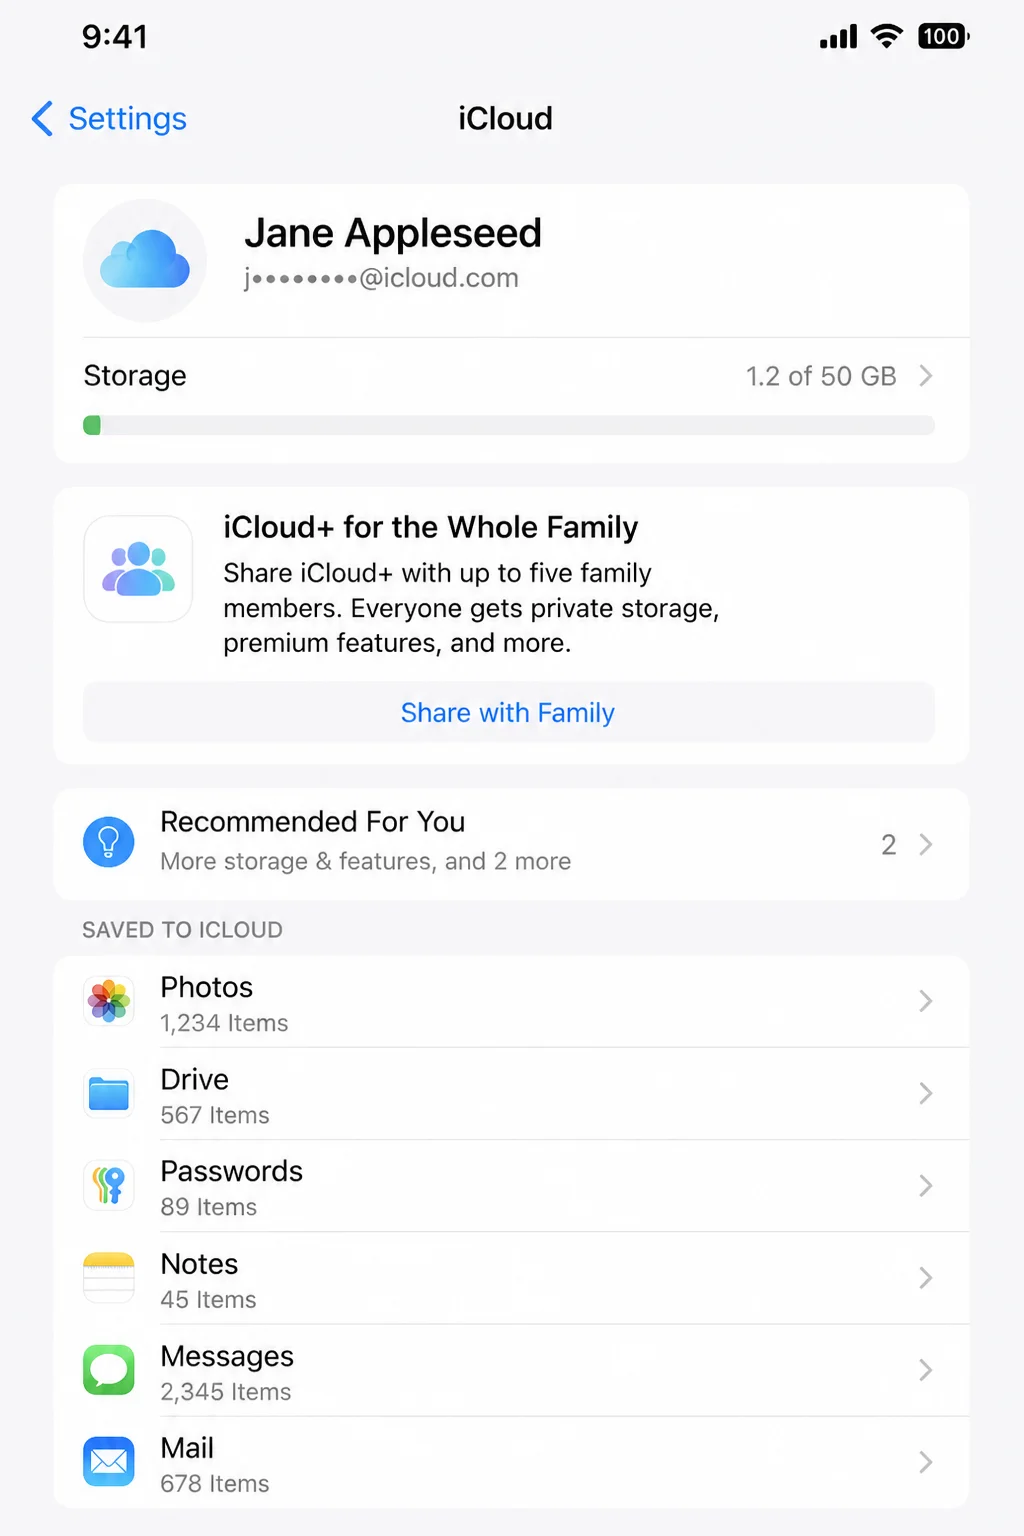
For a supported Apple setup, configure HomeKit Secure Video. On an iPhone or iPad, open Settings > your name > iCloud > Show All. Confirm that Home is available. Then open the Home app, select the camera, open Accessory Settings, and choose its streaming and recording options.
Don’t place indoor cameras where they capture beds, bathrooms, computer screens, or neighboring property. Close the physical shutter or unplug the camera during private moments. A solid piece of plastic doesn’t have a privacy policy to misread.
Expected result: You know where recordings live, who can access them, how long they remain, and if encryption protects them.
Step 12: Verify the Setup on Windows, macOS, and the Web
On Windows
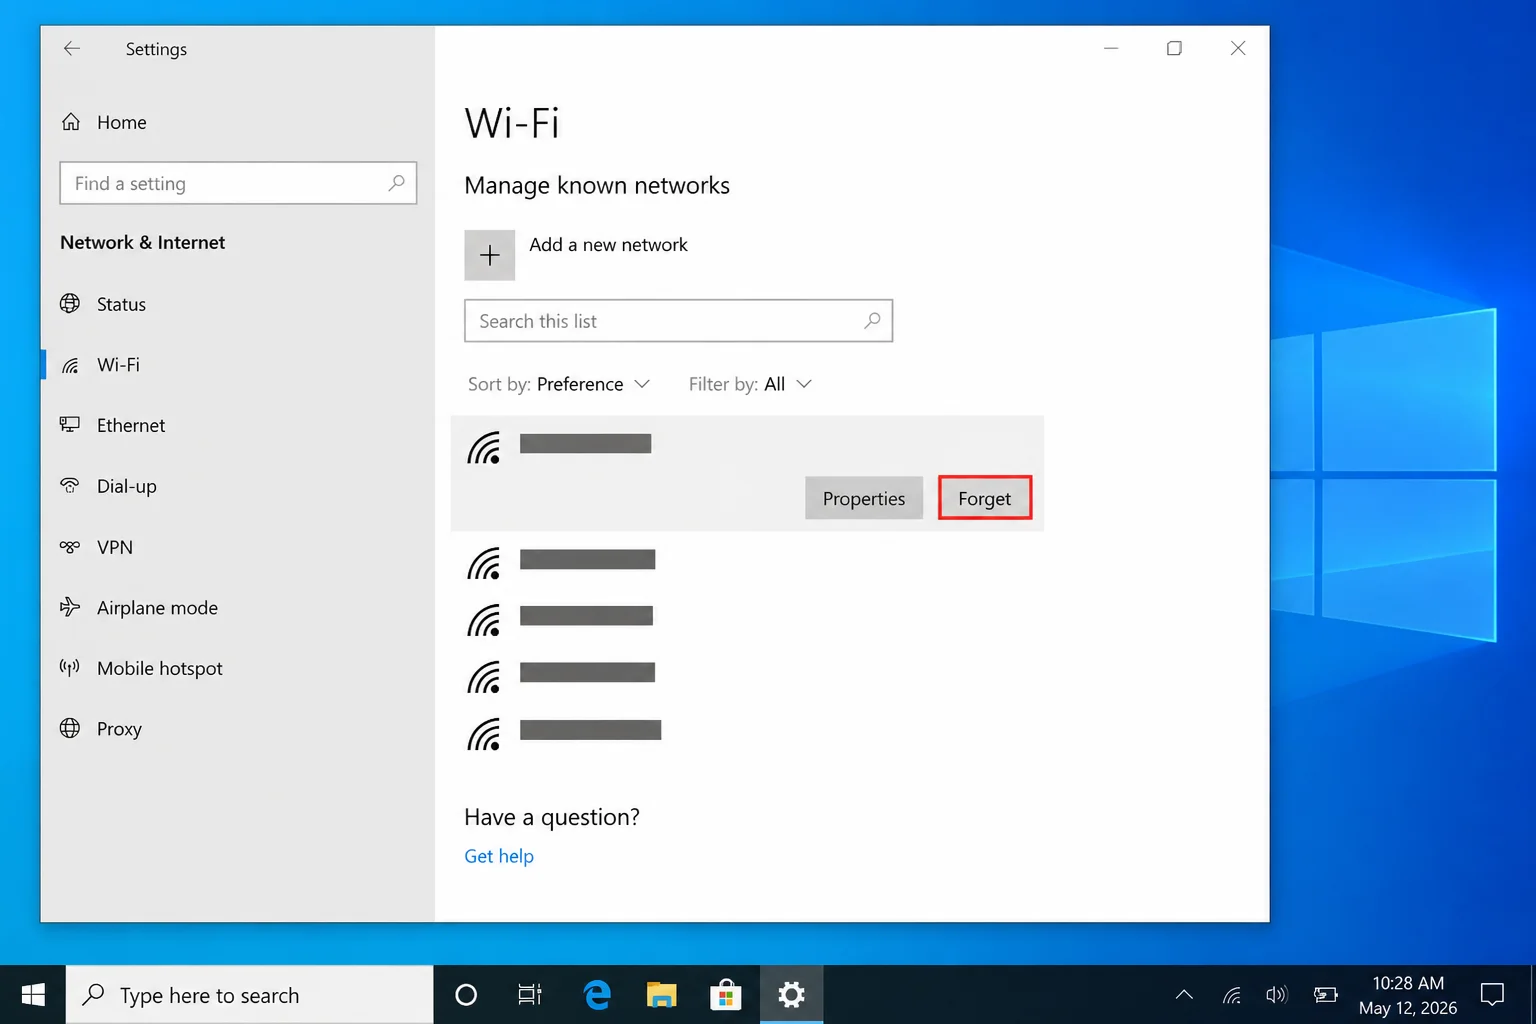
Open Settings > Network & internet > Wi-Fi > Manage known networks. Confirm that your computer uses the main household network, not the IoT network. Select the IoT network and click Forget if the PC doesn’t need it.
On macOS
Open System Settings > Wi-Fi > Details beside the connected network. Confirm that the Mac uses the main network. Under Known Networks, remove the IoT network if the Mac shouldn’t join it automatically.
For iOS
Open Settings > Wi-Fi, then tap the information button beside the IoT network. Turn off Auto-Join after setup if your phone should stay on the main network.
For Android
Open Settings > Network & internet > Internet and tap the IoT network. Disable automatic connection or select Forget after setup. The wording varies by phone maker.
On the Web
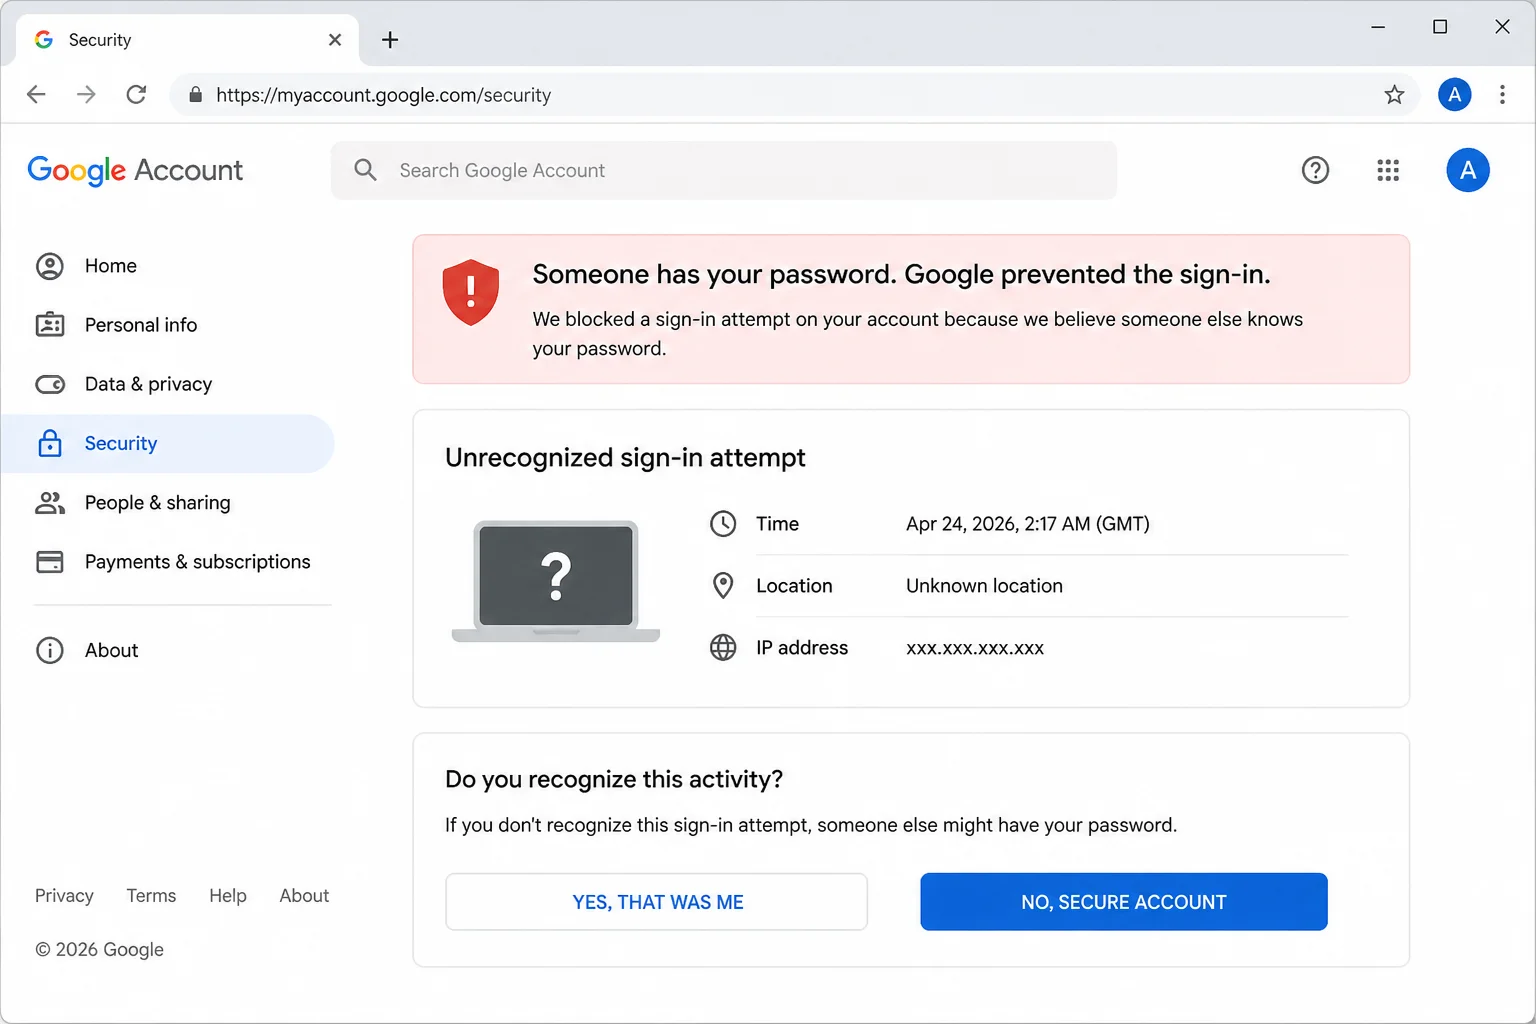
Sign in to each manufacturer’s official account page with a current browser. Review Devices, Security, Privacy, and active sessions. Remove devices and sessions you don’t recognize or use anymore.
Finally, test normal device control, alerts, camera viewing, and updates. Test remote viewing over cellular data only if you plan to use it. Finding a broken alert now beats discovering it when the dog is barking at 2 a.m.
Expected result: Personal computers stay on the main network, while smart gadgets use the separate network. The functions you need still work.
Configuration: Settings That Matter Most
| Setting | Practical choice | Why it matters |
|---|---|---|
| Account password | Unique for every platform | Stops one leaked password from opening several accounts |
| Two-factor authentication | Enable where available | Blocks many password-only account takeovers |
| Guest or IoT network | Use if isolation works | Reduces access between gadgets and personal devices |
| Firmware updates | Enable automatic updates | Installs fixes with less effort |
| Voice retention | Use the shortest useful period | Reduces old account data |
| Camera storage | Match privacy and backup needs | Balances control, remote access, and resilience |
| Drop In and purchases | Restrict or disable if unused | Prevents unwanted connections and orders |
| Physical privacy control | Use during private moments | Stops capture at the device |
For many households, these steps are enough. You probably don’t need an enterprise firewall, several VLANs, a custom DNS server, hourly log checks, or a smart home cut off from the internet. Those measures add work and may break updates or device discovery.
I’d skip the advanced network setup unless you enjoy maintaining it or face a specific risk. Security that frustrates everyone usually gets switched off, which defeats the whole point.
Tips and Troubleshooting
Problem: Devices cannot find one another on the guest network
- Read the router’s description for Client isolation or Local network access.
- Keep isolation enabled when possible.
- Allow only the access required by the product.
- Avoid opening the whole guest network unless you understand the effect.
Guest network isolation can be a little too eager. It may stop the bad connections you don’t want and the useful ones you do.
Problem: Restrict to Home breaks an update or cloud feature
- Open Home > Home Settings > Wi-Fi Network & Routers.
- Select the accessory.
- Temporarily change Restrict to Home to Automatic.
- Install the update or test the feature.
- Restore the restriction if the accessory works afterward.
Problem: Alexa privacy settings are hard to find
- Use Alexa Privacy for recordings and activity histories.
- Use Account Settings for Sidewalk and Voice Purchasing.
- Use Device Settings for each Echo’s Drop In control.
- Update the Alexa app if these labels are missing.
Amazon spreads these controls across several menus. That’s probably the most annoying part of the Alexa setup. Work through them one section at a time.
Problem: The firmware will not update
- Keep the device connected to power and the internet.
- Temporarily relax a strict network restriction.
- Restart the device and router.
- Check the manufacturer’s support page for update behavior.
- Re-enable your restriction after the update.
A restart gives the device and router a quick rest (and you know how well restarting works on computers). Don’t unplug the gadget while an update is installing.
Use Physical Privacy Controls: Mute a speaker or close a camera shutter when you need a private room. Deleting a recording later can’t prevent the original capture.
Review Access After Life Changes: Remove former roommates, guests, contractors, and old phones from household access. This five-minute check is easy to forget and genuinely useful.
Don’t Buy Abandoned Gadgets: Replace sensitive devices such as cameras, locks, and video doorbells when the manufacturer stops security updates. An unsupported camera ages about as gracefully as an old laptop connected straight to the internet.
Wrapping Up
Good smart home security is mostly boring, and that’s a compliment. Unique passwords, 2FA, current updates, separate networks, and careful recording settings beat a complicated setup you hate maintaining.
Check these controls after moving, changing roommates, replacing a phone, or adding a new gadget. A short review keeps old access and forgotten recordings from piling up like clutter in a closet.
| Step | Action | Applies To |
|---|---|---|
| 1 | Decide which features you need | All homes |
| 2–3 | Set unique passwords and 2FA | All accounts |
| 4–7 | Separate, add, and update devices | Routers and gadgets |
| 8–10 | Adjust Alexa, Google, or Apple privacy | Chosen platform |
| 11 | Secure recording and storage | Cameras |
| 12 | Test access and network placement | All homes |
To learn more about Alexa Smart Home Device Compatibility, visit our guide. For setting up your smart home Wi-Fi, check out our Smart Home WiFi Setup Guide. If you’re interested in DNS for Gamers, we have a guide for that as well. You can also explore remote desktop apps for accessing your devices remotely. Additionally, consider reading about Web 3.0 examples and how they might impact your smart home’s future. For troubleshooting, visit Google Home support or Amazon Alexa privacy settings. Learn more about managing Alexa privacy settings and using Alexa while keeping your privacy.