You dock your Switch, turn on the TV, and get a blank screen. No picture, no sound, just nothing. It’s annoying, but it’s almost never serious. A loose cable, the wrong TV input, or a quick restart fixes it most of the time.
This guide starts with the fastest fixes and works through every specific cause if those don’t solve it.
⚠️ Important: Does your Switch model support TV mode?
Before troubleshooting, check which Nintendo Switch model you have: – Nintendo Switch (original), ✅ Supports TV mode and docking – Nintendo Switch OLED, ✅ Supports TV mode and docking – Nintendo Switch Lite, ❌ Does NOT support TV mode. It cannot connect to a TV or dock. This is a hardware limitation, not a bug. If you have a Switch Lite, no amount of troubleshooting will enable TV output. See the FAQ below for more details.
Quick Fixes to Try First
Run through this checklist before anything else. These five steps fix most docking problems in under two minutes:
Check your TV input: Press the Input or Source button on your TV remote and select the HDMI port your dock is plugged into (e.g., HDMI 1, HDMI 2).
Reseat the HDMI cable: Unplug the HDMI cable from both the dock and the TV, then firmly push both ends back in.
Confirm the dock has power: Make sure the AC adapter is plugged into the wall and into the top port inside the dock’s back panel.
Power cycle the Switch: Hold the Power button for 3 seconds, select Power Options, then Restart.
Power cycle the dock: Remove the Switch, unplug the HDMI cable and AC adapter from the dock, wait 30 seconds, then reconnect everything before re-inserting the Switch.
If none of these work, keep reading. The sections below cover every specific problem in detail.
Symptoms and Fixes at a Glance
Symptom
Likely Cause
Quick Fix
TV shows “No Signal”
Wrong input or loose HDMI
Switch TV input; reseat HDMI cable
Switch screen stays on when docked
Software glitch or loose connection
Restart Switch; reseat in dock
Switch not charging in dock
AC adapter not seated or wrong charger
Check dock power port; use official adapter
Blurry or flickering picture
Wrong resolution or RGB setting
Change TV Output settings
Third-party dock not working
Firmware incompatibility
Test with official dock
Dock stopped working after update
Firmware change broke compatibility
Power cycle; contact Nintendo Support
No picture and no charging
Dock may be faulty
Test cables separately; contact Nintendo
Switch Lite won’t connect to TV
Hardware limitation, not supported
Upgrade to Switch or Switch OLED
Common Issues and Solutions
TV Shows “No Signal” When Switch Is in the Dock
Symptoms:
TV screen is black with a “No Signal,” “No Input,” or “Check Signal Cable” message
TV turns on but shows nothing after you dock the Switch
The Switch screen turns off (which is normal when docked), but the TV stays blank
Why it happens: The most common culprits are a wrong TV input, a loose HDMI cable, or the dock not receiving power. A temporary software glitch can also cause this.
Fix:
Grab your TV remote and press the Input, Source, or TV/AV button. Cycle through the inputs until you find the one labeled with the HDMI port your dock is connected to (for example, HDMI 2). Samsung TVs often say “Source,” LG TVs say “Input,” and Sony TVs say “Input Select.”
Open the back panel of the dock (it snaps open at the rear) and check that both the HDMI cable and AC adapter are firmly plugged in. The HDMI port is at the bottom of the dock’s cable bay; the AC adapter port is at the top.
Unplug the HDMI cable from both the dock and the TV, then push both ends back in firmly until you feel a click.
Try a different HDMI port on your TV. If you were using HDMI 1, switch to HDMI 2 and update your TV’s input selection to match.
If you have another HDMI cable, swap it in. A damaged cable is a surprisingly common cause. It can look fine on the outside while broken internally.
Remove the Switch from the dock. Hold the Power button for 3 seconds, select Power Options, then Turn Off. Wait 10 seconds, then place the Switch back in the dock.
Verification: After each step, check your TV. When the Switch is correctly docked and the TV is on the right input, the Nintendo Switch home screen will appear within a few seconds.
Switch Won’t Charge When Placed in the Dock
Symptoms:
The Switch battery doesn’t increase (or slowly drains) while docked
The Switch screen shows no charging indicator when placed in the dock
The Switch powers off while docked during gameplay
Why it happens: The dock charges the Switch through a USB-C connector at the bottom of the dock’s slot. If the AC adapter is in the wrong port, if there’s debris in the connector, or if you’re using a non-Nintendo charger, the Switch won’t receive power.
Fix:
Open the back panel of the dock. Inside, you’ll see three ports stacked vertically. The top port is for the AC adapter. Make sure the Nintendo AC adapter is plugged into that top port, not one of the USB-A ports on the side.
Confirm the AC adapter is plugged into a working wall outlet. Test the outlet with a phone charger or lamp.
Remove the Switch from the dock and look at the USB-C connector at the bottom of the dock slot. Use a flashlight and check for dust, lint, or debris. If you see any, blow it out with compressed air. Never use water or metal objects.
Bypass the dock entirely: plug the Nintendo AC adapter directly into the USB-C port on the bottom of the Switch. This step tells you exactly where the problem is:
If the Switch charges directly: The adapter and the Switch itself are both working fine. The problem is isolated to the dock — most likely a dirty or damaged USB-C connector inside the dock slot, or a faulty dock.
If the Switch does NOT charge directly: The problem is with the AC adapter or the Switch’s USB-C port, not the dock. Try a different outlet, inspect the Switch’s USB-C port for debris or damage, and consider contacting Nintendo Support.
If you’re using a third-party USB-C charger instead of the official Nintendo AC adapter, switch to the official one. Many third-party chargers don’t deliver the correct voltage the dock needs.
Tip: The official Nintendo AC adapter has a USB-C connector on one end and plugs directly into the wall on the other. It’s not a standard phone charger. It’s built specifically for the Switch’s power requirements.
Verification: Place the Switch in the dock and press the Home button to wake it. Look at the battery icon in the top-right corner of the Switch screen. A small lightning bolt or plug icon next to the battery means it’s charging.
Switch Screen Stays On, Display Won’t Switch to TV
Symptoms:
You put the Switch in the dock but the Switch’s own screen stays lit
The TV shows no picture even though the Switch appears to be docked
The Switch seems to be in handheld mode even while sitting in the dock
Why it happens: This usually means the Switch isn’t making a clean electrical connection with the dock’s USB-C port, or a software glitch is preventing the handoff from handheld to TV mode.
Fix:
Remove the Switch from the dock, then slide it back in firmly. Make sure the Switch screen is facing the front of the dock (the side with the Nintendo logo cutout). The Switch should slide straight down and seat fully.
Hold the Power button for 3 seconds, select Power Options, then Restart. After the Switch restarts, re-dock it.
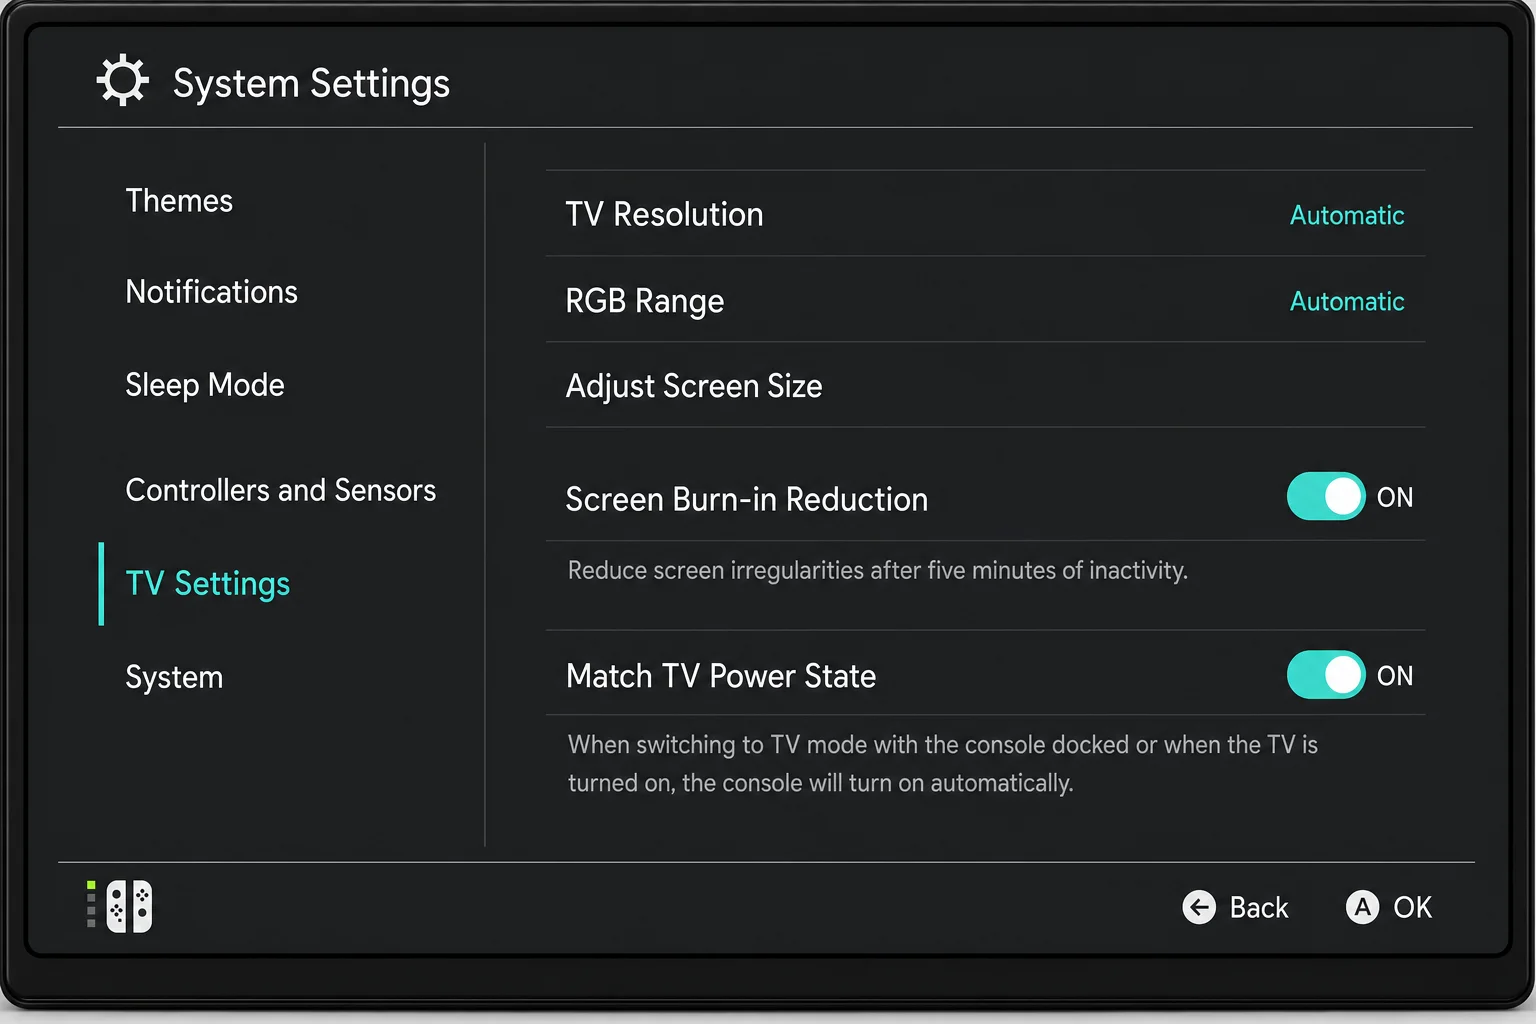
Check your TV output resolution settings. On the Switch, go to System Settings (the gear icon on the Home screen) > TV Output. A resolution mismatch is an uncommon but possible cause of no signal — most modern TVs will downscale a 1080p signal without issue, but some older sets, HDMI-to-VGA adapters, or capture cards may not accept 1080p input. If you suspect this is the issue, set TV Resolution to Automatic (the safest default) or 720p as a fallback.
Perform a full dock power cycle: remove the Switch, unplug both the HDMI cable and AC adapter from the dock, wait 60 seconds, reconnect both cables, then re-insert the Switch.
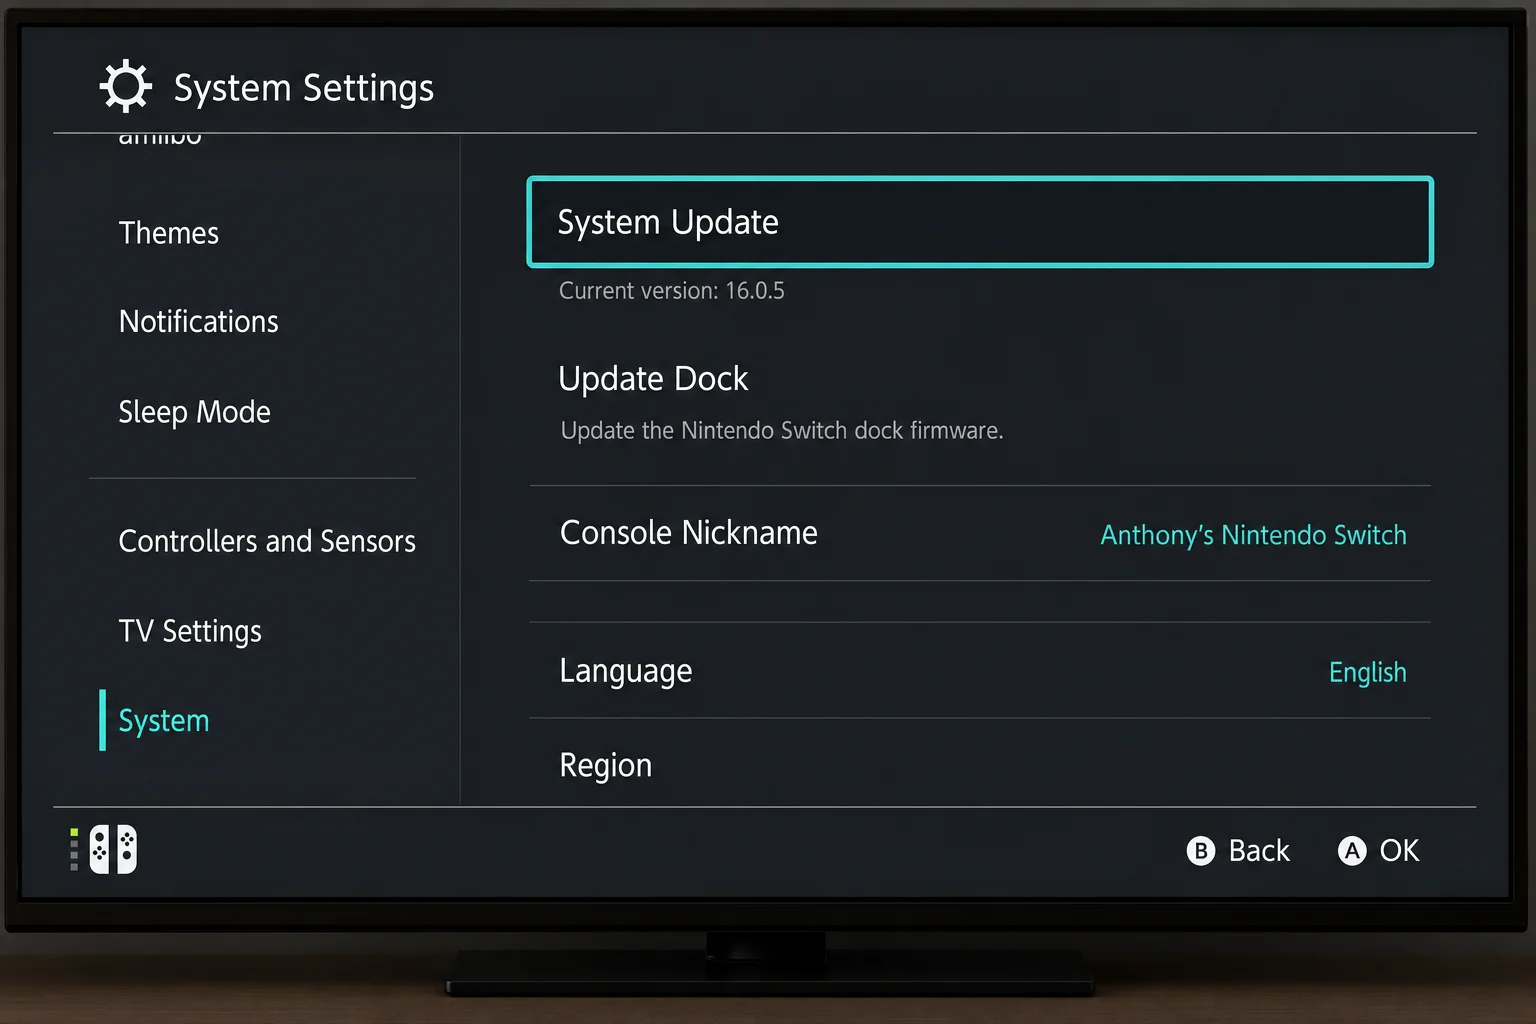
Update the Switch firmware: go to System Settings > System > System Update. Outdated firmware can cause docking issues, and a pending update is easy to overlook.