
So you’re trying to copy a large file to your USB drive and Windows keeps throwing an error, or you need file permissions and encryption on a flash drive for a Windows-only workflow. Either way, you’ve probably landed here because FAT32 isn’t cutting it anymore. The good news? Formatting a USB drive as NTFS in Windows 10 or Windows 11 is totally doable, and you don’t need any special tools to pull it off.
In this guide, you’ll learn four different ways to format your USB drive or memory stick as NTFS, from the quick right-click method in File Explorer to the more powerful DiskPart command line. We’ll also help you figure out whether NTFS is actually the right choice for your situation (spoiler: sometimes exFAT is the better pick).
NTFS, exFAT, or FAT32: Which Should You Use?
Before you start formatting anything, it’s worth taking 30 seconds to pick the right file system. Here’s a plain-English breakdown:
- NTFS, The best choice if your USB drive is mainly used with Windows PCs. It supports large files (way past FAT32’s 4 GB minus 1 byte per-file limit), file permissions, encryption, compression, and journaling (which helps protect your data if something goes wrong mid-write). The catch: macOS can only read NTFS drives by default, not write to them.
- exFAT, The best all-rounder for cross-platform use. Works on Windows, macOS, Linux, smart TVs, cameras, and most modern devices. Supports large files. If you’re sharing files between a Mac and a PC, this is usually your best bet.
- FAT32, The old reliable. Works on basically everything, but has a hard 4 GB minus 1 byte per-file size limit and a 2 TB volume limit. Fine for tiny USB drives used with older devices, but not great for anything modern.
| File System | Max File Size | Windows | macOS | Best For |
|---|---|---|---|---|
| NTFS | Virtually unlimited | ✅ Read & Write | ⚠️ Read only | Windows-only use, permissions, encryption |
| exFAT | Virtually unlimited | ✅ Read & Write | ✅ Read & Write | Cross-platform file sharing |
| FAT32 | 4 GB minus 1 byte per file | ✅ Read & Write | ✅ Read & Write | Legacy device compatibility |
Still want NTFS? Great, let’s get into it.
Before You Begin
A couple of quick things to check before you start:
- ☐ Your USB drive is plugged in and recognized by Windows
- ☐ You’ve backed up any files you want to keep, formatting erases everything on the drive
- ☐ You’re running Windows 10 or Windows 11 (these steps work on both)
Seriously, don’t skip the backup step. Formatting wipes your drive clean. There’s no undo button.
Method 1: Format USB as NTFS Using File Explorer
This is the easiest method and works for most people. If NTFS shows up in the dropdown, you’re good to go.
Step 1: Plug In Your USB Drive
Insert your USB drive or memory stick into your computer. Wait a moment for Windows to recognize it.
Step 2: Open File Explorer and Go to This PC
Open File Explorer (press Windows + E) and click This PC in the left sidebar. You should see your USB drive listed under Devices and drives.
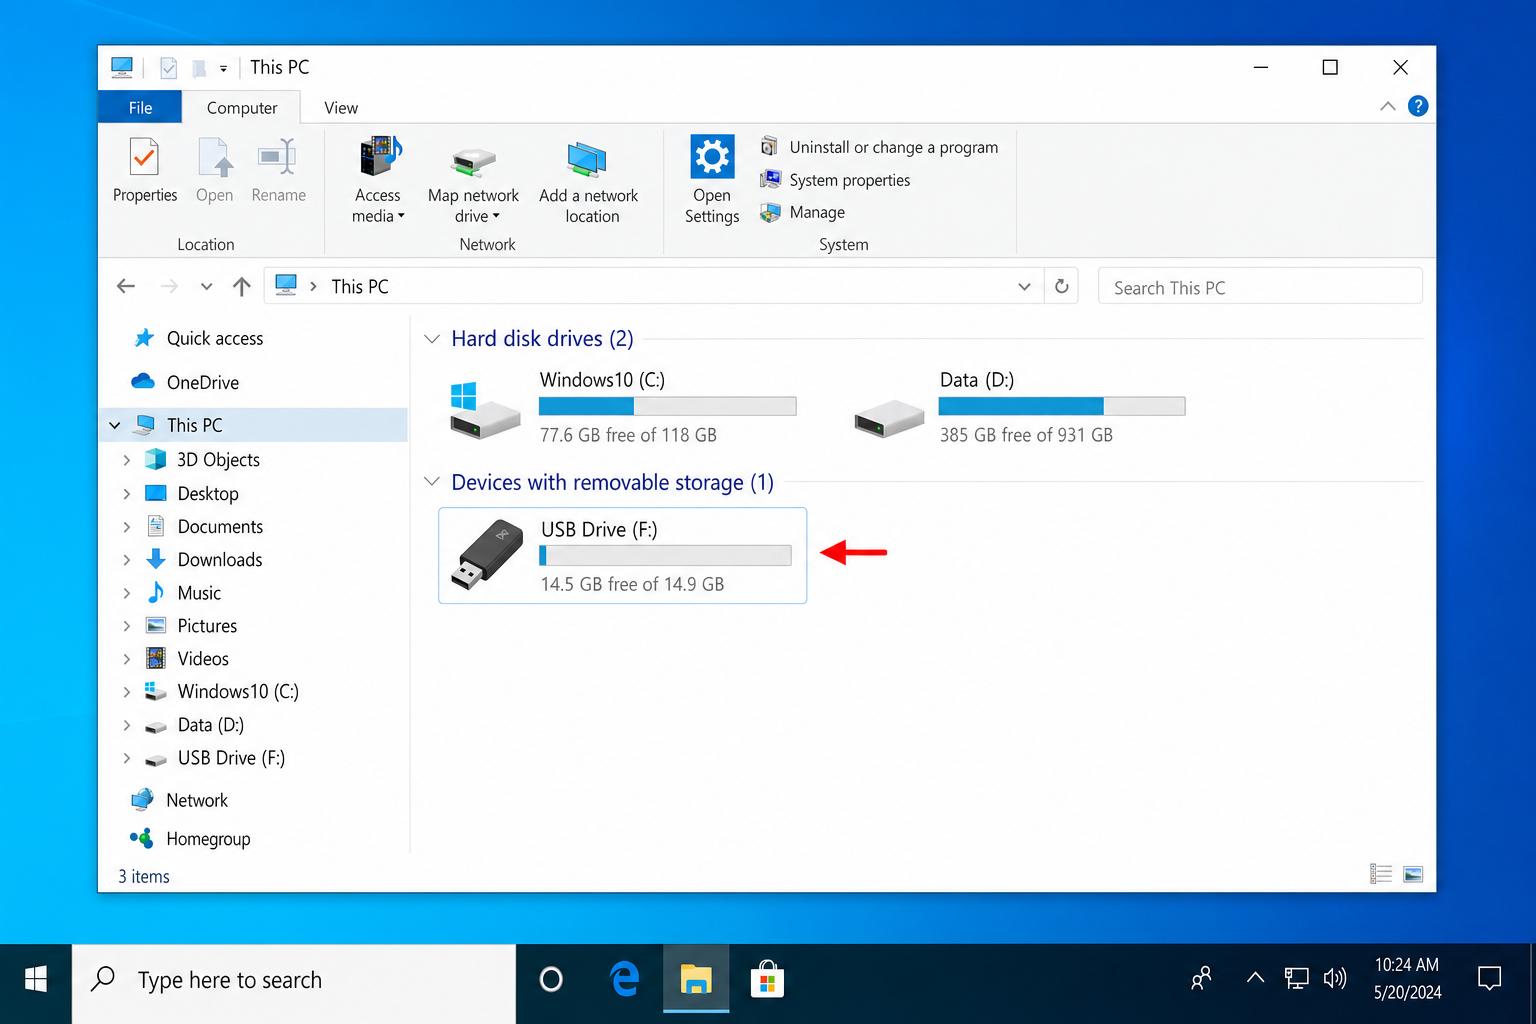
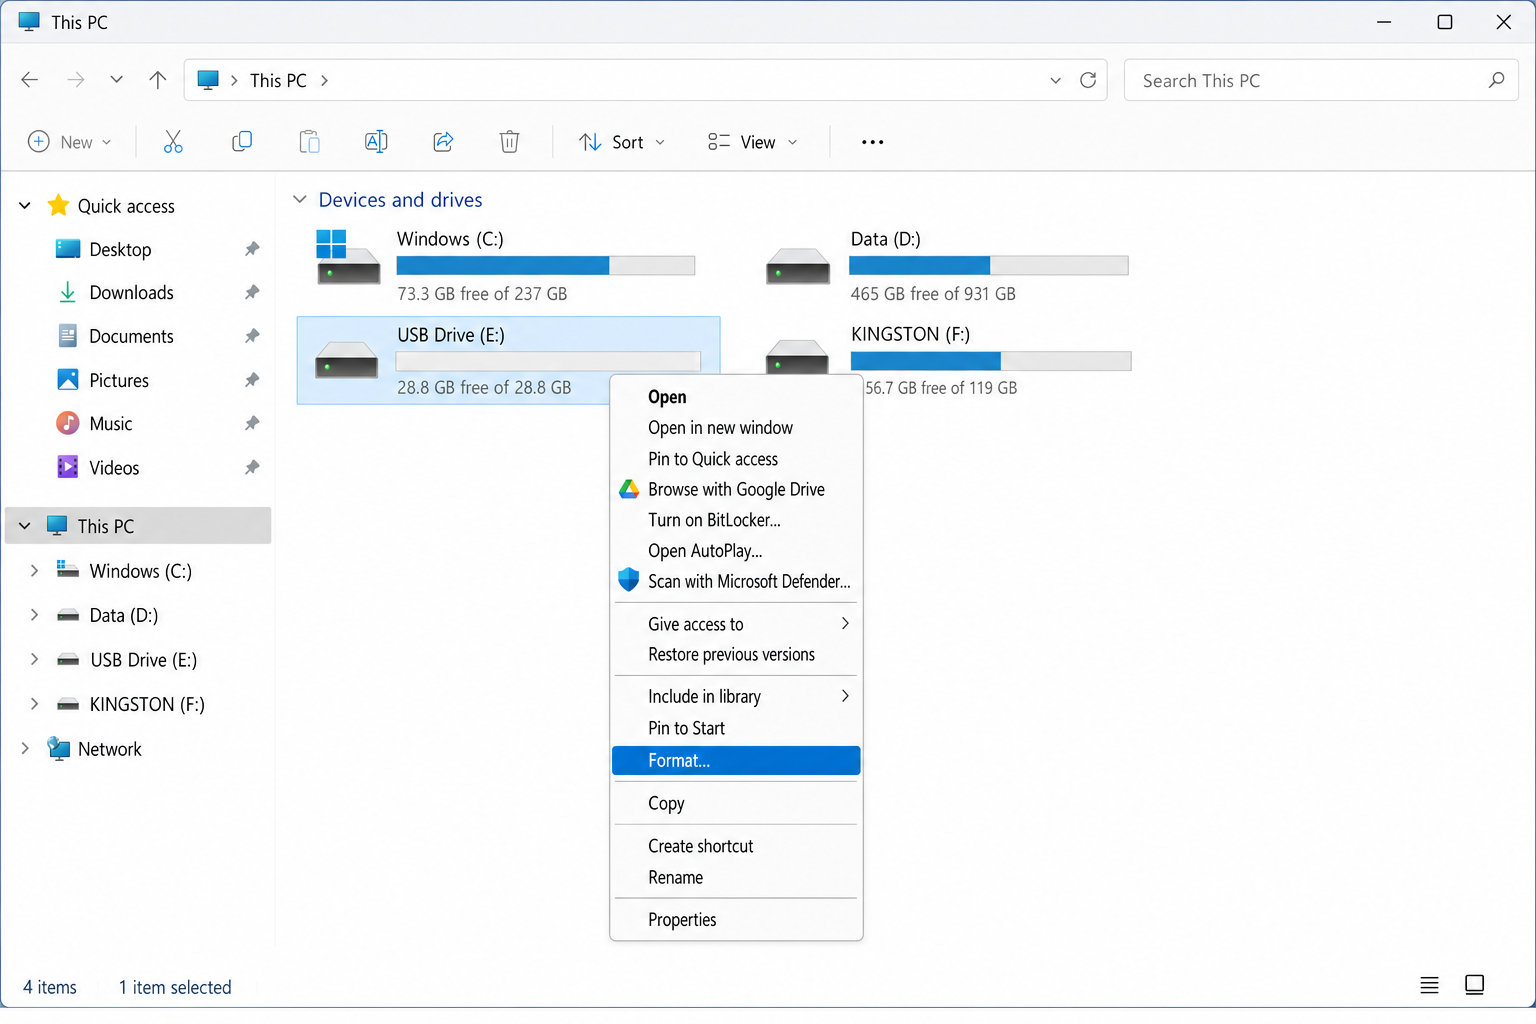
Step 3: Right-Click the USB Drive and Select Format
Right-click on your USB drive and choose Format from the context menu.
Step 4: Choose NTFS as the File System
In the Format window, click the File system dropdown and select NTFS. Leave Allocation unit size set to Default allocation size unless you have a specific reason to change it. You can leave Quick Format checked for a faster process.
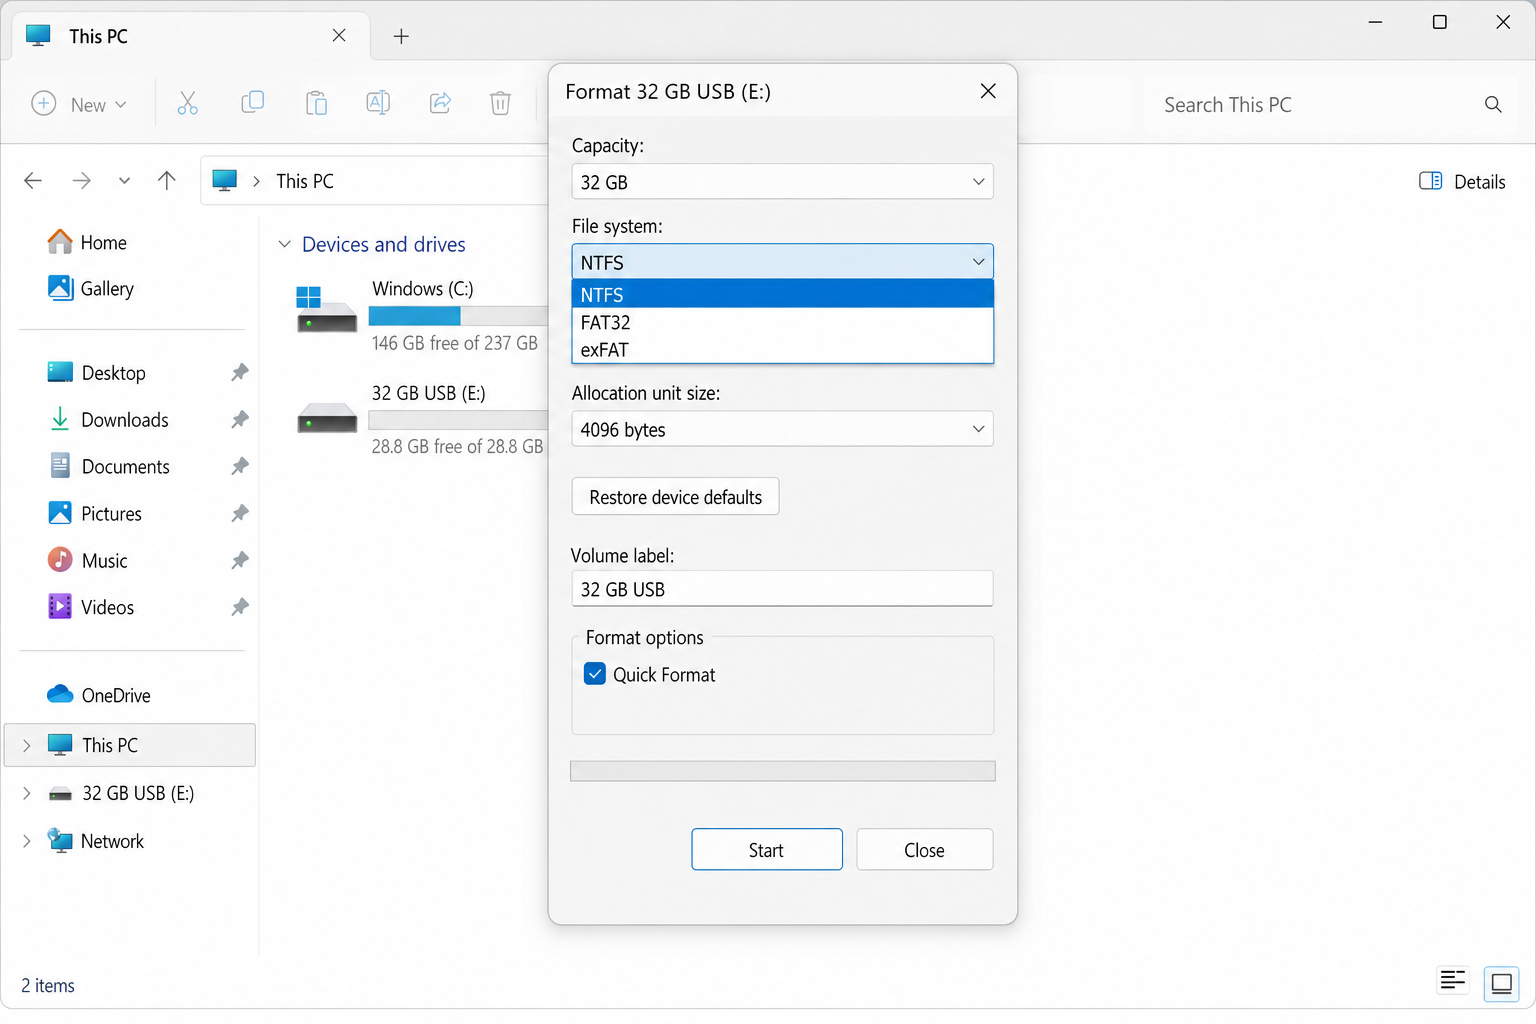
Step 5: Click Start
Click Start. Windows will warn you that all data on the drive will be erased, click OK to confirm. The format will only take a few seconds with Quick Format enabled.
That’s it! Your USB drive is now formatted as NTFS. If NTFS didn’t appear in the dropdown, jump to Method 2 or 3 below.
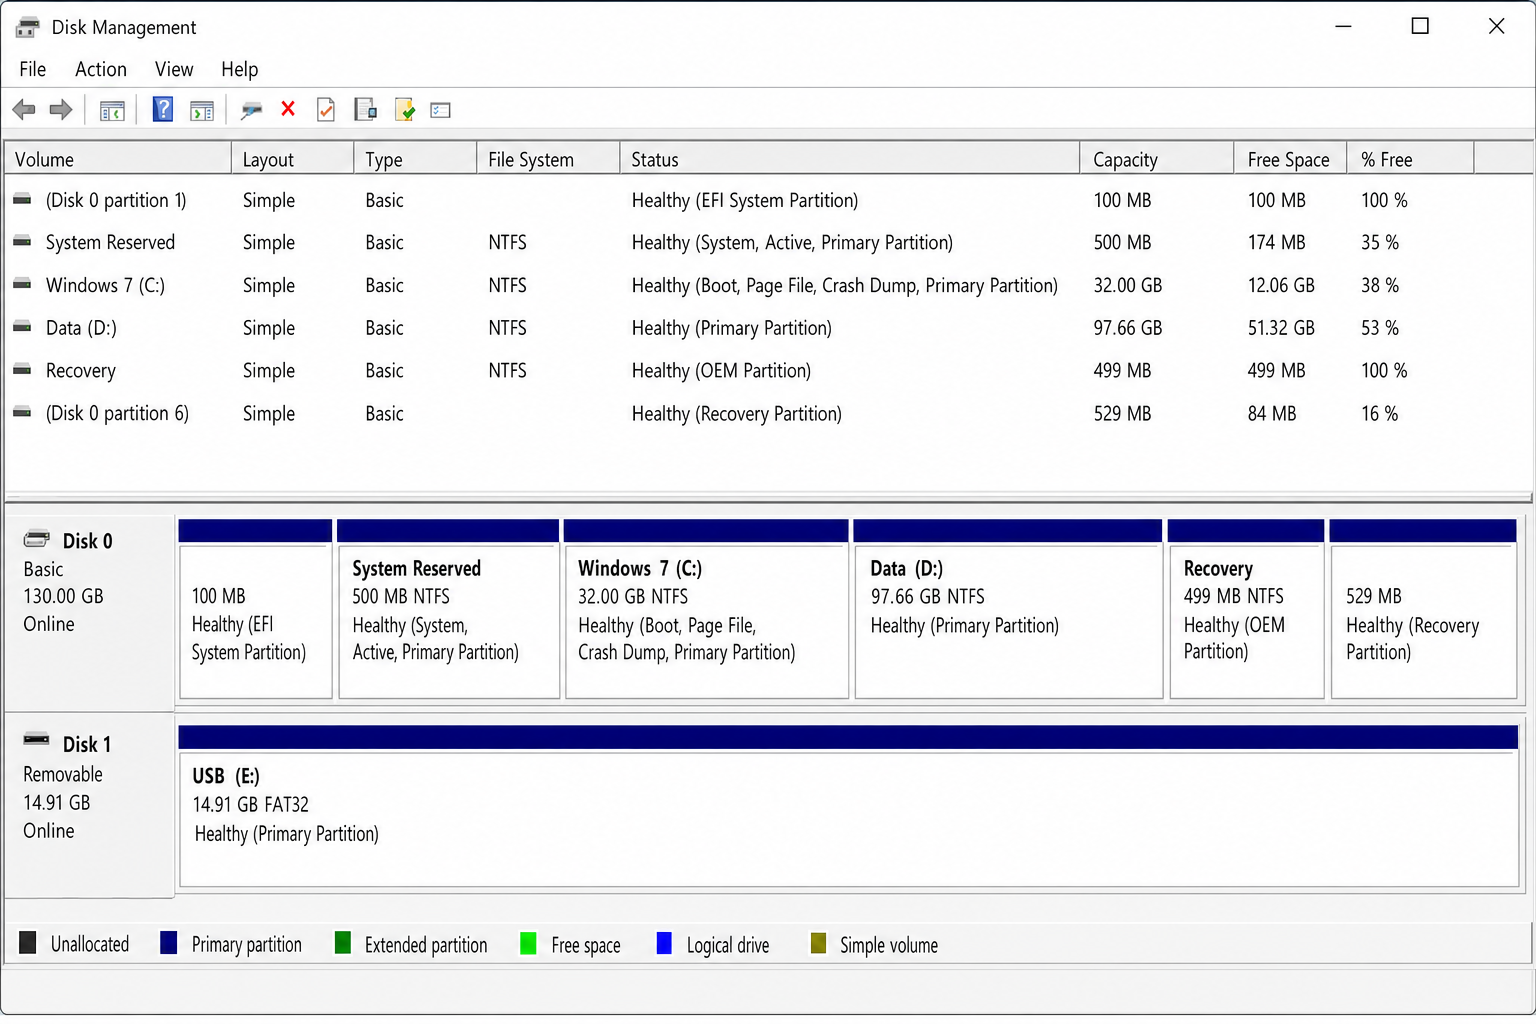
Method 2: Format USB as NTFS Using Disk Management
If File Explorer didn’t show NTFS as an option, or if the format failed with an error, Disk Management is your next stop. It gives you a bit more control over the process.
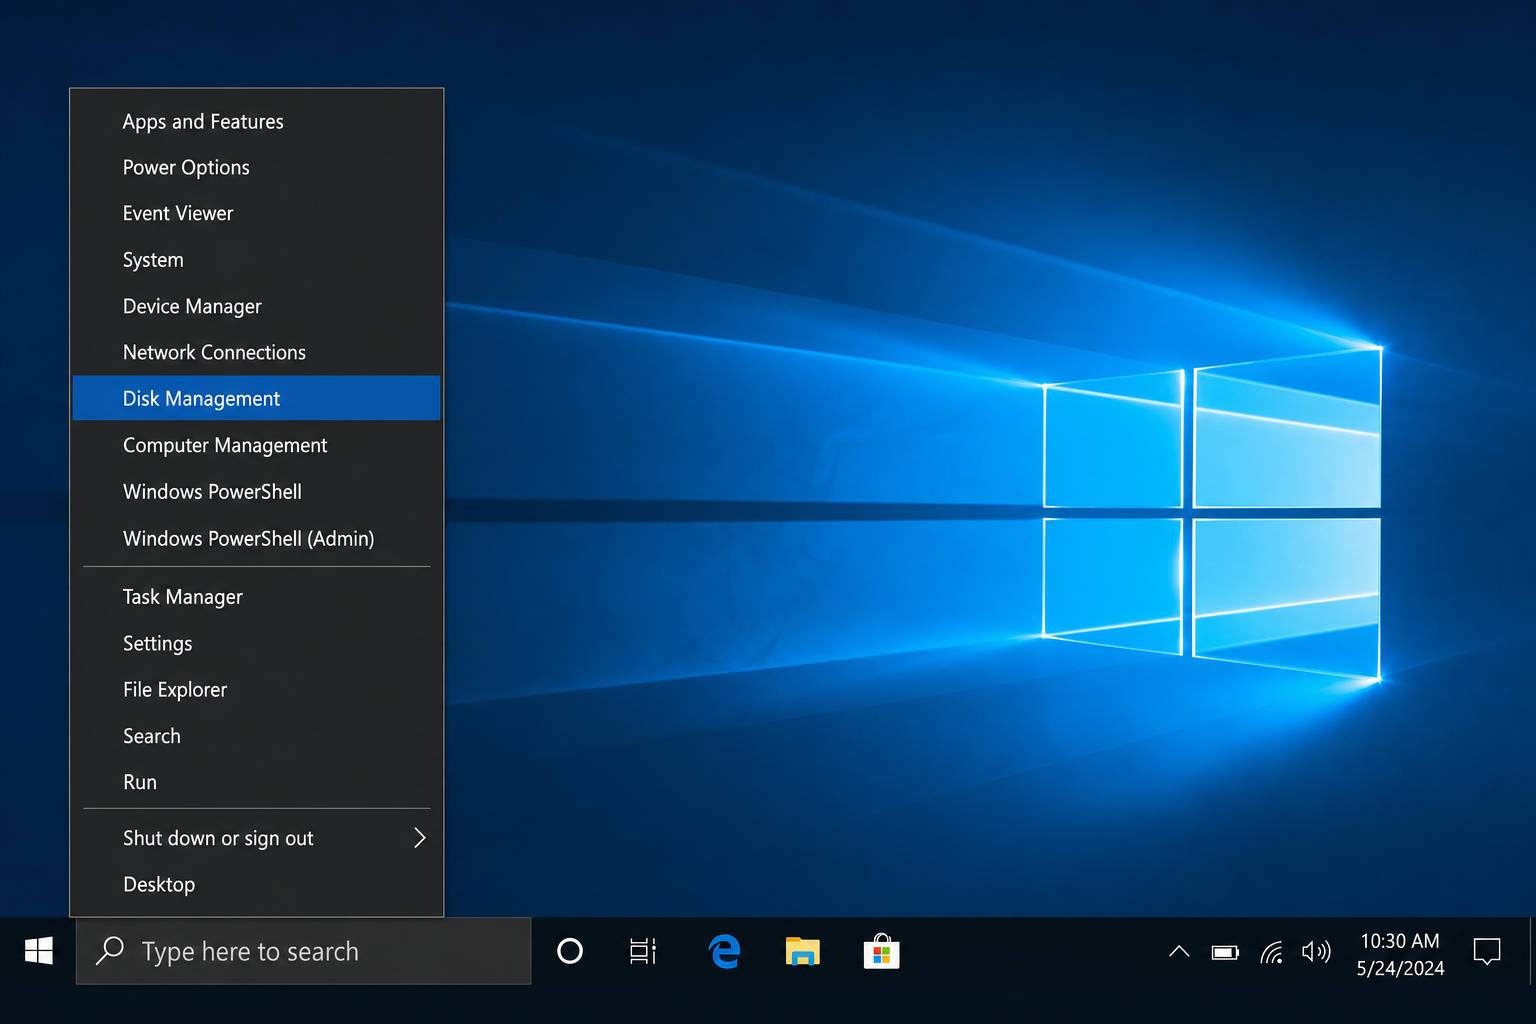
Step 1: Open Disk Management
Right-click the Start button and select Disk Management from the menu.
Step 2: Find Your USB Drive
Look at the list of disks at the bottom of the Disk Management window. Find the one labeled Removable and double-check the size matches your USB drive so you don’t accidentally format the wrong disk.
Step 3: Delete the Existing Volume (If Needed)
If the drive has an existing partition, right-click on it and choose Delete Volume. This will erase the partition so you can create a fresh one. Click Yes to confirm.
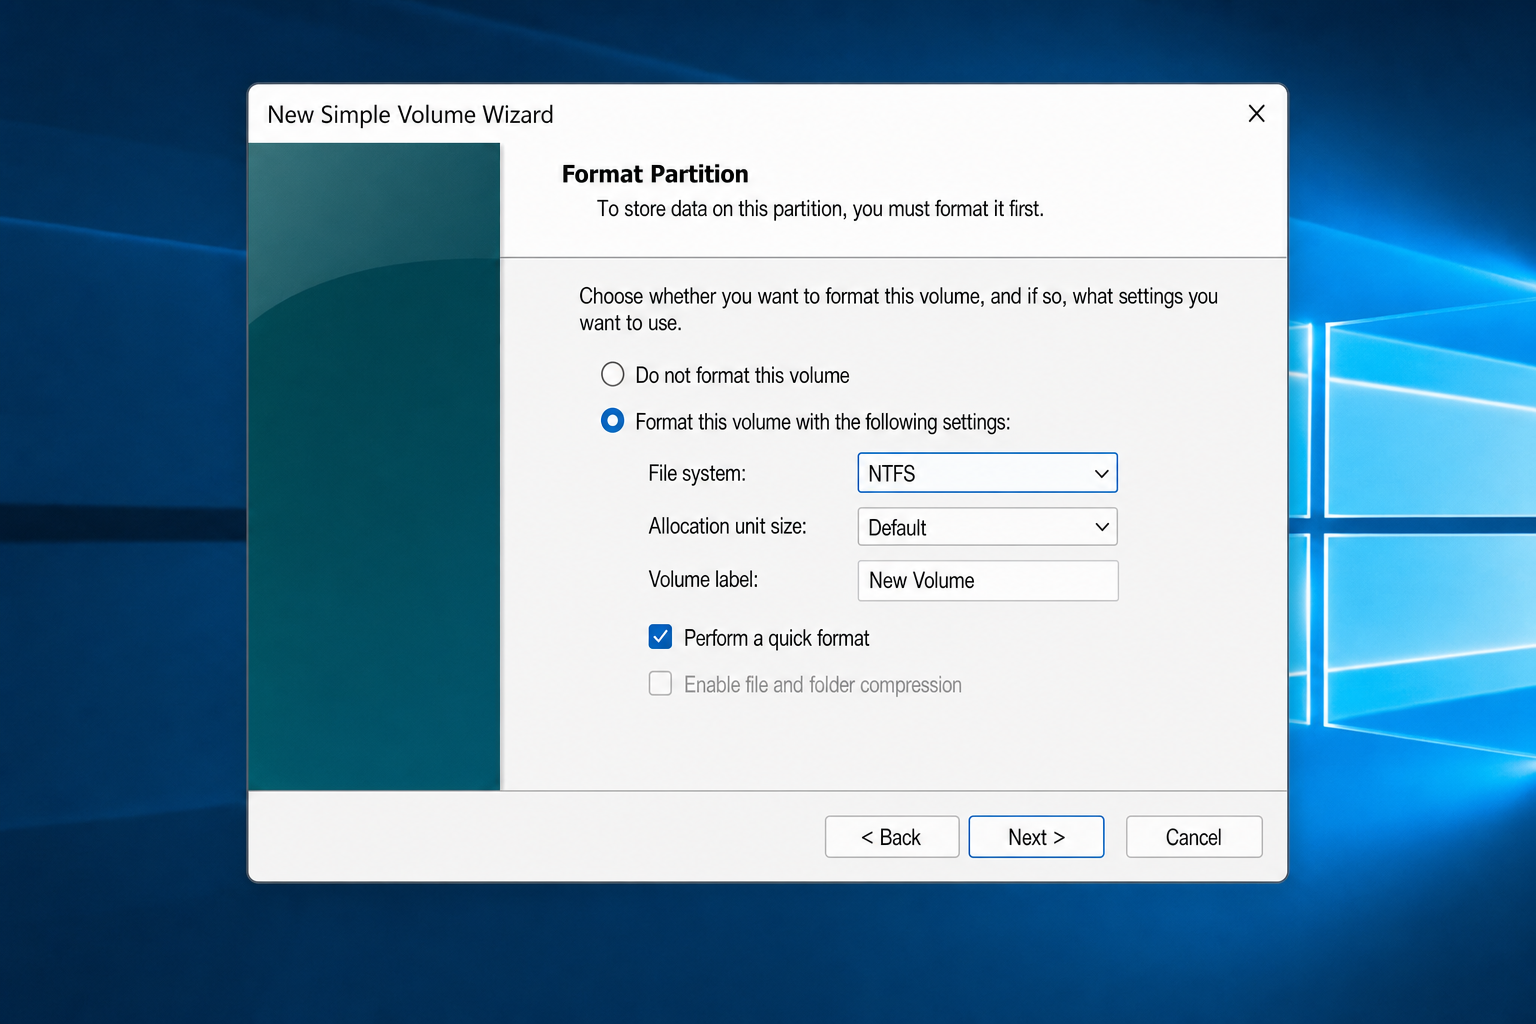
Step 4: Create a New Simple Volume
Right-click the unallocated space on your USB drive and choose New Simple Volume. Follow the wizard, when it asks you to choose a file system, select NTFS. Finish the wizard and you’re done.
Method 3: Format USB as NTFS Using DiskPart (Command Line)
If your drive is being stubborn and neither of the above methods worked, DiskPart is the heavy-duty option. It runs in the command line and gives you full control, but you need to be careful, because it can wipe the wrong disk if you’re not paying attention.
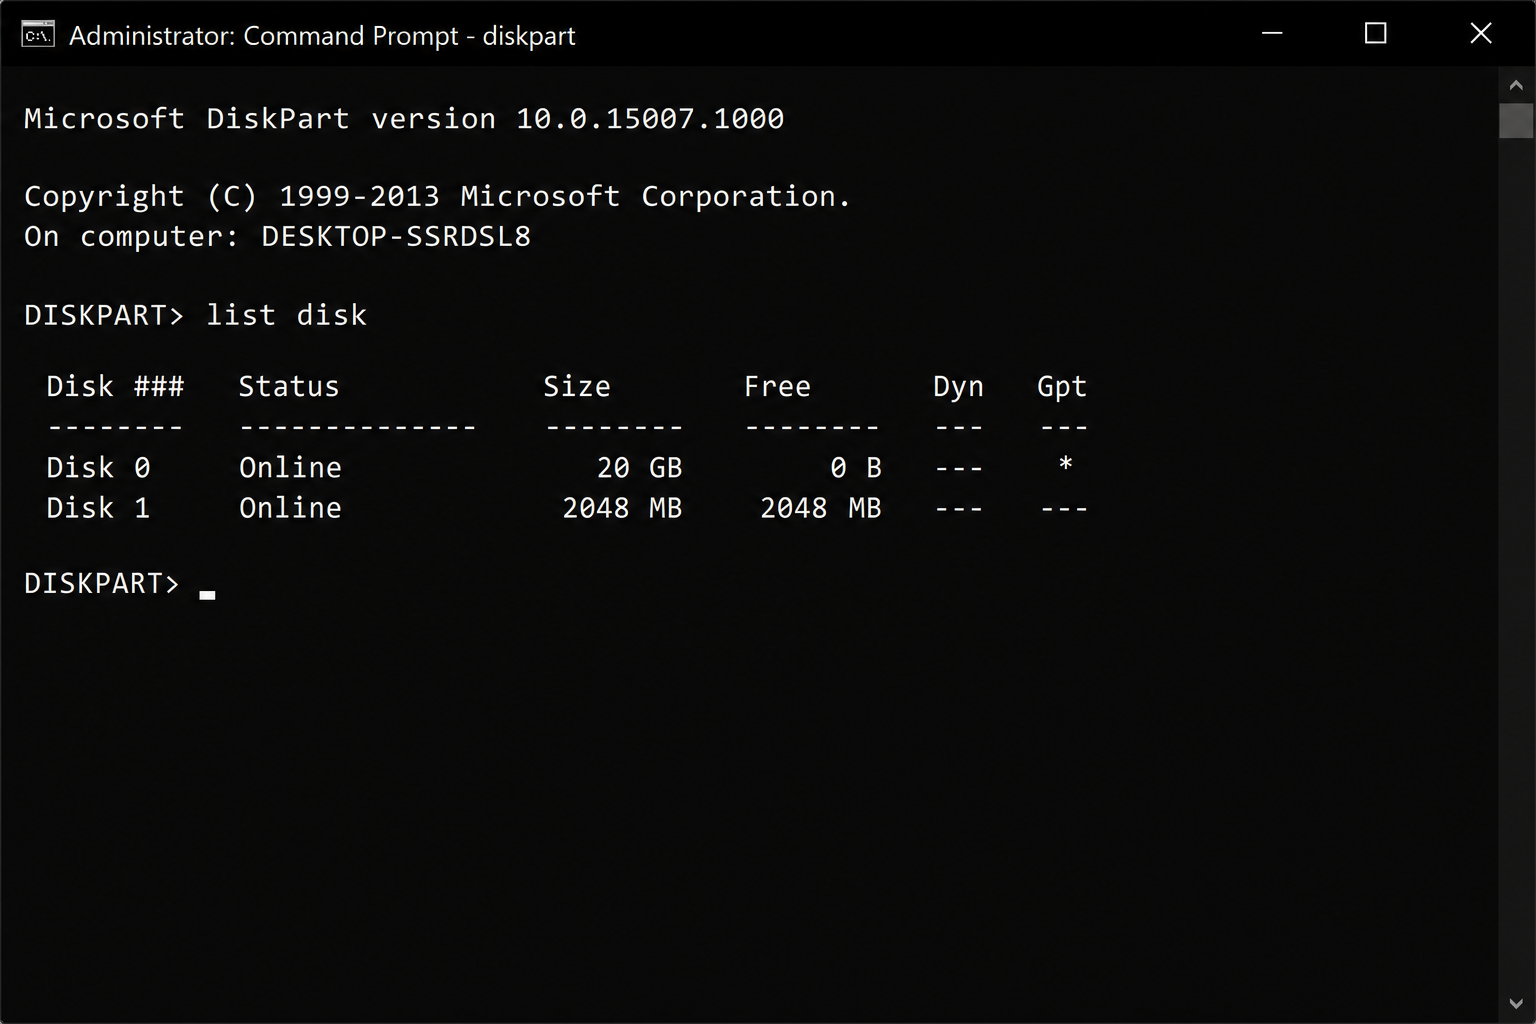
Step 1: Open Command Prompt as Administrator
Click the Start button, type cmd, then right-click Command Prompt and choose Run as administrator.

Step 2: Launch DiskPart
In the Command Prompt window, type the following and press Enter:
diskpartStep 3: List Your Disks
Type the following and press Enter:
list diskYou’ll see a list of all disks connected to your PC. Find your USB drive by its size. Make a note of the disk number, you’ll need it in the next step.
Step 4: Select the USB Drive
Replace X with your USB drive’s disk number:
select disk X⚠️ Double-check the disk number before continuing. The next command will erase everything on the selected disk, including all partitions.
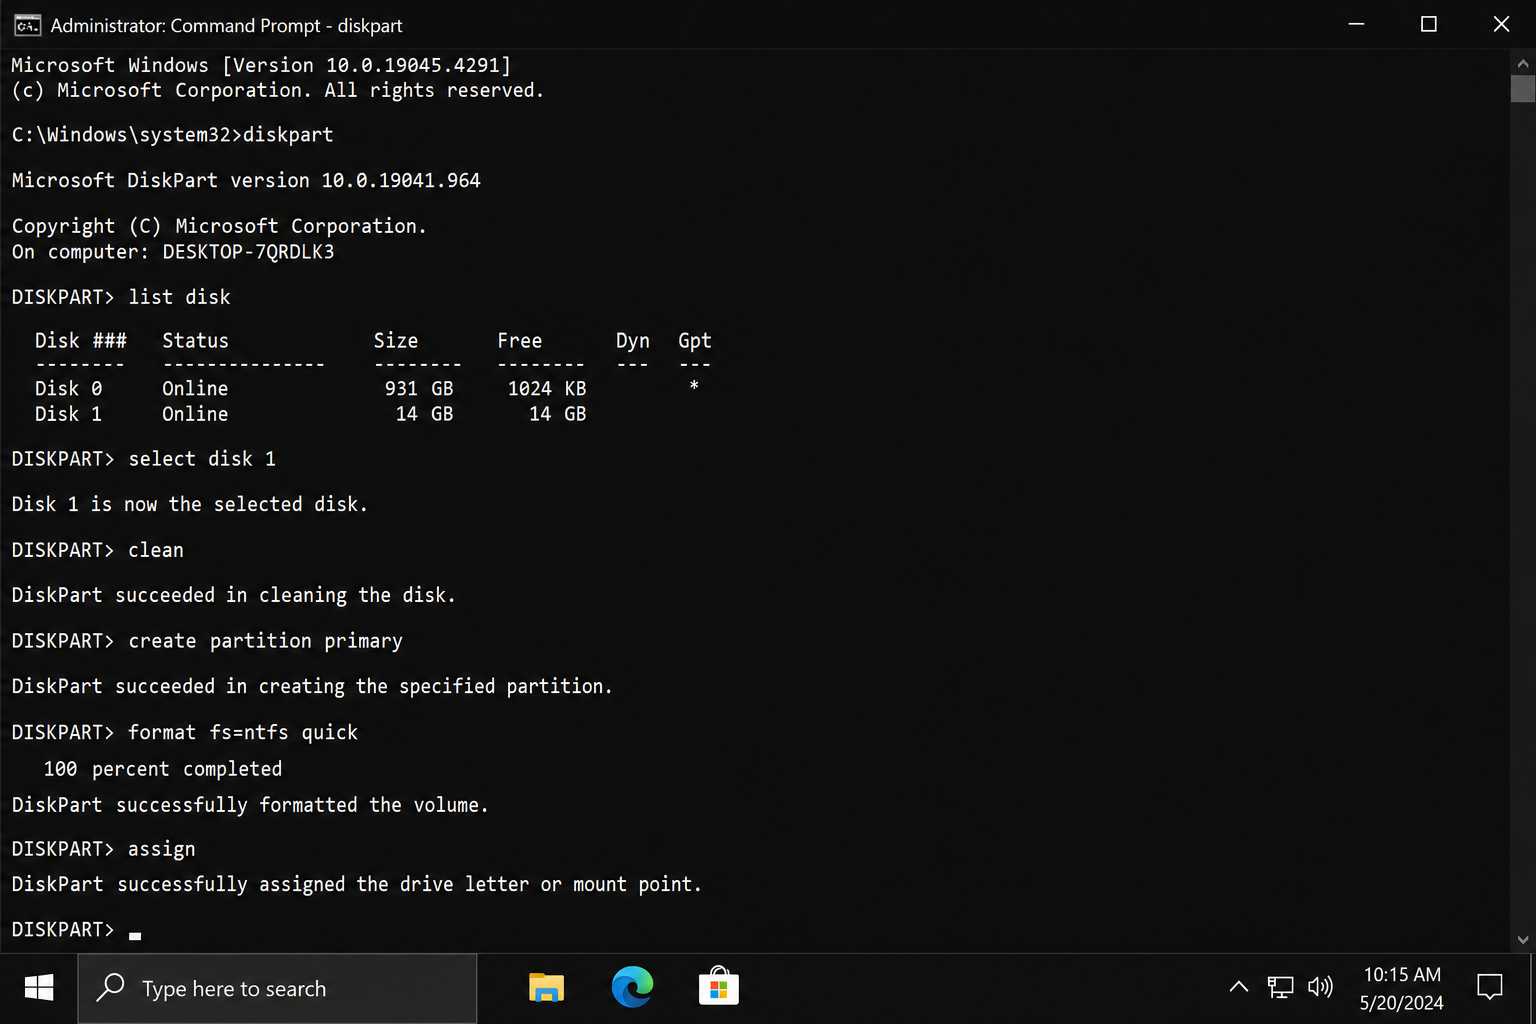
Step 5: Clean and Format the Drive
Run these commands one at a time, pressing Enter after each one:
clean
create partition primary
format fs=ntfs quick
assign
exit
The clean command wipes the partition table. create partition primary sets up a fresh partition. format fs=ntfs quick formats it as NTFS. assign gives it a drive letter so it shows up in File Explorer. Once you type exit, you’re done.
Method 4: Format USB as NTFS Using PowerShell
If you’re comfortable with PowerShell (it’s like Command Prompt but more powerful), this method is clean and scriptable, which is handy if you format drives regularly.
Step 1: Open PowerShell as Administrator
Click Start, type powershell, right-click Windows PowerShell, and choose Run as administrator.
Step 2: Find Your USB Drive’s Disk Number
Type the following and press Enter:
Get-DiskFind your USB drive in the list and note its disk number.
Step 3: Format the Drive
Replace X with your disk number and run this command:
New-Partition -DiskNumber X -UseMaximumSize -AssignDriveLetter | Format-Volume -FileSystem NTFS -NewFileSystemLabel "USB" -Confirm:$falseThis creates a new partition using the full drive size and formats it as NTFS in one go. The label “USB” will appear as the drive name in File Explorer, feel free to change it to whatever you like.
Tips and Troubleshooting
NTFS Doesn’t Appear in the File Explorer Format Menu
This is the most common head-scratcher. If NTFS isn’t showing up as an option in the File Explorer format dialog, try one of the other methods above. Disk Management or DiskPart almost always show NTFS as an option regardless of how the drive is currently partitioned.
Windows 11 Users: Format via Settings App (Disks & Volumes)
If you’re on Windows 11, there’s a fourth built-in path that many users encounter first: Settings > System > Storage > Advanced storage settings > Disks & volumes. Click on your USB drive, select the volume, then click Properties and look for the Format button. This Settings-based UI is more limited than Disk Management (it doesn’t let you delete and recreate partitions as easily), but it works fine for a straightforward reformat to NTFS on a drive that’s already partitioned. If you don’t see NTFS in its dropdown, fall back to Disk Management or DiskPart.
Windows Says the Drive Is Write-Protected
Before you can format a write-protected drive, you need to remove the protection first. Check these things:
- Physical switch: Some USB drives and SD cards have a tiny physical lock switch on the side. Slide it to the unlocked position.
- DiskPart fix: Open DiskPart (see Method 3), select the disk, then type
attributes disk clear readonlyand pressEnter. This removes the software-level write protection. - Failing drive: If neither of those works, the drive’s controller may have locked itself due to errors or worn-out flash memory. At that point, the drive may be unrecoverable.
Windows Was Unable to Complete the Format
If File Explorer throws this error, skip straight to Disk Management (Method 2) or DiskPart (Method 3). These tools can handle situations where Explorer gets stuck. If those also fail, the drive itself may be failing. Try it on a different USB port or a different PC to rule out a port issue. If it still won’t format anywhere, the drive is likely dead.
The Drive Formatted Fine But Still Doesn’t Work Properly
This can happen with cheap or fake-capacity USB drives. If a drive claims to be 128 GB but is actually a 4 GB drive with fake firmware, no amount of formatting will fix it. The same goes for drives with bad sectors or a worn-out flash controller. If you bought the drive from an unfamiliar seller on a marketplace site, this is worth investigating.
Should I Use Quick Format or Full Format?
Quick Format is fine for most situations. It’s faster and sets up the file system without scanning every sector. Full Format takes longer but checks the drive for bad sectors as it goes. If you’re having problems with a drive, a Full Format can sometimes reveal whether the hardware is healthy. Just uncheck the Quick Format box in the File Explorer dialog to run a full format.
Will My Mac Be Able to Use the Drive After Formatting as NTFS?
Your Mac will be able to read the drive, but not write to it. macOS doesn’t support writing to NTFS drives without third-party software. If you need to share files between Windows and macOS regularly, format the drive as exFAT instead. It works seamlessly on both platforms.
Wrapping Up
Formatting a USB drive as NTFS in Windows 10 or 11 is easier than it used to be. In most cases, it’s just a right-click away in File Explorer. If that doesn’t work, Disk Management and DiskPart are reliable fallbacks that almost always get the job done. Windows 11 users can also reach for Settings > System > Storage > Disks & volumes for a quick reformat without opening any legacy tools. Just remember to back up your files first, because there’s no getting them back once you hit format.
If you’re still on the fence about NTFS vs. exFAT, go with exFAT if you ever plug the drive into a Mac, TV, camera, or anything that isn’t a Windows PC. For a dedicated Windows backup or secure file drive, NTFS is the right call. If you run into any issues, drop a comment below and we’ll help you figure it out!