
Your iPhone knows everything about you: your bank passwords, private messages, location history, and browsing habits. Every time you connect to public WiFi at a coffee shop or airport, all that data could be intercepted by hackers sitting at the next table. It’s like having a conversation in a crowded room where anyone can listen in.
So what can you do about it? Well, setting up a VPN on your iPhone nowadays is way easier than it used to be. You can protect all your traffic with just a few taps, and we’ll show you exactly how to do it. By the end of this guide, you’ll have an encrypted tunnel protecting everything from your banking app to your late-night YouTube binges.
What Is a VPN and Why Do You Need One on iPhone?
A VPN (Virtual Private Network) creates an encrypted tunnel between your iPhone and the internet. Think of it like mailing a letter in a locked box instead of on a postcard, even if someone intercepts it, they can’t read what’s inside.
Key Benefits for iPhone Users:
- Public WiFi Protection: Encrypts all data so hackers can’t steal your passwords or personal info
- Hide Your Location: Makes it look like you’re browsing from a different city or country
- Block ISP Tracking: Prevents your cellular carrier from seeing which websites you visit
- App Data Security: Protects data from apps that don’t use proper encryption on their own
- Bypass Restrictions: Access content that might be blocked in your region
Modern VPNs use military-grade AES-256 encryption and protocols like WireGuard or IKEv2 that are optimized for mobile devices, so you won’t notice much impact on battery life or speed.
Method 1: Use a VPN App (Recommended for Most People)
The easiest way to set up a VPN on your iPhone is with a dedicated app from the App Store. This method takes about 2 minutes and works with iOS 15 or later.
Step 1: Choose a Reputable VPN Service
Here are the top iPhone VPN apps in 2026 based on security, speed, and ease of use:
- NordVPN: Huge server network, independently audited, $3-12/month
- ExpressVPN: Lightway protocol for fast mobile connections, $7-15/month
- ProtonVPN: Swiss privacy laws, has a decent free tier, $0-10/month
- Private Internet Access (PIA): Customizable encryption, budget-friendly, $2-12/month
Avoid free VPNs as they often log your data, inject ads, or have severe speed limits. The paid options above frequently offer 30-day money-back guarantees if you want to test them out.
Step 2: Download and Set Up the App
- Open the App Store and search for your chosen VPN service.
- Download the official app (watch out for imposters with similar names).
- Open the app and either Sign In with an existing account or Create Account.
- Choose your subscription plan if you’re signing up for the first time.
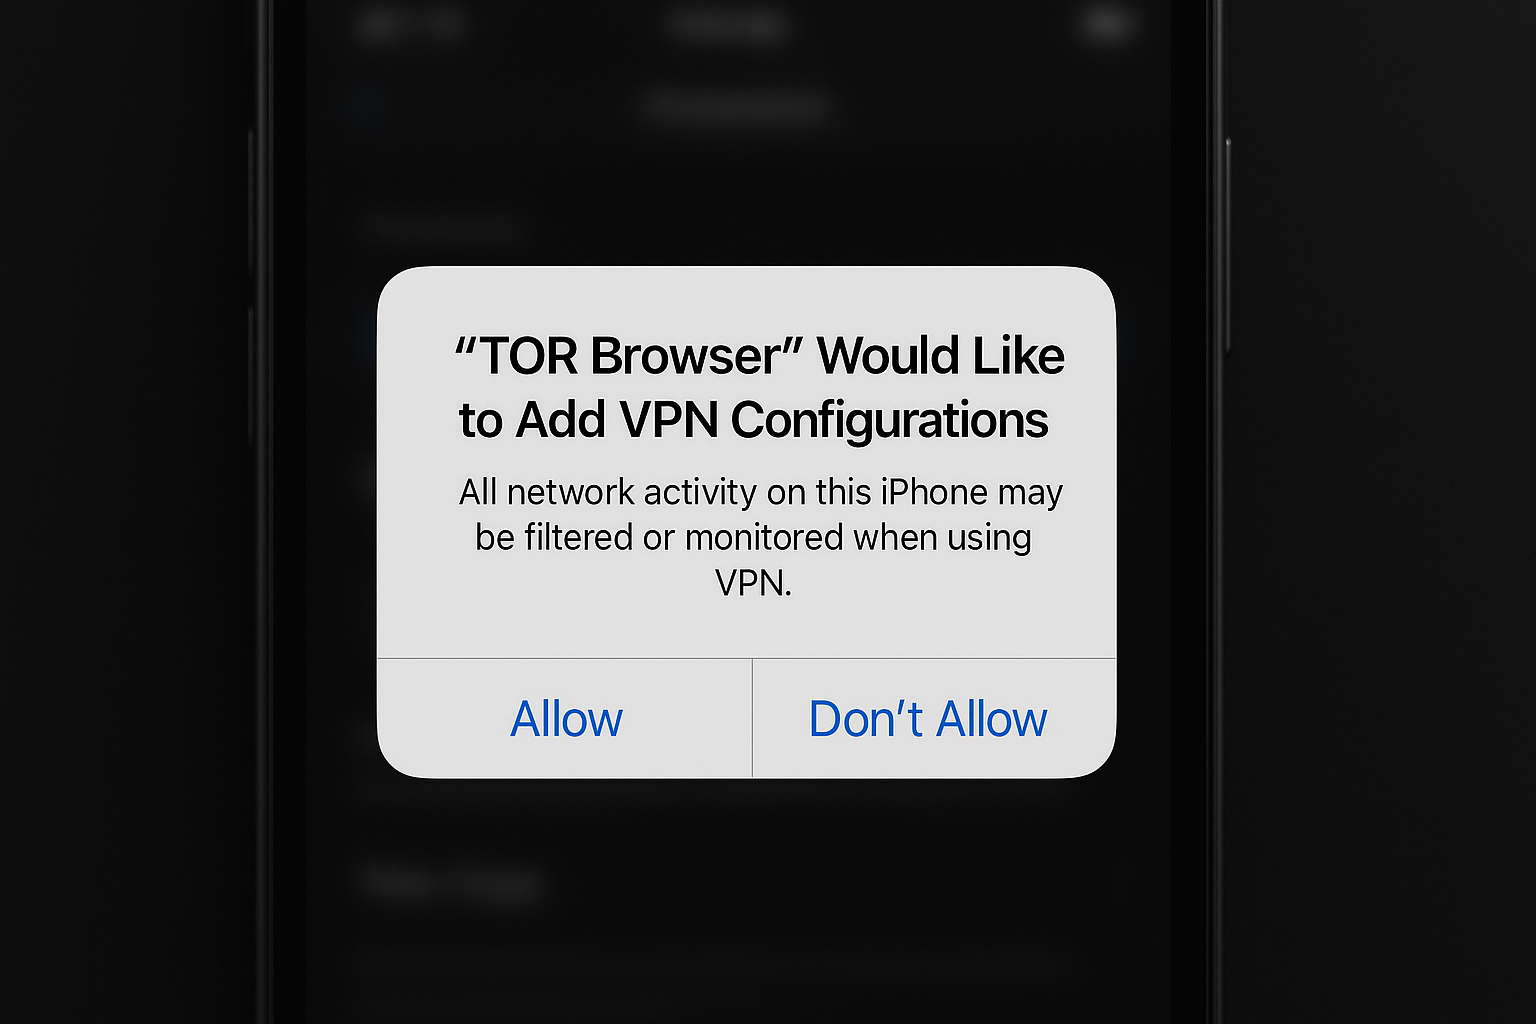
Step 3: Grant VPN Permissions
- Tap the big Connect button in your VPN app.
- iOS will show a popup asking permission to add VPN configurations — tap Allow.
- You might need to enter your iPhone passcode or use Face ID/Touch ID to confirm.
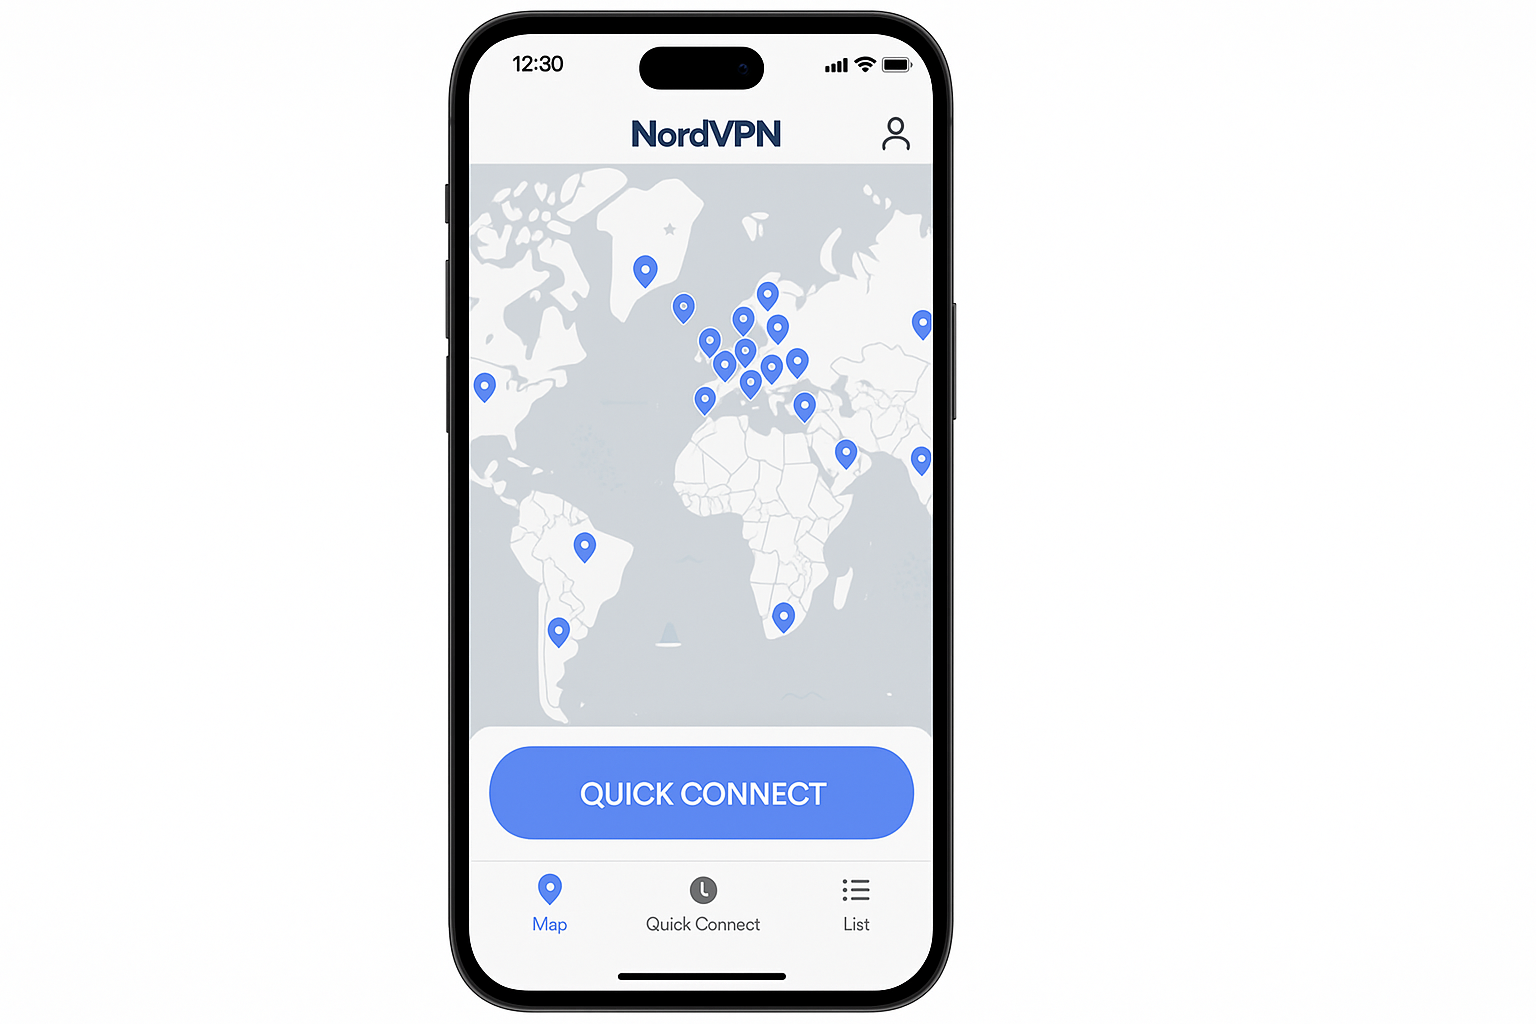
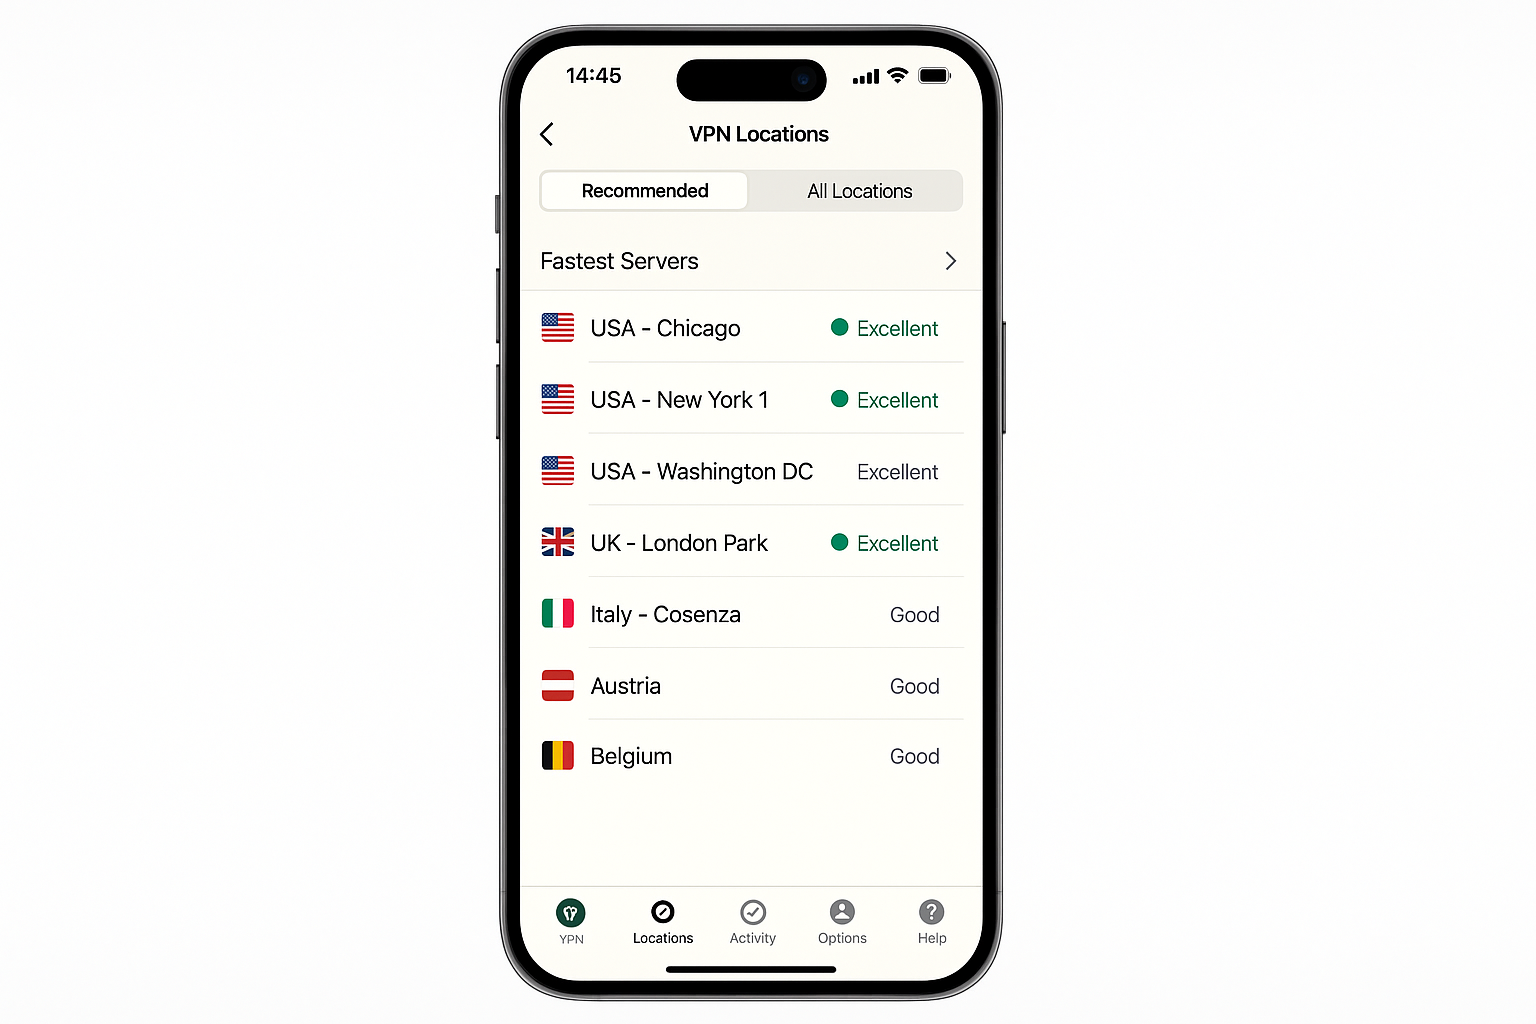
Step 4: Connect to a Server
- Back in the VPN app, you’ll see a list of server locations.
- For best speed, choose a server close to your physical location.
- Tap Connect or the server name to establish the connection.
- You’ll see a “VPN” indicator appear in your status bar when it’s active.
That’s it! All your iPhone traffic is now encrypted and routed through the VPN server. You can verify this is working by checking your IP address at a site like whatismyipaddress.com — it should show the VPN server’s location, not your real one.
Method 2: Manual VPN Configuration (For Custom Servers)
If you’re using a custom VPN server (like one provided by your workplace) or want to set up your own, you can configure it manually in iOS Settings. This method requires technical details from your VPN provider.
Before You Begin
Make sure you have:
- Server address (IP address or domain name)
- VPN protocol type (IKEv2 is recommended for iPhone)
- Username and password
- Pre-shared key or certificate (depending on protocol)
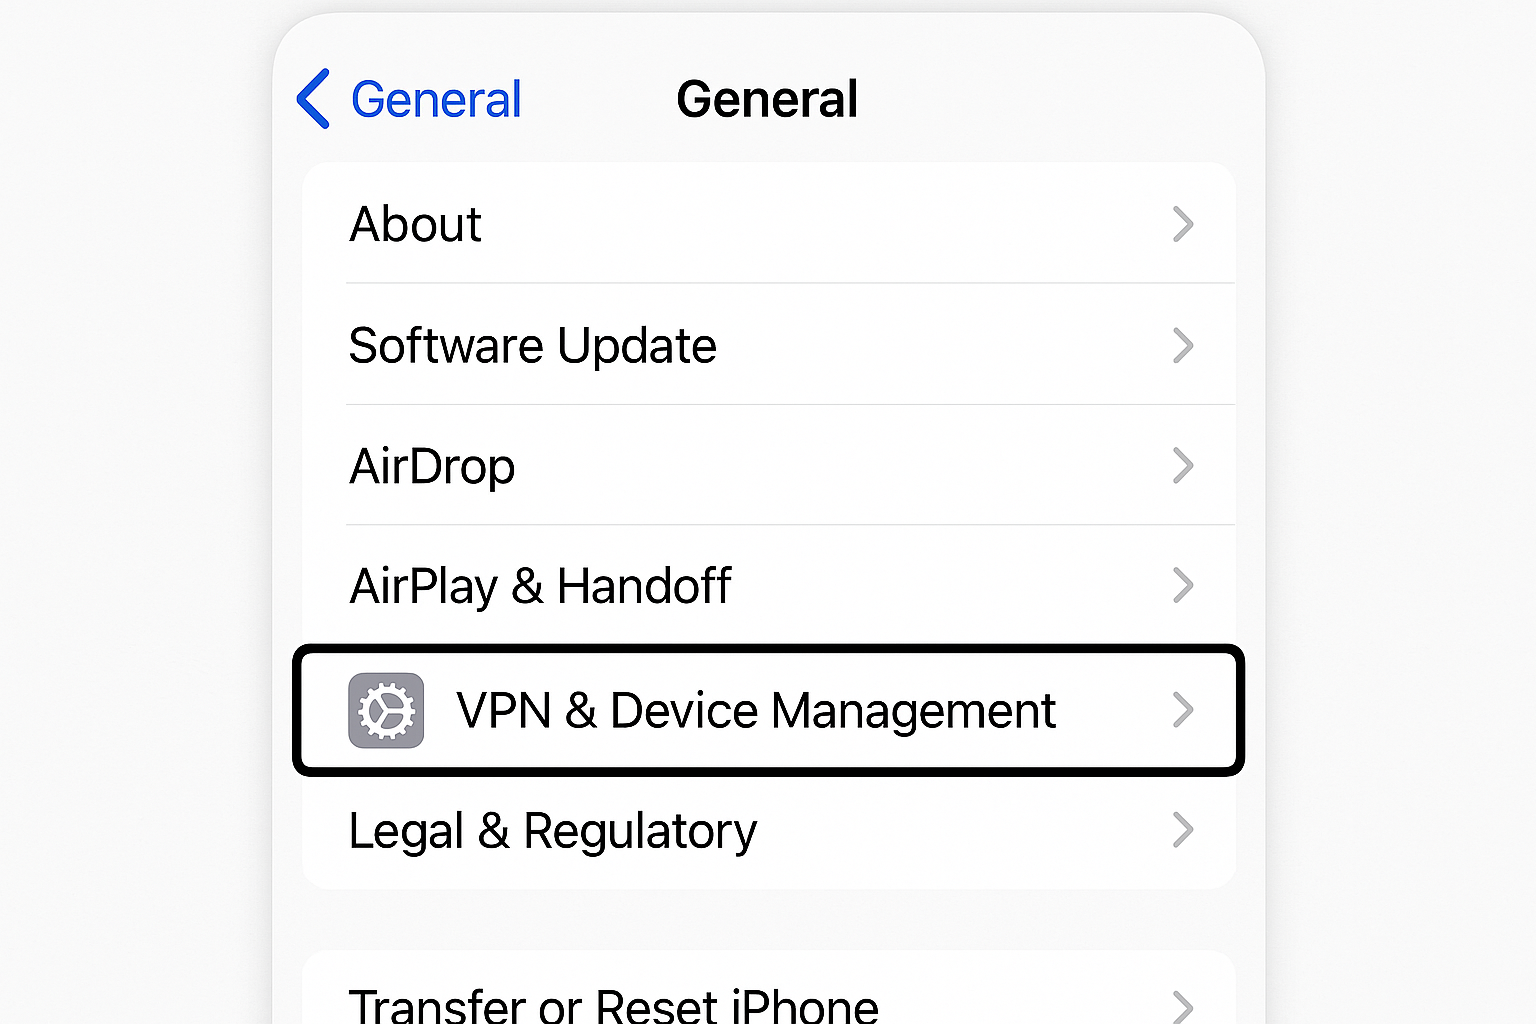
Step 1: Open VPN Settings
- Open Settings on your iPhone.
- Tap General > VPN & Device Management.
- Tap VPN (not Device Management).
Step 2: Add VPN Configuration
- Tap Add VPN Configuration.
- Select your VPN type at the top:
- IKEv2: Best for iPhone — fastest and most secure
- IPSec: Older but widely supported
- L2TP: Legacy option, avoid if possible
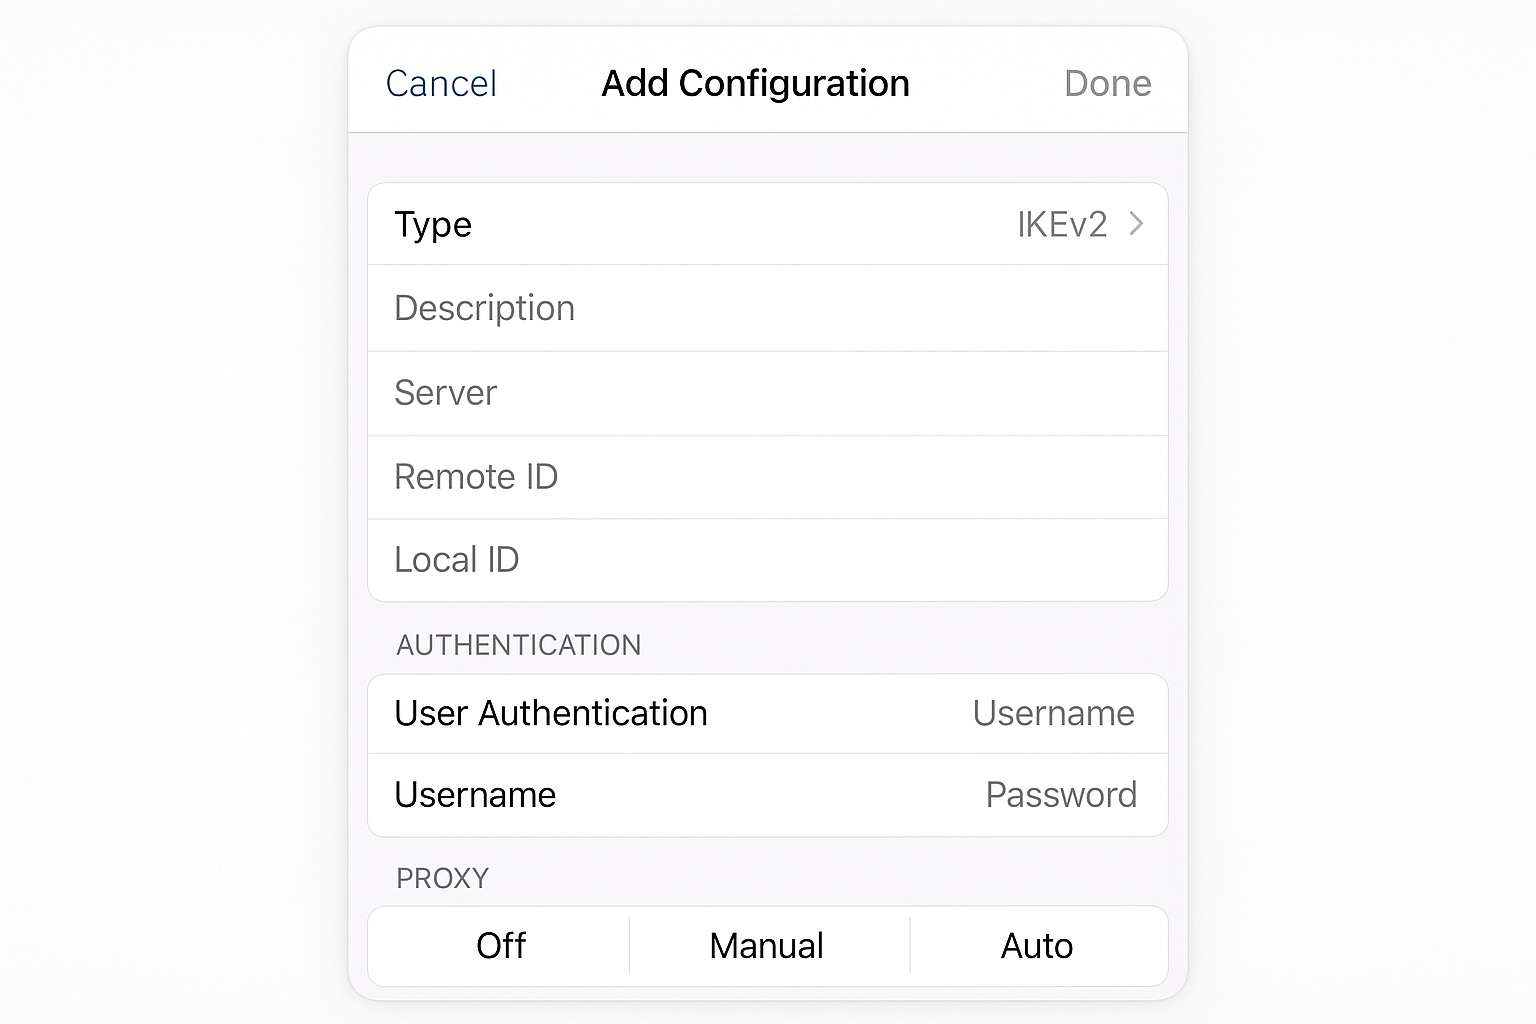
Step 3: Enter Server Details
Fill out the configuration form:
For IKEv2 (Recommended):
- Description: A name for this VPN (like “Work VPN” or “Home Server”)
- Server: Your VPN server’s address
- Remote ID: Usually the same as the server address
- Local ID: Leave blank unless specified
- User Authentication: Choose Username or Certificate
- Username/Password: Your VPN credentials
For L2TP/IPSec:
- Description: Name for this connection
- Server: VPN server address
- Account: Your username
- Password: Your password
- Secret: Pre-shared key provided by your VPN admin
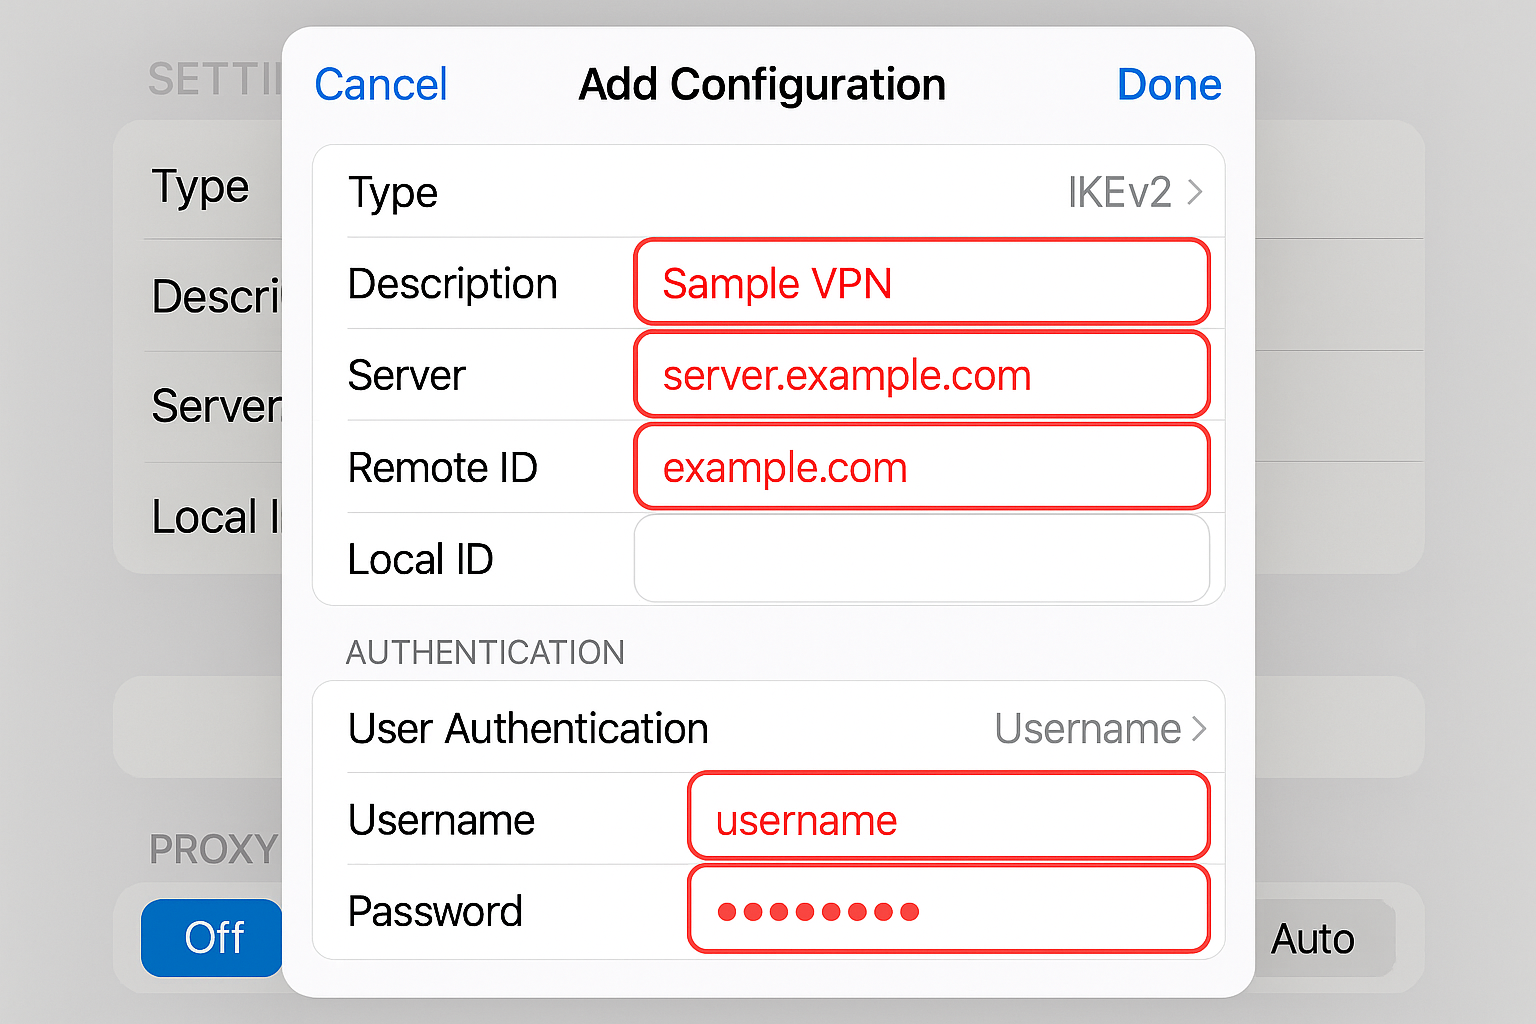
Step 4: Save and Connect
- Tap Done in the top-right corner to save the configuration.
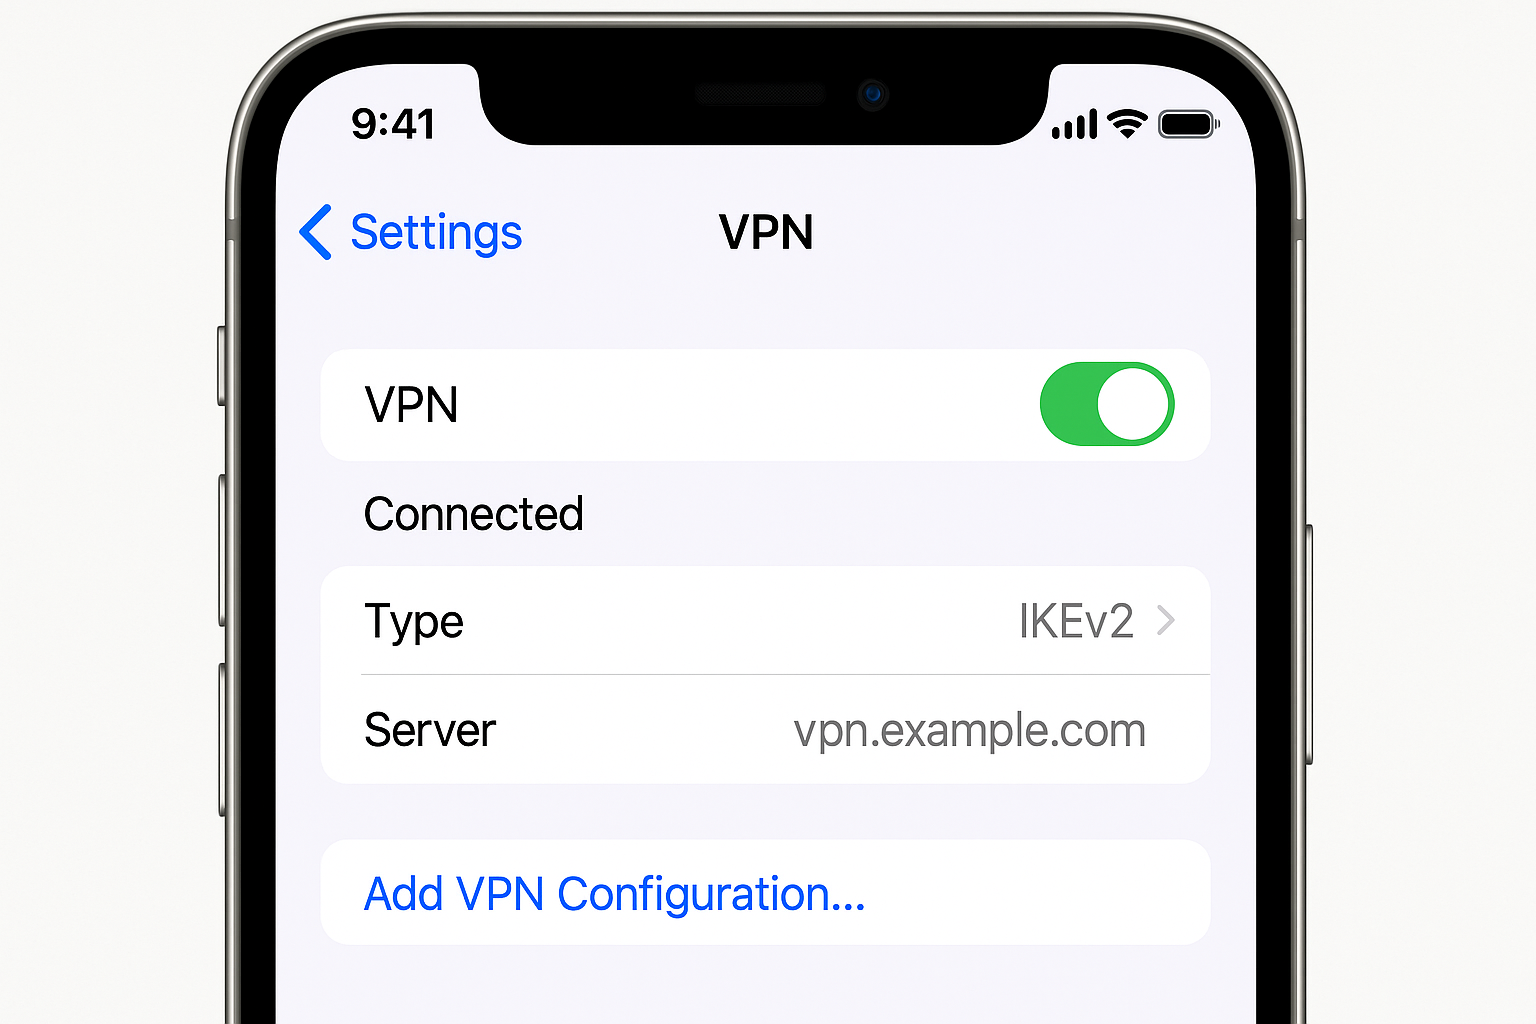
- Back on the VPN screen, toggle the switch next to your new VPN to On.
- iOS will attempt to connect and you should see “Connected” and a VPN icon in your status bar.
Setting Up Your Own VPN Server (Advanced Users)
Want complete control over your VPN? You can set up your own server at home. This requires more technical knowledge but gives you total privacy since you’re not trusting a third-party company.
Option 1: Router with Built-in VPN
Many modern routers support VPN server functionality:
- ASUS routers: Look for “VPN Server” in the admin panel
- Netgear routers: Check for “Dynamic DNS” and “VPN Service” settings
- DD-WRT firmware: Open-source firmware that adds VPN capabilities to compatible routers
You’ll need to set up dynamic DNS (so you can reach your home IP from anywhere) and configure port forwarding for VPN traffic (usually UDP ports 500, 1701, and 4500 for L2TP/IPSec).
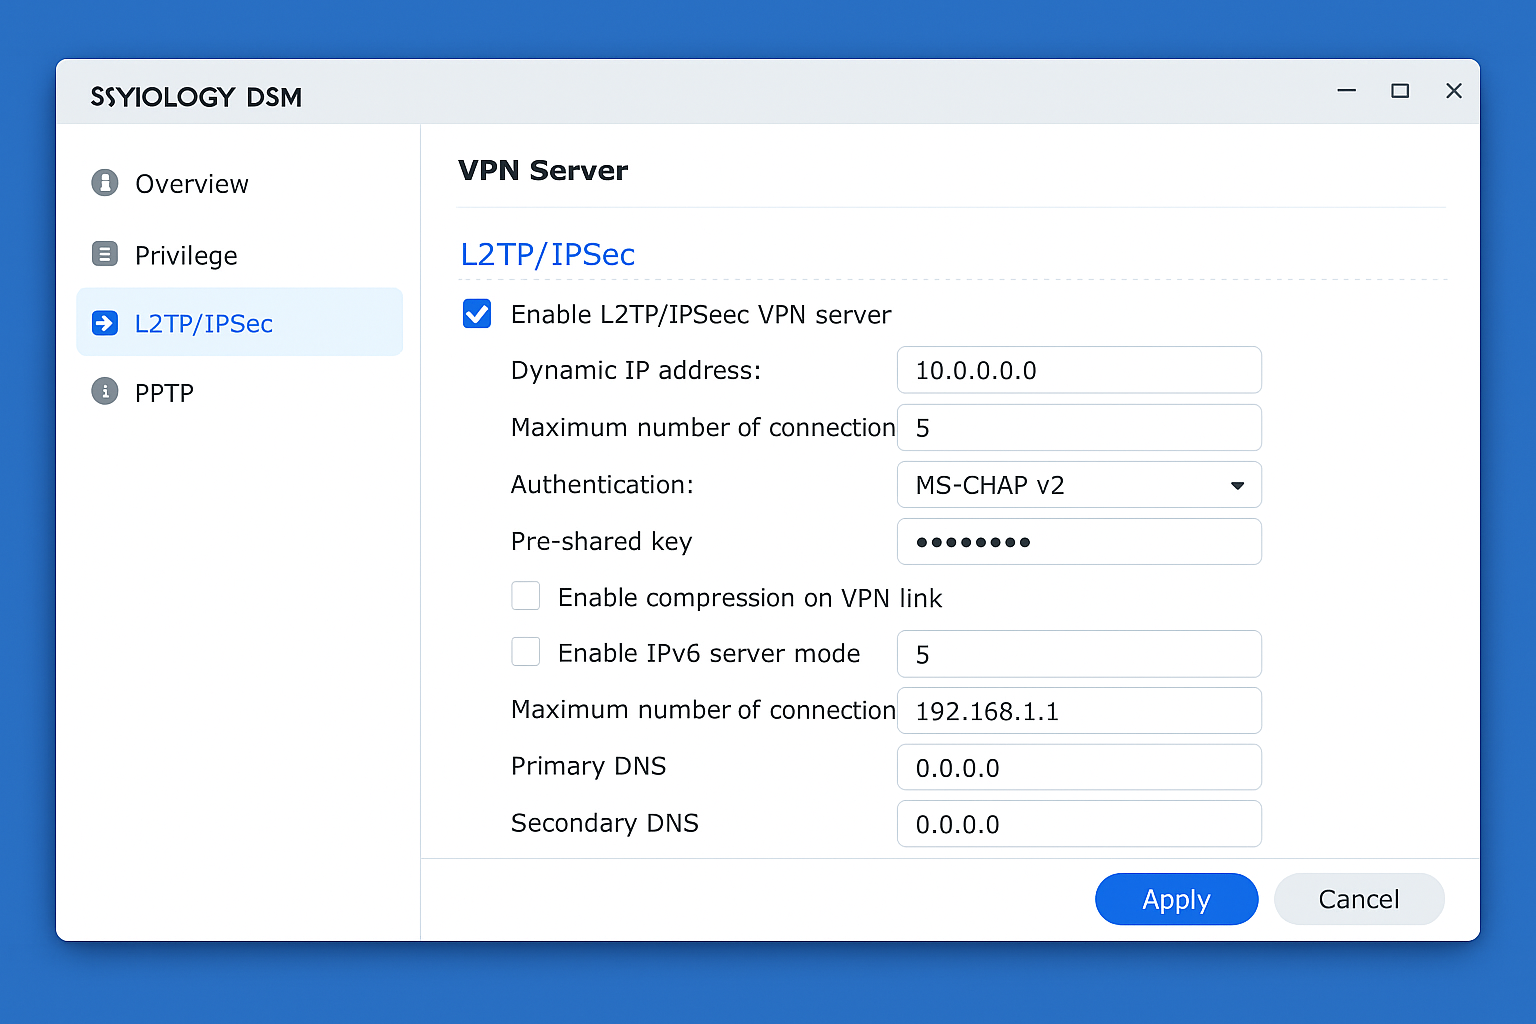
Option 2: Network Attached Storage (NAS)
Devices like Synology or QNAP NAS units often include VPN server packages that are easier to configure than router-based options.
Note: Setting up your own VPN server requires understanding of networking concepts like port forwarding, dynamic DNS, and firewall configuration. If this sounds overwhelming, stick with a commercial VPN service as they handle all the technical complexity for you.
Tips and Troubleshooting
Common Issues
Problem: VPN keeps disconnecting on cellular data
This usually happens when switching between WiFi and cellular. To fix it:
- Open your VPN app settings
- Look for “Auto-reconnect” or “Always-on VPN” and enable it
- Some apps call this “Network Protection” or “Kill Switch”
Problem: Internet is slow with VPN enabled
Try these solutions in order:
- Switch to a server closer to your location
- Change VPN protocol to IKEv2 or WireGuard (faster than OpenVPN)
- Disable “Always-on VPN” if you don’t need constant protection
- Check if your VPN app has a “fast connect” or “auto-select” option
Problem: Can’t access local network devices (printer, NAS) with VPN on
Enable “split tunneling” in your VPN app settings. This routes local network traffic normally while sending internet traffic through the VPN.
Pro Tips
- Battery optimization: Modern VPN protocols like WireGuard use less battery than older ones. Check your app settings for protocol options.
- Quick toggle: Add VPN status to Control Center by going to Settings > Control Center and adding the VPN toggle.
- Multiple configs: You can set up multiple VPN configurations (work, personal, etc.) and switch between them in Settings.
- Automatic connection: Some VPN apps can auto-connect when you join untrusted WiFi networks, just look for this feature in app settings.
Which VPN Method Should You Choose?
Here’s my honest take after testing all these methods: go with a reputable VPN app unless you have specific technical requirements. The app-based approach is dramatically easier to set up and maintain, with better performance and more features than manual configuration.
Manual setup makes sense if you’re connecting to a corporate VPN or have your own server, but for everyday privacy protection, services like NordVPN or ExpressVPN are worth the monthly cost. They handle all the technical complexity, provide fast servers worldwide, and include features like kill switches and split tunneling that you’d have to build yourself otherwise.
Setting up your own VPN server is a fun project if you’re into networking, but it won’t protect you when traveling (since you’re connecting back to your home IP) and requires ongoing maintenance. For most people, it’s overkill.
The bottom line: your iPhone’s data is too valuable to leave unprotected on public WiFi. Pick a method that you’ll actually use consistently, and you’ll sleep better knowing your digital life is secure.