
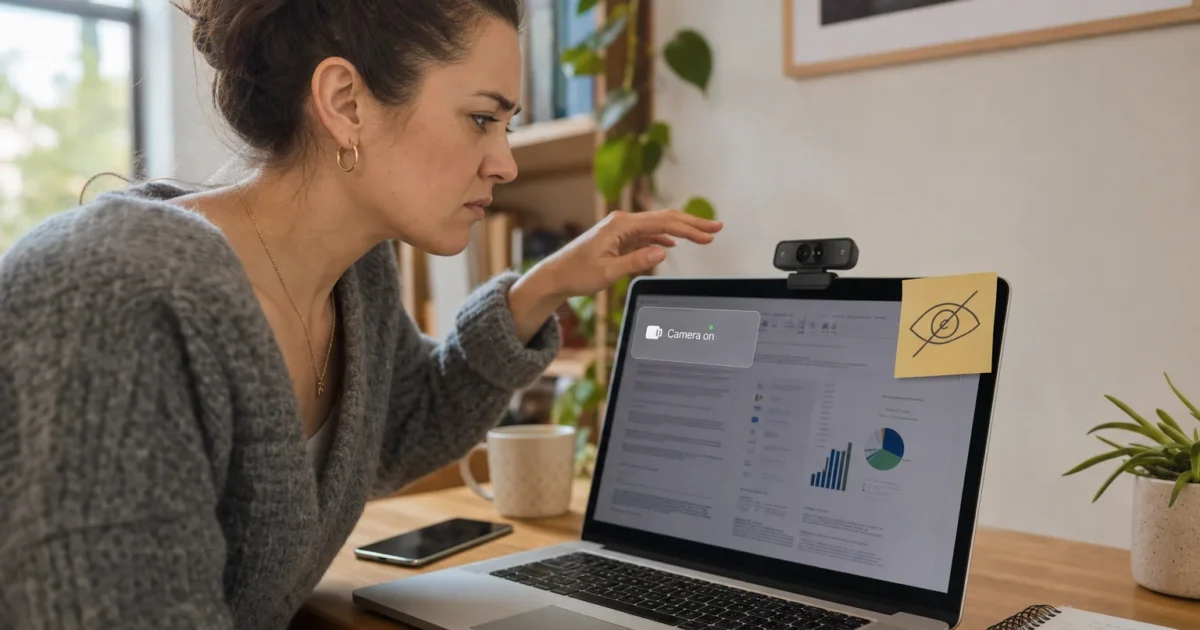
Ever wonder if something is secretly watching you through your webcam? It sounds a little paranoid, but camfecting, that’s when malware hijacks your webcam to record you without your knowledge, is a real threat. And if your laptop doesn’t have a physical camera indicator light (or the one it has is broken), you could have no idea it’s happening.
Here’s something worth knowing: Windows 10 and Windows 11 both have a hidden on-screen display (OSD) notification that pops up whenever an app turns your webcam on or off. It’s disabled by default, but once you turn it on, you’ll get a little alert in the corner of your screen every time your camera activates. It actually works really well, and it takes just a few minutes to set up. In this guide, we’ll walk you through three ways to enable it, plus how to check your camera privacy settings and what to do if the notifications don’t show up.
What Is the Webcam OSD Notification?
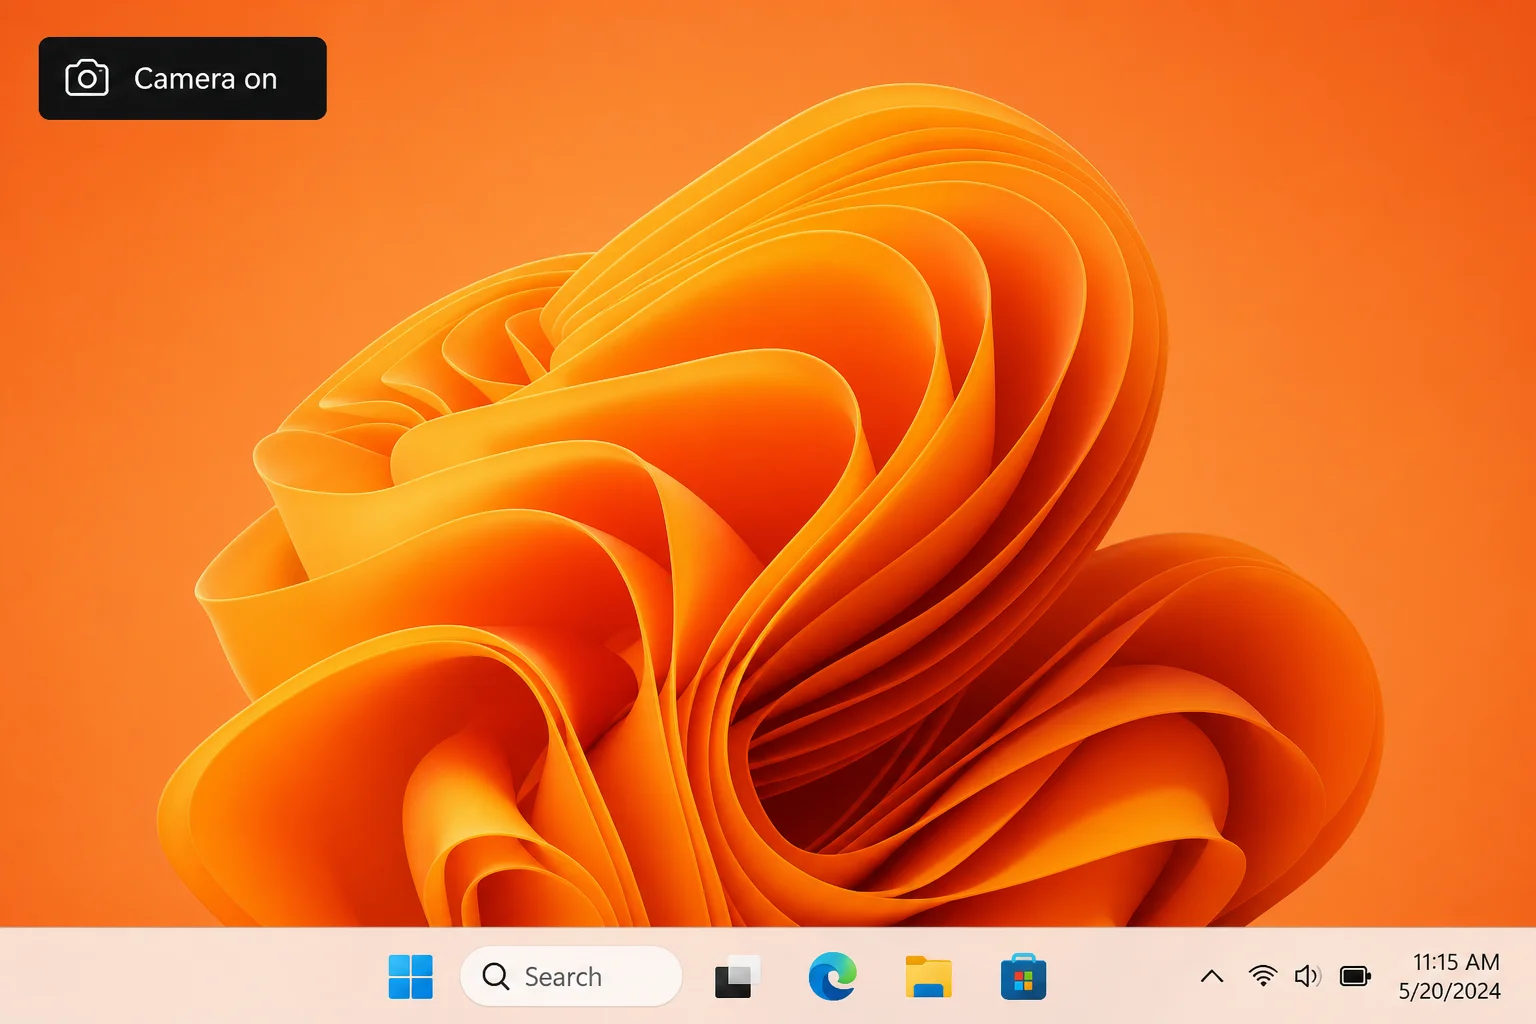
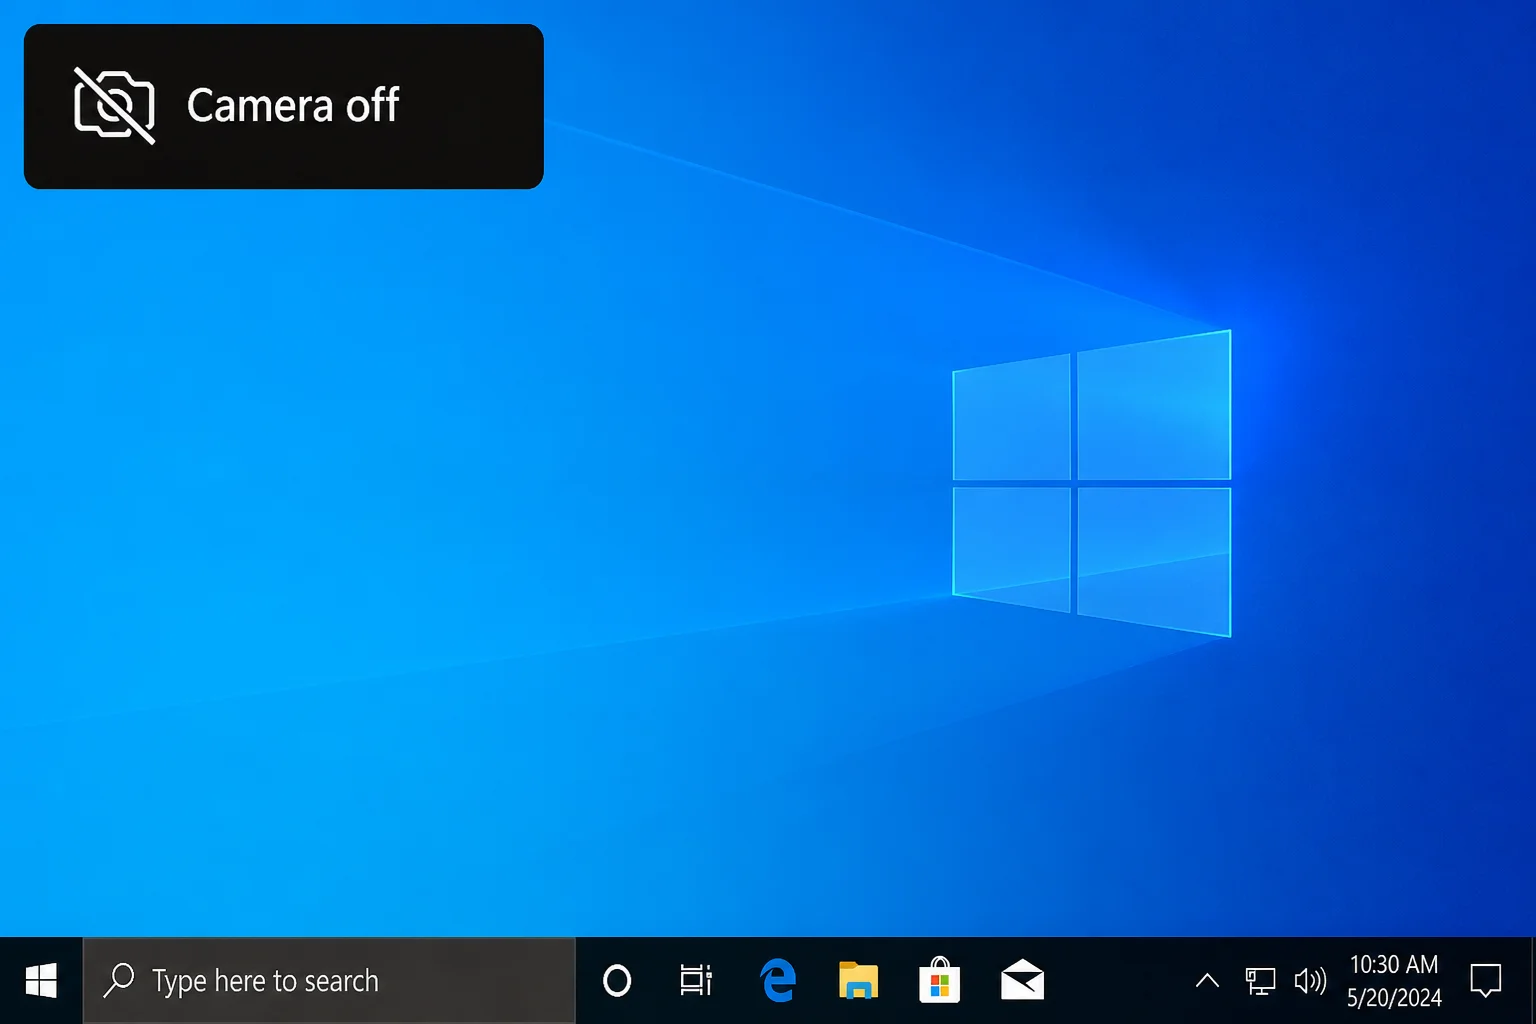
The webcam OSD (on-screen display) notification is a built-in Windows feature that shows a small pop-up alert at the top-left corner of your screen whenever an app starts or stops using your webcam. Think of it as a software version of the little green LED light next to your camera.
Key things to know:
- It works on both Windows 10 and Windows 11
- It’s turned off by default on most PCs
- It’s enabled through a hidden registry setting (don’t worry, we’ll make it easy)
- It only works if your PC’s OEM (manufacturer) included the overlay component, more on that in the troubleshooting section
- It shows both “Camera on” and “Camera off” alerts
Before You Start: Check Your Camera Privacy Settings
Before diving into the registry, it’s worth making sure your camera is actually enabled in Windows. If camera access is blocked system-wide, the OSD won’t have anything to detect anyway.
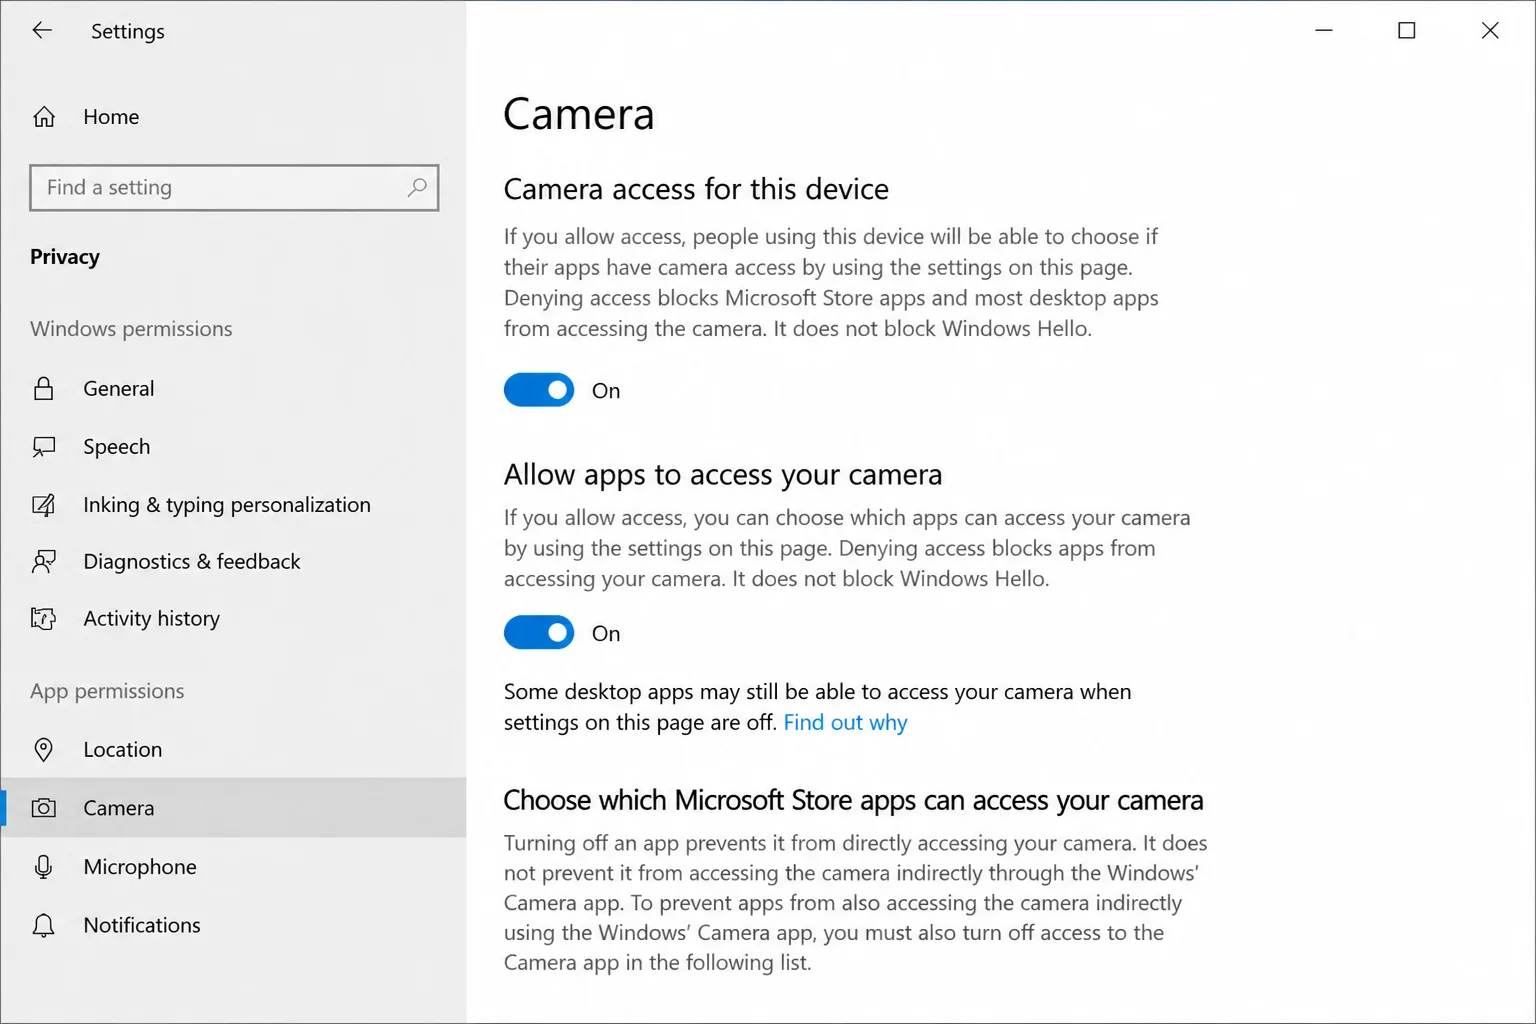
On Windows 10
- Open Settings and go to Privacy > Camera.
- Make sure Camera access for this device is set to On.
- Make sure Allow apps to access your camera is also set to On.
On Windows 11
- Open Settings and go to Privacy & security > Camera.
- Make sure Camera access is toggled On.
- Make sure Let apps access your camera is also toggled On.
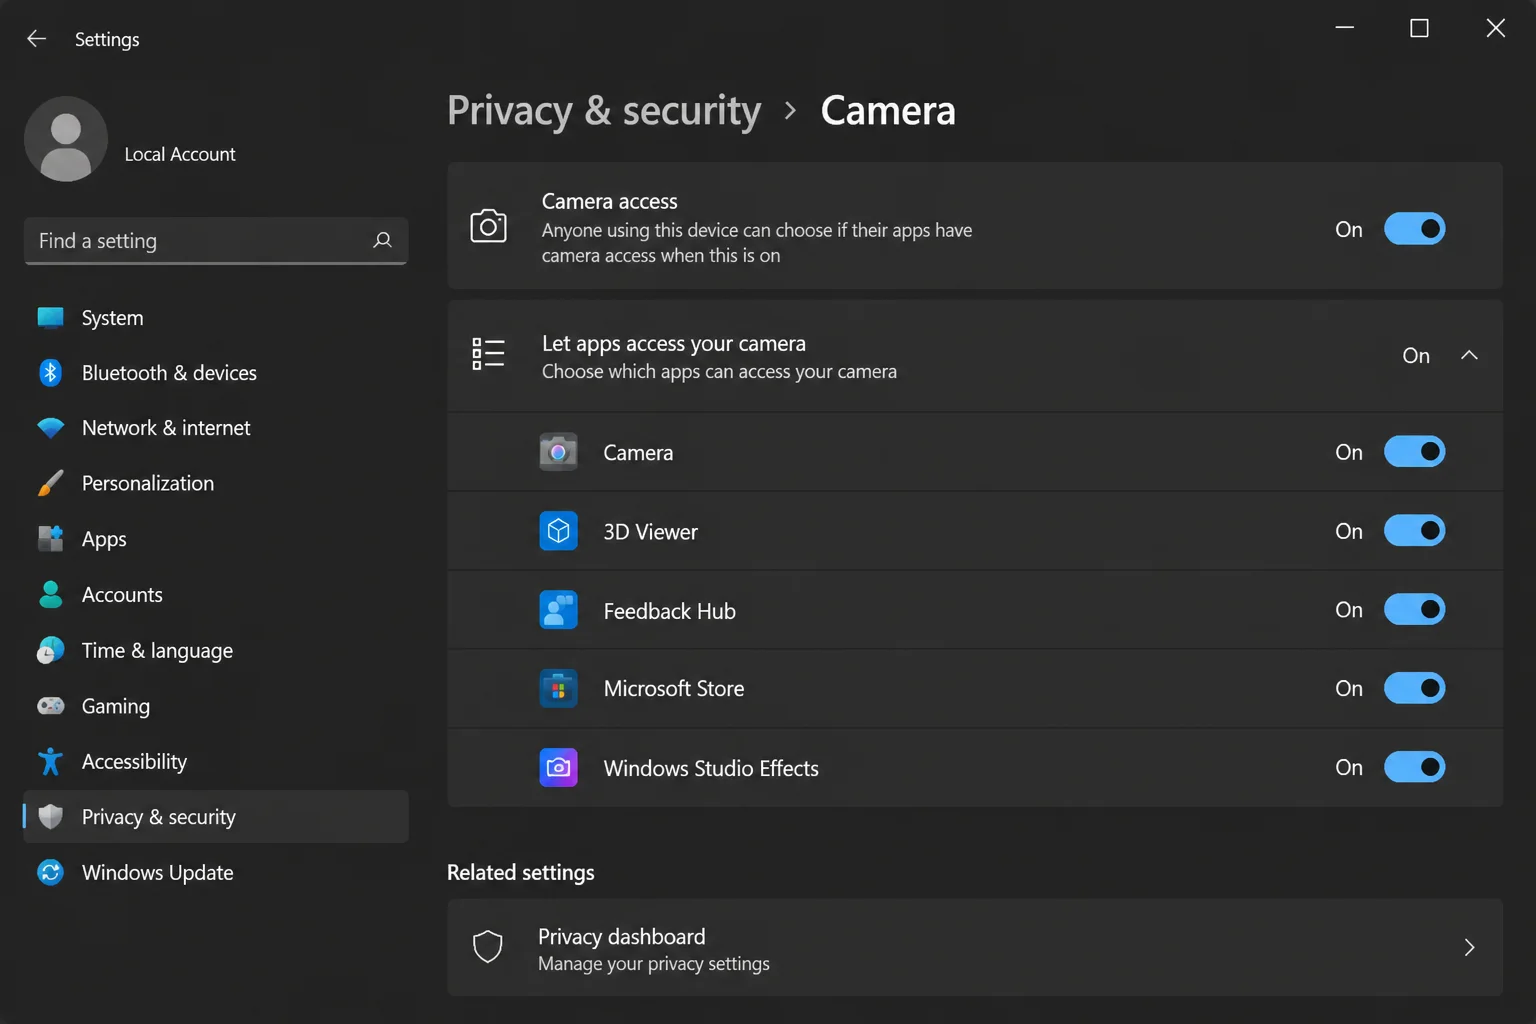
Note: While you’re here, you can also scroll down to see exactly which apps have camera access, handy for spotting anything suspicious.
A Quick Warning Before You Edit the Registry
The methods below involve editing the Windows Registry, a database of settings that Windows relies on to function. Making the wrong change in the wrong place can cause problems, so please take 60 seconds to back up your registry or create a System Restore point before you begin. The specific changes we’re making here are well-documented and low-risk, but it’s always better to have a safety net.
If the idea of manually editing the registry makes you nervous, skip straight to Method 2 (the .REG file), it does the exact same thing with just a double-click.
How to Enable Webcam OSD Notifications in Windows 10 and 11
There are three ways to do this. Pick whichever feels most comfortable.
Method 1: Use Registry Editor (Manual)
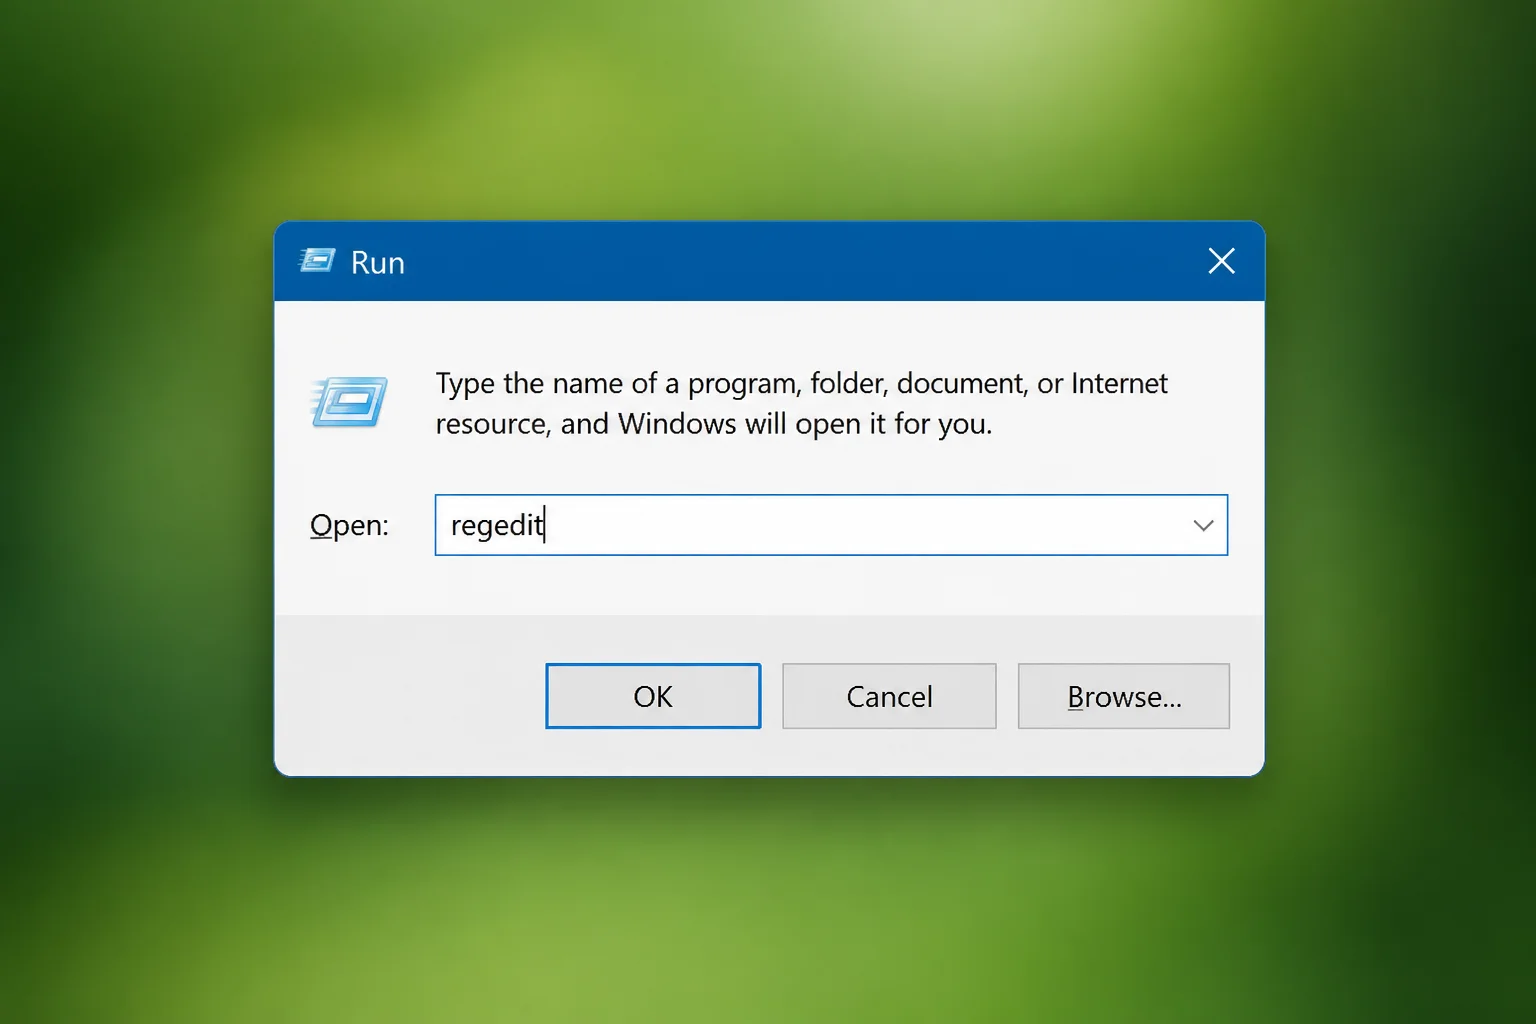
- Press
Windows + Rto open the Run box, typeregedit, then pressCtrl + Shift + Enterto open it as an administrator. Click Yes on the UAC prompt.
- In the Registry Editor address bar at the top, paste the following path and press
Enter:
HKEY_LOCAL_MACHINE\SOFTWARE\Microsoft\OEM\Device\Capture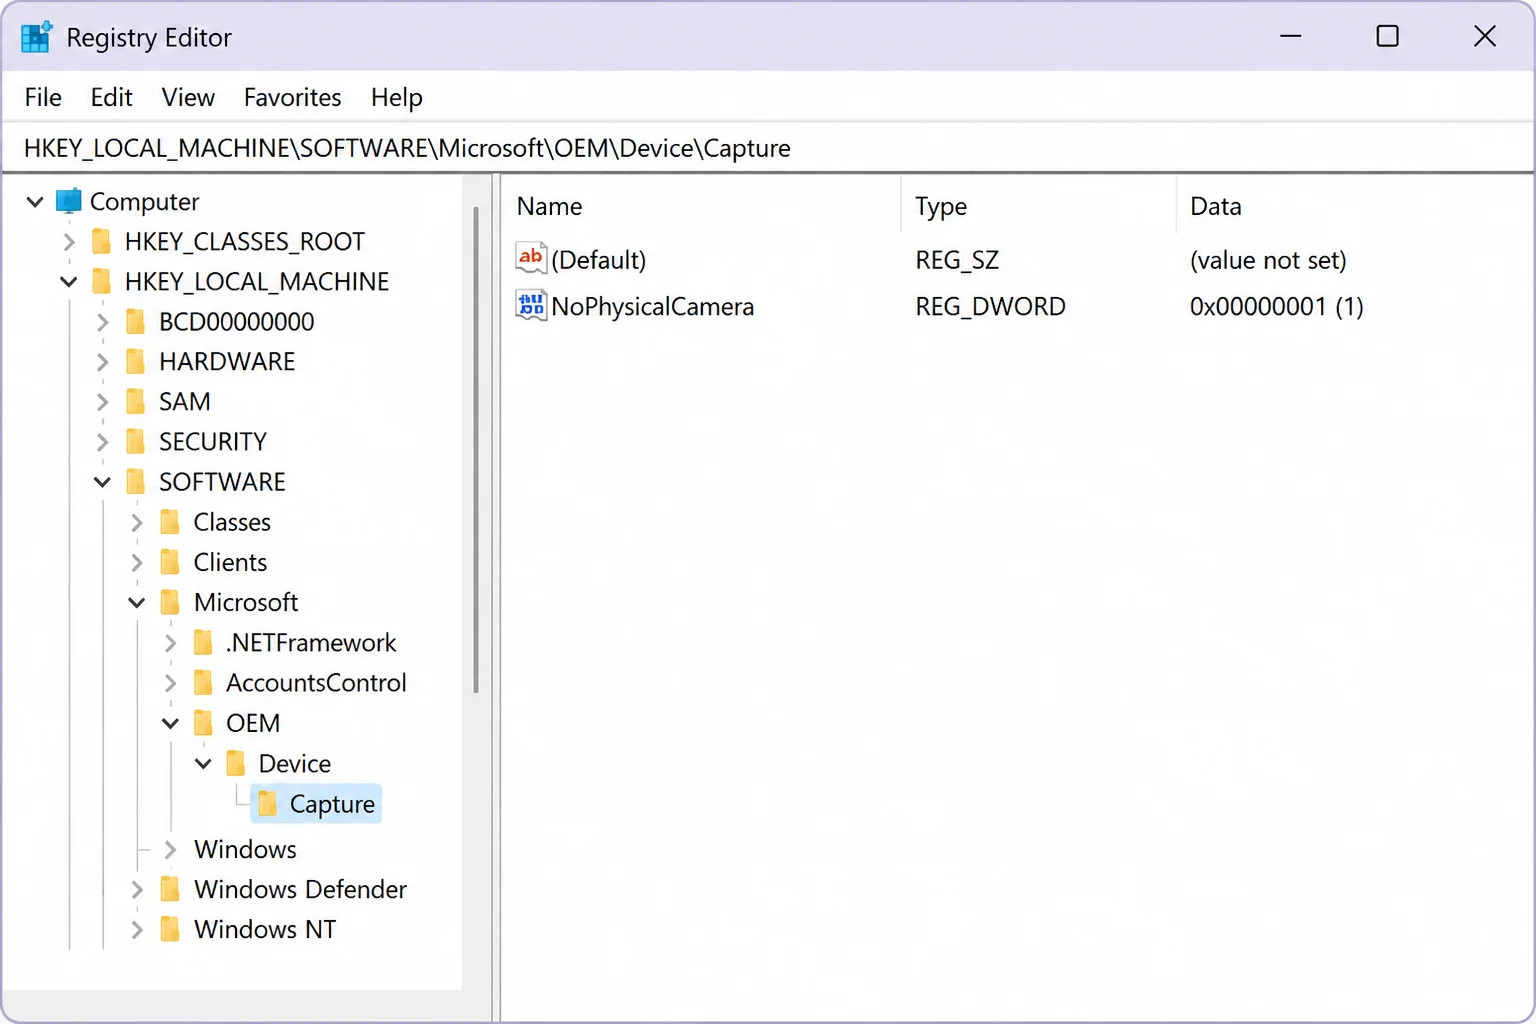
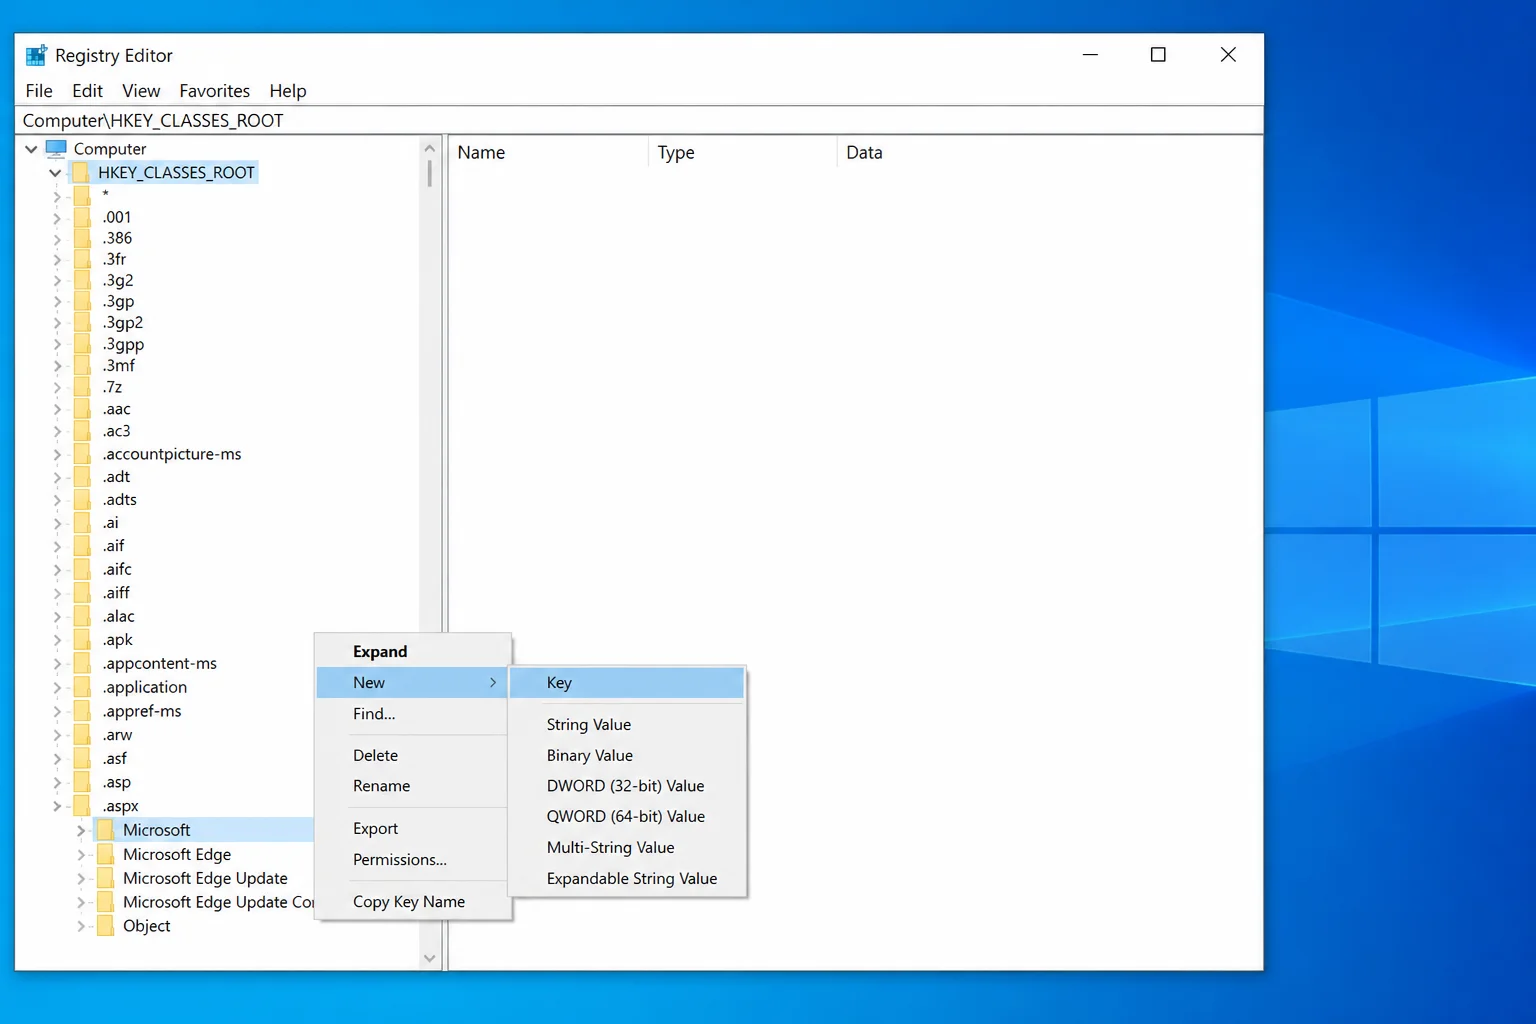
If that path doesn’t exist, you’ll need to create it. Here’s how:
- Right-click on Microsoft in the left panel > New > Key and name it
OEM.
- Right-click OEM > New > Key and name it
Device.
- Right-click Device > New > Key and name it
Capture.
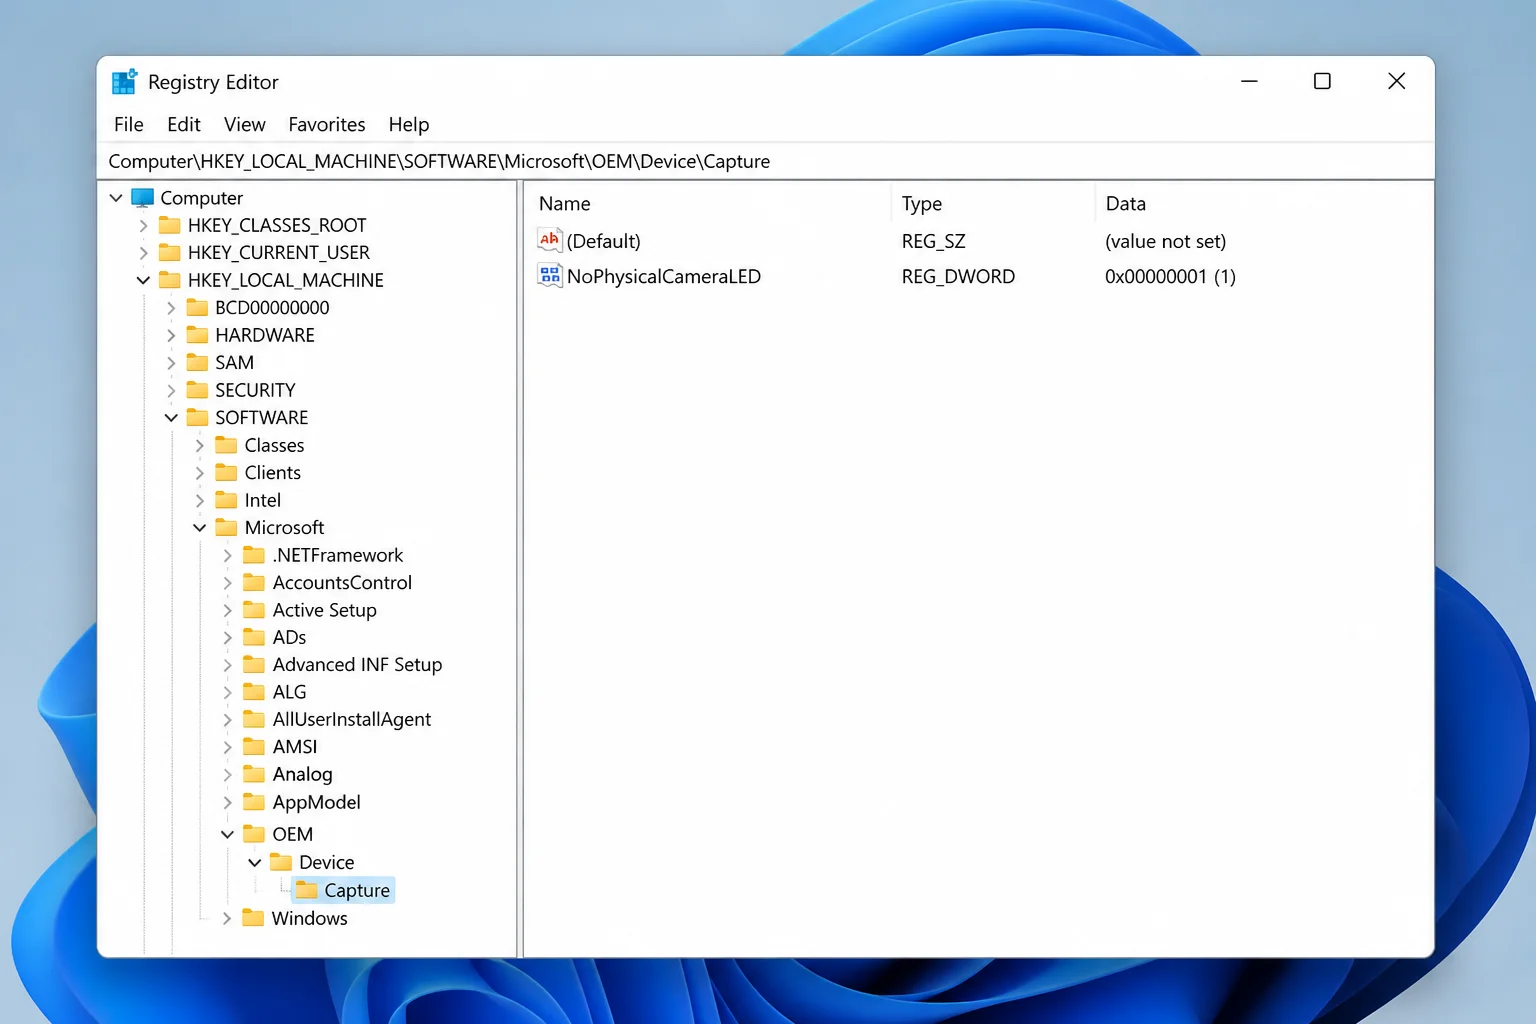
- With the Capture key selected, look in the right panel for a value named
NoPhysicalCameraLED. If it’s not there, right-click a blank area in the right panel and select New > DWORD (32-bit) Value. Name itNoPhysicalCameraLEDand pressEnter.

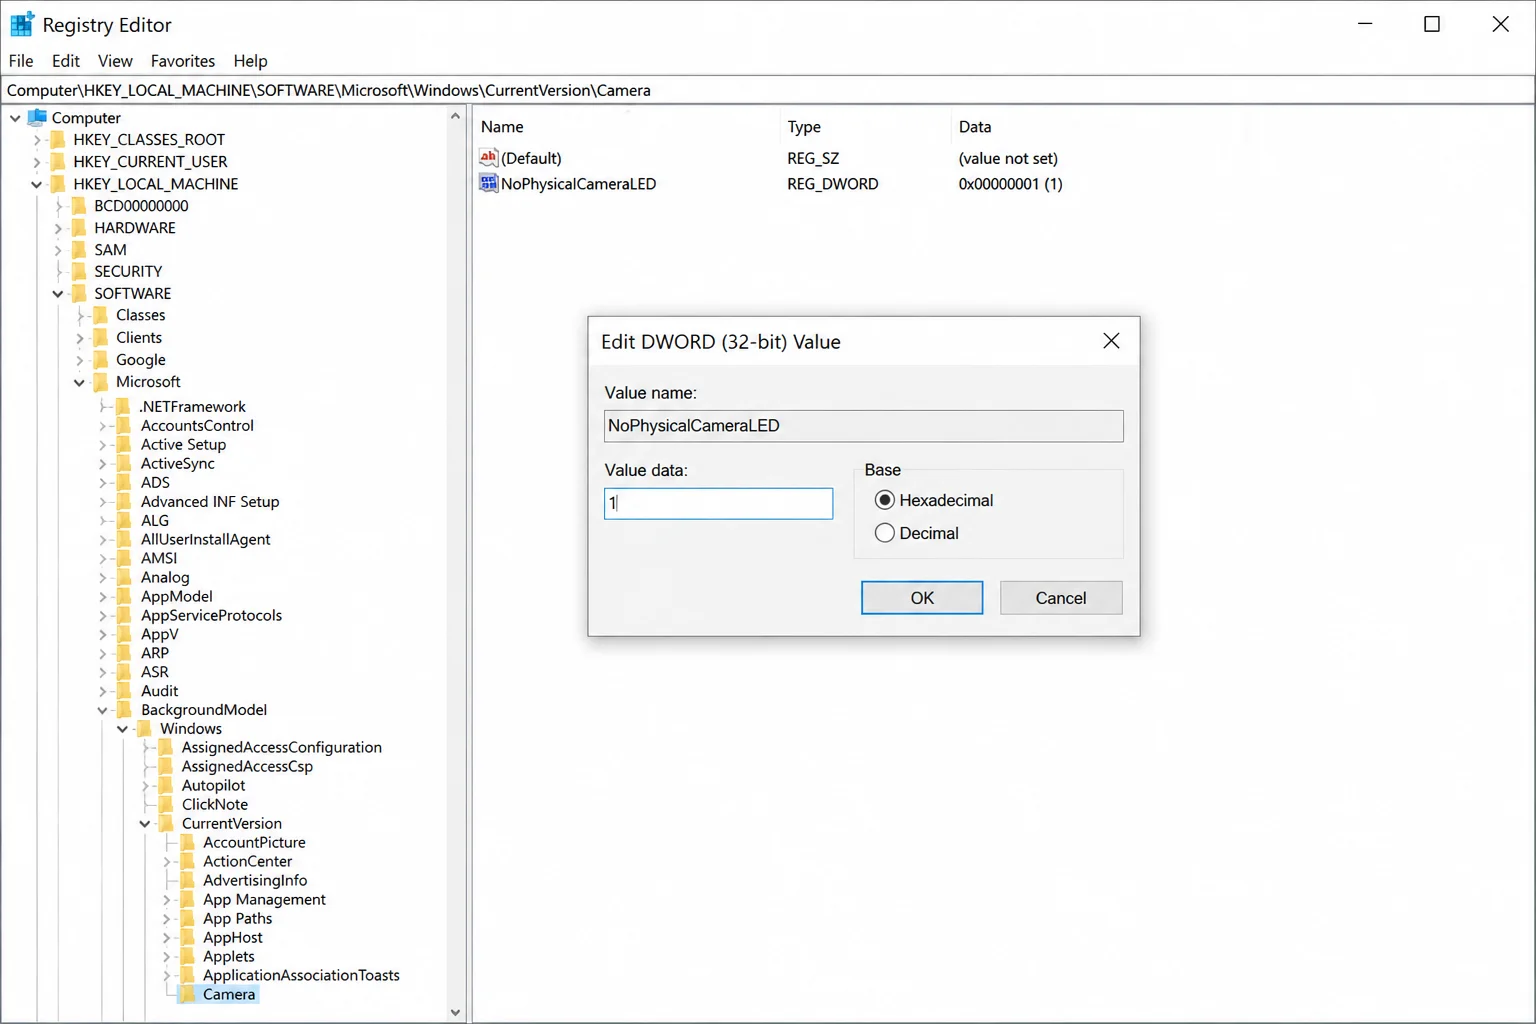
- Double-click
NoPhysicalCameraLED, set the Value data to1, and click OK.
- Close Registry Editor and restart your PC (or sign out and back in) for the change to take effect.
By setting NoPhysicalCameraLED to 1, you’re telling Windows that your webcam doesn’t have a physical LED indicator. Windows then steps in with its own software overlay to fill that gap, which is exactly what we want.
Method 2: Use a .REG File (Easiest)
This is the quickest option. You’ll create a small text file with a .reg extension that automatically applies the registry change when you double-click it, no manual navigation required.
- Open Notepad (search for it in the Start menu).
- Paste the following text exactly as shown:
Windows Registry Editor Version 5.00

[HKEY_LOCAL_MACHINE\SOFTWARE\Microsoft\OEM\Device\Capture]
"NoPhysicalCameraLED"=dword:00000001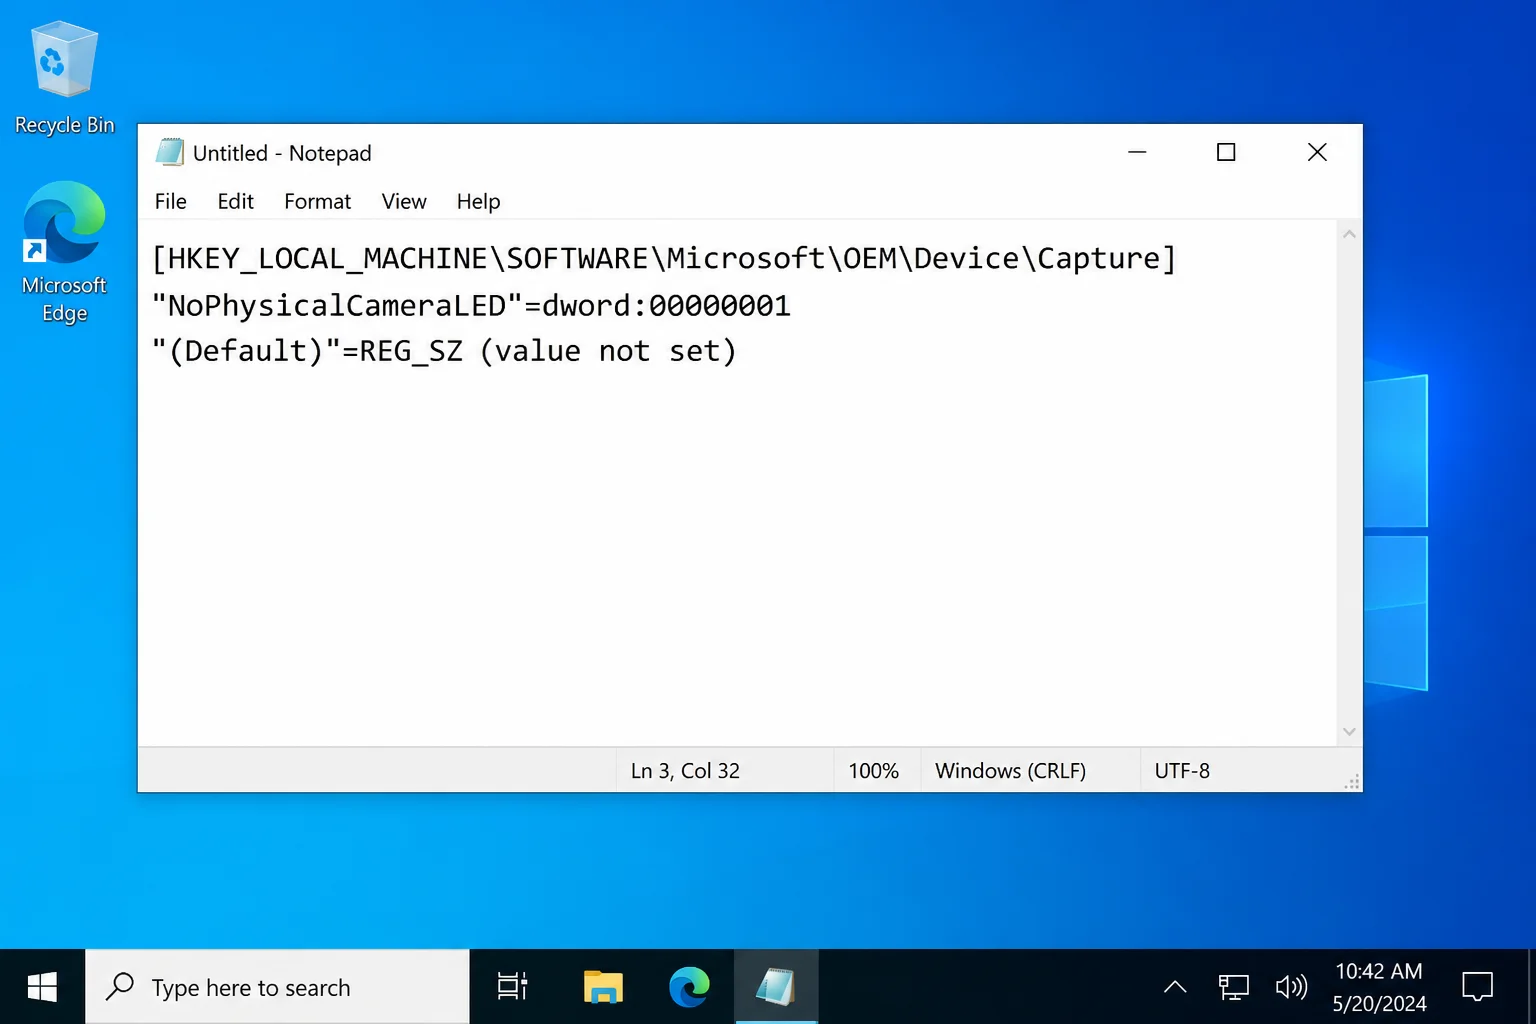
- Press
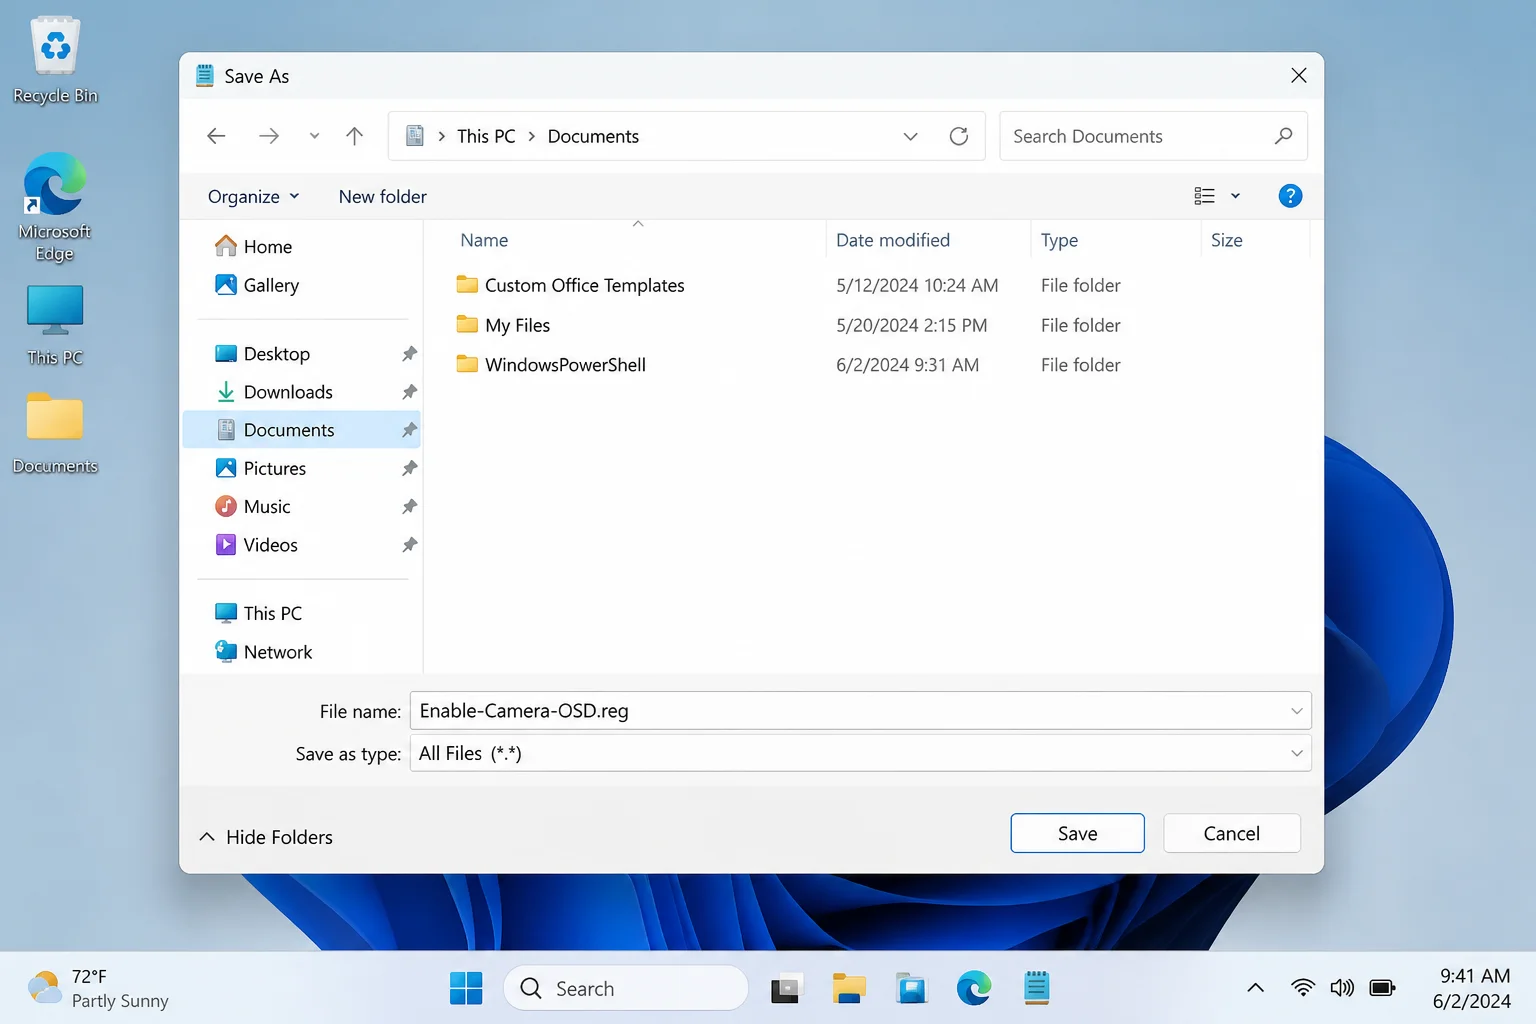
Ctrl + Shift + Sto open the Save As dialog. Name the fileEnable-Camera-OSD.regmake sure the filename ends in .reg, not .txt. Change the Save as type dropdown to All Files, then click Save.
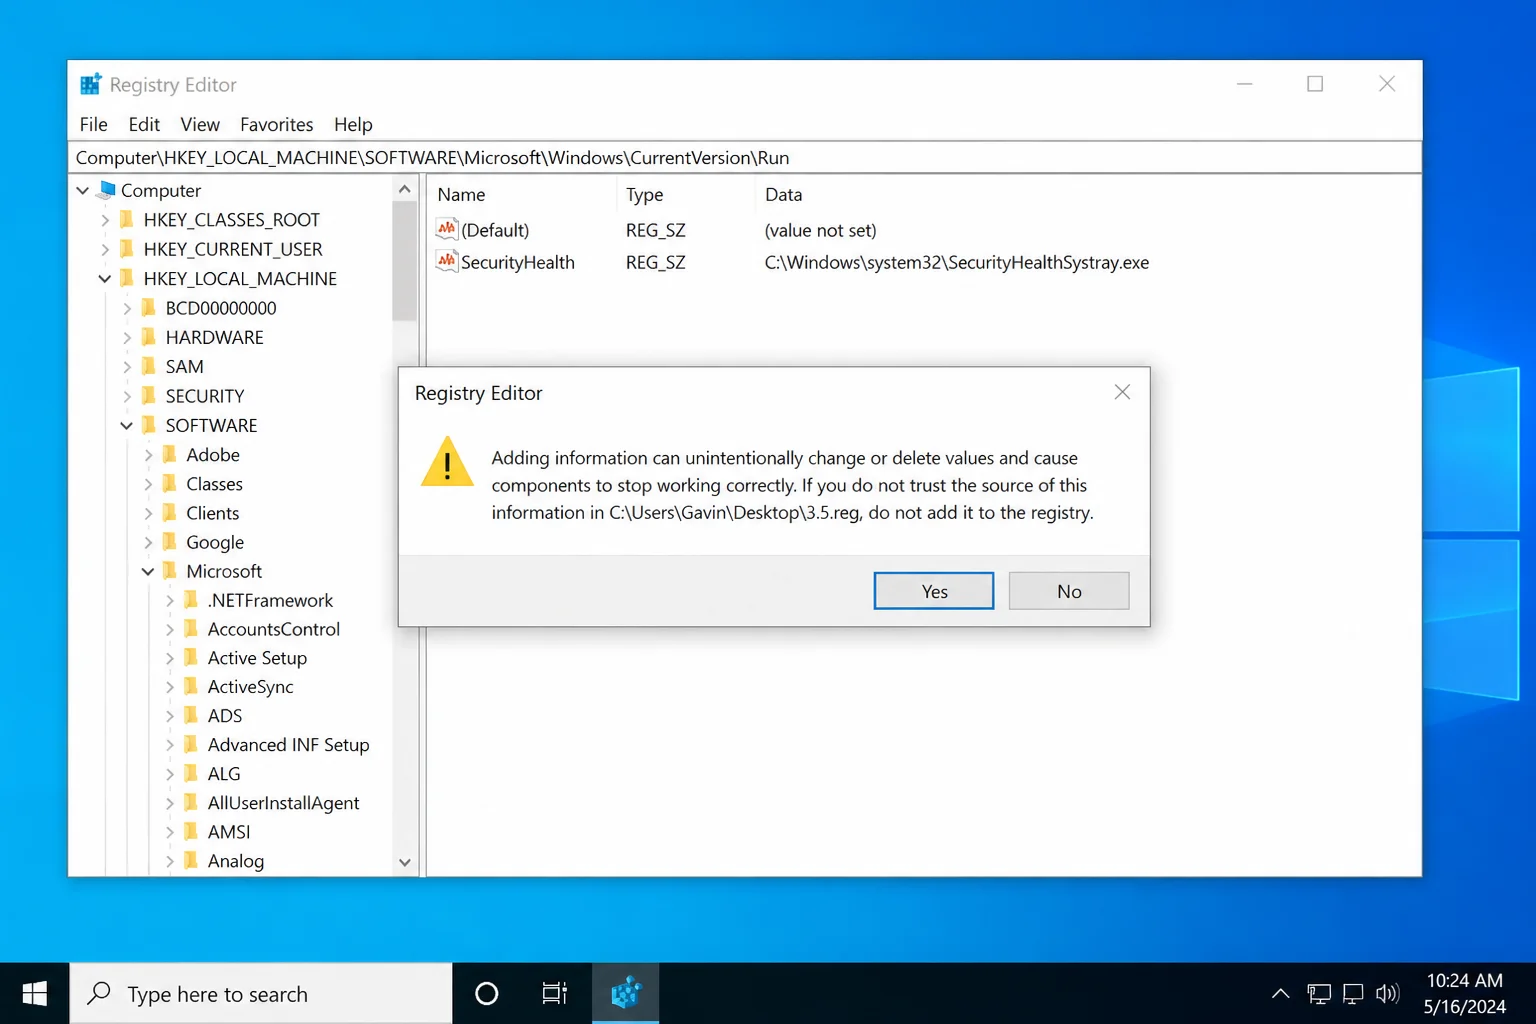
- Find the saved file and double-click it. Click Yes on the warning prompt, then OK on the confirmation message.
- Restart your PC or sign out and back in to apply the change.
Method 3: Use PowerShell (For Advanced Users)
If you’re comfortable with PowerShell, this is actually the fastest method of all, it creates the registry key and sets the value in one go.
- Right-click the Start button and select Windows PowerShell (Admin) or Terminal (Admin) on Windows 11.
- Paste the following commands and press
Enter:
New-Item -Path "HKLM:\SOFTWARE\Microsoft\OEM\Device\Capture" -Force | Out-Null
New-ItemProperty -Path "HKLM:\SOFTWARE\Microsoft\OEM\Device\Capture" -Name "NoPhysicalCameraLED" -PropertyType DWord -Value 1 -Force | Out-Null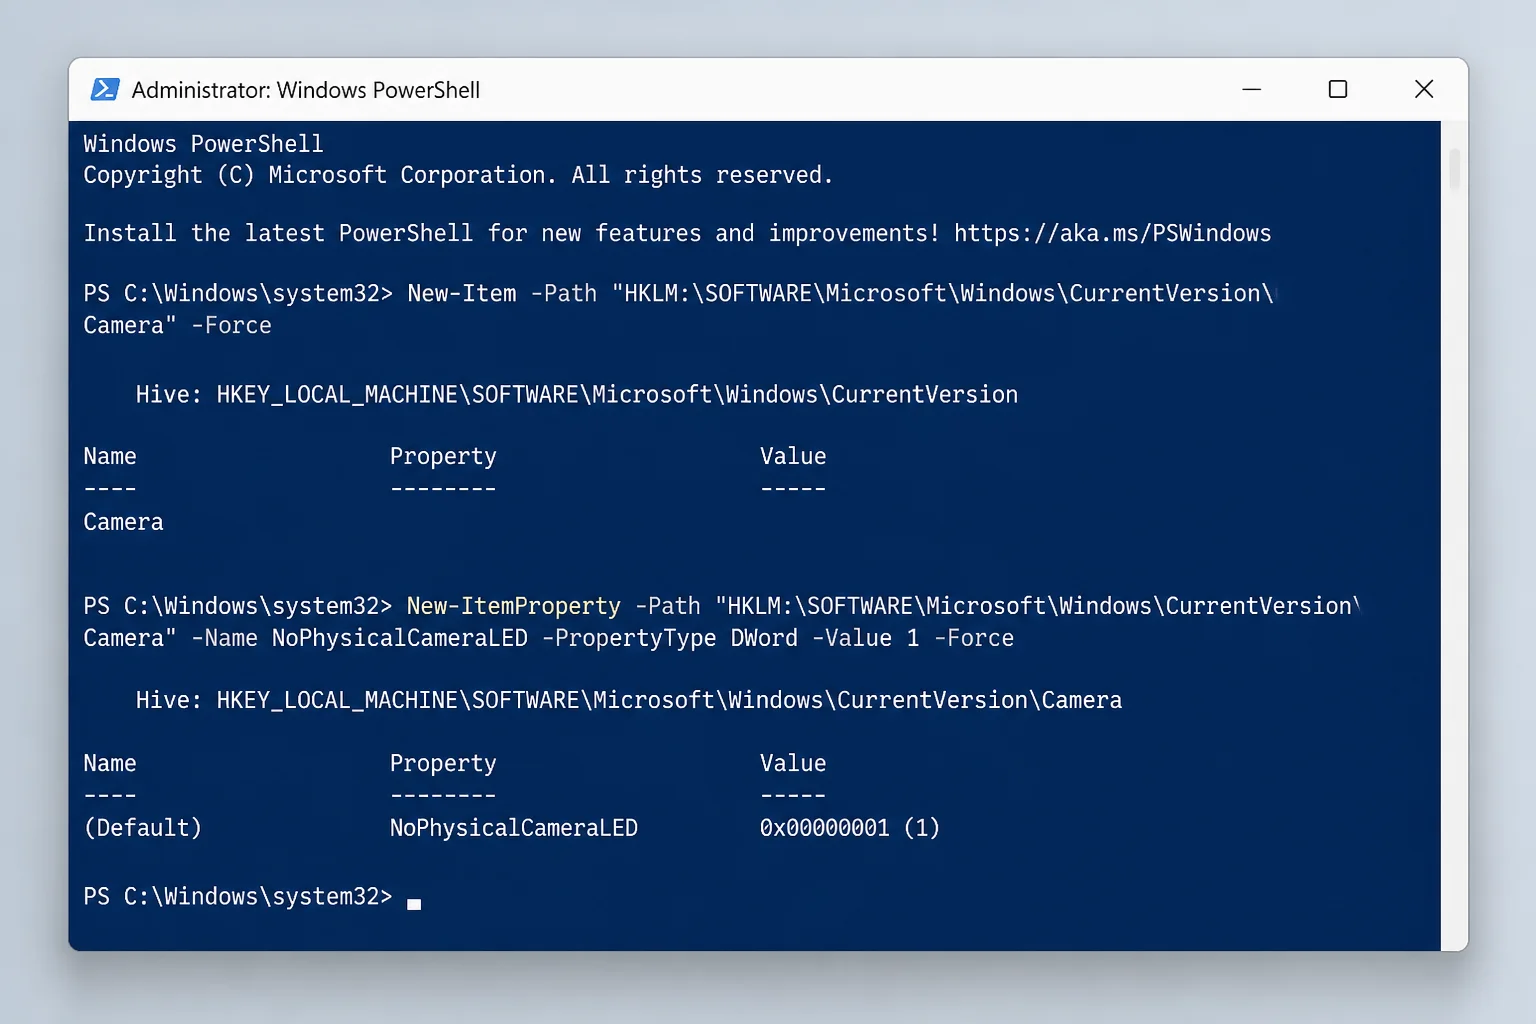
- Restart your PC to apply the change.
How the OSD Camera Notification Works
Once you’ve restarted, here’s what to expect. Open any app that uses your webcam, Zoom, Microsoft Teams, Google Meet, your browser’s camera, whatever you like.
The moment that app activates your camera, you’ll see a small Camera on alert appear at the top-left corner of your screen.
And when the app stops using your camera, a Camera off notification pops up briefly and disappears after about 5 seconds.
Pretty neat, right? It’s a simple thing, but knowing exactly when your camera is active is genuinely useful, especially if you ever suspect something shady is going on in the background.
How to Turn Off Webcam OSD Notifications
Changed your mind? No problem. You can disable the notifications just as easily.
Method 1: Edit the Registry Directly
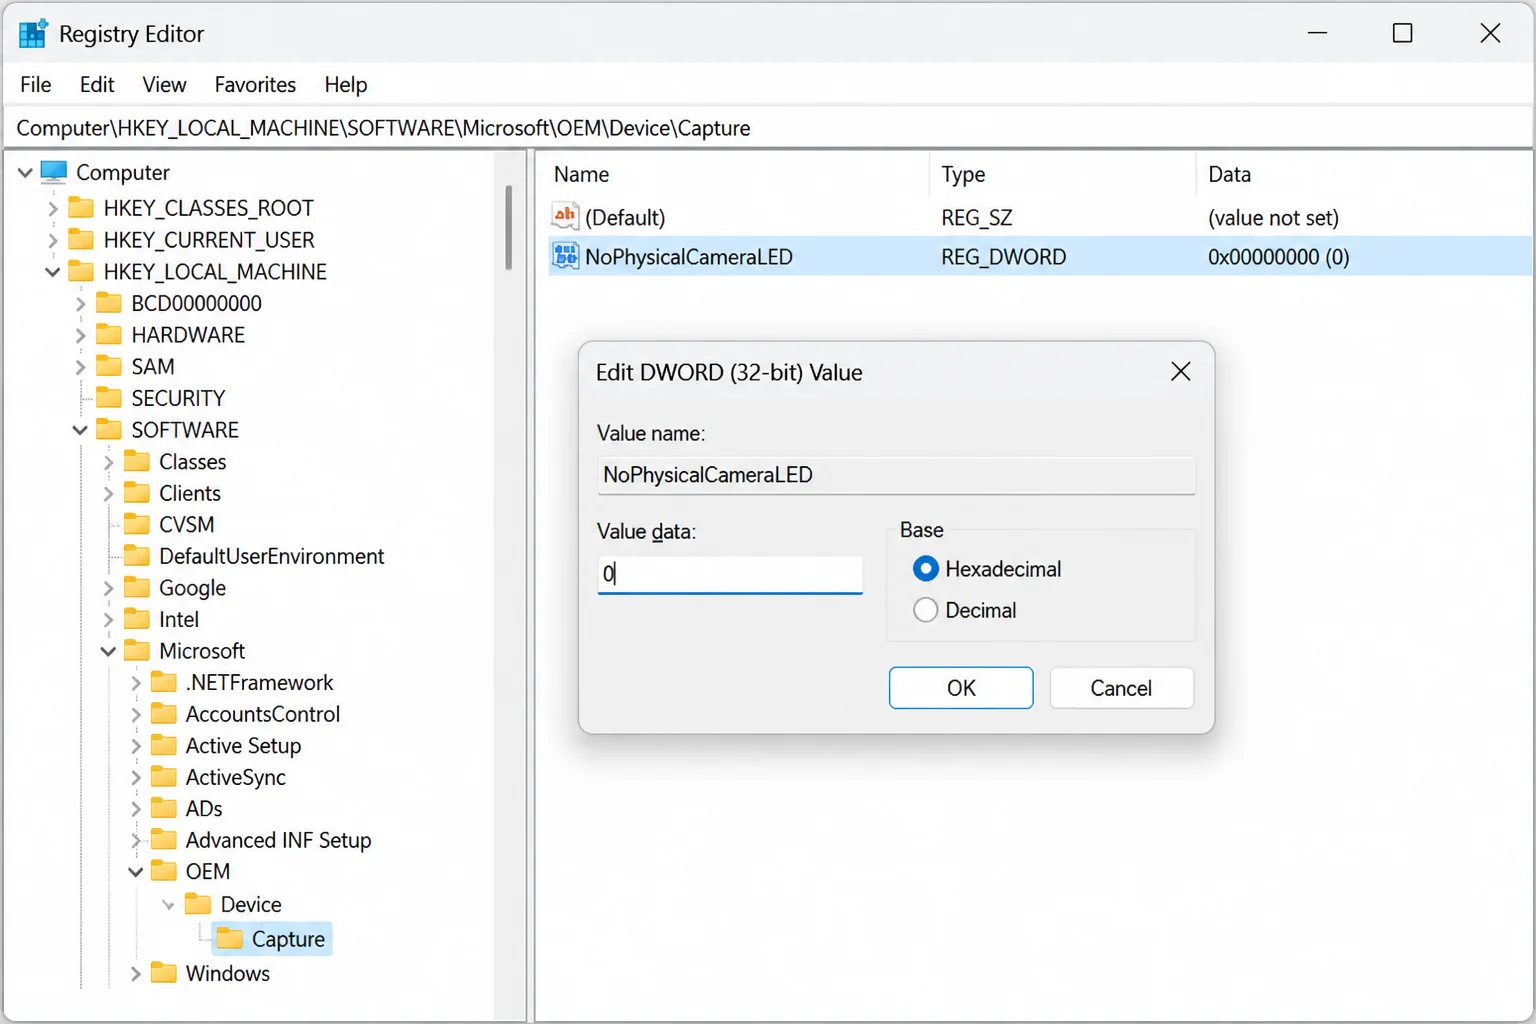
Go back to HKEY_LOCAL_MACHINE\SOFTWARE\Microsoft\OEM\Device\Capture in Registry Editor, double-click NoPhysicalCameraLED, set the Value data back to 0, and click OK. Restart your PC.
Method 2: Use a .REG File
Open Notepad, paste the text below, and save it as Disable-Camera-OSD.reg (with Save as type set to All Files). Double-click it, confirm the prompts, and restart.
Windows Registry Editor Version 5.00

[HKEY_LOCAL_MACHINE\SOFTWARE\Microsoft\OEM\Device\Capture]
"NoPhysicalCameraLED"=dword:00000000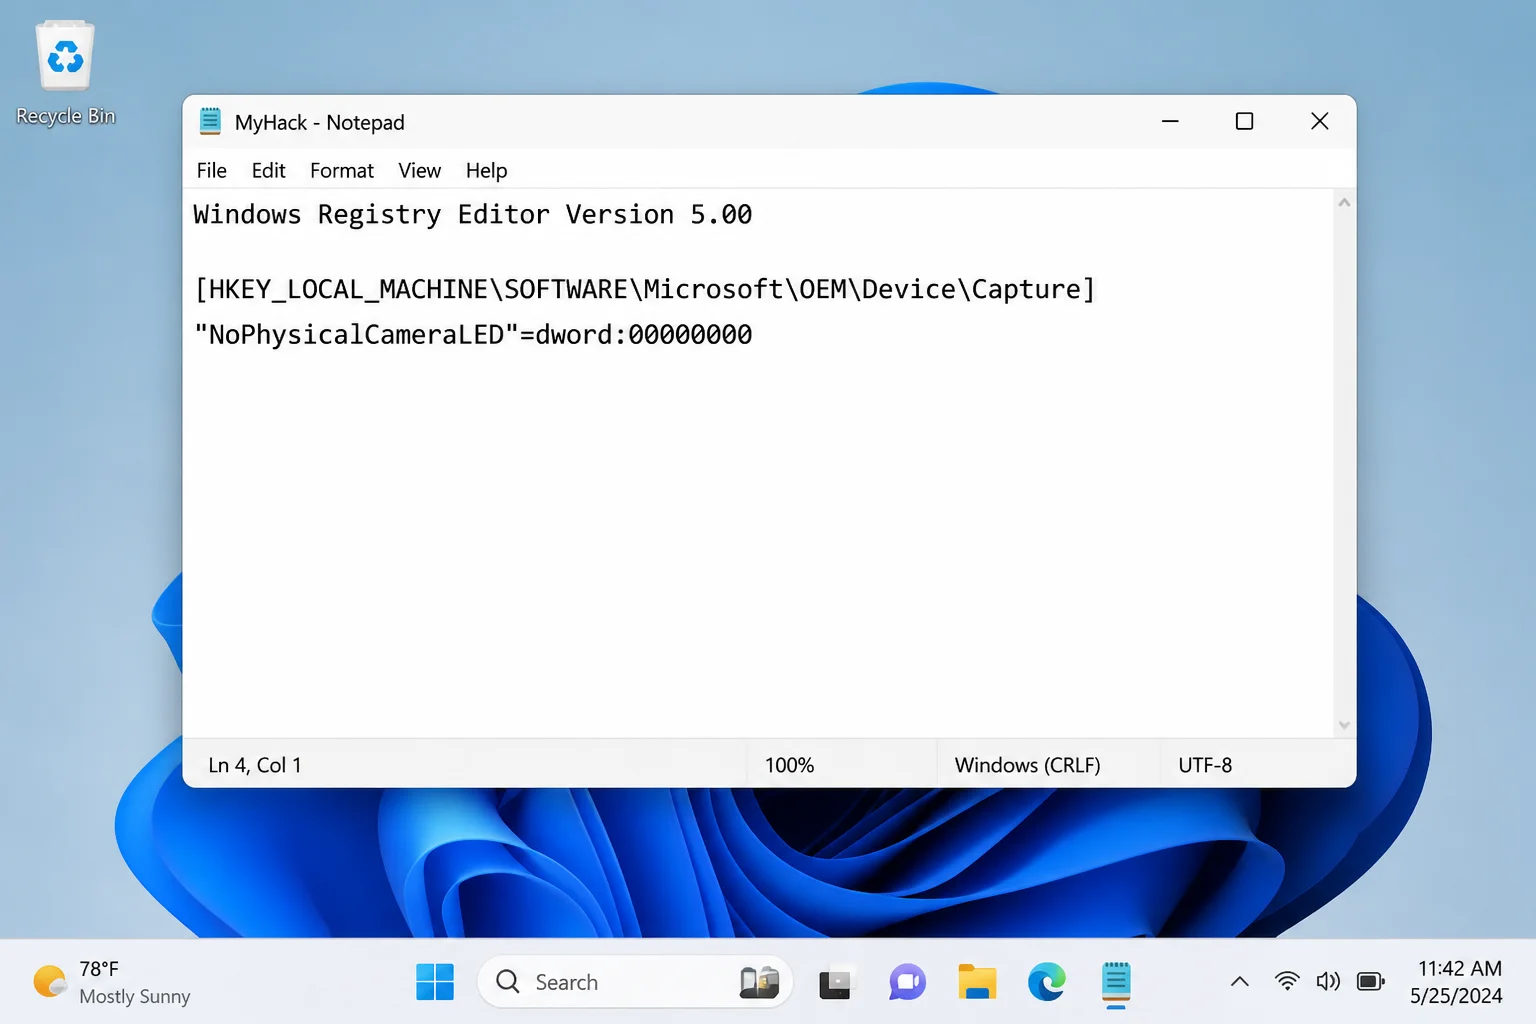
Method 3: Use PowerShell
Run PowerShell as administrator and paste this command:
New-Item -Path "HKLM:\SOFTWARE\Microsoft\OEM\Device\Capture" -Force | Out-Null
New-ItemProperty -Path "HKLM:\SOFTWARE\Microsoft\OEM\Device\Capture" -Name "NoPhysicalCameraLED" -PropertyType DWord -Value 0 -Force | Out-Null
Restart your PC to apply.
Tips and Troubleshooting
The OSD notification isn’t showing up after enabling it
This is the most common issue, and there are a few possible reasons:
- You need to restart: The registry change doesn’t take effect until you reboot. Make sure you’ve fully restarted, not just put the PC to sleep.
- Your PC might not support it: The OSD overlay is an OEM (manufacturer) feature. On laptops from brands like Dell, HP, Lenovo, or ASUS, it usually works. On custom-built desktop PCs or devices with generic camera drivers, enabling the registry key might do nothing because the overlay software was never installed.
- External USB webcams may not trigger it: The OSD is primarily designed for built-in laptop cameras. External webcams sometimes don’t tie into the same system.
- Update your camera drivers: An outdated or generic driver might not support the feature. Check your laptop manufacturer’s website or use their support app (like Lenovo Vantage or HP Support Assistant) to update.
You need to be an administrator to edit the registry
If you get an “access denied” error when trying to edit the registry, you’re probably not running as an administrator. Make sure you opened Registry Editor using Ctrl + Shift + Enter (which runs it as admin), and that your Windows account has administrator privileges. You can check by going to Settings > Accounts > Your info, it should say Administrator under your name.
How do I know which app is using my camera?
Good question. The OSD tells you the camera is on, but not which app triggered it. To find out:
- Go to Settings > Privacy (Windows 10) or Privacy & security (Windows 11) > Camera and scroll down to see which apps have recently accessed your camera.
- Check Task Manager for any unfamiliar processes that are running.
- Run a scan with Windows Security (built into Windows 10 and 11) if you suspect malware.
Pro Tips
- Check your OEM software first: Many modern laptops from Lenovo, Dell, HP, and others come with pre-installed utilities (like Lenovo Vantage or HP Command Center) that include camera privacy controls and indicators. Check those before touching the registry, you might already have what you need.
- Hardware shutters are even better: Lots of laptops made since 2022 include a physical camera shutter or a hardware privacy LED that can’t be overridden by software. If yours has one, use it, it’s the most reliable protection of all.
- Windows 11 multi-app camera mode: Newer Windows 11 builds let multiple apps use your camera at the same time. You can manage this under Settings > Bluetooth & devices > Cameras > your camera > Edit advanced settings. It doesn’t affect the OSD, but it’s worth knowing about.
- Keep Windows Security active: The built-in Windows Security (formerly Windows Defender) is surprisingly good at catching malware that tries to access your webcam. Make sure it’s enabled and up to date.
Wrapping Up
Enabling the webcam OSD notification is one of those small tweaks that’s genuinely worth doing, especially if your laptop doesn’t have a reliable physical camera indicator. It takes about two minutes, and once it’s set up, you’ll always know when something is using your camera. The .REG file method is probably the easiest for most people, but all three methods get you to the same place.
If the OSD doesn’t appear after trying these steps, your device likely doesn’t have the OEM overlay component installed, in that case, your best bet is to check your manufacturer’s software or rely on Windows’ built-in camera privacy settings. Either way, you’ve got more visibility into what’s happening with your webcam than you did before, and that’s a win.