
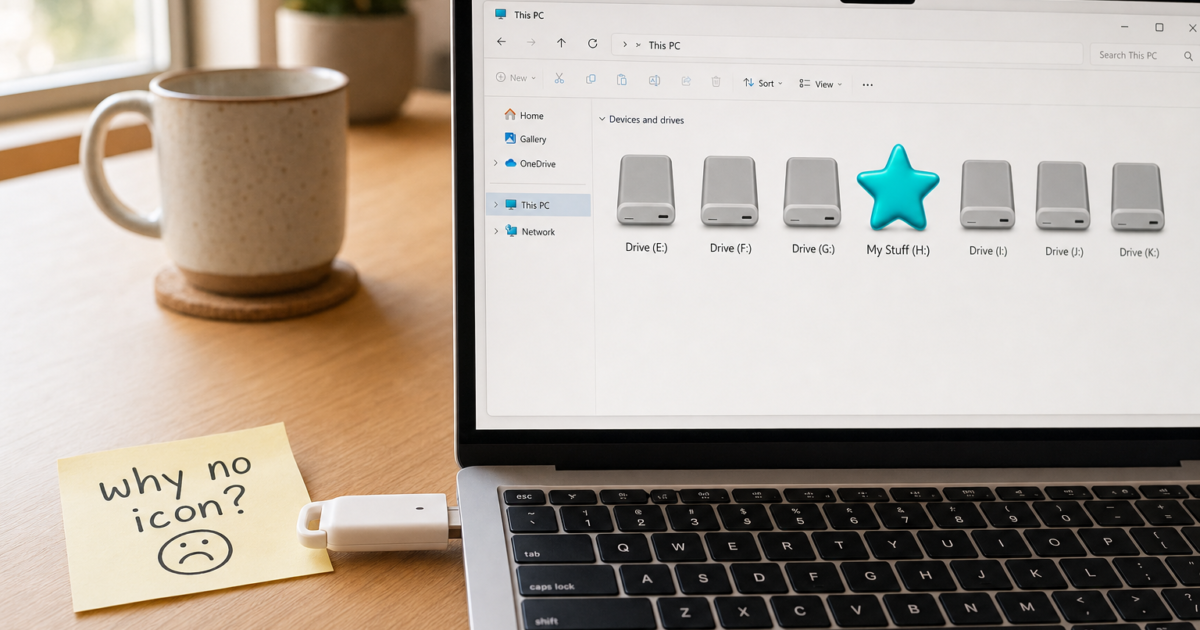
Tired of every USB drive looking exactly the same in File Explorer? You can give your flash drive a custom icon and a proper name so it stands out from the crowd, instead of showing up as “Removable Disk (E:)” like every other drive. The good news: the method is pretty simple. The bad news: Windows 10 and Windows 11 have a metadata conflict that can make this frustratingly unreliable. We’ll walk you through the classic approach and show you how to fix it when Windows decides to ignore your settings.
Fingers crossed it works first try, but if it doesn’t, we’ve got you covered with the troubleshooting steps that actually help in 2026.
⚠️ Heads up before you start: Since Windows 10 version 1903, Windows has preferred device metadata downloaded from Microsoft’s servers over your local
autorun.infsettings, which means your custom icon can get silently overridden even when everything is set up correctly. This behavior carries over into Windows 11. The steps below still work for many people, but if your icon doesn’t appear, jump to the Troubleshooting section. It’s not your fault.
What You’ll Need
- A USB flash drive (formatted as FAT32, exFAT, or NTFS)
- A
.icoicon file (we’ll show you how to find one) - Notepad (already on your Windows PC)
- A Windows 10 or Windows 11 PC
macOS note: On macOS Ventura and later, many users have reported that custom icons on FAT32 and exFAT drives don’t reliably stick after ejecting and remounting the drive. If you’re on a Mac and want custom icons, your drive would need to be formatted as APFS, which kills compatibility with Windows. For most people, this trick is really a Windows thing in 2026.
Step 1: Find or Download an Icon File
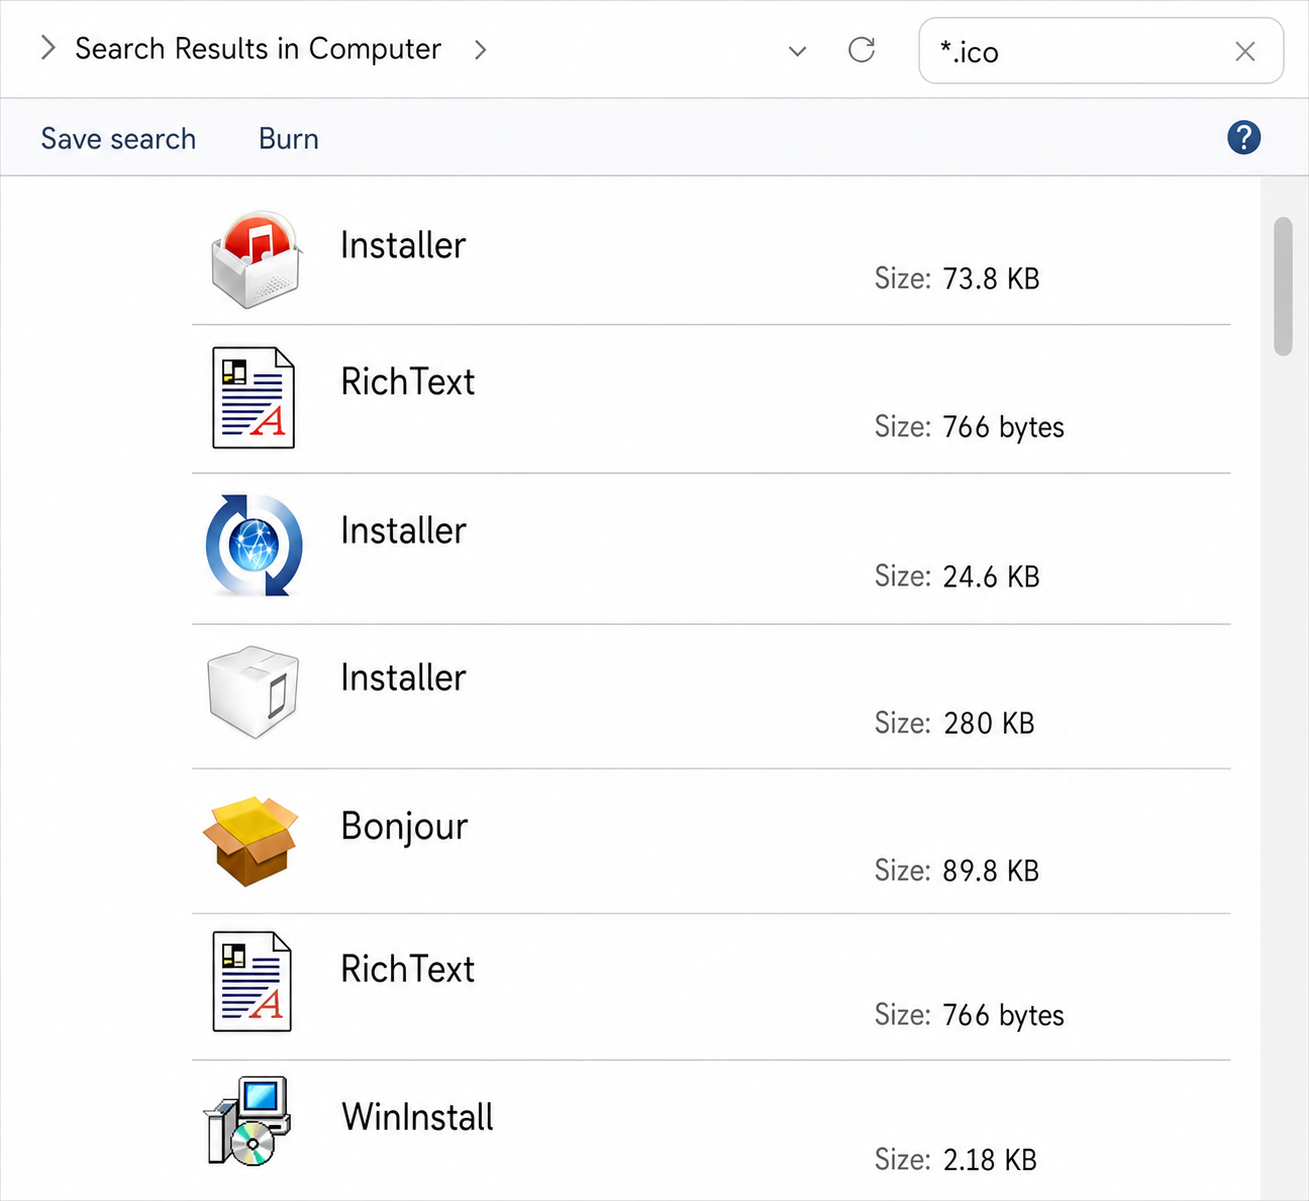
You need a .ico file, that’s the Windows icon format. You might already have some on your computer without knowing it. Open File Explorer and search for *.ico to see what turns up.
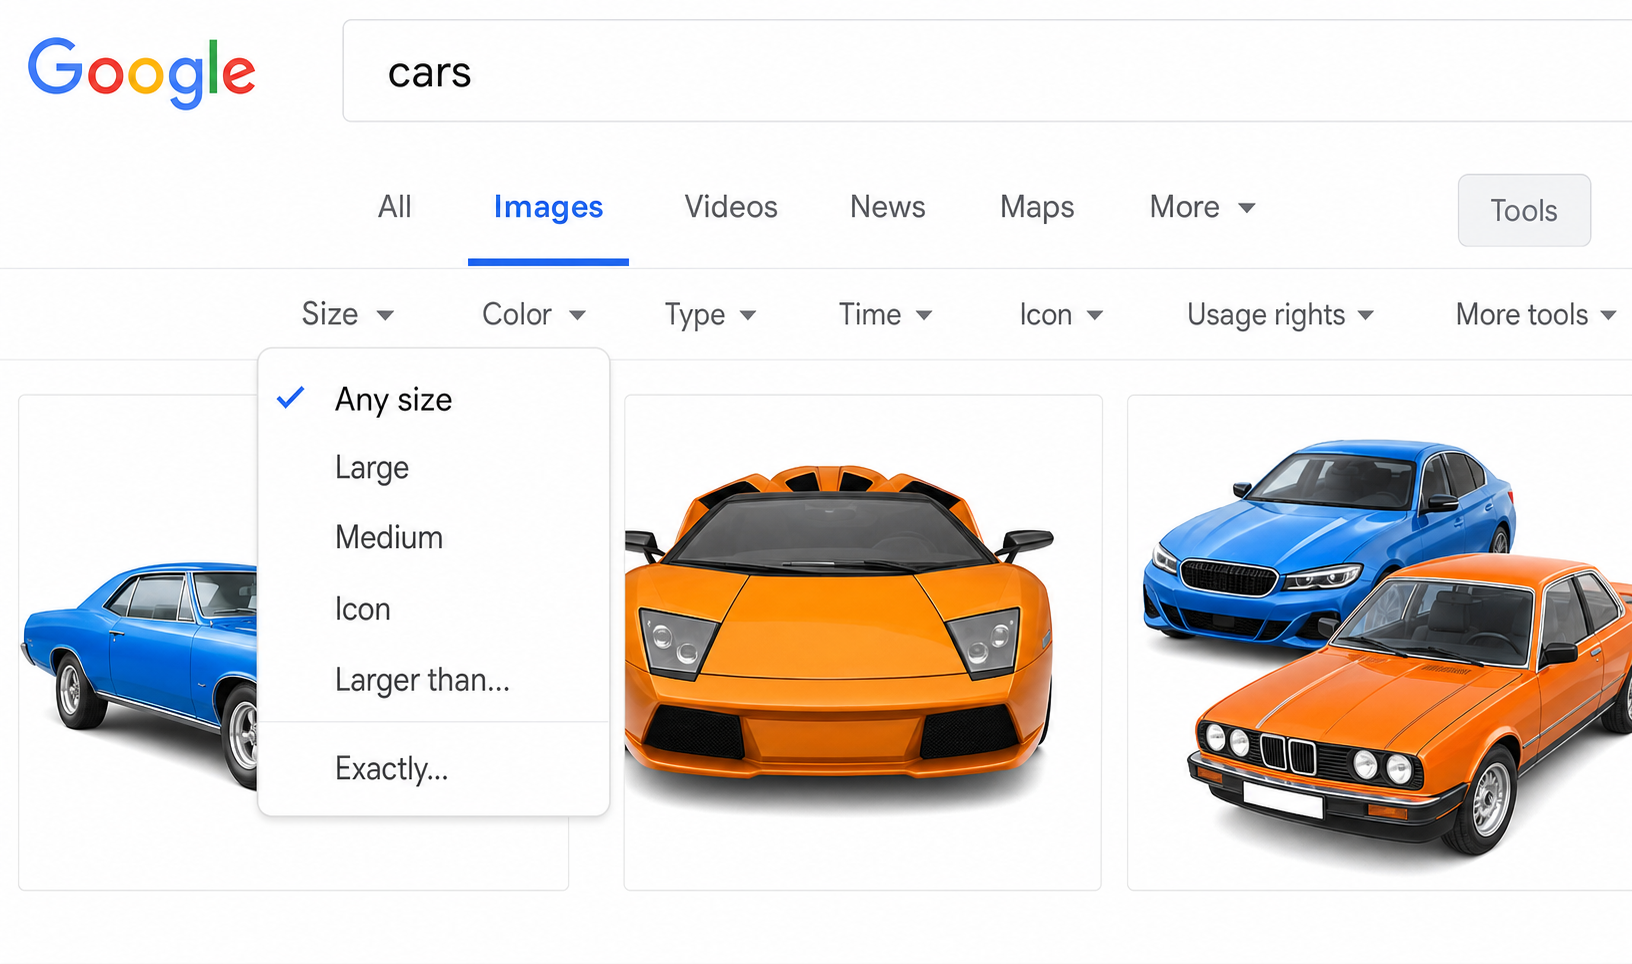
If you want something more specific, Google Image Search is actually a great tool for finding icons. Head to images.google.com and search for filetype:ico followed by whatever kind of icon you want, for example, filetype:ico rocket.

Once the results load, you can filter by size, color, and type. For best results, aim for an icon that’s at least 64×64 pixels. Anything smaller may not display correctly in Windows.
You can also find free icon packs on sites like Icons8 or Flaticon, just make sure to download the file in .ico format specifically. Once you have your icon file, rename it to something simple like autorun.ico so it’s easy to reference.
Step 2: Create the autorun.inf File
This is where the magic happens. Windows looks for a special file called autorun.inf at the root of your drive to figure out what icon and label to display. You’re going to create that file from scratch using Notepad.
Step 2a: Open Notepad
Press Windows + S, type Notepad, and hit Enter.
Step 2b: Paste in the configuration
Copy and paste the following text into Notepad:
[AutoRun]
label=My USB Drive
icon=autorun.ico
Here’s what each line does:
- [AutoRun], Tells Windows this is an autorun configuration file
- label=, Sets the name that appears under the drive in File Explorer. Change My USB Drive to whatever you want to call it.
- icon=, Tells Windows which icon file to use. This must exactly match the filename of your
.icofile.
If you only want to change the label and not the icon, just delete the icon= line. If you only want to change the icon, delete the label= line. Simple as that.
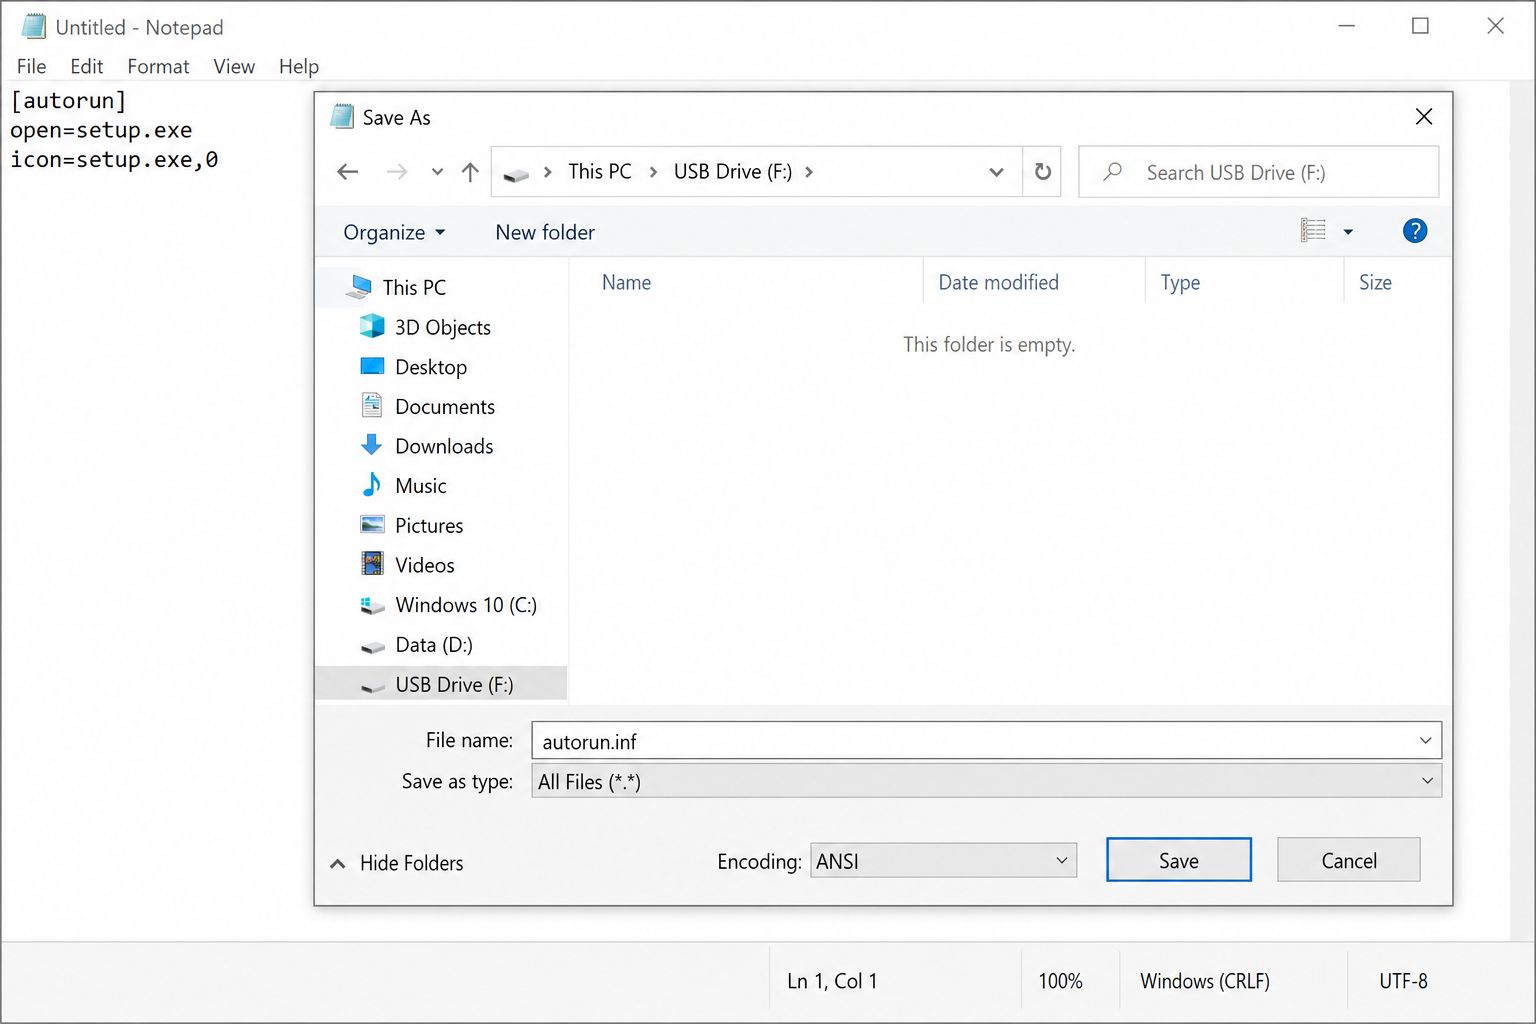
Step 2c: Save it as autorun.inf
This is the step where people most often go wrong, so pay close attention. You can’t just hit Save. You need to make sure it saves as an .inf file and not as a .txt file.
- Click File > Save As
- Change the Save as type dropdown to All Files
- In the File name box, type
autorun.inf - Navigate to your USB drive and save it there (at the root, not inside any folder)
- Click Save
Step 3: Copy Both Files to the Root of Your USB Drive
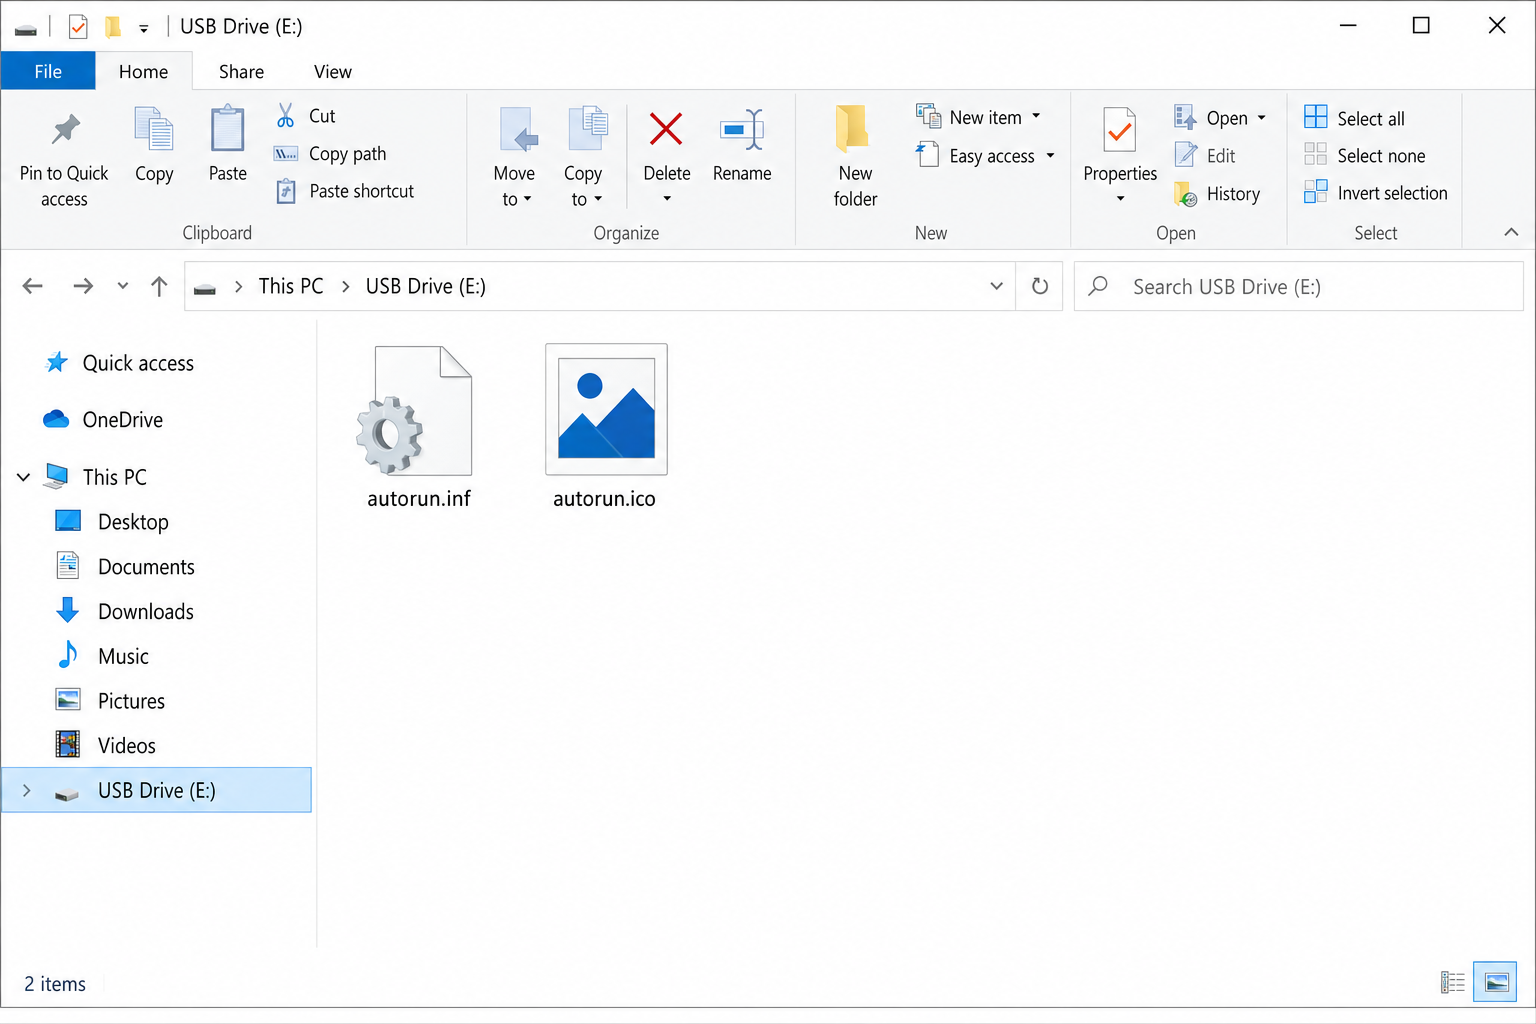
You need two files sitting in the top-level (root) folder of your USB drive, not inside any subfolder:
autorun.inf(the file you just created)autorun.ico(your icon file, or whatever you named it)
Step 4: Hide the Files (Optional but Recommended)
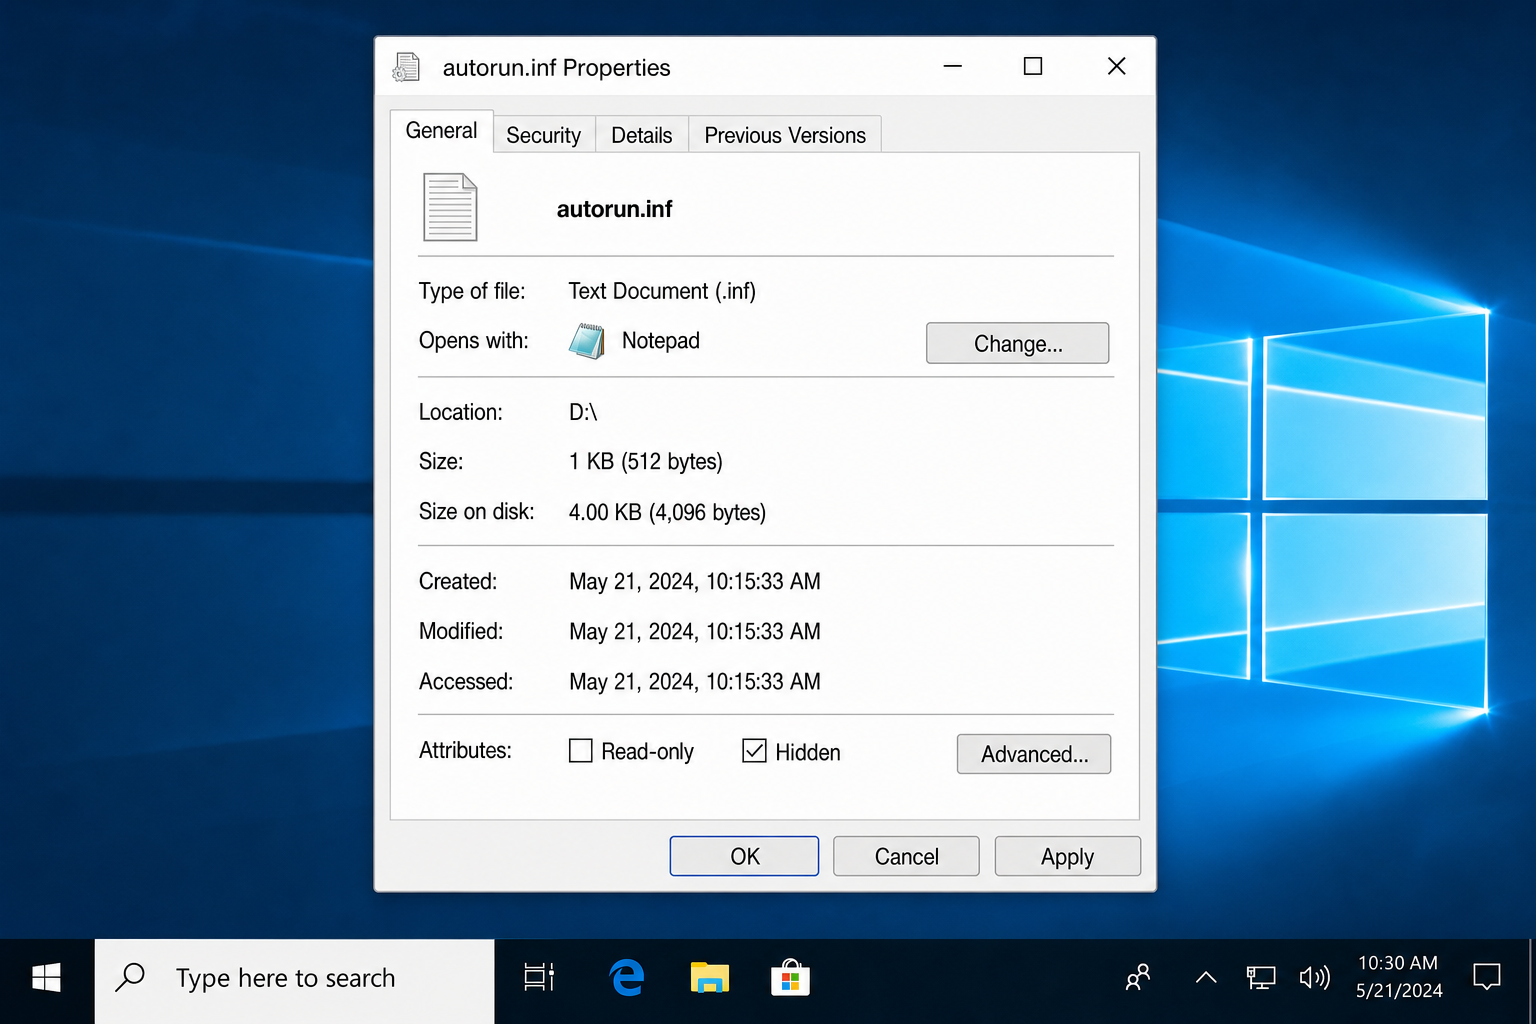
If you don’t want these two files cluttering up your USB drive every time you open it, you can hide them. They’ll still work; you just won’t see them.
- Select both
autorun.infandautorun.icoon your USB drive - Right-click and choose Properties
- Check the box next to Hidden at the bottom
- Click OK
Step 5: Eject and Reconnect Your USB Drive
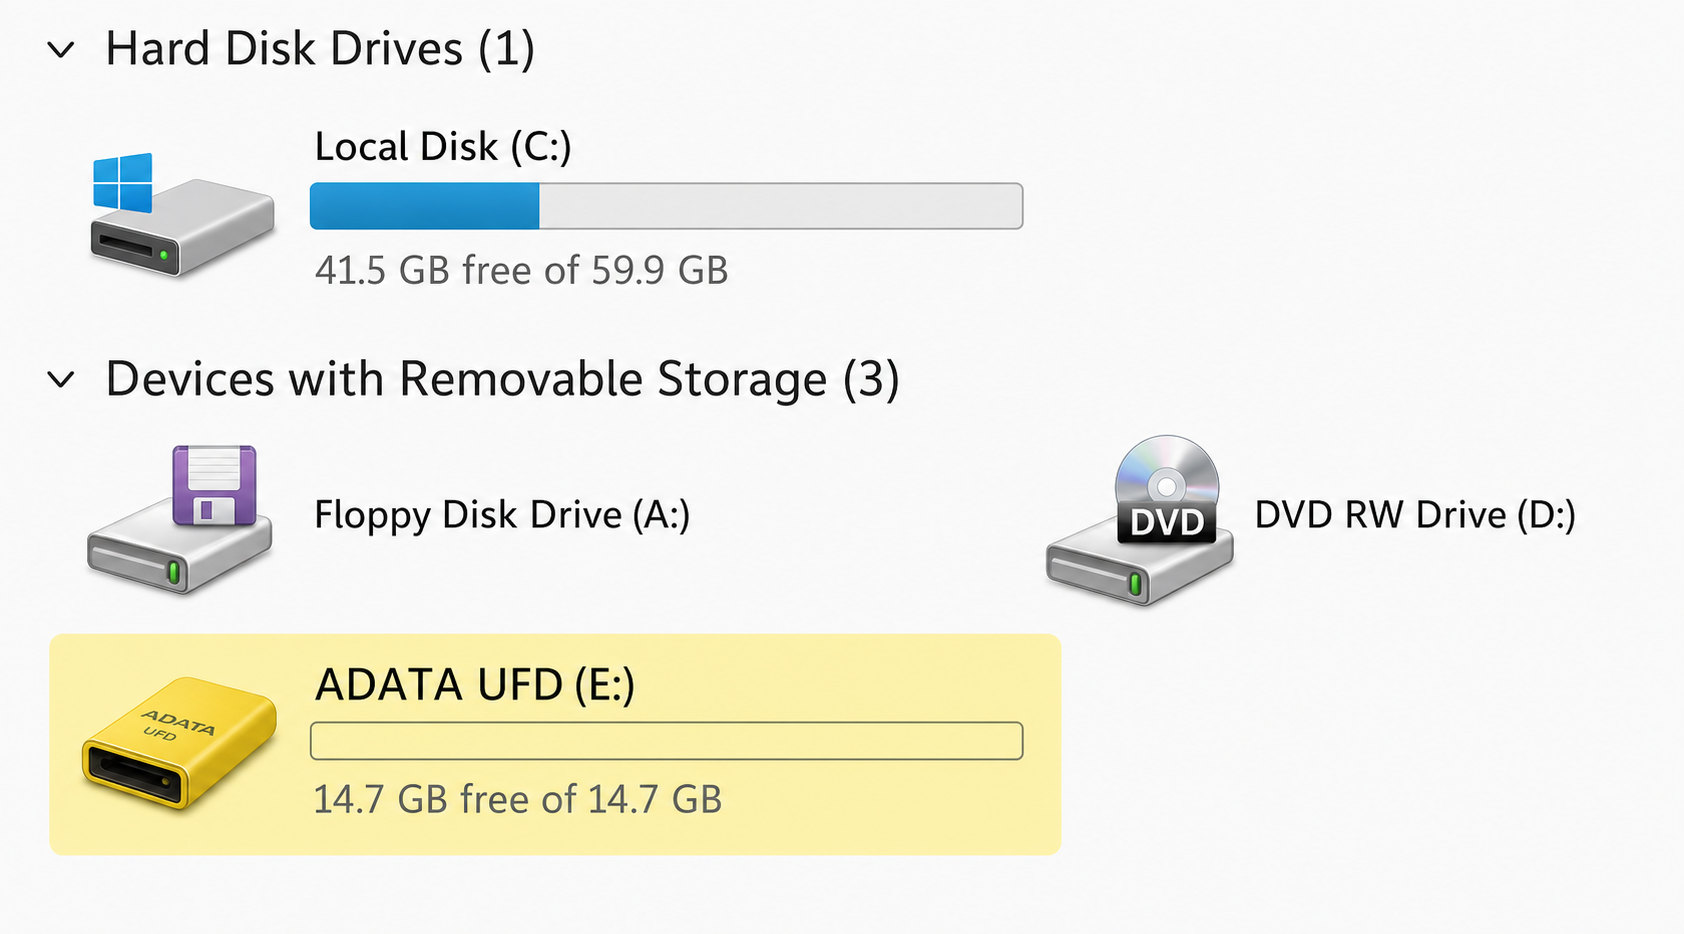
Safely eject your USB drive (right-click it in File Explorer and choose Eject), then plug it back in. If everything works, your custom icon and label should now show up in File Explorer.
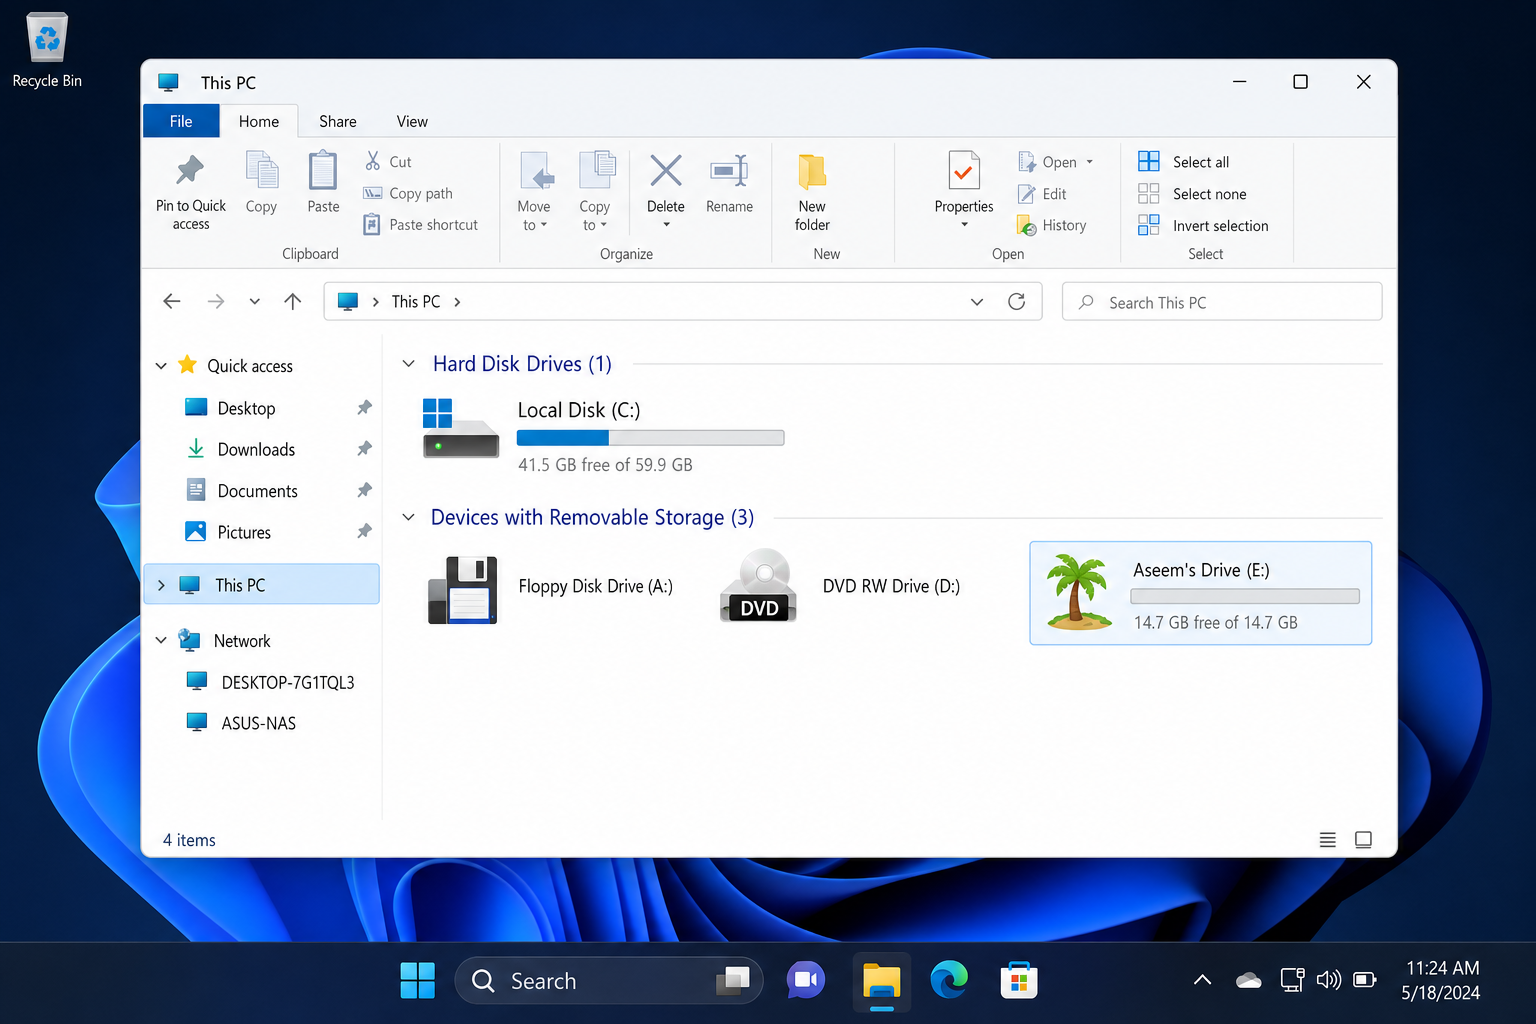
If it worked, nice! You’re done. If Windows is still showing the boring default icon, don’t give up. The next section explains exactly why this happens and how to fix it.
Troubleshooting: When Windows Ignores Your Custom Icon
Here’s the frustrating reality: Windows 10 (version 1903 and later) and Windows 11 can silently override your autorun.inf settings because the OS downloads its own device metadata from Microsoft’s servers and gives it priority over your local configuration. It can even override a perfectly correct setup.
Fix 1: Clear the Device Metadata Cache
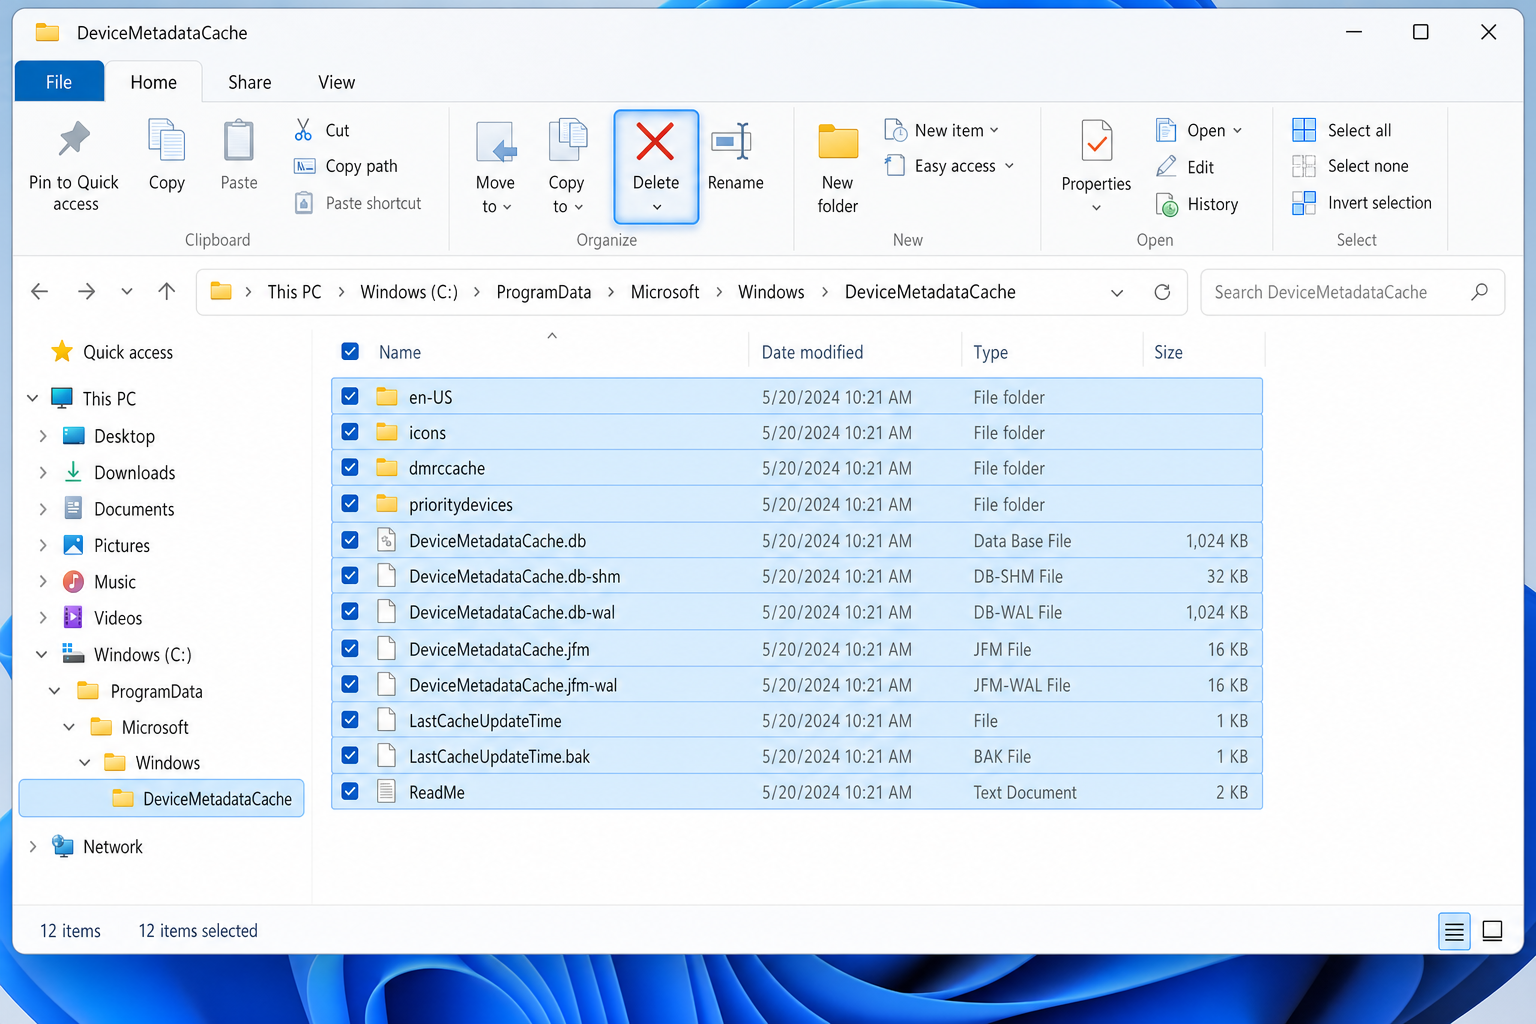
This is the most commonly recommended workaround. Windows stores cached device info (including icons) in a hidden folder, and clearing it may prompt Windows to start fresh and actually read your autorun.inf file. It doesn’t work for everyone, but it’s a good first step.
- Unplug all USB devices from your computer first
- Press
Windows + Rto open the Run dialog - Type
%PROGRAMDATA%\Microsoft\Windows\DeviceMetadataCache\and press Enter - Select everything inside that folder (
Ctrl + A) and delete it - Plug your USB drive back in and check if the icon appears
Fix 2: Stop Windows from Auto-Downloading Device Icons
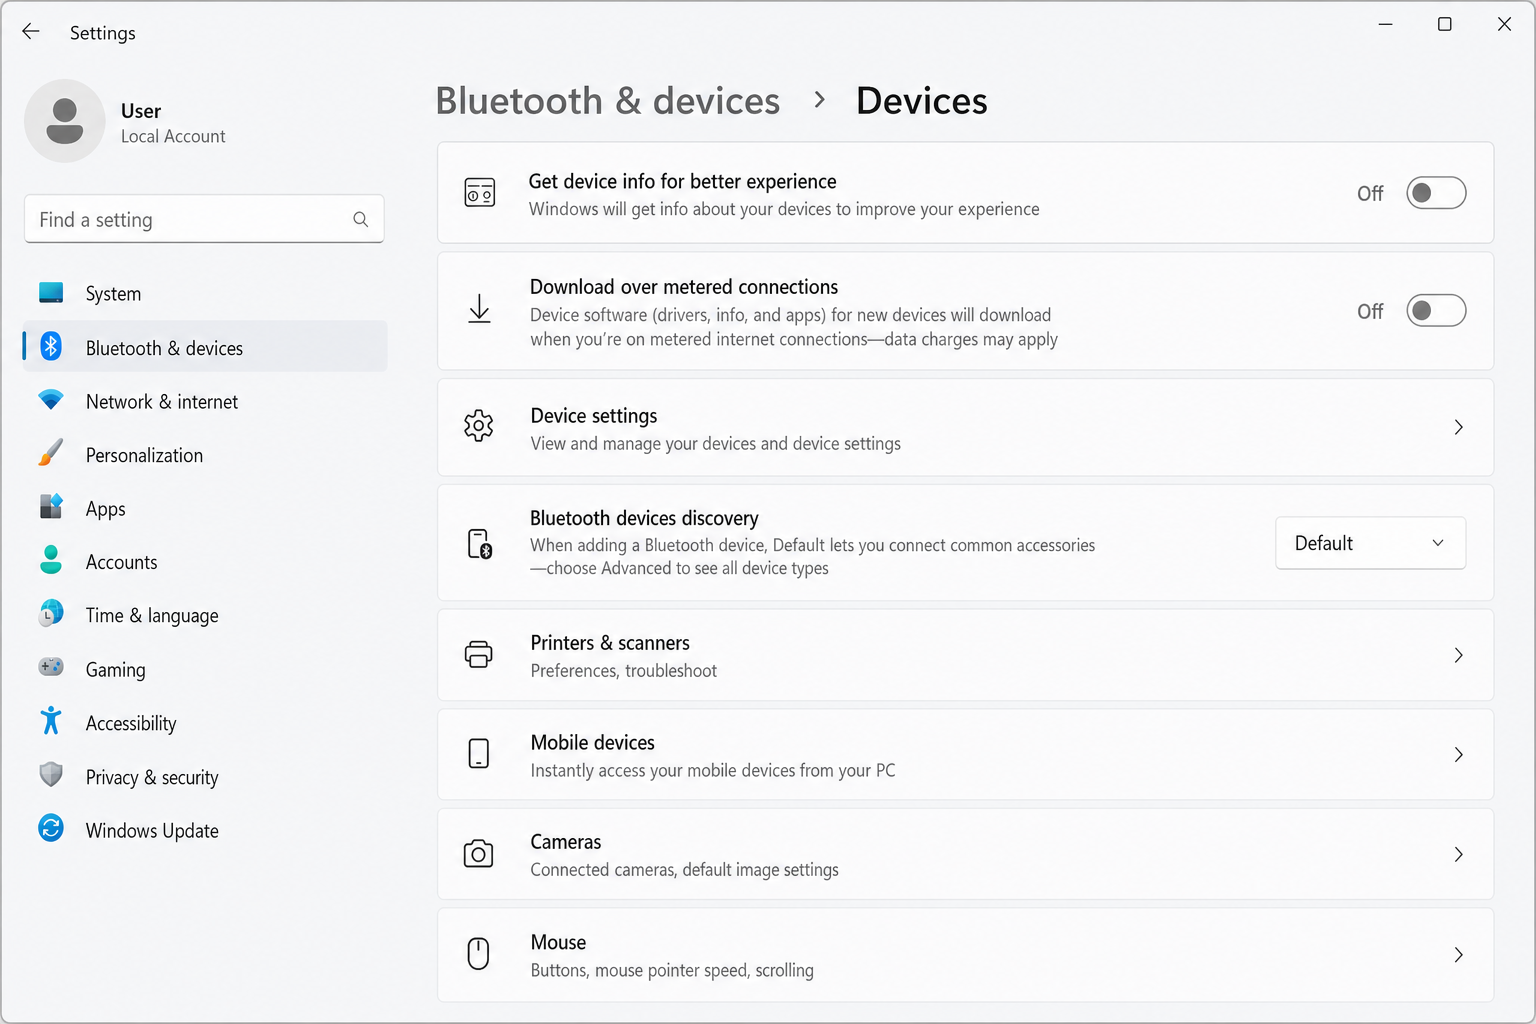
You can try telling Windows to stop overwriting your custom icon by disabling the automatic metadata download feature. This may help in some cases, though results can vary depending on your Windows version and configuration.
- Press
Windows + Ito open Settings - Go to Bluetooth & devices > Devices
- Find the option for Download over metered connections or Get device info for better experience and turn it Off
Fix 3: Try a Full Format (Not Quick Format)
If you’ve done a quick format of your drive recently, Windows may have cached old device info that’s interfering. Try doing a full format of the drive (not quick format), then set up the autorun.inf and .ico files again from scratch.
Warning: A full format will erase everything on the drive. Back up your files first!
Known Limitation: This May Never Fully Work on Windows 11
Let’s be honest. Some users have tried every workaround and Windows 11 still shows the generic icon. Microsoft hasn’t addressed the server-side metadata priority behavior introduced back in 2019, and it has persisted through every major Windows update since. If you’ve tried everything here and it’s still not working, the label change (the drive name) tends to work more reliably than the icon, so at least you can get a custom name even if the icon stays stubbornly generic.
Platform Notes
On macOS
On macOS Ventura and later, many users have reported that custom icons on FAT32 or exFAT formatted drives don’t reliably persist after ejecting and remounting the drive. If your drive is formatted as APFS, you can set a custom icon through Finder (right-click the drive > Get Info, then paste an icon image in the top-left corner), but APFS drives won’t be readable on Windows. So for cross-platform drives, you may find yourself stuck with the default icon on Mac.
On Linux
Good news if you’re a Linux user. Custom USB icons work reliably on Linux through file manager properties (GNOME Files, Dolphin, Nautilus all support it). The autorun.inf method also tends to work better on Linux than on modern Windows, which is a bit ironic.
Tips and Tricks
- Keep the icon filename simple: Avoid spaces or special characters in the
.icofilename. Something likeautorun.icoormyicon.icoworks great.my awesome icon (final).icois asking for trouble. - Use a 256×256 icon for best results: Windows 11 displays icons at higher resolutions than older versions. A 256×256 pixel
.icofile will look much sharper than a 64×64 one. - The label can have spaces: Unlike the filename, your drive label can include spaces and most special characters.
label=John's Work Driveworks fine. - This works on external hard drives too: Not just USB flash drives. The same
autorun.inftrick applies to external HDDs and SSDs connected via USB. - Corporate PCs may block autorun entirely: If you’re trying this on a work computer, IT policy may have disabled autorun functionality completely. Nothing you can do there except try it on a personal machine.
Wrapping Up
Setting up a custom USB drive icon is a satisfying little personalization trick, when it works. The process itself is straightforward: grab a .ico file, create an autorun.inf config file, drop both onto your drive, and reconnect. The persistence-pays-off moment when you see your custom icon pop up in File Explorer is genuinely worth the effort. That said, Windows 10 and 11 have made this less reliable than it used to be due to the server-side device metadata taking priority over local settings, so don’t be discouraged if you need to run through the troubleshooting steps.
If you just can’t get the icon to stick, focus on getting the custom label working instead. It’s more reliable and at least you’ll know which drive is which at a glance. And if you’re setting up a bootable USB drive, check out our guide on using Rufus instead, which handles drive labels as part of its setup process.