
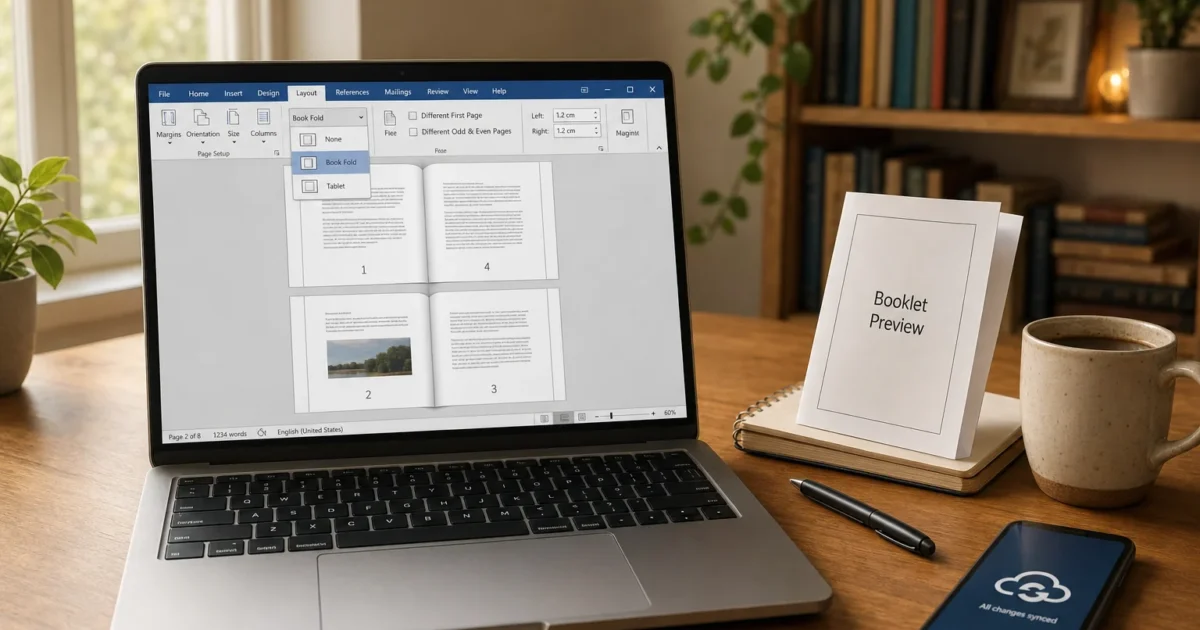
Microsoft Word can do a lot more than just open and edit documents, and booklets are a perfect example of a hidden gem most people never discover. Whether you’re putting together a church bulletin, an event program, a school project, or a simple product manual, Word has everything you need to create and print a professional-looking booklet without downloading any extra software.
In this guide, you’ll learn three ways to make a booklet in Word: starting from a blank document using the Book fold layout, using a built-in desktop template, and using Word for the web if you don’t have Word installed locally. We’ll also cover how to print it correctly, because that’s honestly where most people run into trouble. The steps below apply to Word for Microsoft 365 and Word 2016 or later on Windows and macOS. Word for the web works too, though with a few limitations we’ll flag along the way.
Method 1: Create a Booklet from Scratch (Book Fold Layout)
This is the most flexible approach. You’re starting with a blank document (or an existing one) and telling Word to format it as a booklet. Word handles all the page ordering automatically. You just type your content in normal order and it figures out how each page should be arranged for folding.
Step 1: Open or Create Your Document
Open Microsoft Word and either start a new blank document or open the document you want to turn into a booklet. If you’re starting fresh, don’t worry about content yet, you can add it after setting up the layout.
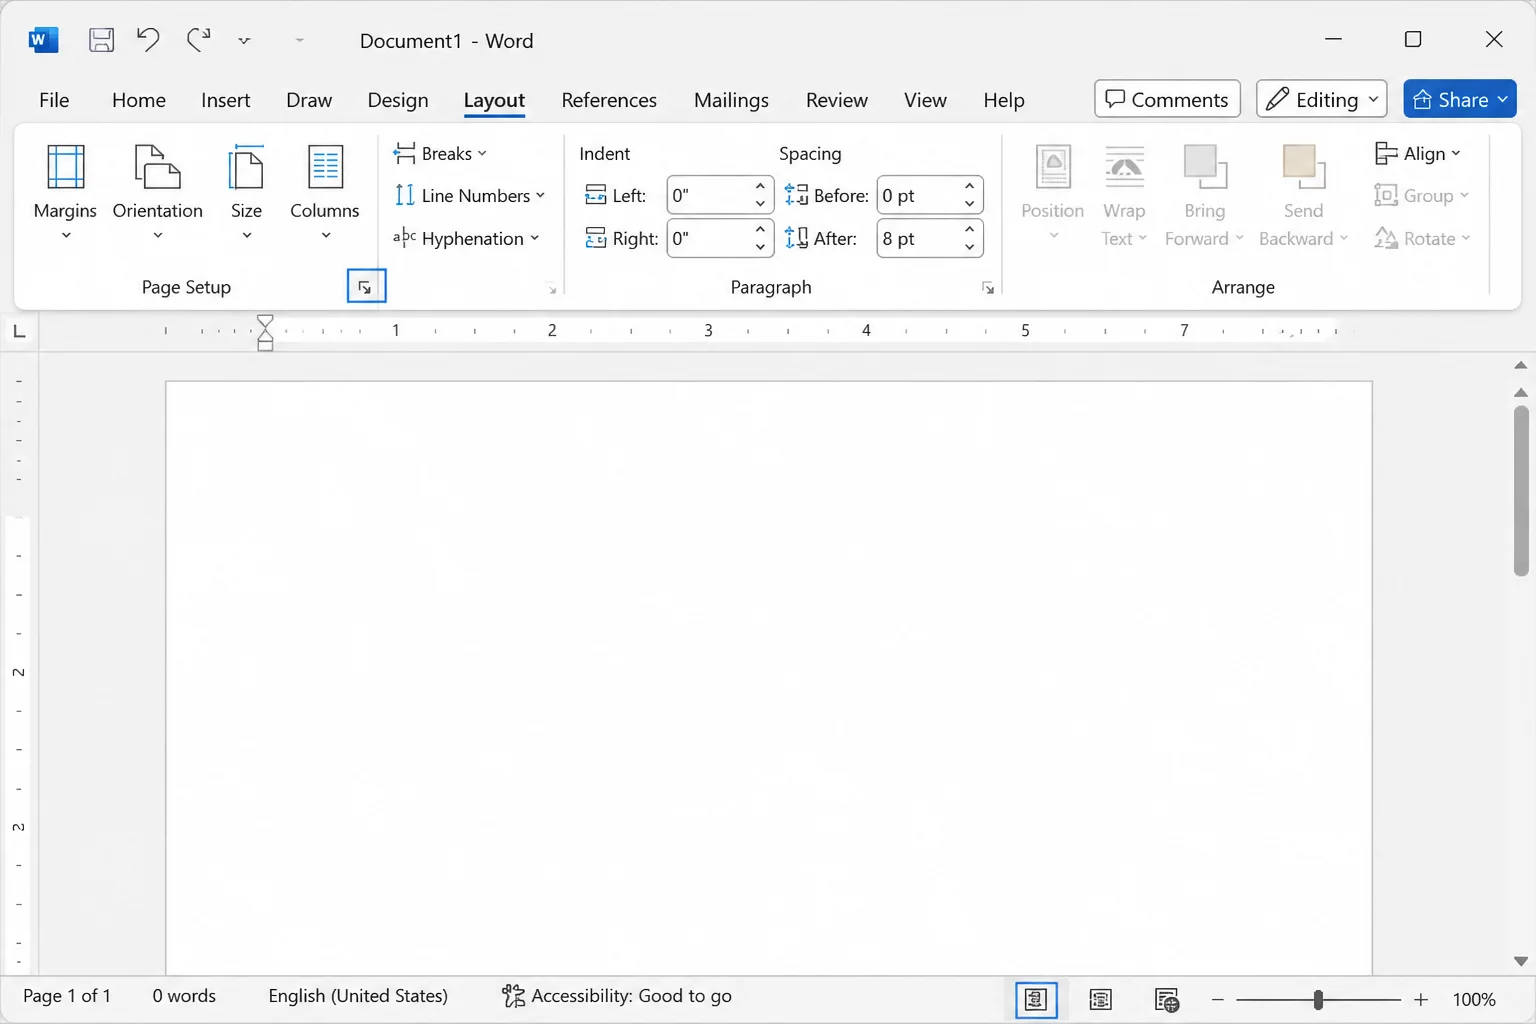
Step 2: Open the Page Setup Dialog
Click the Layout tab in the Ribbon at the top of the screen. In the Page Setup group, look for the small diagonal arrow icon in the bottom-right corner of the group. That’s the dialog box launcher. Click it to open the full Page Setup dialog.
Step 3: Set the Layout to Book Fold
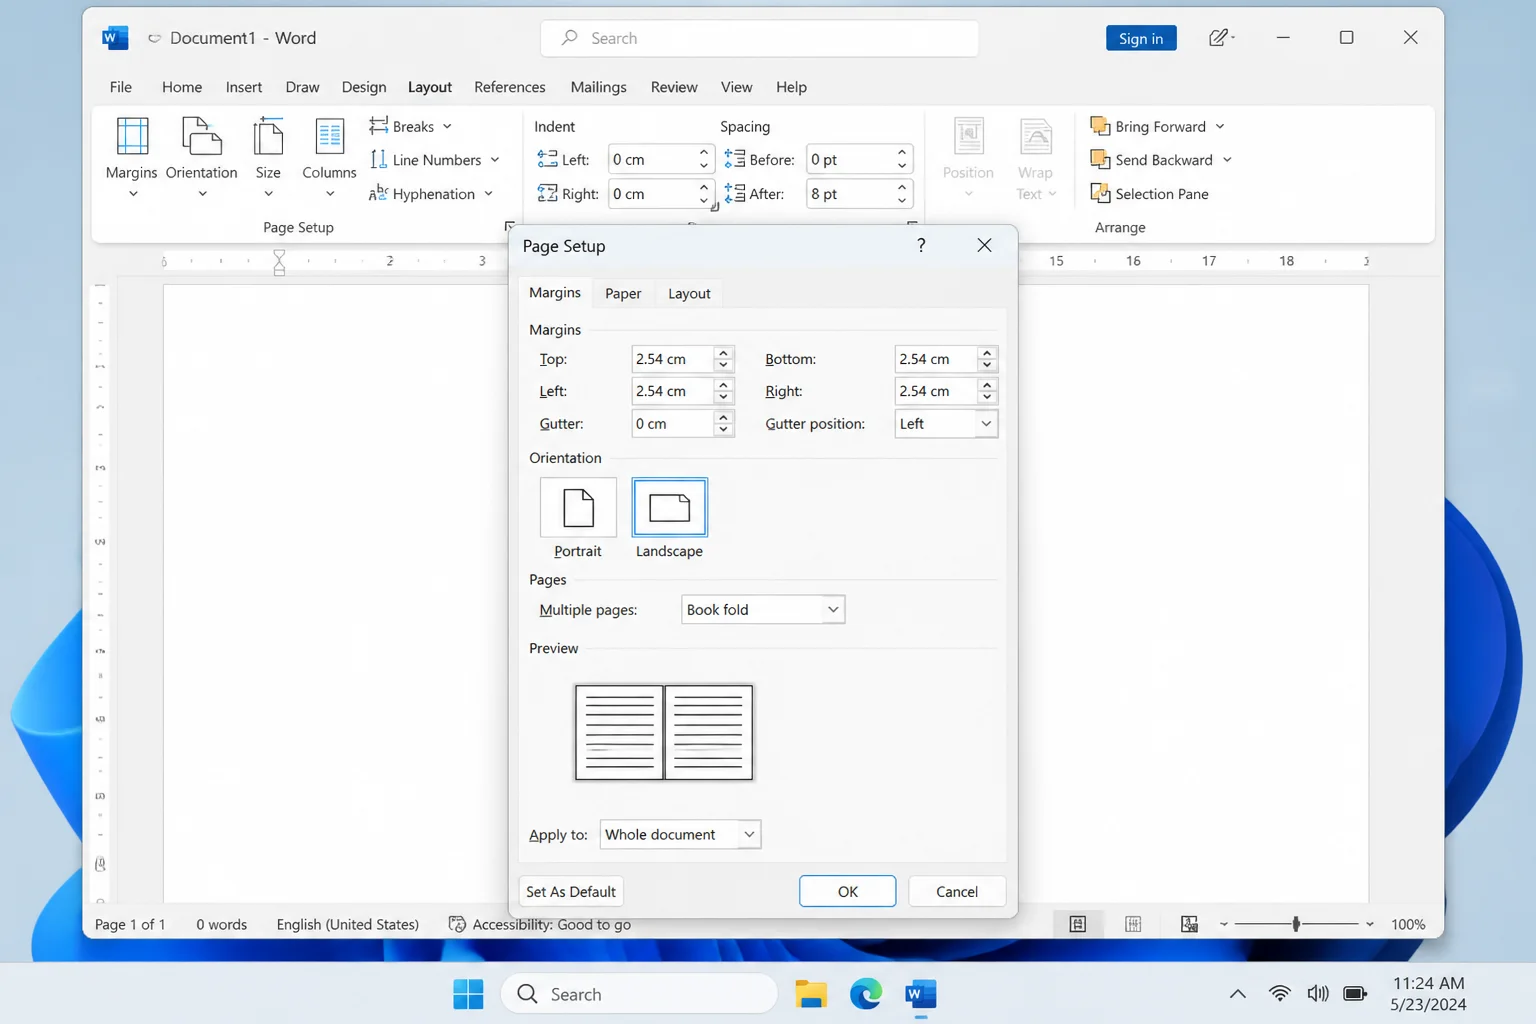
In the Page Setup dialog, make sure you’re on the Margins tab. Look for the Pages section and find the Multiple pages dropdown. Click it and select Book fold.
Once you do this, Word will automatically switch your document orientation to Landscape, which is totally normal. Each sheet of paper will hold two booklet pages side by side, and Word handles the page ordering so everything lines up correctly when you fold the printed sheets.
Step 4: Set Your Gutter (the Binding Margin)
Still on the Margins tab, find the Gutter field. The gutter is the extra space added along the inner edge of each page. It prevents your text from disappearing into the fold or binding. Set it to at least 0.5 inches (about 1.2 cm). If you’re planning to staple or glue-bind the booklet, bump it up to 0.6–0.8 inches (1.5–2 cm) to be safe.
Step 5: Choose Your Paper Size
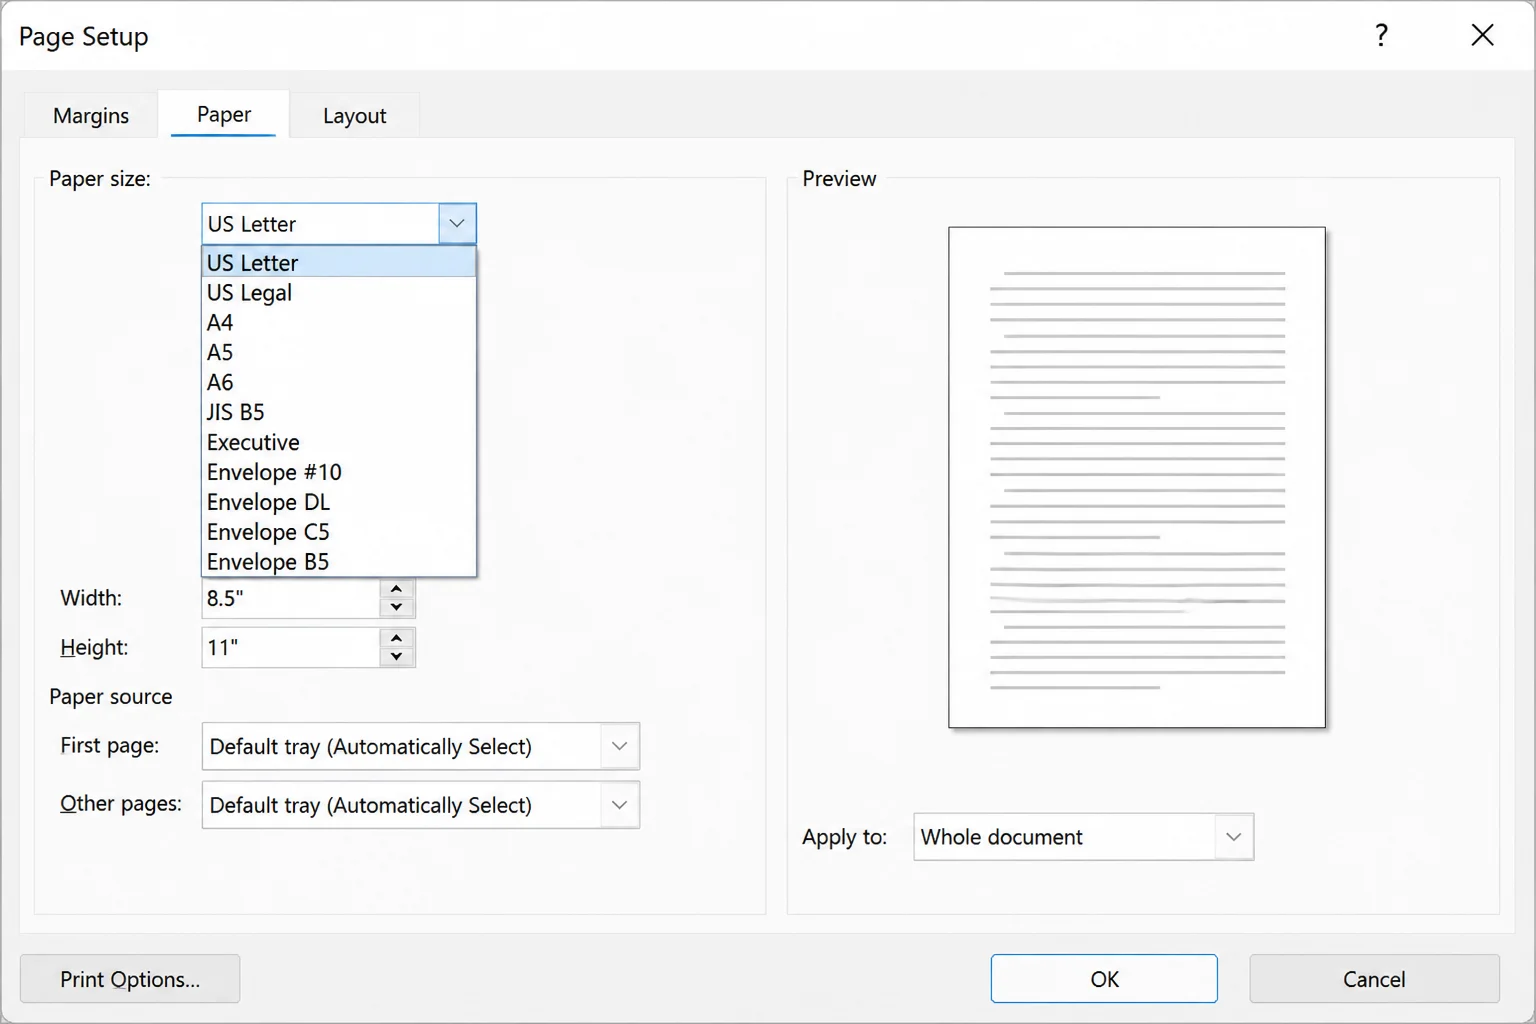
Click the Paper tab at the top of the Page Setup dialog. Under Paper size, select the paper size you’ll actually be printing on, usually US Letter (8.5 x 11 in) or A4. Keep in mind that your finished booklet pages will be half that size once folded. So if you print on US Letter paper, your booklet pages will be roughly 5.5 x 8.5 inches.
Click OK to apply all your settings.
Step 6: Add Your Content
Now just type (or paste) your content as you normally would. Write everything in reading order: page 1 first, page 2 second, and so on. Word automatically rearranges the pages behind the scenes so they print in the right booklet order. Don’t try to manually reorder pages yourself, or things will get very confusing very fast.
If your booklet is getting long, you can control how many pages go into each physical booklet. Under Margins > Pages, look for the Sheets per booklet option. This lets you split a long document into smaller booklet sections that you can bind together after printing.
Step 7: Save Your Booklet
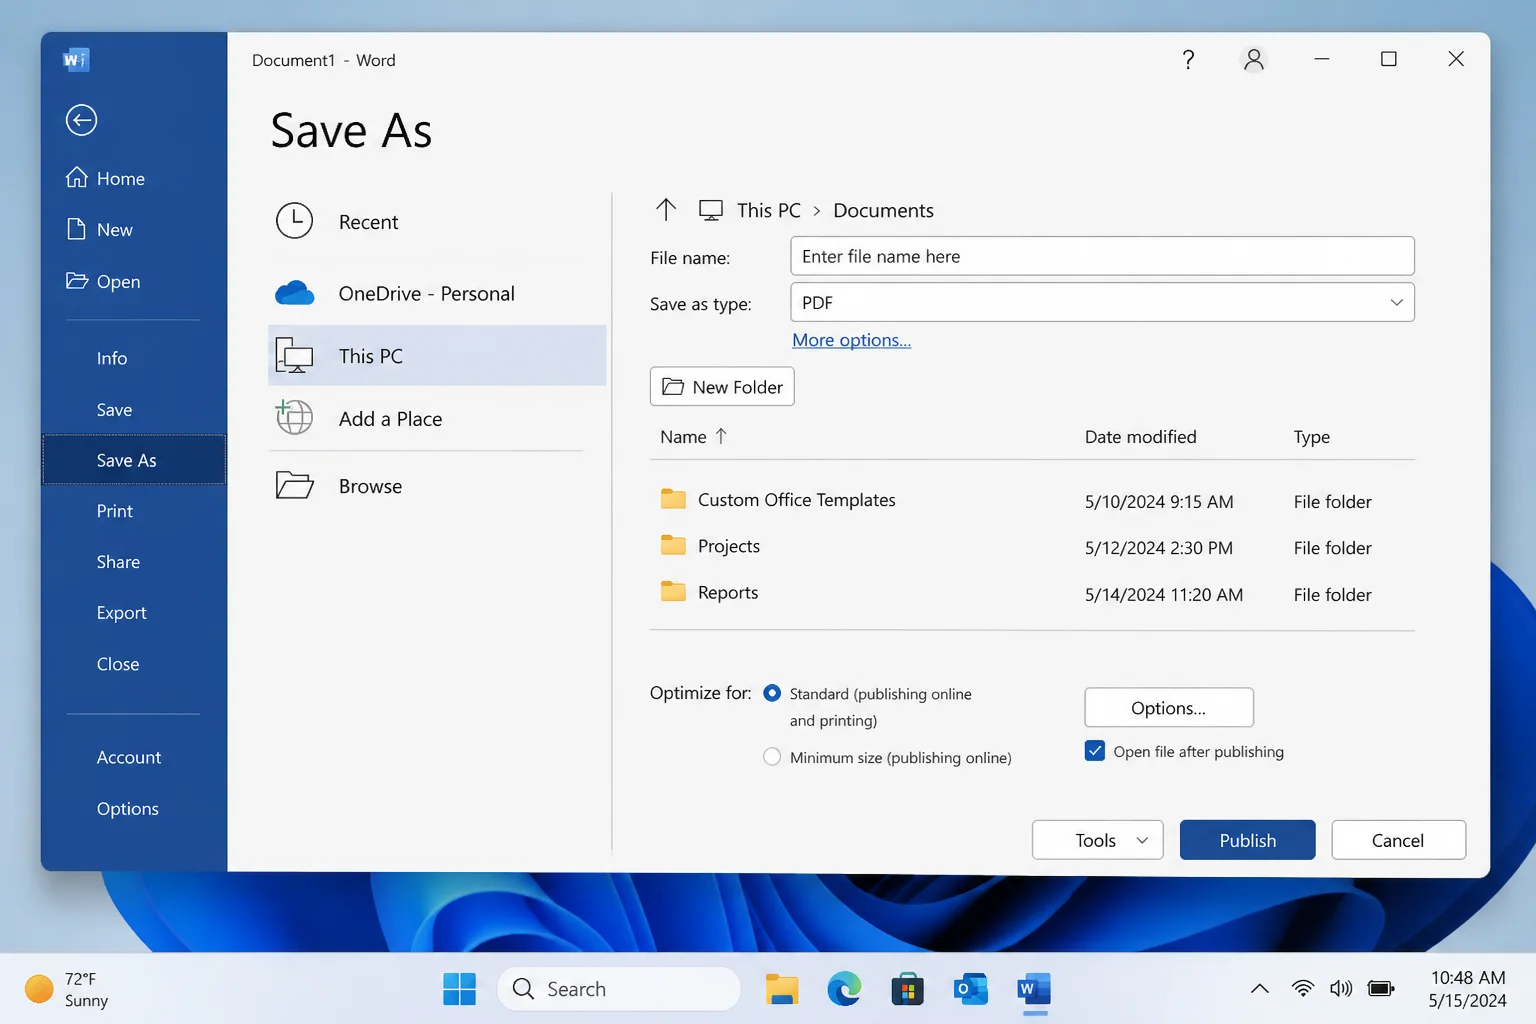
Go to File > Save As and save your document as a Word file. If you want a digital version to share or send to a print shop, go to File > Export (or Save As and choose PDF) to save it as a PDF. The PDF will preserve the booklet layout exactly as you set it up.
Method 2: Use a Booklet Template in Desktop Word
If you’d rather not start from a blank page, Word’s built-in templates are a solid shortcut. Microsoft offers a bunch of pre-designed booklet templates, including event programs, product guides, church bulletins, and school projects, that are already formatted with the right page layout. You just swap in your own text and images.
Step 1: Search for a Booklet Template
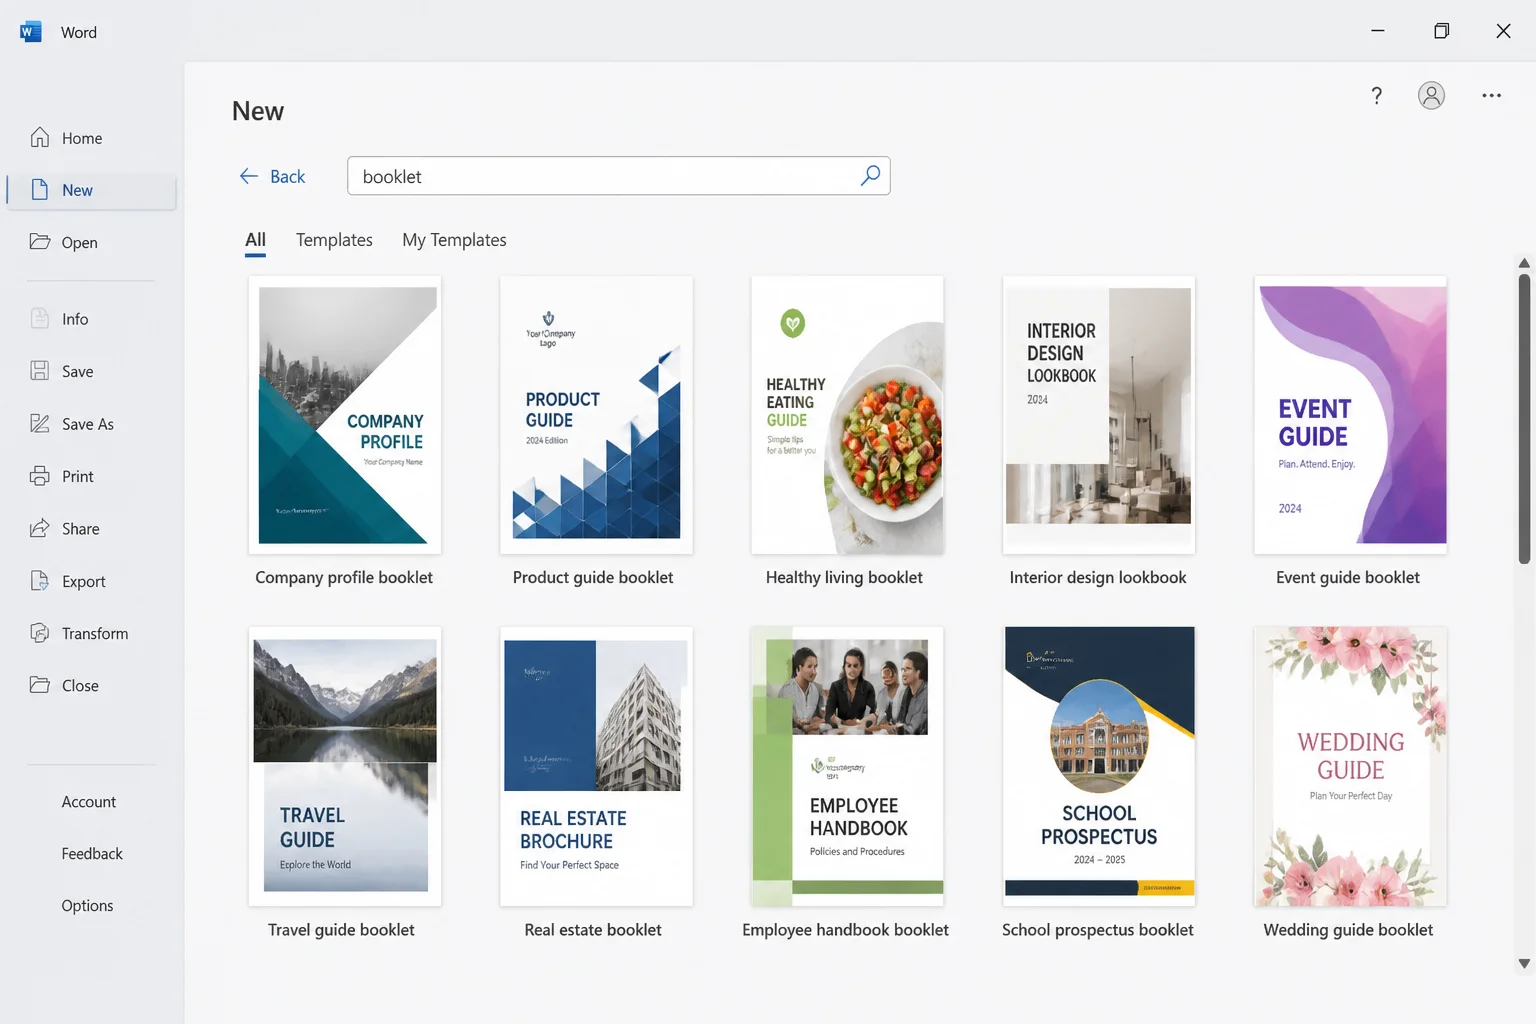
Open Word and go to File > New. You’ll see a gallery of templates with a search bar at the top. Type booklet in the search box and press Enter.
You can also try related keywords like event program, brochure, or manual if you’re looking for something specific. Browse through the results until you find one that fits your project.
Step 2: Open the Template
Click the template you want to use, then click Create. Word will download and open the template as a new document. From here, it works just like any other Word document. Click on any text placeholder and start typing your own content.
Step 3: Customize the Template
Replace the placeholder text with your own titles, body text, and contact info. Swap out any sample images by right-clicking them and selecting Change Picture. You can also adjust fonts, colors, and spacing using the normal Word formatting tools in the Ribbon.
Step 4: Double-Check the Page Setup
Most booklet templates already have the right layout settings baked in, but it’s worth a quick check, especially if you’re printing on a different paper size than the template assumes. Go to Layout > Page Setup dialog launcher and confirm that Multiple pages is set to Book fold on the Margins tab, and that the paper size on the Paper tab matches what’s in your printer.
Step 5: Save and Print
Save your document with File > Save As, then follow the printing steps in the section below.
Method 3: Use Word for the Web (No Word Install Needed)
Don’t have Word installed on your computer? No problem. Microsoft offers free customizable booklet templates through Word for the web that you can edit right in your browser. No download required, though you’ll need a free Microsoft account.
Step 1: Browse the Online Booklet Templates
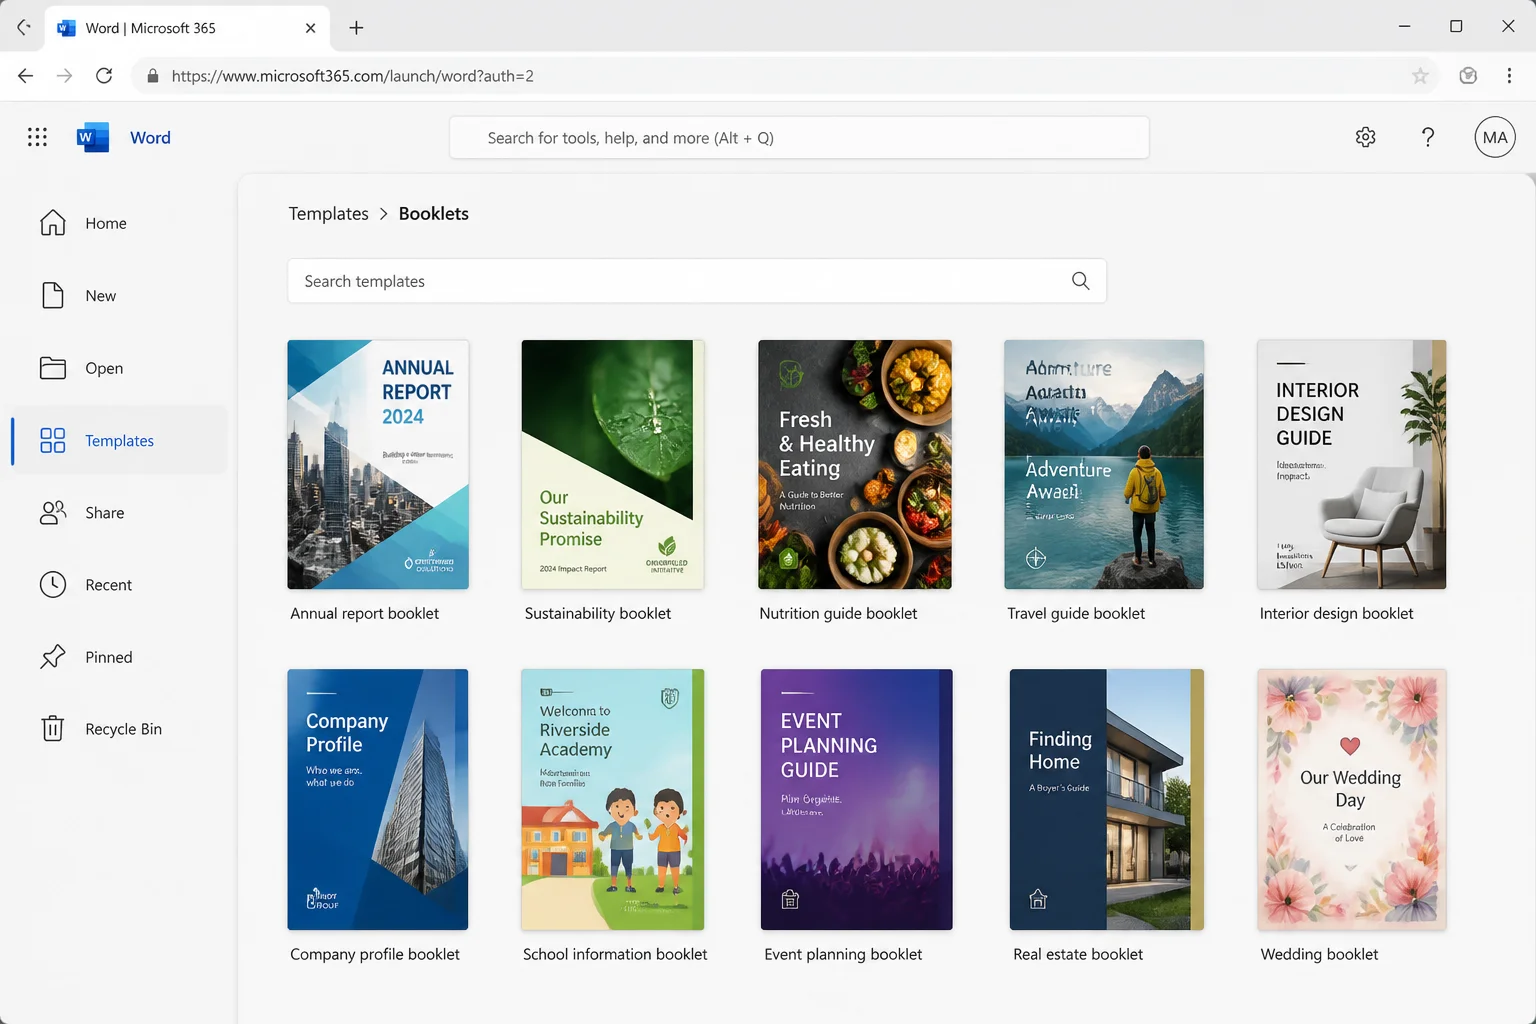
Head to word.cloud.microsoft/create/en/booklet-templates/ and browse the available templates. There’s a decent selection of designs for different use cases.
Step 2: Open and Edit the Template
Double-click a template to open it in Word for the web. The editing experience is similar to the desktop version. Click on text to edit it, swap out images, and adjust formatting as needed. Your changes are automatically saved to OneDrive.
Step 3: Save as PDF or Print
When you’re done, go to File > Print to print directly from the browser, or go to File > Save As > Download as PDF to save a copy to your computer.
One heads-up: Word for the web doesn’t give you full access to the Page Setup dialog or the Book fold layout option. It’s great for editing pre-made templates and printing them, but if you need fine-grained control over margins, gutter, and page ordering, you’ll want to use the desktop version of Word instead.
How to Print a Booklet in Word
Getting the print settings right is honestly the trickiest part of the whole process, and where most booklet projects go sideways. Here’s how to do it correctly.
If Your Printer Supports Double-Sided Printing
Most modern printers can print on both sides of the paper automatically (this is called duplex printing). Here’s how to set it up:
- Go to File > Print.
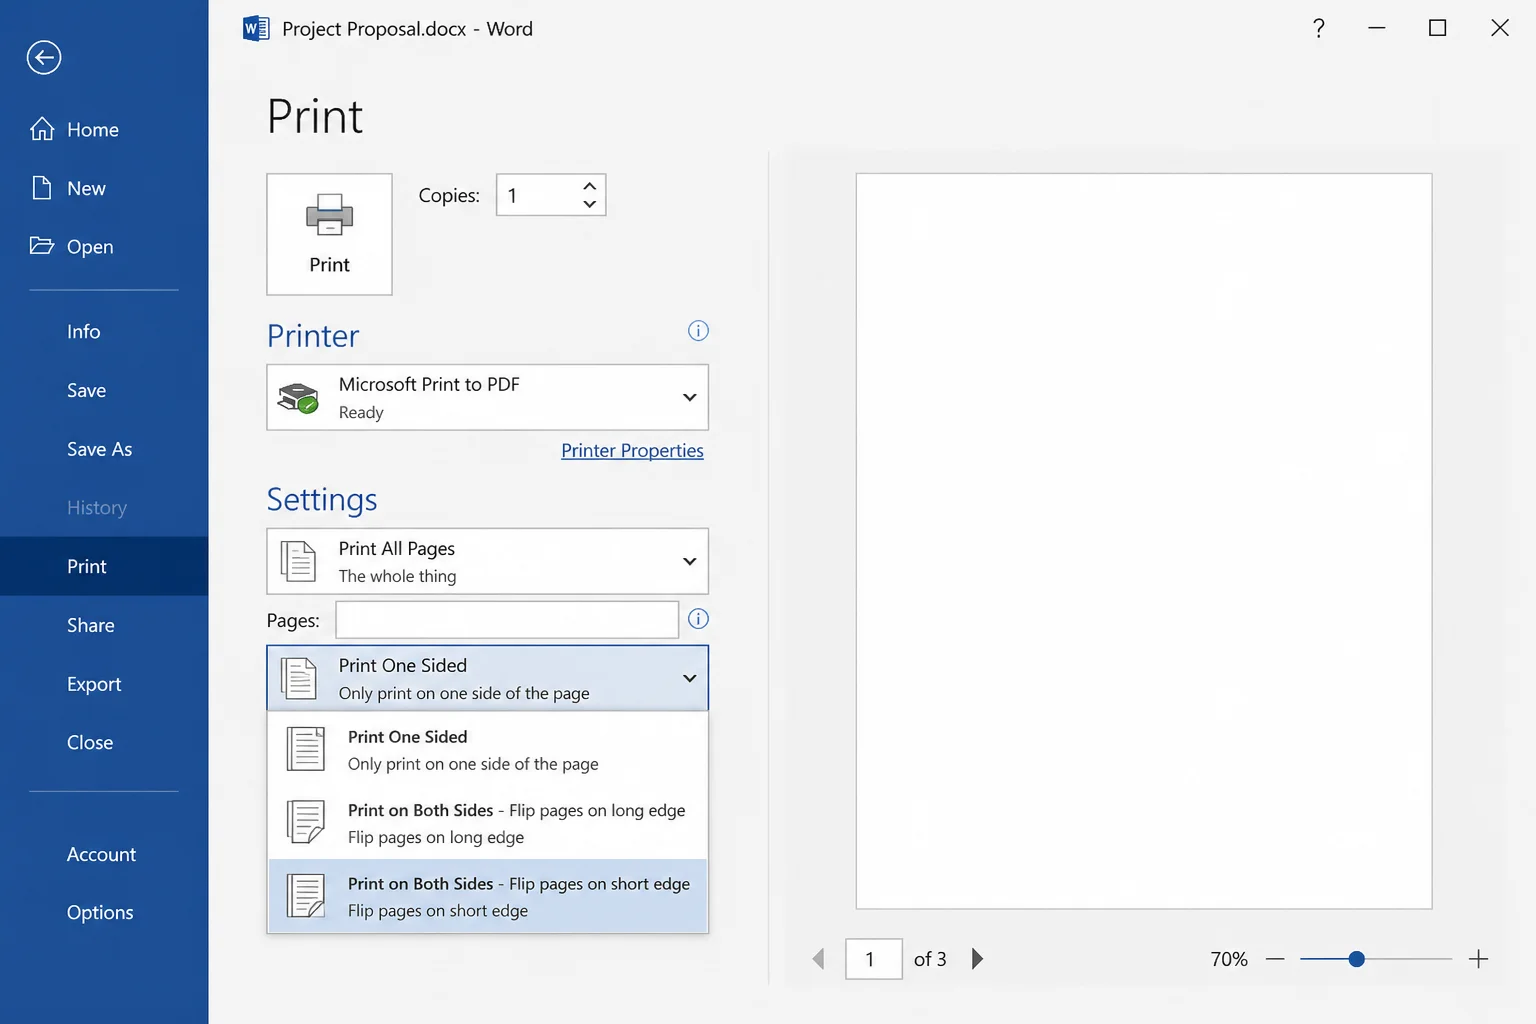
- Under Settings, click the dropdown that says Print One Sided and change it to Print on Both Sides.
- Look for a sub-option that says Flip pages on short edge and select this one. This is the critical setting that makes sure the back side of each page isn’t printed upside down. (If you accidentally choose “Flip pages on long edge,” your booklet will come out wrong.)
- Check the print preview to confirm pages are in the right order and margins look correct.
- Click Print.
If Your Printer Is Single-Sided Only
No duplex printer? You can still make it work, though it takes an extra step.
- Go to File > Print.
- Under Settings, look for Manually Print on Both Sides (the exact wording depends on your printer driver).
- Word will print all the odd-side pages first, then pause and prompt you to flip the stack and reinsert it so it can print the other sides.
- Before you flip and reinsert, do a quick test with just 4 pages first to make sure you’re flipping in the right direction. A little pencil mark on the first sheet helps you keep track.
Tips and Troubleshooting
Common Issues
Problem: Pages are printing in the wrong order
This almost always happens when someone manually reorders pages in the document instead of letting Word handle it. The fix: make sure Multiple pages: Book fold is set in Layout > Page Setup, then write your content in normal reading order (page 1, 2, 3…) and let Word sort out the printing sequence automatically.
Problem: The back side of the page is upside down
You’ve got the wrong duplex setting. Go back to File > Print and make sure you’ve selected Flip pages on short edge (not long edge). If your printer driver uses different wording, try both options on a 4-page test print until you get it right.
Problem: Text is getting swallowed by the fold
Your gutter is too small. Go to Layout > Page Setup > Margins tab and increase the Gutter value to at least 0.5 inches. If you’re binding with glue or a thick staple, go up to 0.7–0.8 inches.
Problem: Margins are getting cut off when printing
Your Word paper size doesn’t match the paper in your printer. Open Page Setup > Paper tab and make sure the Paper size matches what’s actually loaded in your printer tray (e.g., US Letter vs. A4). Also check your printer’s own properties, as both need to match.
Problem: My printer doesn’t support duplex at all
Use the Manually Print on Both Sides option described in the printing section above. It takes a little more patience but works fine for short booklets.
Problem: Can I do Book fold in Word for the web?
Not directly. Word for the web doesn’t expose the full Page Setup dialog. You can edit and print booklet templates in the browser just fine, but for custom Book fold layouts with specific margin and gutter settings, you’ll need the desktop version of Word.
Pro Tips
- Test with 4 pages first: Before printing your entire booklet, do a test run with just 4 pages. It’s much easier to spot orientation or margin problems on a small test than to waste a full stack of paper.
- Export to PDF before printing: Saving as PDF first lets you preview exactly how the booklet will look and catch any layout issues before you send it to the printer.
- Use Insert > Page Number: Word will automatically handle page numbering in booklet order. Just insert page numbers normally and it’ll sort everything out.
- Keep it simple for short booklets: Word’s Book fold layout is ideal for booklets up to around 40 pages. For longer books, catalogs, or anything with complex multi-column layouts, you might want to look at dedicated desktop publishing tools like Adobe InDesign or Affinity Publisher.
When to Use Something Other Than Word
Word is a great choice for simple booklets, including event programs, handouts, school projects, instruction manuals, and church bulletins. But it has its limits. If you’re working on something more complex (think: a magazine-style layout with multiple columns, heavy graphics, or a commercial print job), you’ll have a much better time with a dedicated desktop publishing tool.
Alternatively, if you’ve already designed your pages in Word and just need to rearrange them into booklet order for printing, there are PDF imposition tools that can do that reordering for you, which is handy if you’re sending the file to a print shop.
Wrapping Up
Making a booklet in Word is surprisingly straightforward once you know where to look. The Book fold option in Page Setup does most of the heavy lifting for you. Whether you use a template or build one from scratch, the process is the same: set up the layout, add your content in normal order, and let Word handle the page arrangement. The only part that trips most people up is the print settings, so make sure you’re selecting Flip pages on short edge when printing double-sided.
Honestly, for quick booklets like event programs or handouts, Word is a solid choice. It’s already on most people’s computers and the results look genuinely good. Give it a try and you might be surprised how much you can do with it. If you run into any issues, the troubleshooting section above should have you covered.