

What’s more frustrating than finding a hotel, home, or event venue online and getting only five photos taken from flattering angles? A virtual tour lets you look around the space yourself, almost as if you were standing there.
I stumbled upon virtual tours through 360-degree photography, and they caught my eye because they work in an ordinary web browser. No VR headset required. Better still, making one is much easier than it first appears. You’ll learn how to plan, capture, build, test, and publish your own tour below.
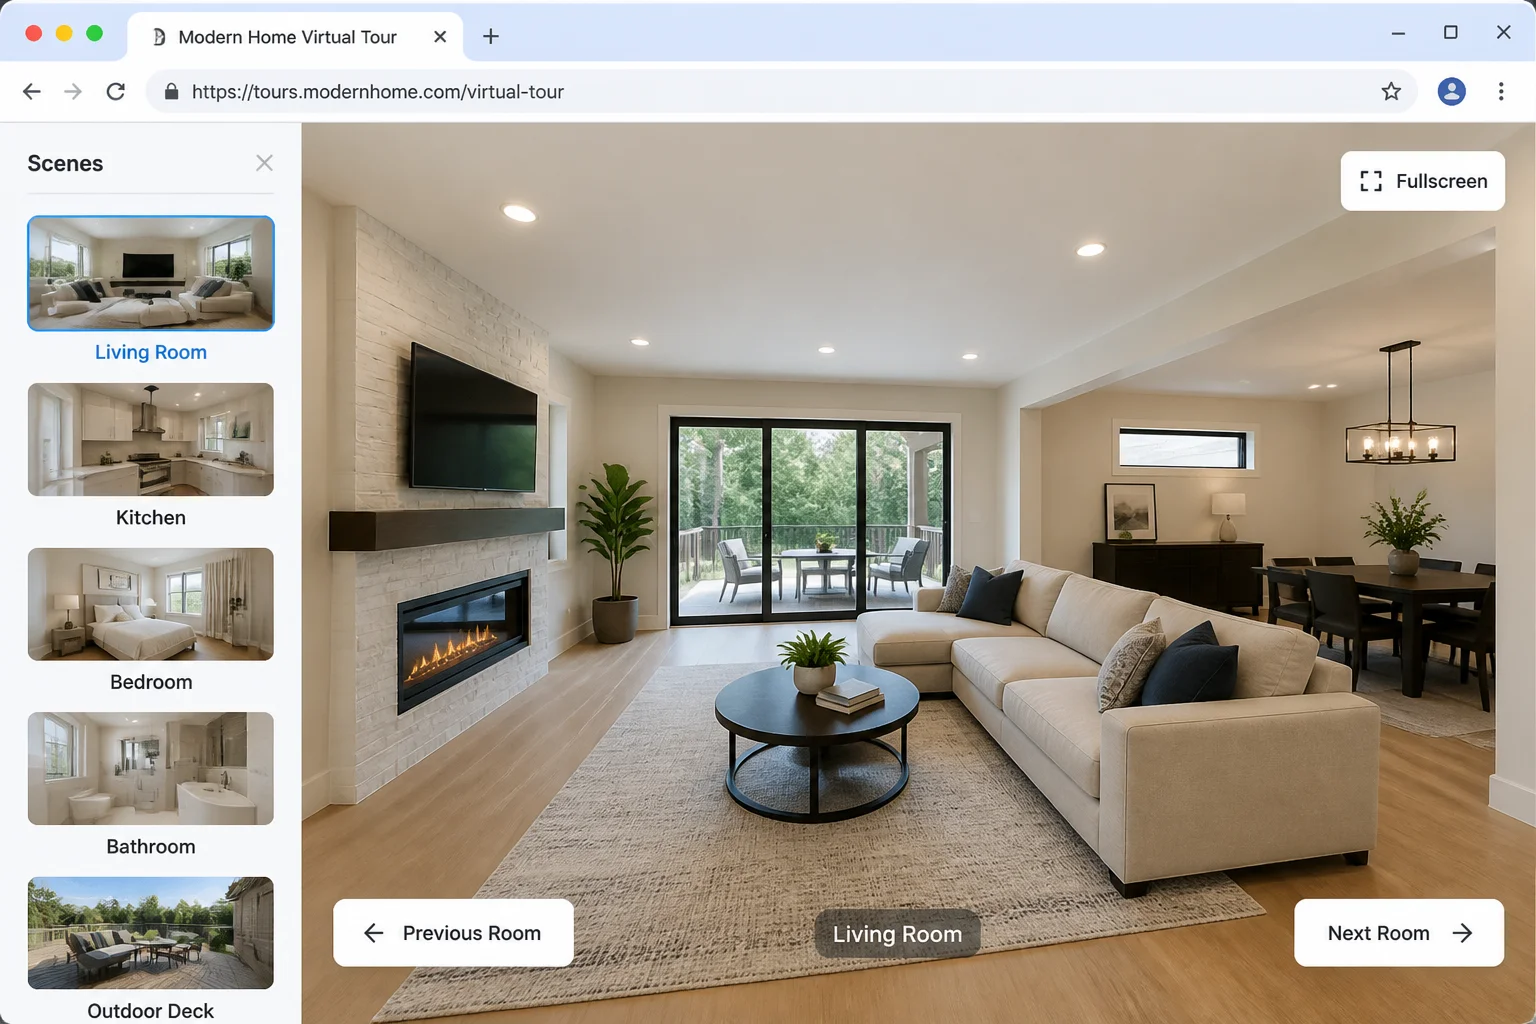
What Is a Virtual Tour?
A virtual tour is an interactive collection of 360-degree images, videos, or 3D scans that lets someone explore a real place remotely. Visitors can view it on a computer, phone, tablet, or supported VR headset.
Some tours follow a fixed route. Others let visitors jump freely between rooms using clickable hotspots, which are buttons placed inside the scene. More advanced tours create a spatially accurate 3D copy of the property, sometimes called a digital twin.
Key features:
- 360-degree views: Visitors can turn around and inspect the whole scene.
- Room-to-room navigation: Hotspots connect hallways, rooms, floors, or outdoor areas.
- Extra information: Labels can open text, photos, videos, booking pages, or contact forms.
- Maps and floorplans: Visitors can see where they are and move directly to another area.
- Cross-device viewing: Modern tours run in current desktop and mobile browsers, with VR support available on compatible platforms.
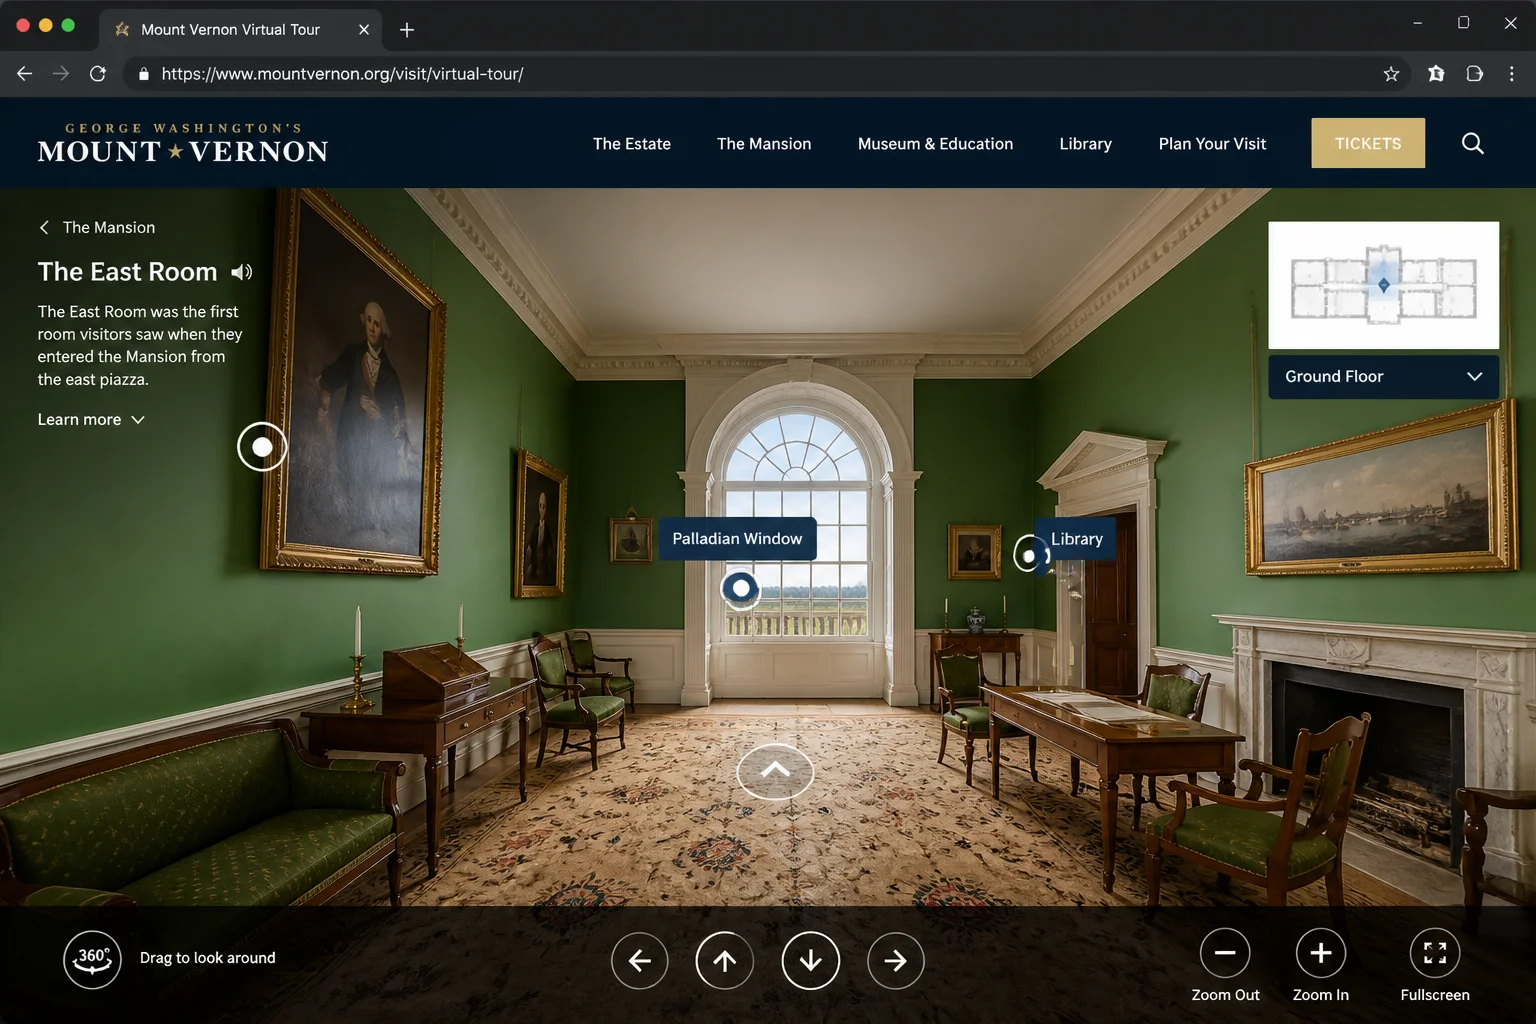
Real estate and hotels are obvious uses, but the list is much wider. Museums can add notes beside exhibits, universities can show prospective students around campus, and factories can create remote training materials. Tours also work well for shops, vacation rentals, event spaces, and historic sites.
Choose the Right Type of Virtual Tour
Before buying equipment, decide how visitors need to explore the space. This choice affects the camera, software, cost, and time involved.
| Tour type | How it’s created | Best for |
|---|---|---|
| 360 photo tour | Connected panoramic images | Homes, hotels, galleries, and small businesses |
| 3D scanned tour | A camera or depth sensor maps the space | Property listings, planning, measurements, and facilities |
| 360 video tour | Continuous immersive video | Guided visits, events, and travel experiences |
| Photogrammetry tour | Software builds a 3D model from overlapping photos | Historic objects, outdoor areas, and custom projects |
A 360 photo tour is the easiest starting point. It loads well on common devices and gives visitors control over where they look.
A 3D scan takes more work, but the result can include measurements, floorplans, room labels, and a dollhouse view. That last option shrinks the whole property into a model you can rotate (and yes, it looks surprisingly clever).
Photogrammetry is the advanced route. You take lots of overlapping standard photos, and software reconstructs the subject in 3D. I’d skip this method unless you need a detailed model of an unusual site or object.
Before You Begin
Make sure you have:
- A 360 camera, compatible scanning device, or supported phone or tablet
- A tripod or stable camera stand
- A phone or tablet for controlling the camera
- Access to the entire space
- A virtual tour platform account
- A current version of Chrome, Edge, Firefox, or Safari
- Permission to photograph the location and anything visible inside it
You don’t need a VR headset. You also don’t need to write code because modern tour builders handle publishing and navigation through visual editors.
What Camera Equipment Do You Need?
You have three practical capture options. Pick the one that fits the result you need rather than chasing the largest number printed on a camera box.
A 360-Degree Camera
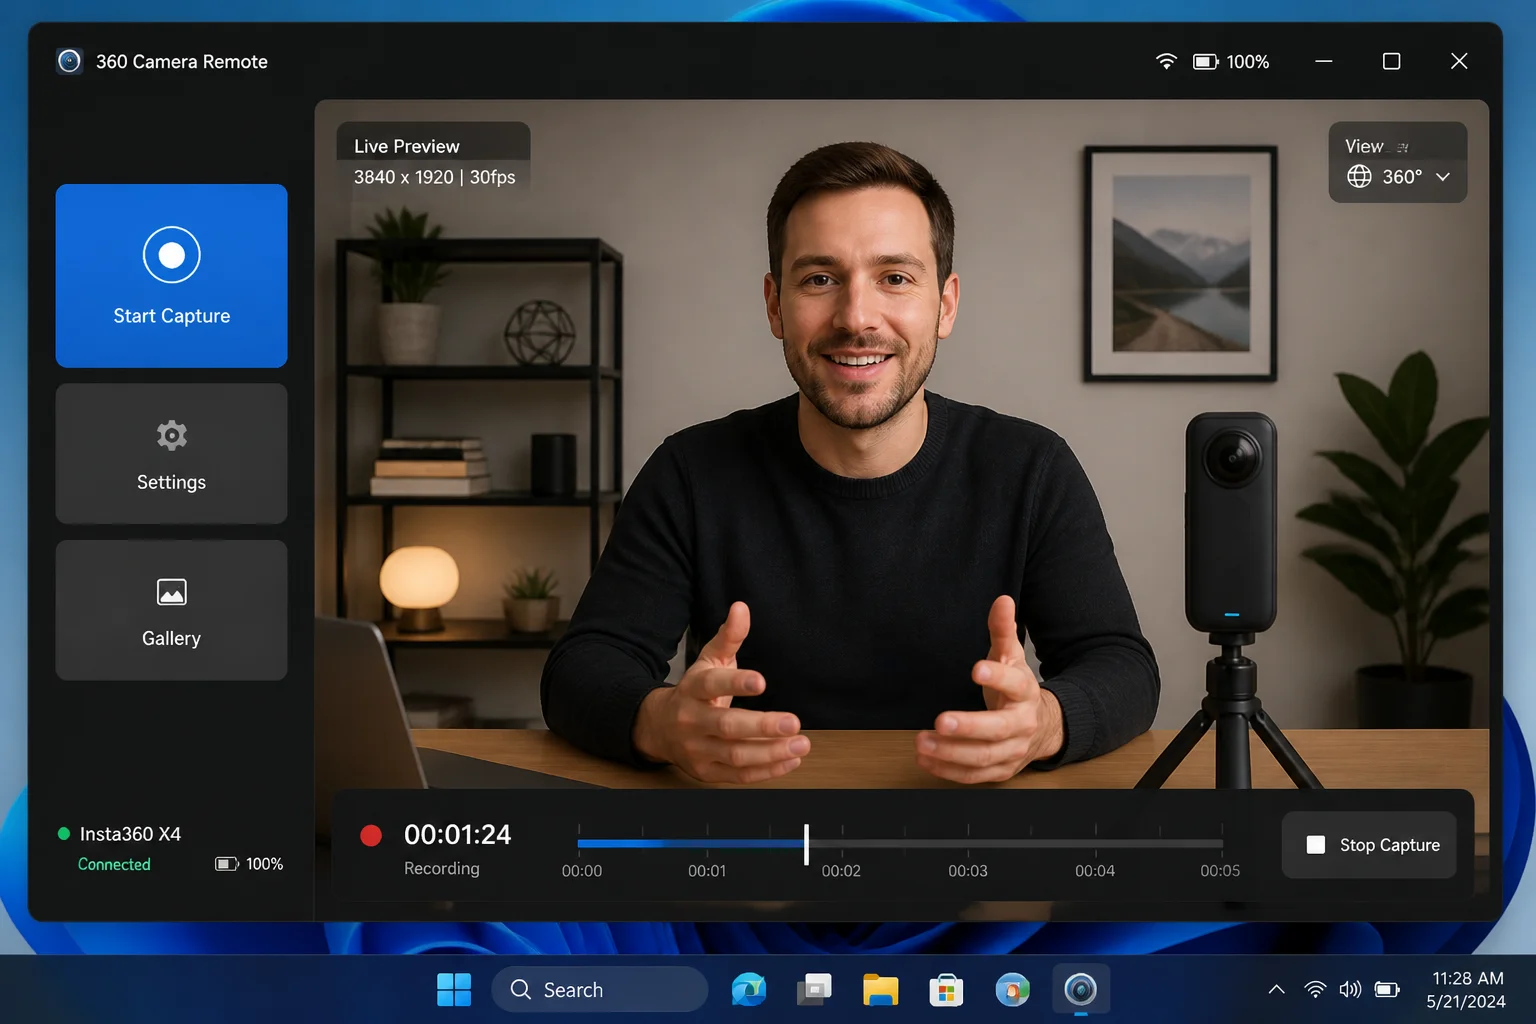
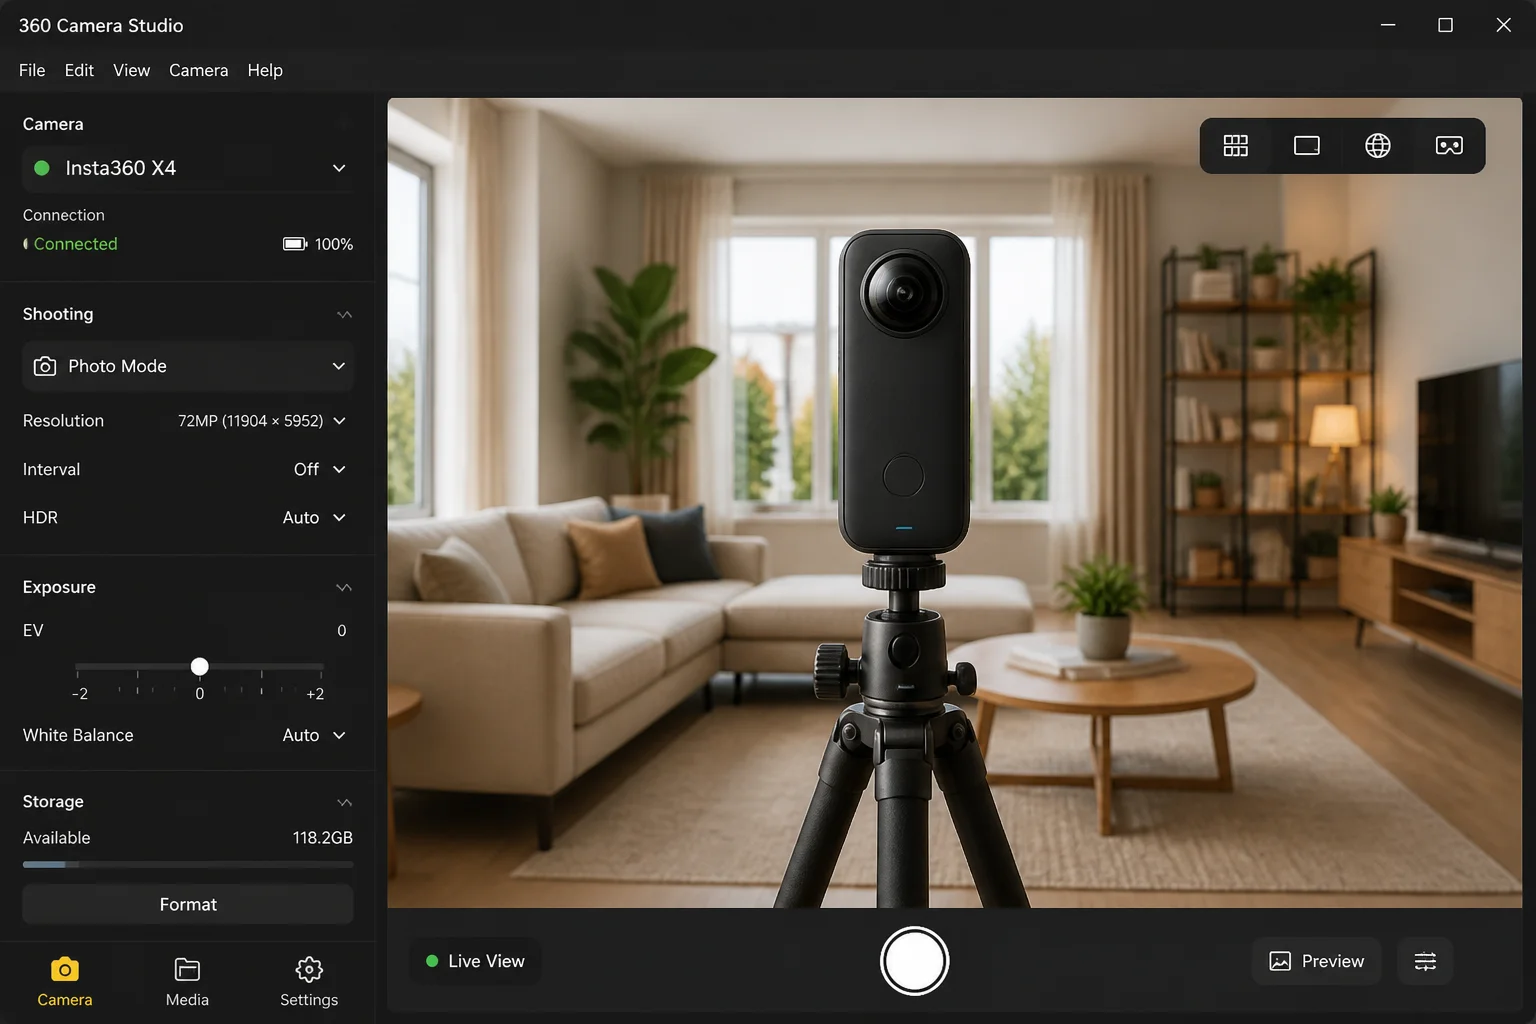
A dedicated 360 camera is usually the smoothest choice for an image-based tour. Current models from the Ricoh Theta, Insta360, and GoPro Max families can capture the full scene with one shutter press.
Place the camera on a tripod at roughly eye height, connect its mobile app, and trigger it remotely after stepping out of view. Hiding around a corner feels a little silly, but it saves you from appearing in every room.
Check these details before choosing a camera:
- Photo resolution: Higher-resolution images preserve signs, furniture, and small room details.
- Low-light performance: Interiors often contain dark corners and bright windows in the same shot.
- HDR support: High dynamic range combines different exposures to balance shadows and highlights.
- Automatic stitching: Stitching joins the camera’s separate views into one continuous panorama.
- Platform support: Confirm that your tour service accepts the camera’s file format and resolution.
A Phone or Tablet With a Depth Sensor
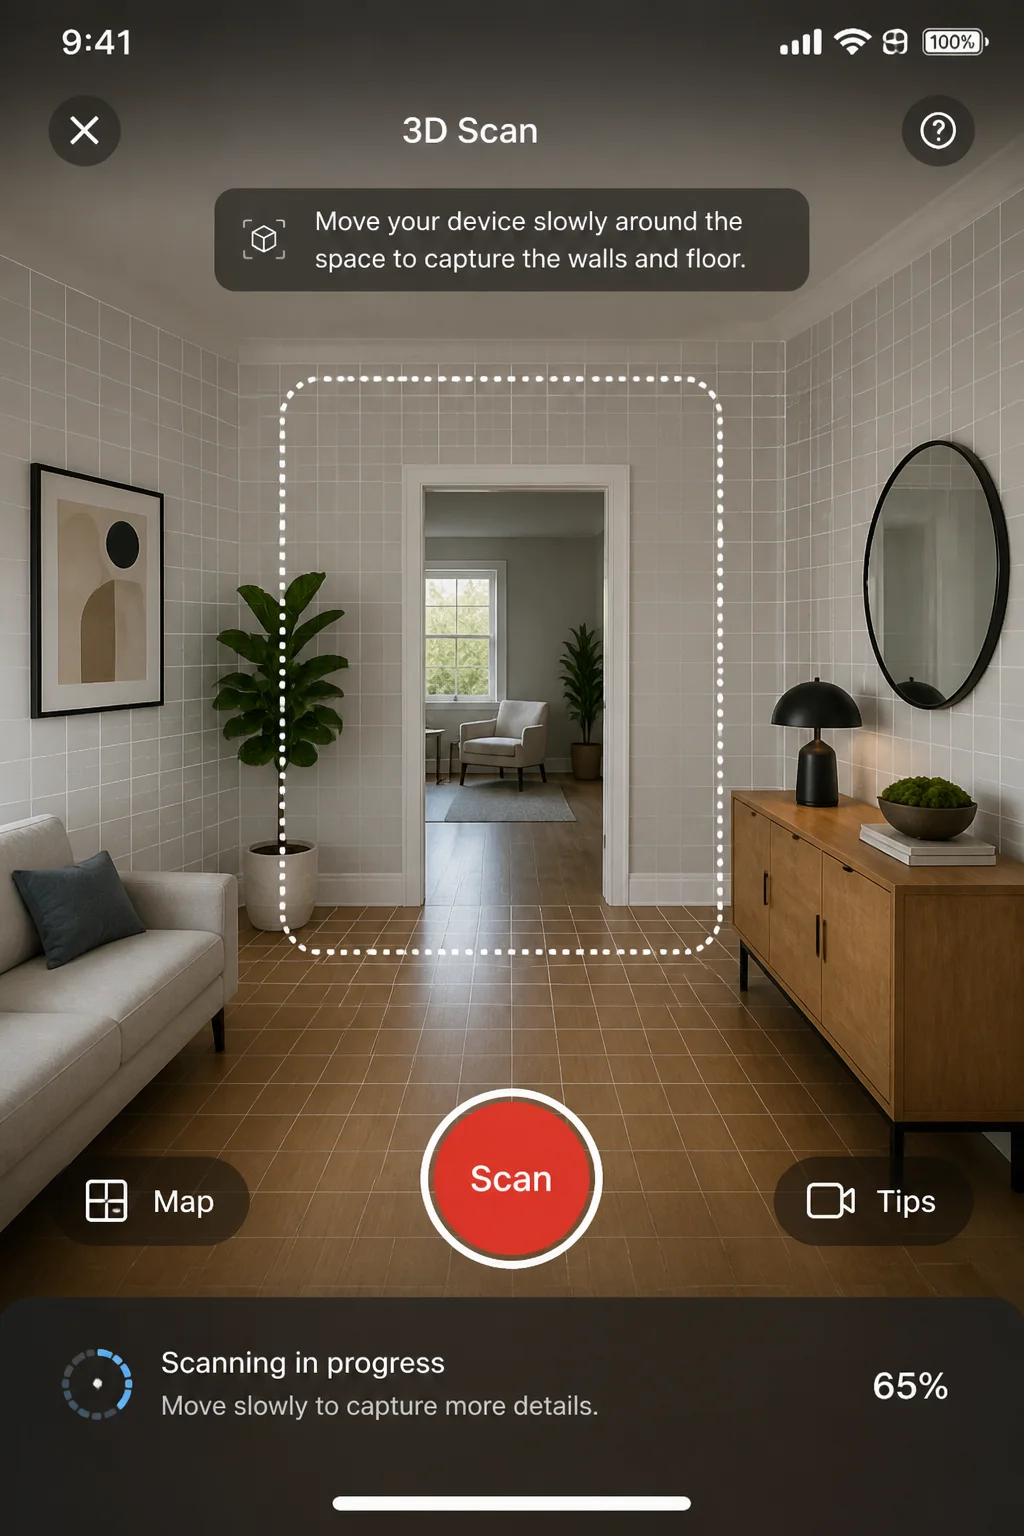
Some virtual tour platforms can scan a room with a compatible phone or tablet. A depth sensor, including LiDAR on supported devices, measures nearby surfaces and helps the app understand walls, floors, and furniture.
The app guides you around the space and uploads the scan to create a 3D model. This method is handy when you need floorplans or measurements and don’t want to carry a separate camera.
Availability depends on your device and chosen platform, so check the provider’s compatibility page before starting.
A Regular Camera With a Panoramic Head
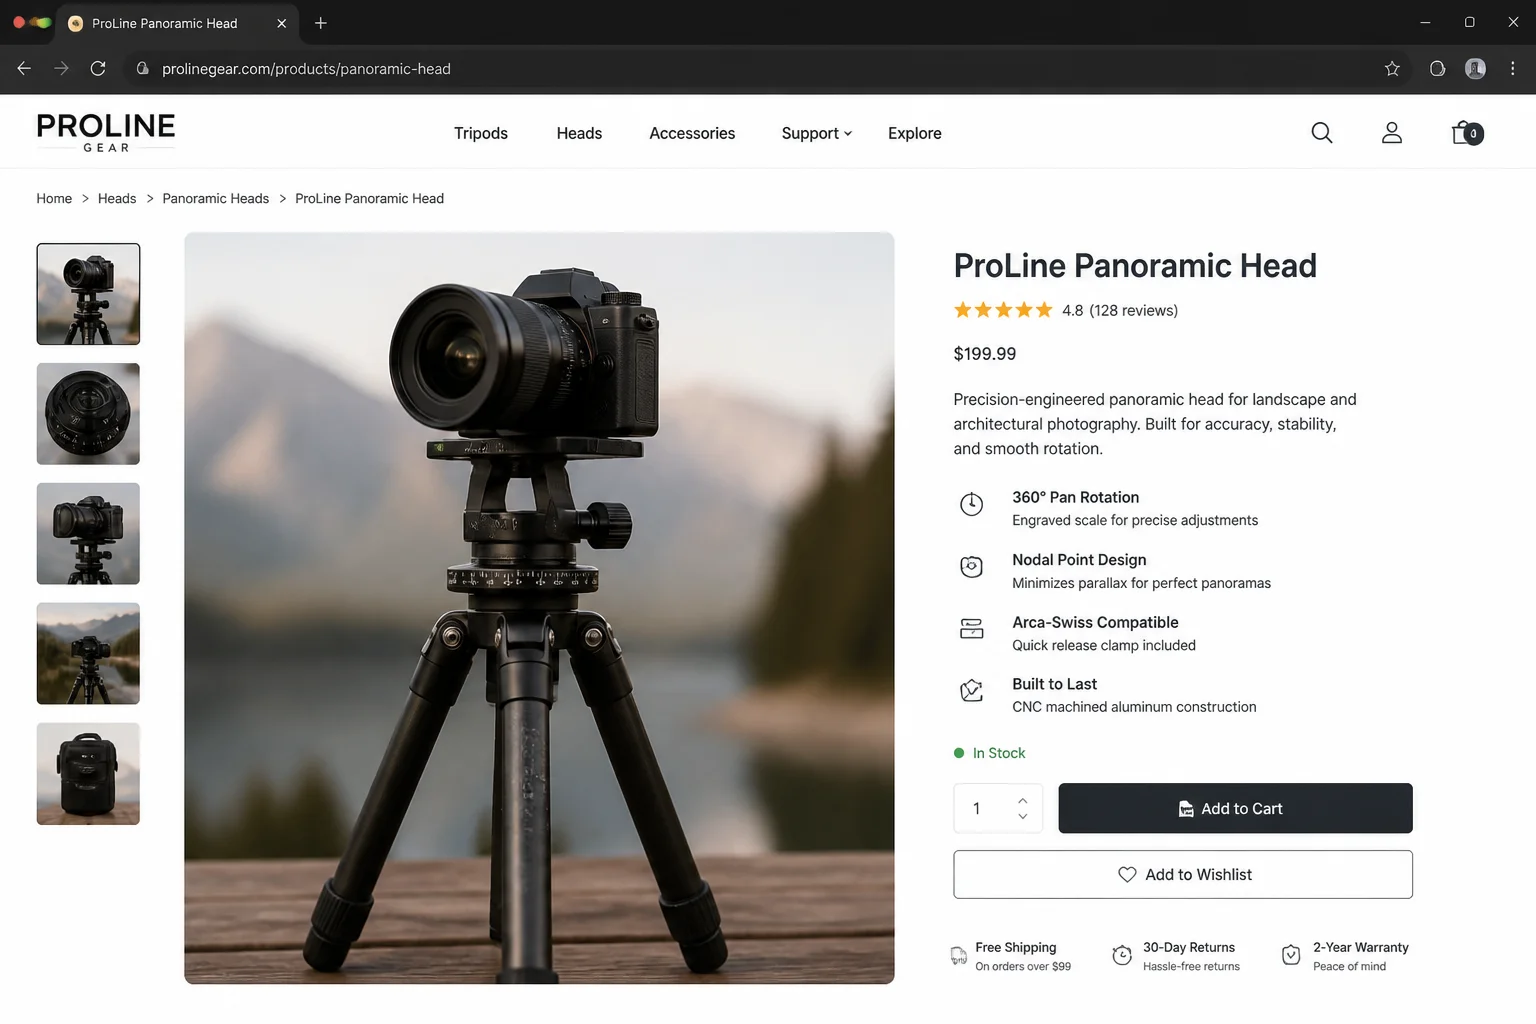
A DSLR or mirrorless camera can produce excellent panoramas when mounted on a panoramic head. This adjustable mount rotates the camera around the correct optical point, which reduces stitching errors.
You’ll take several overlapping photos and combine them with software such as PTGui. The process gives you more control over image quality, but setup and editing take longer. It makes sense for commercial photography where every detail matters.
How to Make a Virtual Tour
The exact buttons vary between platforms, but the workflow stays fairly consistent. Many services now automate room detection, image enhancement, labels, and navigation paths. Capture plus upload does much of the heavy lifting, which is a pleasant surprise the first time it actually works.
Step 1: Plan the Visitor’s Route
Write down the purpose of the tour and list every area visitors should see.
For a home, that may include the entrance, living room, kitchen, bedrooms, bathrooms, and backyard. A museum tour may need a route for each gallery. You should finish with a simple shot list and a sensible starting point.
Step 2: Mark Your Capture Positions
Choose a camera position in every room and along any connecting hallways.
Put the camera near the natural walking path rather than against a wall. Keep neighboring positions close enough that moving between them feels smooth. When you’re done, each capture point should connect logically to the next one.
Step 3: Prepare the Space
Turn on the lights, open curtains where appropriate, and remove clutter from view.
Hide private documents, family photos, alarm panels, keys, and anything showing personal information. Remember that a 360 camera sees almost everything, including the mess you pushed behind an ordinary camera.
Step 4: Stabilize the Camera
Place the camera on a level tripod at about eye height.
A stable camera keeps the horizon straight and reduces blurry details. Check that the tripod isn’t blocking a doorway or sitting somewhere a visitor would never naturally stand.
Step 5: Capture Every Position
Leave the camera’s view and take one 360 photo or scan at each marked location.
Use the camera or scanning app’s HDR or high-quality option when the room has mixed lighting. Review each result before moving on. You should see a sharp, level image without people walking through it.
Step 6: Process the Images
Use the camera app or desktop software to stitch and correct your photos.
Adjust brightness and color only enough to make connected rooms look consistent. Remove visible tripod parts when your software supports it, and inspect walls or furniture near stitching lines for strange bends.
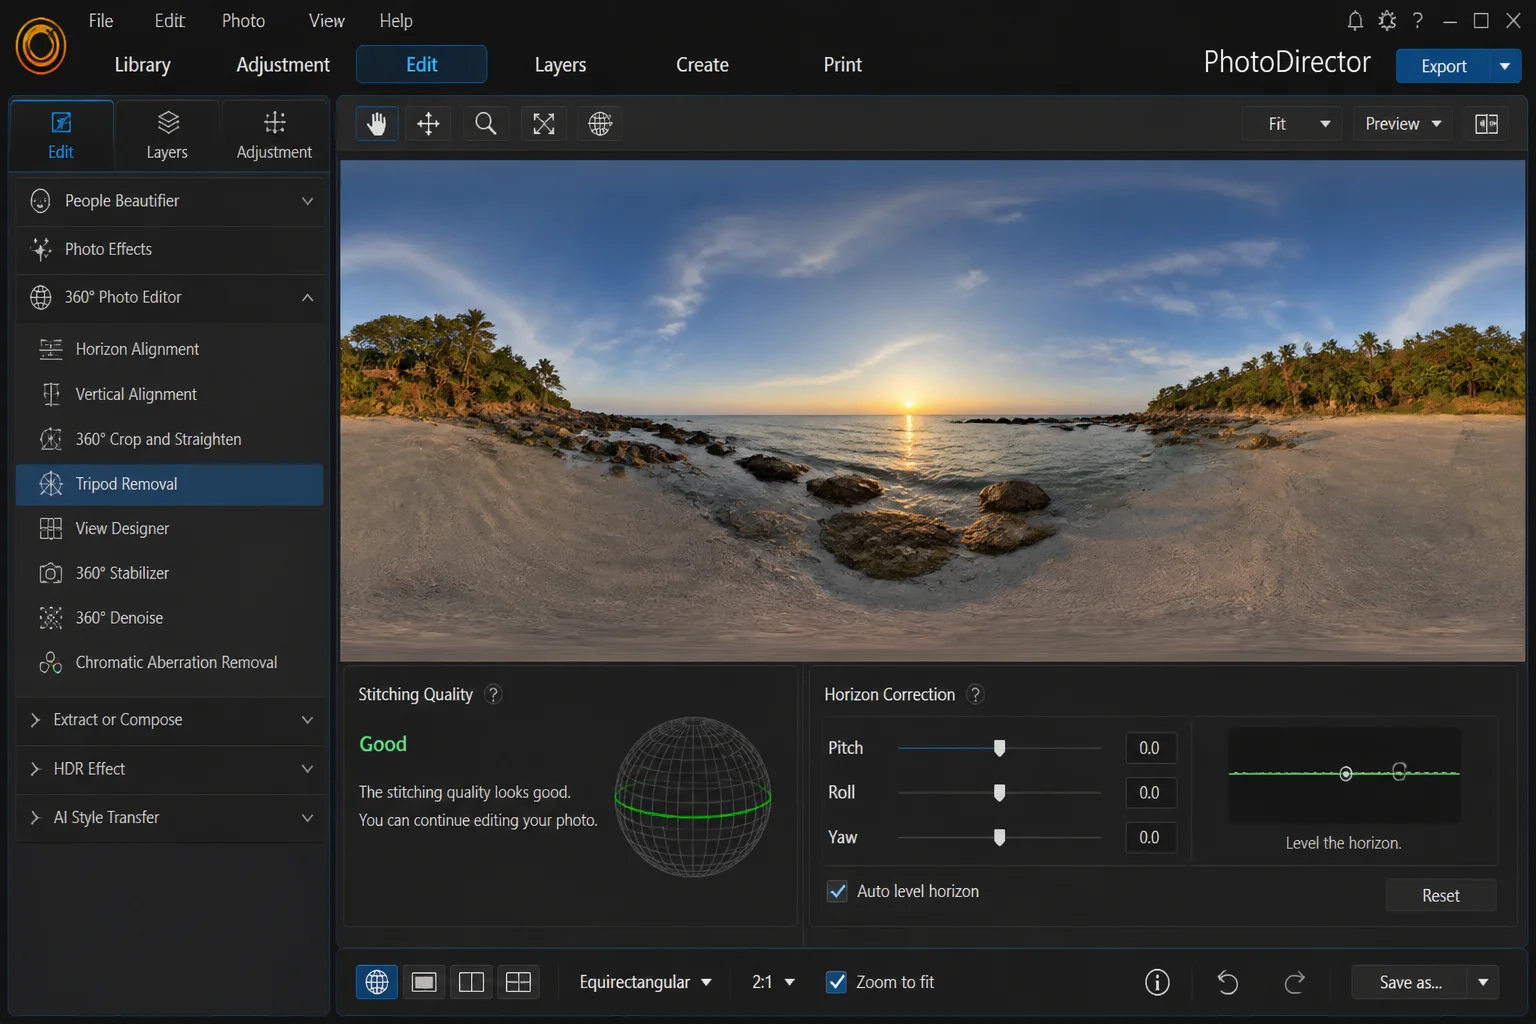
On Windows and macOS, the editing process is generally the same:
- Open the camera maker’s desktop app or your preferred panorama editor.
- Import the original 360 photos.
- Apply stitching, horizon, exposure, and color corrections.
- Export the images at the resolution and format recommended by your tour platform.
You should now have finished panoramic files ready for upload.
Step 7: Upload the Tour Files
Sign in to your chosen virtual tour platform, create a project, and upload the 360 images or scan data.
Platforms may call the project a Tour, Space, Property, or Model. After processing, you should see scene thumbnails, a floorplan, or a 3D model inside the editor.
Step 8: Arrange the Scenes
Put the uploaded scenes in the order visitors will encounter them.
Browser-based editors often let you drag thumbnails into place. A 3D platform may arrange rooms automatically and ask you to confirm its choices. Set the best-looking scene as the starting view.
Step 9: Add Navigation Hotspots
Place a navigation hotspot on each doorway, path, or staircase that leads to another scene.
Connect every hotspot to the correct destination, then test the return path. Visitors should be able to enter a room and get back out without hunting for an invisible button.
Step 10: Add Useful Information
Create information hotspots for details visitors may want to inspect.
You can add room names, exhibit descriptions, product photos, videos, booking links, or contact forms. Keep these labels short. A screen covered with floating buttons quickly starts to feel like a desktop full of forgotten shortcuts.
Step 11: Add a Map or Floorplan
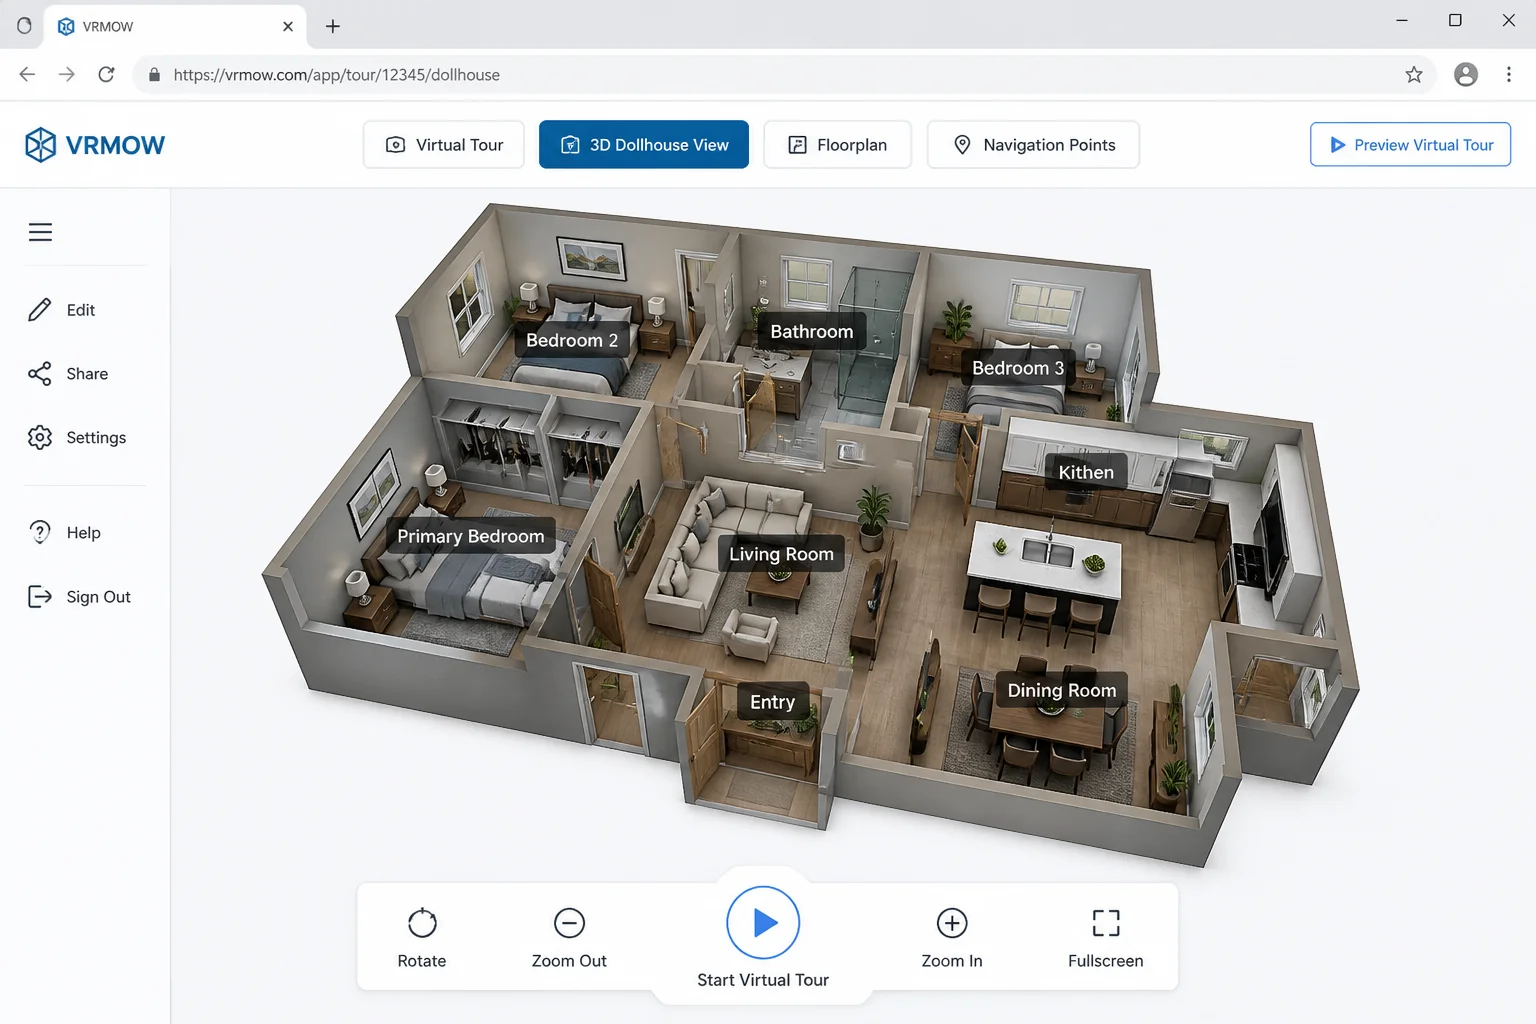
Enable the platform’s mini-map, floorplan, or dollhouse view when available.
Name rooms clearly, using labels such as Lobby, Kitchen, or Suite 101. Visitors should now be able to understand the layout and jump directly to another part of the tour.
Step 12: Customize the Tour Controls
Choose the starting view and configure the controls visitors will see.
Useful options include scene thumbnails, fullscreen mode, auto-rotation, branding, narration, and a map button. I’d keep auto-rotation slow or turn it off. Fast spinning looks flashy for about five seconds and then becomes annoying.
Step 13: Test on Every Device
Preview the complete tour on a computer, phone, and tablet.
On Windows or macOS, open the preview link in a current browser and click through every hotspot. On Android, iOS, and iPadOS, test touch controls, screen rotation, labels, and loading time. If the platform offers VR mode, use its recommended headset browser and confirm that WebXR support is available.
You should be able to complete the whole route without a dead end, misplaced label, or unreadable button.
Step 14: Publish and Share the Tour
Use the platform’s publishing controls to generate a share link or website embed code.
You can send the link directly, add it to a property listing, or place the supplied