
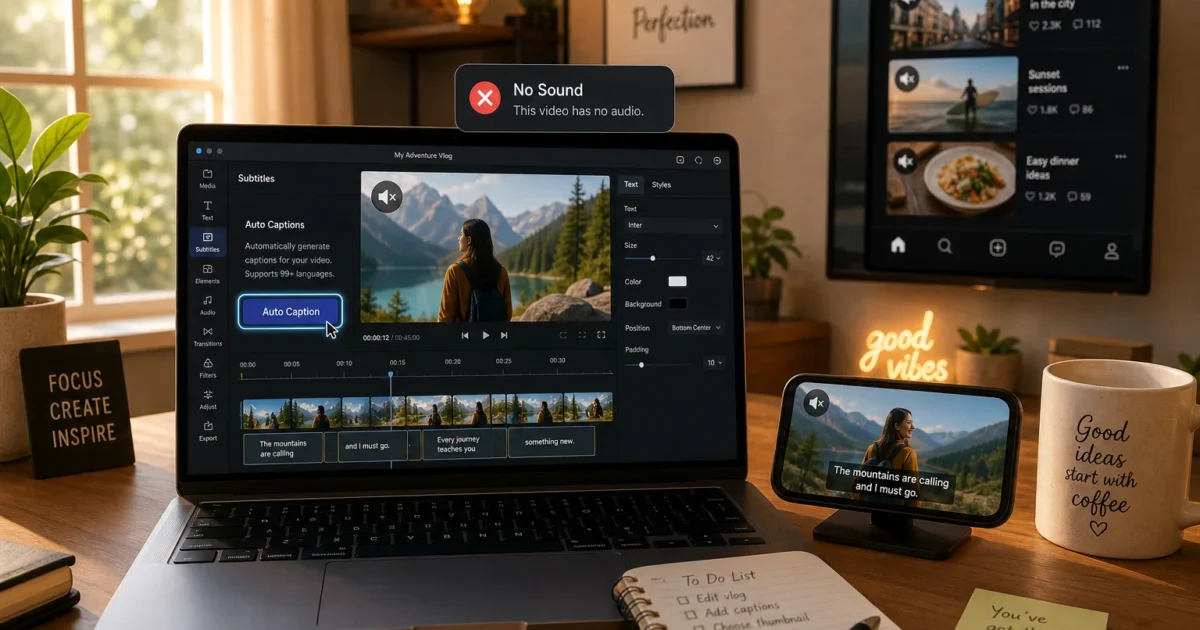
You put real time into that video, the lighting, the script, the recording. Then it lands in someone’s feed and plays in total silence. Every major social platform mutes video by default: TikTok, Instagram Reels, Facebook, LinkedIn, YouTube Shorts. Without subtitles, a big chunk of your audience scrolls right past without catching a single word.
The good news is that captioning your videos has gone from an hour-long chore to a five-minute job. AI transcription is now built into most free video tools, and modern engines hit 95–98% accuracy on clear audio. You don’t need to hire anyone on Fiverr or type out your own transcript. This guide covers the quickest free methods, from simple browser tools to a solid offline option for long or sensitive videos.
The 4-Step Subtitle Workflow
Whatever tool you pick, the process is essentially the same across all of them.
Step 1: Upload Your Video
Drop your file into the tool. Common formats work fine: MP4, MOV, AVI, MKV. A few tools also accept a YouTube or TikTok link directly, so you can skip the upload if your video is already live online.
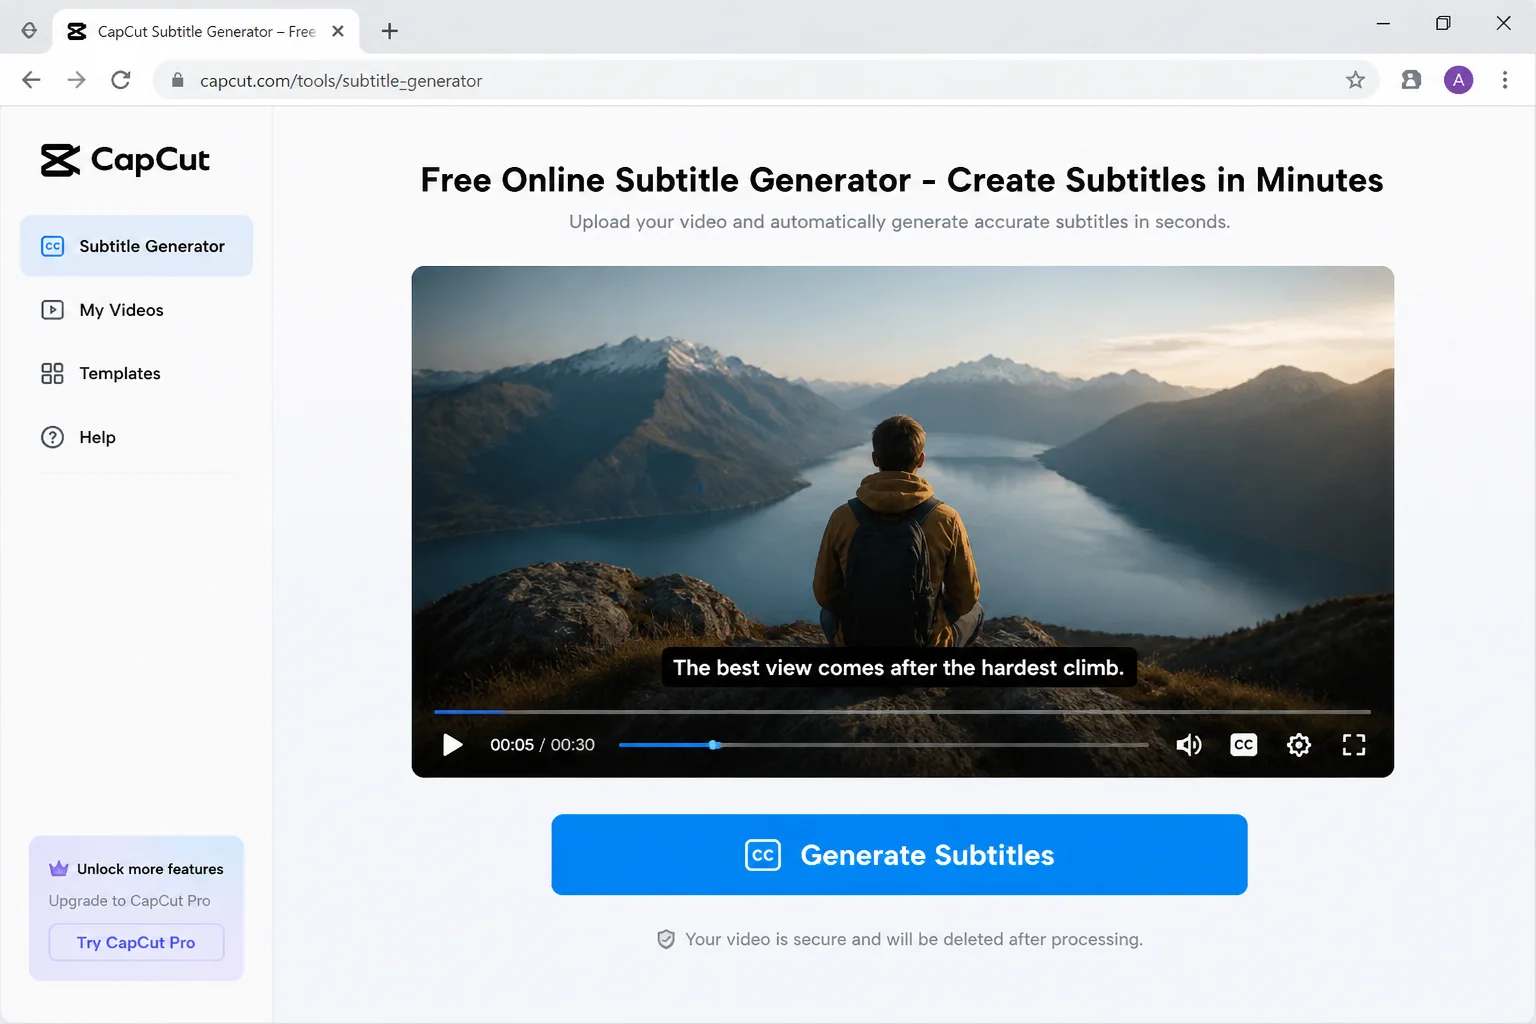
Step 2: Generate Captions Automatically
Find the auto-caption button. Different tools label it differently: Auto subtitles, AI captions, Generate captions, and Subtitle generator are all common. Click it, pick your language, and give the AI a minute or two to transcribe your audio into a timed caption track.
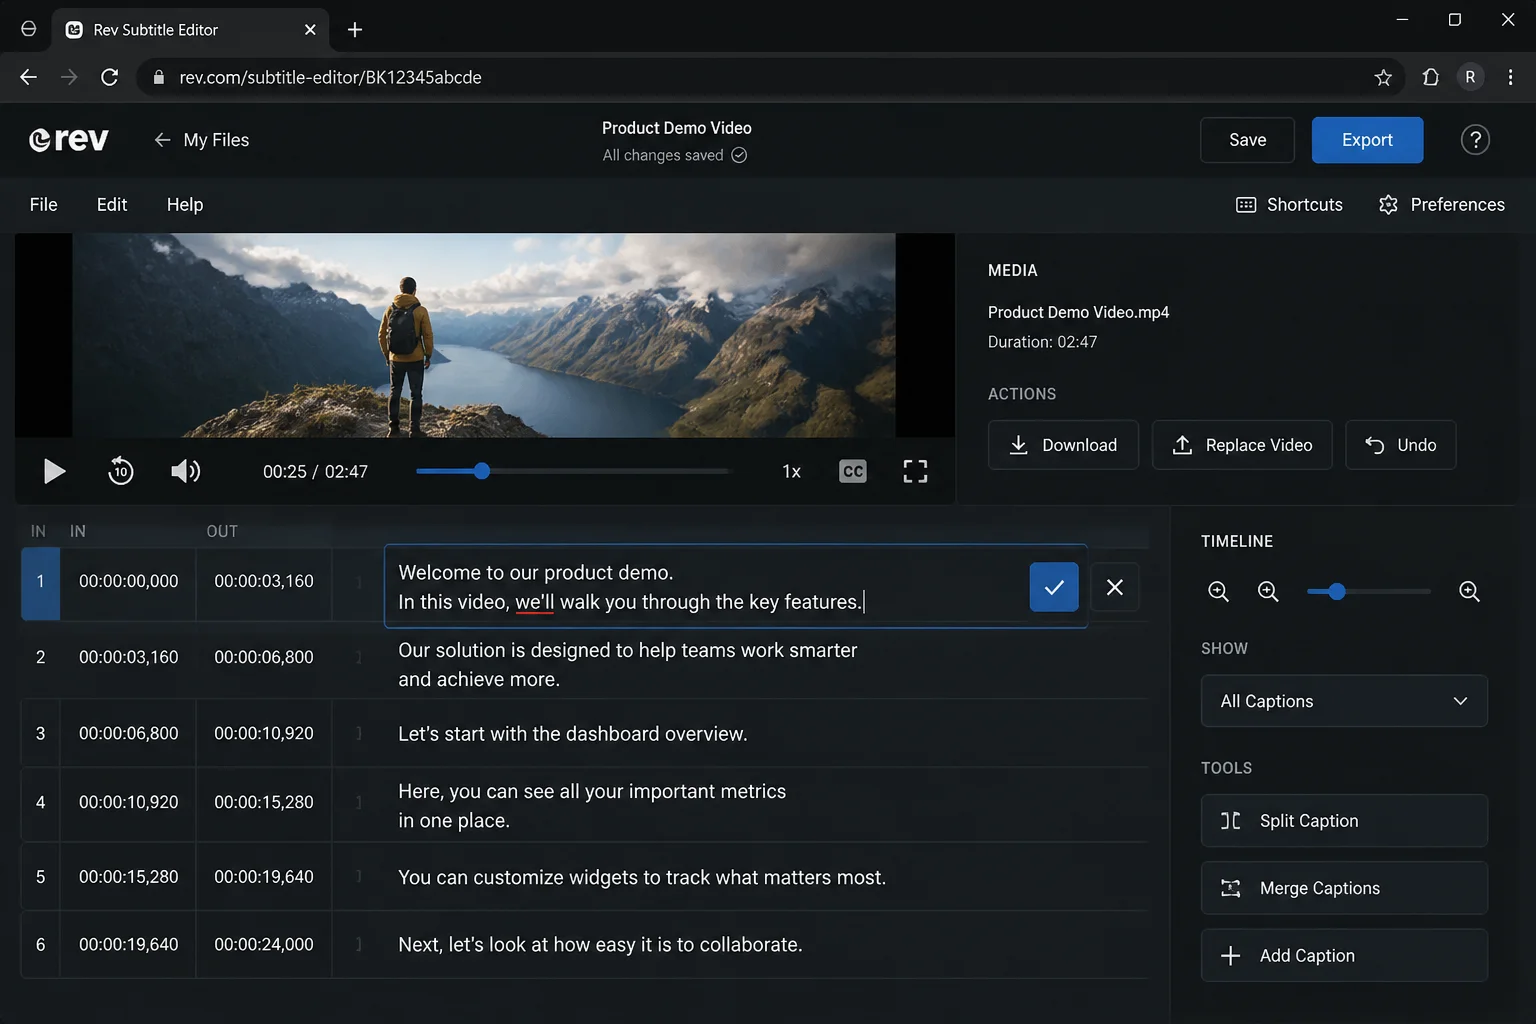
Step 3: Review and Edit
The AI nails most words. It stumbles on proper nouns, brand names, and anything technical or strongly accented, so those need a quick manual pass. Click any caption in the text editor and retype the correction; timing adjusts automatically in most tools.
Step 4: Style and Export
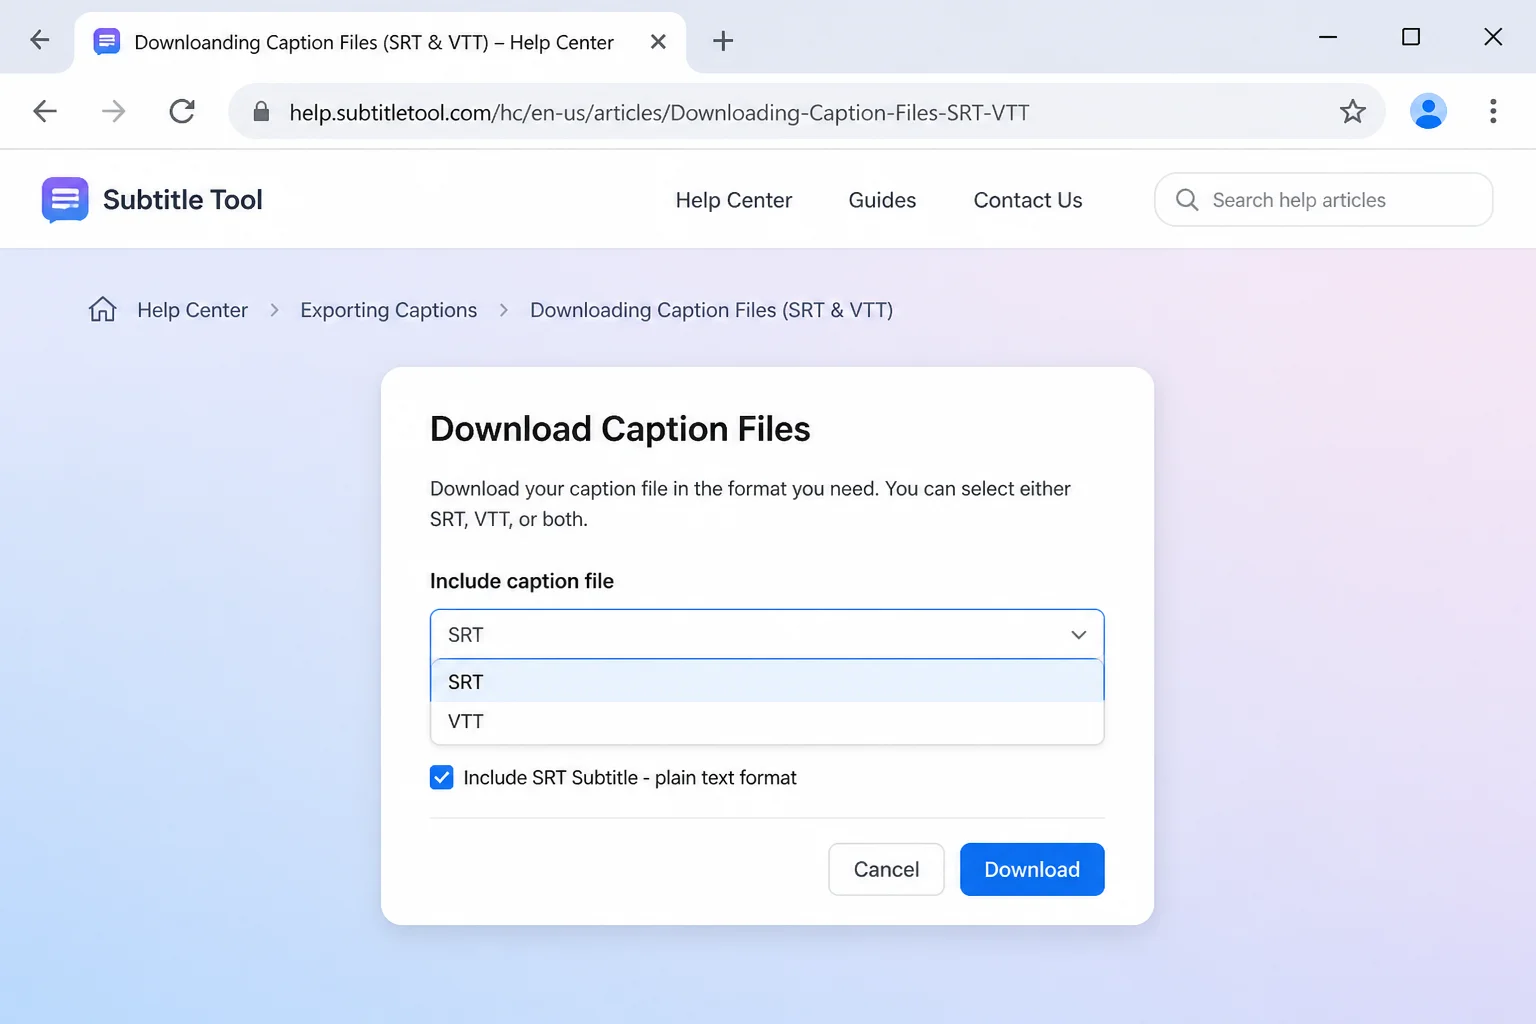
Set your font, color, and text size. Then decide on your output format:
- Burned-in captions (MP4 with captions baked into the picture): best for TikTok, Reels, LinkedIn, and Facebook feeds
- Subtitle file (
.srtor.vtt): best for YouTube, Vimeo, or any platform that accepts a separate caption file upload
Free Tools That Actually Work
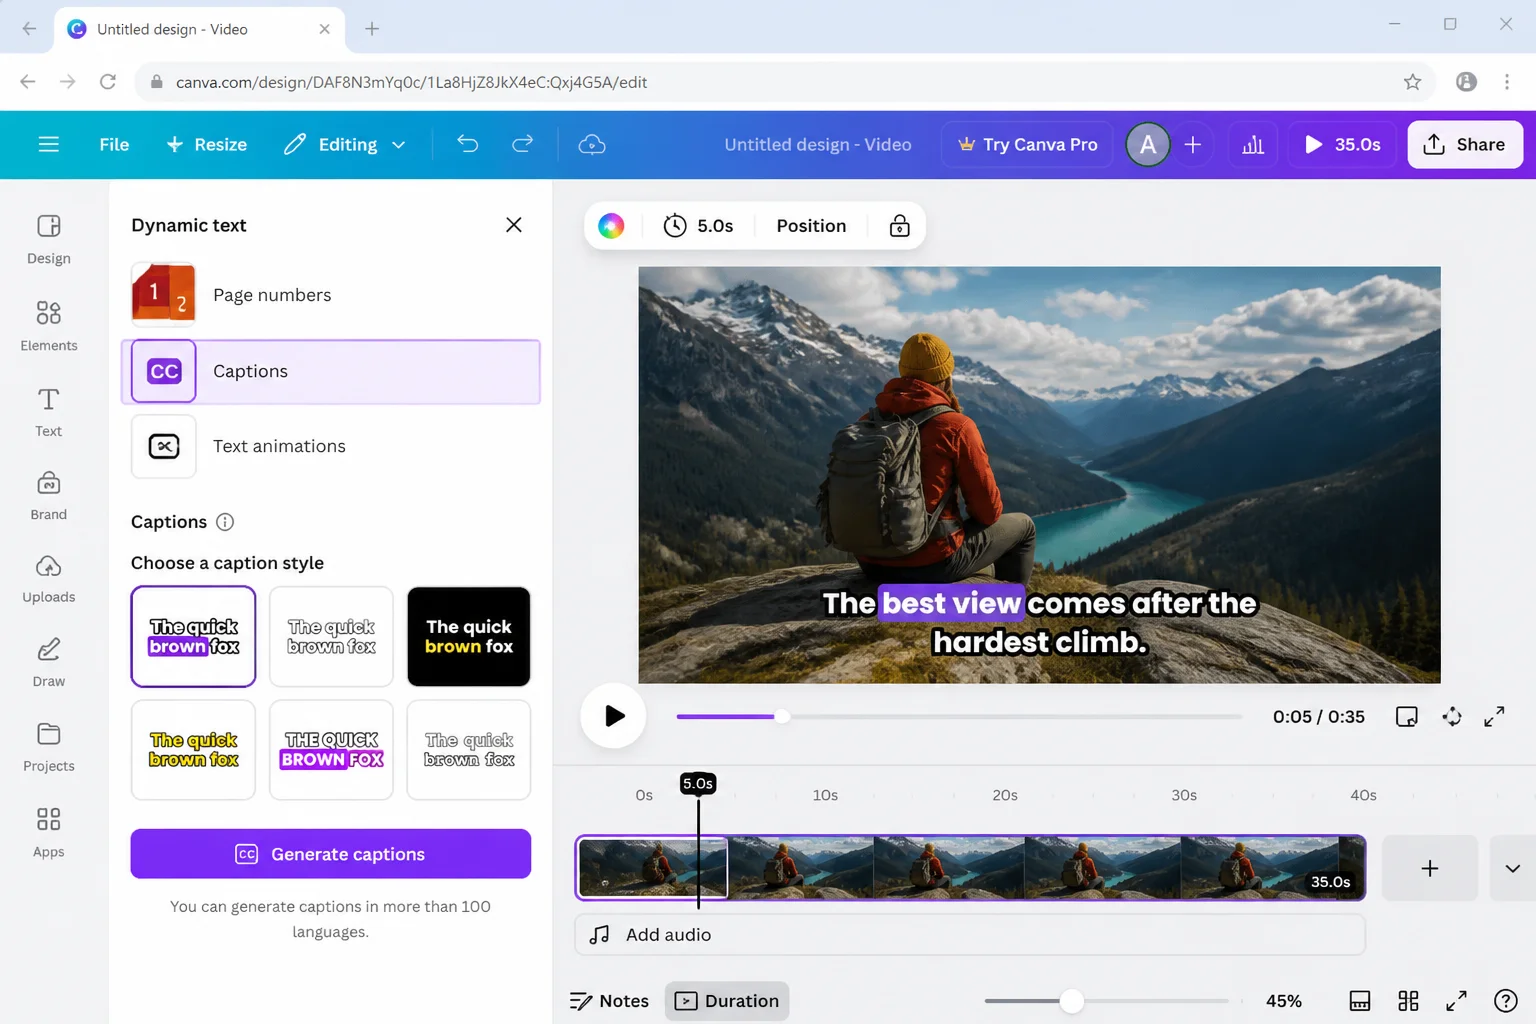
Canva
Canva’s caption generator is built right into the video editor and free on the base plan, with no watermarks on standard exports. It ships with styling presets for TikTok, YouTube, and other social formats, so the result looks polished without much extra work.
- Log into Canva and open or create a video project.
- Upload your video via the Uploads panel and drag it onto the canvas.
- Go to Text > Dynamic text > Captions and pick a caption style.
- Click Generate captions and wait for the transcription to finish.
- Click any caption block to correct errors.
- Click Share > Download and export as MP4.
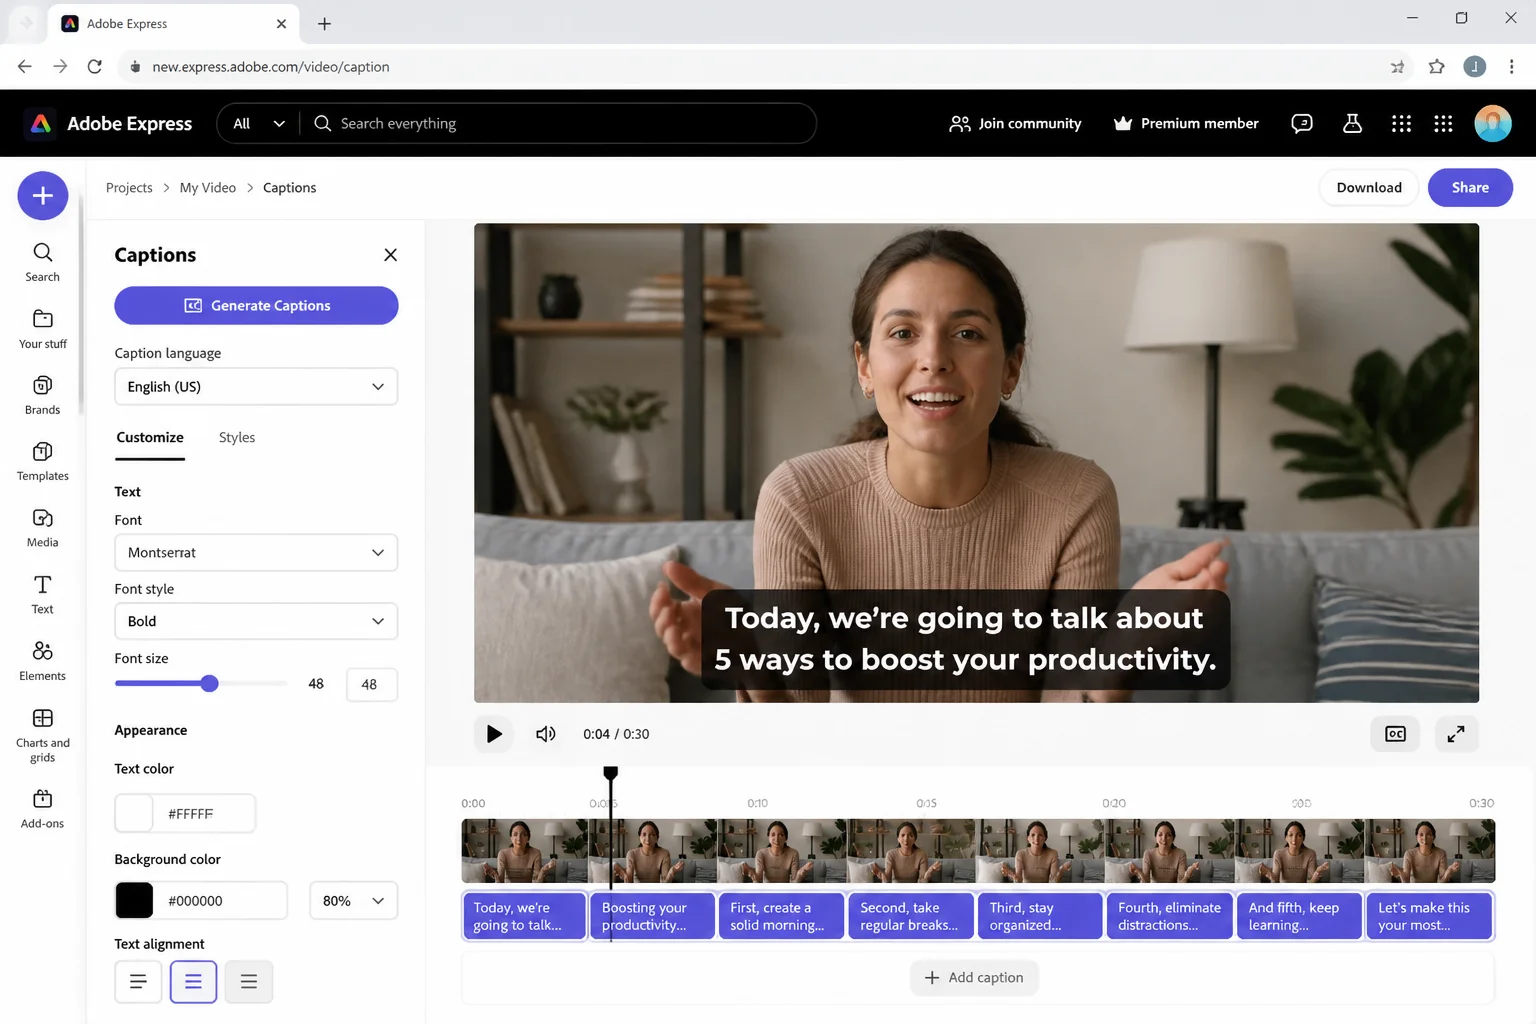
Adobe Express
Adobe Express trims the process down to almost nothing. Upload, generate, style, download. Good choice if you want clean captions without touching a full timeline editor.
- Go to Adobe Express and open the video caption tool.
- Upload your video and choose your language.
- Click Generate captions and select a font style.
- Edit any errors in the text panel.
- Download as MP4.
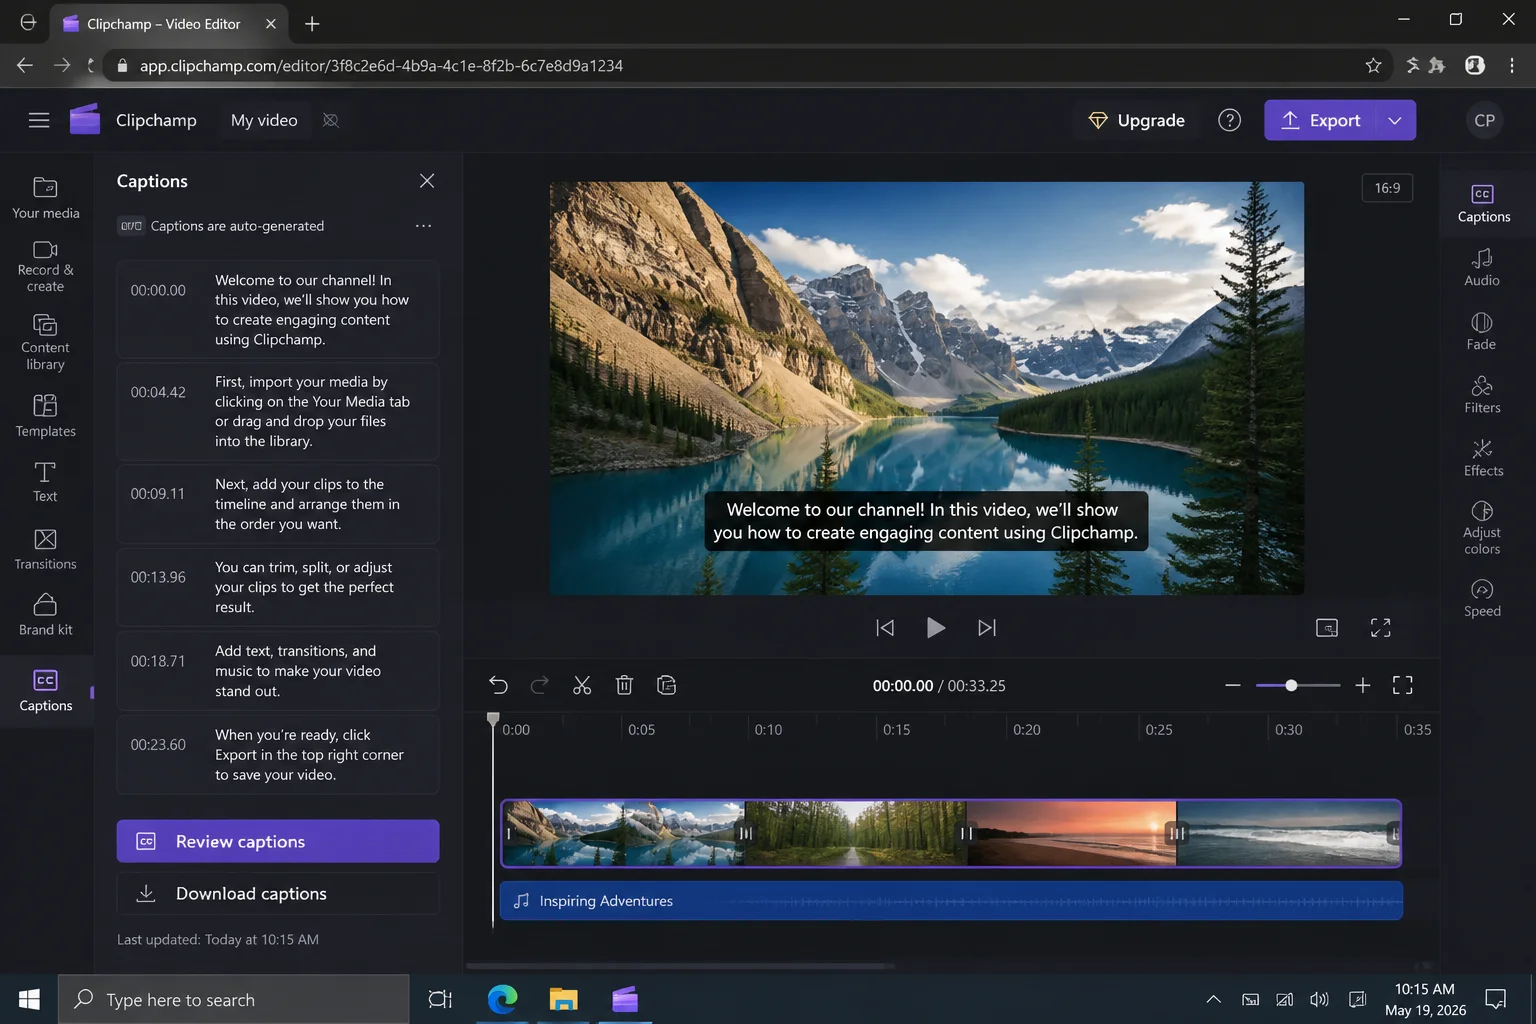
Clipchamp (Already on Windows 11)
If you’re on Windows 11, Clipchamp is already installed, with no setup required. It’s a proper video editor with AI captions built in, and it exports to MP4 with captions burned in.
- Open Clipchamp from the Start menu (type “Clipchamp” in the search bar if you can’t find it).
- Click Create a new video and import your clip.
- Drag your clip onto the timeline.
- Click Captions in the left sidebar, then Auto-generate captions.
- Choose your language and wait for the transcription.
- Fix errors in the captions panel, then click Export.
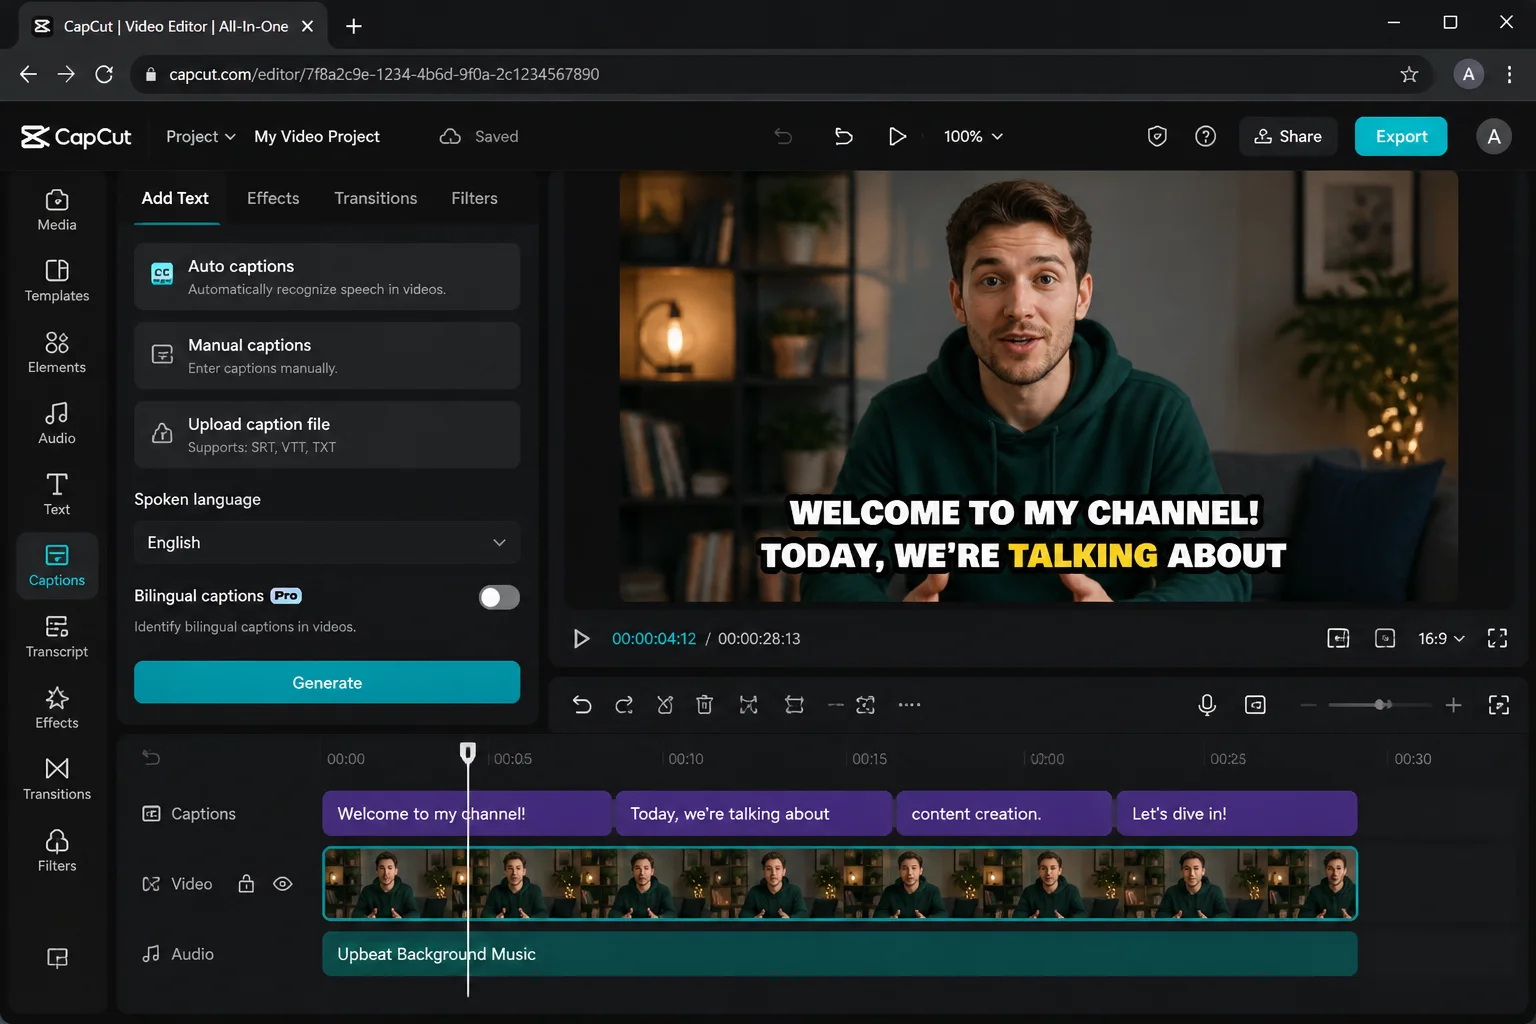
CapCut
CapCut is the go-to for short-form content, especially TikTok. The auto-caption presets look polished straight out of the box: animated word highlights, platform-specific sizing, the works. Core captioning features are free on both web and mobile, though some animated styles require a paid plan.
- Go to capcut.com and sign in.
- Create a new project and upload your video.
- Click Captions > Auto captions in the left panel.
- Select your language and click Generate.
- Edit captions in the text panel, pick a style, and export.
Using YouTube Studio (Smart if You’re Uploading There Anyway)
YouTube transcribes every video you upload, automatically, for free. If your video is heading to YouTube regardless, you can pull the auto-generated captions out of YouTube Studio as an SRT file, clean them up in a text editor, and use that file anywhere you need it. It’s a workflow that’s been around for a while, and it still holds up well.
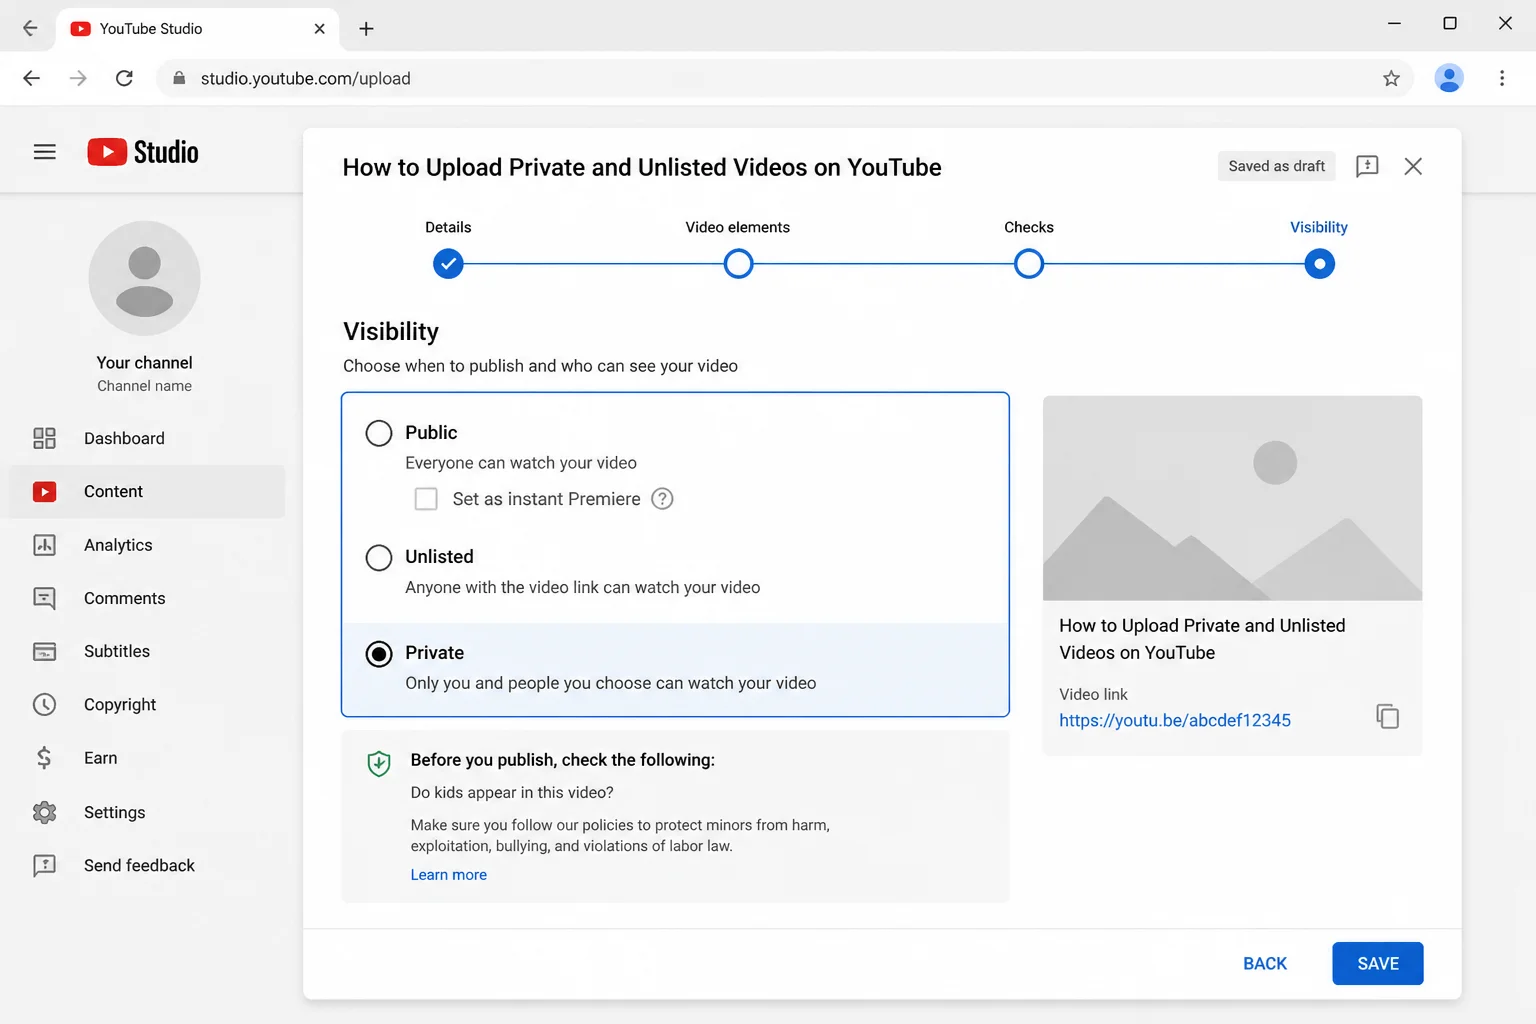
Step 1: Upload Your Video as Private
Click the camera icon in YouTube’s top-right corner and choose Upload video. Set visibility to Private before adding the file, that way it won’t go live while you’re working on captions.
Step 2: Wait for the Auto-Captions
Once your video finishes processing, YouTube generates a caption track automatically. Short videos are usually ready in a few minutes.
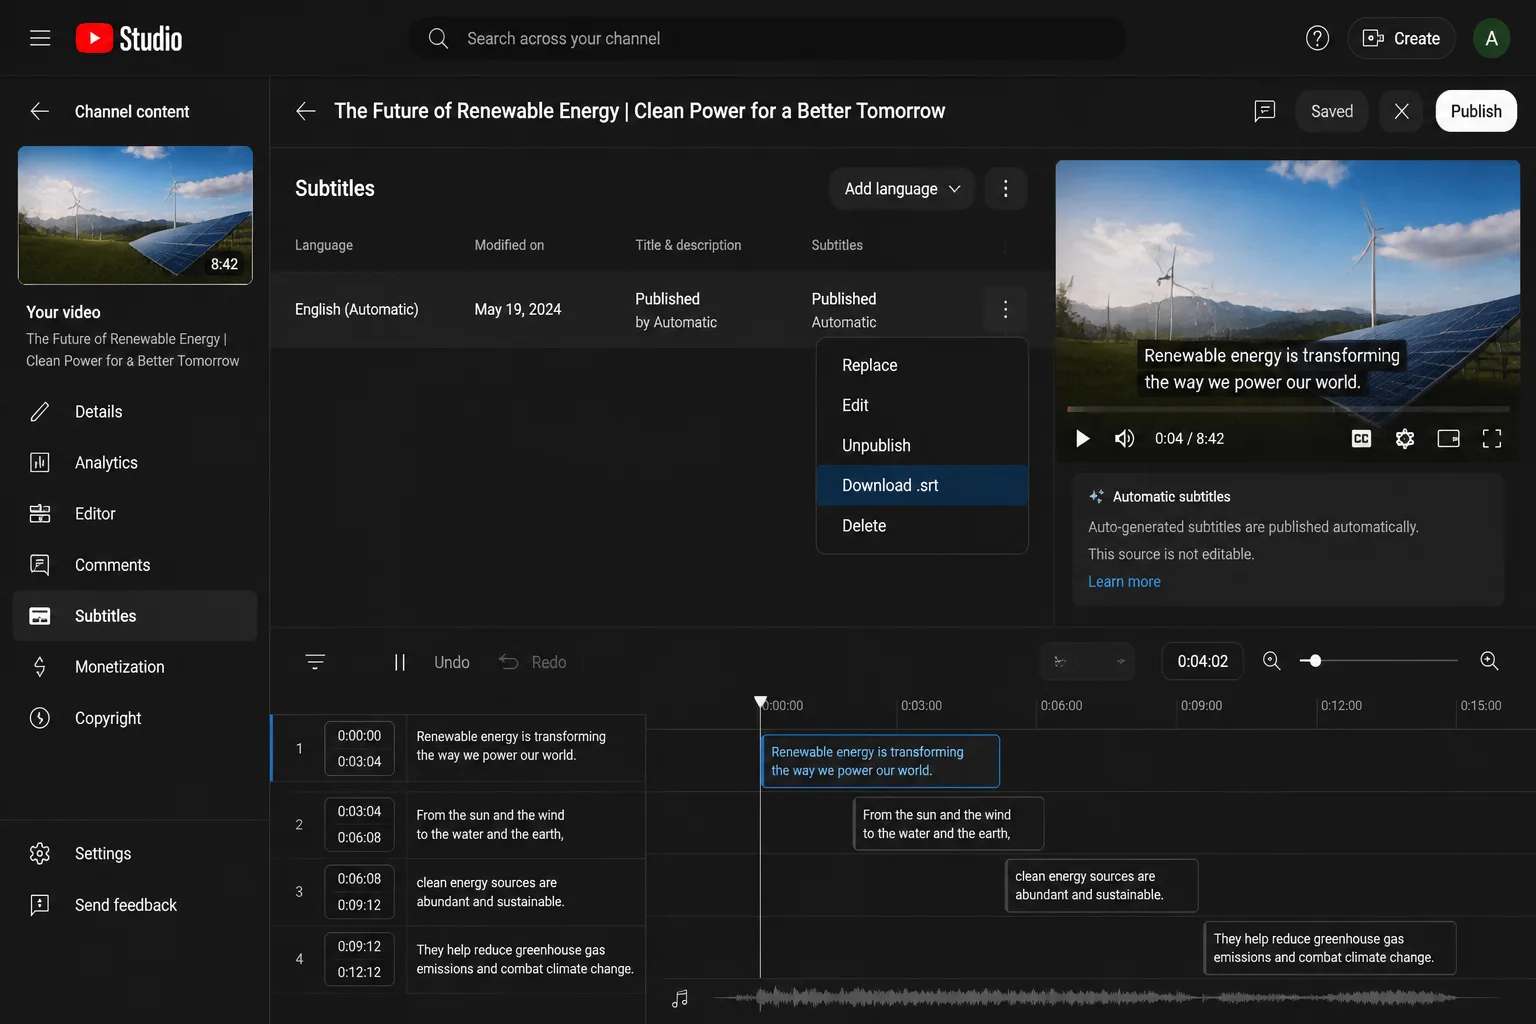
Step 3: Download the SRT File
- Go to YouTube Studio and click Subtitles in the left sidebar.
- Click your video to open it.
- Click the three-dot menu next to the auto-generated caption track.
- Choose Download > .srt.
Step 4: Edit the SRT File
Open it in Notepad (Windows) or TextEdit (macOS). An SRT file looks like this:
1
00:00:02,500 --> 00:00:05,000
Welcome to my channel.

2
00:00:05,100 --> 00:00:08,000
Today we're talking about subtitles.
Fix spelling, add punctuation, and correct any names. Leave the timestamps alone unless a caption is noticeably out of sync, editing them by hand is tedious and easy to mess up.
Step 5: Re-Upload to YouTube
If the video is staying on YouTube:
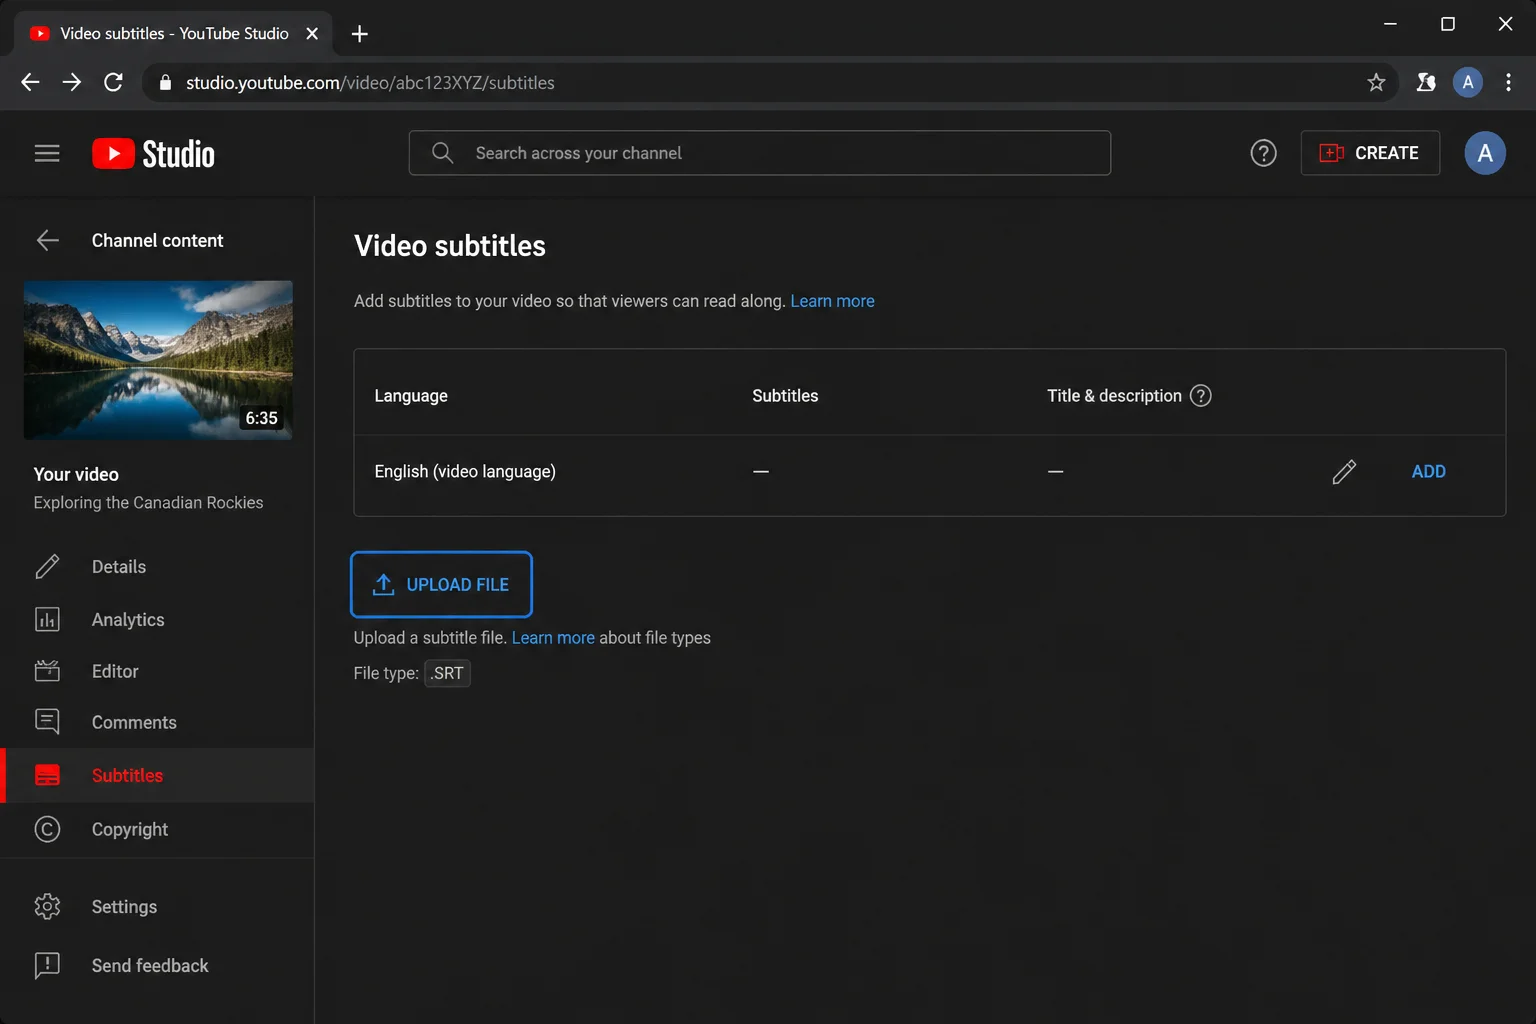
- In YouTube Studio, open Subtitles for your video.
- Click the three-dot menu next to the existing caption track and choose Upload file.
- Upload your edited
.srtand click Publish. - Flip the video from Private to Public when the captions look right.
For Long or Sensitive Videos: Subtitle Edit + Whisper
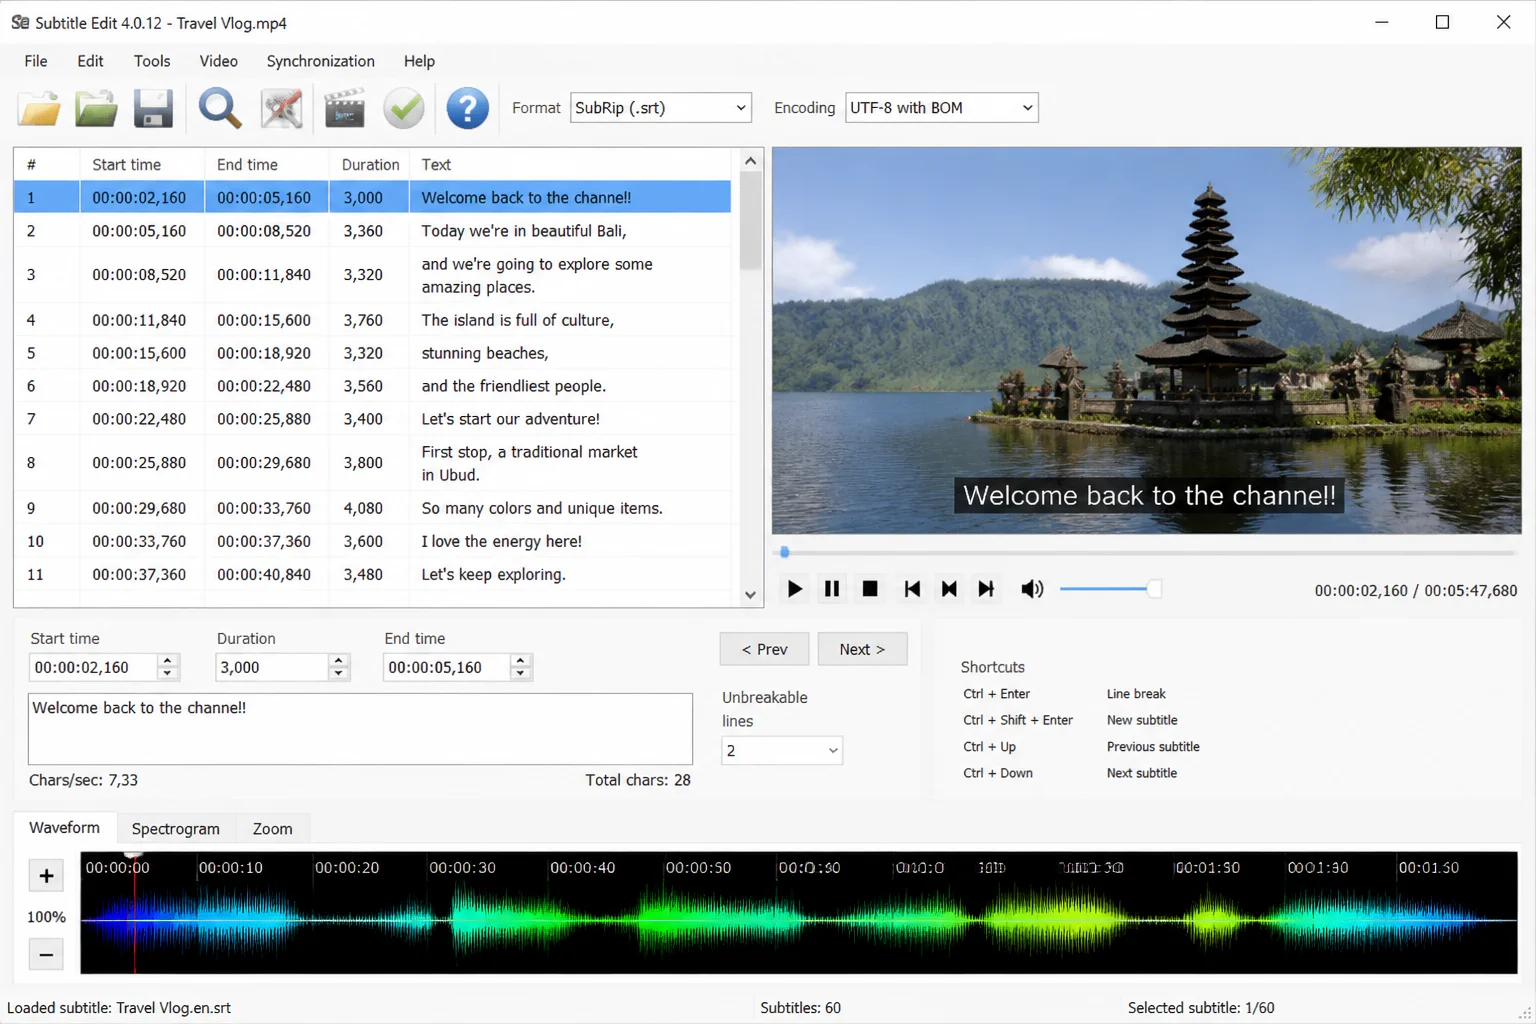
Some videos shouldn’t leave your computer, client recordings, medical content, anything private or confidential. And browser-based tools tend to slow down or crash on files longer than 30 minutes. For those situations, Subtitle Edit paired with OpenAI’s Whisper model handles the job entirely offline.
Subtitle Edit is free, open-source, and runs on Windows. First-time setup takes around 15 minutes, but after that you get unlimited local transcription with no watermarks, no file size limits, and nothing sent to anyone’s server. Mac users can get similar offline results with Buzz, a free desktop app that also runs Whisper locally.
Tips and Troubleshooting
Problem: The captions have a lot of errors
Background noise and music are the main culprits. If your audio is competing with anything else, such as a fan, a TV in the next room, or a music track, accuracy drops across every tool. Record in a quiet space when you can, and always do a manual pass for proper nouns and brand names. Those trip up every AI, every time.
Problem: The export has a watermark
A lot of “free” subtitle tools watermark your video unless you pay. Canva and Adobe Express don’t add watermarks to standard video exports. If you want something completely free with no catches at all, Subtitle Edit + Whisper offline is the cleanest option.
Problem: My SRT file won’t upload to YouTube
Check the file encoding. Open your .srt in Notepad, go to File > Save As, and confirm Encoding is set to UTF-8. On macOS, TextEdit handles this automatically. Also check that your filename actually ends in .srt. Windows sometimes silently appends .txt, turning it into subtitles.srt.txt, which platforms won’t accept.
Problem: The tool is slow or crashes on my long video
Browser-based tools struggle past 30 minutes. Break the video into segments, generate captions for each one, and merge the SRT files in a text editor. Or switch to Subtitle Edit + Whisper offline, which handles long files without breaking a sweat.
Caption Styling Tips
- High contrast matters. White or yellow text on a dark background reads on any screen in any lighting. Stylish low-contrast colors that look sharp on your monitor can be completely unreadable on a phone outdoors.
- Two lines maximum per caption. More text than that and viewers won’t have time to read it before it changes.
- Use the platform presets. Canva and CapCut both ship caption presets tuned for TikTok, YouTube, and Reels, the font sizes and line spacing are already figured out for you.
- Preview on mobile before you post. Font sizes that look fine on a desktop are often too small on a phone screen.
Wrapping Up
Adding subtitles is now a five-minute job, and you’ve got several solid free options depending on what you’re working on. For social content, Canva or CapCut get you styled, burned-in captions fast. For YouTube, the Studio SRT workflow is still clean and reliable. For anything long or sensitive, Subtitle Edit + Whisper keeps everything local.
| Method | Best For | Output |
|---|---|---|
| Canva | Social content, styled captions | MP4 (burned-in) |
| Adobe Express | Quick results, minimal setup | MP4 (burned-in) |
| Clipchamp | Windows 11 users | MP4 (burned-in) |
| CapCut | TikTok and short-form content | MP4 (burned-in) |
| YouTube Studio | YouTube videos | .srt download |
| Subtitle Edit + Whisper | Long videos, offline, private content | .srt, .vtt |
Pick the method that fits your situation and stop watching your videos scroll past in silence. If you’ve already got an SRT file and just need to play it back locally, check out our guide on displaying SRT files in a video player.