
Introduction
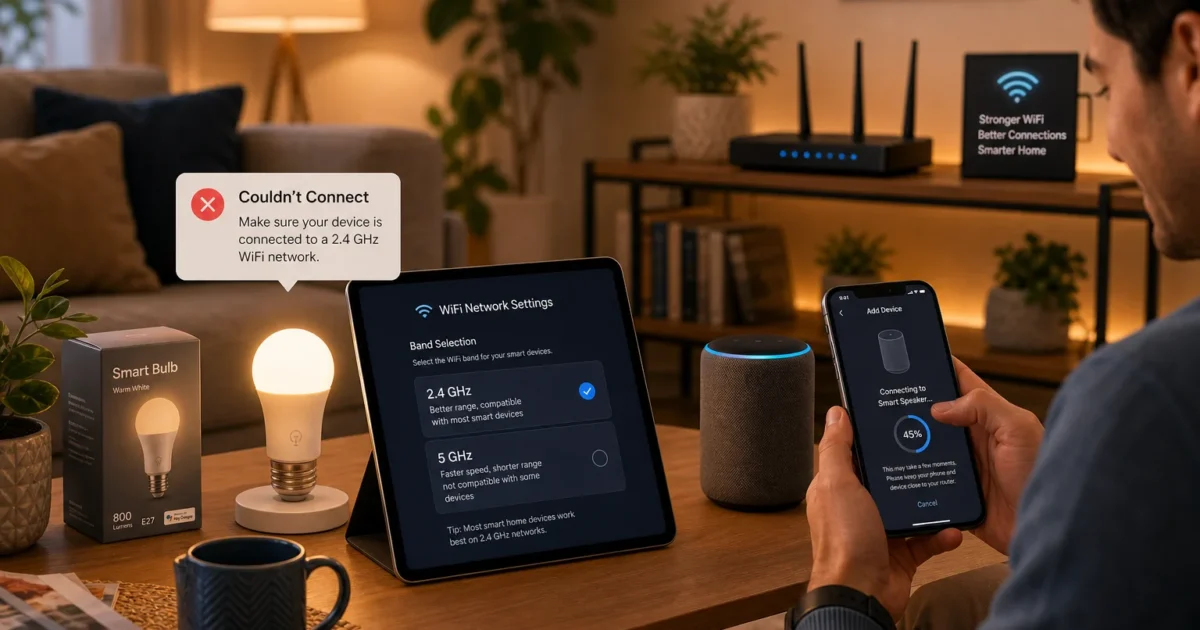
What’s more annoying than a smart light that suddenly forgets how to be smart? Many accessory problems are really WiFi problems in a cheap disguise. This guide will help you build and test a reliable network before adding lights, plugs, cameras, speakers, and Matter devices.
You’ll check router placement, WiFi bands, security, and how you connect each device. You’ll also know what to try before a factory reset (the sledgehammer of smart-home fixes).
What Is a Smart Home WiFi Setup?
A smart home WiFi setup is the network connecting your phone, accessories, speakers, and home hubs. It helps those devices find and control one another. You don’t need a separate product or subscription.
A good setup provides:
- Reliable coverage: Devices stay connected in the rooms where you use them.
- Compatible WiFi bands: Each accessory gets the 2.4 GHz or 5 GHz support it needs.
- Enough router capacity: The router can handle your household’s growing pile of connected gear.
- Local communication: Phones, accessories, and hubs can find one another.
- Basic security: Strong encryption and passwords keep unwanted visitors out.
This matters when you’re building a smart home or adding gear in distant rooms. It also helps when devices keep dropping offline. Nobody enjoys reopening an app just to turn on a lamp.
Prerequisites
Make sure you have:
- A working modem and WiFi router or mesh system
- Your WiFi network name and password
- The router’s manual, mobile app, or administration address
- An iPhone or iPad with iOS 17 or later for current Google Home guidance
- An Android phone or tablet with Android 9 or later for current Google Home guidance
- The latest Google Home, Apple Home, Alexa, or manufacturer app
- The accessory’s box, manual, or setup code
- Access to a 2.4 GHz network if the accessory requires it
- A compatible Apple home hub if you want remote Apple Home control
- About 30 minutes for network checks and the first device
Important: Basic smart-home setup doesn’t require Alexa+ or another paid assistant plan. You still need your own network equipment, internet service, and smart devices.
Step-by-Step Guide
Step 1: Test the Existing Internet Connection
Before touching the smart device, make sure the internet works on your setup phone. This quick check can stop you from blaming an innocent light bulb for a router problem.
On iOS
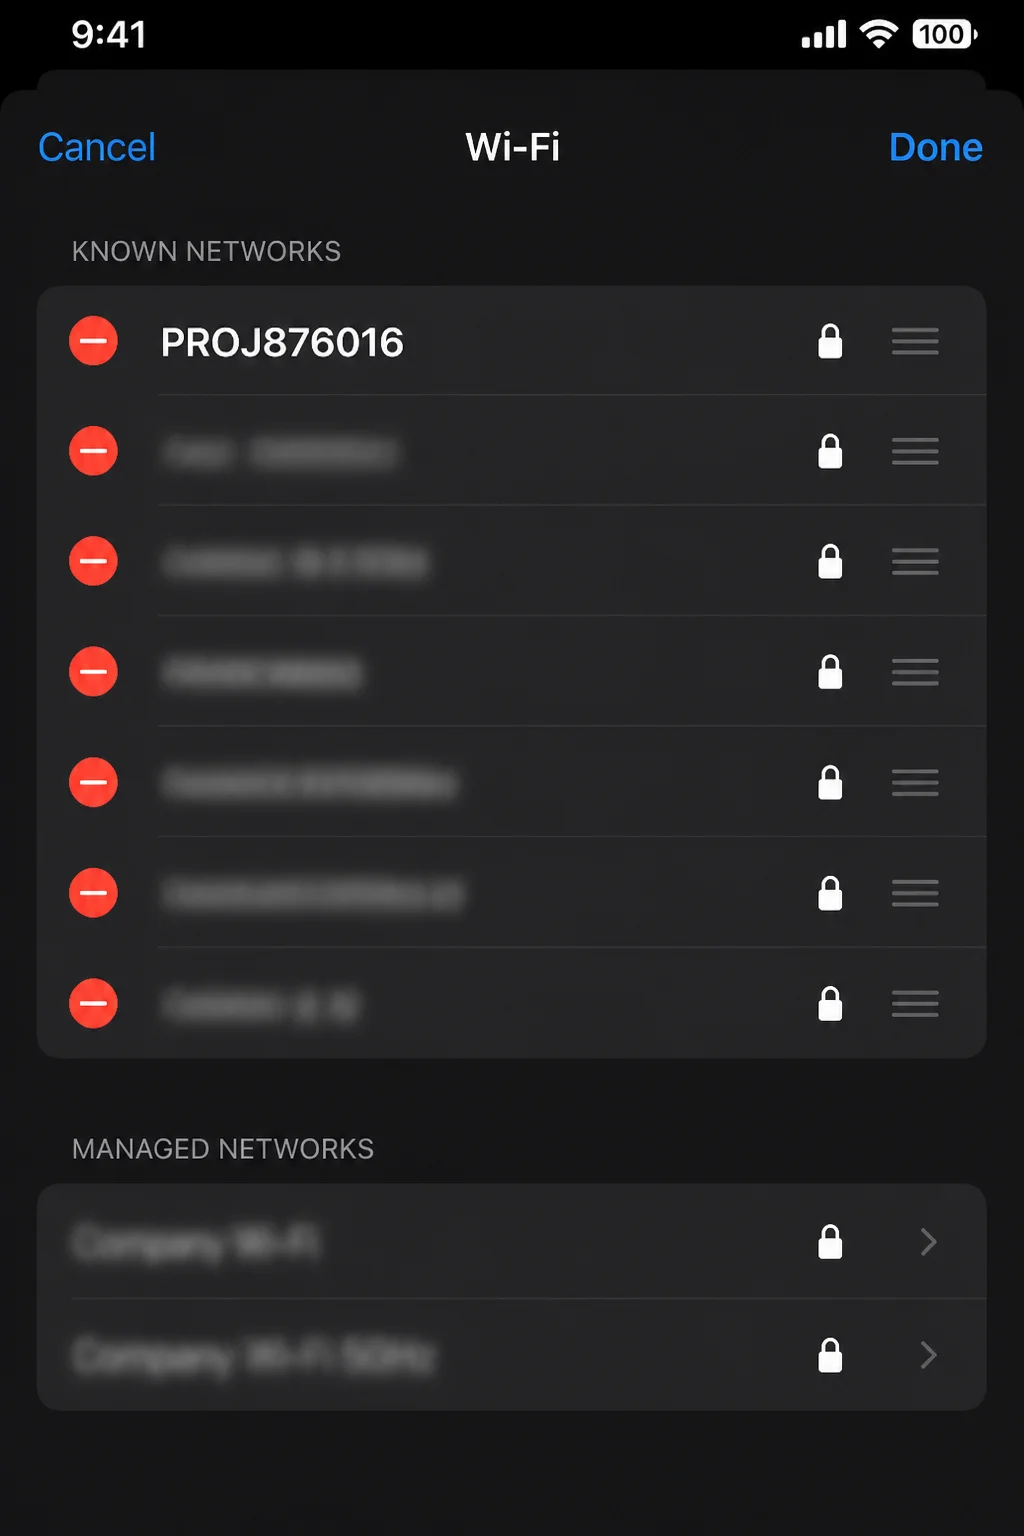
Open Settings > Wi-Fi. Look for a blue checkmark beside your home network. Turn off cellular data under Settings > Cellular for a moment. Then open Safari and load a website.
On Android
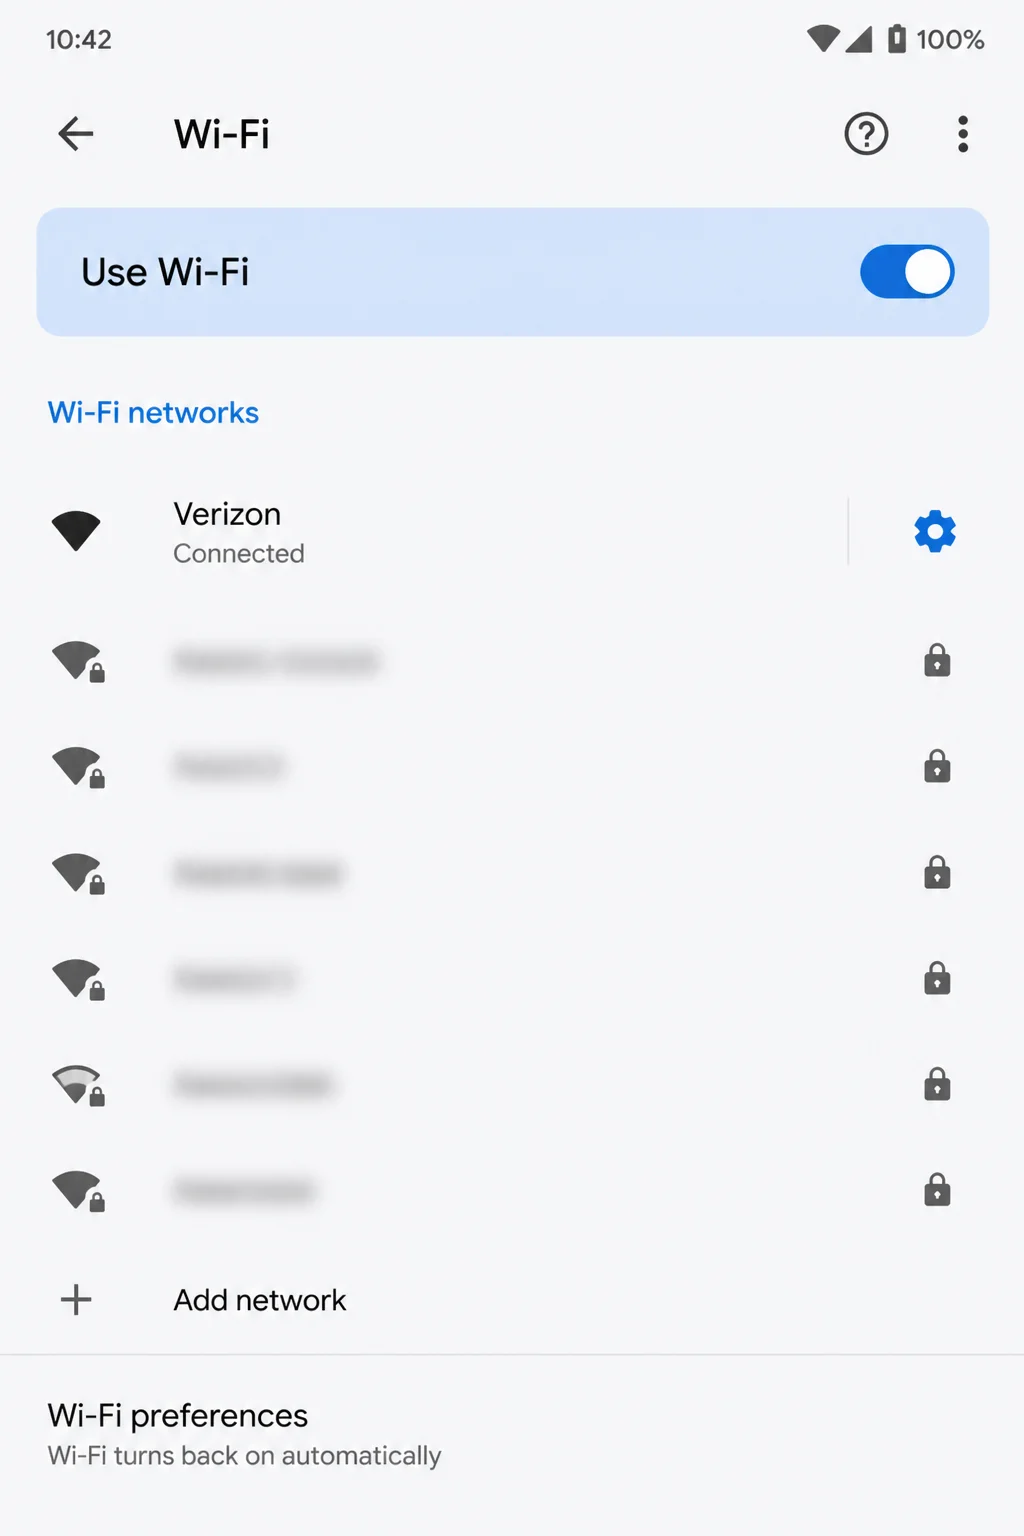
Open Settings > Network & internet > Internet. Some phones use Settings > Connections > Wi-Fi instead. Tap the connected network, turn off mobile data, and load a website in Chrome.
On macOS
Click Apple menu > System Settings > Wi-Fi. Your home network should say Connected. Click Details to check it, then load a website in Safari.
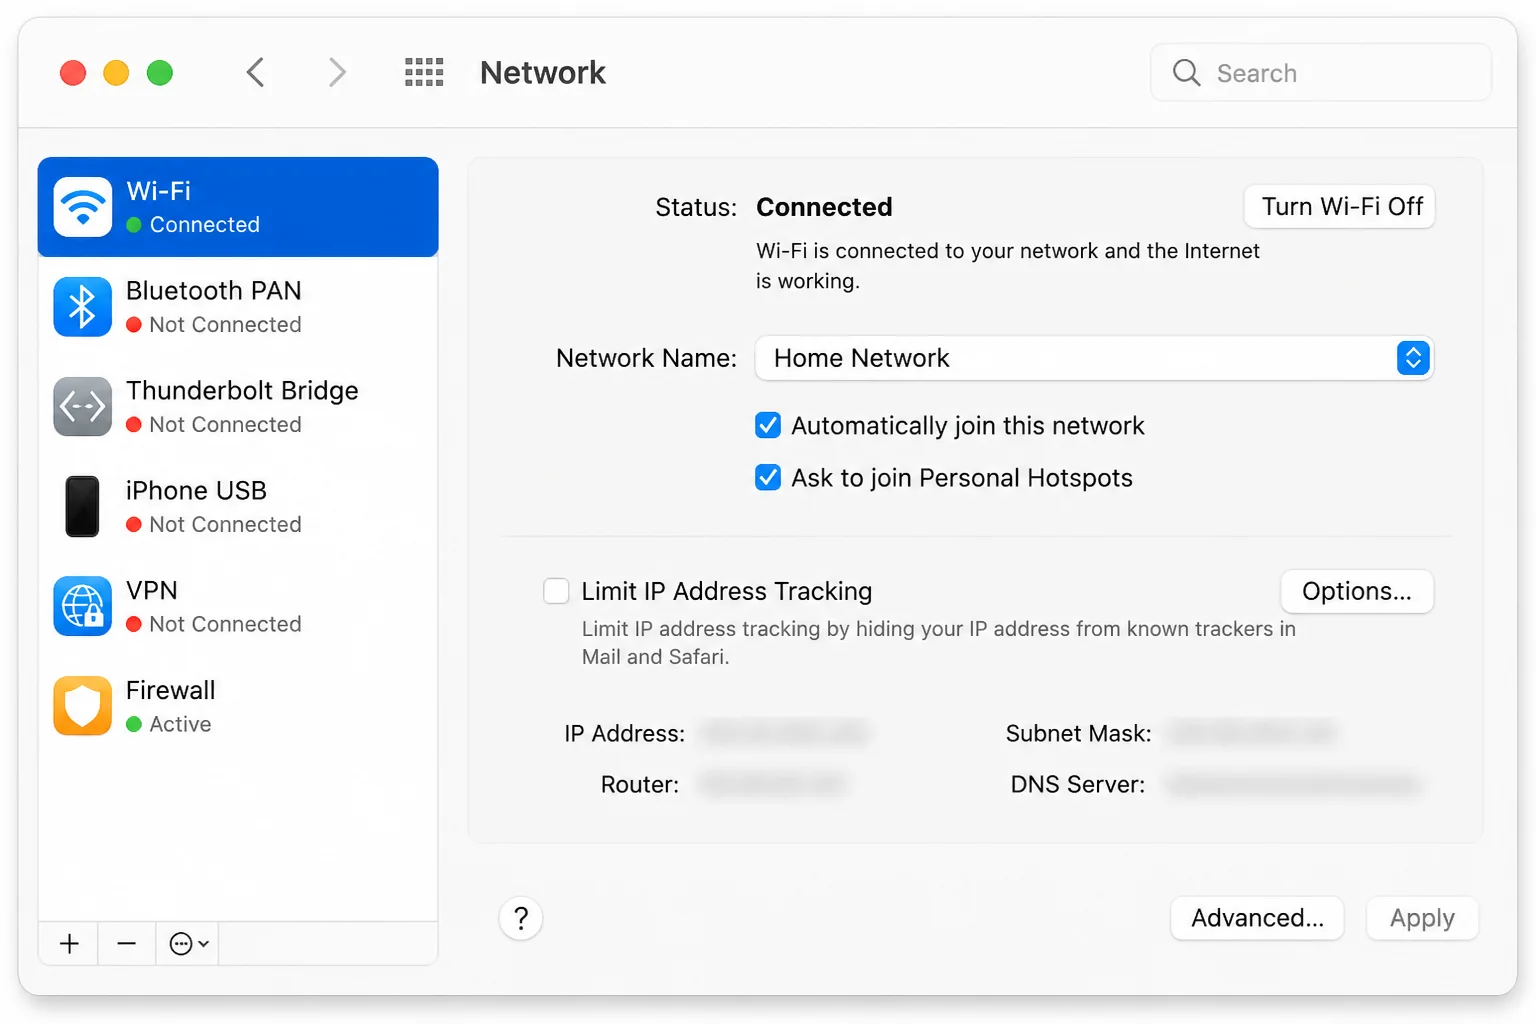
Expected result: Your phone or Mac loads a website using only your home WiFi. If it says connected but can’t load anything, fix the router or internet connection before adding accessories.
Internet access on your phone doesn’t prove that a smart device can connect. Your phone may support a band the accessory can’t use. It may also have a stronger signal or quietly switch to cellular data. Phones are sneaky that way.
Step 2: Find the WiFi Band Your Accessory Requires
Check the device box, manual, manufacturer’s product page, or setup screen for wording such as:
- WiFi: 2.4 GHz only
- 2.4 GHz and 5 GHz
- Dual-band WiFi
- Matter over WiFi
- Matter over Thread
Use 2.4 GHz when the instructions require it. This band is slower, but it reaches farther and passes through walls better. The 5 GHz band is usually faster and less crowded, though it has a shorter range. The right choice depends on the device and its location.
Matter describes how smart-home systems communicate. A Matter device doesn’t always connect through WiFi. A Matter-over-Thread accessory needs a compatible Thread border router rather than a direct WiFi connection.
Expected result: You know if the accessory needs 2.4 GHz, supports both bands, or uses Thread.
Step 3: Check Your Router’s Band Settings
Open the router maker’s app or administration page. Check the instructions printed on the router if you need its address. Menu names vary, so look for WiFi, Wireless, Network, or Bands.
If you see separate 2.4 GHz and 5 GHz sections, make sure the required band is on. Leave the security and channel settings alone for now. Changing five things at once turns troubleshooting into a junk drawer.
Some routers combine both bands under one WiFi name and choose the band for you. That’s normal. Try setting up the accessory near the router first. If a 2.4 GHz-only device still fails, check the router’s app or manual. Look for an IoT setup mode, separate band names, or a way to pause 5 GHz. Restore the normal setting afterward.
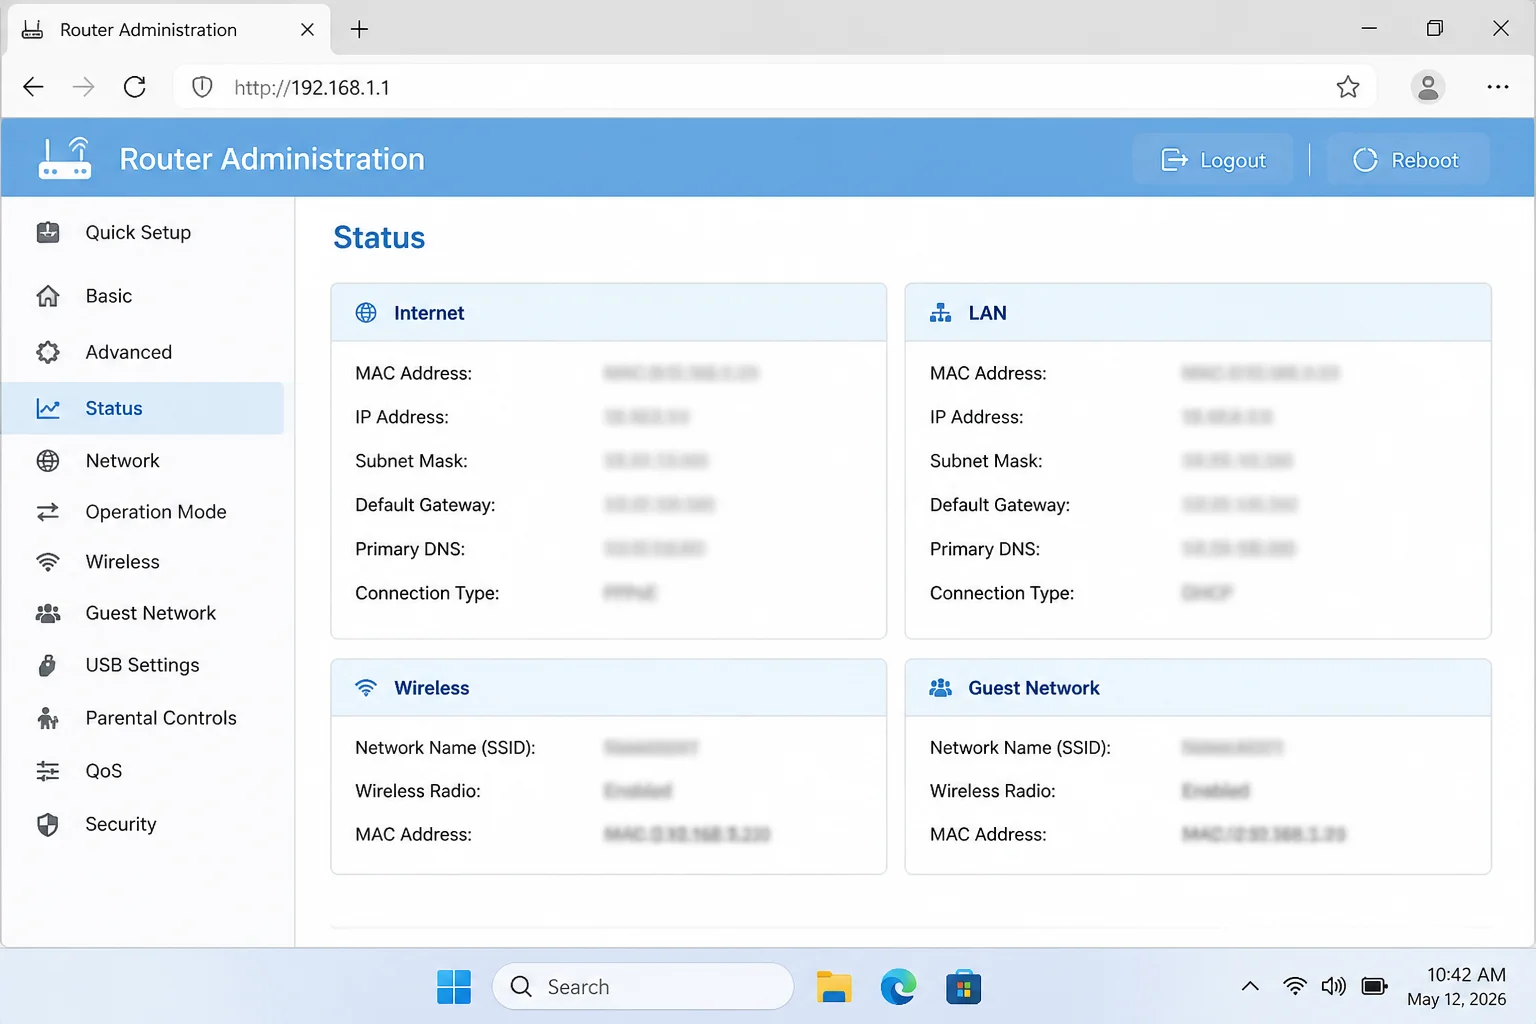
Expected result: The required band is on, and you know if the router uses one name or separate names.
Step 4: Count Devices and Check Router Capacity
Open the router app or administration page. Find Connected Devices, Clients, Device List, or a similar menu. Count everything. Include phones, computers, televisions, consoles, speakers, cameras, plugs, and visitors’ devices.
No single device limit fits every router. A number printed on one model tells you nothing about another. Cameras also put much more strain on a network than simple sensors. Compare your total with the maker’s guidance for your exact router model.
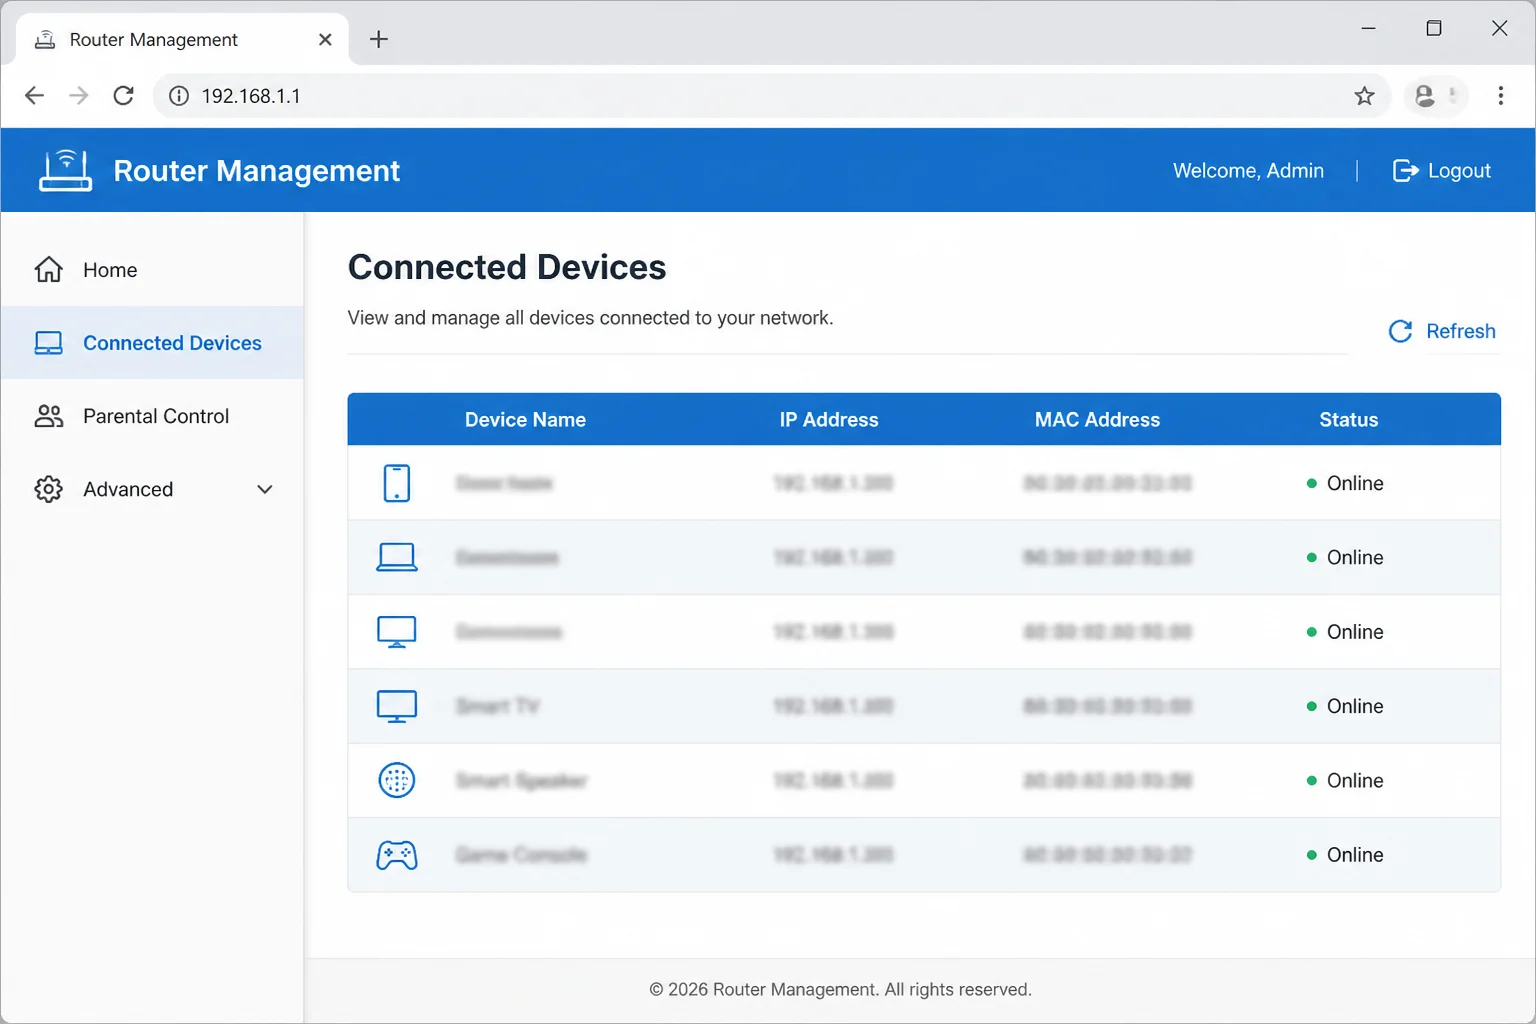
Expected result: Your router is within its listed capacity, or you’ve found a possible cause of widespread dropouts.
Step 5: Place the Router or Mesh Nodes Properly
Put a single router in an open, central, raised spot. A shelf beats the floor, and the middle of your home beats a far corner. Hiding the router behind furniture may look tidy, but WiFi doesn’t care about your decorating plans.
Keep it away from:
- Thick masonry walls and metal cabinets
- Microwave ovens and large appliances
- Aquariums (water absorbs wireless signals surprisingly well)
- Cordless-phone bases and other wireless equipment
- Piles of cables or electronics
A single router is often enough for a smaller home with good central coverage. Mesh WiFi makes more sense across several floors or a long layout. It can also help with thick walls and distant rooms that stay unreliable.
Place each mesh node partway between the main router and the weak area. Don’t put it inside the dead zone. A node needs a healthy connection before it can pass one along. Think of a relay runner: nobody can hand off a baton they never received.
Expected result: The router covers the main living area. Each mesh node gets a strong link from the main router or another node.
Step 6: Secure the Network Without Blocking Devices
In the router’s WiFi or Security settings, choose WPA2, WPA3, or a WPA2/WPA3 mode that all your devices support. Set a long, unique password. It should be manageable for your household but hard for anyone else to guess.
Update the router through Firmware, Software Update, or System Update. Keep the network name visible during setup. Some accessories struggle with hidden networks.
A guest network can separate devices you trust less, but there’s a catch. Many guest networks stop devices from talking to one another. That can block your phone, speaker, accessory, or home hub from finding each other. Use the main network unless your router has a smart-device network that allows local communication.
Expected result: Your network uses current encryption and a strong password. Controllers and accessories can still talk to each other locally.
Step 7: Prepare the Setup Phone
Connect your phone to the exact network you want the accessory to use.
On iOS, open Settings > Wi-Fi and select the network. On Android, open Settings > Network & internet > Internet and select it. Turn off any VPN for a moment and enable Bluetooth. Lots of accessories use Bluetooth while you’re setting them up.
Keep the accessory about 15-20 feet (4-6 meters) from the router during setup. Allow any needed permissions, such as Bluetooth, Local Network, Nearby Devices, or Location. The wording depends on your phone and app. These prompts can feel nosy, but setup may fail without the right permission.
The phone and accessory should usually use the same local network during setup. For Matter-over-WiFi devices, the compatible controller must also use the required network. Amazon tells users to connect supported Matter WiFi devices and controllers to the same 2.4 GHz network.
Expected result: The phone has a steady WiFi connection and can find nearby accessories.
Step 8: Add One Smart Device
Turn on the accessory and wait for its setup light or sound. Then open the right app:
- Google Home: Tap Devices > Add > Google Nest or partner device and follow the prompts.
- Apple Home: Tap the Add button > Add Accessory, then scan the HomeKit or Matter code.
- Alexa: Tap Devices > + > Add Device, choose the device type, and follow the prompts.
- Manufacturer app: Add the device there first when its instructions require it. Many third-party Alexa accessories work this way.
Don’t add ten devices at once. Add one, name it, assign its room, update it, and test it. Then open the next box (future you will be grateful).
Expected result: The device appears online in its app and responds to an on/off, status, or test command.
Step 9: Verify Each Platform’s Network Status
Google Home on iOS or Android
Open Google Home > Devices > All devices. Touch and hold the device tile, then tap Settings. Look for its WiFi or device information. The exact fields vary by product.
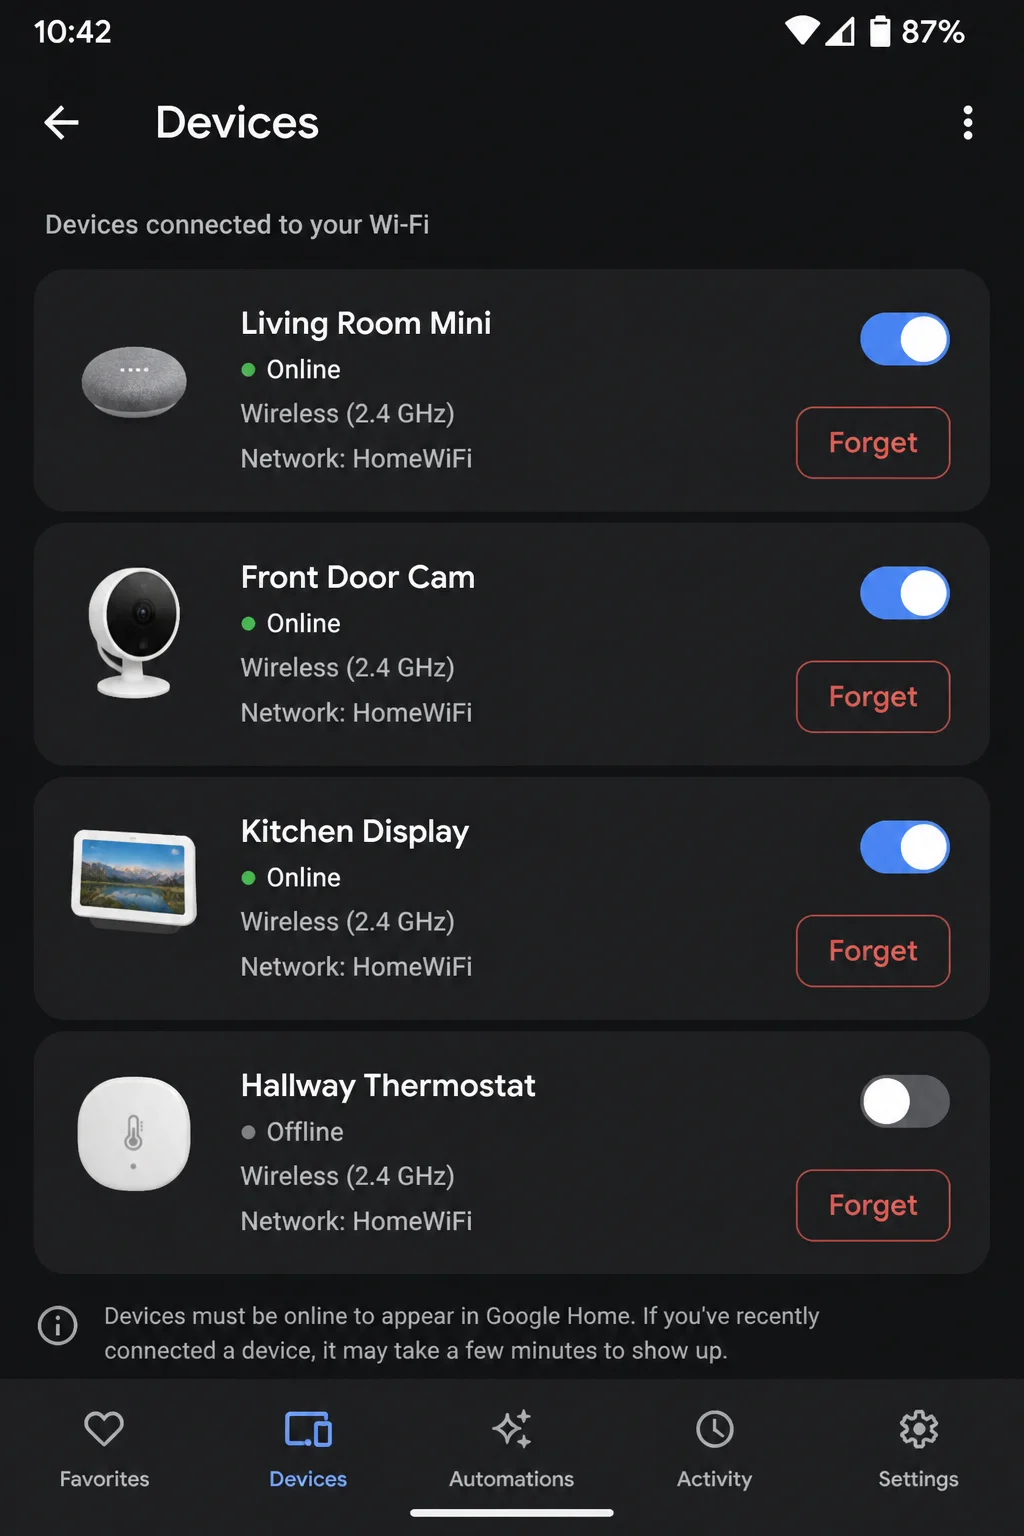
Apple Home on iOS and macOS
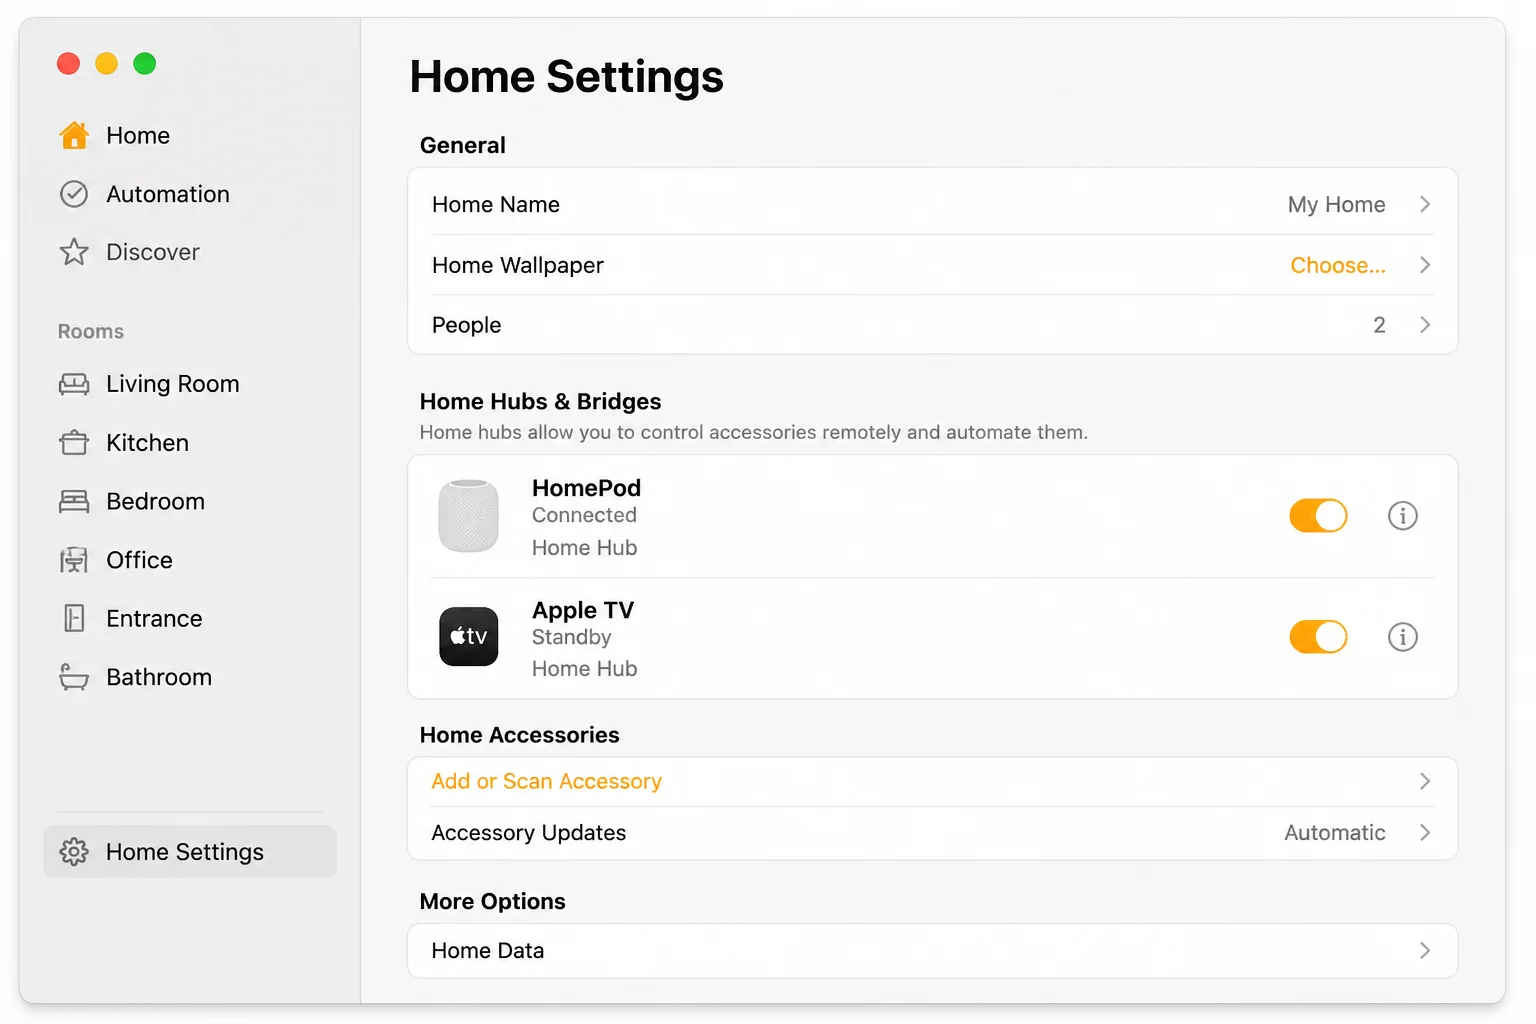
On an iPhone, open Home, tap the accessory, then tap Settings. On a Mac, open Home, double-click the accessory, and check its settings. Look for Network Issue, No Internet, or HomePod Network Mismatch alerts.
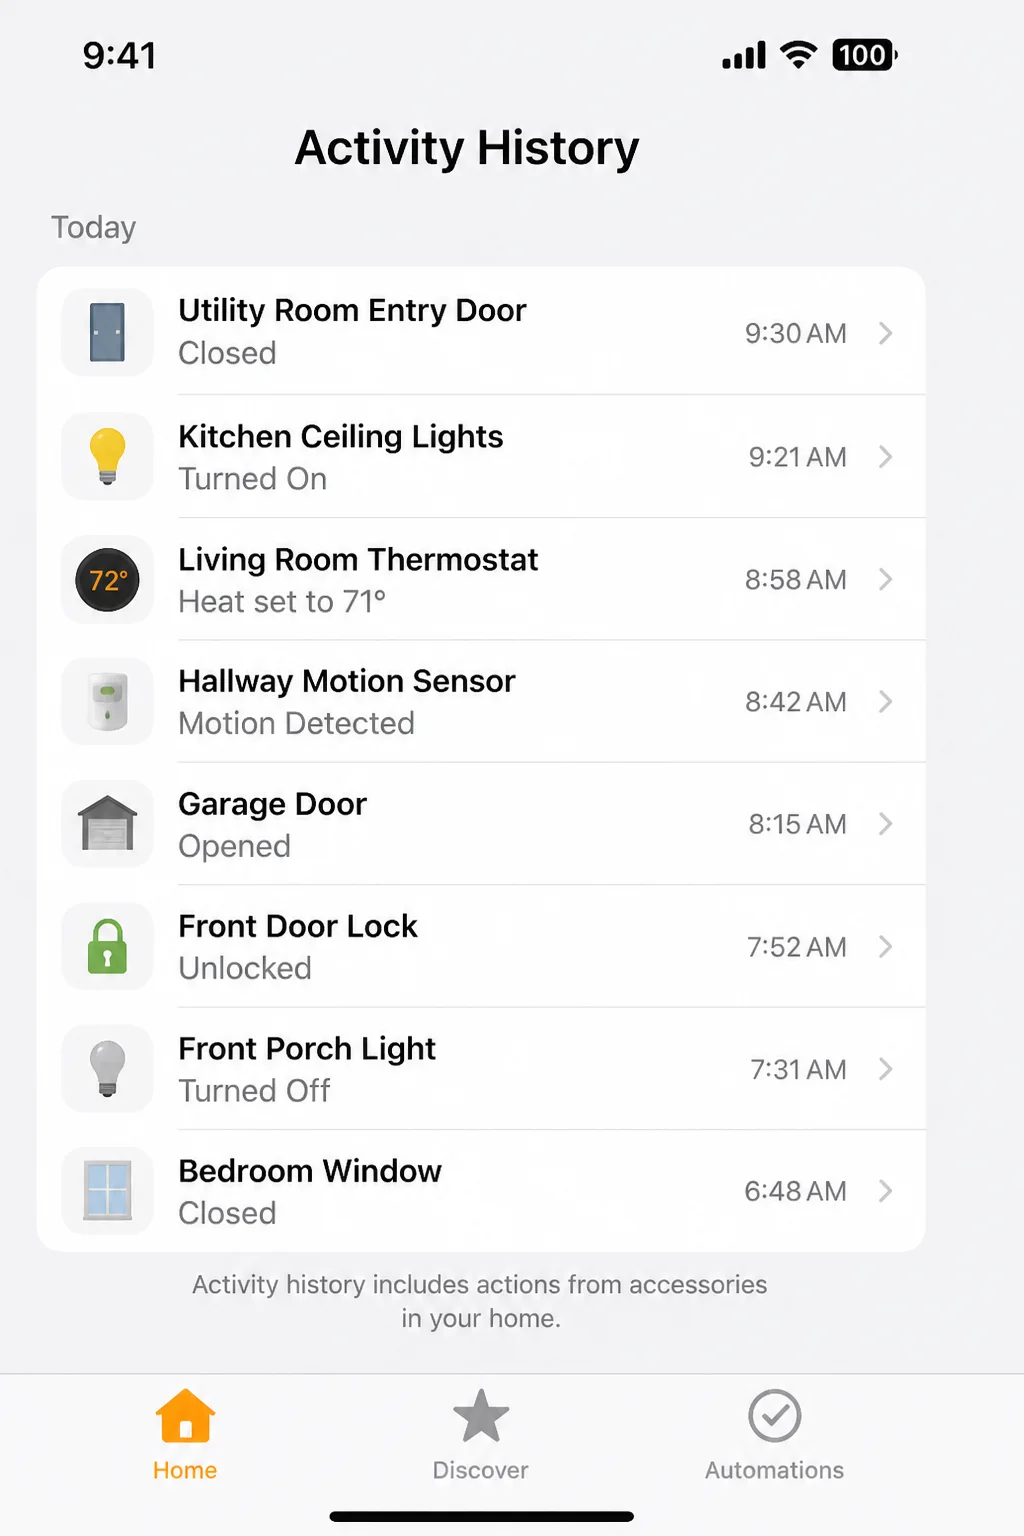
To check the home hub on macOS, open Home and click the More button. Choose Home Settings, then open the section for home hubs and bridges.
Alexa on iOS or Android
Open Alexa > Devices, select an Amazon or Matter device, and tap the gear icon. Find Wi-Fi Network, then tap Change if that option appears.
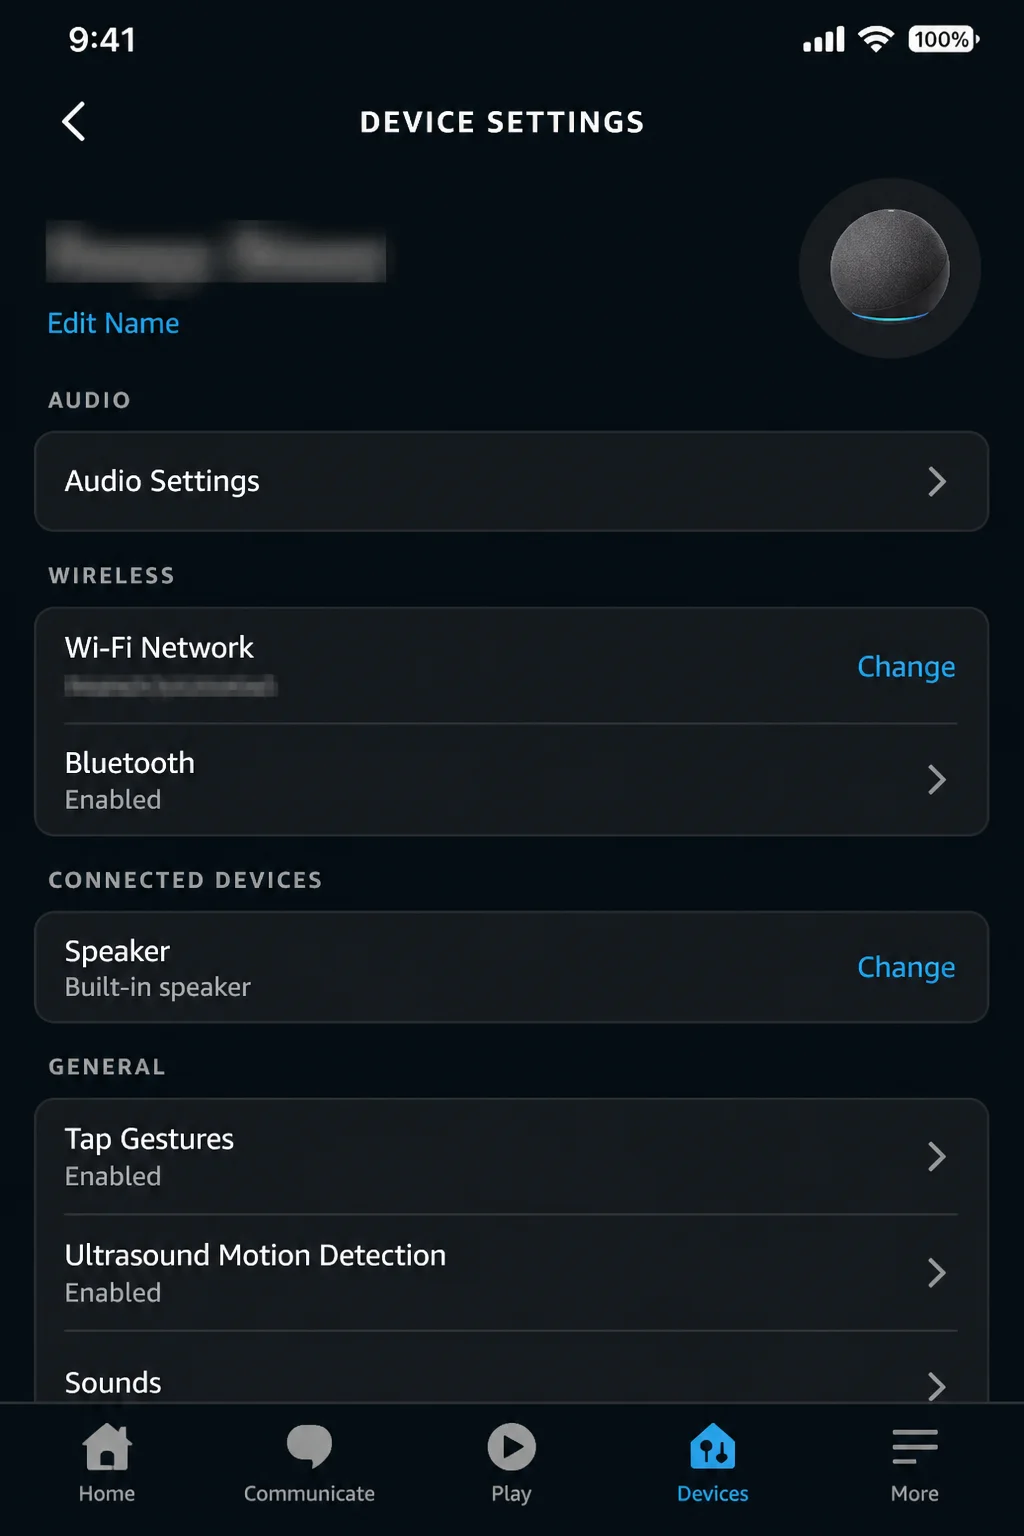
Alexa can’t change WiFi directly for many third-party devices. Update the connection in the maker’s app, then reconnect its Alexa skill if needed.
Expected result: Every device appears online, sits in the right home and room, and responds through its main app.
Step 10: Test Devices in Their Final Rooms
Move each accessory to its permanent spot. Wait two minutes, then control it three times from the app. Open live video when testing cameras. Trigger sensors to check their response.
If a device works beside the router but disconnects elsewhere, that room likely has weak coverage or interference. Your phone may still work because it has a better antenna than a tiny plug or sensor. Move the router, bring a mesh node closer, or add suitable coverage.
Expected result: Devices work reliably in their final locations, not only beside the router.
Configuration
These settings are worth checking again after everything works:
- WiFi Name: Pick a clear name without personal details. When replacing a router, keeping the same name and password may help some devices reconnect. The security mode must also stay compatible.
- Band Steering: Leave automatic band selection on when devices work. Separate the bands only if the router allows it and a specific accessory needs help during setup.
- Automatic Updates: Turn on router and accessory updates when available. Updates often fix connection and Matter compatibility problems.
- Device Names: Use plain names such as “Kitchen Lamp” instead of calling several devices “Light.” Voice assistants work much better with unique names.
- Guest Network: Use it only if local discovery works between every required phone, hub, speaker, and accessory.
- Home Hub: In Apple Home, make sure a compatible Apple TV or HomePod appears as a home hub when you need remote access.
- Connected-Device List: Check it now and then for unknown or long-abandoned devices. It’s the network version of cleaning out that kitchen drawer.
Tips and Troubleshooting
Problem: The accessory can’t find the WiFi network
- Make sure the right network name is visible on the phone.
- Move the accessory within 15-20 feet of the router.
- Restart the accessory, router, and setup app.
- Make sure the required 2.4 GHz or 5 GHz band is on.
- Forget any saved networks you don’t need on the phone, then try again.
Google provides more help for missing networks during speaker and display setup.
Problem: A 2.4 GHz device fails on a combined WiFi name
- Keep the phone and accessory close to the router.
- Check the accessory manual to make sure it uses only 2.4 GHz.
- Look for an IoT setup mode in the router app.
- If the router allows it, separate the bands or pause 5 GHz for a moment.
- Finish setup, then restore the router’s normal band setting.
Don’t assume a combined name is broken. Plenty of smart devices connect to one without any trouble.
Problem: Devices stopped working after a router or password change
- Make sure the new network works on your phone.
- Open each maker or smart-home app.
- Use Change Wi-Fi, Update Network, or the matching option.
- Start with hubs, speakers, and bridges. Then reconnect accessories.
- Remove or factory-reset a device only if its maker says you can’t change the details another way.
This job can be tedious, especially when every plug has its own app. For supported devices, see Google’s network-change instructions and Amazon’s Echo WiFi instructions.
Problem: Google Home setup keeps failing
- Force-close and reopen Google Home.
- Update the app and phone.
- Restart the Google or Nest device and router.
- Forget unused nearby networks on the setup phone.
- Try again close to the router.
Google’s setup troubleshooting page includes checks for specific devices.
Problem: Apple Home shows Network Issue or No Internet
- Open the affected HomePod or Apple TV in Home.
- Read the alert before changing anything.
- Make sure the iPhone or iPad uses the preferred WiFi network.
- Restart the HomePod or Apple TV.
- Restart the modem and router.
If HomePod Network Mismatch appears, tap View Details > Move HomePod to [Wi-Fi network]. Apple also has specific HomePod network troubleshooting.
Problem: Alexa can’t control a device that works in its manufacturer app
- Update Alexa, the maker’s app, and the device firmware.
- Make sure both accounts are still linked.
- In Alexa, disable or remove the affected skill.
- Turn it on again and link the account.
- Ask Alexa to find devices again if prompted.
Use the maker’s app to change WiFi for unsupported third-party accessories. Alexa’s direct Change control mainly works with supported Amazon and Matter devices.
Problem: Devices disconnect only in one room
- Test the device closer to the router.
- Move the router or nearest mesh node to a more open spot.
- Keep nodes out of cabinets and away from large appliances.
- Put a mesh node between the router and the weak room.
- Test again before buying more equipment.
Walls and floors can block signals like nobody’s business, especially when they contain pipes, concrete, or metal. One small move may work better than buying another box.
Problem: Many devices become unreliable at once
- Restart the router.
- Install its latest software.
- Count every connected client in the router app.
- Remove unused entries if the router allows it.
- Compare the count with the guidance for your exact router.
- Consider newer or mesh equipment if coverage and capacity stay poor.
A router restart is like giving the whole network a quick rest (and you know how well restarting works on computers). It won’t fix bad coverage or an overloaded router, but it’s a sensible first check.
Before Factory-Resetting Anything: Check the network name, password, WiFi band, signal strength, app permissions, software updates, service status, and router connection. Then restart the router, phone, hub, and accessory. A factory reset is the last tool in the drawer. It wipes settings and may force you to rebuild automations.
Wrapping Up
| Step | Action | Applies To |
|---|---|---|
| 1-3 | Test WiFi and confirm band support | Every smart home |
| 4-6 | Check capacity, placement, and security | Router or mesh network |
| 7-8 | Prepare the phone and add one device | iOS and Android |
| 9-10 | Verify status and test final locations | Google Home, Apple Home, Alexa |
A stable smart home starts with boring, reliable WiFi. That’s much better than resetting “smart” bulbs while standing in a dark kitchen. Build the network first, add one device at a time, and test each one where it’ll live.
Smart-home gear will still have the odd bad day. With the network sorted, though, you’ll have a much shorter list of things to blame.