In case you run into errors
When you delete a file on a Mac, you only end up hiding it in Finder. To remove it and free up the associated disk space, you must empty the Trash. Control-clicking the Trash icon and picking the Empty Trash option is the fastest way to do that.
However, permanently getting rid of the contents within the Trash isn’t always that easy and may result in errors. So if you run into any trouble, you can quickly empty the Trash in macOS using Terminal instead. You’ll find the complete procedure below.
Delete the Trash in Mac Using Terminal (macOS El Capitan and Later)
If you use a Mac running macOS 10.11 El Capitan or later (such as Big Sur or Monterey), you can quickly empty the Trash using Terminal.
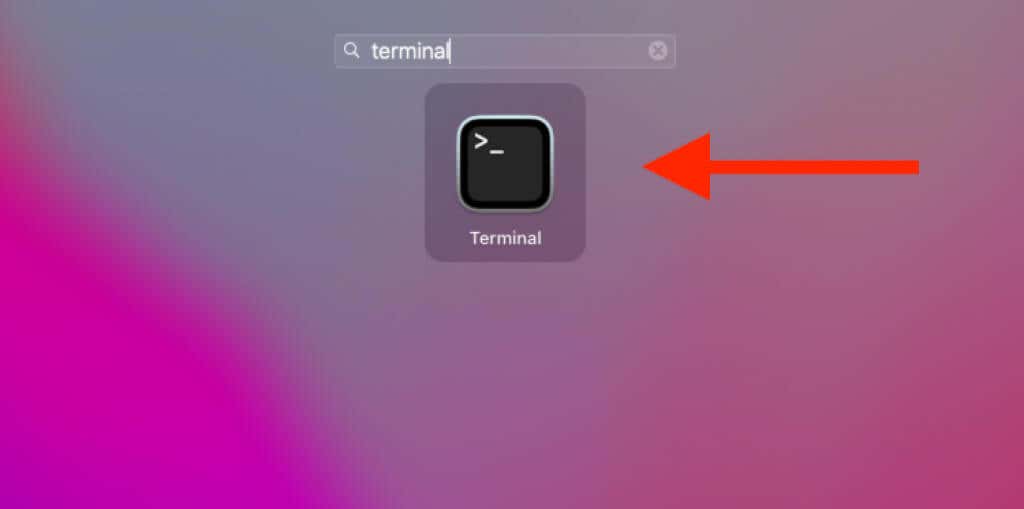
1. Open the Launchpad and select Other > Terminal.
2. Type the following command:
sudo rm -r
Note: Do not run the command yet.
3. Press the Space key once to add a single space to the end of the command. It’s essential to do that. If not, the command will fail.
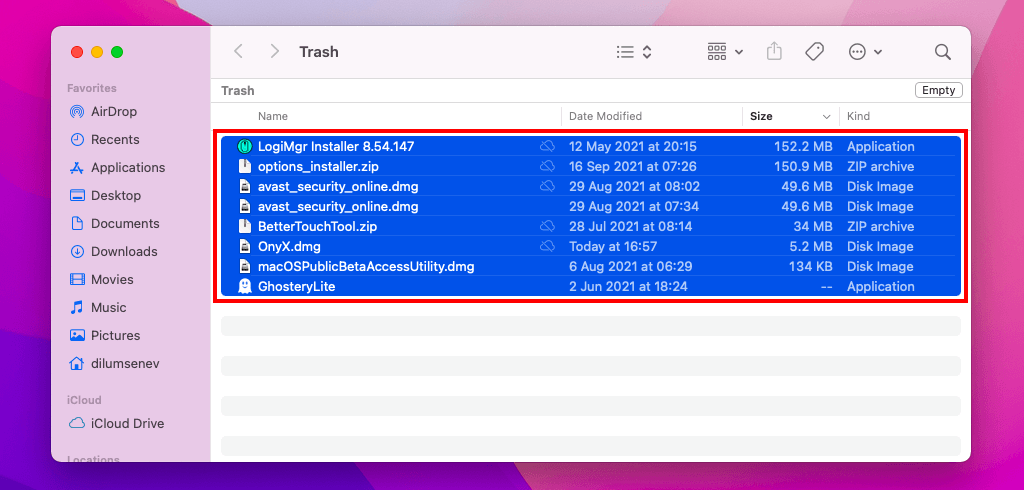
4. Open the Trash.
5. Select the files you want to delete while holding down the Command key. If you want to remove everything, press Command + A to highlight all files and folders instantly.
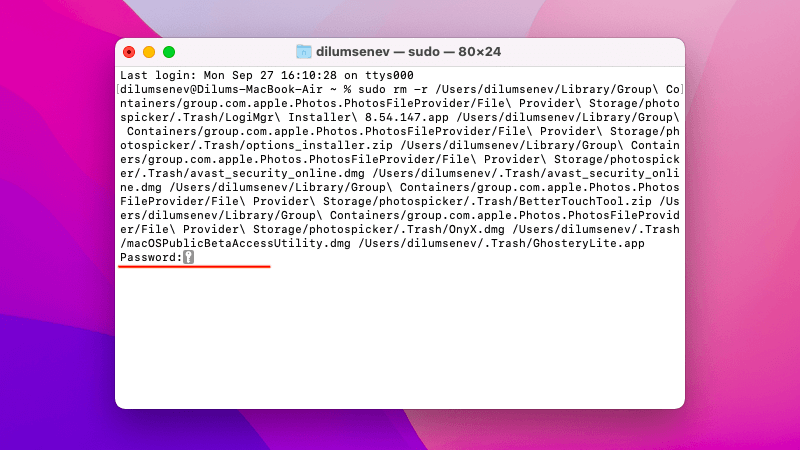
6. Drag the highlighted files into the Trash. Depending on how many items you want to delete, multiple file paths may show up in Terminal.
7. Press Enter.
8. Type in your administrator password.
9. Press Enter. Terminal will delete the specified items from the Trash. You won’t receive a confirmation, so it’s best to double-check.
If Terminal fails to delete a specific file or files, adding the f (force) option will override issues caused by conflicting permissions. Type sudo rm -rf in step 2.
Emptying the Trash permanently deletes the files (unless you’ve set up Time Machine on your Mac). Hence, if you prefer confirmation before deleting each time, you can use the i (interactive) option—e.g., sudo rm -ri.
Delete the Trash in Mac Using Terminal (macOS Yosemite and Earlier)
On a Mac running macOS 10.10 Yosemite or earlier, emptying the Trash using Terminal is relatively uncomplicated.
1. Open the Launchpad and select Other > Terminal.
2. Type the following command:
sudo rm -rf ~/.Trash/*
3. Press Enter.
4. Type in your administrator password.
5. Press Enter.
Alternative Ways to Delete Problematic Files in Trash
Deleting the Trash using Terminal is quick. But it’s also inconvenient. If you can’t empty the Trash using the GUI (graphical user interface) in macOS due to a specific file or files, run through the pointers below the next time.
Delete Items Individually
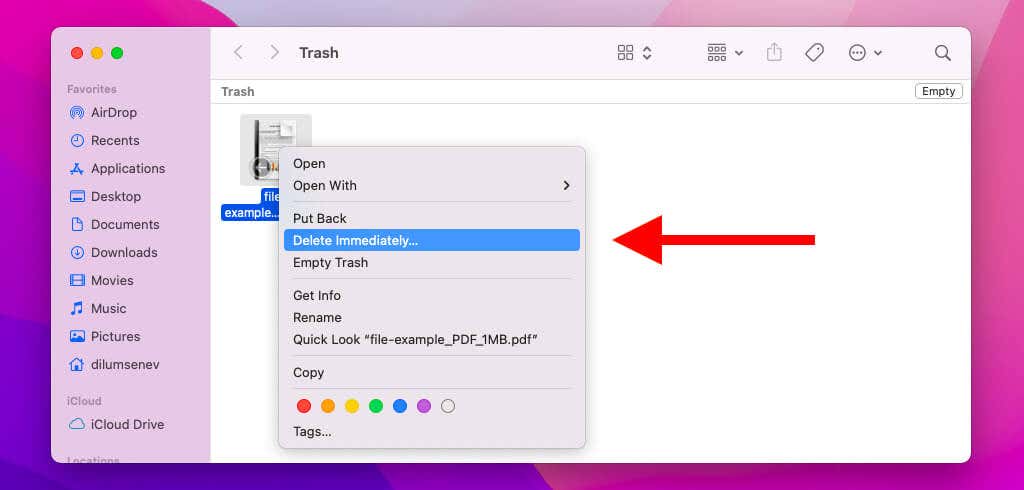
Try deleting any problematic files or folders individually. To do that, open the Trash, control-click the offending item, and select Delete Immediately.
Unlock Files and Check Permissions
macOS may prevent you from deleting a locked file or folder. Try unlocking it. To do that, control-click the item within the Trash and select Get Info. Then, uncheck the box next to Locked.
While you’re at it, you may also want to scroll down to the Sharing & Permissions section and set Privilege to Read & Write for your user account. You may not be able to do that if you don’t have administrative privileges.
Force-Quit Relevant Programs
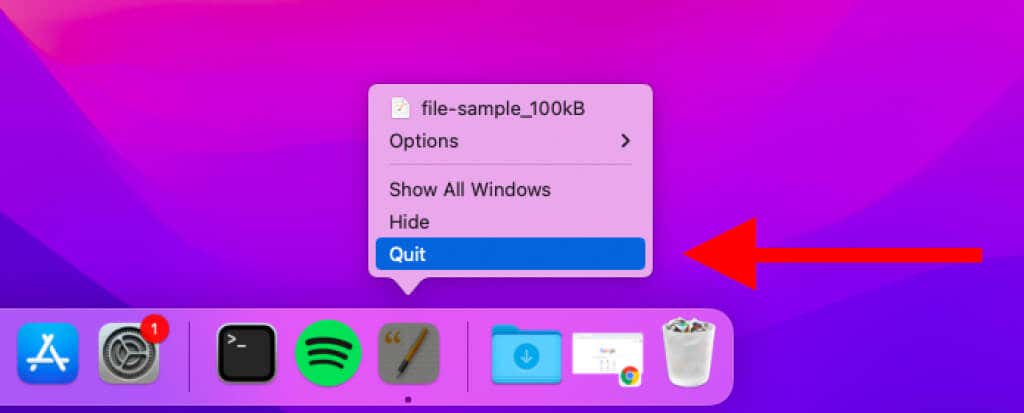
Try quitting any programs that might be preventing you from permanently deleting a file or folder. You can do that by control-clicking the program’s icon via the Mac’s Dock and selecting Quit. For example, if you have trouble removing a Pages document, fully exit the Pages app.
Additionally, you might want to check if the relevant program is stuck. To do that, open the Apple menu and select Force-quit. If the program appears within the list, select the item and choose Force Quit.
Restart Your Mac
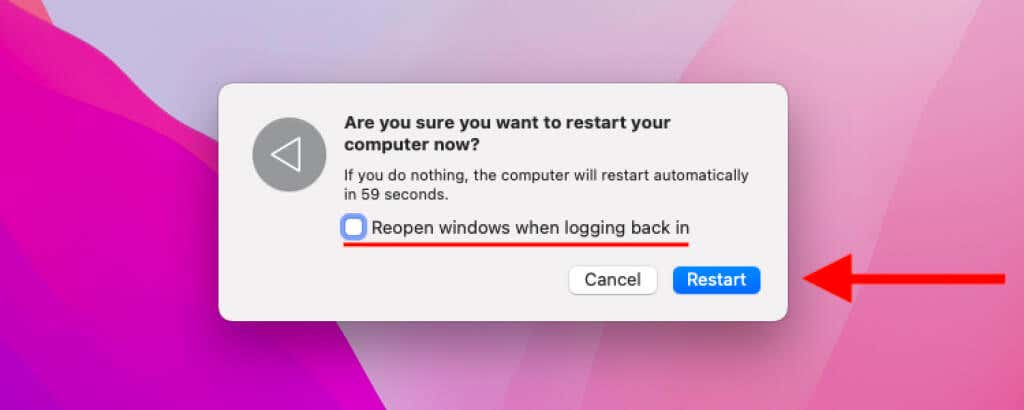
Restarting your Mac can also help resolve bugs, glitches, and conflicts preventing you from emptying the Trash.
Just open the Apple menu and select Restart. Then, leave the box next to Reopen windows when logging back in unchecked and choose Restart.
Disable Conflicting Startup Programs
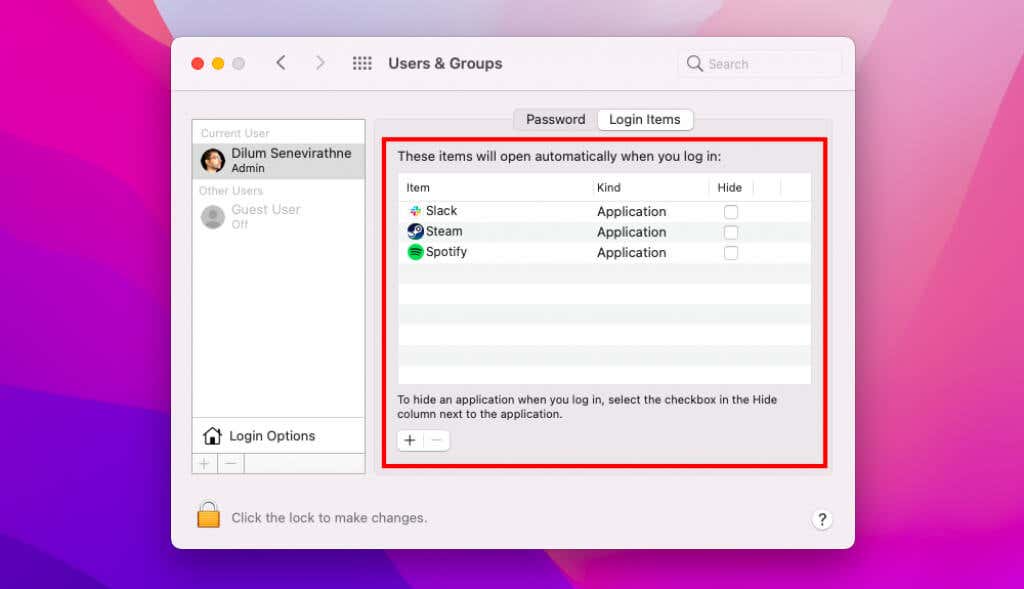
If you continue to have trouble emptying the Trash normally, you probably have a conflicting program that boots alongside macOS.
To remove it, open the Apple menu and select System Preferences > Users & Groups. Then, select your user account on the sidebar and switch to the Login Items tab. Follow that by selecting and removing any apps that might cause issues with a specific file format.
Booting your Mac in Safe Mode can also help you identify problematic or sketchy startup programs and extensions that cause issues.
Take Out the Trash
Despite being able to empty the Trash using Terminal in macOS, it’s best to stick to the graphical user interface, if possible. Taking the time to figure out what prevents you from deleting files within Mac’s Trash rather than force-deleting its contents may help you avoid having to deal with the same problem going forward.
That being said, if you end up permanently removing files and folders you later want to recover, don’t forget to restore the lost items using Time Machine.

