Works just like any other laptop and printer
If you own a Chromebook and have it connected to the same Wi-Fi network as your printer, adding a printer to your Chromebook is almost identical to adding one on any other computer.
Using the printer settings in your Chromebook’s settings menu, you can configure your printer so that you can print to it any time you like.
How to Add a Wi-Fi Printer to Your Chromebook
If you have a wireless printer connected to your network, adding that printer on your Chromebook is effortless. ChromeOS supports mostly all modern printer drivers.
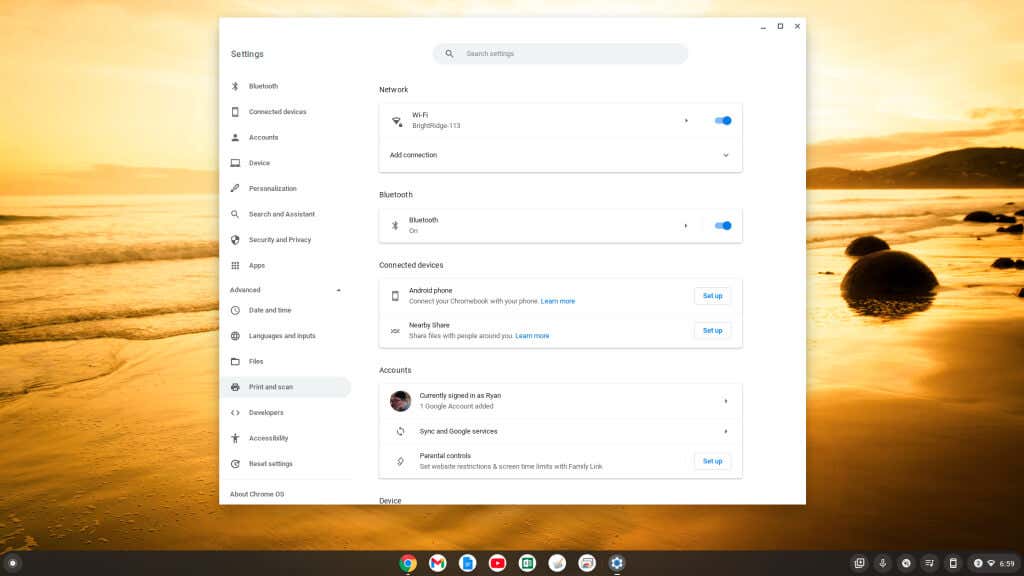
- Select the clock in the bottom-right corner of the window and select the gear icon to open your Chromebook settings. Select Print and scan in the left menu.
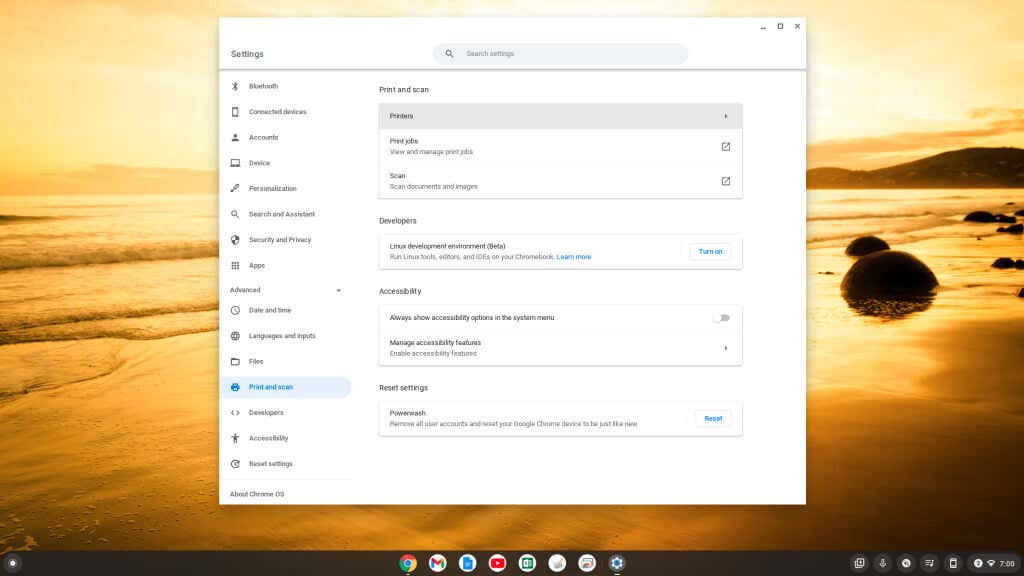
- In the right pane, select the right arrow next to Printers.
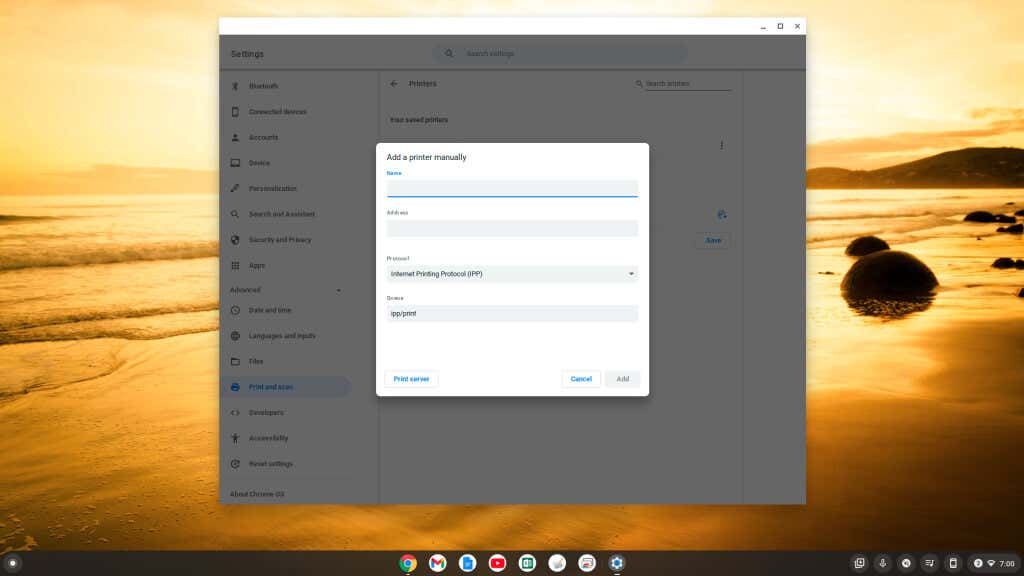
- A new window will open for you to add the new printer. All you need is the printer’s IP address (which you can get from your printer’s menu). Type a name for the printer, enter the IP address in the Address field, and then select the Add button.
Note: Ensure Internet Printing Protocol (IPP) is selected in the Protocol drop-down menu for Wi-Fi network printing to work properly.
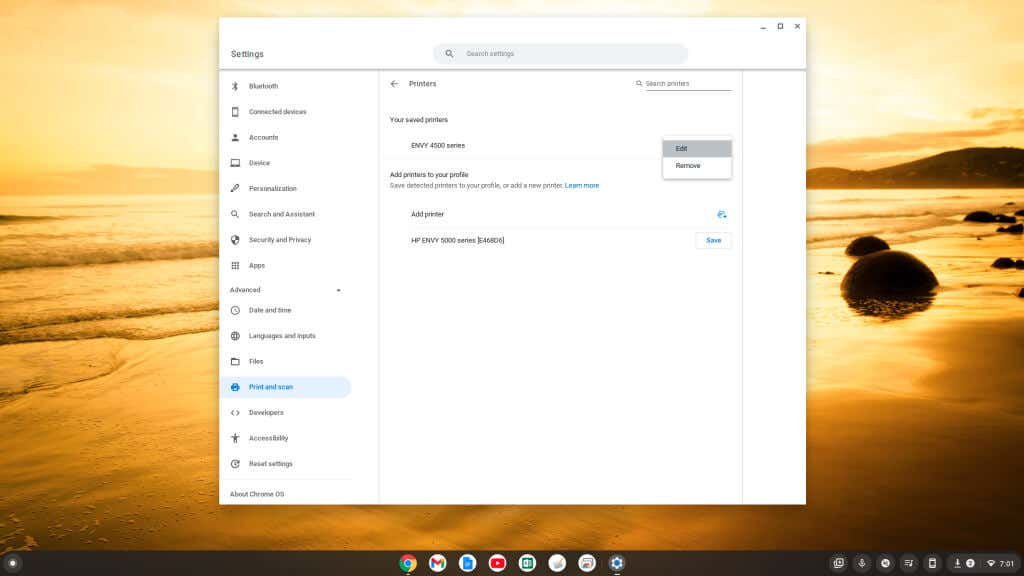
You’ll see your printer show up in your list of compatible printers on the Printers page. It will show up under Your saved printers and under Add printers to your profile.
If you have a newer printer with Wi-Fi functionality, it may show up under the second section. You can select Save to add that printer automatically rather than using the manual process above.
If you don’t see any new printer you purchase in the list at the bottom of the settings window, you can add it manually using the same process above by selecting the small plus icon to the right of Add printer.
How to Add a USB Printer to Your Chromebook
If you’re using an older printer that requires a USB connection, you can still connect your Chromebook to that printer.
- Plug the USB cable from your printer into your Chromebook’s USB port.
- You’ll see a pop-up window to add a new printer. Select Add Printer.
- Follow the wizard to step through adding the new printer.
If you don’t see a Wizard appear, you can go through the steps in the previous section to view available printers in the Settings menu and select the connected printer under the Add printers to your profile section.
Note: Whenever you print for the first time, if you don’t see the new printer’s name in the Destination field, select See more… and the printer should be listed in that window.
How to Print From Your Chromebook
Once you’ve added your printer, you can print to it from any Chromebook app that supports printing.
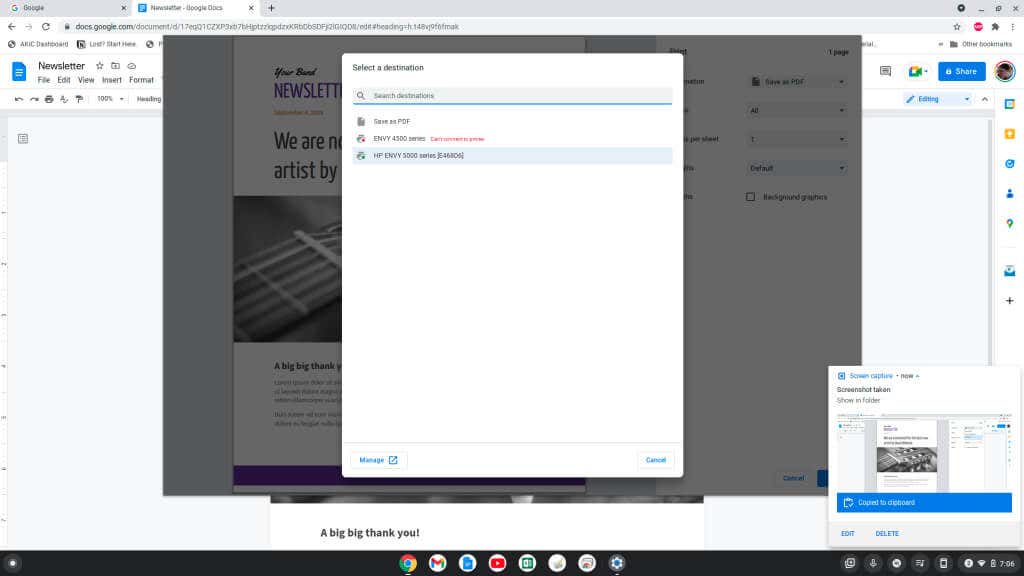
- With the document, image, or other media open that you want to print, just press Ctrl + P keyboard shortcut on the keyboard to open the Print menu. In that menu, select the Destination dropdown and choose See more.
- In the Select a destination window, select the printer you want to print to.
- Once you’ve selected the printer you want to print to, select the Print button to send that print job to your selected printer.
You should see the document or image printed on the printer you’ve selected on your network.
Printing From a Google Chromebook
As you can see, printing from a Chromebook is similar to printing from any other computer. Just open the Chromebook Settings menu and go through the process to add the new printer using the simple menus.
Also, if you want to print from your Chromebook outside your home, away from your Wi-Fi network, Google Cloud Print is the perfect solution.

