Use this as an extra security step
If you have multiple computers on a network and want to share folders between them, you can add an extra bit of security by creating a hidden Windows share. This guide is fairly basic and assumes that you are in either a workgroup or domain Windows environment. Hidden shares are useful if you want to share a folder, but only want it accessed by people who you’ve given the share name to.
Of course, a hidden share does NOT ensure that someone cannot gain access to the folder if they try hard enough. It’s best to use this as an extra security step along with your other network security policies. If you’re in a Windows domain, like within a corporate network, you will find that 99% of the time, your local hard drives are shared out. These are called admin shares in IT lingo. Basically, it’s configured that way so that any administrator can connect to any computer on the network and access all of the local files.
Table of Contents
The admin shares are also all hidden shares, so that anyone browsing the network will not see them. You can see if your local drives are shared out by going to My Computer, right-clicking on the local C drive (or whatever letter you have), and choosing Properties. Click on the Sharing tab and you’ll see that “Share this folder” is selected and the share name is C$.
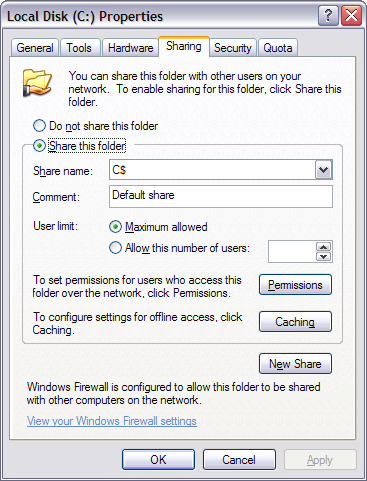
The $ symbol after the share name is what makes the folder hidden on the network. As you can see here, my entire C hard drive is shared out since I’m on a corporate domain. Remember, this means that any Administrator can access all of your files at any time! So you really have no privacy in a Windows domain.
Of course, to share a folder on a home network or even in your office, follow the same procedure as described above. By default, when you click Share this folder, the share name is filled in with the name of the folder. In Windows 7 and Windows 8, click on the Advanced Sharing button to get all the sharing options.

Just add the $ right after the share name without any spaces. You should note that you can only create this hidden share when you first share the folder in Windows 7 and Windows 8. For some reason, you can’t change the share name once you’ve shared the folder, so in order to change it, you have to first remove the share and then re-share the folder.

Also, if you want people to be able to add and delete files in the folder, you’ll need to click on the Permissions button and click either Change or Full Control.
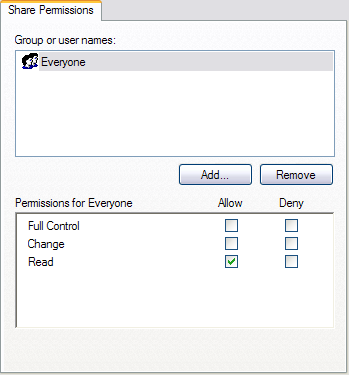
Change is usually good enough because it allows people to add files and delete files. Full Control allows someone to change the permissions on the folder itself.
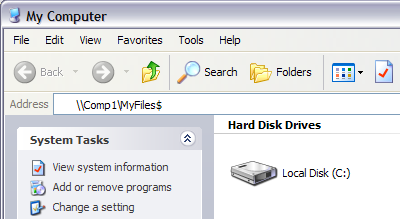
In order to access the hidden share in Windows, you need to go to Windows Explorer (My Computer) and type the full UNC path to the folder. If that didn’t make any sense, the UNC path is simply the computer name and folder name that you want to access. So if I shared a folder called MyFiles as MyFiles$ on a computer named Comp1, I would access that folder by going to My Computer and typing in the address bar:
As long as everything was setup correctly, the contents of the folder should pop up without a problem! Note that if you browse the network via Explorer and click on that computer, you won’t see that shared folder in the list because it’s hidden. You can only access it by manually typing in the full path like shown above.
And that’s it! You have now shared a folder on the network that is hidden! If you have any questions or problems setting this up, post a comment and we’ll try to help. Enjoy!


