For those still rockin' a burner
There’s still a need for CDs, DVDs, and Blu-ray discs. Whether it’s for music and movies when you go off-the-grid or for archiving important documents, disk-based storage is still here. Most devices don’t have a built-in CD, DVD, or Blu-Ray drive. Fortunately, you can get an external DVD drive, and Windows 10 and 11 are still capable of burning data to discs.
Windows Built-in Disc Burning Software
Microsoft has two tools to burn discs built into the Windows operating system. Windows File Explorer can format discs to be used as a flash drive or burn discs to be used with CD or DVD player. It can also burn an ISO image file to a disc. Windows Media Player can burn discs to be used with CD or DVD players. Look at both and see which is the right one for you.
To set a default burner, you can choose the first time you insert a blank disc.
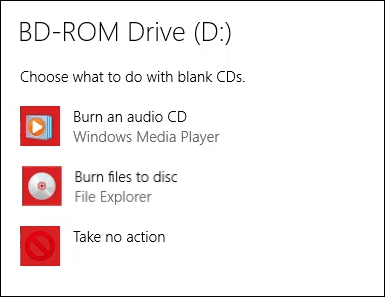
- Insert a blank CD or DVD disc into your PC. If this is your first time inserting a blank disc, a notification will ask what you want to happen with blank CDs. Click on the notification.
- Choose either Burn an audio CD to use Windows Media Player or Burn files to disc to use File Explorer automatically next time you insert a blank disc.
Burn CDs or DVDs to Use Like a USB Flash Drive with Windows Explorer
This method assumes you have Windows set to automatically use File Explorer to burn discs. If not, just open File Explorer after inserting the blank disc, and the utility is available. You must use a CD-RW or DVD-RW format disc for this.
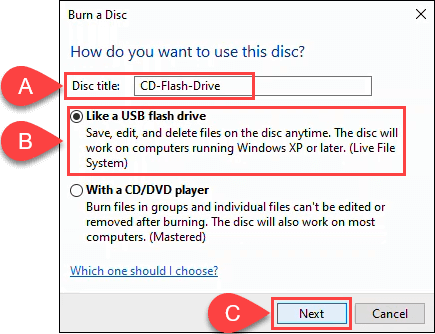
- When File Explorer’s Burn a Disc window opens, enter a Disc title: and select Like a USB flash drive and Next.
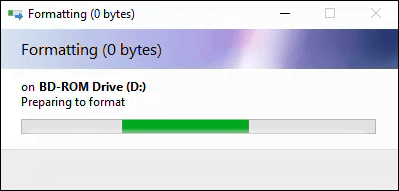
File Explorer will format the disc, so it works like a USB flash drive. This process takes about a minute.
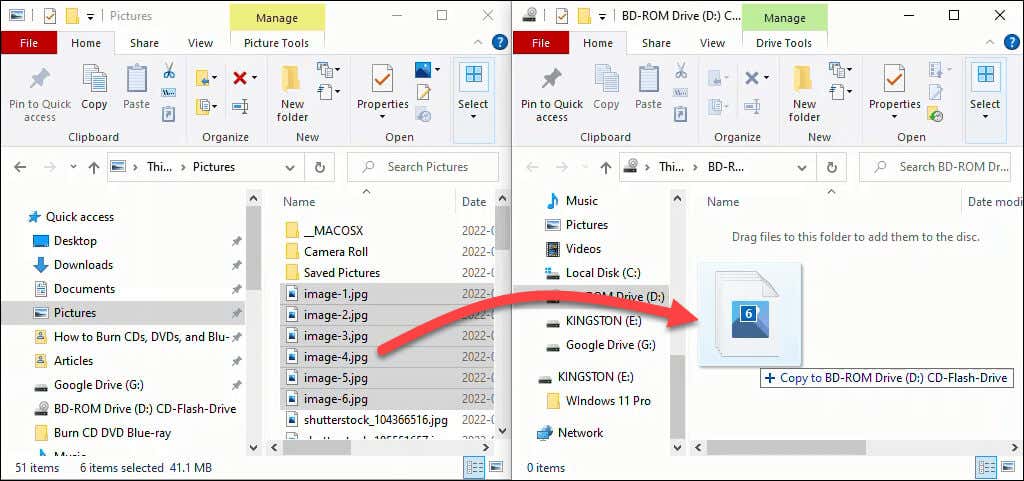
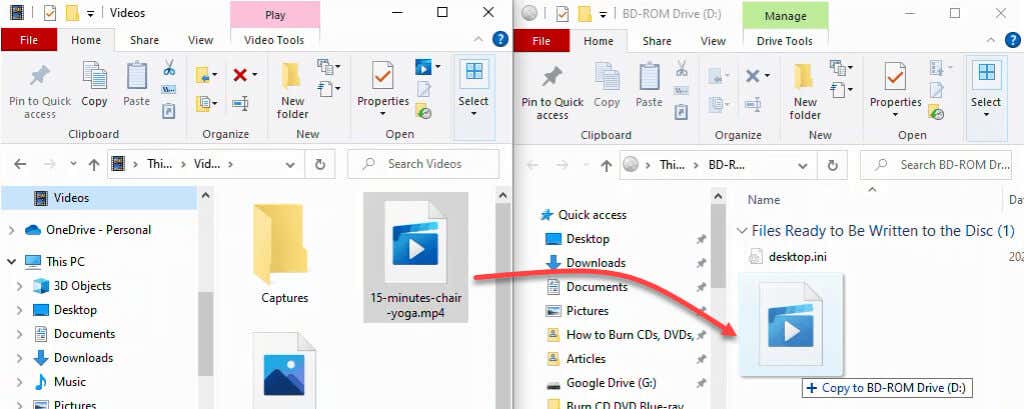
- File Explorer will open. It’s easiest to open another File Explorer window, navigate to the files you want to add, select them and then drag and drop them into the File Explorer that’s focused on the disc.
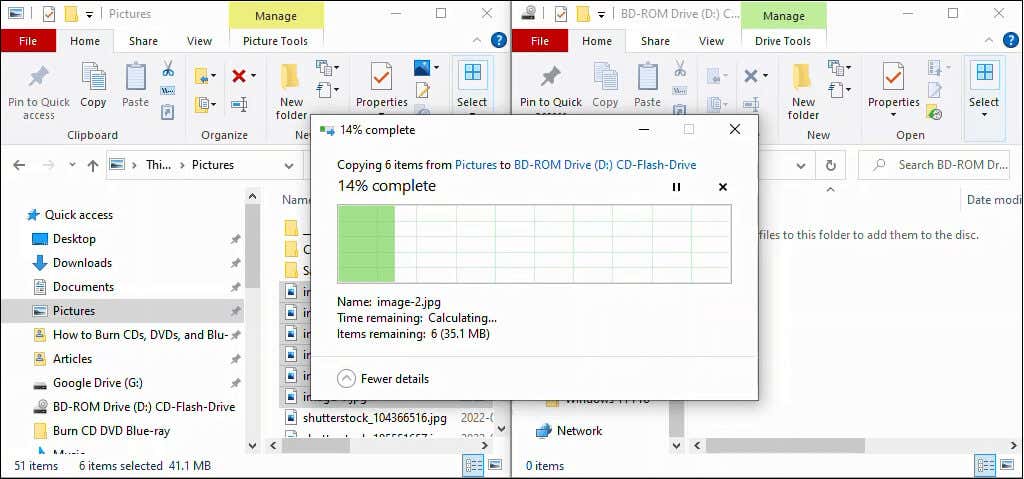
The files get added to the disc. Depending on the amount and size, this could take a few seconds or minutes. It’s not as fast as a USB flash drive, though.
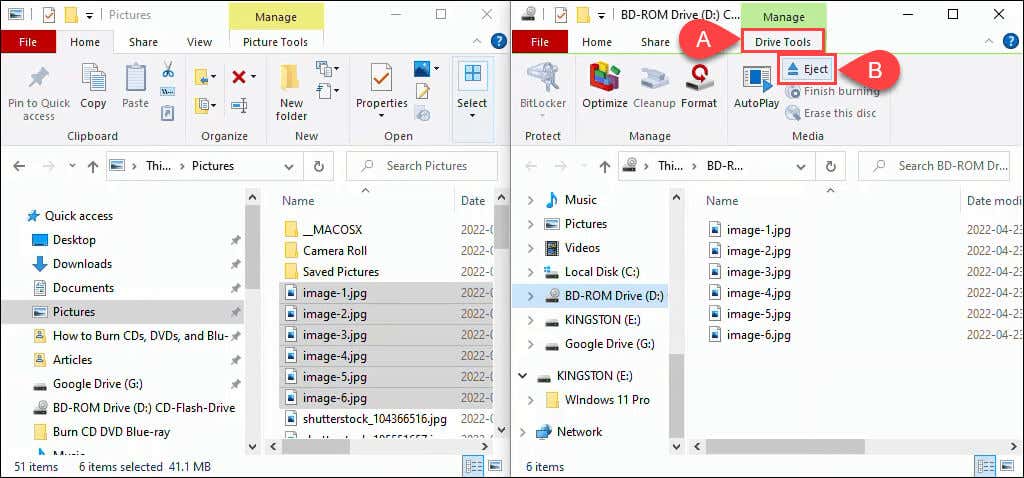
- You can remove, add, or even edit file names. After any changes, select Drive Tools, then Eject to remove the disc. To retrieve or add files later, pop in the disc, and Windows will recognize it as a rewritable disc.
Burn CD or DVD to Use with a CD or DVD Player with Windows Explorer
This method assumes you have Windows set to use File Explorer to burn discs automatically. If not, just open File Explorer after inserting the blank disc, and the utility is available.
You can use any blank CD or DVD format disc for this. If you use a CD-RW or DVD-RW disc, it will not be rewritable anymore. These discs will work on PCs but not necessarily all other CD or DVD players. CD-R and DVD-R discs are best for this, and they’re cheaper too.
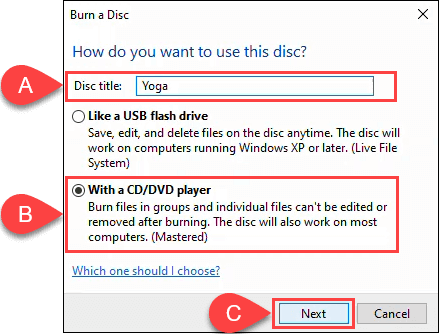
- When File Explorer’s Burn a Disc window opens, enter a Disc title: and select With a CD/DVD player and Next.
- File Explorer will open with its Drive Tools and the disc selected. It’s easiest to open another File Explorer to select files from the hard drive or SSD to
drag and drop onto the disc.
- Once you have added all the files you want to the disc, select Drive Tools, then Finish Burning.
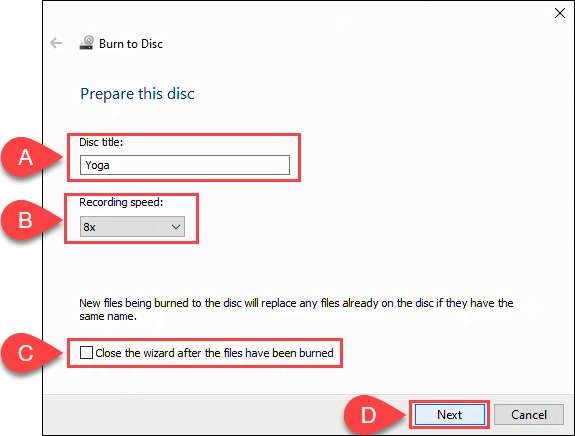
Ensure the disc title is correct and choose a recording speed. Depending on the type of CD/DVD burner you have, this could be anywhere from 4x to 48x. This means it will write 4 to 48 times faster than the disc read speed. The higher the speed, the greater chance of it failing or creating a poor quality product, so choose wisely. If you’re sure you’re not going to burn another copy, choose to Close the wizard after the files have been burned. Then select Next.
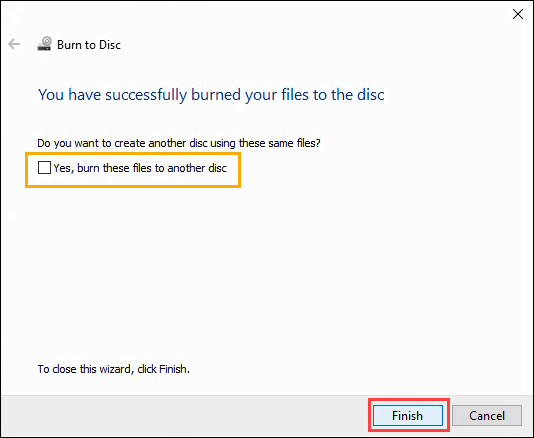
When the disc burning is finished, opt for Yes, burn these files to another disc if you want to make another copy. Otherwise, select Finish to close the wizard.
Burn CDs and DVDs with Windows Media Player
You can use Microsoft’s built-in Windows Media Player app to burn audio CDs and data CDs and DVDs. The audio CDs will work on PCs and most CD players. Data CDs and DVDs can be used for data files or music and videos. Data disks with music and videos will play on computers and may play on some CD and DVD players. Check with your CD or DVD player maker to be sure.
Burn Audio CDs with Windows Media Player
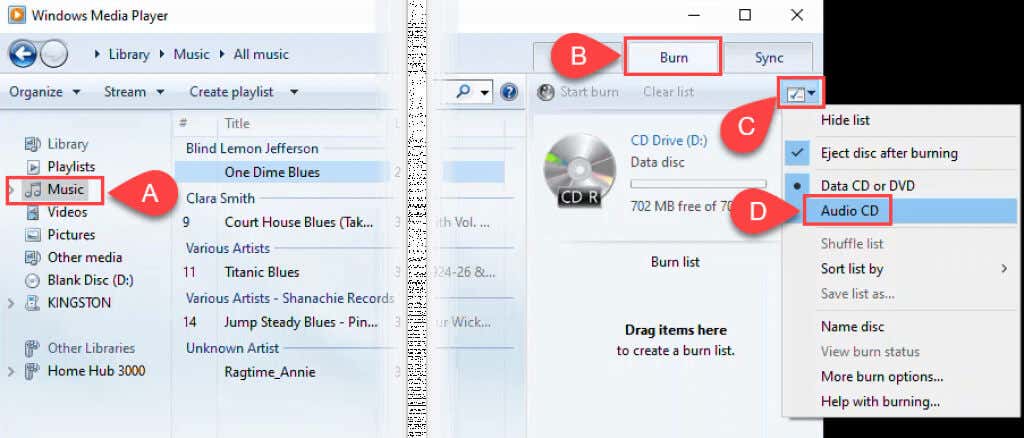
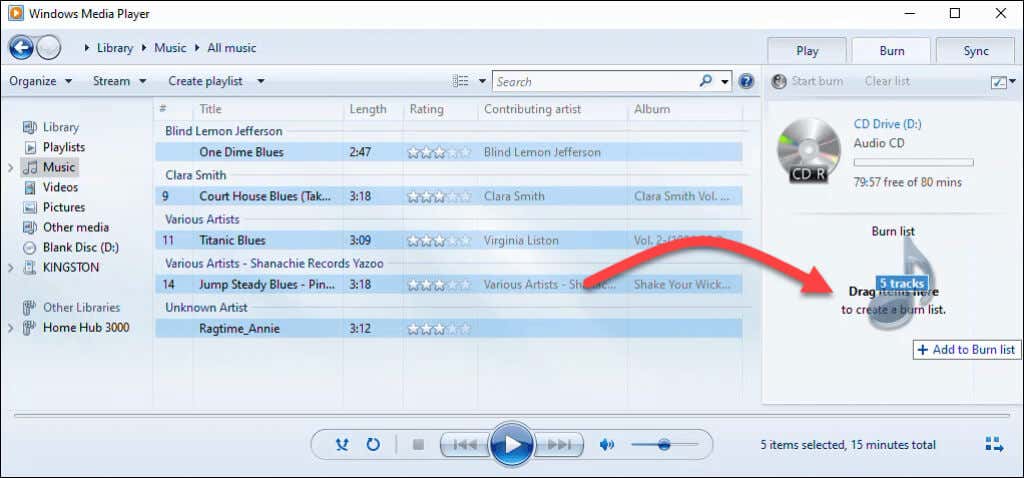
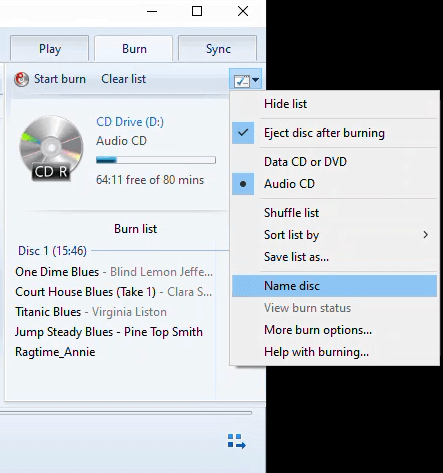
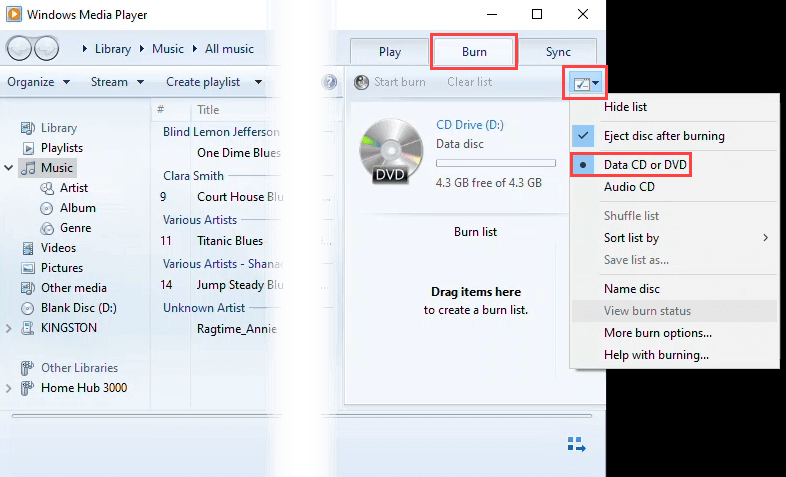
- With a blank CD in your PC, open Windows Media Player and navigate to the Music part of your library. Then select the Burn tab. Near the top-right corner, select the small options button. In the menu that opens, select Audio CD.
- Drag and drop songs from the main window of Windows Media Player into the Burn list area.
- You can go back to the options list and make other choices about how the music is sorted, name the disc, and other options. Select More burn options to fine-tune the disc.
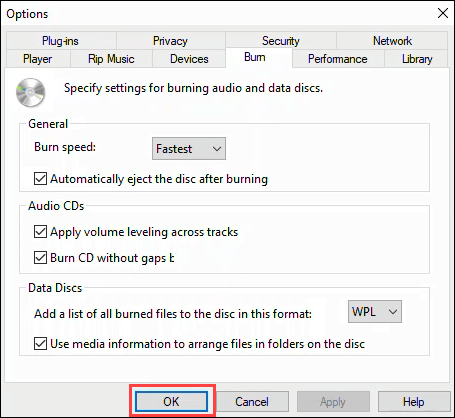
For instance, in the Options window under the Burn tab, you can adjust the burn speed, apply volume leveling across tracks, remove gaps between songs and add a list of burned files to the CD. The default values are fine for most people. Select OK to return to Windows Media Player.
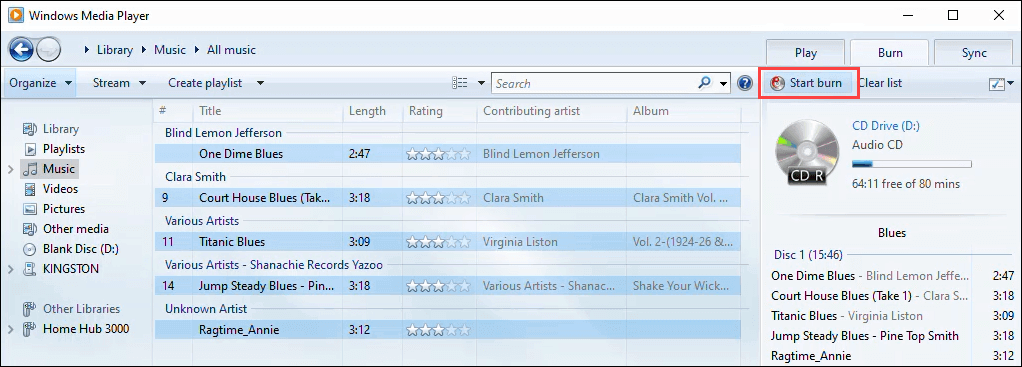
- When you’re ready, select Start Burn. The disc will pop out when the burn is finished.
Burn Data CDs and DVDs with Windows Media Player
This method is for burning plain data, music, or video to CDs and DVDs. Music and video CDs and DVDs made this way may not play on all CD and DVD players, but they will work on any PC. It’s not the best way to make DVDs, but it works. Unfortunately, Microsoft stopped including Windows DVD Maker after Windows 7. For proper DVD authoring with classic DVD menus, subtitles, and more, check out the DVD-burning software apps suggested in the Burn Blu-ray Discs section below.
- With a blank CD or DVD in the optical drive, open Windows Media Player and select the Burn tab. Then select the Options button and make sure Data CD or DVD is selected. Normally, it defaults to this, but it’s good to be sure.
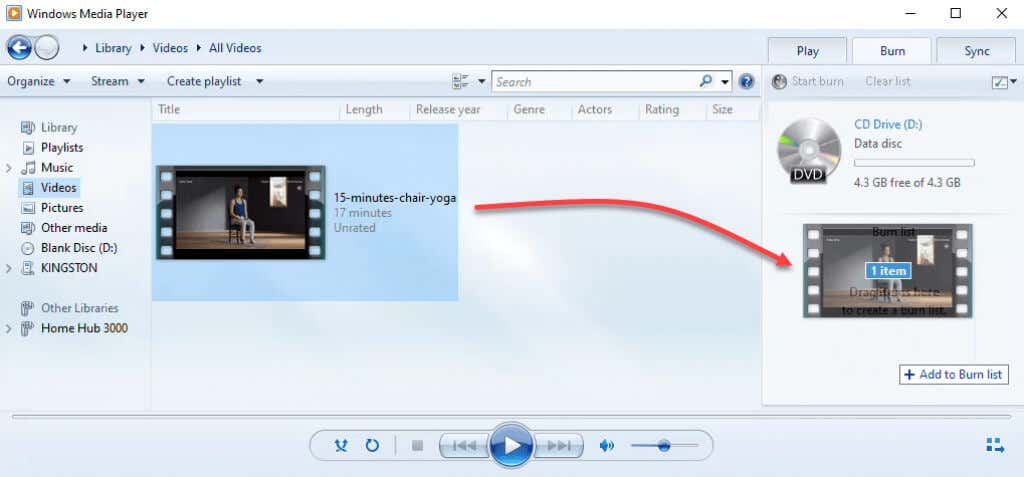
- Go to the part of the library that has the data, music, or video that you want to burn. Then, drag and drop the media to the Burn list area.
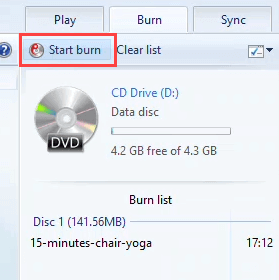
- Select Start burn to burn the disc. When the burning is complete, the disc burner will pop the disc out.
Burn ISO Disc Image to CD or DVD
ISO disc images tend to be for operating systems or larger applications and even games. ISO files allow for storing a large number of files into one while maintaining the directory structure. So when you mount the ISO, whatever is in it will run as intended. It’s the preferred format for bootable disks too. This works on DVDs and CDs but make sure the disc has enough capacity for the ISO file.
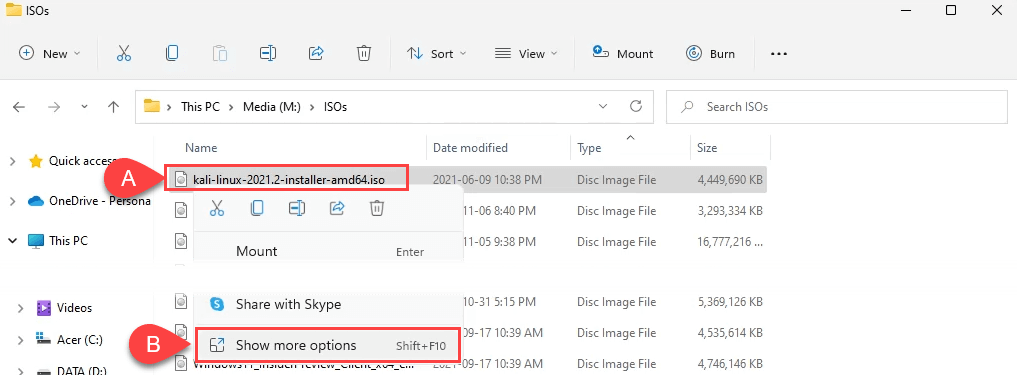
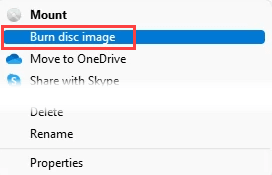
- Insert a blank disc into the disc burner. Next, open Windows Explorer and navigate to the ISO you want to burn. In Windows 11, right-click on the ISO file and select Show more options, or select the file and press Shift + F10.
Then select Burn disc image.
In Windows 10, just right-click and select Burn disc image.
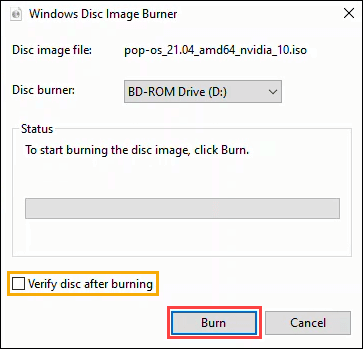
- In the Windows Disc Image Burner window, you can select which disc burner to use or to Verify disc after burning. It will default to your main burner, and most of the time, discs don’t need to be verified. Select Burn to continue.
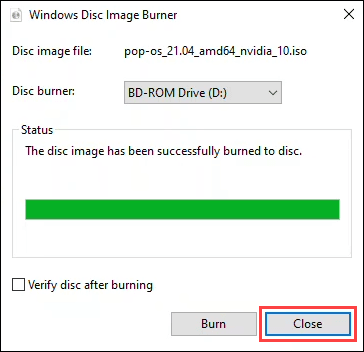
Once the burn completes, the disc will pop out. Select Close to end the session.
Burn Blu-ray Discs in Windows 11/10
It turns out there’s nothing in the Windows operating system for burning Blu-ray discs. Also, most Windows PCs and laptops don’t come with an optical disc reader or burner of any kind. So you need a Blu-ray burner and Blu-ray burning software. Make sure you have the right Blu-ray disc type, too.
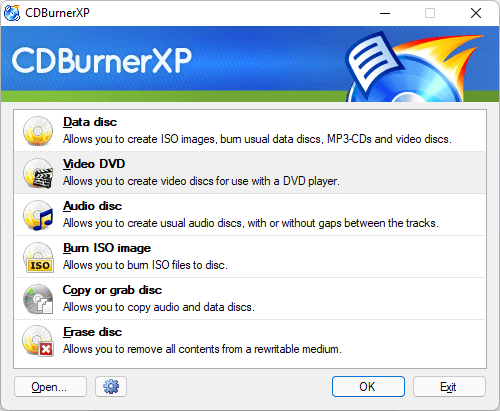
These three free apps have a good, long history and continue to work well. You may recognize CDBurnerXP, ImgBurn, and Ashampoo Burning Studio Free from the heyday of torrent downloads in the late 90s and early 2000s.
CDBurnerXP looks old-school, as the XP part of the name suggests. Still, it’s a solid Blu-ray and DVD burner software. It’s the only one of the three that has a portable app option so it can be run from a USB flash drive.
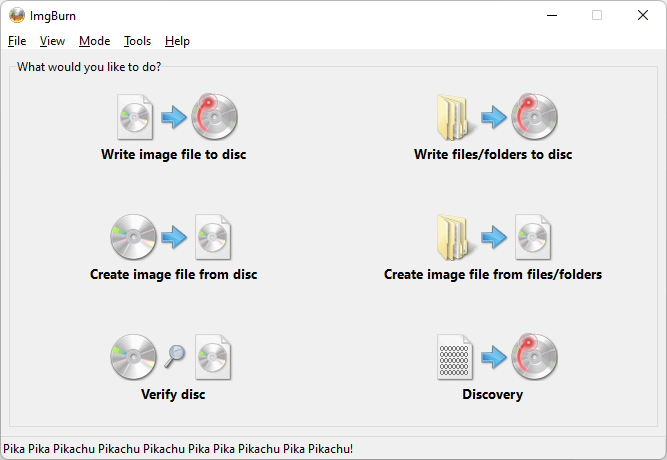
ImgBurn may look like a Windows 7 app, yet it works well to burn any type of disc, including Blu-ray. There’s also a strong ImgBurn community forum with plenty of guides to help you do just about anything.
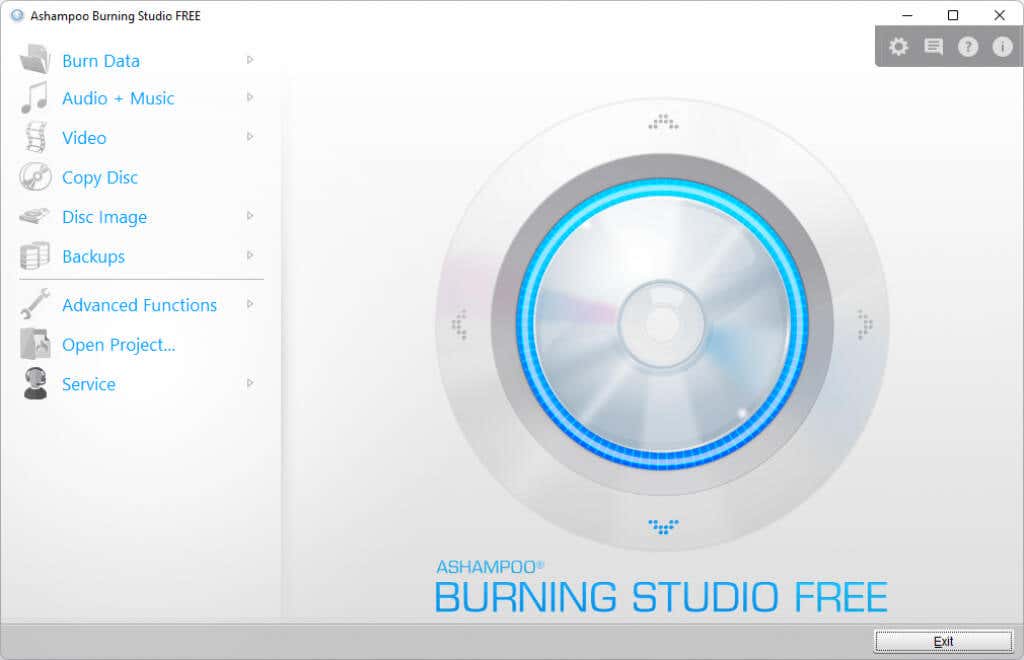
Ashampoo Burning Studio Free is another free app that’s been around a long time. It does get updated though, as reflected in the app design below. Ashampoo Burning Studio Free does require you to register with an email to use the software, while ImgBurn doesn’t.
Burn, Baby, Burn
If you’re still rocking a CD player or prefer to pop in a DVD or Blu-ray on Friday night instead of Netflix and chill, you’ve got all the tools and info at your fingertips to do it. Or do you already have a favorite burning software? Please let us know in the comments.

